Project 04
Make Something Big
As expected from most How to Make (Almost) Anything prompts, the incredible vagueness drove me to think in many directions. The biggest questions I faced was, should I make something huge? Or should I make something I could use? After accepting that I don’t need anything huge at the moment, I decided to make myself something relatively contained. I like the constraint of cutting something out of a single 4×8 sheet of wood, so I sort of stuck to those dimensions and went from there.
I spend most of the week watching people cut, helping people cut, and in turn, learning plenty about the ShopBot (a new tool to my repertoire). This weeks steps were the following:
- Sketch Ideas
- Model in CAD
- Get decent wood (because apparently I am snooty)
- CNC Router (So many STOP buttons)
- Assemble
Oh, and LEARN TO WELD!! (been wanting to learn this for years)
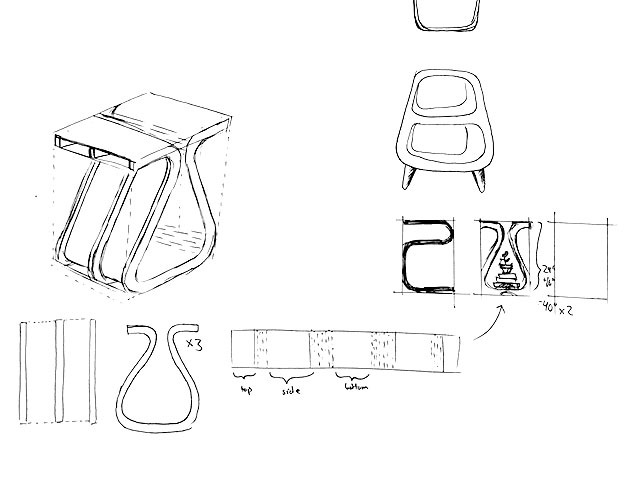
Sketch / PAD (Pen Aided Design)
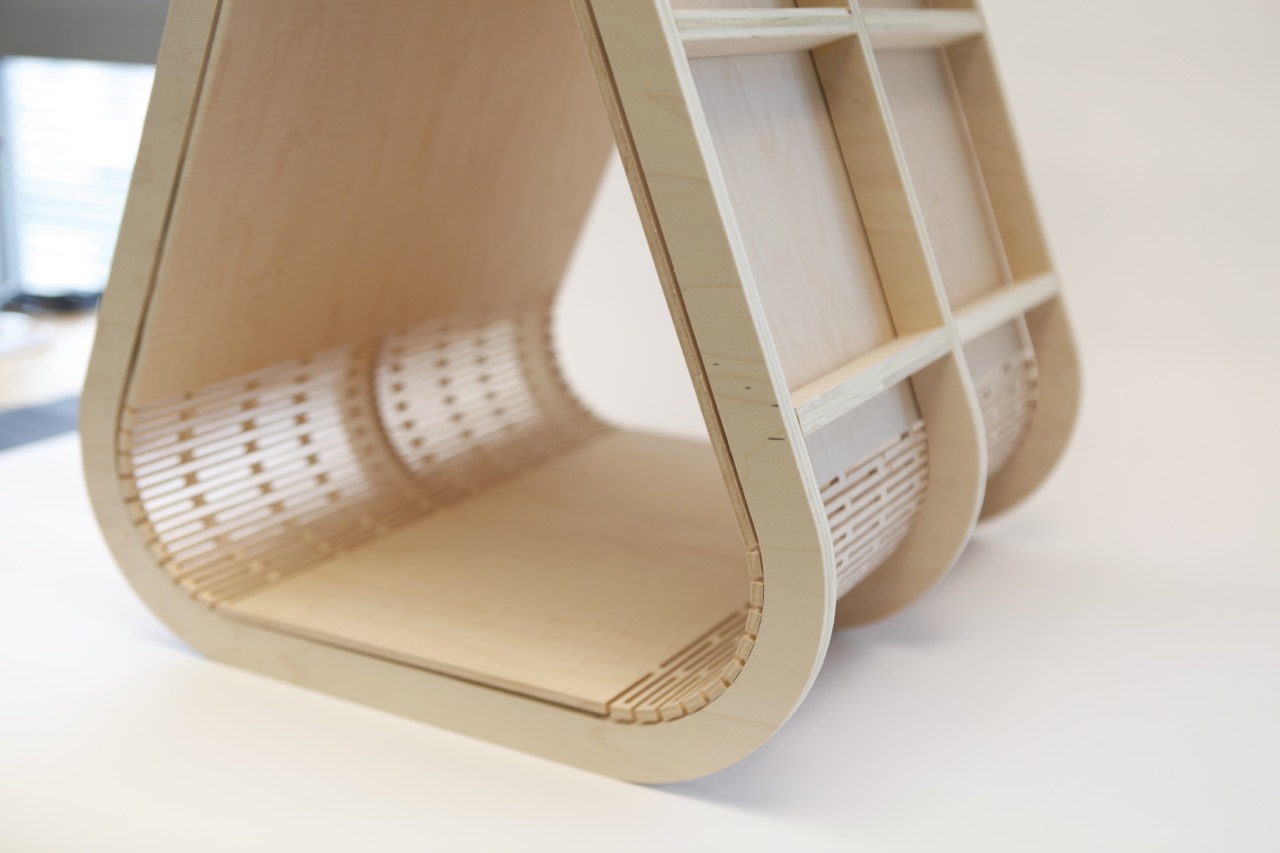
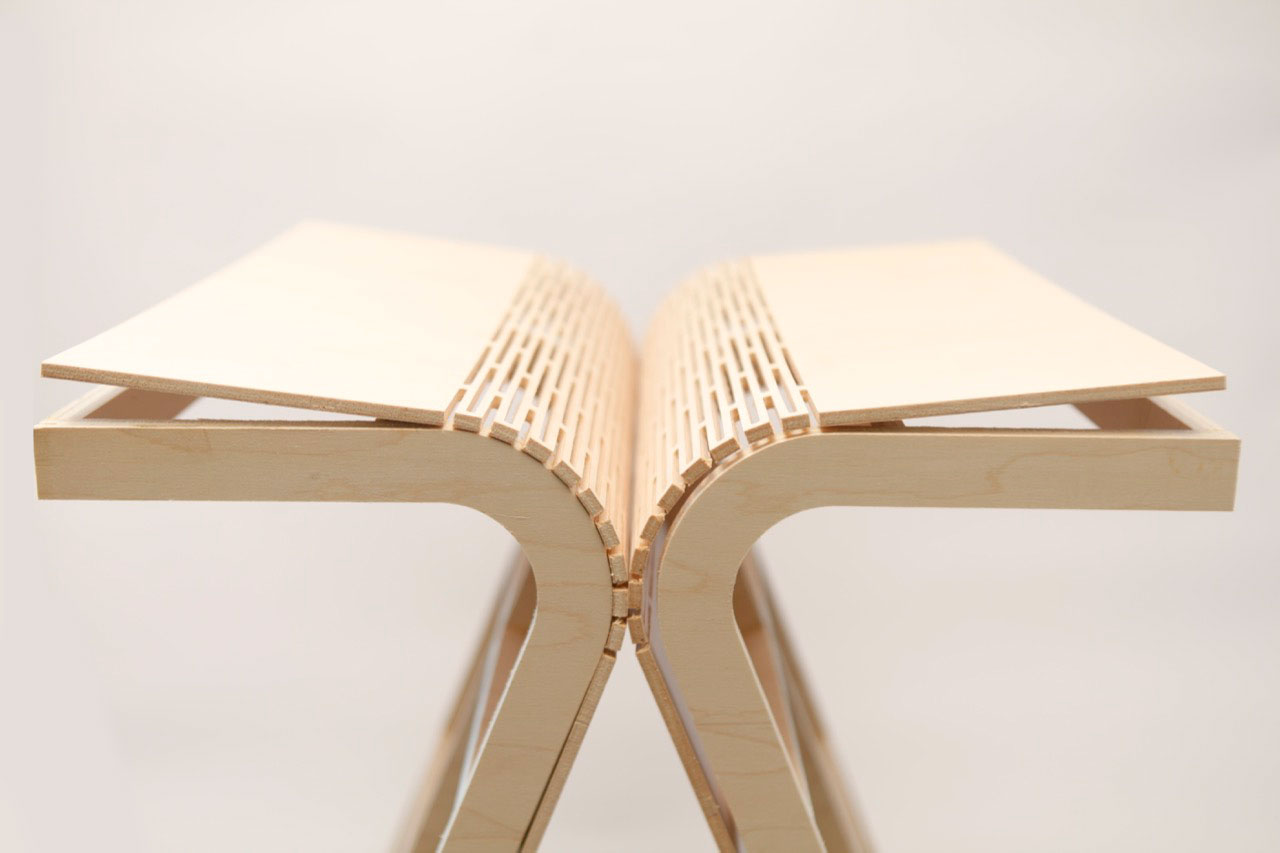
I wanted to play with flextures, making a stiff sheet of wood bend and flex without the common methods of molding wood into curved forms. I started sketching out shapes and curves constrained by the 16″ x 16″ x 24″ box that would eventually be a fitting bedside table. One idea that I thought would be fun but decided against was making a Helvetica “a” table. (This seems like an instant Etsy hit :)
Wood
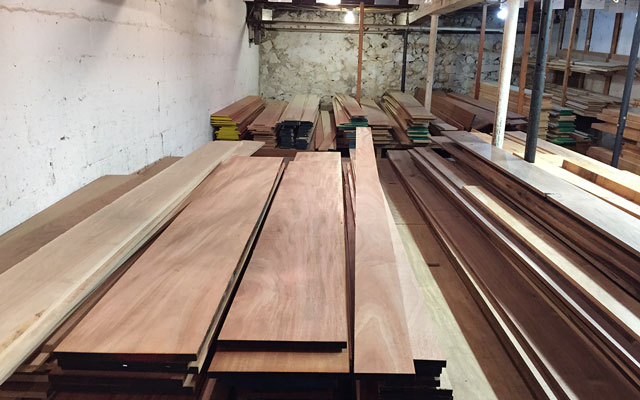
The wood smelled as though it was a living tree hours earlier.
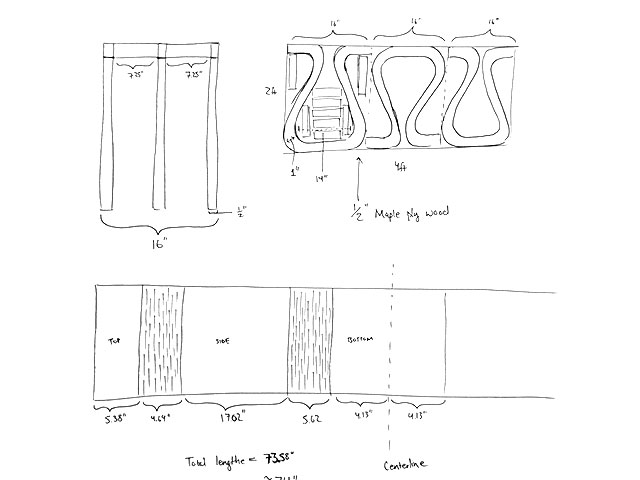
Model in CAD
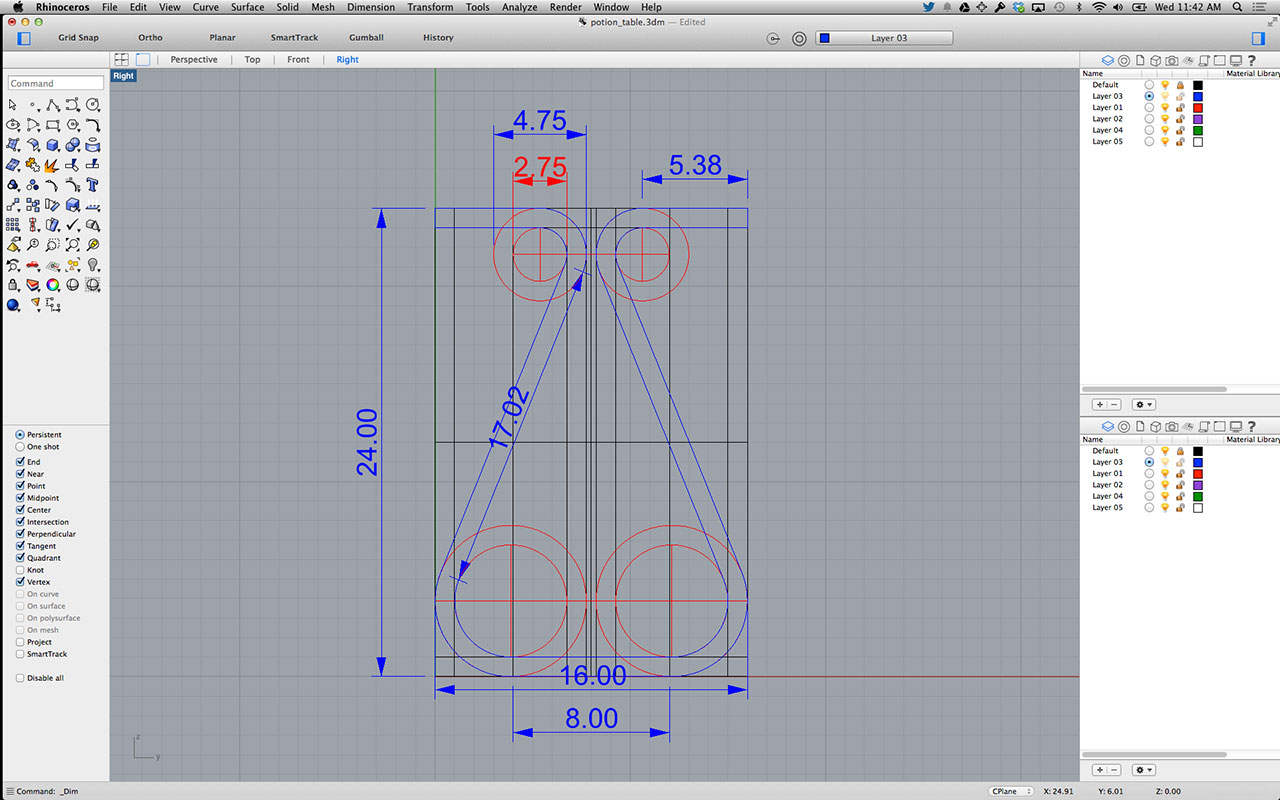
Using rhino to get specific dimensions
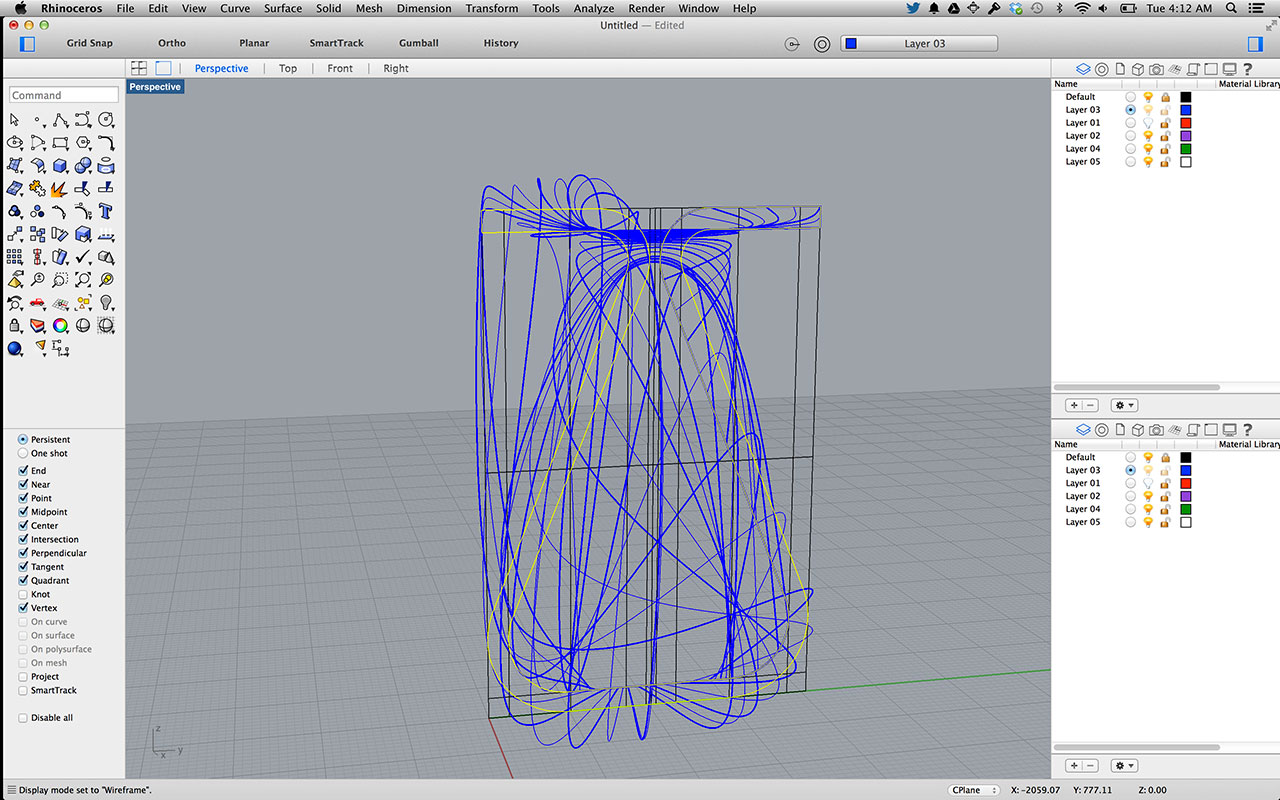
Thought this was an interesting accident (Thanks Rhino)
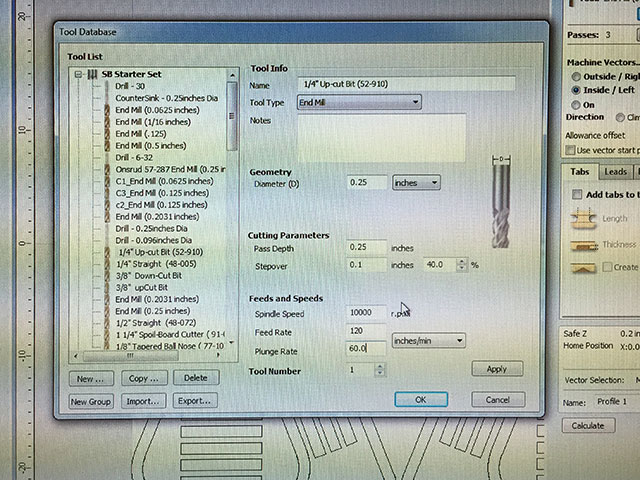
CNC Routing
So Many STOP buttons!!! What does that mean? Well, there are multiple ways to stop this machine for safety, but it is important to know that they do not all behave the same way for the software. Pressing ‘s’ will stop the ShopBot (or better yet pause it). Pressing stop in the window will also do the same. In both of these cases, you can resume the cutting where it stopped. Pressing a physical red STOP button will in fact stop the machine, but it will also lose some of your settings (specifically your ZERO) and you will have to figure out how to continue from the same place. One way to do this is to edit the shopbot file. Another way is to make a new file (which felt a little safer).
If that isn’t enough stoppage for you, enjoy this piece by Steve Martin :)
Endmill settings for .125″ (the flexures)
- Pass Depth = .15″
- Stepover = .1″
- Spindle Speed = 13,000 rpm
- Feed Rate = 80
- Plunge Rate = 40
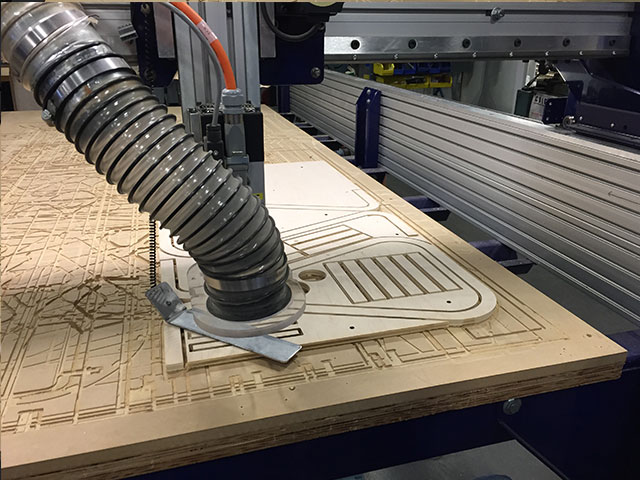
Zero the z axis using the metal plate (it knows by connecting a circuit when it touches)
Pack the parts as tight as possible
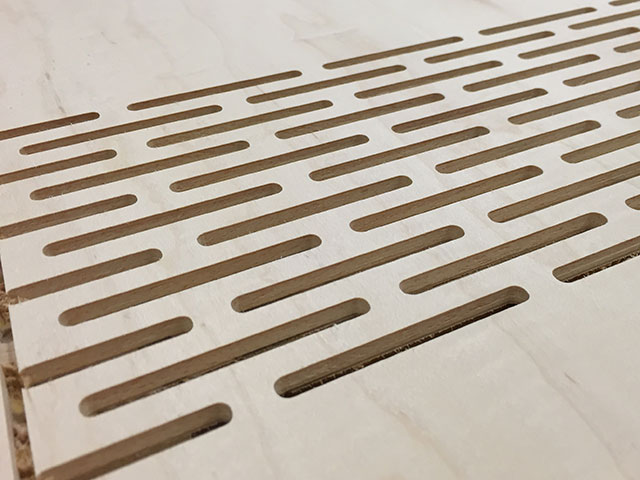
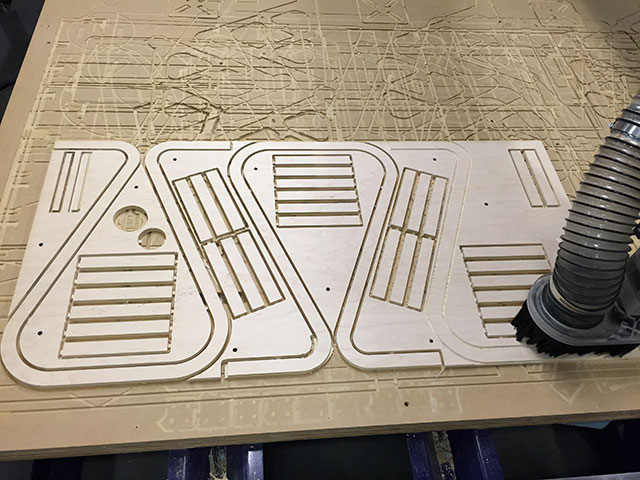
Flexures
ShopBot Time Lapse
Assembly
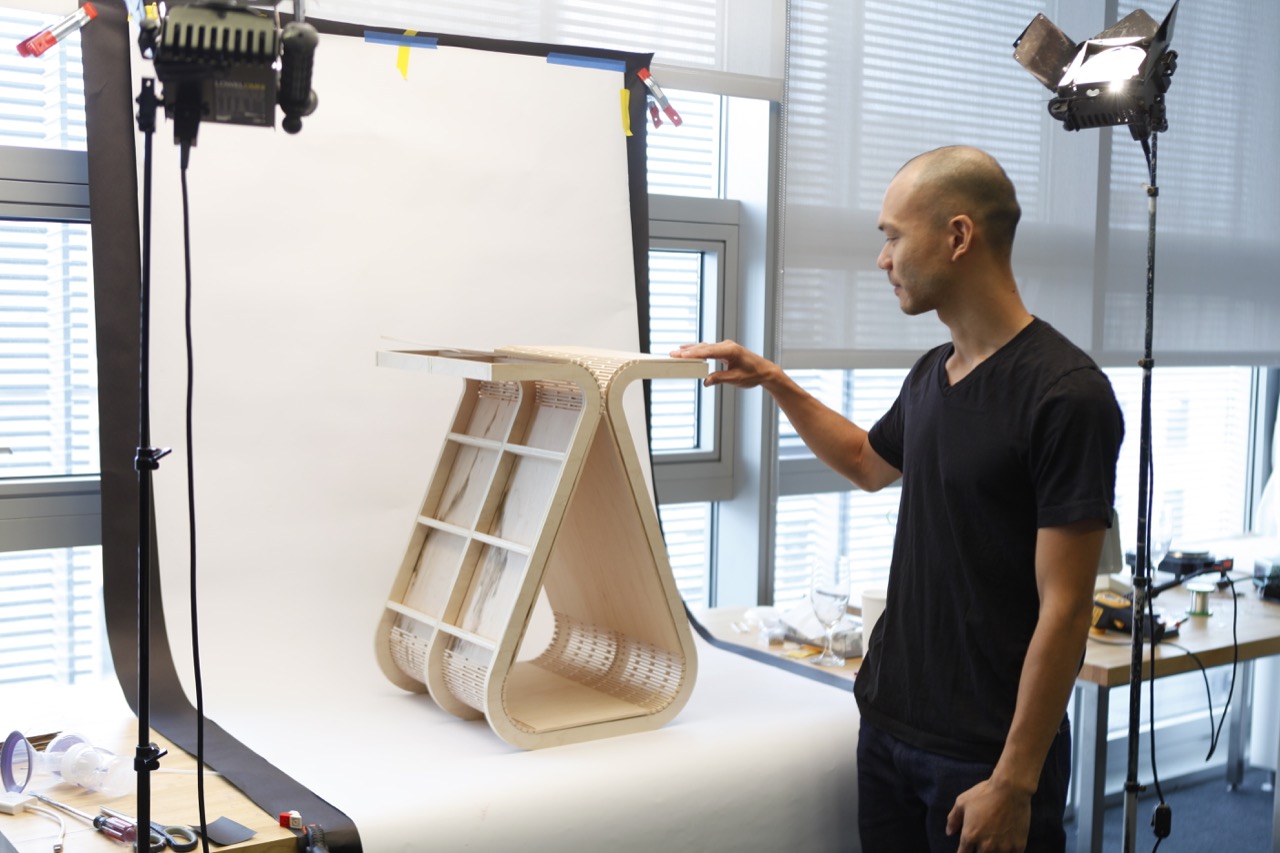
Hindsight is 20/20. Once I finished cutting I needed to figure out how to put the table together. Yes, this would have been so much easier if I took the 10 minute it would take to add pressfit connections, but I didn’t, so here I was with pieces needing to fit together and no magic to make it happen quickly. With some reluctance, I decide to glue the parts together.
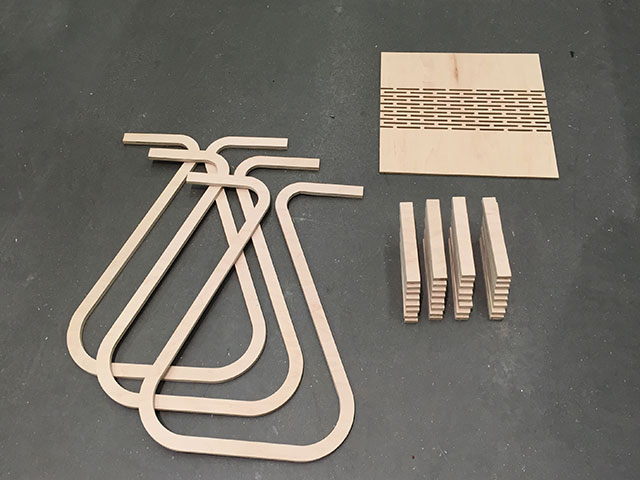
All of the parts (sort of)
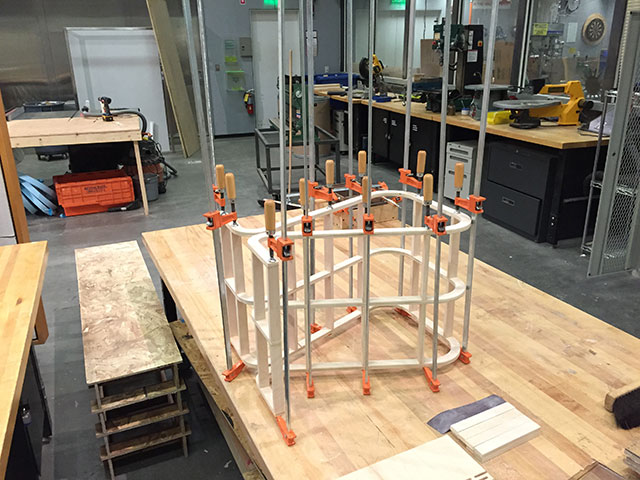
Clampin’ in style :)
While the gluing and clamping resulted in a quite clean and seamless end product, I would like to modify the design to be entirely press-fit for quick assembly right out of the ShopBot.
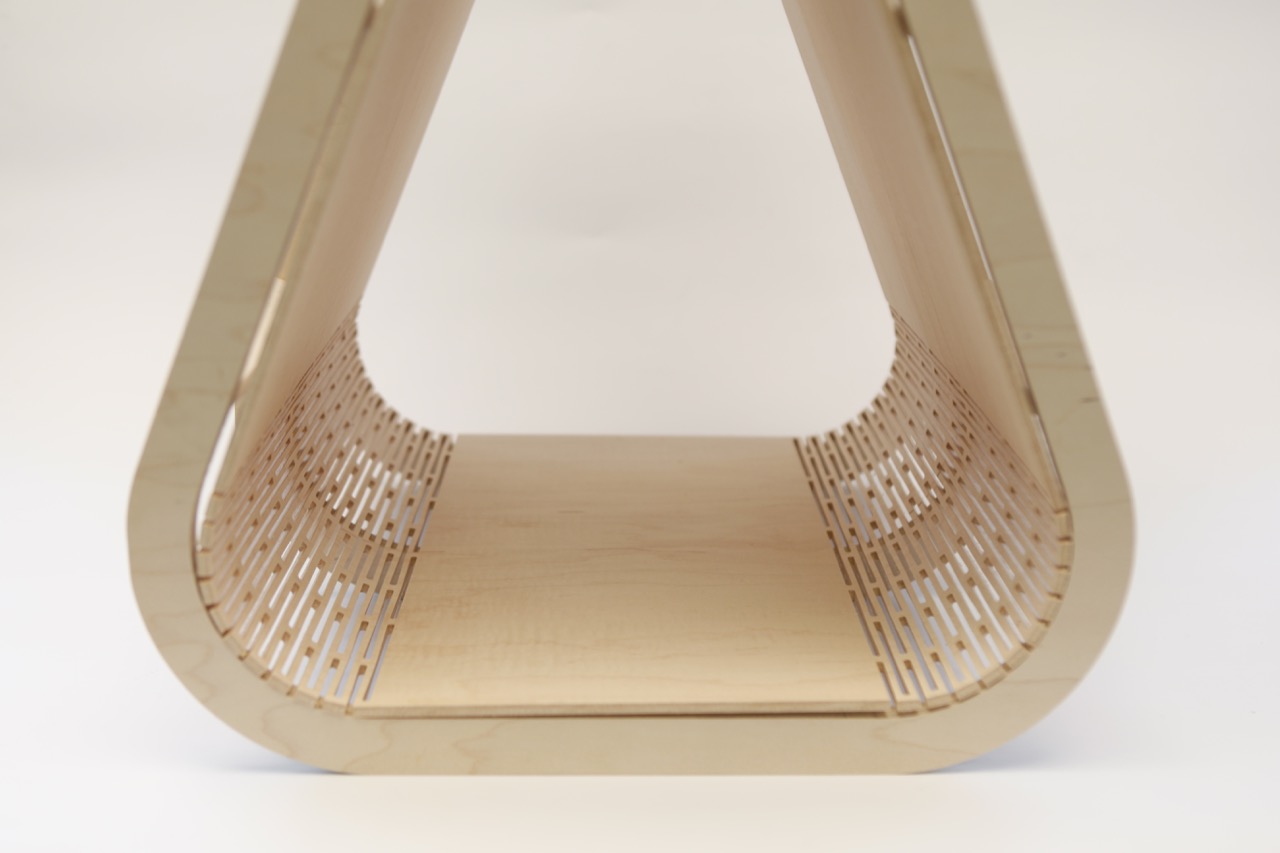
Almost finished photos (top layer not yet adhered and not yet sanded)
Welding
In addition to working with the ShopBot CNC Router, we learned some welding techniques since they will most likely be relevant in the future when making something big. The following techniques were covered:
- Spot Welding – basically the same purpose as a rivet, but without the rivet.
- Stick Welding – classic welding style, looks like someone needed to make a weld and the only tools on hand were jumper cables
- TIG Welding – similar to soldering, this method requires two hands in coordination. Most common clean welding technique (i.e. used for bicycle welds)
- MIG Welding. – like TIG Welding, but the device autofeeds the metal and only requires one hand. Best for tough to reach spaces
Here is a quick clip of us learning to use the MIG Welder.