Embedded Programming
This week, the assignment was to read a microcontroller data sheet, and program our boards from a couple weeks ago to do something with as many different programming languages and environments as possible. I used 64-bit Windows 7 and tried 3 different approaches – Atmel Studio, Arduino + WinAVR. Ultimately, WinAVR and Arduino were the ones I could get working.
A very important first: If you hadn’t already done so, you need to download and install some drivers so that Windows communicate with your FabISP. To do that:
1. Plug in your FabISP
2. Control Panel > Devices and Printers - right click on the FabISP icon and select properties
3. Download and install these drivers.
4. In your FabISP properties, there should be an option to specify a filepath for a driver. Select the folder that contains the drivers you downloaded in step 3 as the filepath.
5. Install the drivers - now you should be able to communicate w/ your board through arduino, atmel, winavr, etc. Without the drivers, you can't specify a serial port in arduino to load the bootloader, etc.
The fab academy at AS220 also offers a great tutorial on how to do so here.
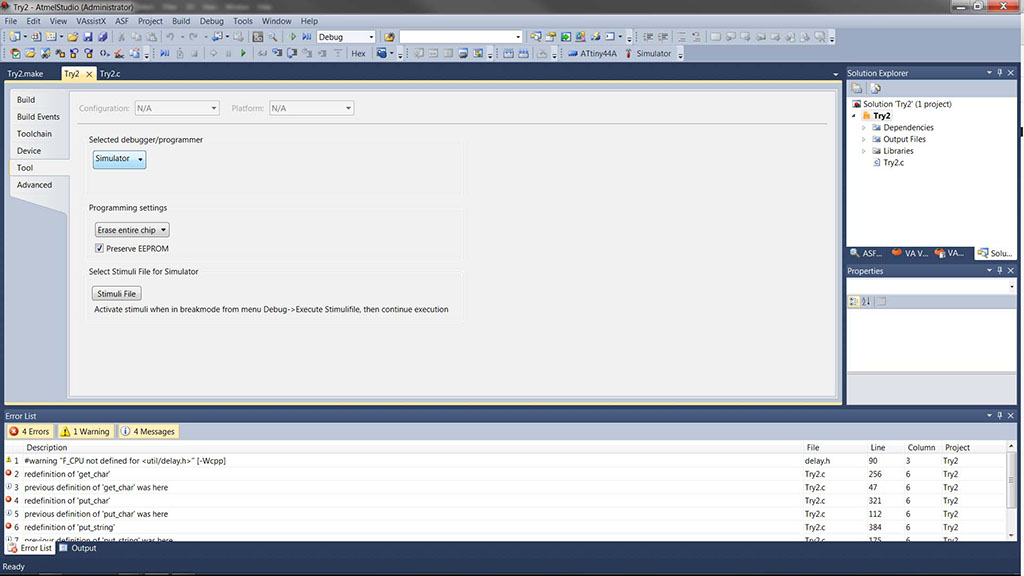
I started out trying to use Atmel Studio to do my programming but ended up hitting a roadblock related to Atmel’s willingness to communicate with the FabISP. Atmel Studio appears to only work with Atmel ISP’s. I was able to compile my code into a .hex file but only run using a simulator tool, rather than my ISP.
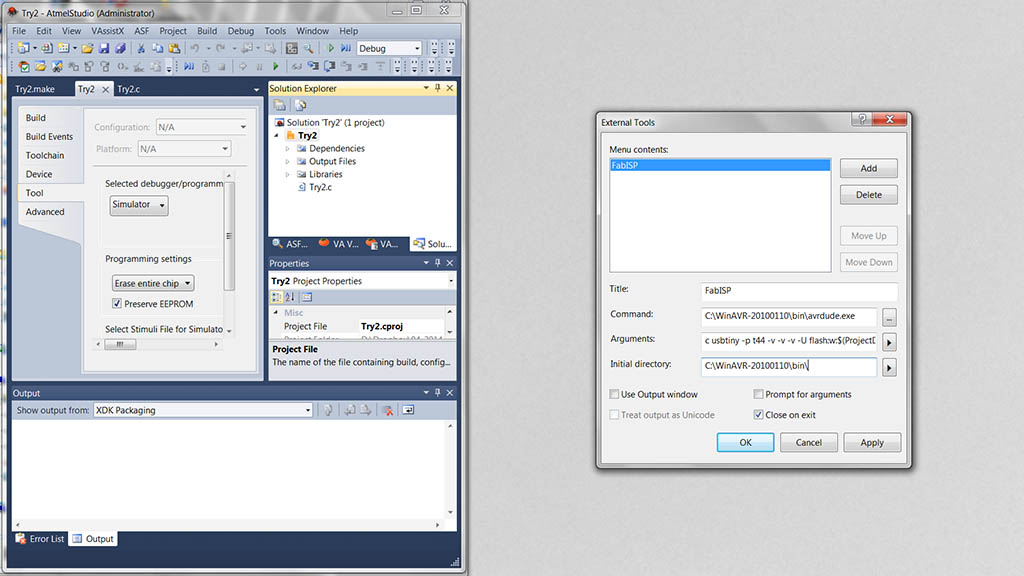
I found a couple options for either emulating an Atmel ISP with the FabISP, calling avrdude when compiling, or just using an AVRIspII, but all of the fixes seemed beside the point of trying to establish a quick and productive workflow using the ISP + board I’d already made. Here are some of the most helpful links I found on the subject:
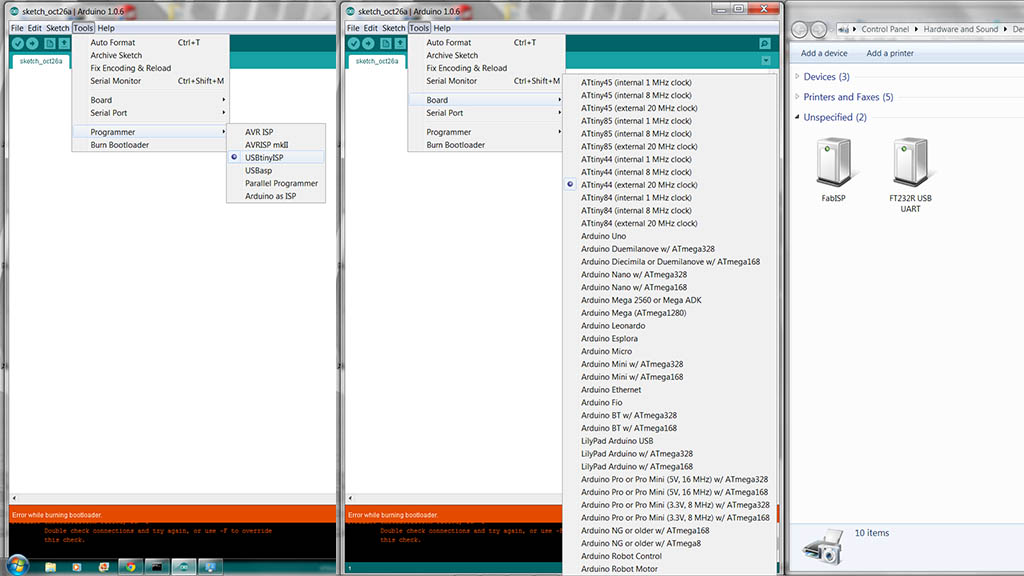
Moving on to Arduino. Before doing anything, I downloaded FTDI Libraries and the ATtiny board.txt libraries. I created “hardware” folder in the Arduino sketch directory (C:\Program Files (x86)\Arduino for me and pasted the appropriate ATtiny documents inside.
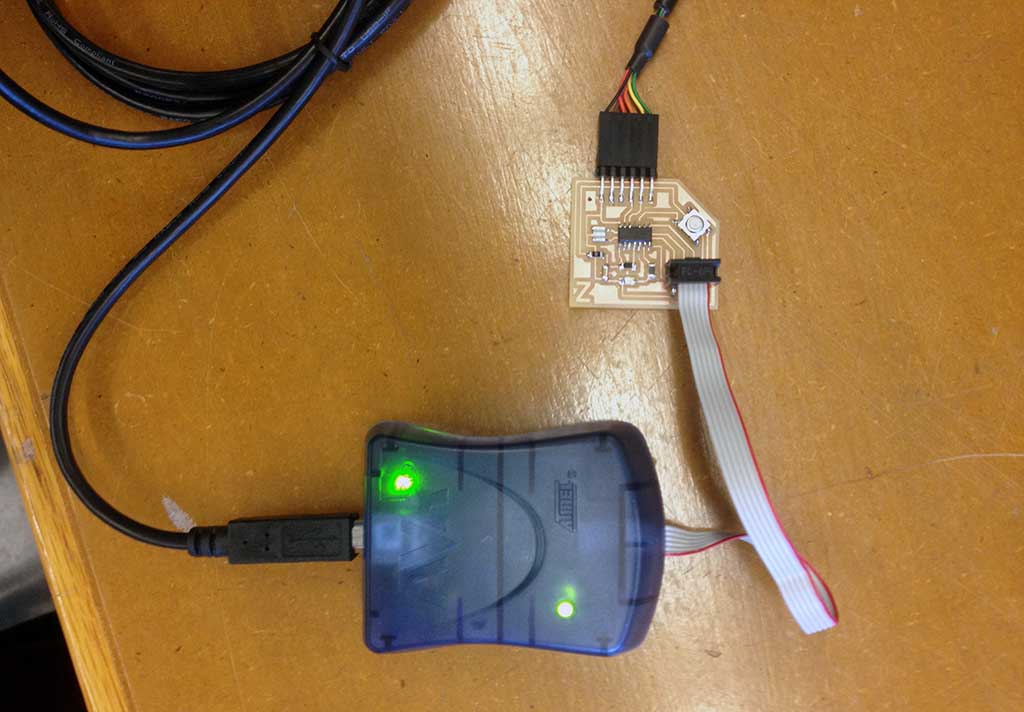
Once that was done, I was able to select the correct board - ATtiny 44 (external 20MHz clock) – and programmer – USBTinyISP from the Arduino Tools menu. I then burned the Bootloader.
The fab academy at AS220 offers another great tutorial on this whole process
here. At this point, I altered some example code to reflect the pinout of the ATtiny and sent it to my board. It didn’t work. I think that at some point I either sent the wrong pin locations to my board, or plugged it in backwards soon afterwards, because it was no longer recognizable to Arduino. I couldn’t burn a bootloader, and when I tried to do anything I would get this message:avrdude: usbdev_open(): did not find any USB device "usb"
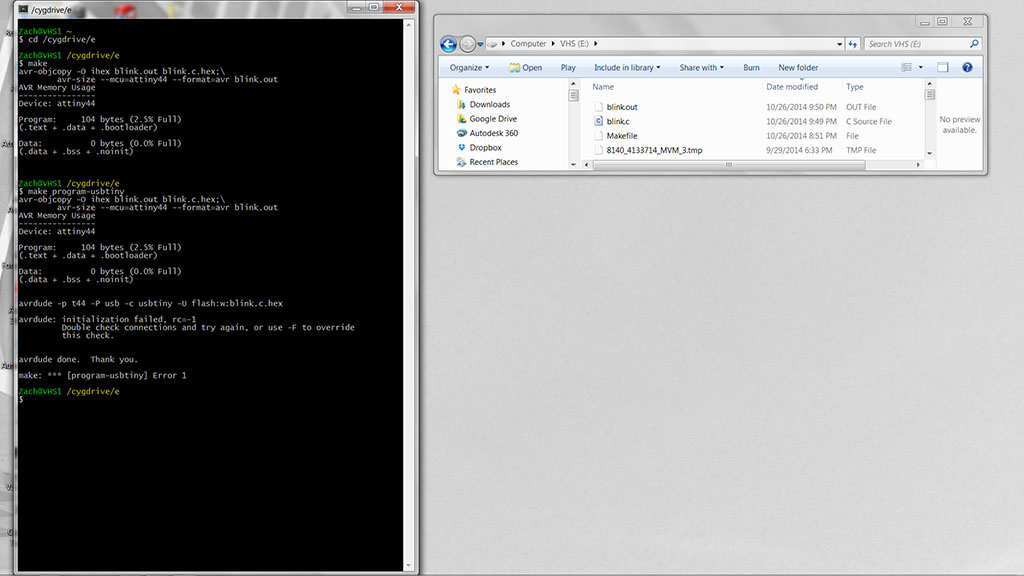
I suspected that this was a hardware issue rather than a software issue. Just to make sure, I tried compiling and sending some code via command line + WinAVR.
Setup instructions here: http://ladyada.net/learn/avr/setup-win.html
I used Cygwin64 to open a terminal in Windows. Note that when a Makefile is named Makefile (with no extension), you can just type “make” rather than “make –f <>” to compile code. I successfully compiled my c code into a .hex file. However, when I tried to send my compiled code, I kept getting errors when using a FabISP: avrdude -p t44 -P usb -c avrisp2 -U lfuse:w:0x5E:m
avrdude: usbdev_open(): did not find any USB device "usb"
make: *** [program-avrisp2-fuses] Error 1
or a AVRIspII.
avrdude -p t44 -P usb -c usbtiny -U lfuse:w:0x5E:m
avrdude: initialization failed, rc=-1
Double check connections and try again, or use -F to override
this check.
avrdude -p t44 -P usb -c avrisp2 -U lfuse:w:0x5E:m
avrdude: usbdev_open(): did not find any USB device "usb"
make: *** [program-avrisp2-fuses] Error 1
or a AVRIspII.
avrdude -p t44 -P usb -c usbtiny -U lfuse:w:0x5E:m
avrdude: initialization failed, rc=-1
Double check connections and try again, or use -F to override
this check.
avrdude done. Thank you.
make: *** [program-usbtiny-fuses] Error 1
I tried sending my compiled code while changing a single variable in my setup each time, eg. change FTDI cable, resend, change USB cable, resend, change FabISP, resend, change computer, etc…
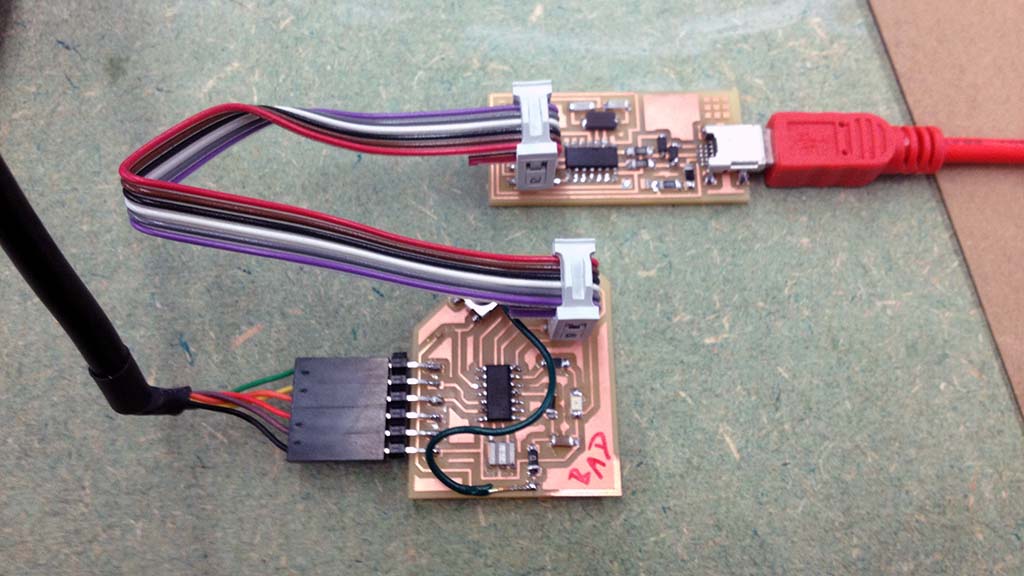
It was definitely something with my board. Luckily, I saved my “bad” board from week 6. I was able to reroute my rogue trace using some wire I found in the shop, and make it into a functioning board in about 5 minutes. Not pretty, but a lot easier than diagnosing each component on my board or fabbing a new one entirely. The hello echo code compiled and loaded on the first try. I used the serial monitor in Arduino to confirm its functionality.
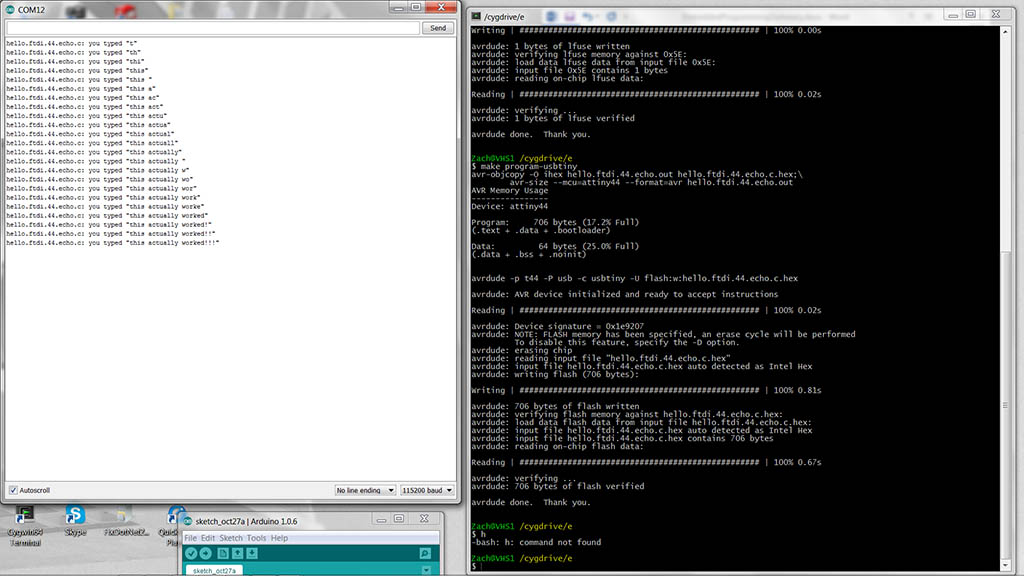
The final output using Cygwin and avrdude.
Zach@VHS1 ~
$ cd /cygdrive/e
Zach@VHS1 /cygdrive/e
$ make
avr-objcopy -O ihex blink.out blink.c.hex;\
avr-size --mcu=attiny44 --format=avr blink.out
AVR Memory Usage
----------------
Device: attiny44
Program: 104 bytes (2.5% Full)
(.text + .data + .bootloader)
Data: 0 bytes (0.0% Full)
(.data + .bss + .noinit)
Zach@VHS1 /cygdrive/e
$ make program-usbtiny-fuses
avr-objcopy -O ihex blink.out blink.c.hex;\
avr-size --mcu=attiny44 --format=avr blink.out
AVR Memory Usage
----------------
Device: attiny44
Program: 104 bytes (2.5% Full)
(.text + .data + .bootloader)
Data: 0 bytes (0.0% Full)
(.data + .bss + .noinit)
avrdude -p t44 -P usb -c usbtiny -U lfuse:w:0x5E:m
avrdude: AVR device initialized and ready to accept instructions
Reading | ################################################## | 100% 0.00s
avrdude: Device signature = 0x1e9207
avrdude: reading input file "0x5E"
avrdude: writing lfuse (1 bytes):
Writing | ################################################## | 100% 0.01s
avrdude: 1 bytes of lfuse written
avrdude: verifying lfuse memory against 0x5E:
avrdude: load data lfuse data from input file 0x5E:
avrdude: input file 0x5E contains 1 bytes
avrdude: reading on-chip lfuse data:
Reading | ################################################## | 100% 0.00s
avrdude: verifying ...
avrdude: 1 bytes of lfuse verified
avrdude done. Thank you.
Zach@VHS1 /cygdrive/e
$ make program-usbtiny
avr-objcopy -O ihex blink.out blink.c.hex;\
avr-size --mcu=attiny44 --format=avr blink.out
AVR Memory Usage
----------------
Device: attiny44
Program: 104 bytes (2.5% Full)
(.text + .data + .bootloader)
Data: 0 bytes (0.0% Full)
(.data + .bss + .noinit)
avrdude -p t44 -P usb -c usbtiny -U flash:w:blink.c.hex
avrdude: AVR device initialized and ready to accept instructions
Reading | ################################################## | 100% 0.00s
avrdude: Device signature = 0x1e9207
avrdude: NOTE: FLASH memory has been specified, an erase cycle will be performed
To disable this feature, specify the -D option.
avrdude: erasing chip
avrdude: reading input file "blink.c.hex"
avrdude: input file blink.c.hex auto detected as Intel Hex
avrdude: writing flash (104 bytes):
Writing | ################################################## | 100% 0.13s
avrdude: 104 bytes of flash written
avrdude: verifying flash memory against blink.c.hex:
avrdude: load data flash data from input file blink.c.hex:
avrdude: input file blink.c.hex auto detected as Intel Hex
avrdude: input file blink.c.hex contains 104 bytes
avrdude: reading on-chip flash data:
Reading | ################################################## | 100% 0.09s
avrdude: verifying ...
avrdude: 104 bytes of flash verified
avrdude done. Thank you.