week 5: computer-controlled machining
This was my favorite week so far. Our assignment was to "make something big", and we each had a 4' x 8' sheet of OSB to work with. I decided to make a rocking horse. I started by looking online for designs, and I found one from Lowe's website which I used as a starting point. I especially liked the shape of the two sides of the horse in those plans compared to other ones I found.

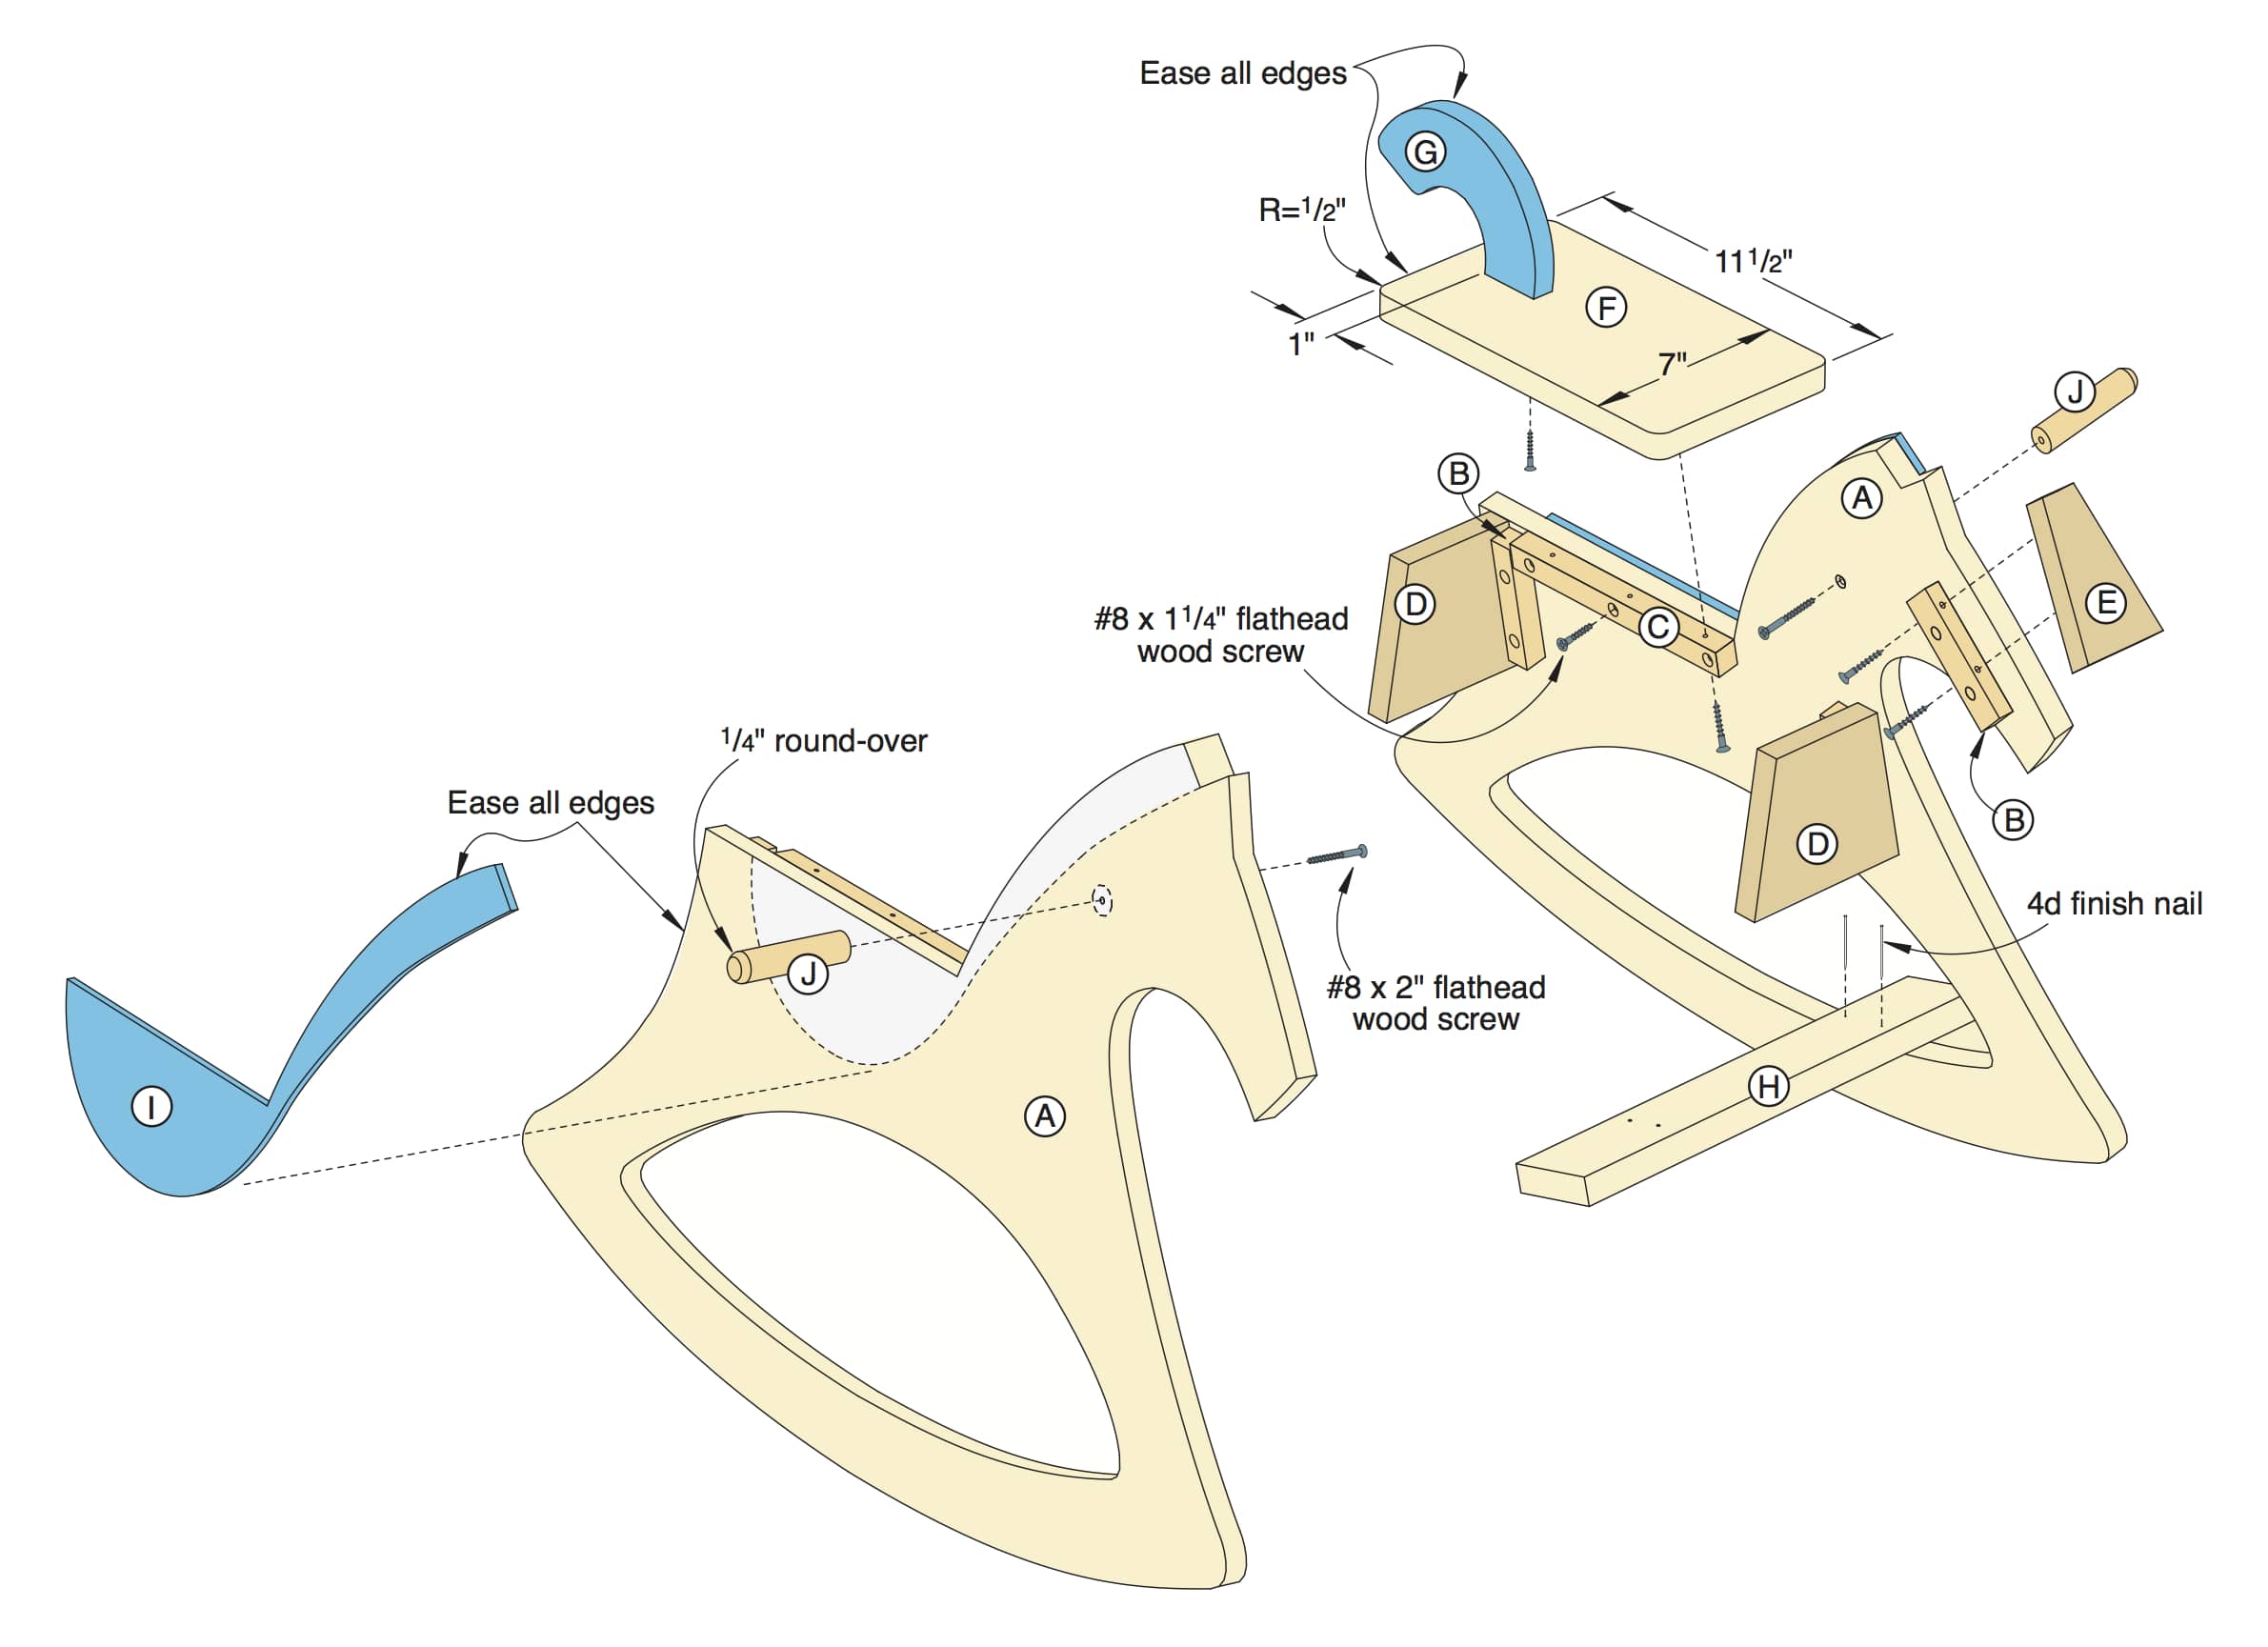
The photo and plans for the rocking horse which inspired my design.
I used Rhino to design my rocking horse. I started by inserting an image of the Lowe's rocking horse, and tracing the outline of one of the sides, since I knew I wanted that to be similar. I then made the two identical sides be solid objects with the thickness of the wood, and I angled them in space so that the bottom of each side was further to the center than the top, in hopes that this would help with stability.
Early stages of design in Rhino.
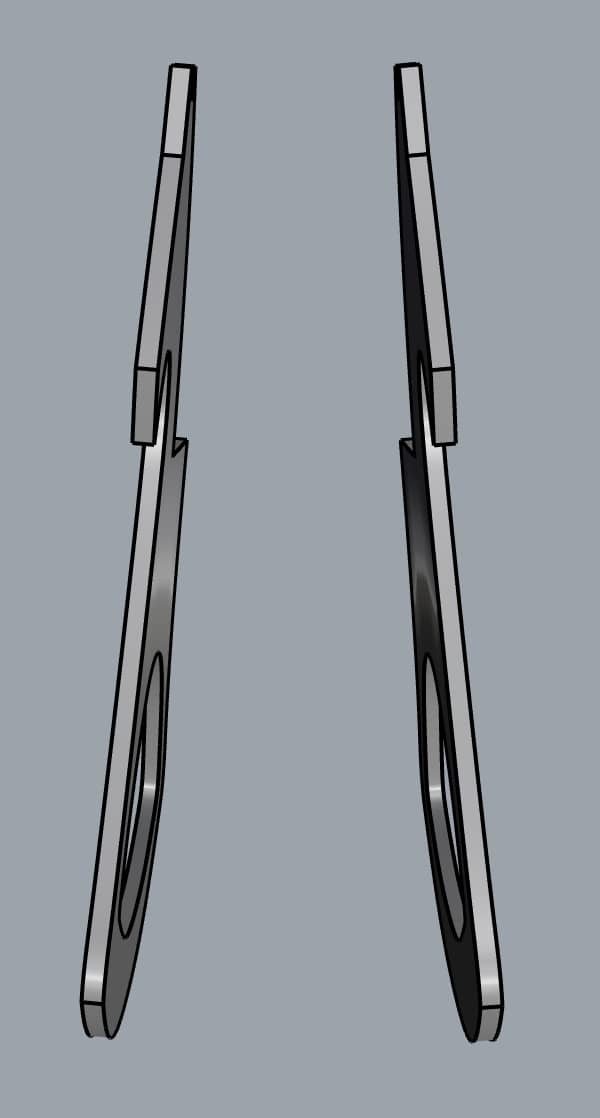
I wasn't sure how I wanted to connect the two sides together. I knew that I wanted to make it press-fit, but I had a few different ideas about how to construct the joints. I considered using finger joints, but kept getting confused because the two sides of the horse were angled, so the connections wouldn't be at 90 degrees. I think I could have gotten it to work, but was also worried about stability. Instead, I decided to have pieces of wood extend slightly beyond the side panels of the horse with angled slots to fit into slots in the sides of the horse. I angled the slots in the connecting pieces of wood to align with the tilt of the horse. I thought this would be a stronger connection than any of the alternatives I was considering, and wouldn't require screws, nails, or glue.
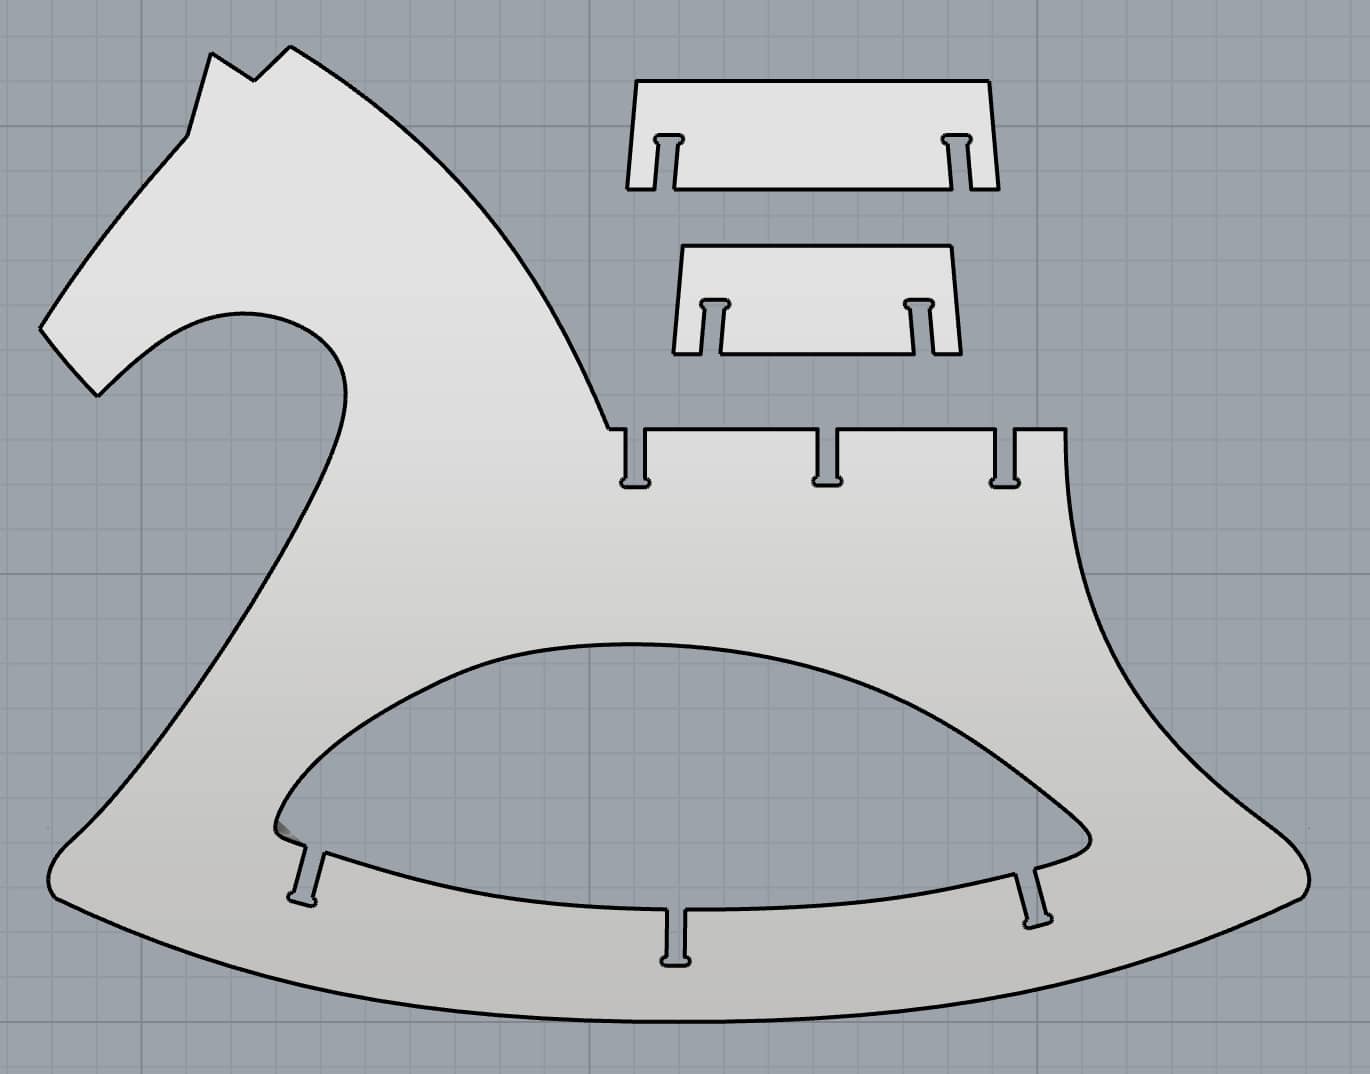
I decided against using finger joints and used slots instead.
I added three connecting pieces of wood across the top of the horse (where the seat would rest), and three across the bottom of the horse. At first, I used all 90 degree angles to create the slots, but I was doing some googling and came across this article from Makezine, and took their advice to round the edges in the slots due to the limitations of the CNC router. By Tuesday morning when I had my scheduled time with the ShopBot, I had a finished set of designs ready to cut.
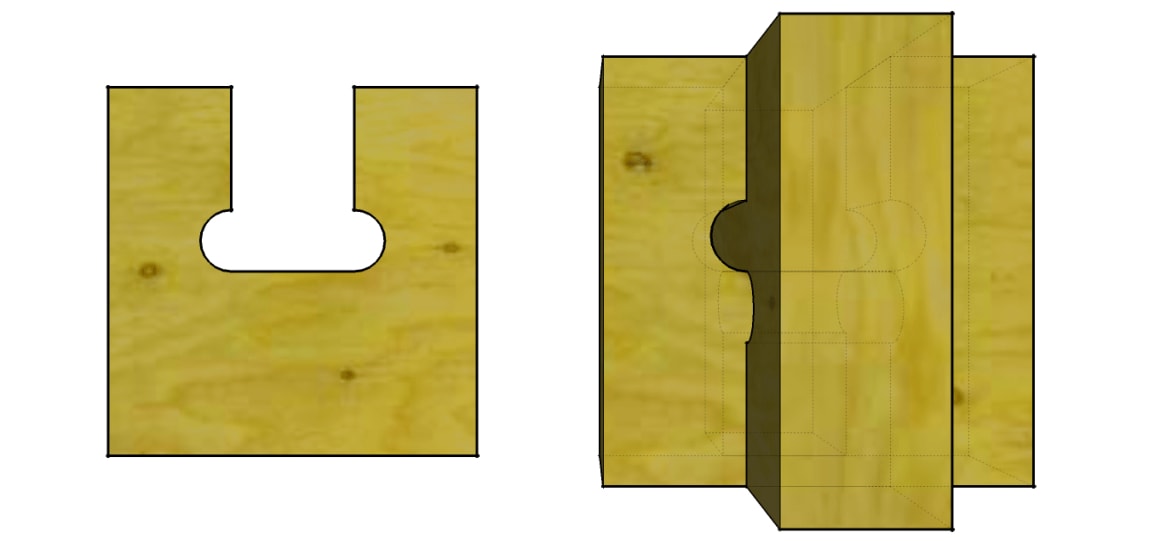
This image was helpful as I made my joints.
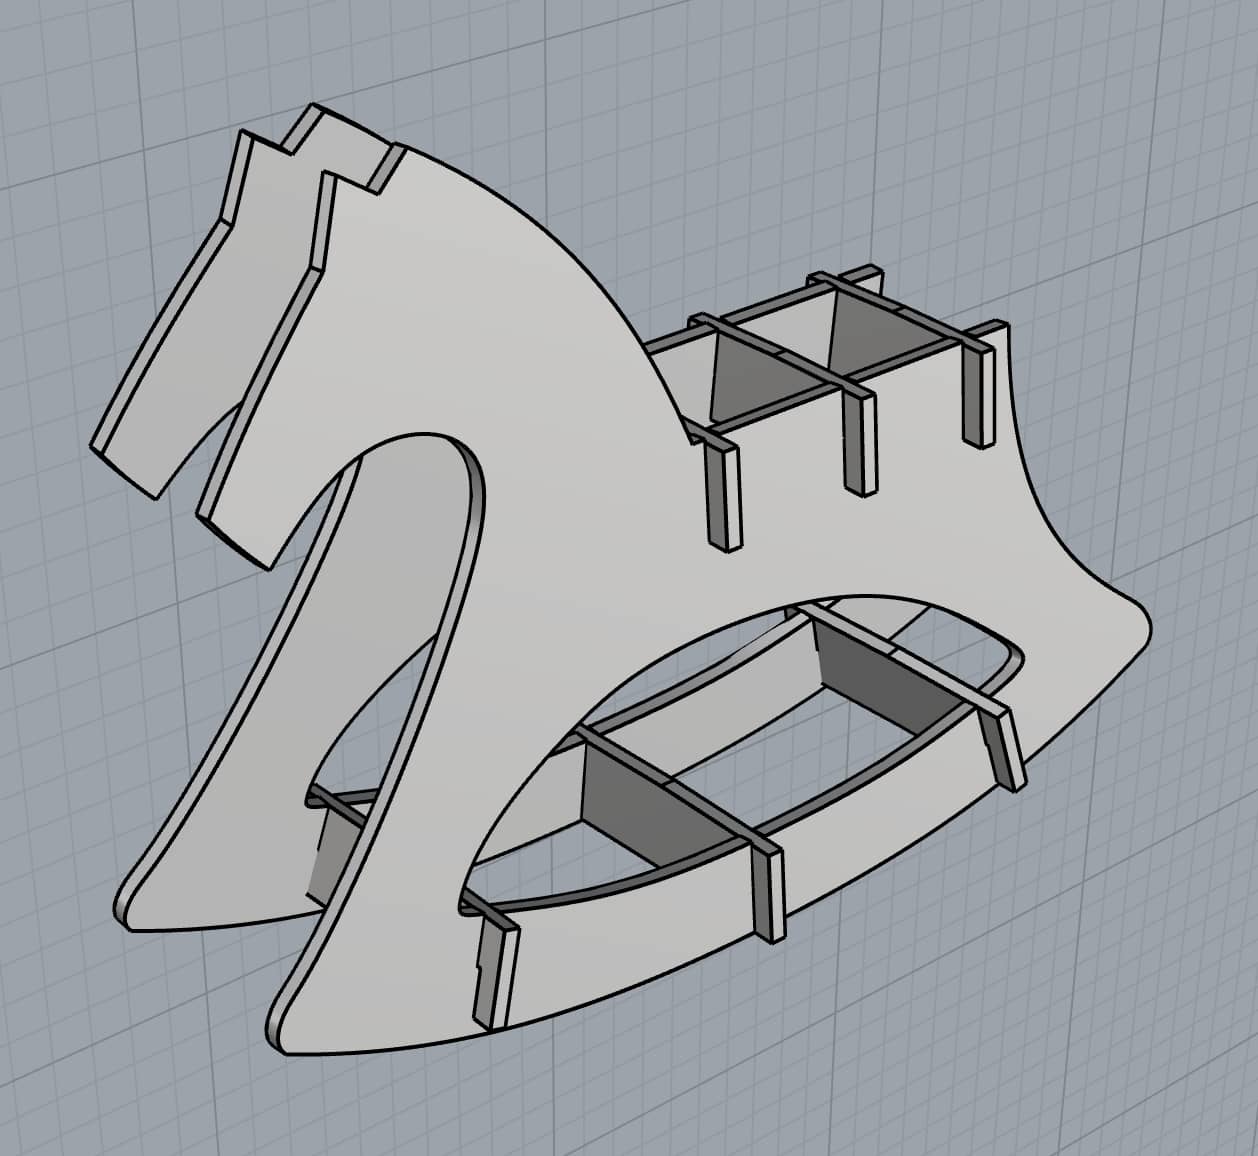
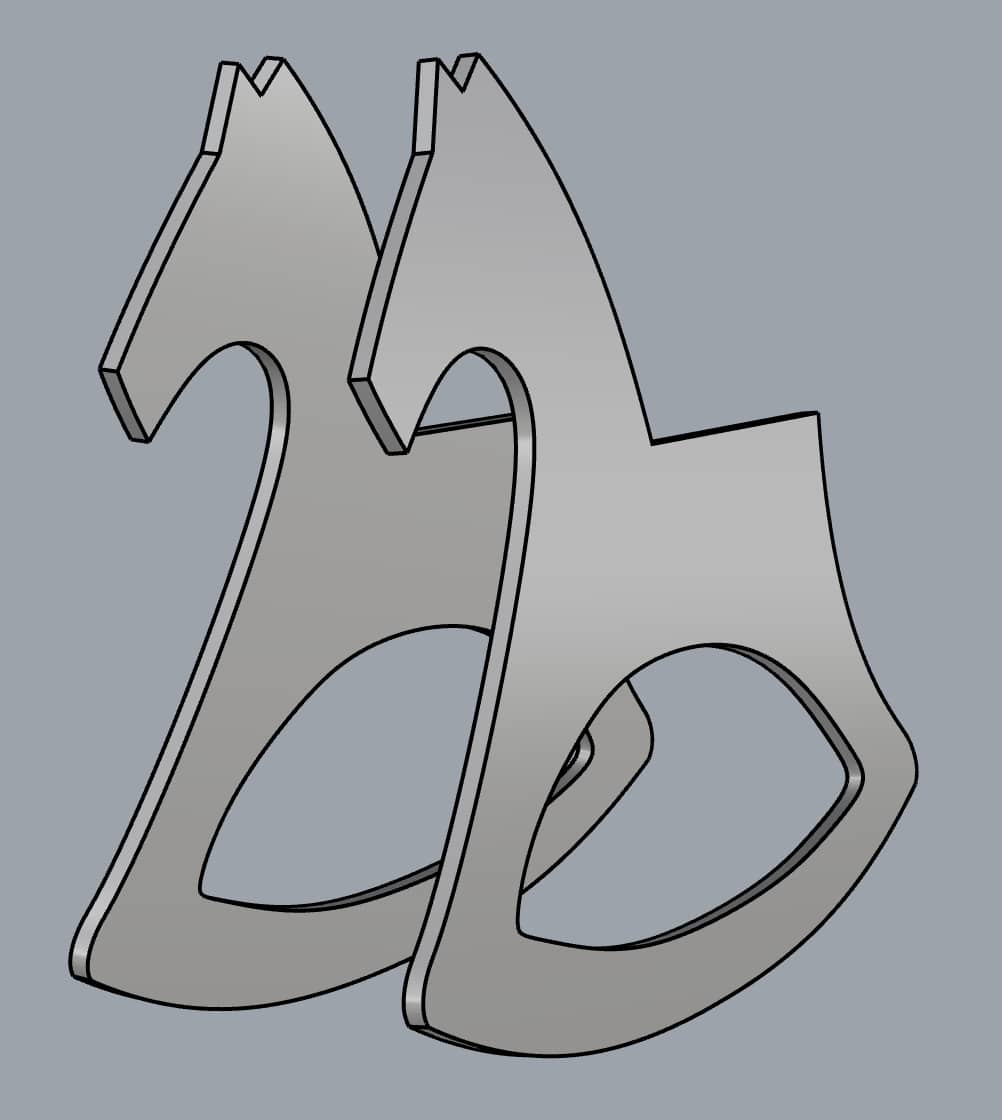
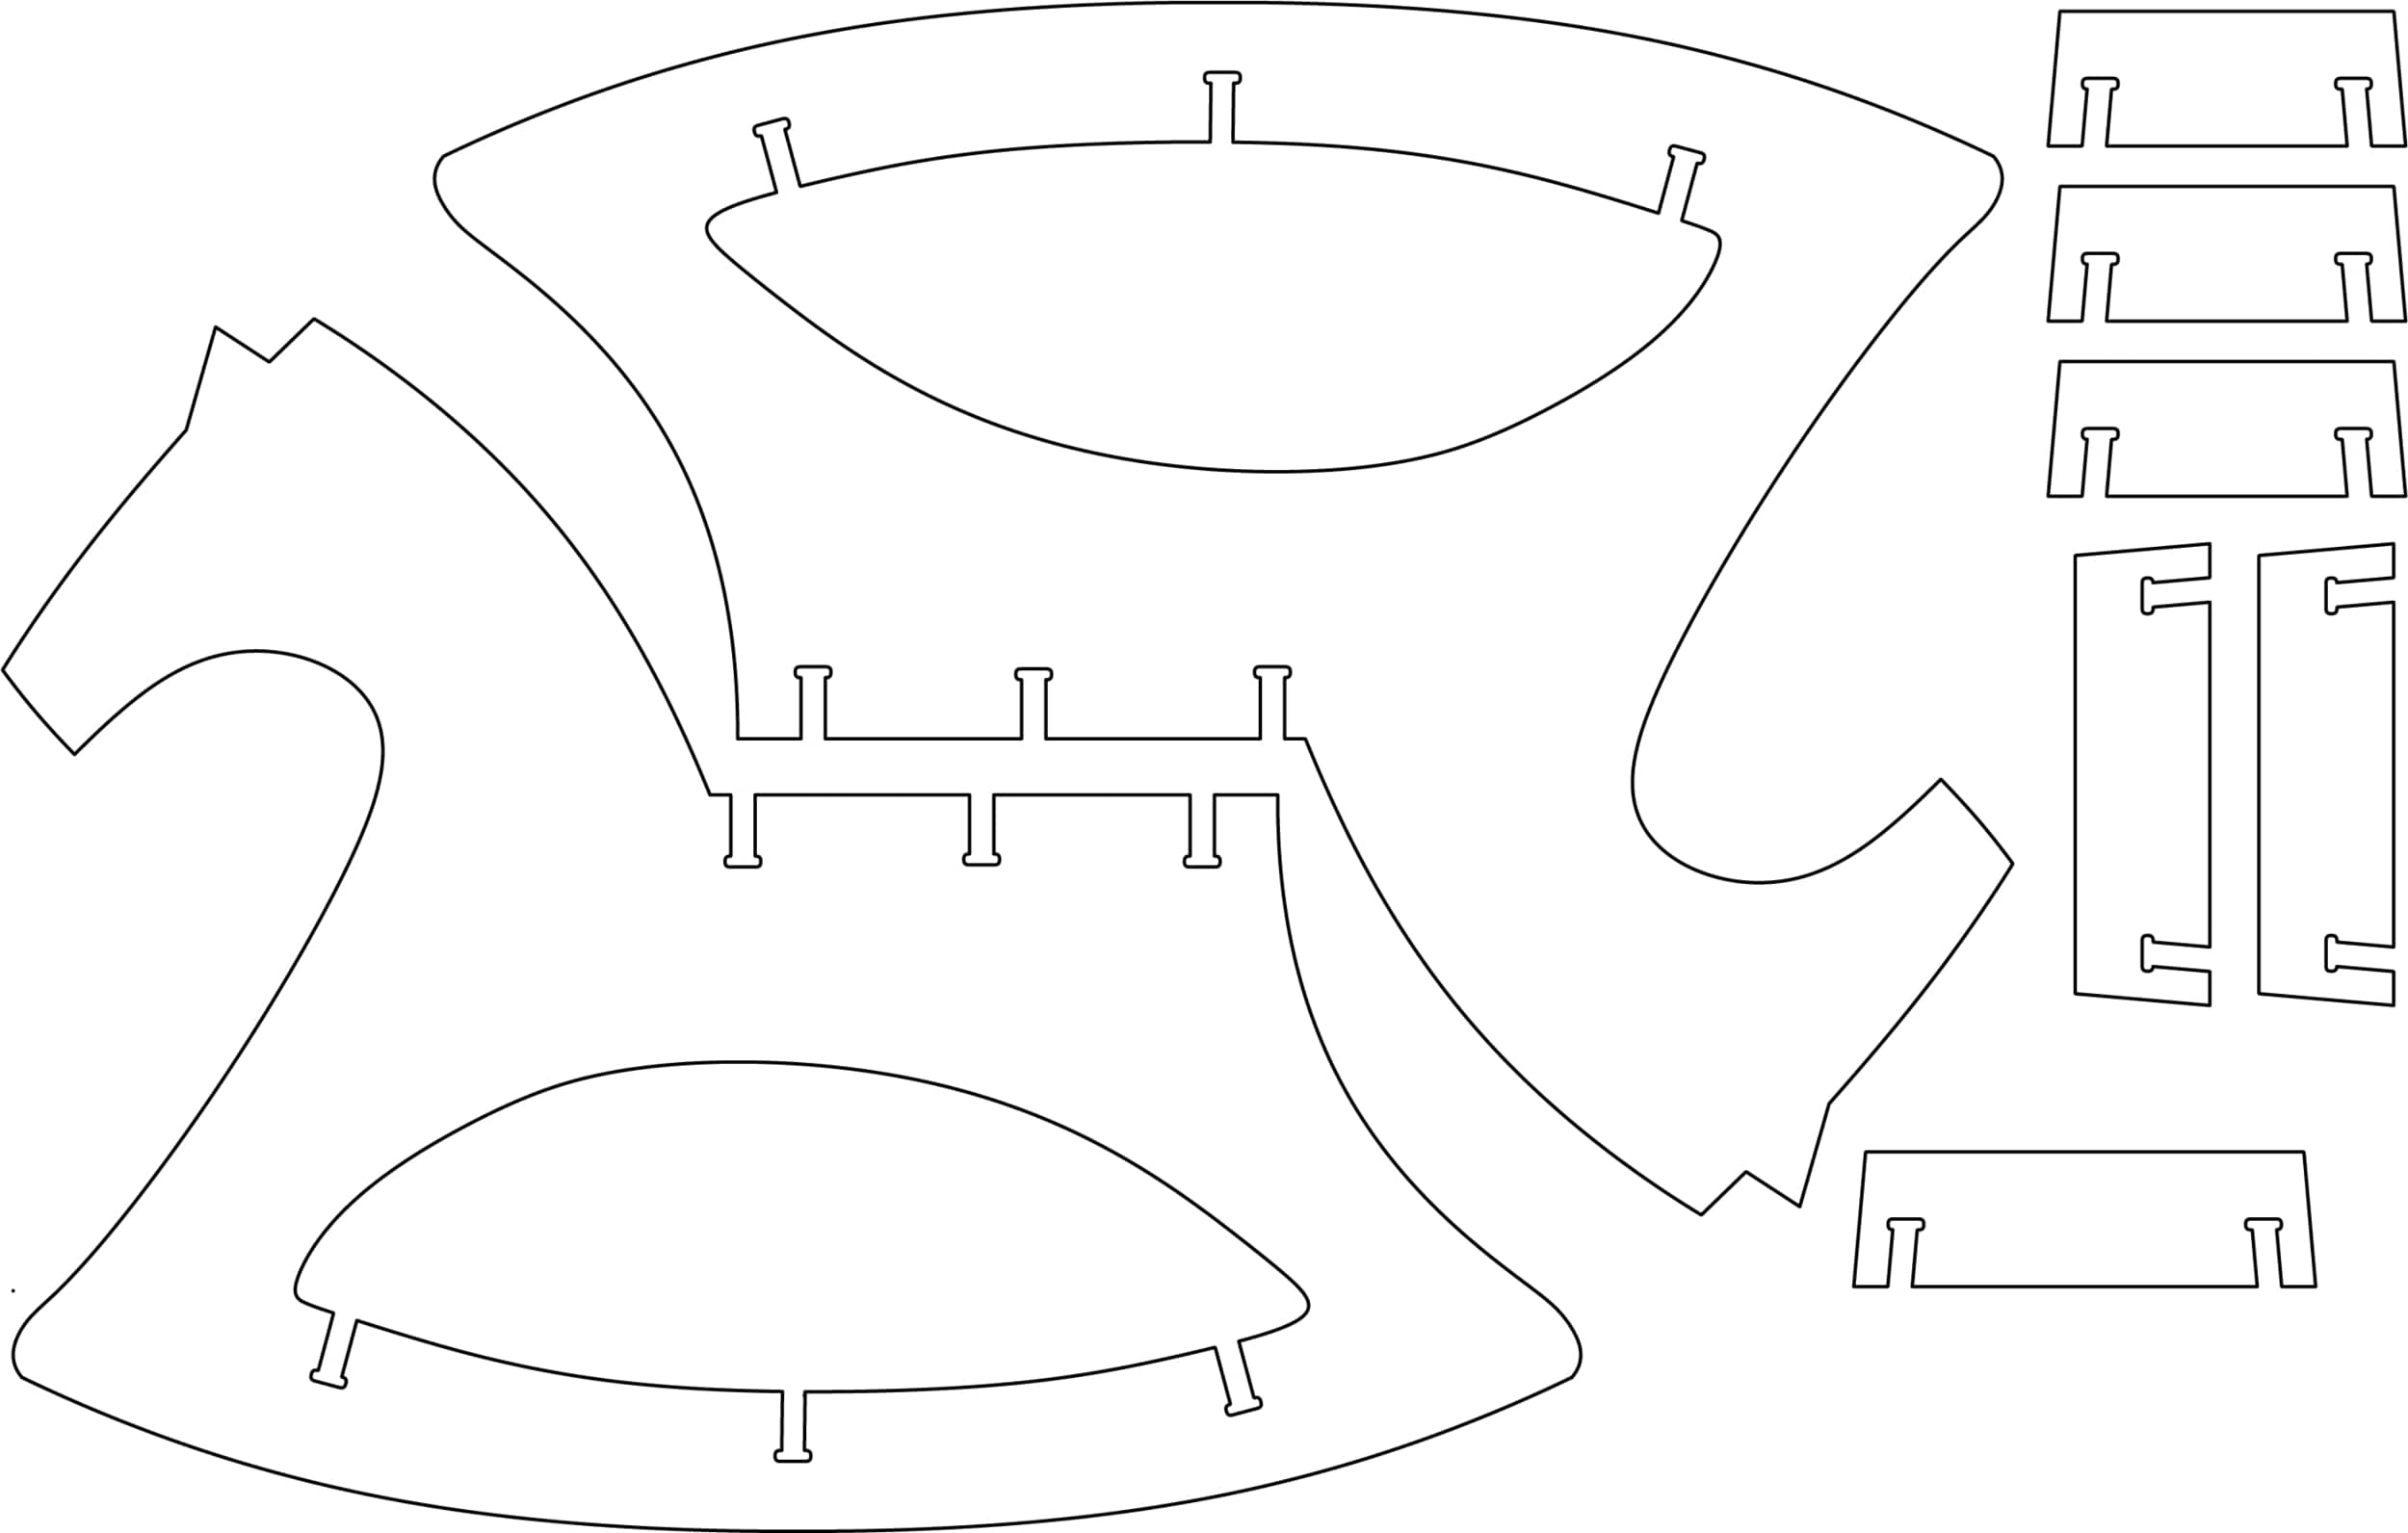
A 3D version of my final design.
On Tuesday, Alexandre and I had our scheduled time to machine our designs with the TA Grace. Grace took a look at our designs and gave us a little feedback. Luckily, there wasn't much to change with my design. There was already an OSB screwed into the sacrificial layer with over half unused, so we didn't have to set up a new sheet yet. We decided to do a test of my joints before printing my whole pattern to check if the width I had used in my design was good for the sheet of OSB we had. The OSB was almost 0.1" thicker than the thickness I had assumed when drawing, so I thought I might have to adjust it. Grace reacquainted us with the process of prepping the machine, importing the DXF file, creating toolpaths, and actually printing it. I printed two of my connection pieces, and I was convinced that my slots were too narrow, but Grace used a mallet to hammer them together and it ended up being a really secure joint, so we decided that my full design was good to go.
Zeroing the Z axis.
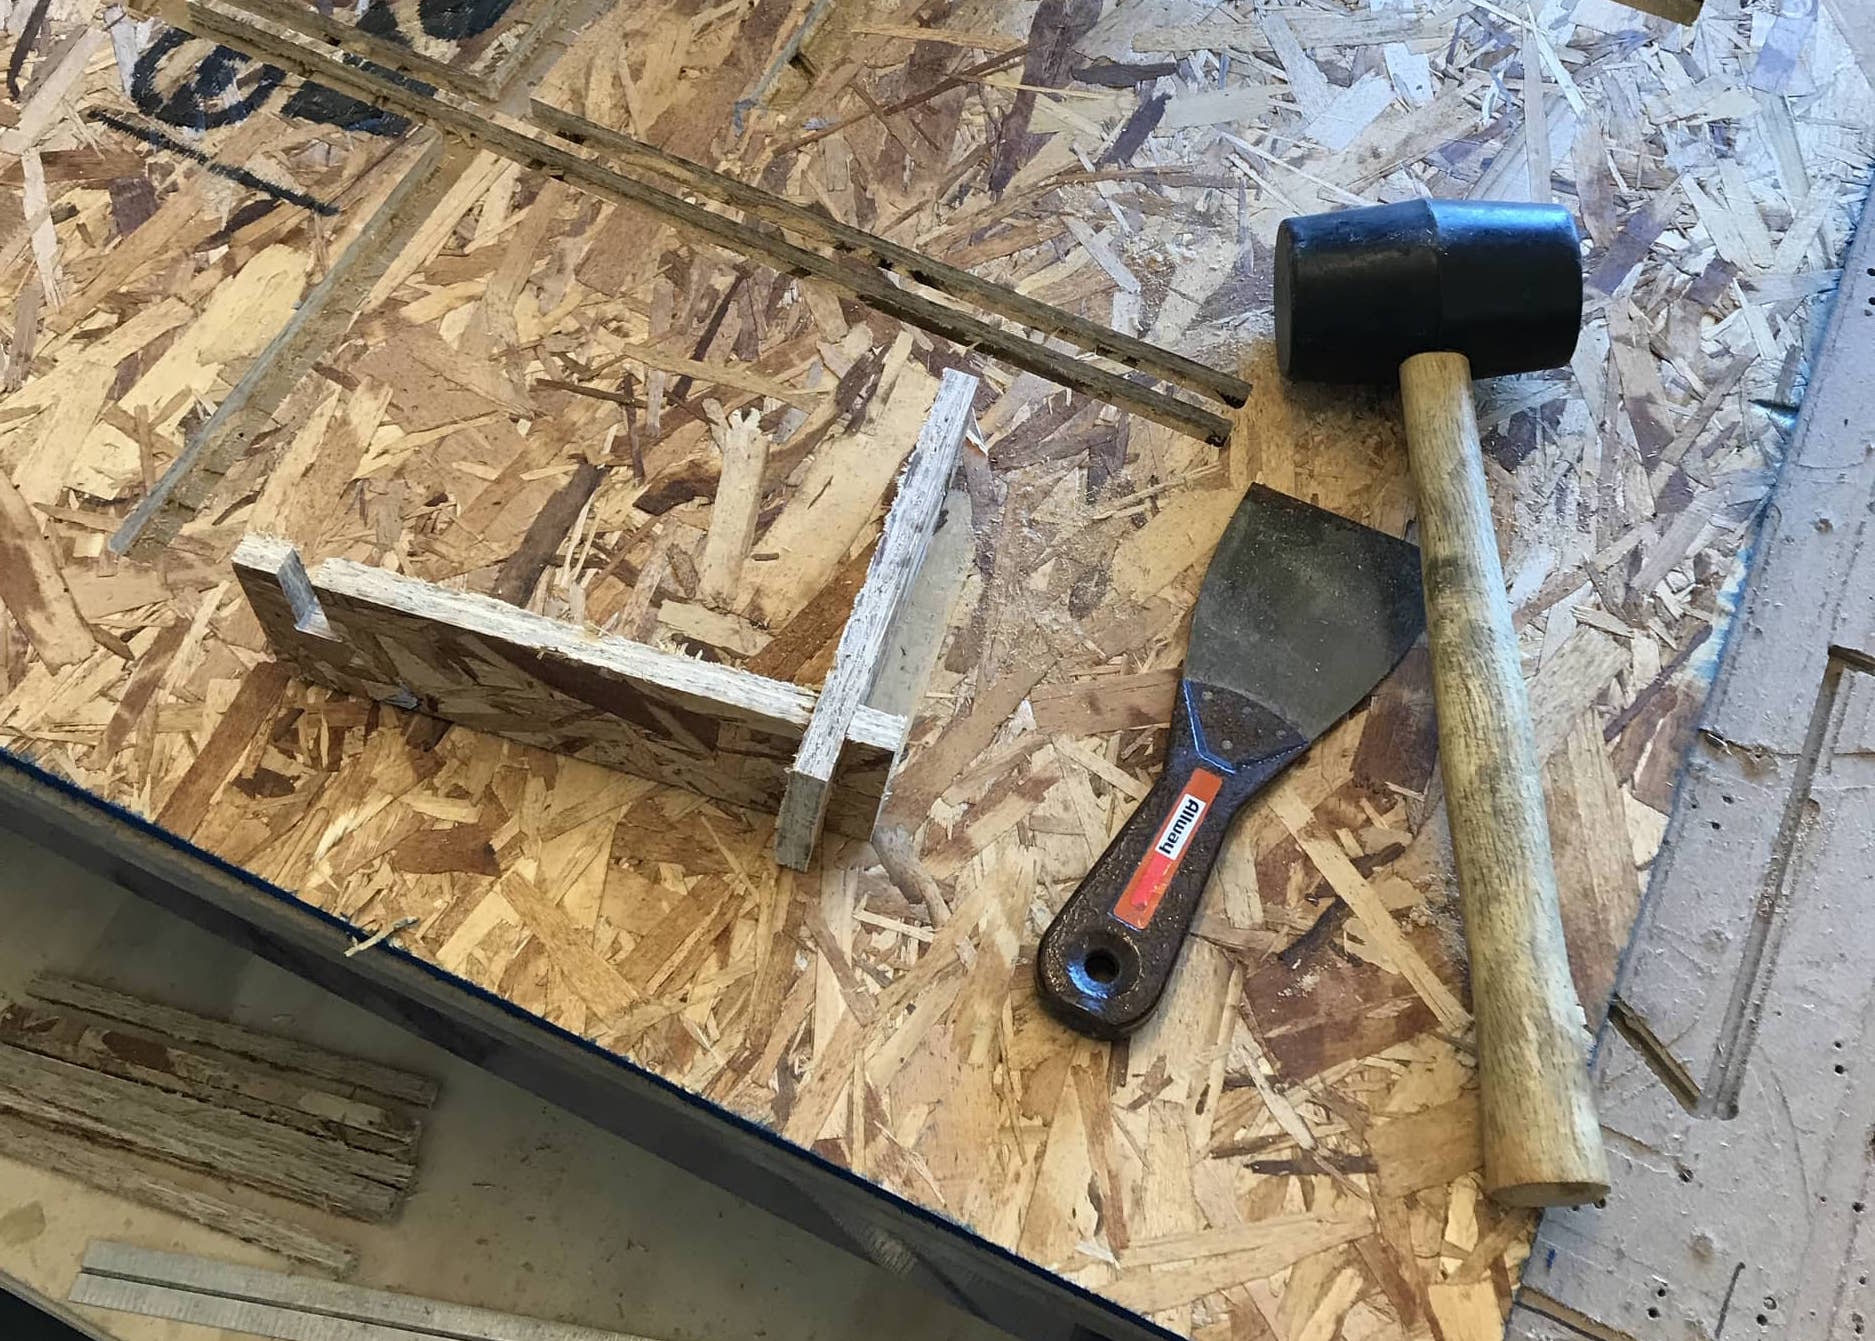
Testing the slot width of my joints by cutting two pieces.
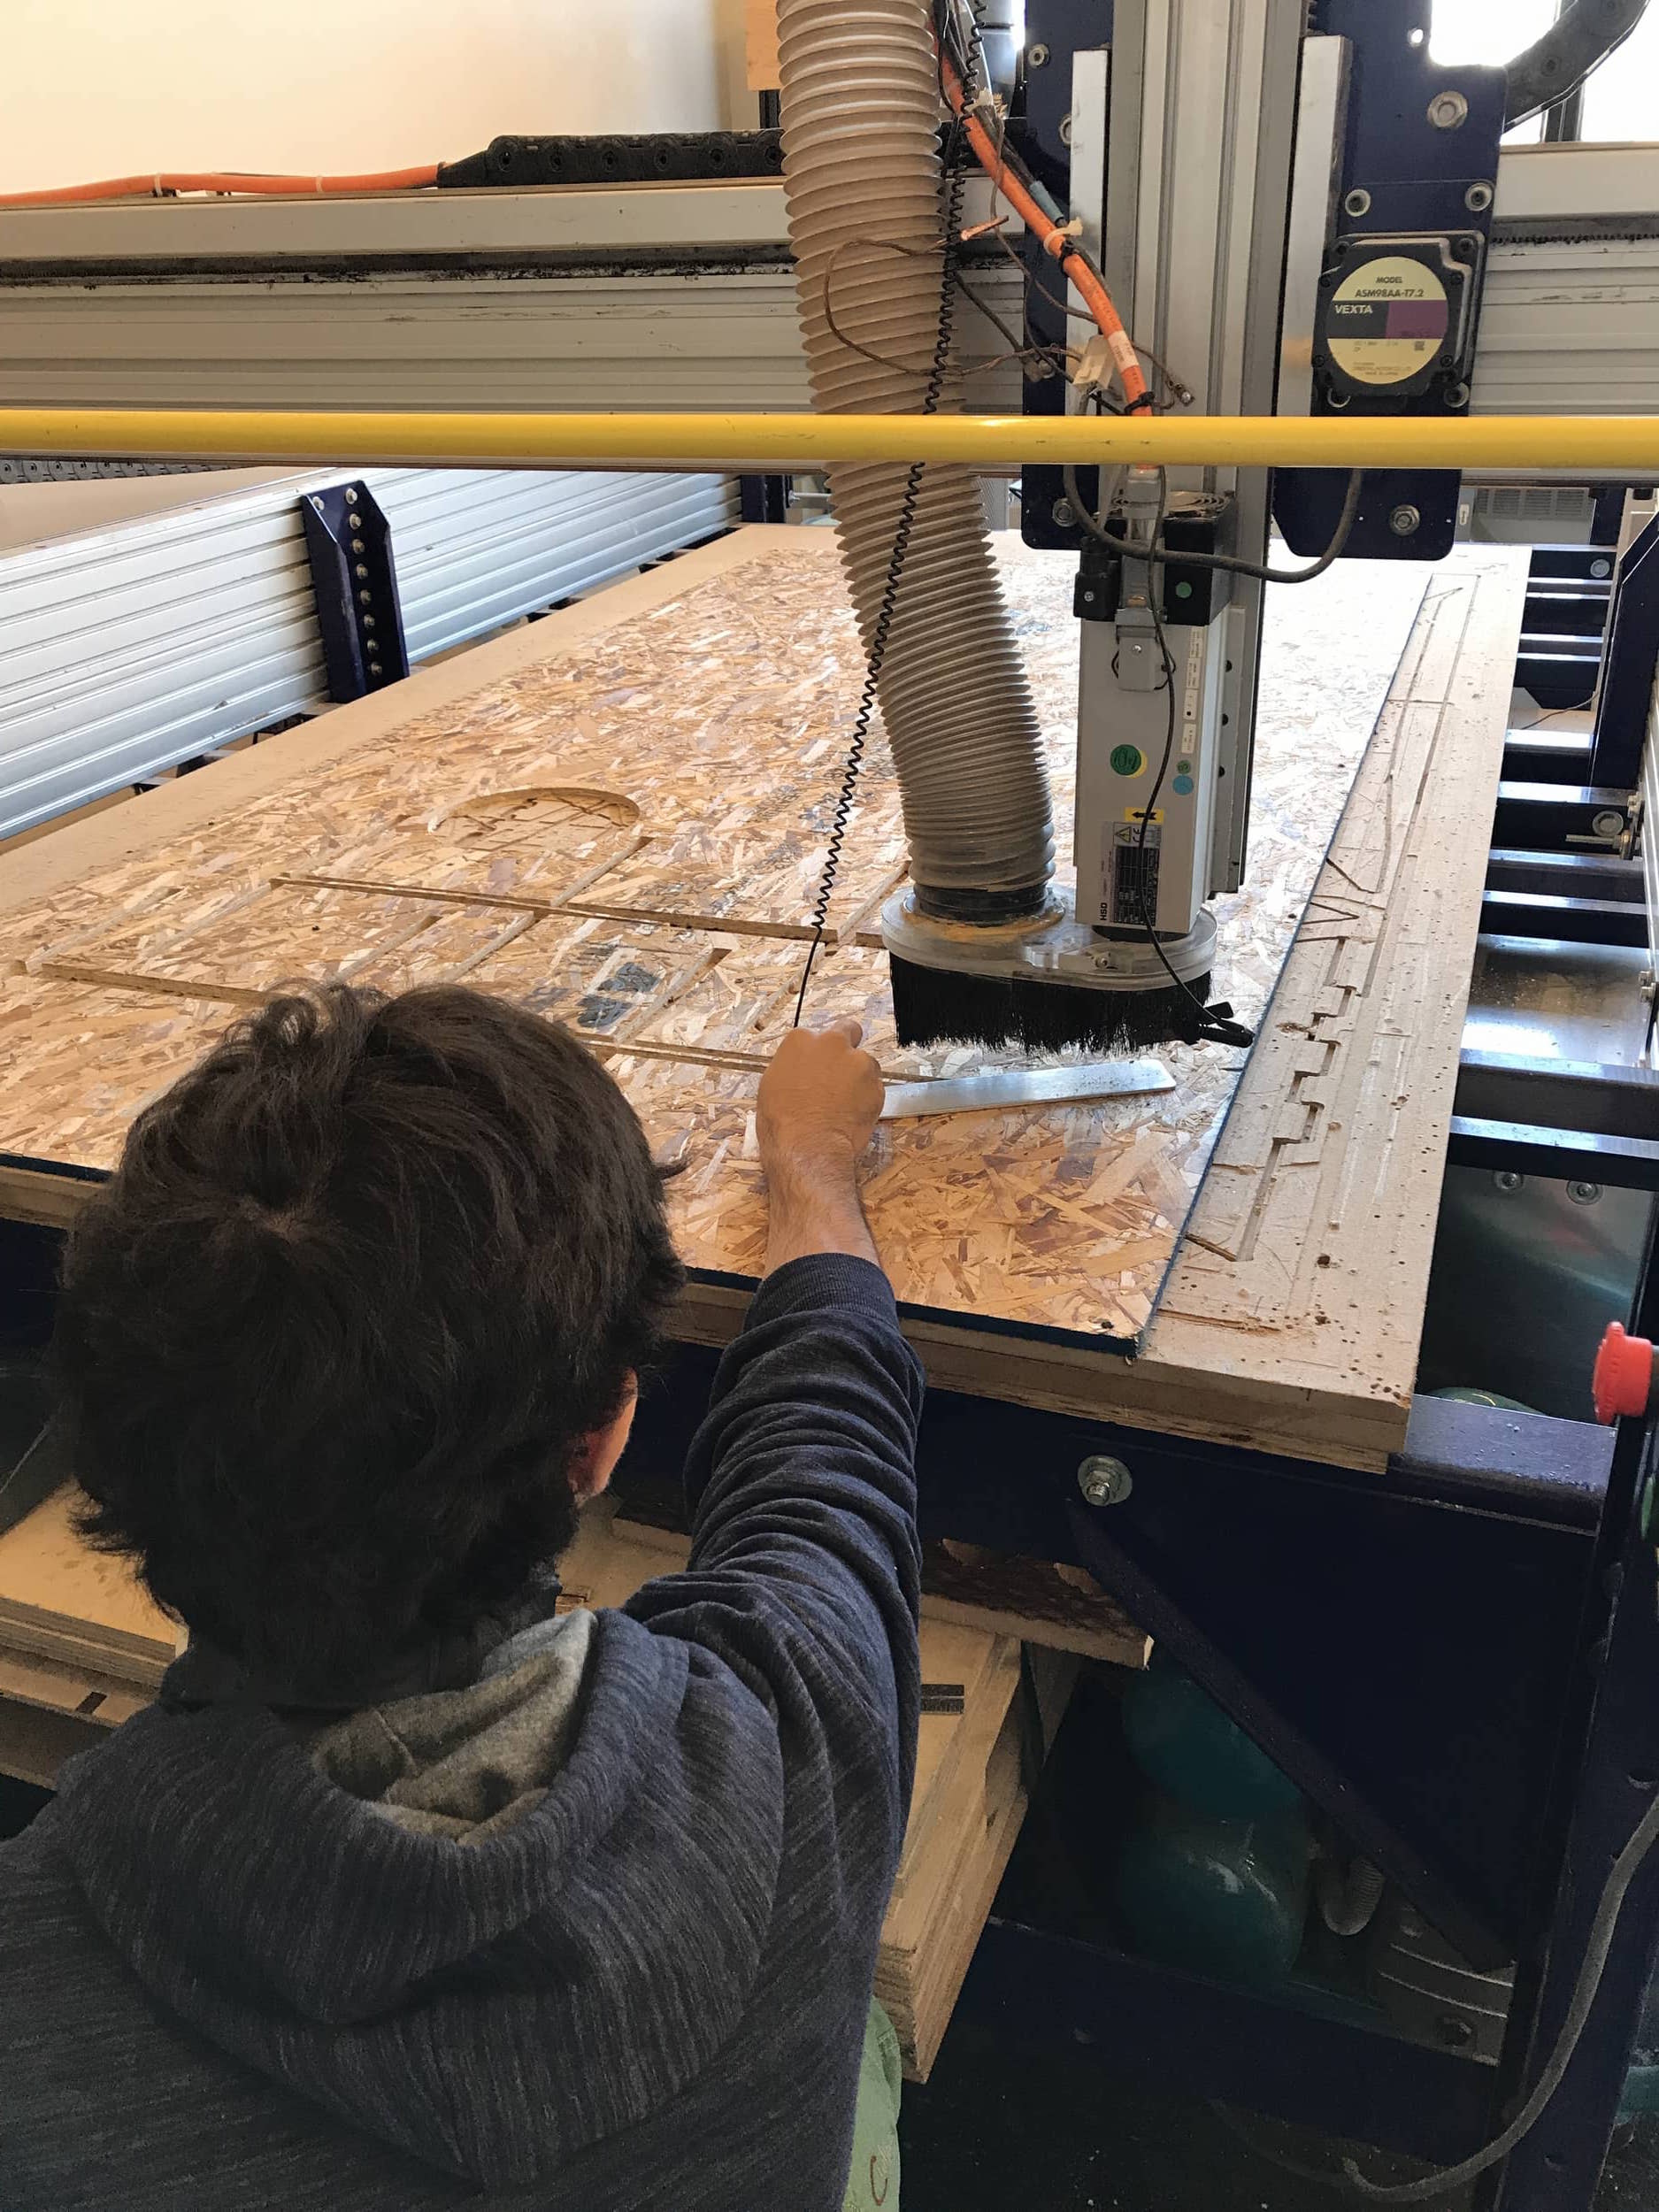
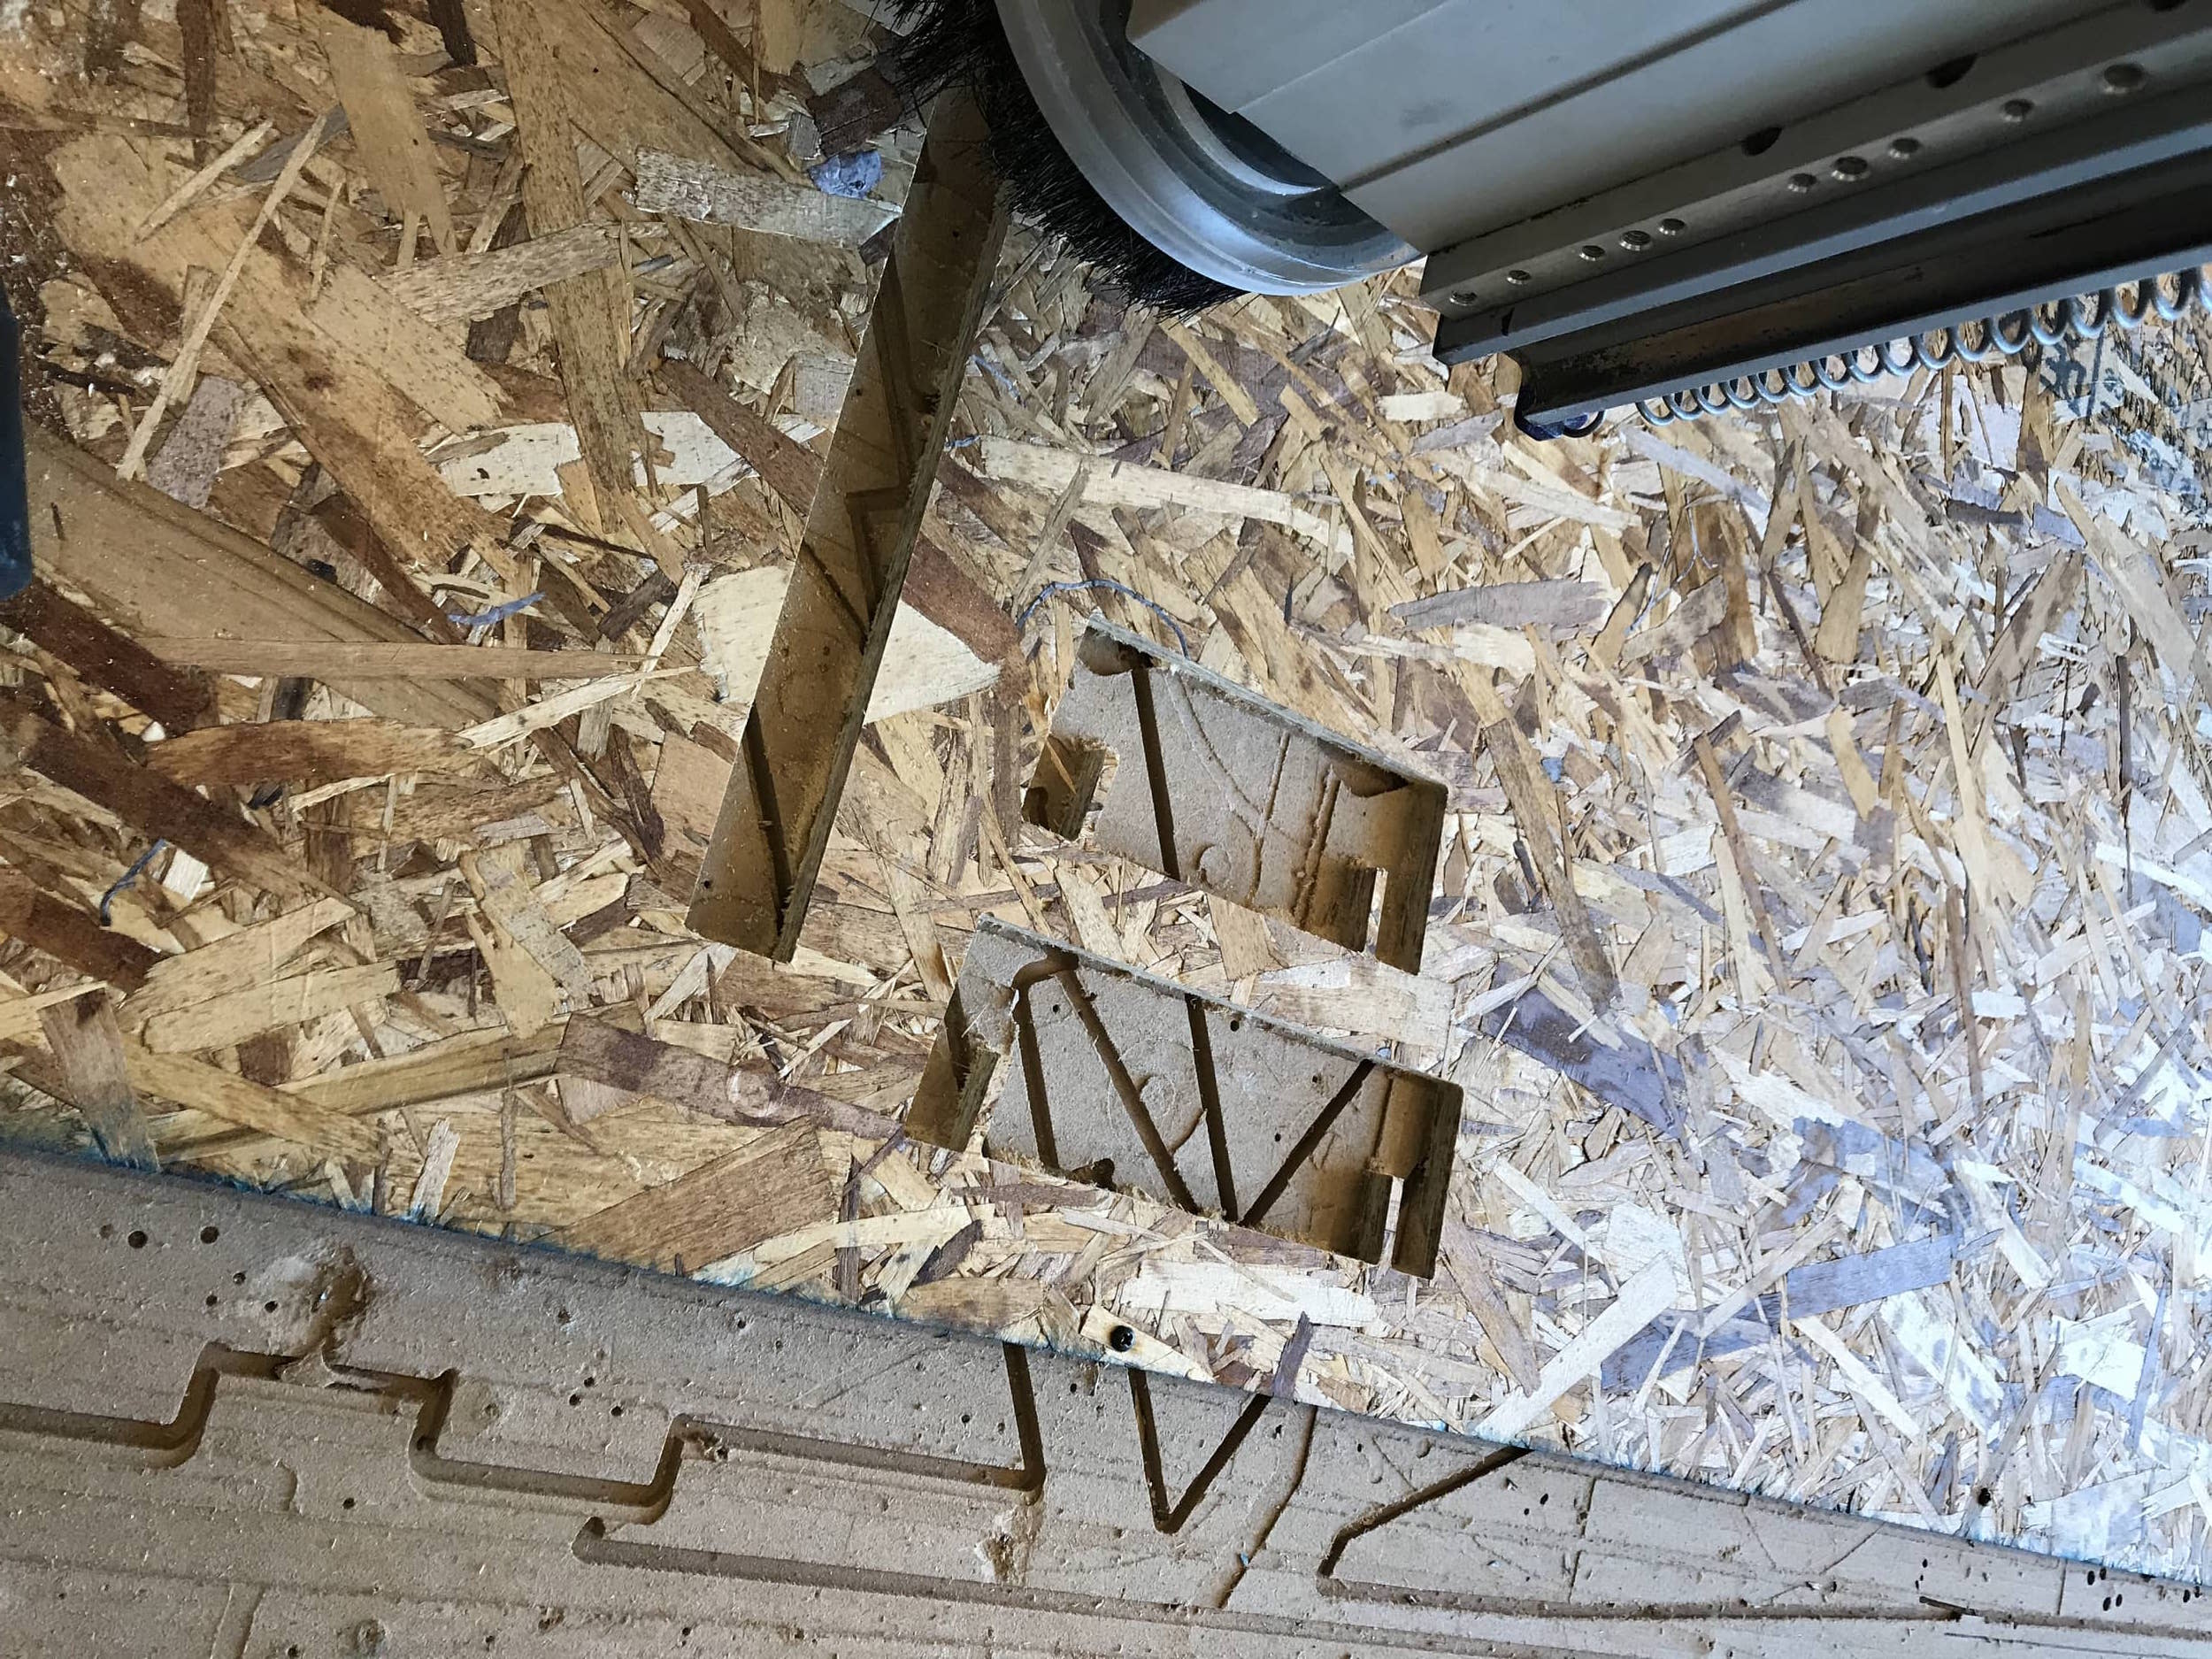
We sent my job to the ShopBot without any problems. A couple minutes into the job we paused it to add more screws to tack down the board because we noticed there weren't many on the side where my design was getting cut. It took about 45 minutes overall my job to finish. This time would have been shorter if I had used the 1/4" end mill, but I used the 1/8" end mill instead because the slots for my press-fit joints were narrow, and the rounded corners I made in the slot were apparently just too small for the 1/8" end mill to safely work.
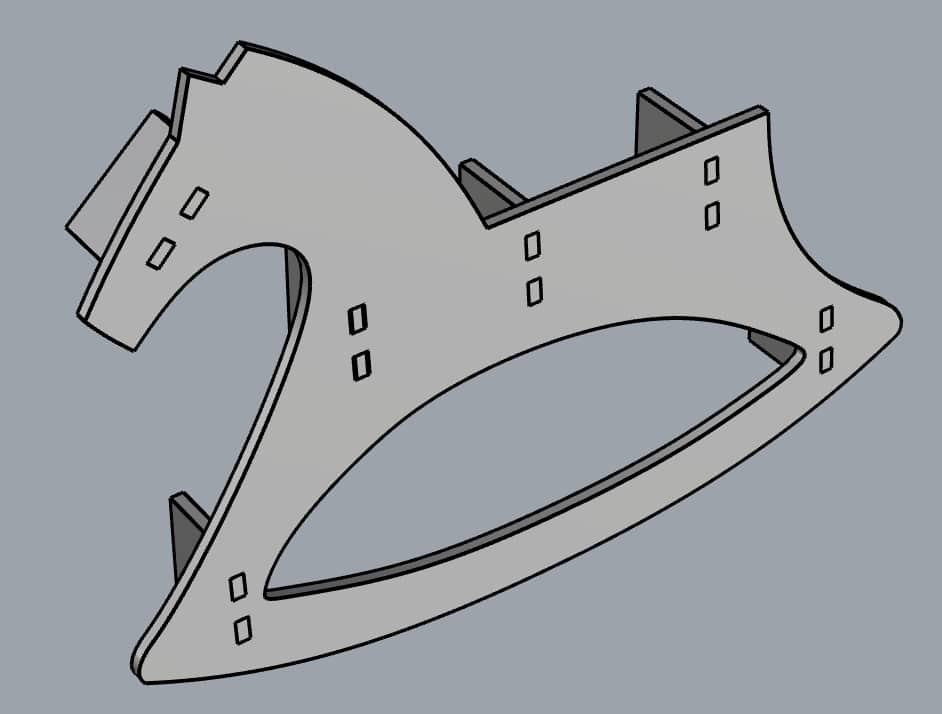
The layout I used for cutting my full design.

Midway through cutting my design.
I forgot to take photos of the pieces after I removed them because during this time we were quickly remove the OSB sheet currently on the ShopBot and setup a new sheet for Alex to print his design. I can't remember the last time I used a drill, but I got comfortable drilling in screws to tack down the board. Alex used the 1/4" end mill for his cutting, so Grace reviewed with us how to change the end mill.
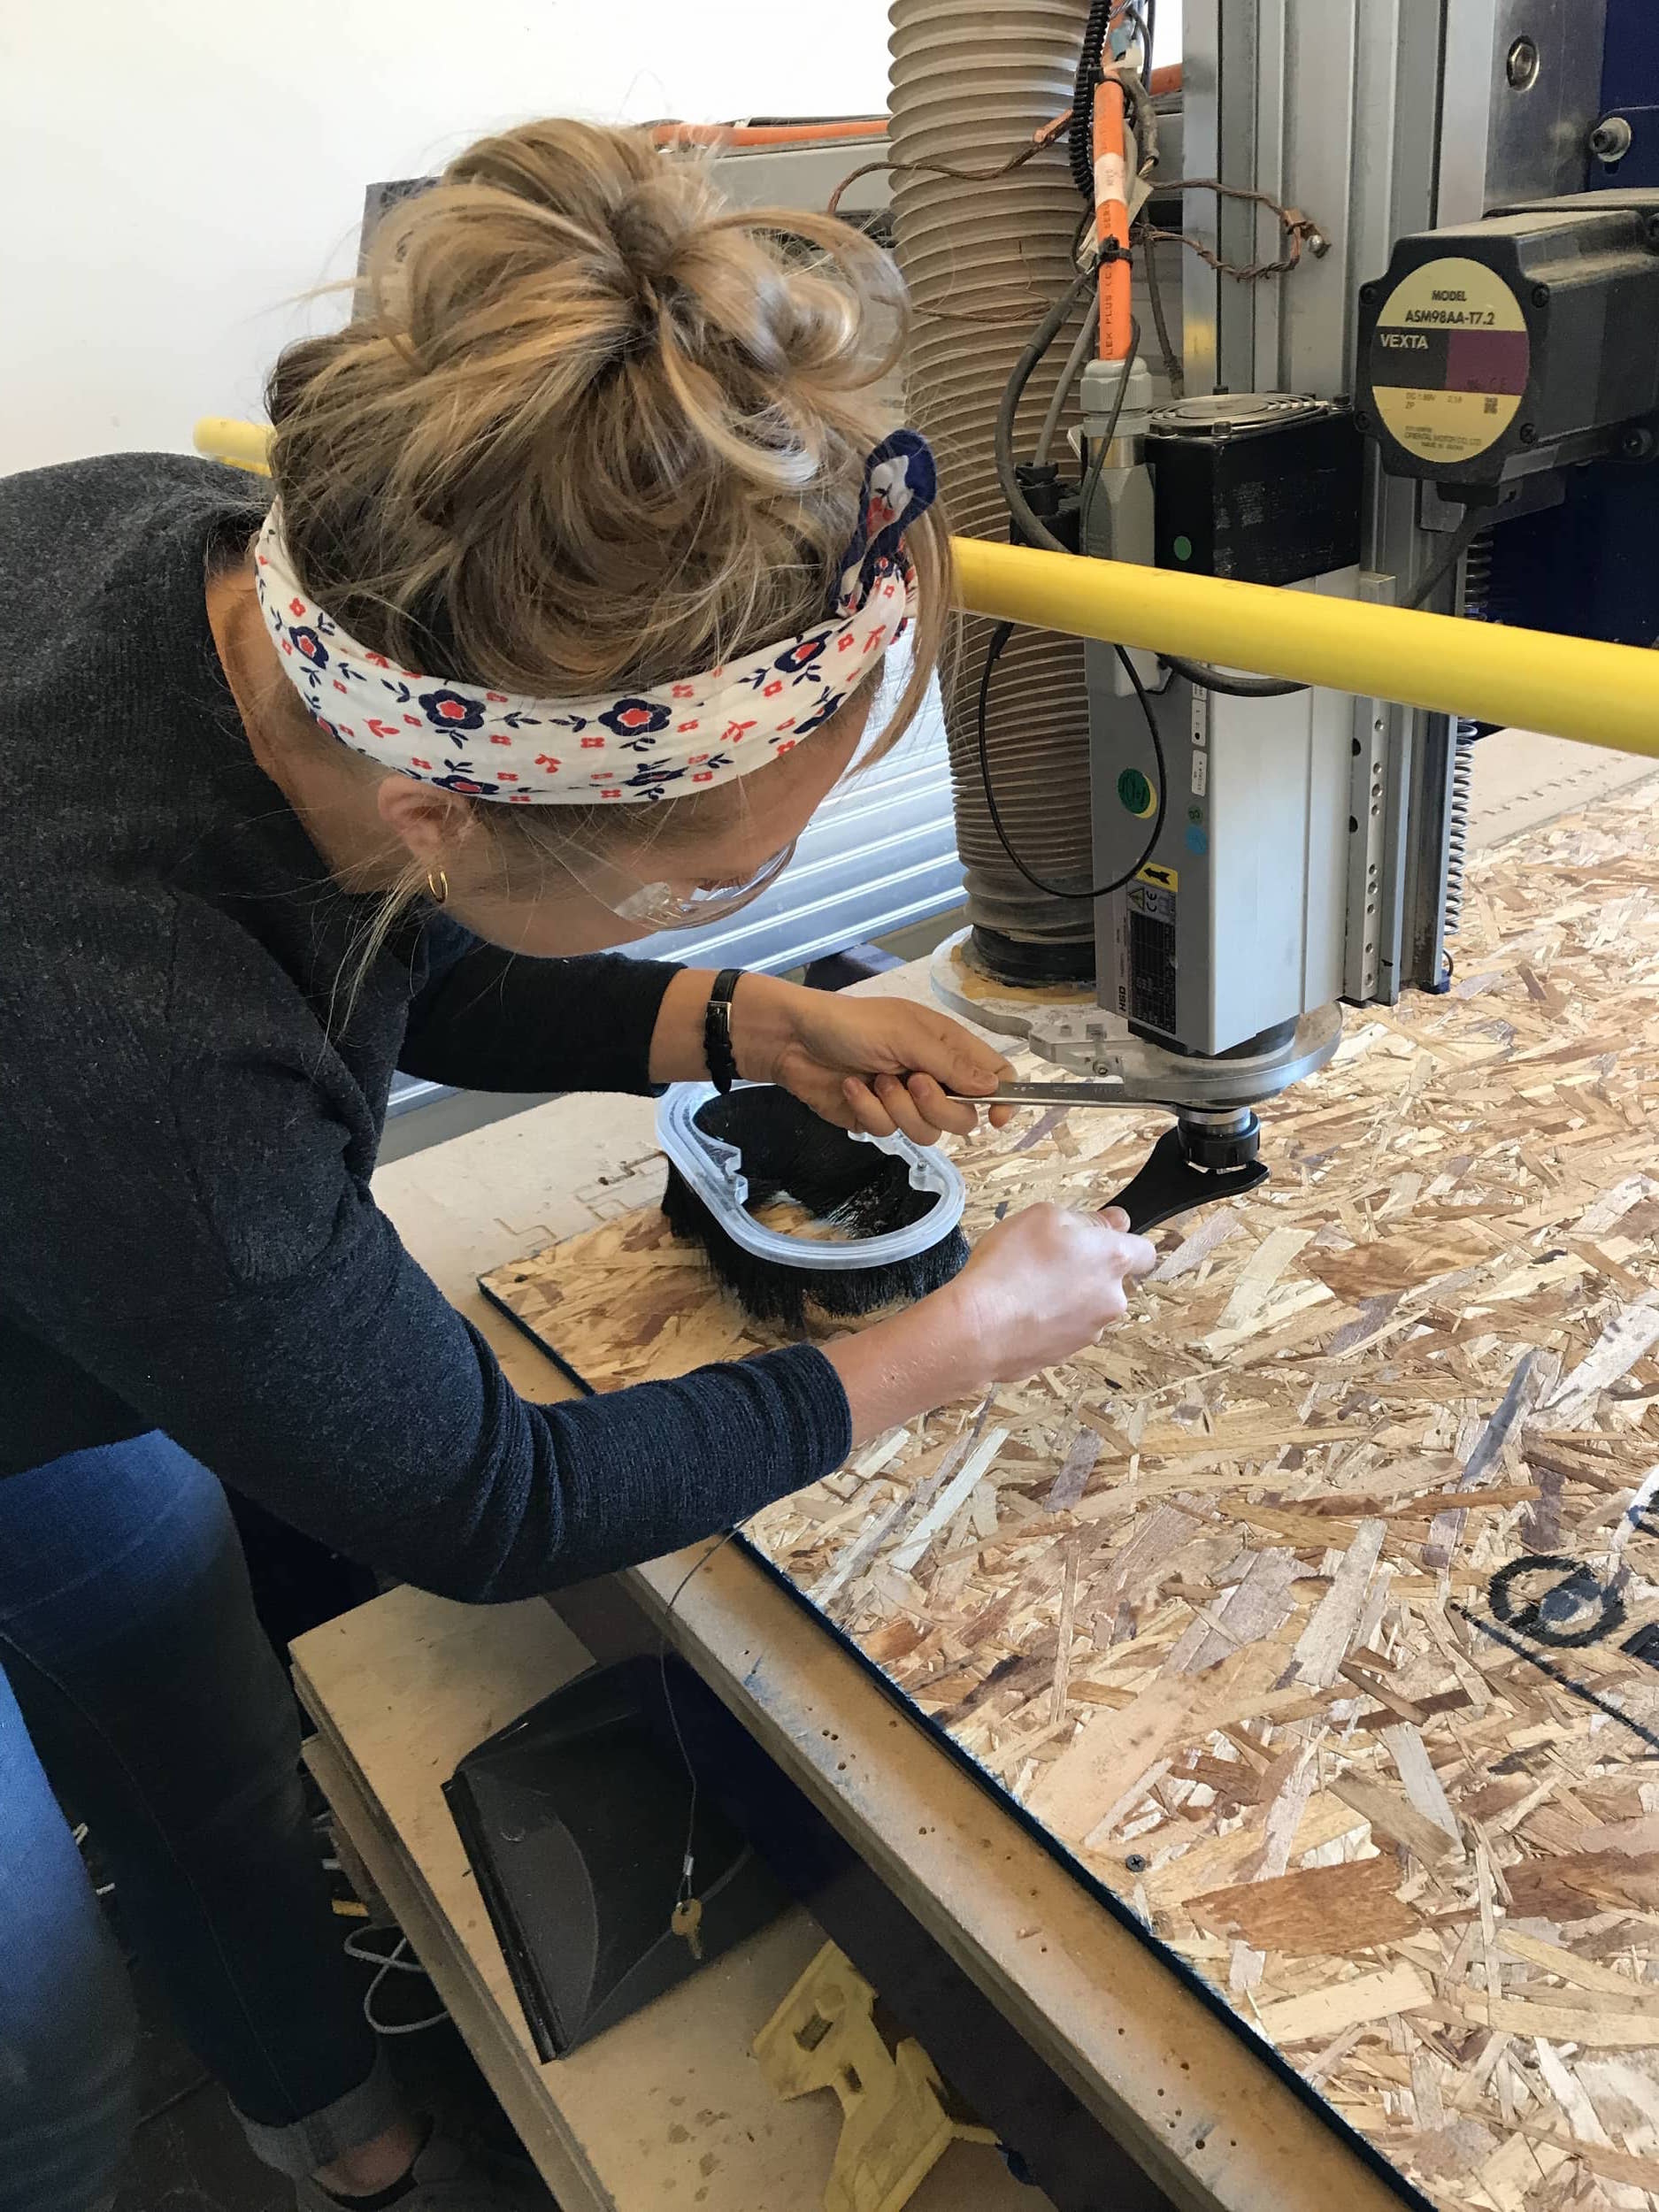
Learning how to change the end mill.
After helping setup the ShopBot for Alex, I assembled the pieces I had cut into the rocking horse. It worked so much better than I expected! The connections, for the most part, fit really well. I use a rasping tool in a few places where the OSB hadn't cut cleanly to remove excess wood so that the joints fit. I was able to push in all but one of the six connection pieces, and resorted to the mallet to make the last one fit. Once everything was fit together, the rocking horse was actually incredibly sturdy. It's uncomfortably small for me, but it completely supported my weight. I spent half an hour sanding down the wood to try to get it as smooth as I could, but with OSB it's impossible to get perfect. But nevertheless, I'm really happy with how my rocking horse turned out.
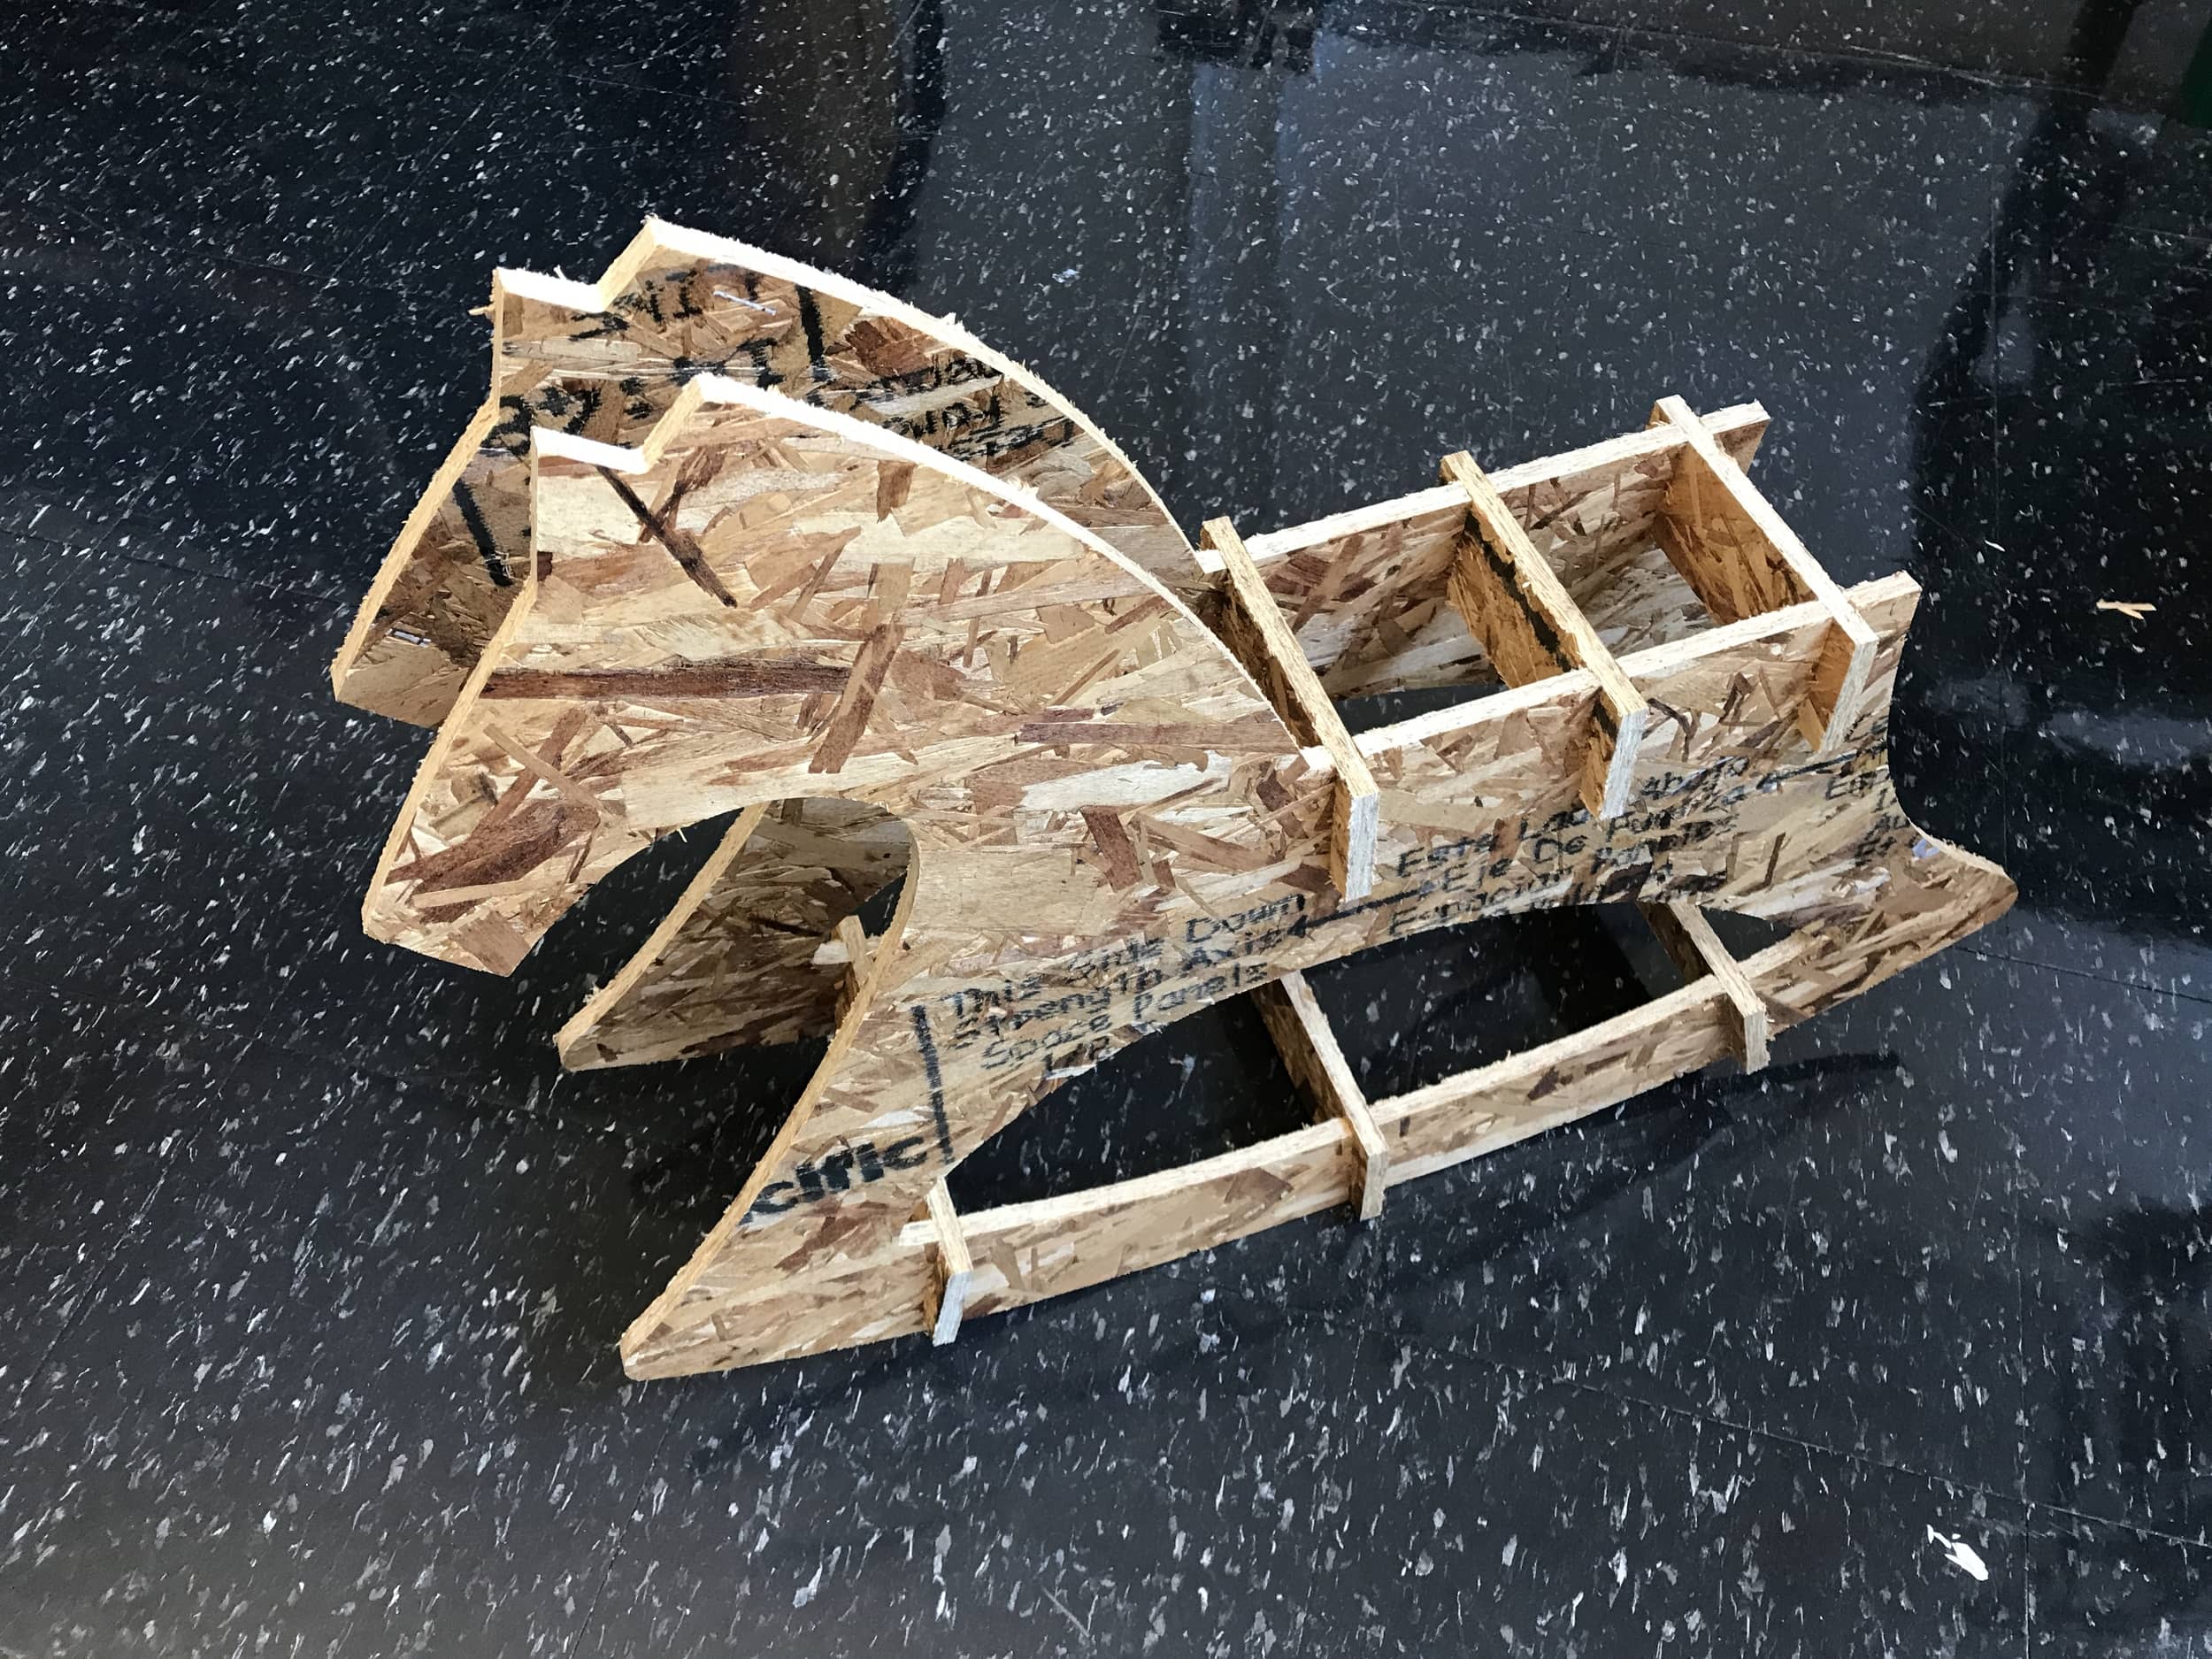
It's a rocking horse!
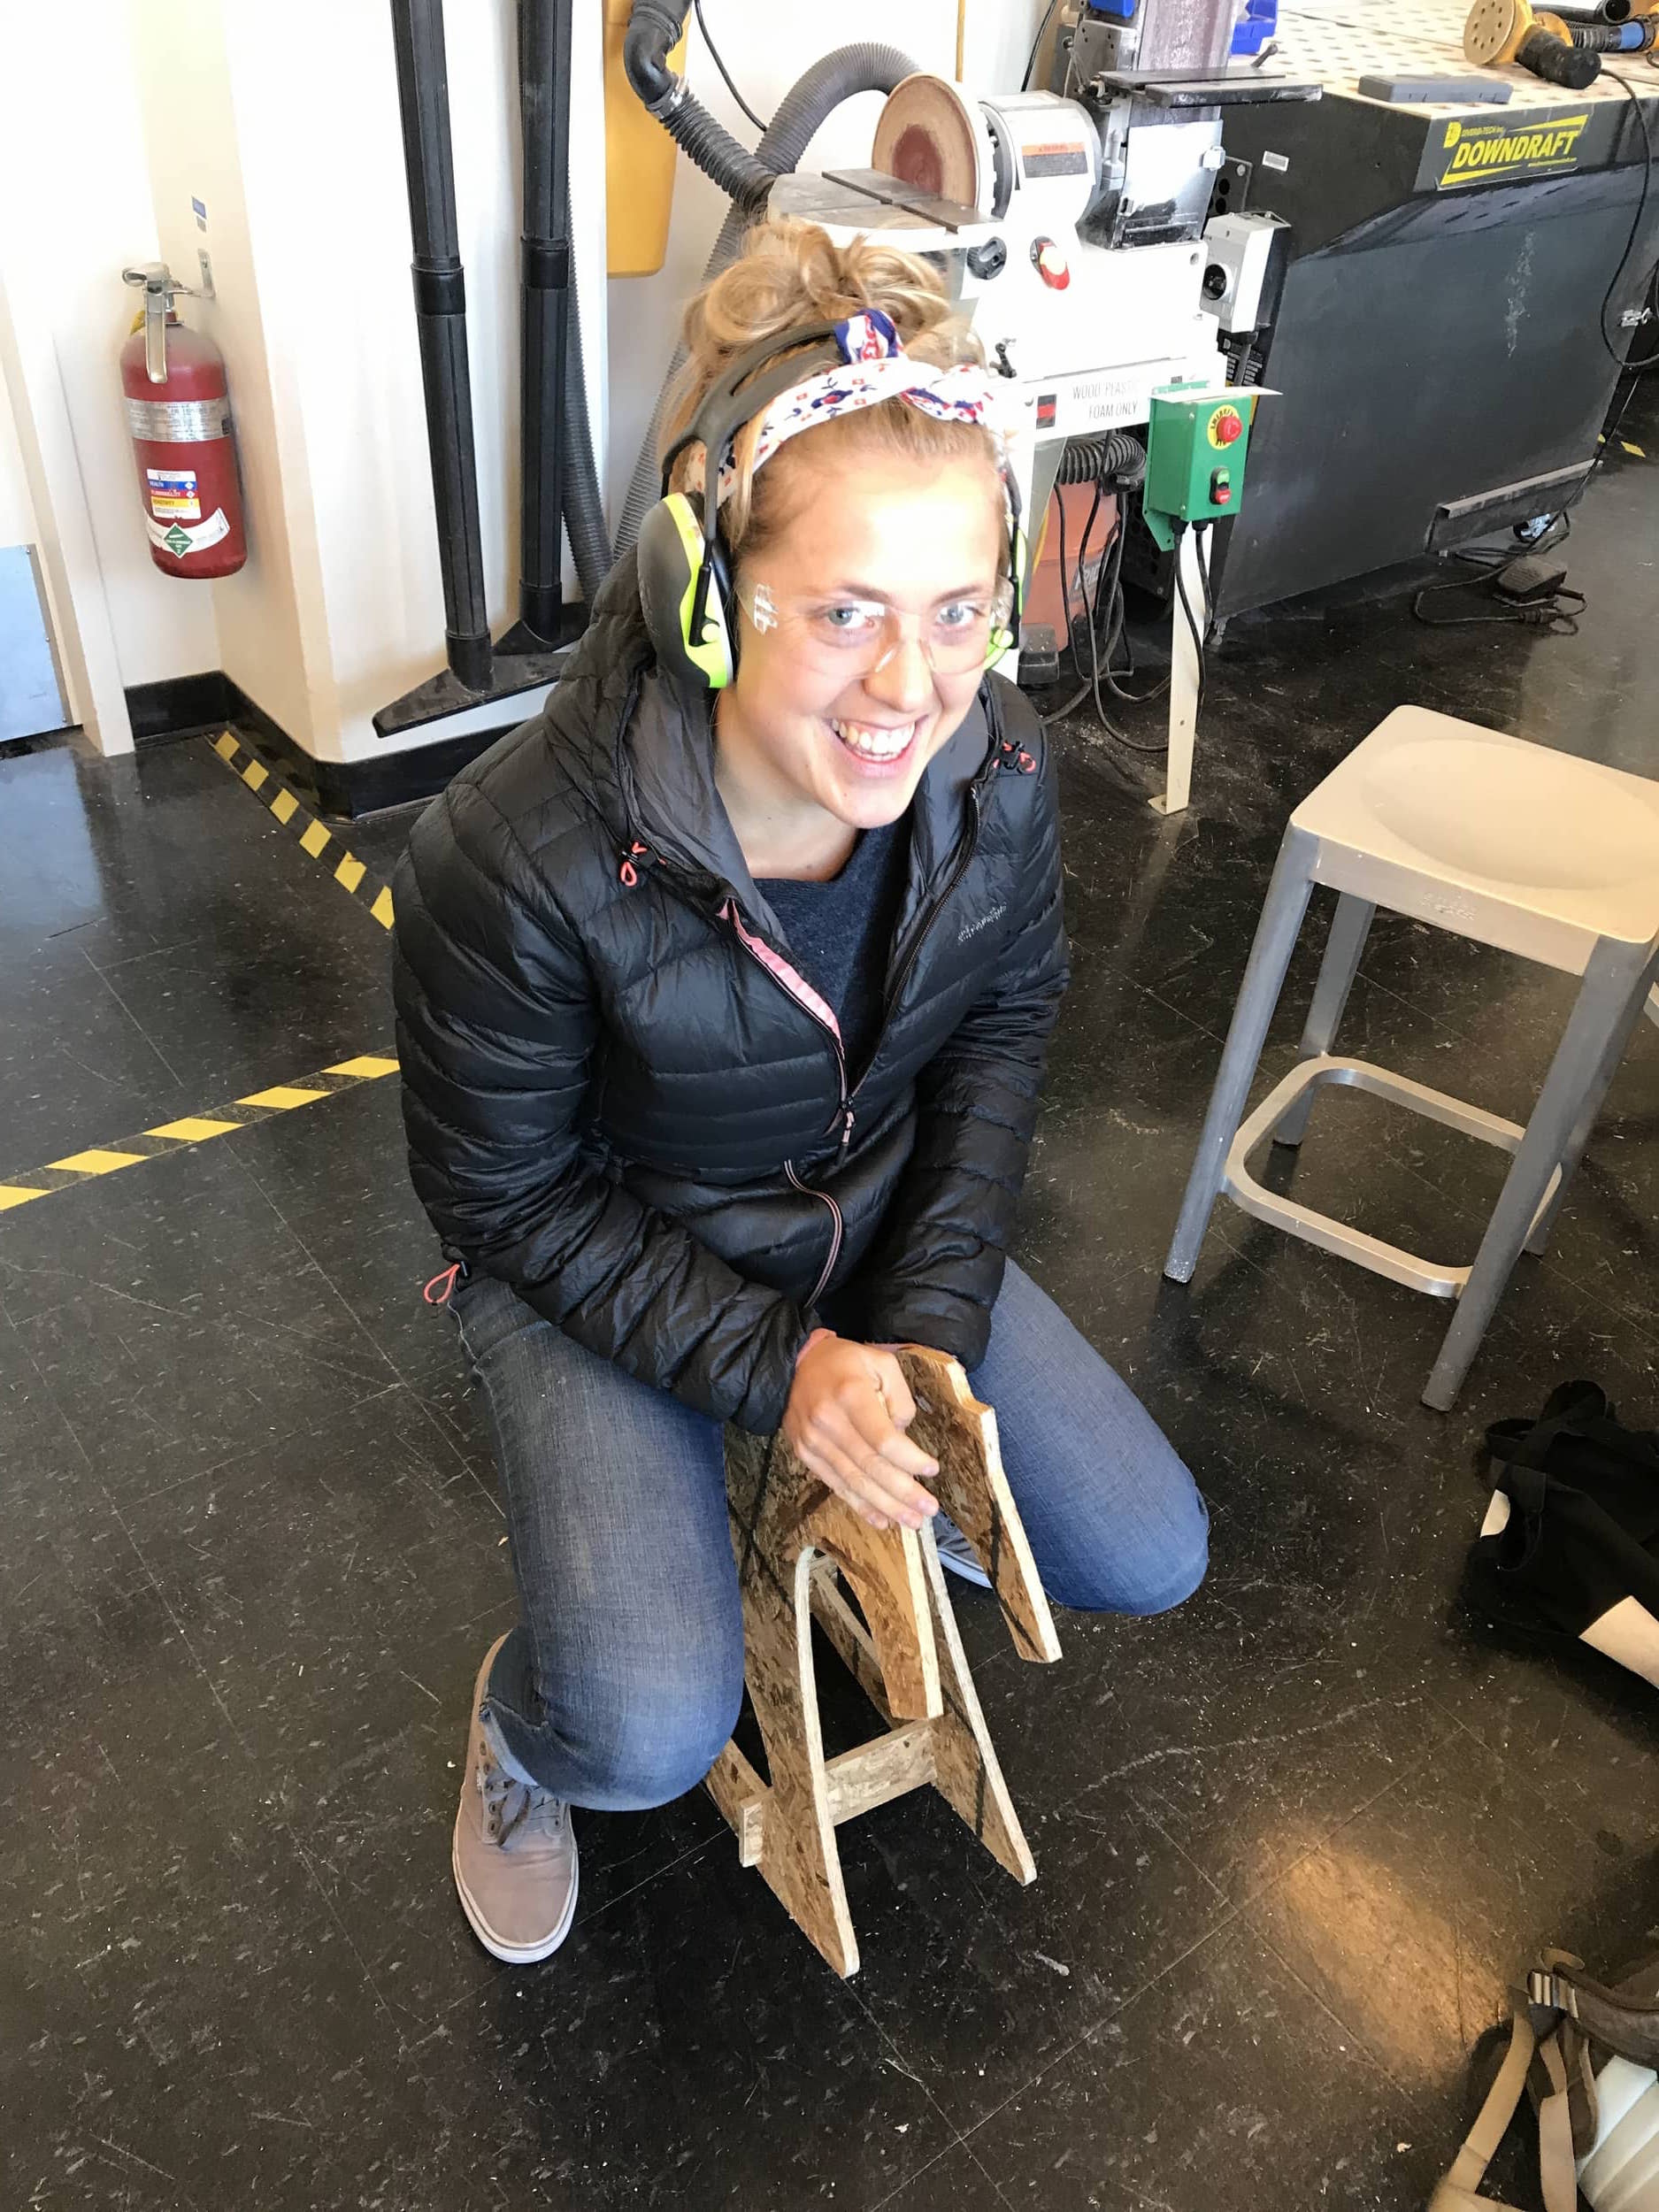
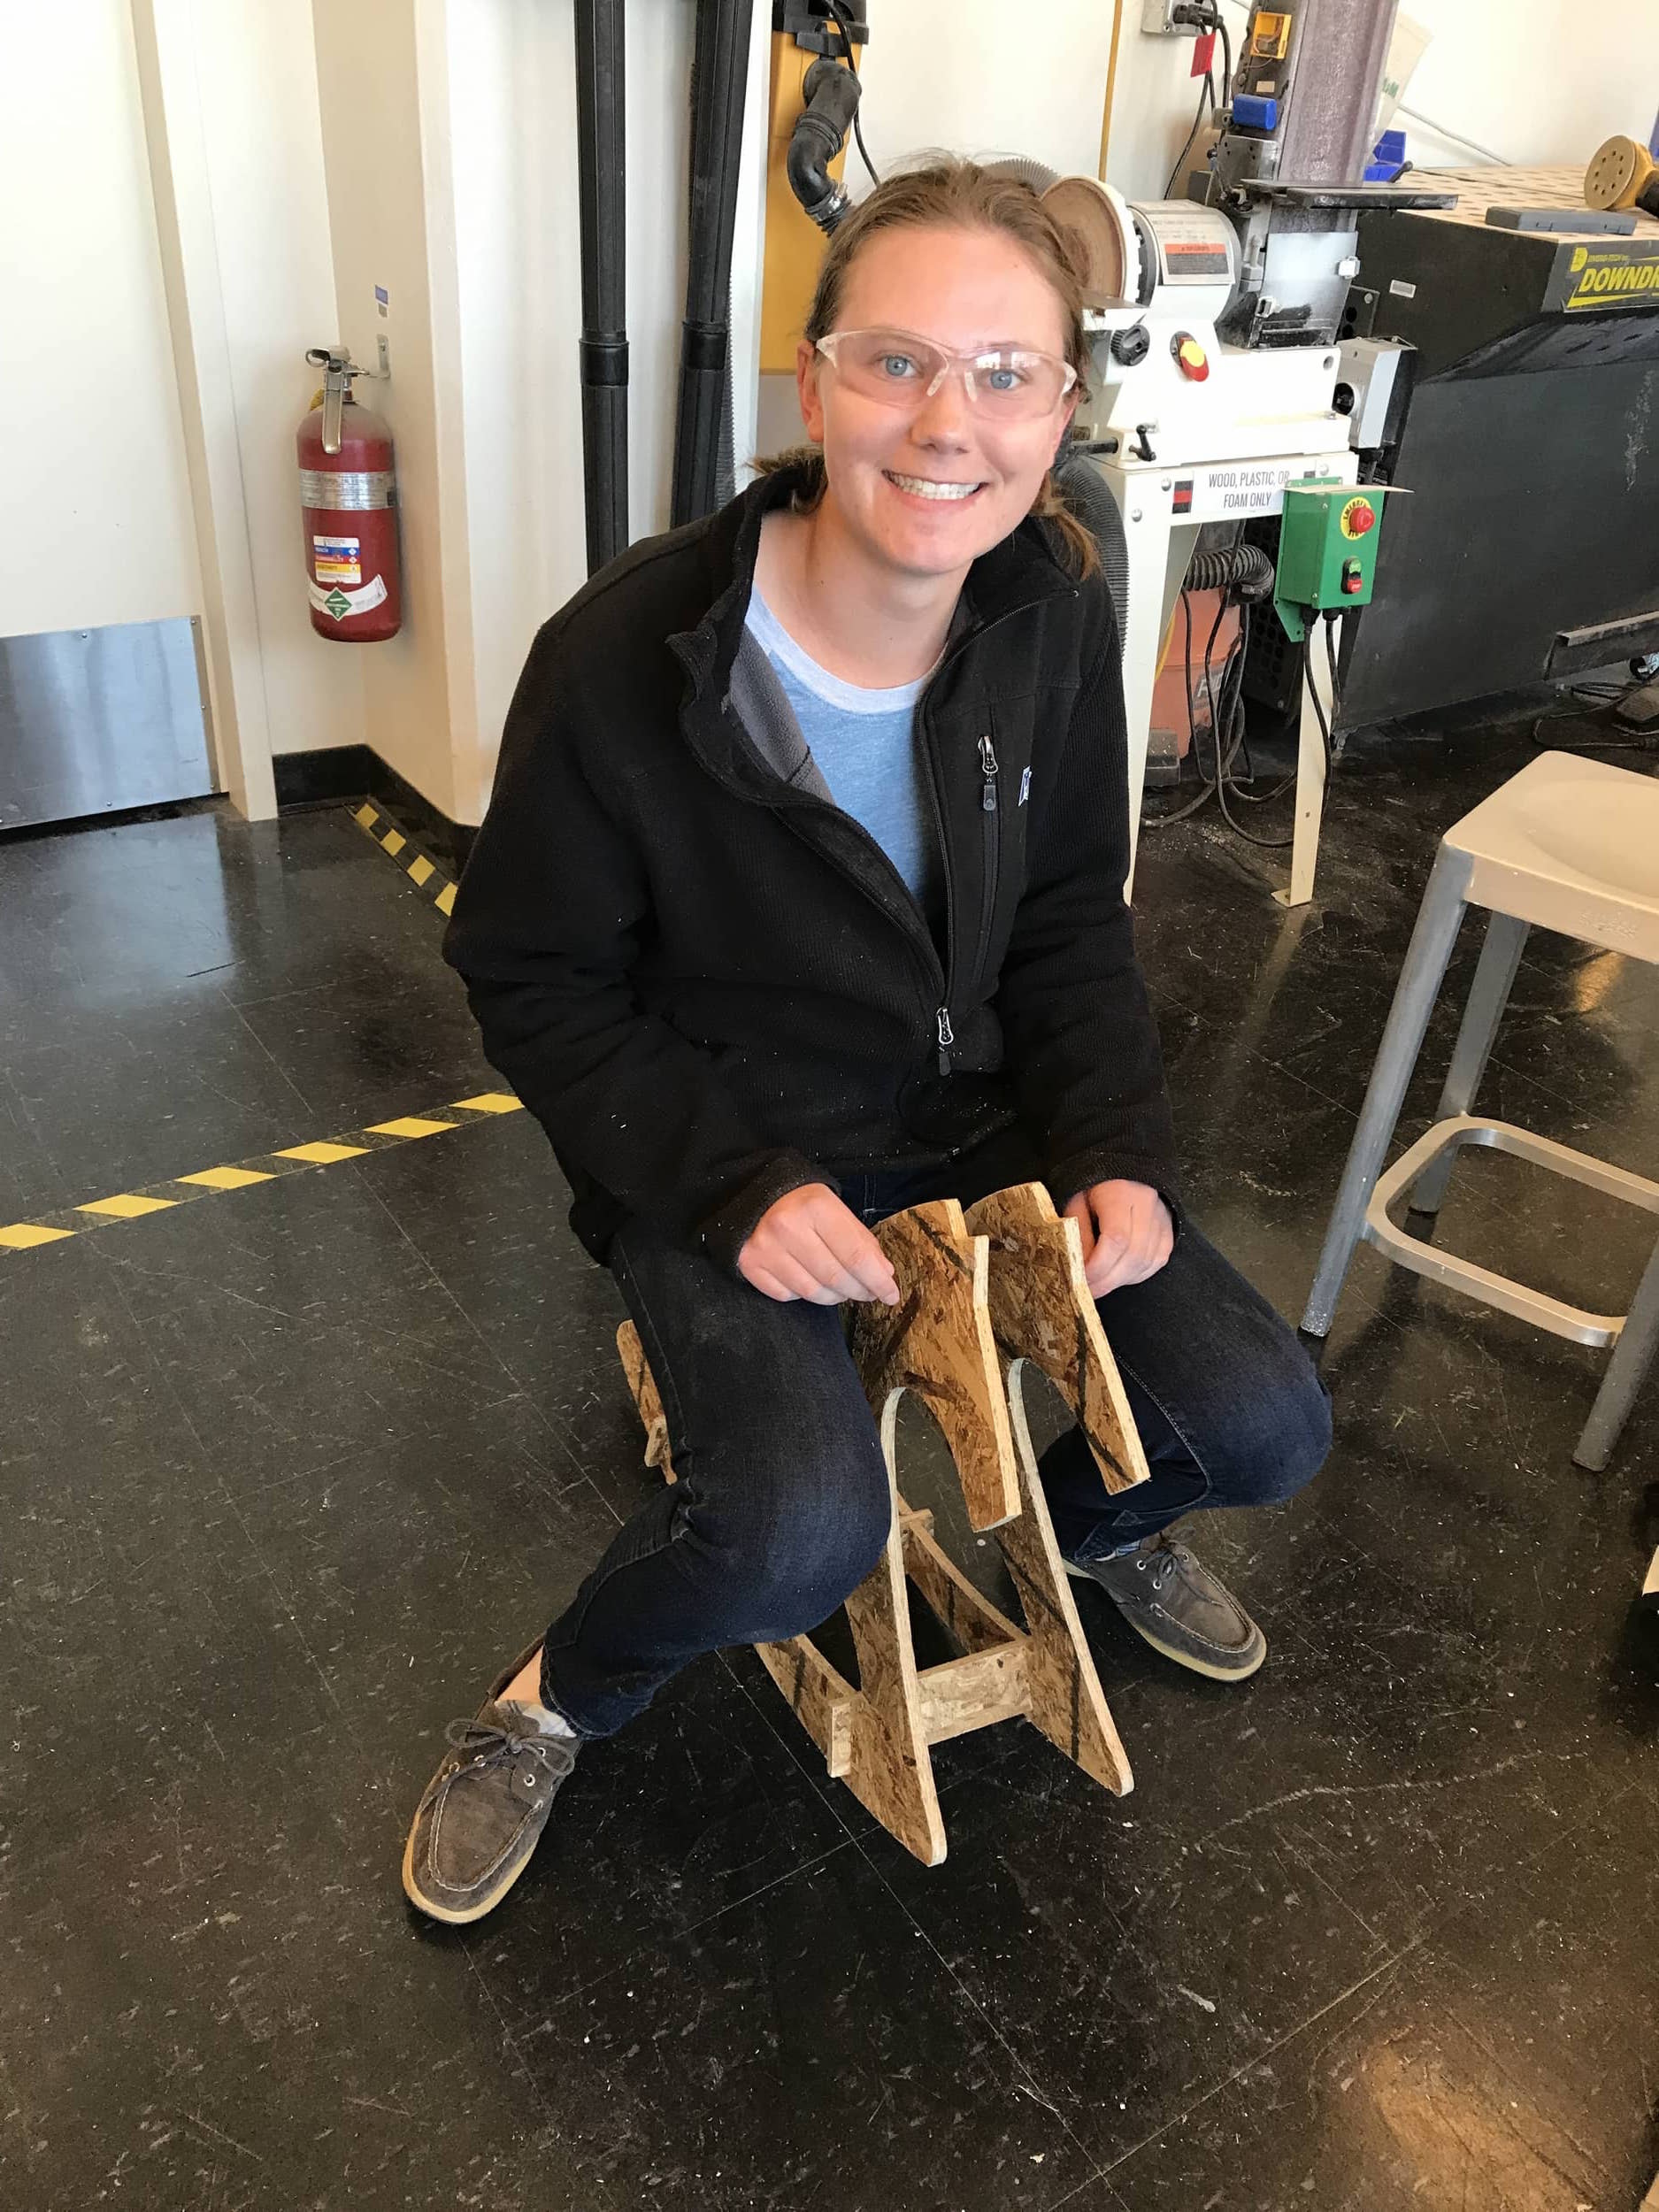
And it can support human beings!
If I were to do this project again, I would definitely want to make my rocking horse bigger. I based the dimensions I used off of the plans I referred to initially, so it's probably an appropriate size for a small toddler. I would also want to experiment more with the joints. The press fit joints I used with the six connecting pieces of wood were great in terms of how sturdy they made the horse. However, I would have preferred for the connecting pieces of wood to not extend past the sides of the horse. The last change I'd like to make is to add a seat to my rocking horse. Gavin and Grace mentioned that I could make one during the composites week, so I'm going to keep that in mind.