Final Project: Whack-a-Beaver
For my final project I decided to make a toy for my cat. She loves hunting, and everytime she sees something moving or hiding she runs after it. After some thinking I decided to make a whack-a-mole game, actuallu its MIT edition: Whack-a-Beaver.
What does it do? Who's done what beforehnad?
Whack-a-mole is a popular arcade game. The principle is quite simple: there is a series of holes from which mole heads will appear, you have to hit as many targets (i.e. moles) as you can. The more you hit, the higher the puntuation.
Cats are known for their tendency of hitting moving targets (e.g. mice, birds, humans, ...), so this is actually a quite appropriate game for them... Many examples of home-made whack-a-mole games can be found online...
What I want to do is a more complex/automated version of the above. My game will consist on an array of holes from which moles beavers will show up. So far nothing new, BUT in order to make it more complicated I want to add sensors that tracks where the cat is. When the cat approaches to its prey, the beaver will know it, hide and appear somewhere else (determined by the current possition of the cat).
Design: concept and 3D CAD [Weeks 1 + 2]
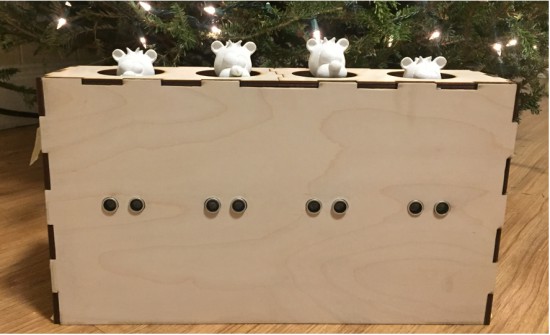
Initially, I wanted to make something big: perhaps a 5x5 array of holes with a spacing of 10ish inches between holes... This way, the cat could walk/run on the board. However, my living room is not infinite... so I decided to make something smaller: one row of 4 beavers. I made my design using Fusion 360 and AutoCAD.
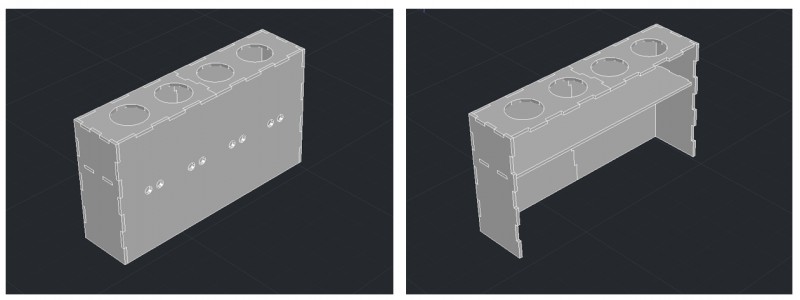
Whack-a-Mole: 3D concept
I made my design using Fusion 360 and AutoCAD. I started with the 2D parametric design, and then the 3D to make sure everything fits. Since I was pretty sure my cat is gonna jump onto it, smash it, etc. I thought I needed to make it quite sturdy. I chose 1/4"-thick plywood for the structure (it will also look nicer :D) and use the laser-cutter to fabricate it. I used 15% speed, 55% power and a frequency of 500. The result was good and I got it cut relatively quickly.
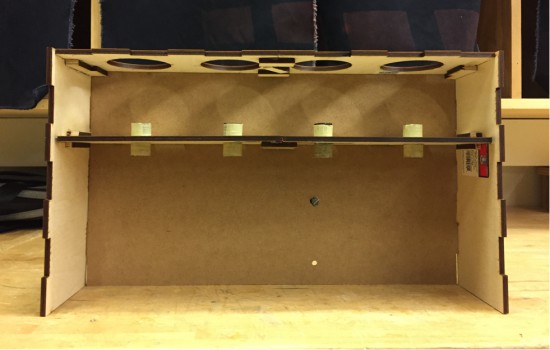
Game enclosure made of plywood
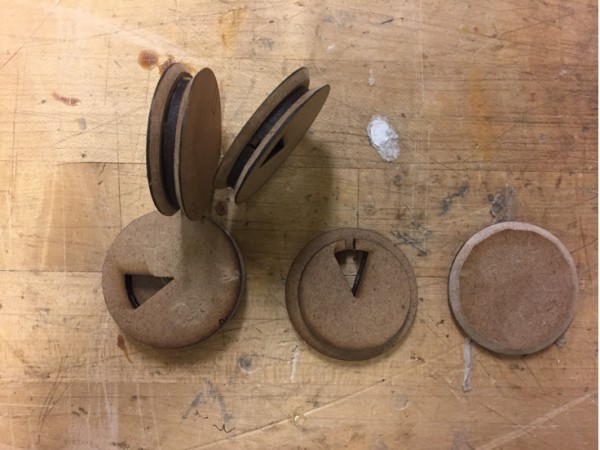
Beaver heads [Weeks 4 + 8]
The beaver heads were the perfect excuse to do some molding and casting: I needed to make a part multiple times (and fast). Since the STL model I chose was quite complex, I ended up 3D-printing the mold. The cast was done using drystone. For more details looked at what I did in Week 8.
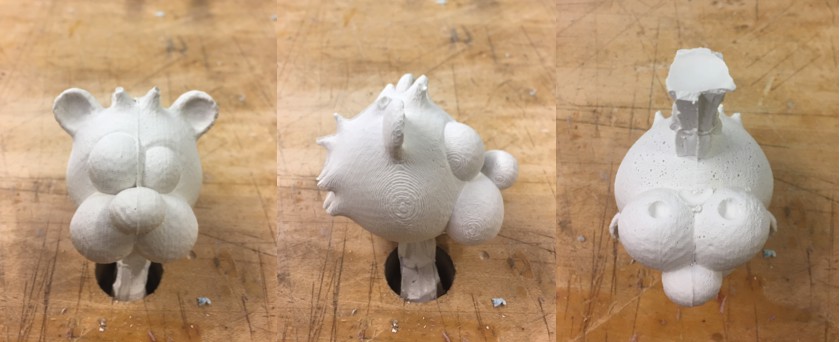
A beaver head!
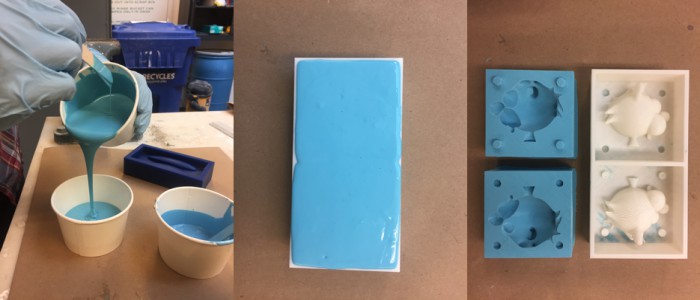
Molding procedure
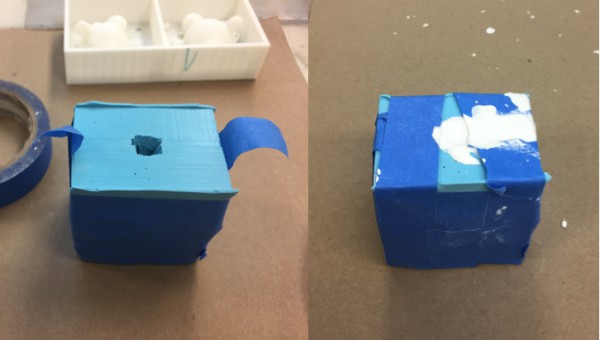
Casting using drystone
Proximity sensor [Week 9]
In order to track the position of the cat, I initially considered some type of step-response sensor (recall that initially the cat was gonna walk on the board...). However due to the new design (i.e. 1 row of 4 beavers), I changed my mind. Then I considered motion and distance sensors. Since in Week 9 I tried the sonar and it worked pretty well, I decided to incorporate it to my design.
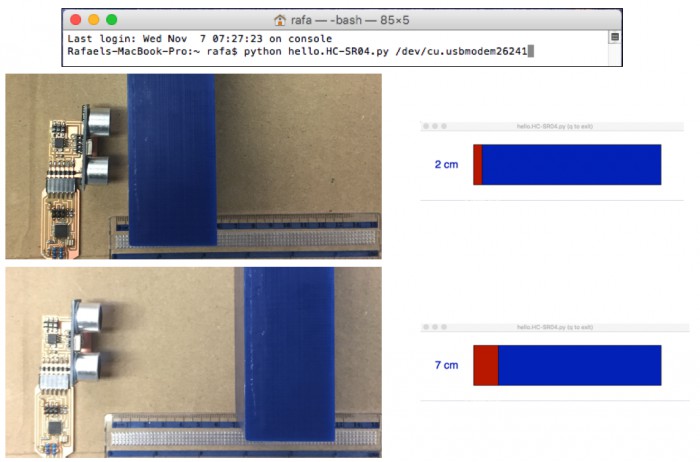
Proximity sensor: sonar. It's quite simple and works fine for my application
Mechanismn and actuator [Week 10]
The heads movement is quite simple: the beaver only has to go up and down. I did some research and found that most comercial whack-a-mole games use compressed air cylinders. I also found some clever solutions that control several moles at once using DC motors, and I even considered to use solenoids. But (1) I wanted to have individual actuators for each head, (2) solenoids with more than 1in of travel are expensive (I know I could have done them...), and (3) I didn't want to depend on a air-pump or a big tank of compressed-air. So I looked for another solution...
After some thinking, I designed a mechanism consisting on a spring + a pulley driven by one of the servo motors I used in Week 10. I made the springs myself using 19 gauge steel wire. I had to iterate a little bit with the diameter, pitch and length, but at the end it worked pretty well. The reason why I had to iterate was because the motors are super week...
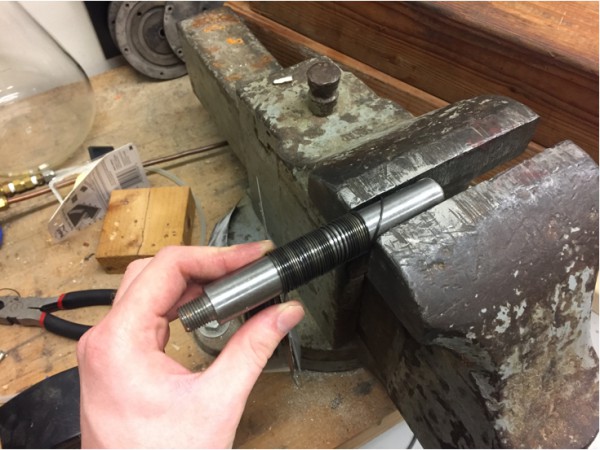
Home-made springs made using 19 gaige steel wire
I fabricated the pulley using chiboard that I found in the shop. I made it using a sandwich-concept that cactches the string (which is basicallya rope that I also found in the shop...).
The pulleys are directly hot-glued to the servos. This was a quick solution (and actually reversible!)
Here I leave a small video :D
Finally, I measured the power consuption, which was about 0.5A (@ 5V). Being coservative I could expect up to 2A because not all the motors were going to move at the same time... These power requirements are too high if I want to use a small batery, but quite standard if I use a high-amperage USB charger (which I happend to have). In my board design (one for each heead) I will include a power regulator wich will be connected to the external charger. For this I made a simple connection using the USB traces in the Fab library of Eagle.
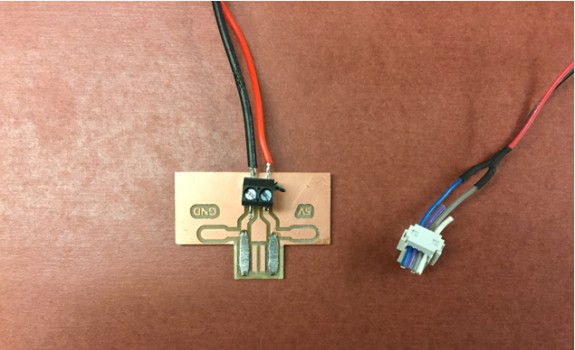
Connection to external power supply (i.e. high-amperage USB charger)
Electronics: deisgn + programming + networking [Weeks 5 + 7 + 13]
In my design modularity is key (so I could add more beavers in the future!). I wanted each head (a.k.a. station) to be controlled individually with a servo. For this, I needed to build individual boards for each station (also recall that besides the servo, each station includes a sonar that senses how far the cat is). Since only one mole would be up at a time (i.e. one station active), and its position would depend on the location of the cat derived from all sonar data, all the boards need to communicate with a master (i.e. the one who will make the decissions). For further details, please refer to the udated version of my Networking and Communication week.
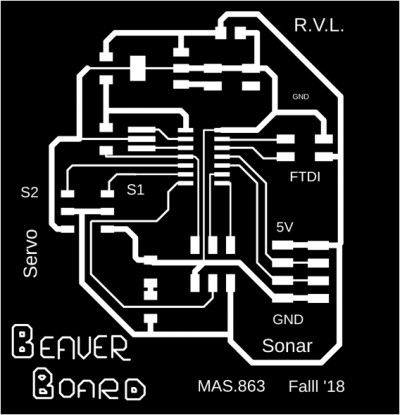
Beaver board traces
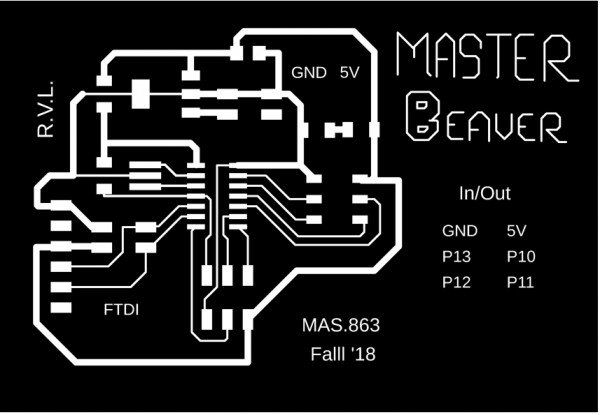
Master board traces
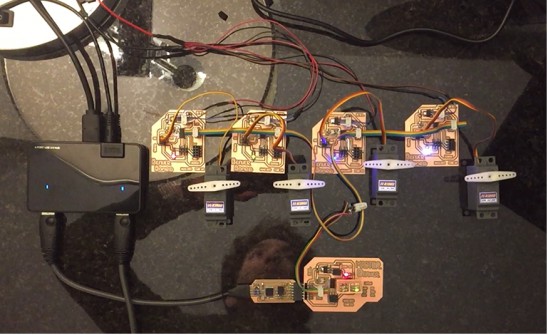
Four Beaver (slave) boards + Master beaver board
And a video showing how the networks work
Recipe: materials and components
Here there is the list and budget of this project:
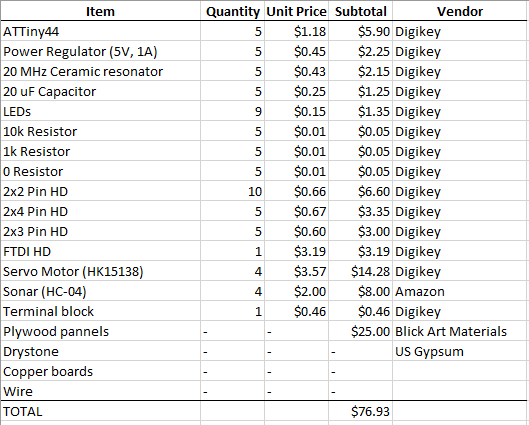
Budget
And here the final result!
What I have left out
I run out of time in thos project... but there are still things I'd like t try: