chocolate 3d printer and pen plotter
Introduction
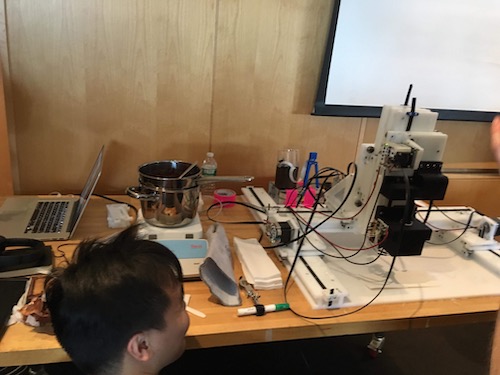
This week, the CBA section aimed to make a chocolate extruding machine. You might be asking, isn’t that a chocolate 3d printer? Our machine didn’t quite get there as we were only able to observe and implement 2D chocolate drawings.
This page is about my specific contributions to the project. On the electronics and software team, I worked with Zijun, Teja, Matt G, and got help from Jake, Erik, Filippos!
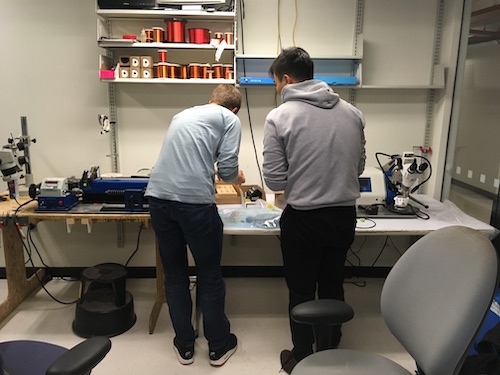
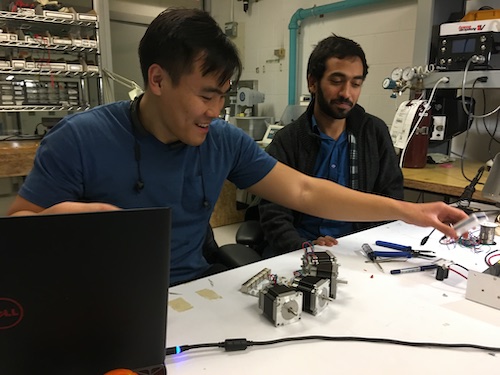
On Friday, we met at 043, checkout out our parts and made a gameplan for what and how we would accomplish electronics and software for the week. Our main reference is Jake Read’s Machine Week 2018 docs
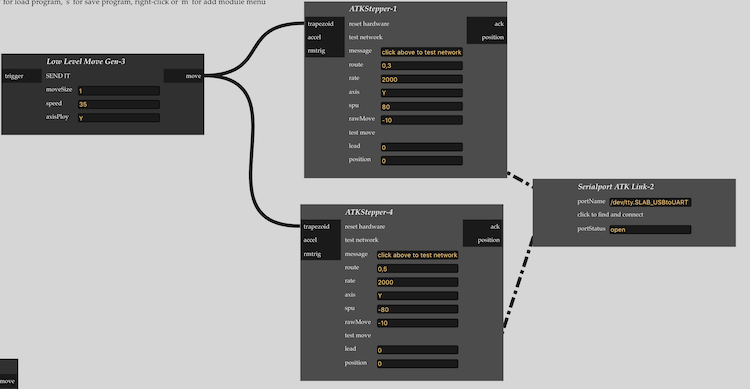
Goal: have 4 stepper motors we can control to drive the movement of a 3 axis machine.
Materials:
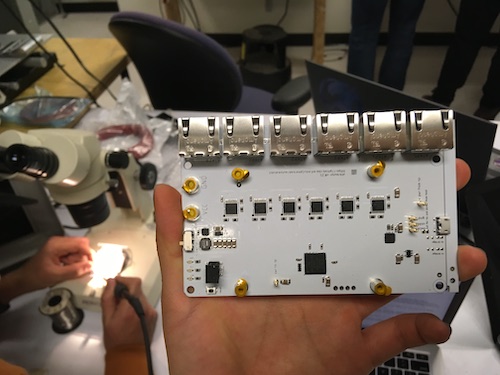
- ATKRouter, the board to facilitate communication between the computer (running rndmc) and the peripherals (the 4 stepper motors)
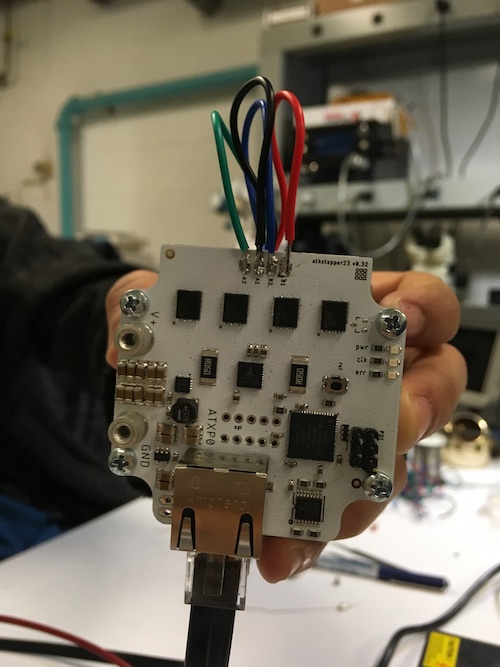
- ATKStepper23, the stepper motor driver
- black and red thick wires
- eyelets
- ethernet wire cables, RJ45 jacks and ports
- RJ45 jack crimper
- wire cutter
Hardware tools:
- soldering iron, solder
Software Tools:
- RNDMC, Jake Read’s web-based dataflow machine controller that is designed to make it easier to quickly program machines.
- Atmel Studio 7 (Windows only)
high level steps:
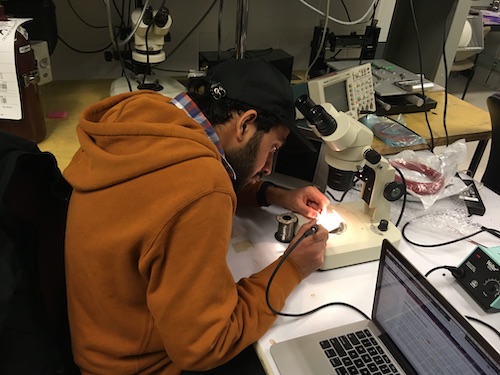
- assemble boards
- test boards using power supply, making sure the indicator LEDs lit up
- assemble wires
- test single motor and motor driver board by sending a raw move to the motor using rndmc
- test multiple motors together.
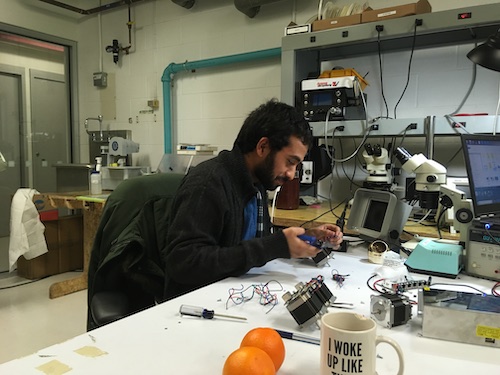
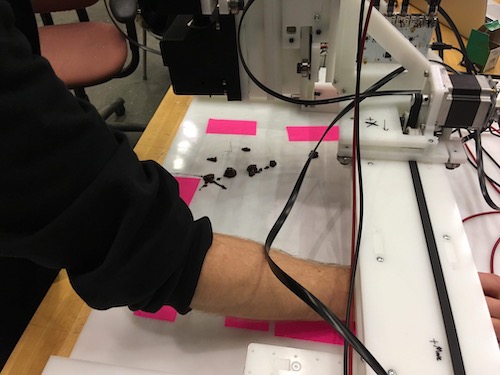
- assemble, adding electronics to the mechanical part of the machine
- generate and send gcode to the machine to get it to draw.


My Contributions
This week, I worked on software as well as supported integrating electronics into the machine. On the software side, I learned how to use and extend rndmc. I wanted to add 2 new modules to rndmc: - svg -> gcode - stl -> gcode
- chatted with jake and learned that we don’t need to generate gcode to interface with the planner he wrote. This is because the gcode gets passed through a parser to generate a JS object that looks like
`{ position: { X: 10, Y: 10, Z: 10 }, hasMove: true, speed: 50, kv: { G: 0, F: 50, X: 10, Y: 10, Z: 10 } }
To view these objects, you can attach the logger module to the output of the gcode parser. The logger will also output the sizes of the trapezoids that indicate the movement of from one position to another. These sizes should not be ‘too small’ (not sure what too small is though). I asked Jake what trapezoids are and the said that they correspond to a plot of the speed.
- i noticed that testing modules would sometimes result in rndmc crashing due to things (“routes”) being undefined. I think this was from either hardware not being plugged in to instantiate the proper Hardware object.
-
to make development on rndmc easier (making modules and stuff), we can go into ‘main.js’ and programmatically instantiate, set location of, and connect modules on page load. Great for handling crashes.
var program = Programs.new(‘new program’)
// load the gcode and multiline modules var gcode = Programs.loadModuleFromSource(program, ‘./modules/parsing/gcode.js’) var multiline = Programs.loadModuleFromSource(program, ‘./modules/ui/multiline.js’)
// attach the output of multiline to the input of the gcode. // attachments always go from output to input. multiline.outputs.lineOut.attach(gcode.inputs.lineIn)
// set the absolute position of the gcode module so that it doesn’t overlap // with other modules. gcode.description.position = { left: 100, top: 400 }
- in thinking about loading files into rndmc, i was wondering if there was UI that already existed for that. jake suggested utilizing the ui components/building blocks already supported.
high level possible goals:
- create a new ‘file load’ module specifically for loading a file and providing the result on an output
- on the new ‘input’ module that generates the instruction from file, create a state variable that can contain the filepath.
possible paths to take towards goal:
- option 1: define a callback function for when the state changes, to actually attempt to load the file
- option 2: create a button to indicate when the desired filepath has been provided
- option 3: create a button (tied to the ‘input’ module) that will pop up new UI specifically for getting the proper path.
A huge portion of my time was spent trying to find and debug 3rd party node modules for converting svg to gcode, and improvising ways to load code into rndmc.
I succeeded in modifying the multiline module to pull gcode from a local gcode file, but failed to allow importing an svg.
investigating existing node packages for generating gcode
svg2gcode svg2gcode/test/star.svg --tooldiameter 1 -p
The tooldiameter parameter is required, whereas the -p (–positive) option’s not. Thet -p option means that the we only take the outlines rather than try to fill the svg.
visualizing gcode
troubleshooting integration of svg to gcode into rndmc
trying an older version of canvg that i found in svg2gcode package.json “canvg”: “0.0.6” while the latest one is “canvg”: “^1.5.3”,
trying to use a child process to call svg2gcode command line generate gcode from svg: generated error:
quacht@bish-whet~/Documents/Course/htmaa/rndmc: node test_svg2code.js
fs.js:143
    throw err;
    ^

Error: EACCES: permission denied, open '/dev/stdin'
    at Object.fs.openSync (fs.js:577:3)
    at Object.fs.readFileSync (fs.js:483:33)
    at run (/Users/quacht/.nvm/versions/node/v10.3.0/lib/node_modules/svg2gcode/bin/svg2gcode:44:19)
    at Object.<anonymous> (/Users/quacht/.nvm/versions/node/v10.3.0/lib/node_modules/svg2gcode/bin/svg2gcode:54:3)
    at Module._compile (internal/modules/cjs/loader.js:702:30)
    at Object.Module._extensions..js (internal/modules/cjs/loader.js:713:10)
    at Module.load (internal/modules/cjs/loader.js:612:32)
    at tryModuleLoad (internal/modules/cjs/loader.js:551:12)
    at Function.Module._load (internal/modules/cjs/loader.js:543:3)
    at Function.Module.runMain (internal/modules/cjs/loader.js:744:10)
child_process.js:643
    throw err;
    ^

Error: Command failed: svg2gcode files/star.svg -D 1
fs.js:143
    throw err;
    ^

Error: EACCES: permission denied, open '/dev/stdin'
    at Object.fs.openSync (fs.js:577:3)
    at Object.fs.readFileSync (fs.js:483:33)
    at run (/Users/quacht/.nvm/versions/node/v10.3.0/lib/node_modules/svg2gcode/bin/svg2gcode:44:19)
    at Object.<anonymous> (/Users/quacht/.nvm/versions/node/v10.3.0/lib/node_modules/svg2gcode/bin/svg2gcode:54:3)
    at Module._compile (internal/modules/cjs/loader.js:702:30)
    at Object.Module._extensions..js (internal/modules/cjs/loader.js:713:10)
    at Module.load (internal/modules/cjs/loader.js:612:32)
    at tryModuleLoad (internal/modules/cjs/loader.js:551:12)
    at Function.Module._load (internal/modules/cjs/loader.js:543:3)
    at Function.Module.runMain (internal/modules/cjs/loader.js:744:10)

    at checkExecSyncError (child_process.js:603:11)
    at execSync (child_process.js:640:13)
    at svg2gcode_process (/Users/quacht/Documents/Course/htmaa/rndmc/test_svg2code.js:49:5)
    at Object.<anonymous> (/Users/quacht/Documents/Course/htmaa/rndmc/test_svg2code.js:63:1)
    at Module._compile (internal/modules/cjs/loader.js:702:30)
    at Object.Module._extensions..js (internal/modules/cjs/loader.js:713:10)
    at Module.load (internal/modules/cjs/loader.js:612:32)
    at tryModuleLoad (internal/modules/cjs/loader.js:551:12)
    at Function.Module._load (internal/modules/cjs/loader.js:543:3)
    at Function.Module.runMain (internal/modules/cjs/loader.js:744:10)
finding another library that will generate gcode from svg
an alternate website for going from svg to gcode nicely…
matt found and suggested gcode-simulator
Thinking about the chocolate extruder.
the extruder uses a stepper motor which moves a cart that push the syringe plunger –> chocolate out of the syringe. As a result, we need another axis to control using the planner.
line commands only –> after every line command, add an extrusion command calcualte length traveled for that line, divide it by the feedrate –> amt of time travelling for that line multiply that time by the extrusion rate –> distance we
F is speed of travel, combine x, y, z using euclidean vec sums
gcode tutorial G28 – Perform Homing Routine
G28 ; home all axes (X, Y, and Z)
G92 – Set Current Position
G92 E0 ; set the current filament position to E=0
G1 E10 F800 ; extrude 10mm of filament
Coding a quick way to modify Gcode to account for the extruder.
High Level Process:
- create a test file
- test the generated code using rndmc interface’s multiline gcode input
- if that works, integrate the gcode modifier into rndmc…
- as a module?
- modifying existing module?
Creating a test file
extruder.js
// Process Gcode to add in instructions for the extruder.

var sampleGcode = `
G90
G1 Z80
G82
M4
G1 X100 Y10 F1100
G1 Z114 F200
G1 X100 Y10 F1400
G1 X40 Y180 F1400
G1 X190 Y60 F1400
G1 X10 Y60 F1400
G1 X160 Y180 F1400
G1 X100 Y10 F1400
G1 Z80 F300
G4 P1
M5
G1 Z0 F300
G1 X0 Y0 F800`

function getKeyValues(str) {
    var kv = {}
    for (var i = 0; i < str.length; i++) {
        if (str[i].match('[A-Za-z]')) { // regex to match upper case letters
            var lastIndex = str.indexOf(' ', i)
            if (lastIndex < 0) {
                lastIndex = str.length
            }
            var key = str[i].toUpperCase()
            kv[key] = parseFloat(str.slice(i + 1, lastIndex))
        }
    }
    return kv
}

/**
 * Given an array of gcode instructions return the modified instructions that
 * support extrusion.
 * @param {!Array<String>} gcodeInstructions - list of gcode instructions
 * @param {int} extrusionRate - rate of extrusion in units per second
 */
function processGcode(gcodeInstructions, extrusionRate) {
	// The G1 instruction means “move in a straight line in a controlled fashion”
	var newInstructions = [];
	var currentPosition = {
		'X':0,
		'Y':0,
		'Z':0,
		'E':0
	}
	for (const instruction of gcodeInstructions) {
		var codes = instruction.split(' ');
		if (codes[0] == 'G1') {
			// get length of distance traveled in gcode instruction
			var newPosition = getKeyValues(instruction);
			var axes = ['X','Y','Z'];
			var distance_squared = 0;
			for (var axis of axes) {
				if (axis in newPosition) {
					distance_squared += Math.pow(newPosition[axis] - currentPosition[axis], 2);
				}
			}
			var distance = Math.sqrt(distance_squared);
			// translate that distance to a distance the extruder should move.
			var eposition = distance/newPosition['F']*extrusionRate;
			codes.push(`E${eposition}`)
		}
		newInstructions.push(codes.join(' '));
		}
		return newInstructions.join('\n');
	}

var gcodeInstructions = sampleGcode.split('\n')
gcodeInstructions = gcodeInstructions.filter((instruction) => {return instruction != ''});
var extrusionRate = 80 // ups
console.log(processGcode(gcodeInstructions, extrusionRate))