making a
squiggly mold :
squiggly mold :
modular wave holder object thing :
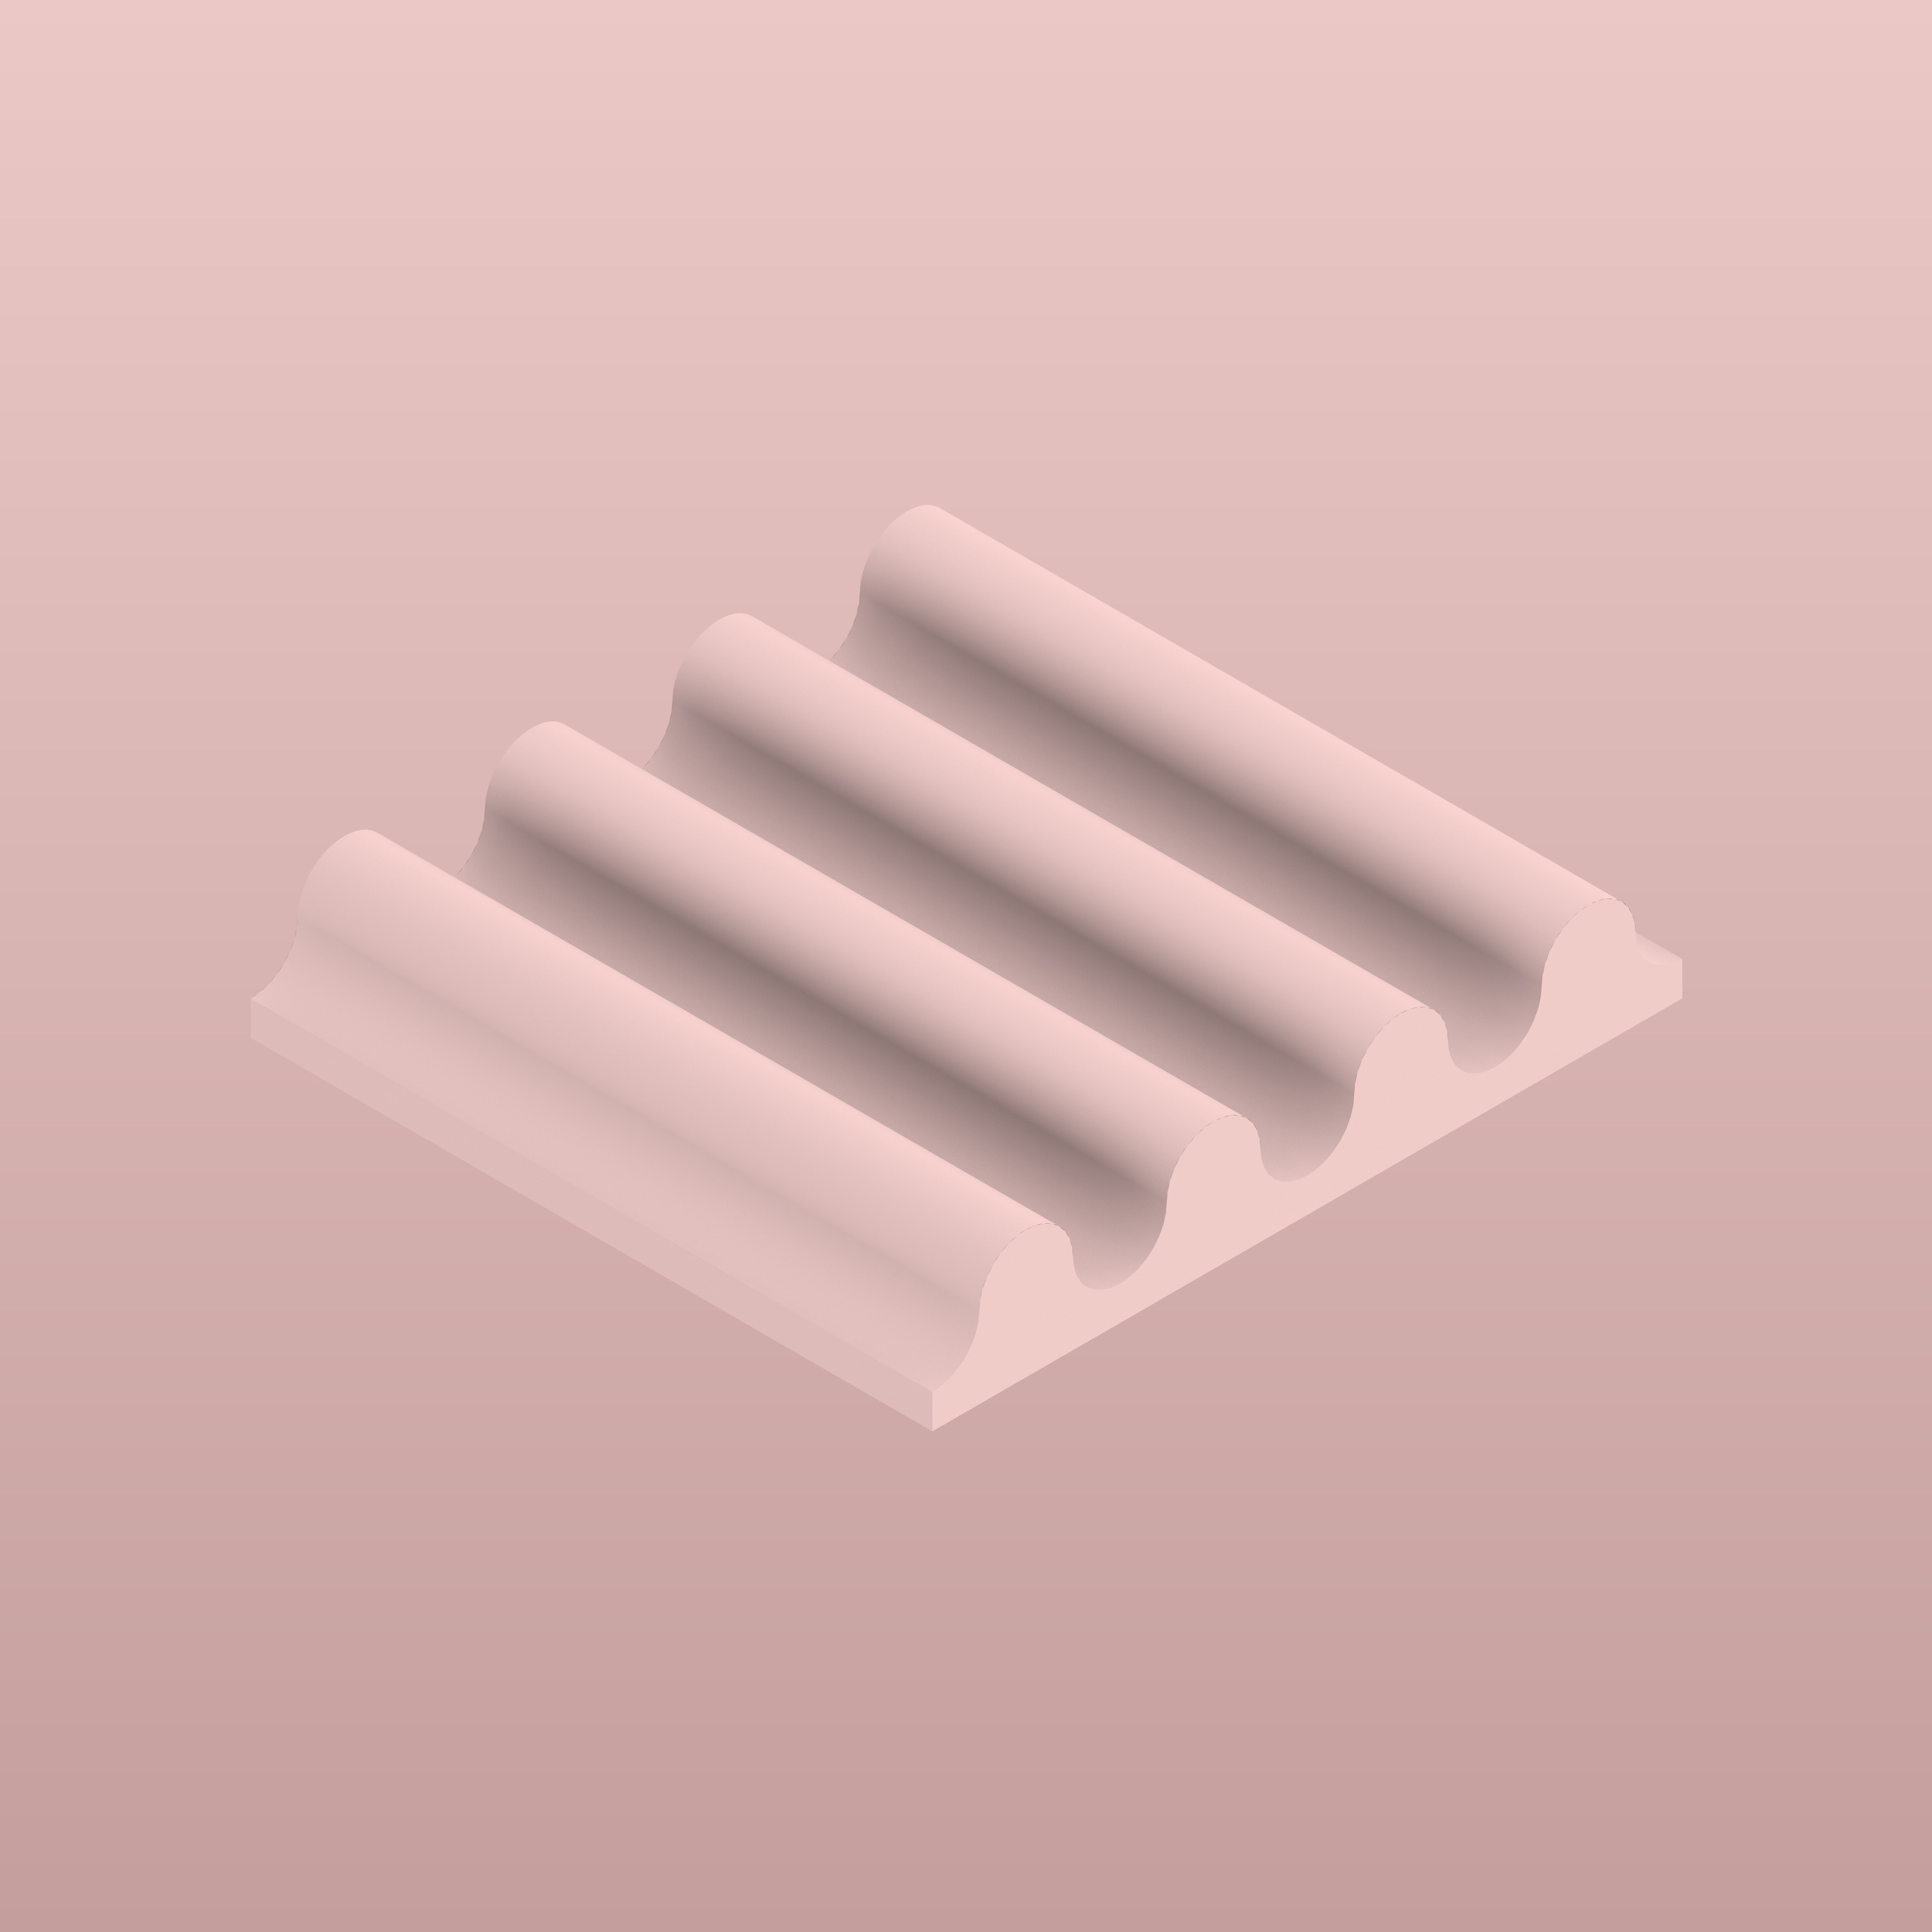
This week we were asked to make a mold! Thinking about my conveyor belt, I wanted to make a kind of plate cushion that would help hold small objects in place, and avoid the problem of them sliding around the plates.
Unfortunately, I don't have all of my conveyor belt details figured out at this point, so I thought I'd make a kind of holder that could be placed on the belt, but also that is independent from it.

glossier show room :
glossier make up holders attach to tables :
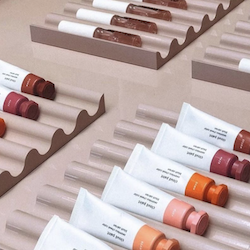
Glossier's show rooms have these very fun make up holders, and I wanted to recreate a modular form of them.
These may or may not be used on my conveyor belt to display objects. But I mean, I could just see myself using this at home for my make up or at my desk for all my small objects floating around my desk.
mold pattern w module :

i am hoping module wont be easily read :
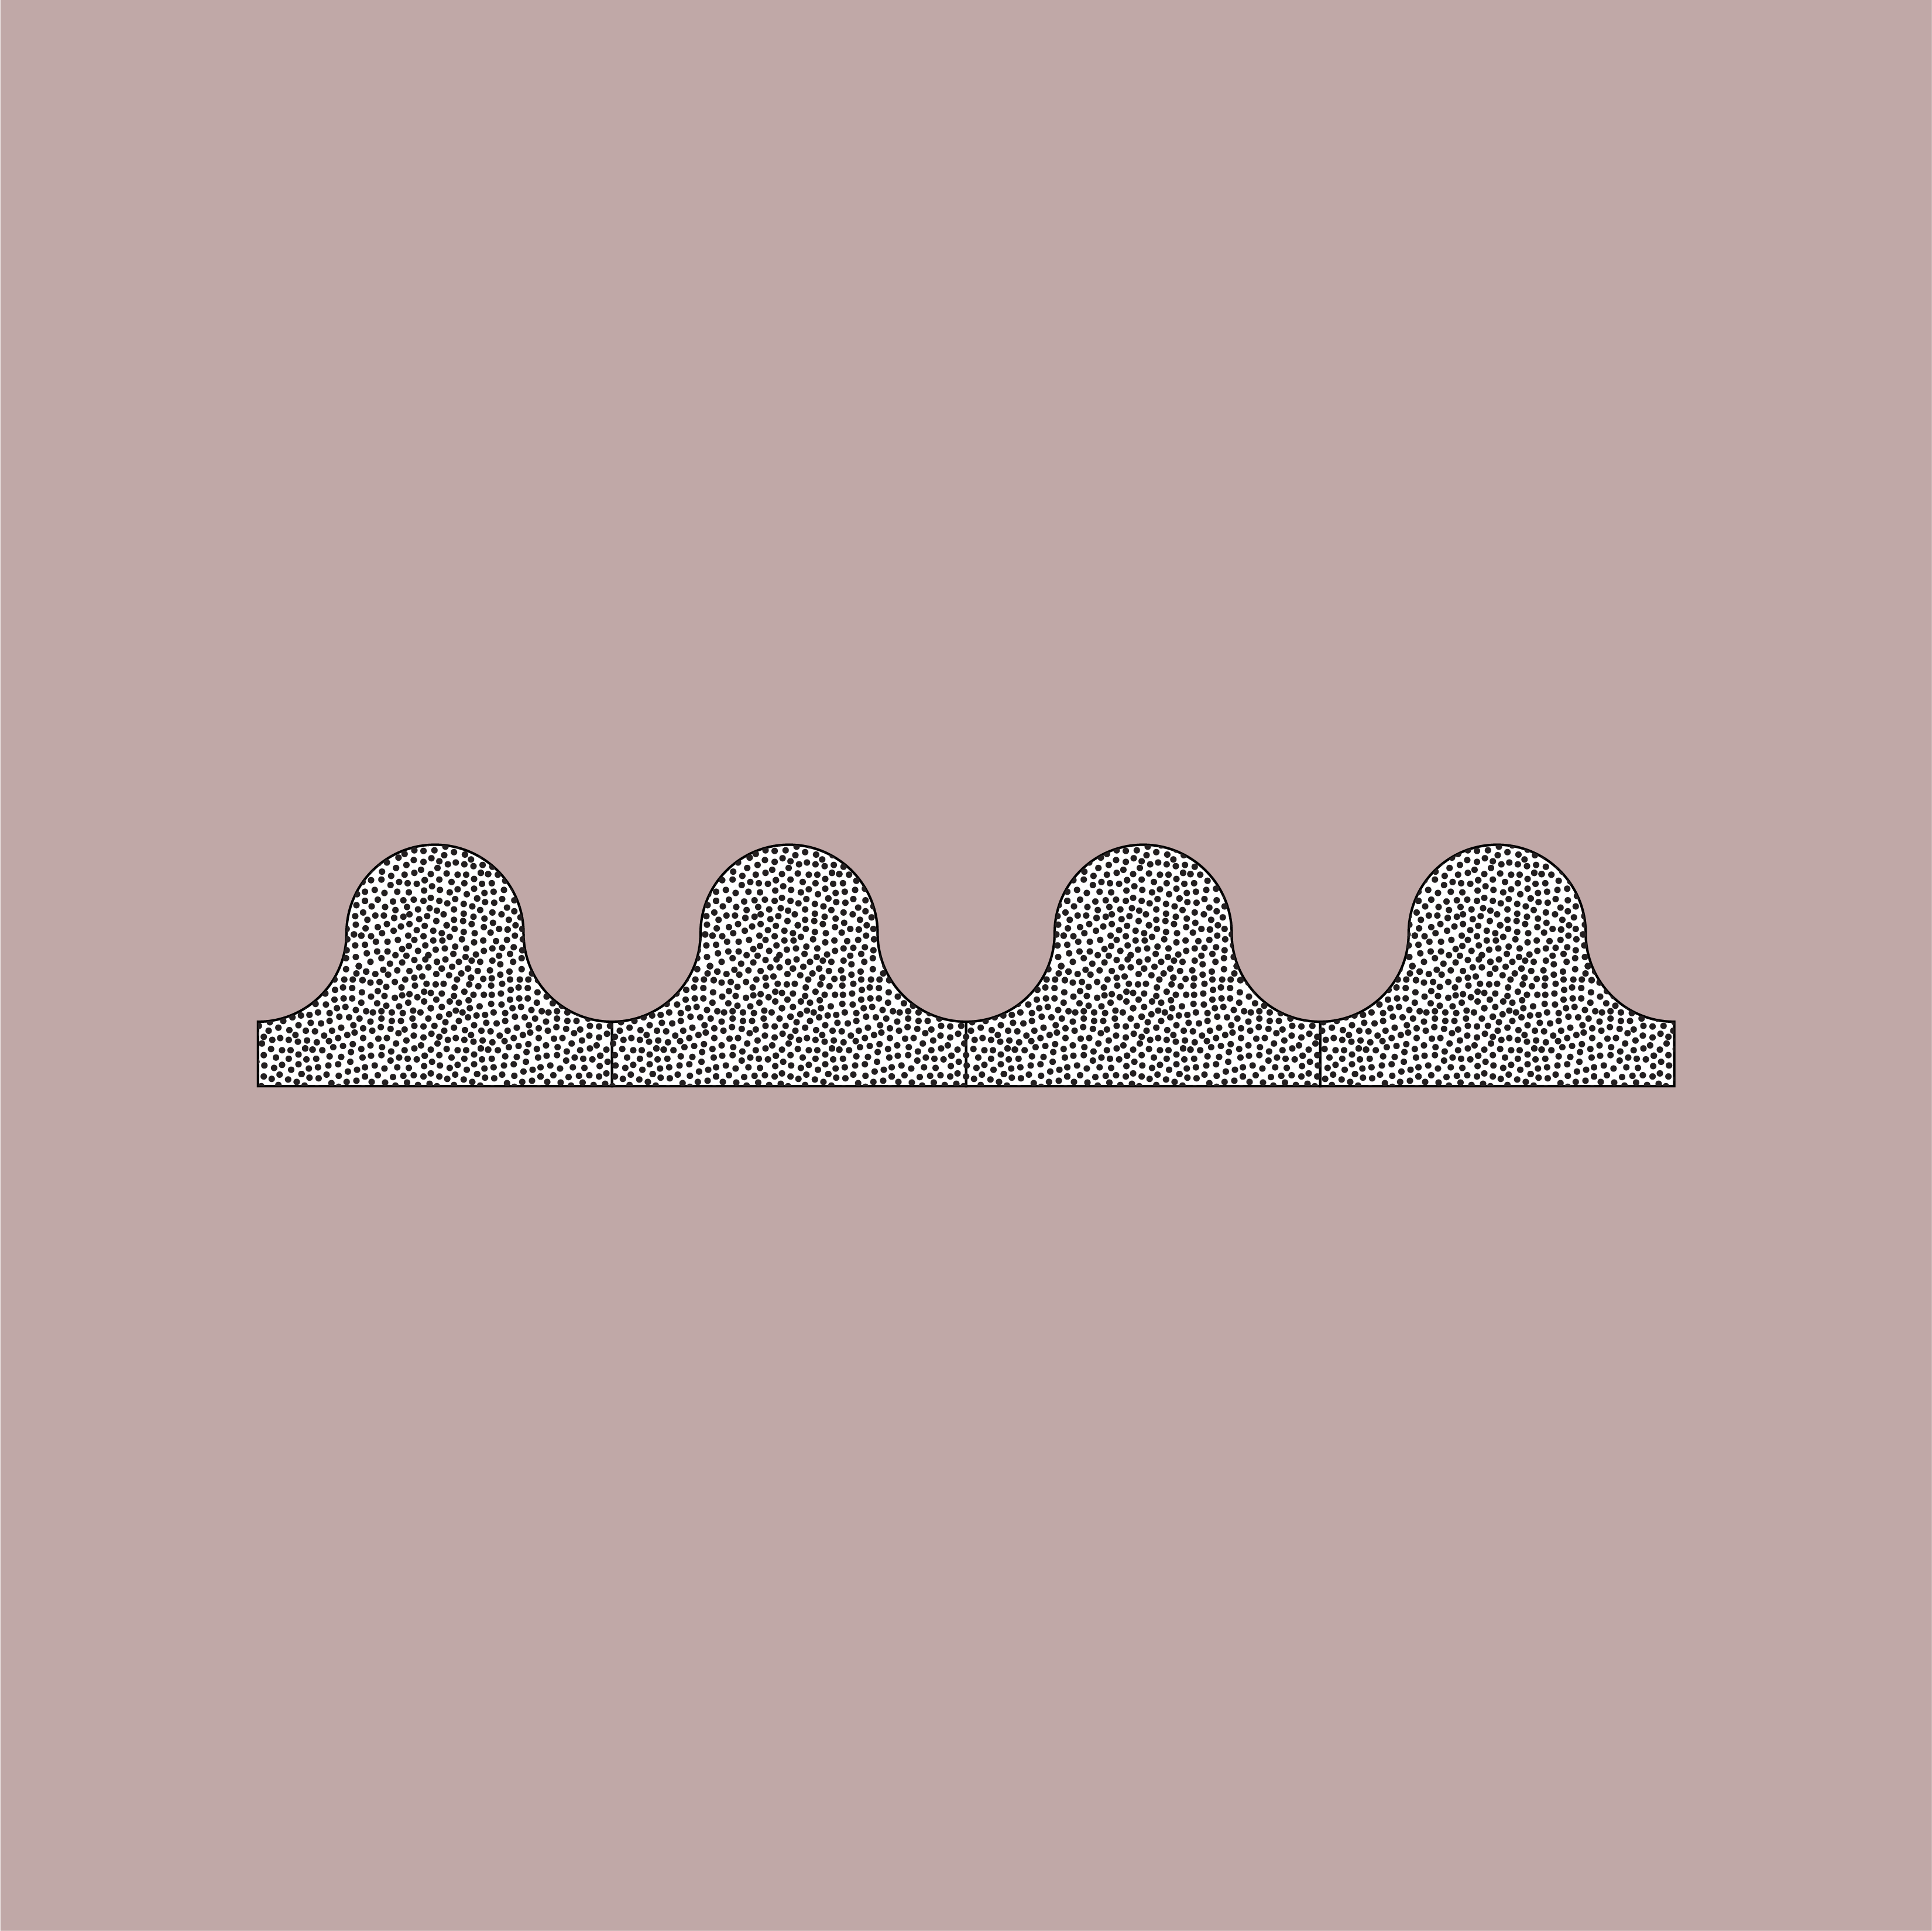
Because the wax is quite small, each "wave" will be a module. I'm a bit skeptical these modules will work nicely next to one another (they might need some kind of thing to hold them together so they don't just come apart when an object is placed in / on them) but I'm also curious how they will come out. I want to die plaster and place small rocks to make a kind of cheap terrazo.. but tbd...
I also wasn't sure whether to make a mold for another mold (soft mold to make hard objects) or to use the wax as a mold for soft objects. That is, I was interested in these wavy holders being soft and / or hard, but I decided I'd rather make a mold for a mold because that will allow for sharp edges vs if I used the wax as a mold, I would get filleted corners (I think? had to model this because making a mold of a mold means you kind of have to work backwards.
3 toolpaths :
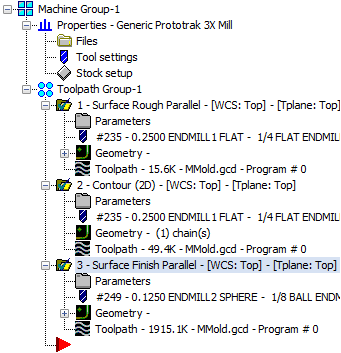
The mastercam file was pretty simple to set up : surface rough parallel, with a 1/4 flat, which get material out of the way very quickly, a 2D contour, with the same 1/4 flat, to clean the bottom most edge, and surface finish parallel, with a 1/8 ball, to finish the curvilinear surface. Because the mold was a bit on the deep side, the 1/4" tool needs to be high enough so that the tool holder doesn't collide with the material.
The mastercam file was pretty simple to set up : surface rough parallel, with a 1/4 flat, which get material out of the way very quickly, a 2D contour, with the same 1/4 flat, to clean the bottom most edge, and surface finish parallel, with a 1/8 ball, to finish the curvilinear surface. Because the mold was a bit on the deep side, the 1/4" tool needs to be high enough so that the tool holder doesn't collide with the material.
surface finish along the long direction :
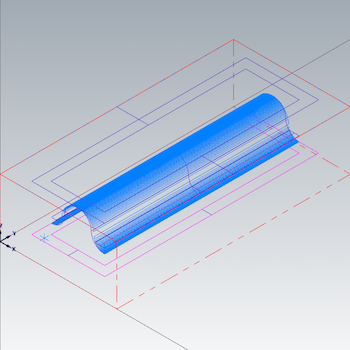
Initially, I thought the surface finish would make most sense along the y direction, or the long direction, but if you look at the toolpath, you can see there's a bit that isn't continuously curving :
Initially, I thought the surface finish would make most sense along the y direction, or the long direction, but if you look at the toolpath, you can see there's a bit that isn't continuously curving :

non smooth surface :
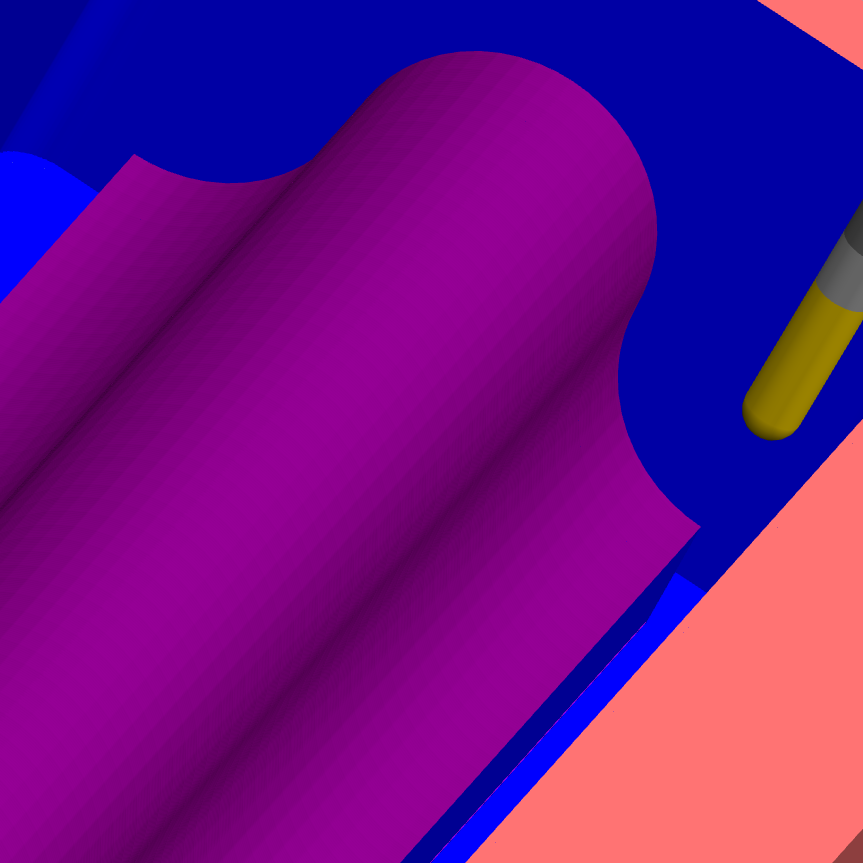
It's always a good to click "view verify" to get a higher resolution view of what the mill is actually doing. Here you can see that non-smooth surface I was talking about. I'm not quite sure why this is happening, but sometimes Mastercam doesn't like circular geometry - when the circle approaches zero, it confuses Mastercam, which in general does not read vertical surfaces.
It's always a good to click "view verify" to get a higher resolution view of what the mill is actually doing. Here you can see that non-smooth surface I was talking about. I'm not quite sure why this is happening, but sometimes Mastercam doesn't like circular geometry - when the circle approaches zero, it confuses Mastercam, which in general does not read vertical surfaces.
toolpath > parameters > finish parallel parameters :
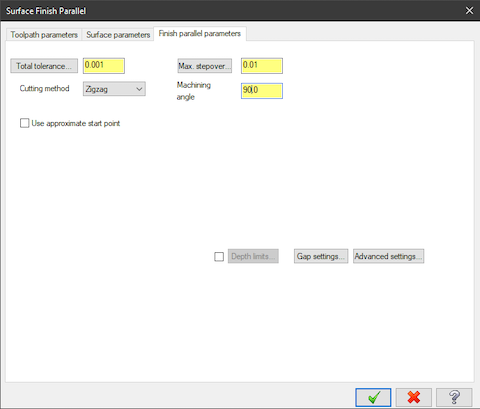
This is a quick fix - you can easily change the direction of the cut. Here I changed the machining angle to 90, and that makes the toolpath cut along the short direction, or the x direction. Maybe that will give a better finish. In this case, it does!
This is a quick fix - you can easily change the direction of the cut. Here I changed the machining angle to 90, and that makes the toolpath cut along the short direction, or the x direction. Maybe that will give a better finish. In this case, it does!

surface finish along the short direction :
You can see the non-smooth surface is no more :
You can see the non-smooth surface is no more :
view verify in simulation :
And a quick look at "view verify" confirms we have a continuously smooth surface.
And a quick look at "view verify" confirms we have a continuously smooth surface.

edge finder to find origin of material :
The proto trak is not like the onsrud - it's a bit more analog. You have to switch tools, and find origin of materials. Initially, I didn't like this, but it actually does make the machine a bit more accessible.. I was a bit familiarized w the mill because I've been taking Zain's course, 4.180 : Introduction to Robotic Fabrication. We've been using it to mill aluminum, but I actually hadn't run a Mastercam file on it yet.
In any case, in order to find the origin of the material, you need to use the edge finder.
The edge finder is a funny little guy. You should manually set the speed to 1200. With your finger you can push the disk to be out of place, as shown in the picture. Then slowly you push the edge finder to the edge. Once you are at the edge the disk will be in place, unlike the image above. Once you are at this place, you should gentle push the edge finder in the material, causing the disk to jump out of place again, as shown above.
Because diameter of the edge finder it .2, when you do find the edge, you need to set the zero to +/- .1 depending on what edge you are referencing. In my case, I was referencing the lower left corner so I set x and y to -.1.
stuck in yuxuan's folder :
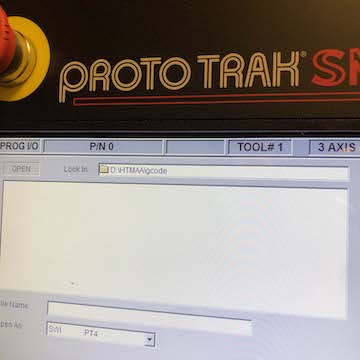
I helped Yuxuan mill her file by changing tools and helping her zero them, but when she left and took her USB with her, the computer did not like it. The computer allows you to go into folders, but it seemed to be stuck on her folder... It didn't recognize there was a new USB in the computer.
At this point, Zain had gone home, but once I got him on the phone, he said I should try tricking the computer by making the same folder structure in my USB and locating my files there.
Sure enough, this worked!
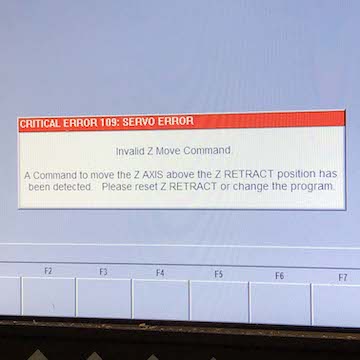
z retract? :
Unfortunately, there was another error ahead :
Although I was able to select the file and begin running the code, the machine stopped and showed the error message above. I tried removing clearances and retracts from Mastercam, but still the same error continued to pop up. I'm pretty sure this error was in part caused by a higher tool, which I needed since my mold went a bit deep.
Finally, I decided to manually lower the table a bit, and this worked, but once the file started, I realized I needed to either rotate my file in Mastercam or rotate my real physical stock (though this also means I would have to re-zero my material and tool). I called it a day and decided to try again in the morning because by now it was late Sunday night.
job successfully running :
It turns out, you haze to set your top of stock to 0 in Mastercam. I'm much more acquainted with the Onsrud, and there you always set the bottom of your stock to 0. So, I was getting a Z retract error because it thought the top of stock was my bottom of stock - if that makes sense.
Once this was changed in Mastercam, the file ran as it should.
2nd toolpath, contour, running :

this is why I needed such a long tool :
third toolpath, surface finish parallel, running (much faster) :
Though I decreased feed on the machine for toolpaths 1 and 2, but the time toolpath 3 was running, most of the material had been removed. That is, we weren't doing any deep plunges, rather, just cleaning the surface. So, after letting to go at 20 feedrate for 15 minutes and it not even being a quarter done I slowly increased all the way to 50.
This did nto affect the results, it wasn't cleaner or less clean, it was just finished faster.
I was super happy / relieved all went as it should. And the resolution of the mold is really quite lovely, even if the surface is super simple :
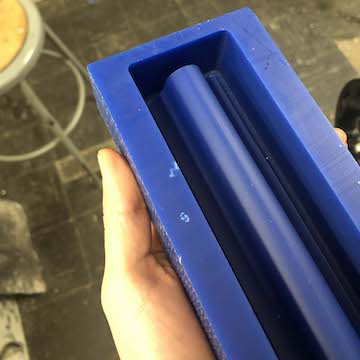
fresh off the proto trak:
Next step : Oomoo.
Next step : Oomoo.
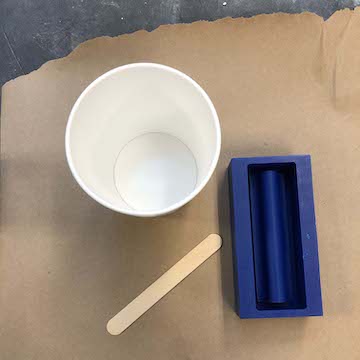
oomoo mixing / pouring set up :
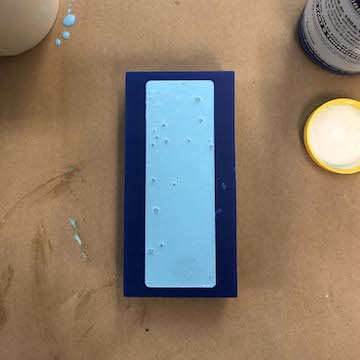
post pouring :
It was a bit difficult to tell if I poured 1:1... The darker blue was a bit clumpy, so it didn't fall quite like the more green-ish liquid. In any case, I mixed in "8" formation, but there were still a bit of bubbles.
Diego says you should "cut" the liquid to help get rid of more bubbles. But at this point I had already poured the entire mixture into the mold.
It did help to knock on the bottom of the mold. More bubbles popped as they reached the top - I guess I will have to wait and see if the top of the mold is bubble-free enough to use it as a mold.
For now, I think I might head to Blick and grab a dye to color the hard material I'll be pouring into the mold. I want a deep pink.
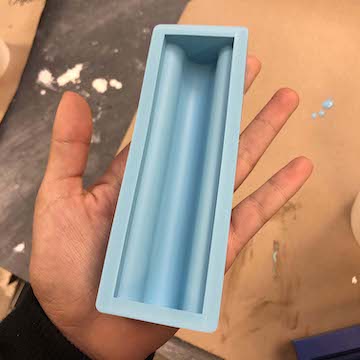
blue oomoo mold :
After waiting for about 2 hours, my mold was set. I gently yanked all around and it came out pretty easily.
After waiting for about 2 hours, my mold was set. I gently yanked all around and it came out pretty easily.
clear pour :
I saw there was some "sorta clear" oomoo, and wanted to make another mold.. Ideally these "waves" would be made in batches so you could have color consistency, but whatever.. For now I'll pour one on it's own, though a small "plate" of them would be made w four or five.
I saw there was some "sorta clear" oomoo, and wanted to make another mold.. Ideally these "waves" would be made in batches so you could have color consistency, but whatever.. For now I'll pour one on it's own, though a small "plate" of them would be made w four or five.
dying inspo : jesse hammer
A couple of years ago, an ig friend was making terrazzo in an tech seminar w erin besler. She used powder pigment to die concrete. Ever since I saw that video, I've always wanted to do it, but I've just never had the chance or reason to.
A couple of years ago, an ig friend was making terrazzo in an tech seminar w erin besler. She used powder pigment to die concrete. Ever since I saw that video, I've always wanted to do it, but I've just never had the chance or reason to.
pinking up the hydrastone :
You can add more or less - depends what intensity you want.
You can add more or less - depends what intensity you want.
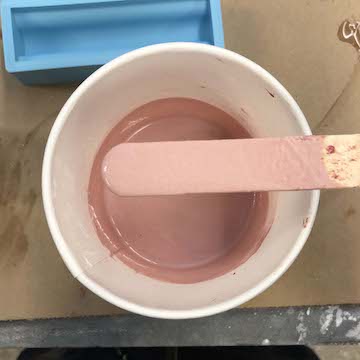
Looks pretty close to the pink render :P :
pink render made at beginning of assignment :
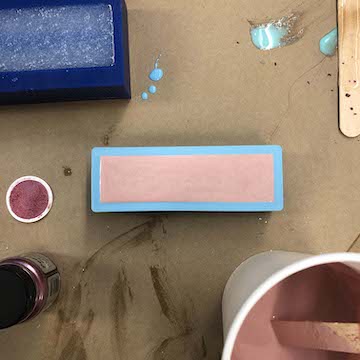
pink cast setting :
I'm curious if the color will darken as the hydrastrone sets...
I'm curious if the color will darken as the hydrastrone sets...
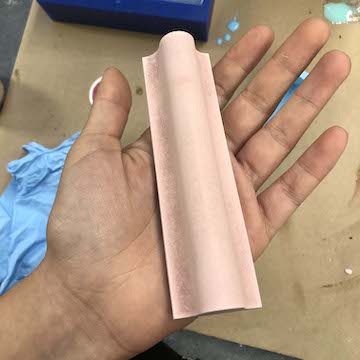
pink cast out :
The piece only took about 30 minutes to set and was warm to the touch. The edges were a bit lighter than the middle, but I wonder if that's because the edges are drier than the middle.
Either way, I like it!
The piece only took about 30 minutes to set and was warm to the touch. The edges were a bit lighter than the middle, but I wonder if that's because the edges are drier than the middle.
Either way, I like it!
clear mold :
As I was pouring other modules, the clear mold set. When I took it out, it felt a tiny bit sticky? I'm not sure if this means I didn't properly mix the two liquids - it was a lot more difficult to tell if it was even because both were clear. I am going to let it sit for a bit before I pour into it - I'm afraid it'll be some kind of catastrophe, haha.
As I was pouring other modules, the clear mold set. When I took it out, it felt a tiny bit sticky? I'm not sure if this means I didn't properly mix the two liquids - it was a lot more difficult to tell if it was even because both were clear. I am going to let it sit for a bit before I pour into it - I'm afraid it'll be some kind of catastrophe, haha.
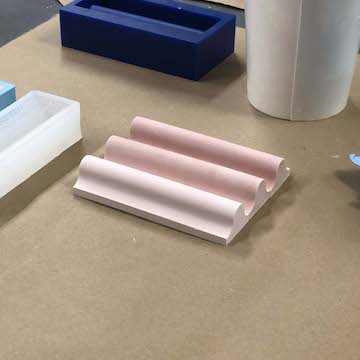
3 modules :
Because each module is poured individually and I'm not measuring the dye, they all end up being different shades of pink. Idk, I do like the gradient. I mean, ideally they wouldn't be starkly different.
Additionally, the modules don't meet perfectly, but the seam is not terrible. Either way, I'm glad I made the seam the bottom of the curve, because once you begin to place items, they would "hide" the seam :

seam between modules :
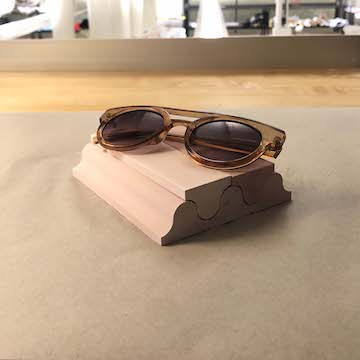
stacked modules :
One last thing - because of the modular shape, these guys can stack next but also - flip and then stack on top of one another to make a flat surface. I mean this is completely ripped off from Glossier's show room, but v cool.
One last thing - because of the modular shape, these guys can stack next but also - flip and then stack on top of one another to make a flat surface. I mean this is completely ripped off from Glossier's show room, but v cool.

gradient modules holding sum objects :
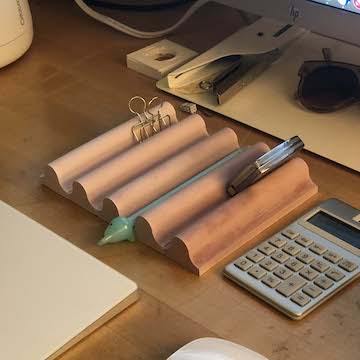
new home at my desk :
Anyways, I really like these, and I think I may buy my own hydrastone and buy more colors and gift these away, or idk maybe somehow incorporate into the display of objects on the conveyor belt.
Files :
Dropbox
Anyways, I really like these, and I think I may buy my own hydrastone and buy more colors and gift these away, or idk maybe somehow incorporate into the display of objects on the conveyor belt.
Files :
Dropbox