This week, the primary printer we'll be using is the Prusa. This a highly customizable extrusion printer, with an open-box design, made largely out of 3d printed parts which it can replace. To do this, we decided to print a copy of each of the test parts given to us as examples in class.
many
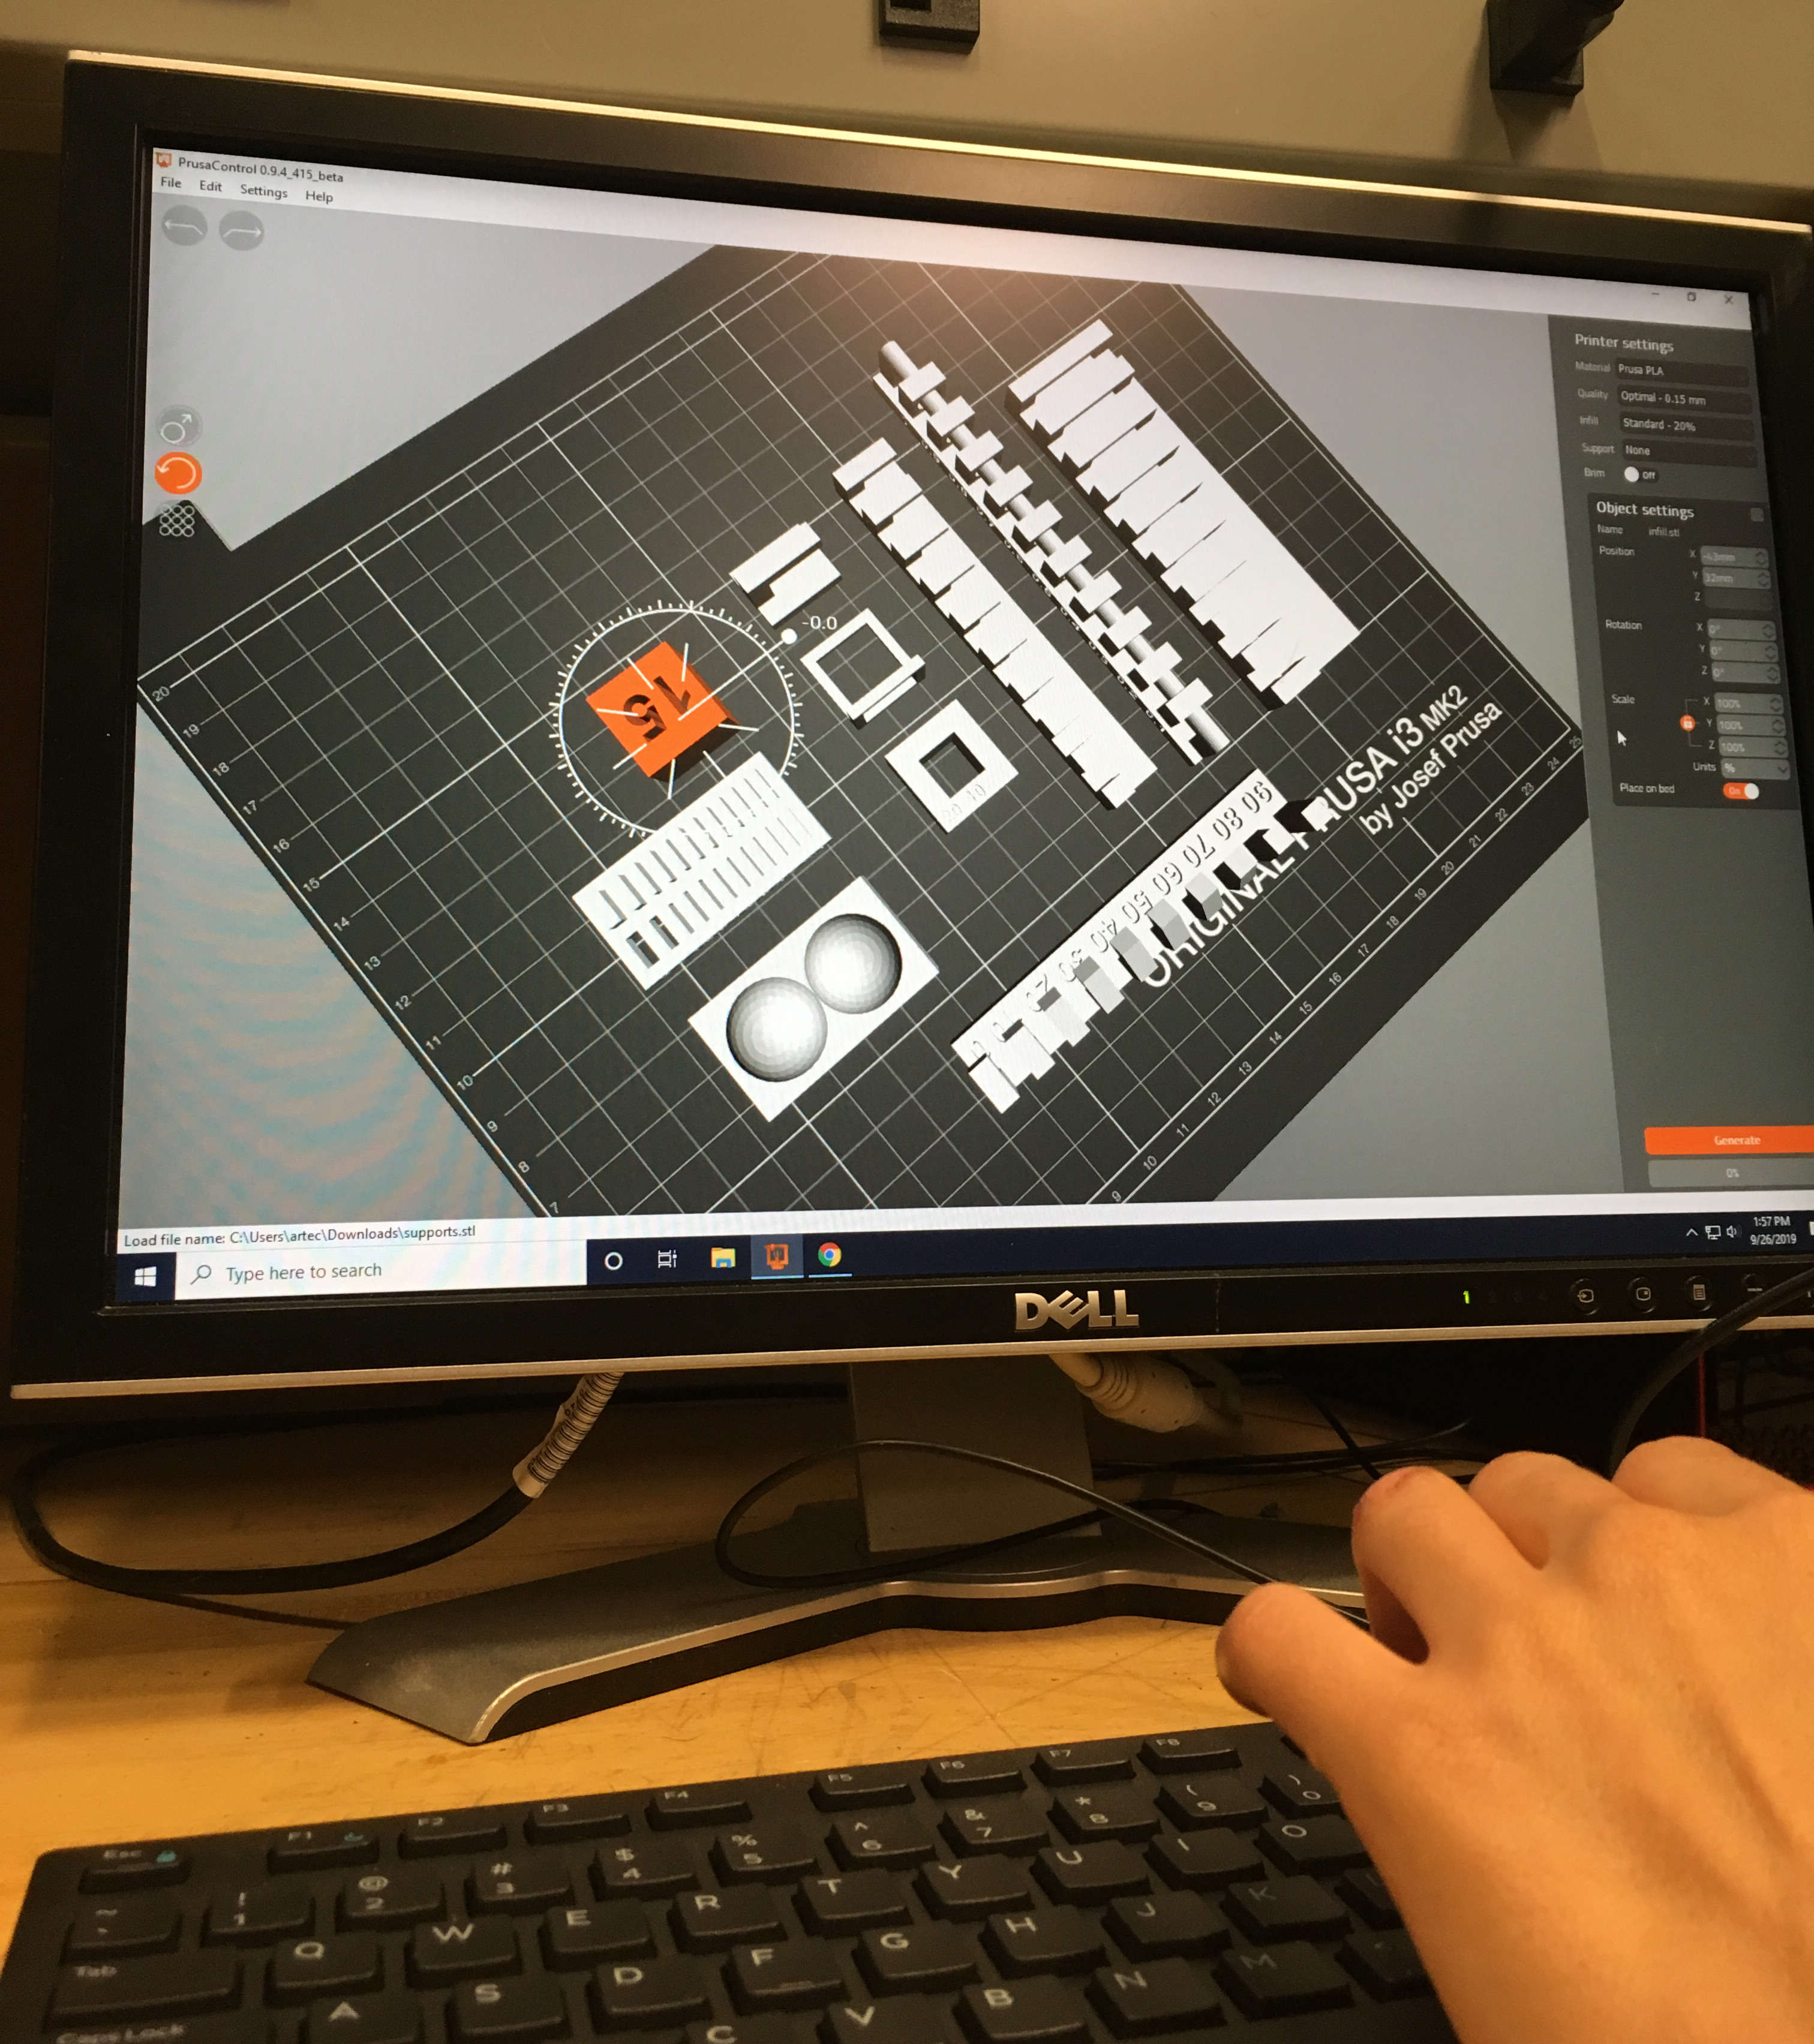
Arranging the parts in the slicer
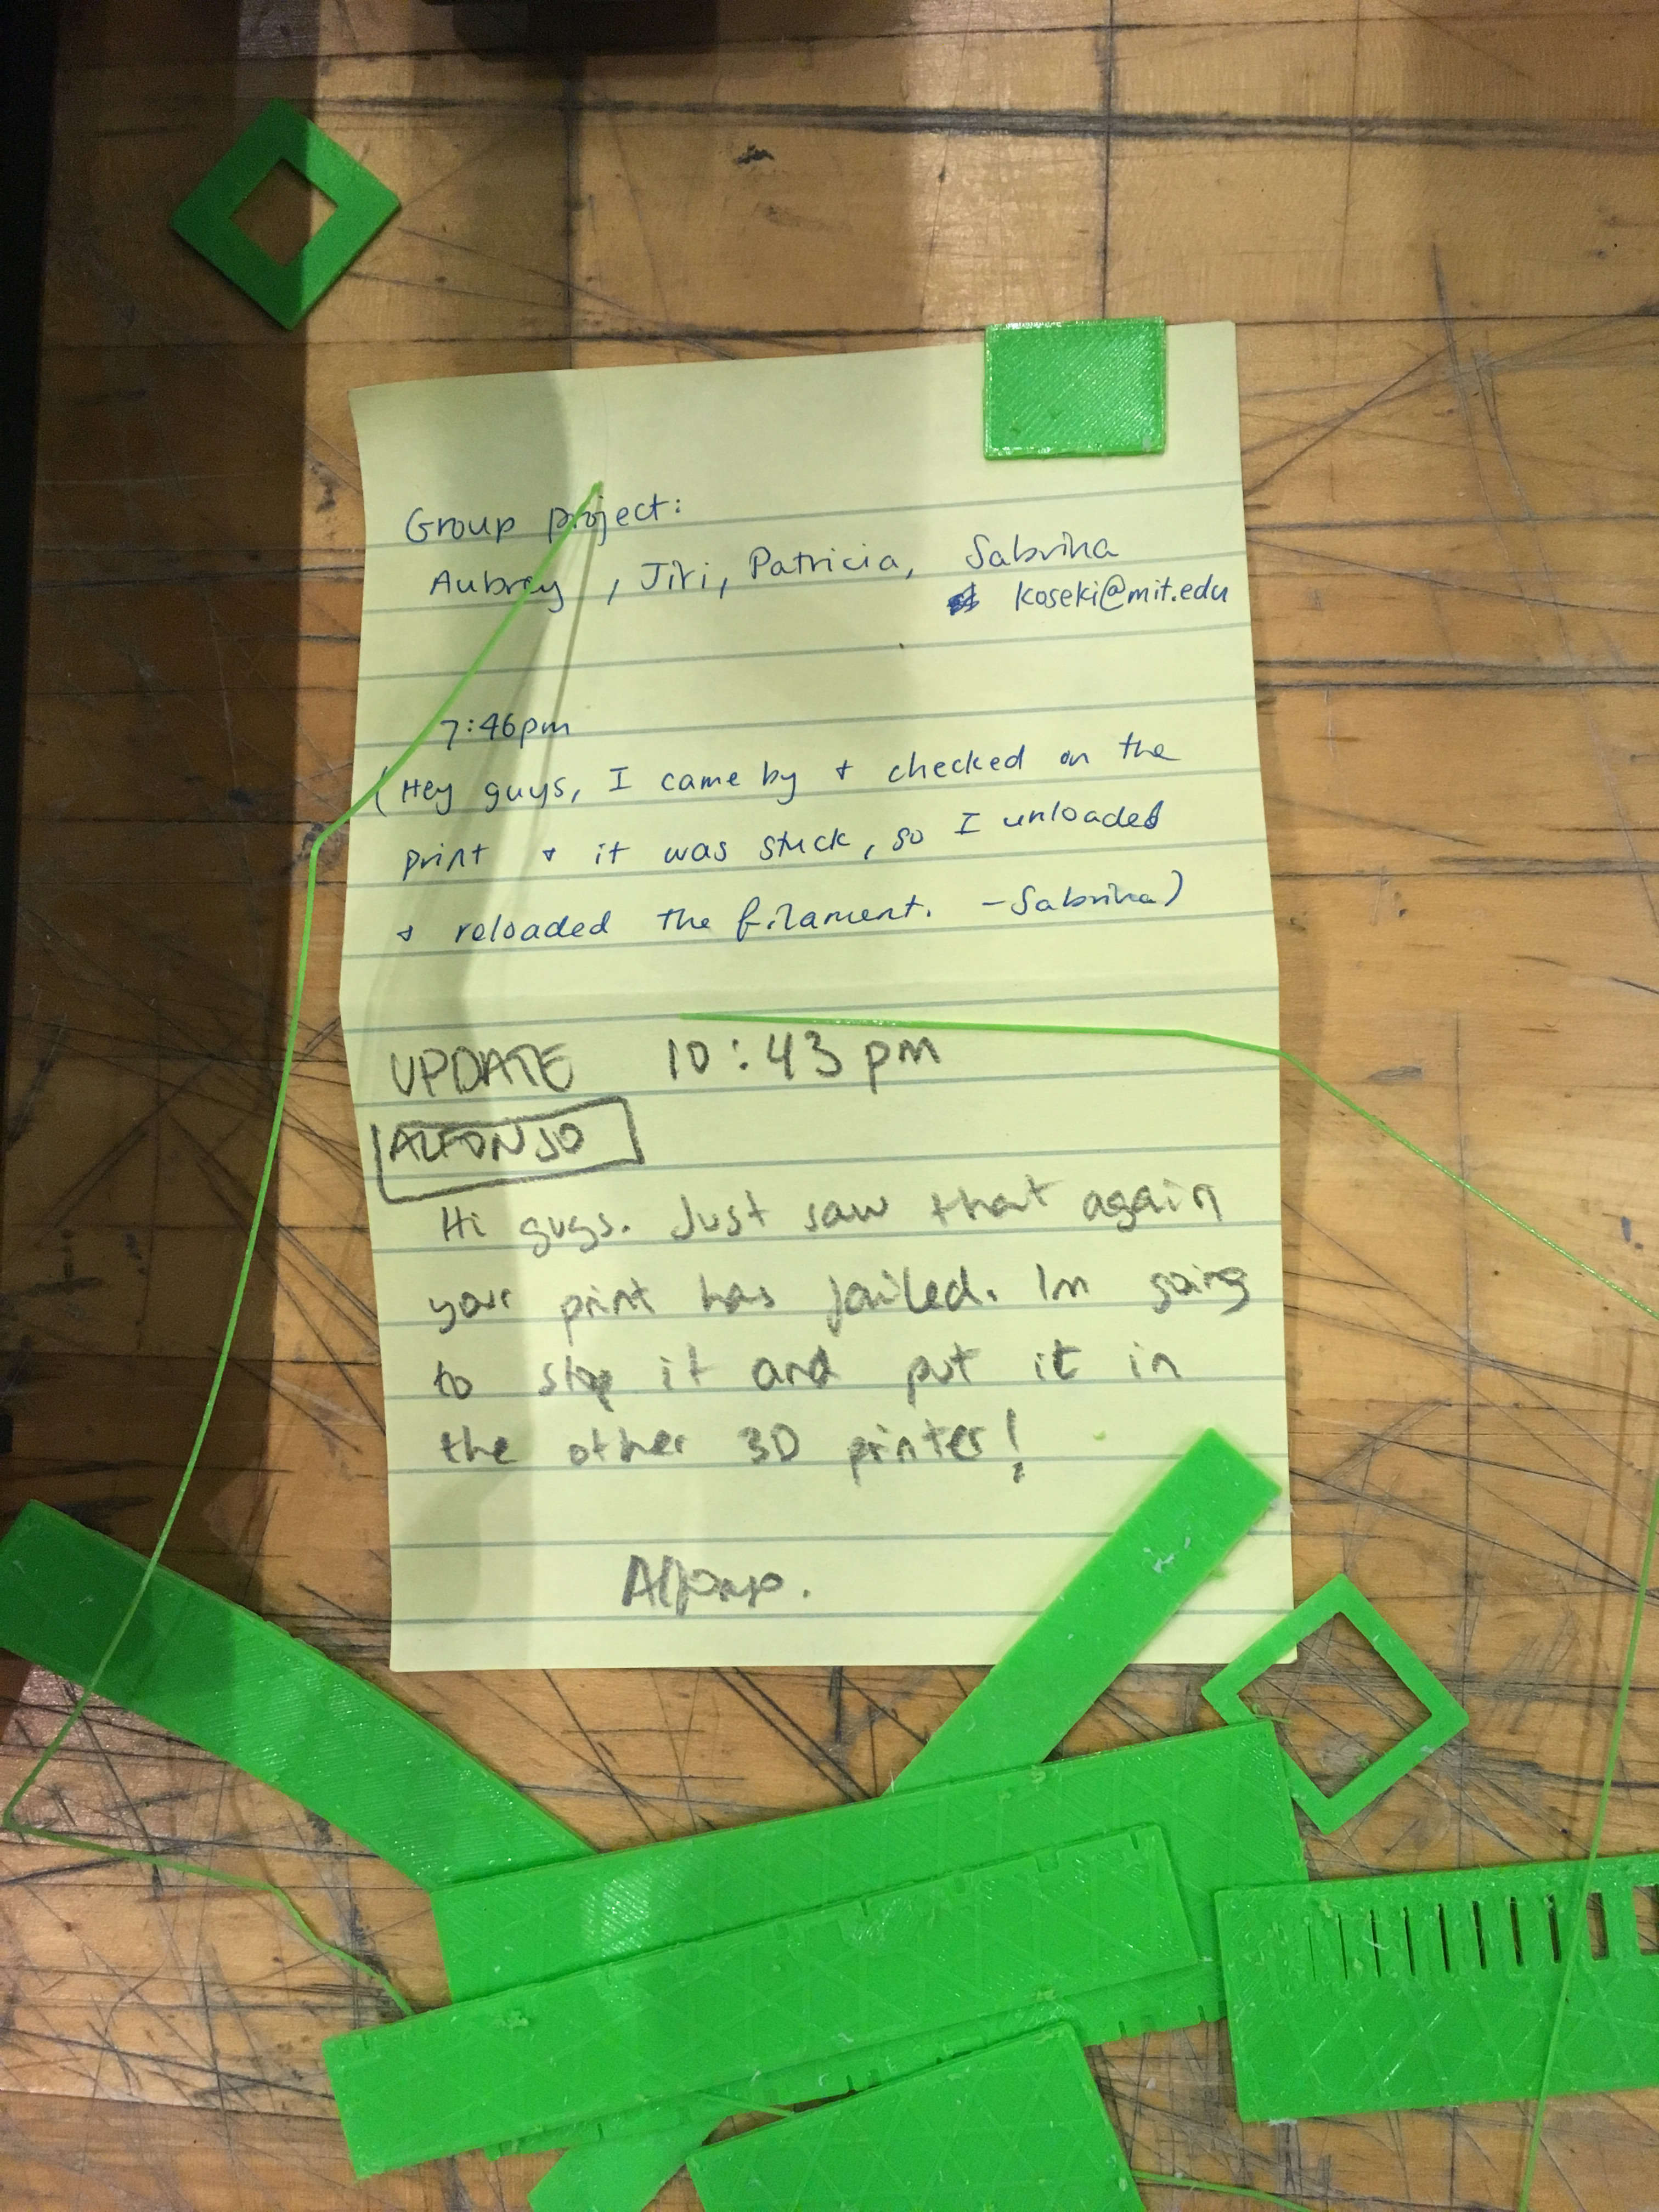
We let our print run overnight, due to the fact that it was supposed to take 10 hours or so, but ran into some complications along the way.
Our prints were ready by the morning after we started them. They were a little hard to remove from the board, but Tom showed us how to take off the build plate, and flex it like an ice cube tray in order to release the corners of our prints, and make them easier to remove.
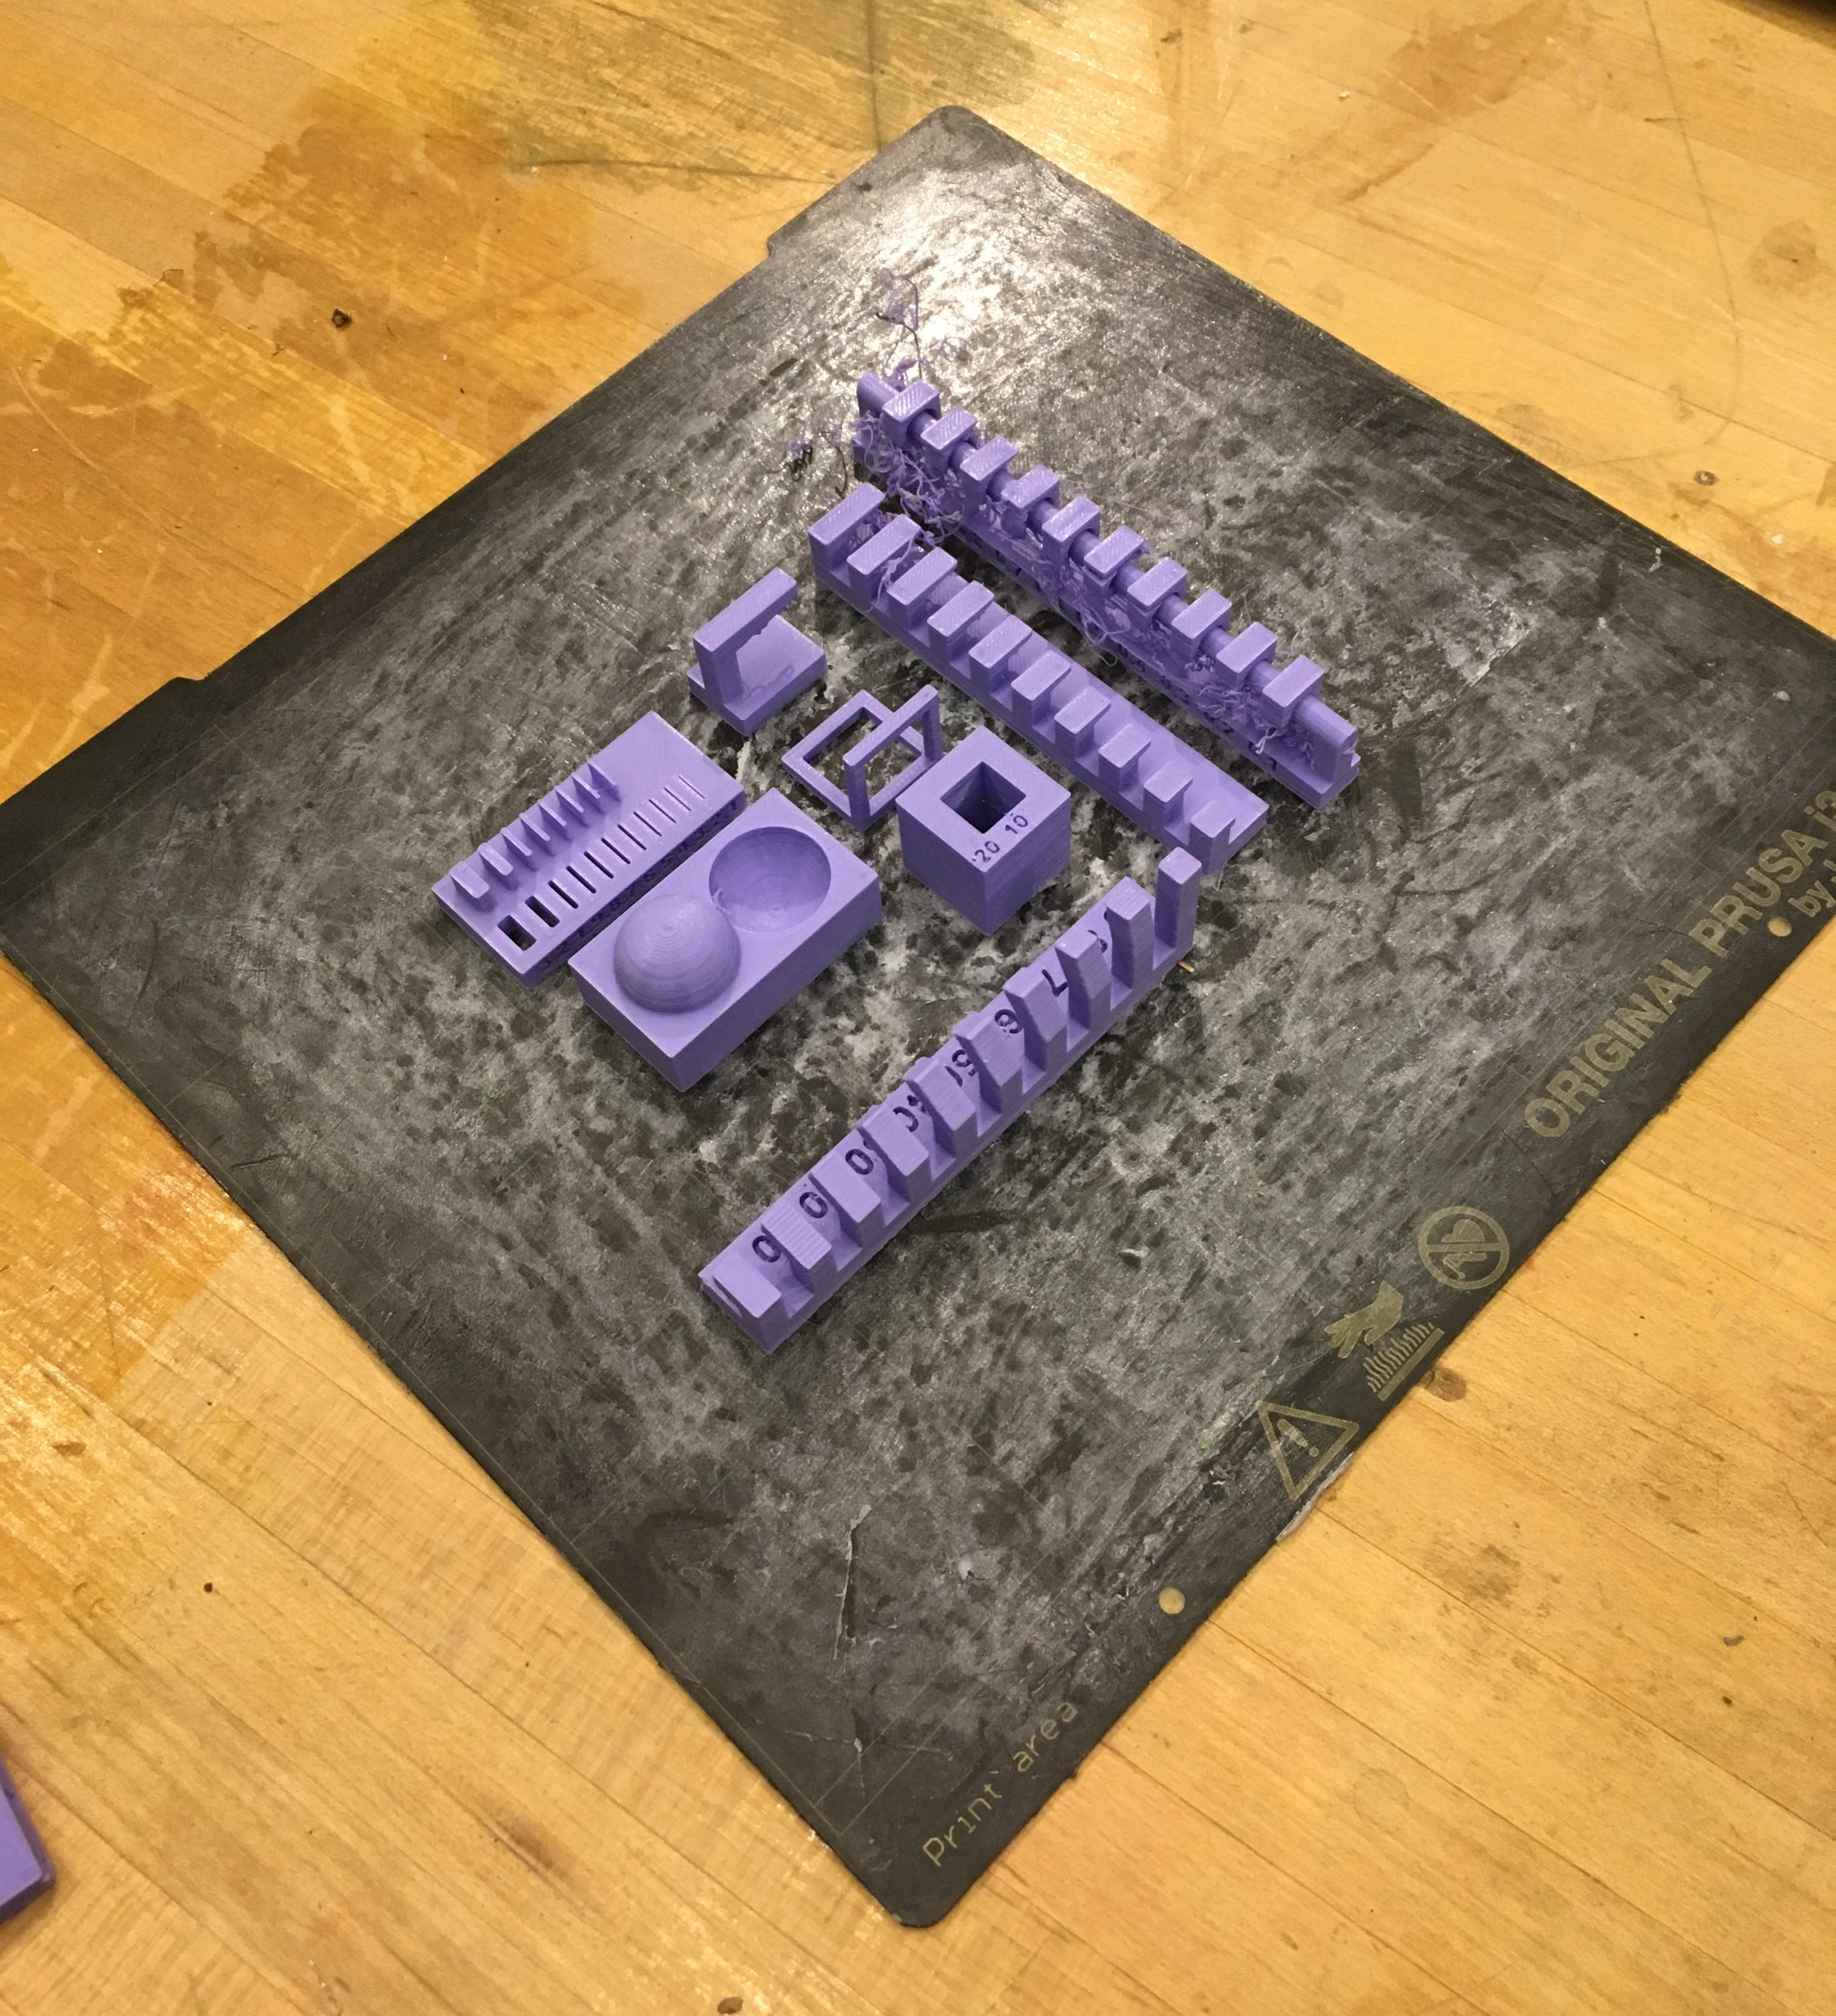
Our test print for the clearance between two parts required to make them separable didn't work exactly as planned. While we did find that we were able to separate parts with a clearace down to 0.2mm, printing the bottoms of the rings proved challenging.

when you try to make the receipe from the internet and it turns out looking like a much sadder version of the picture
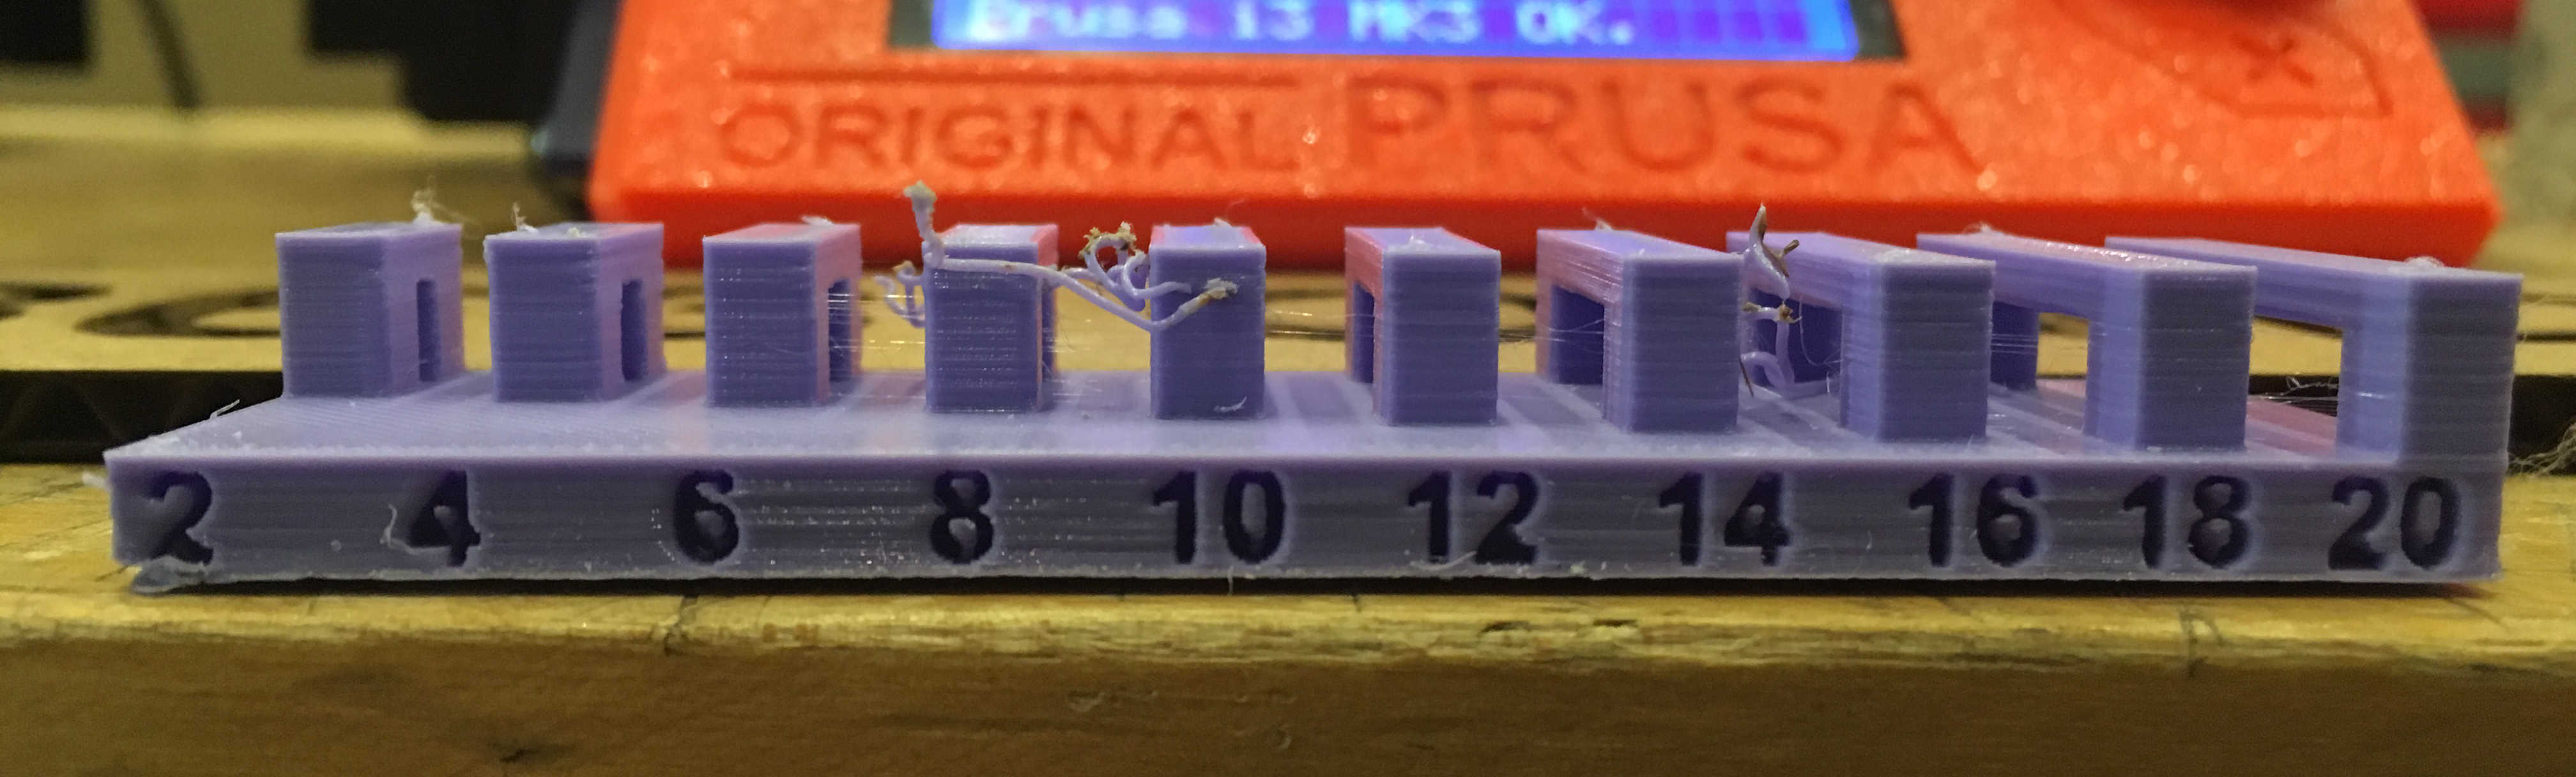
The bridges all printed successfully, though distances greater than 8mm experienced some loose threads of plastic on the first layer.
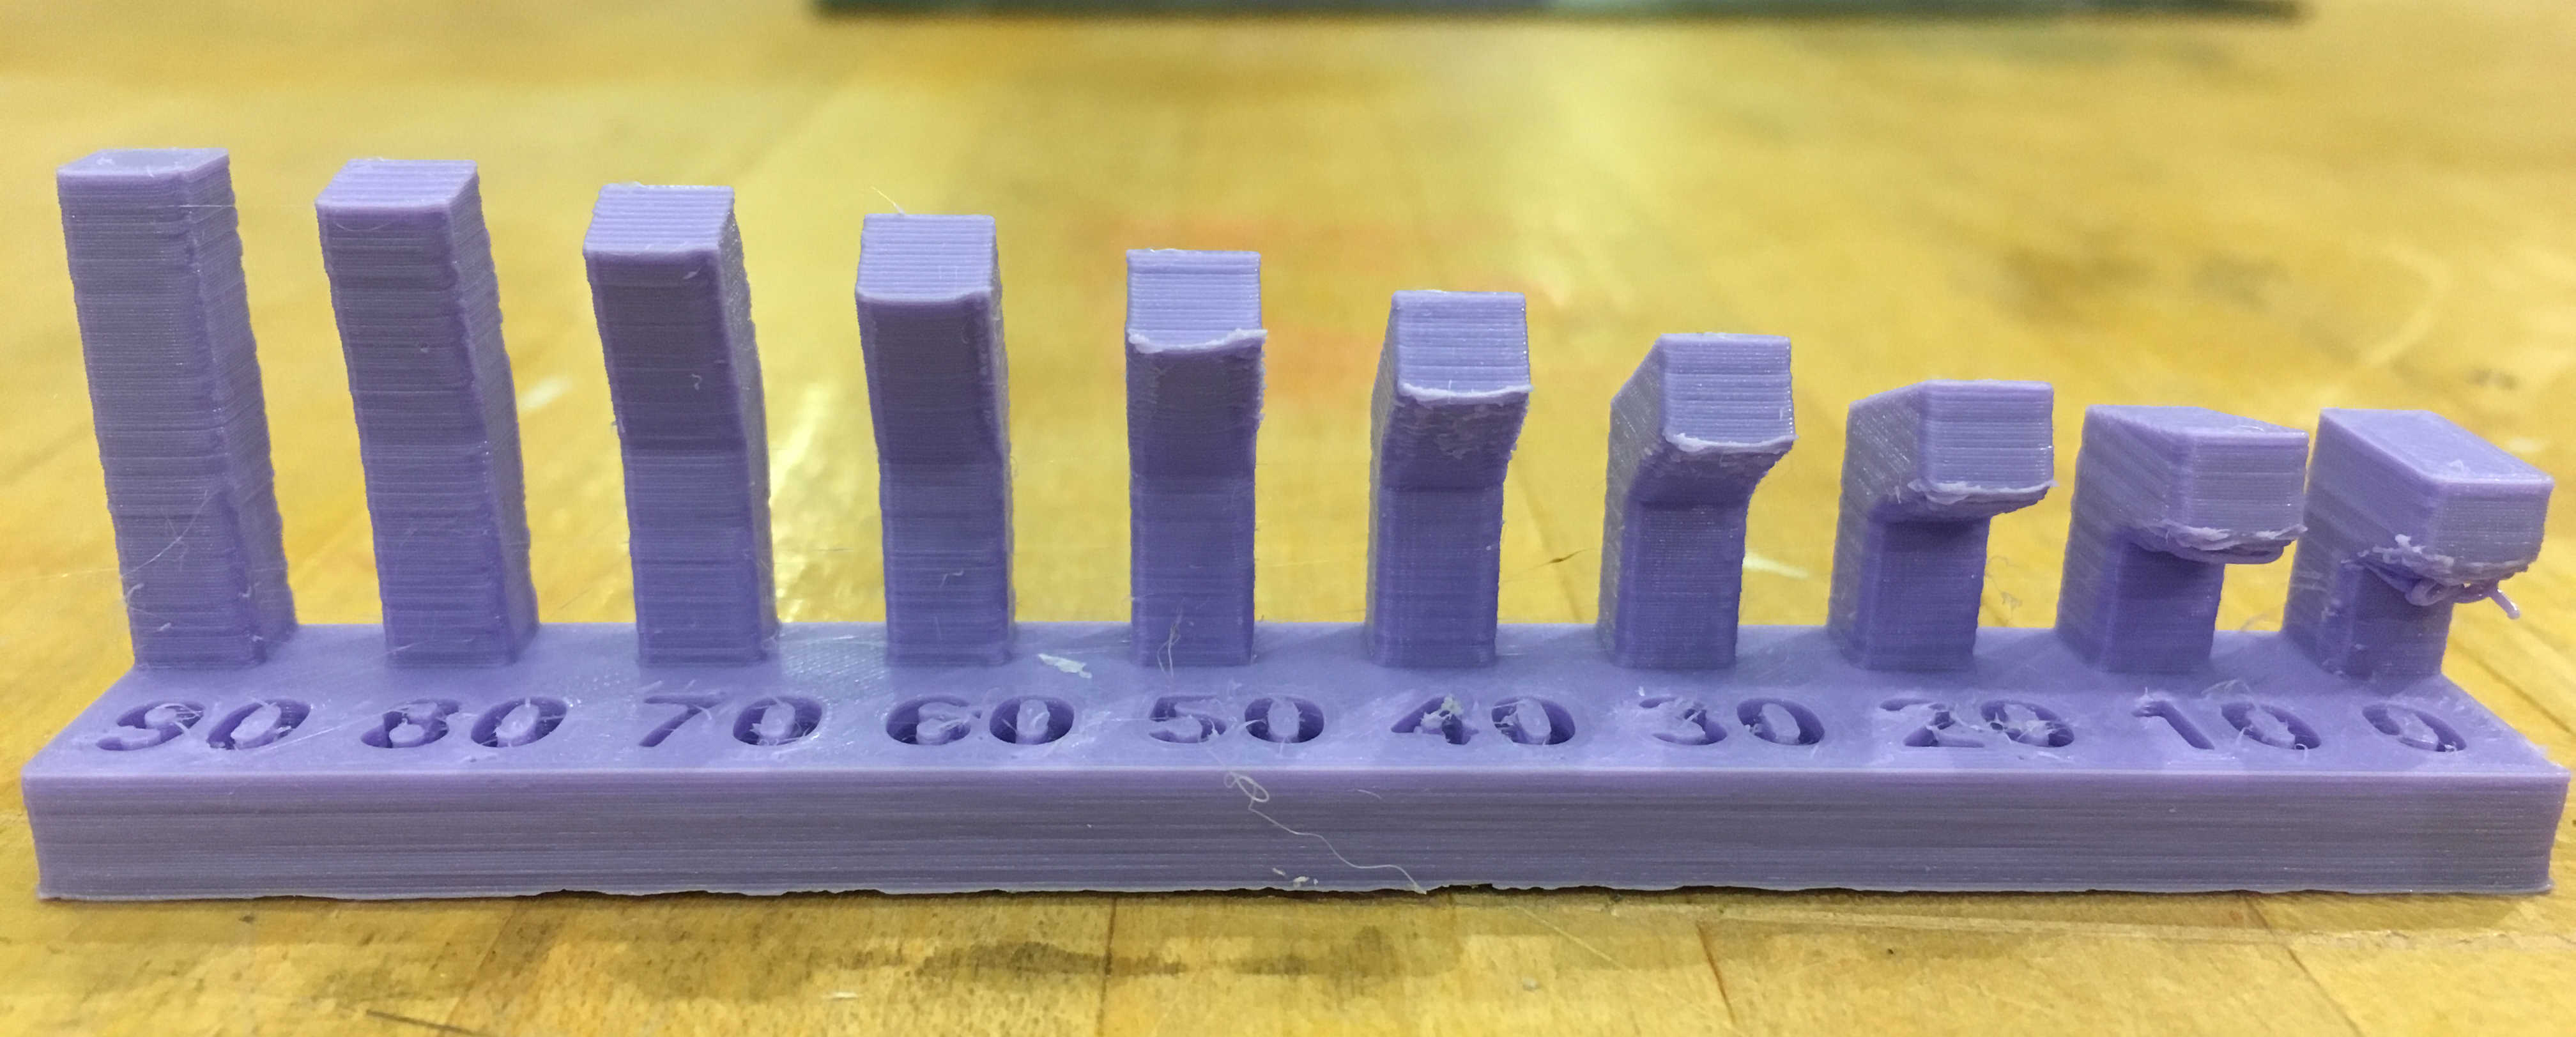
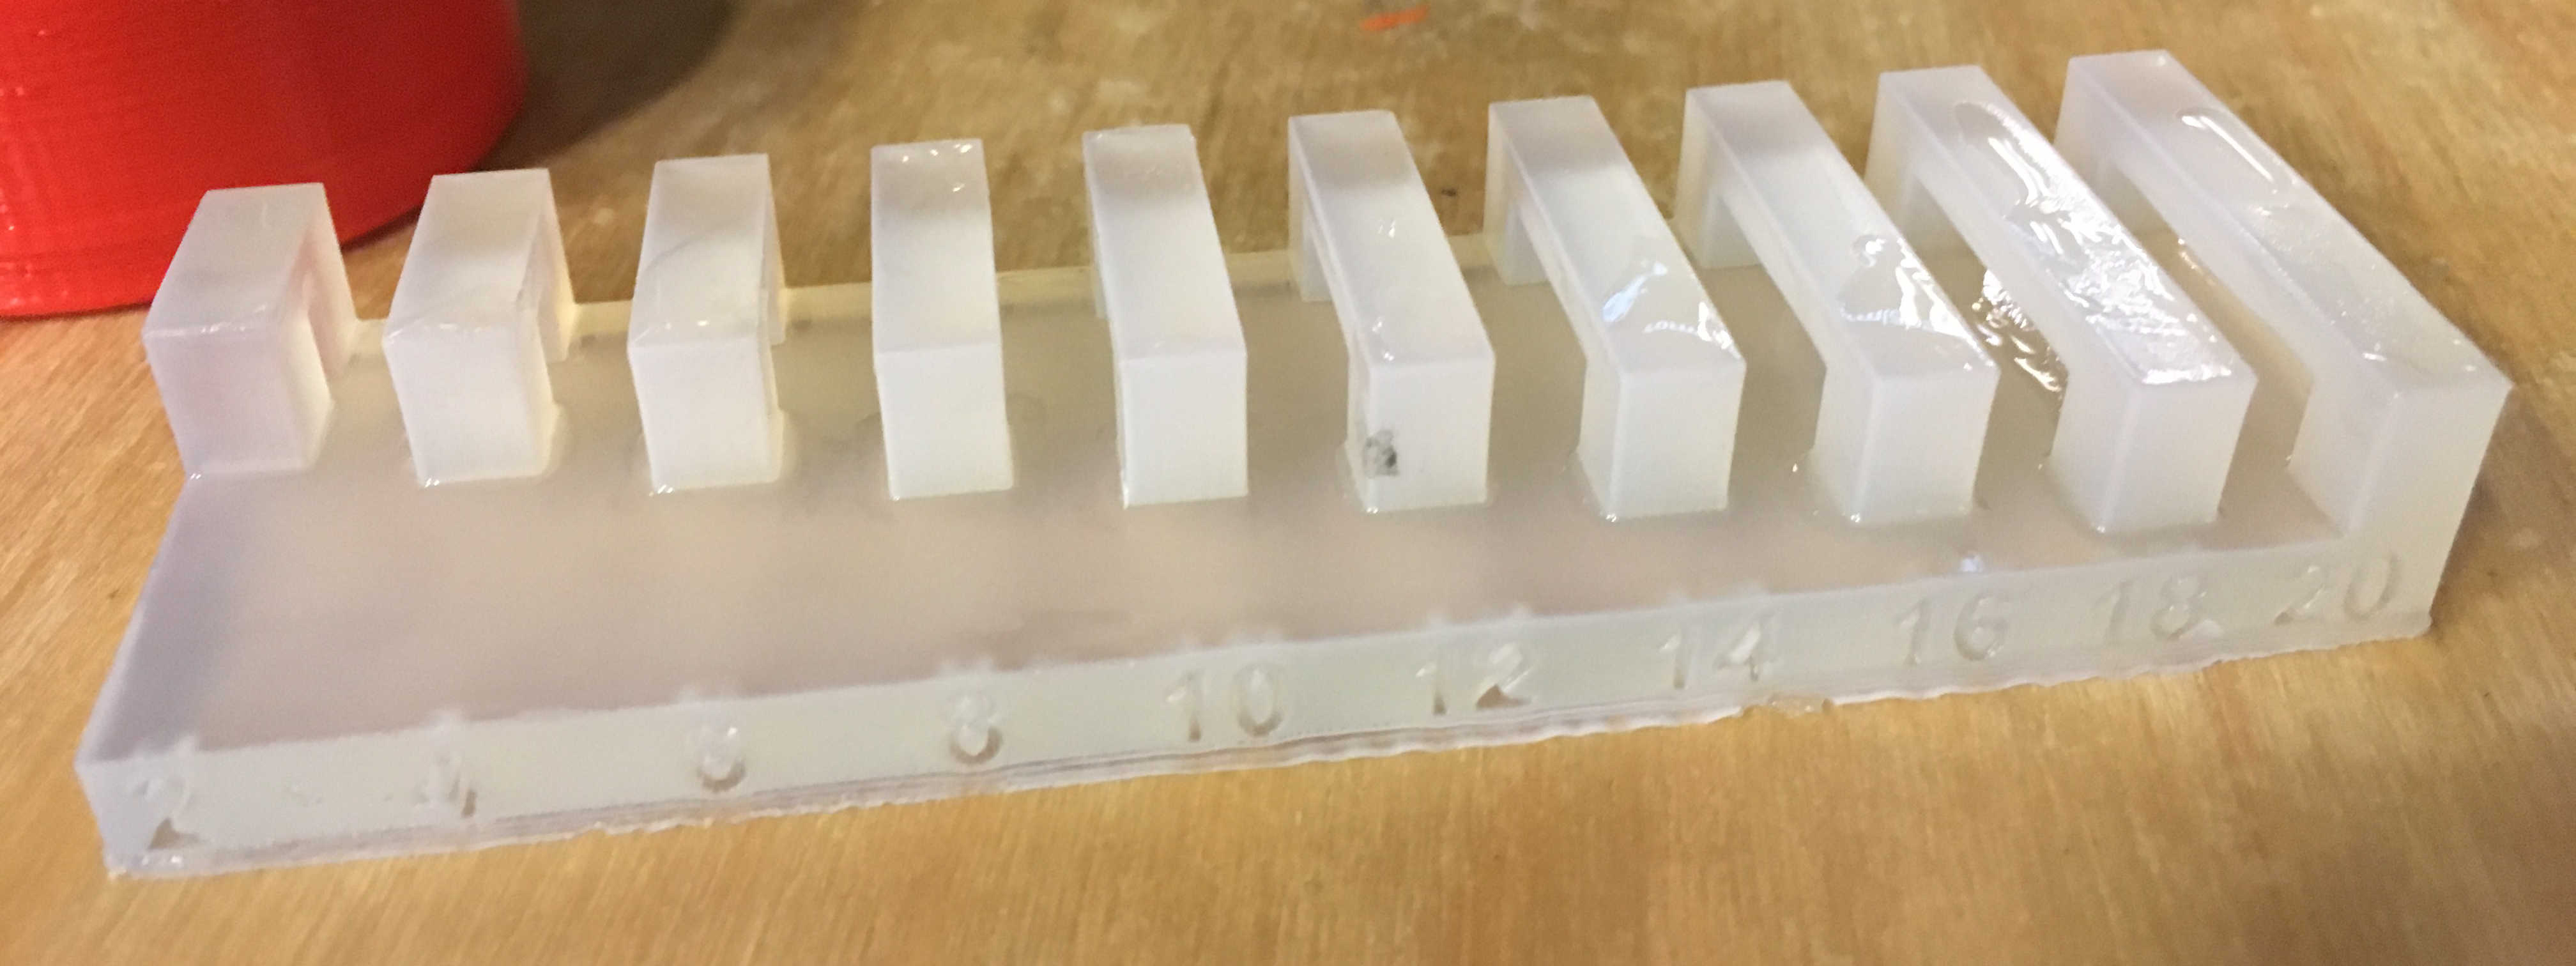
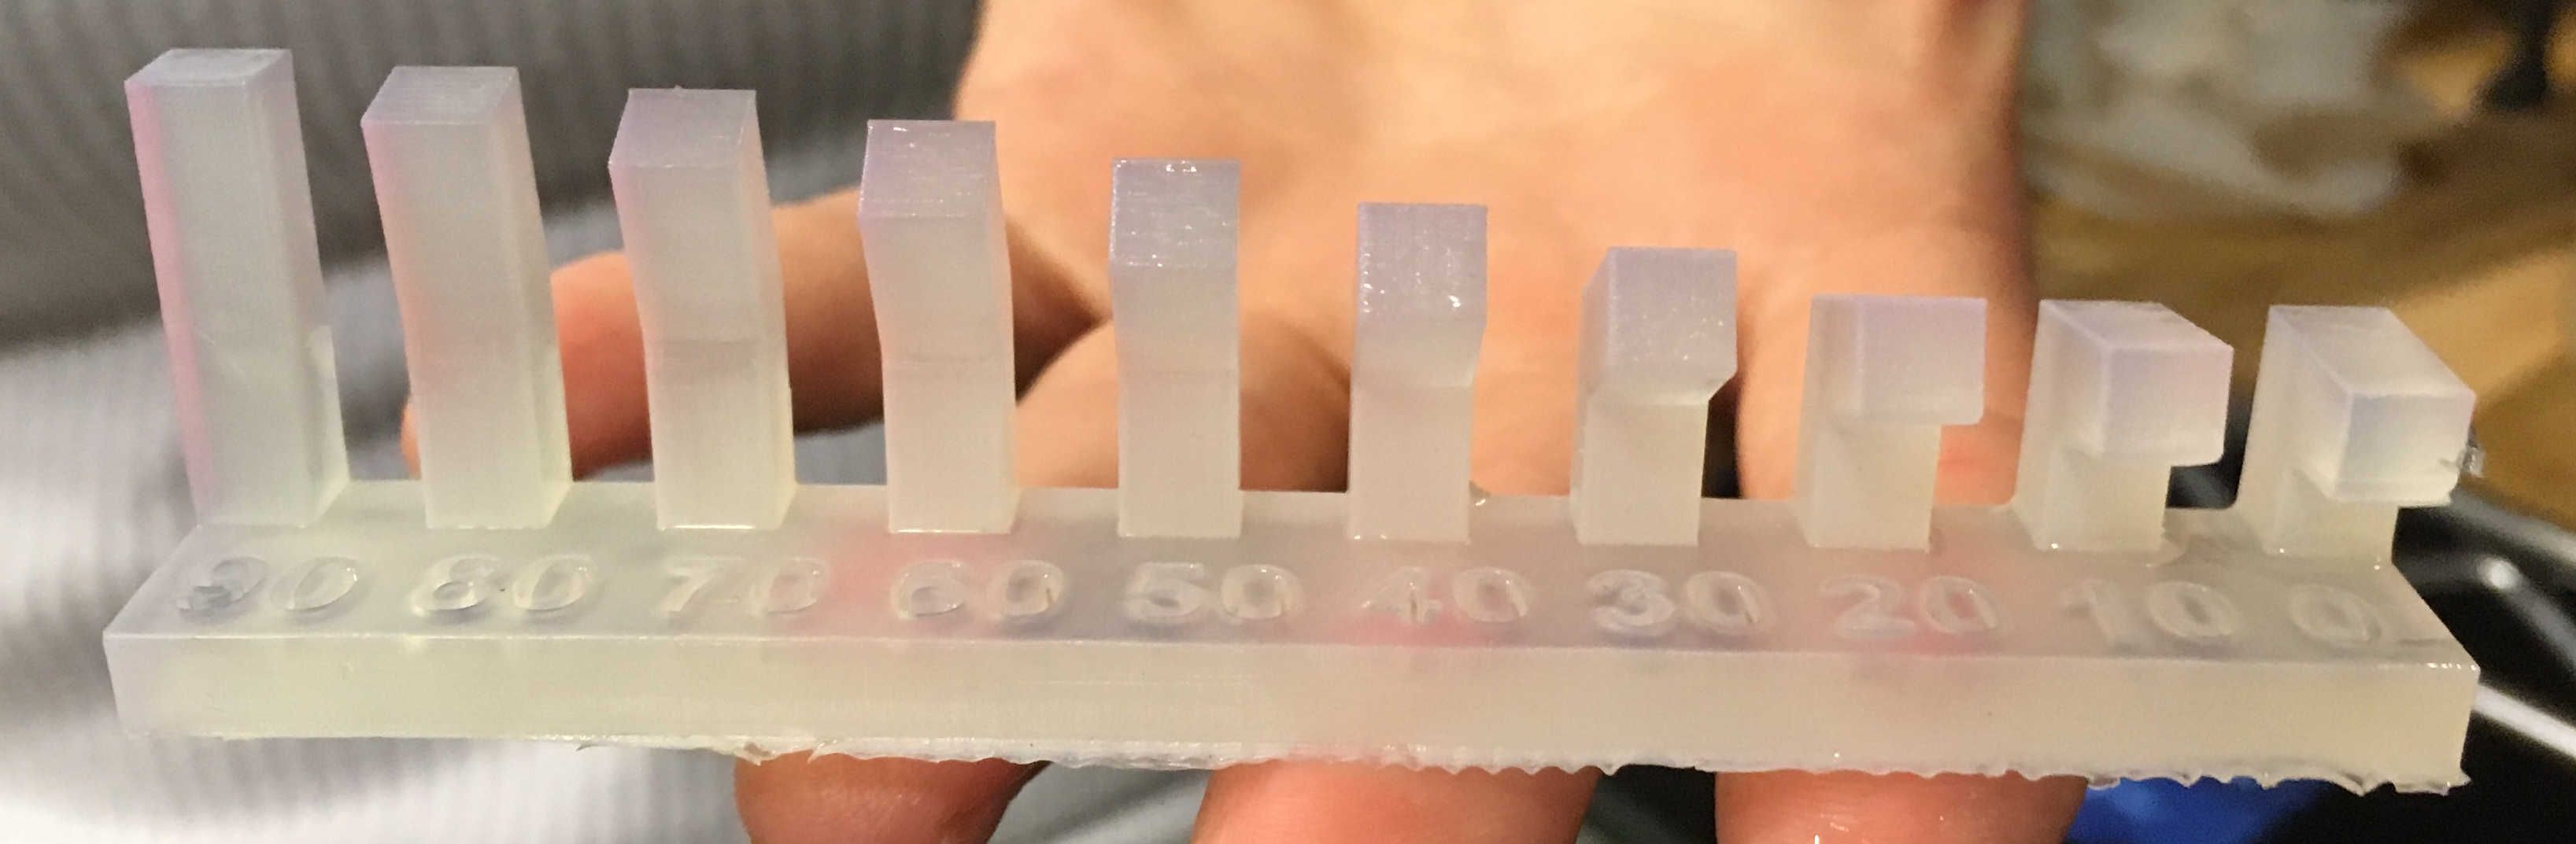
We found that the Prusa could print overhang angles down to about 20 degrees without any serious problems.
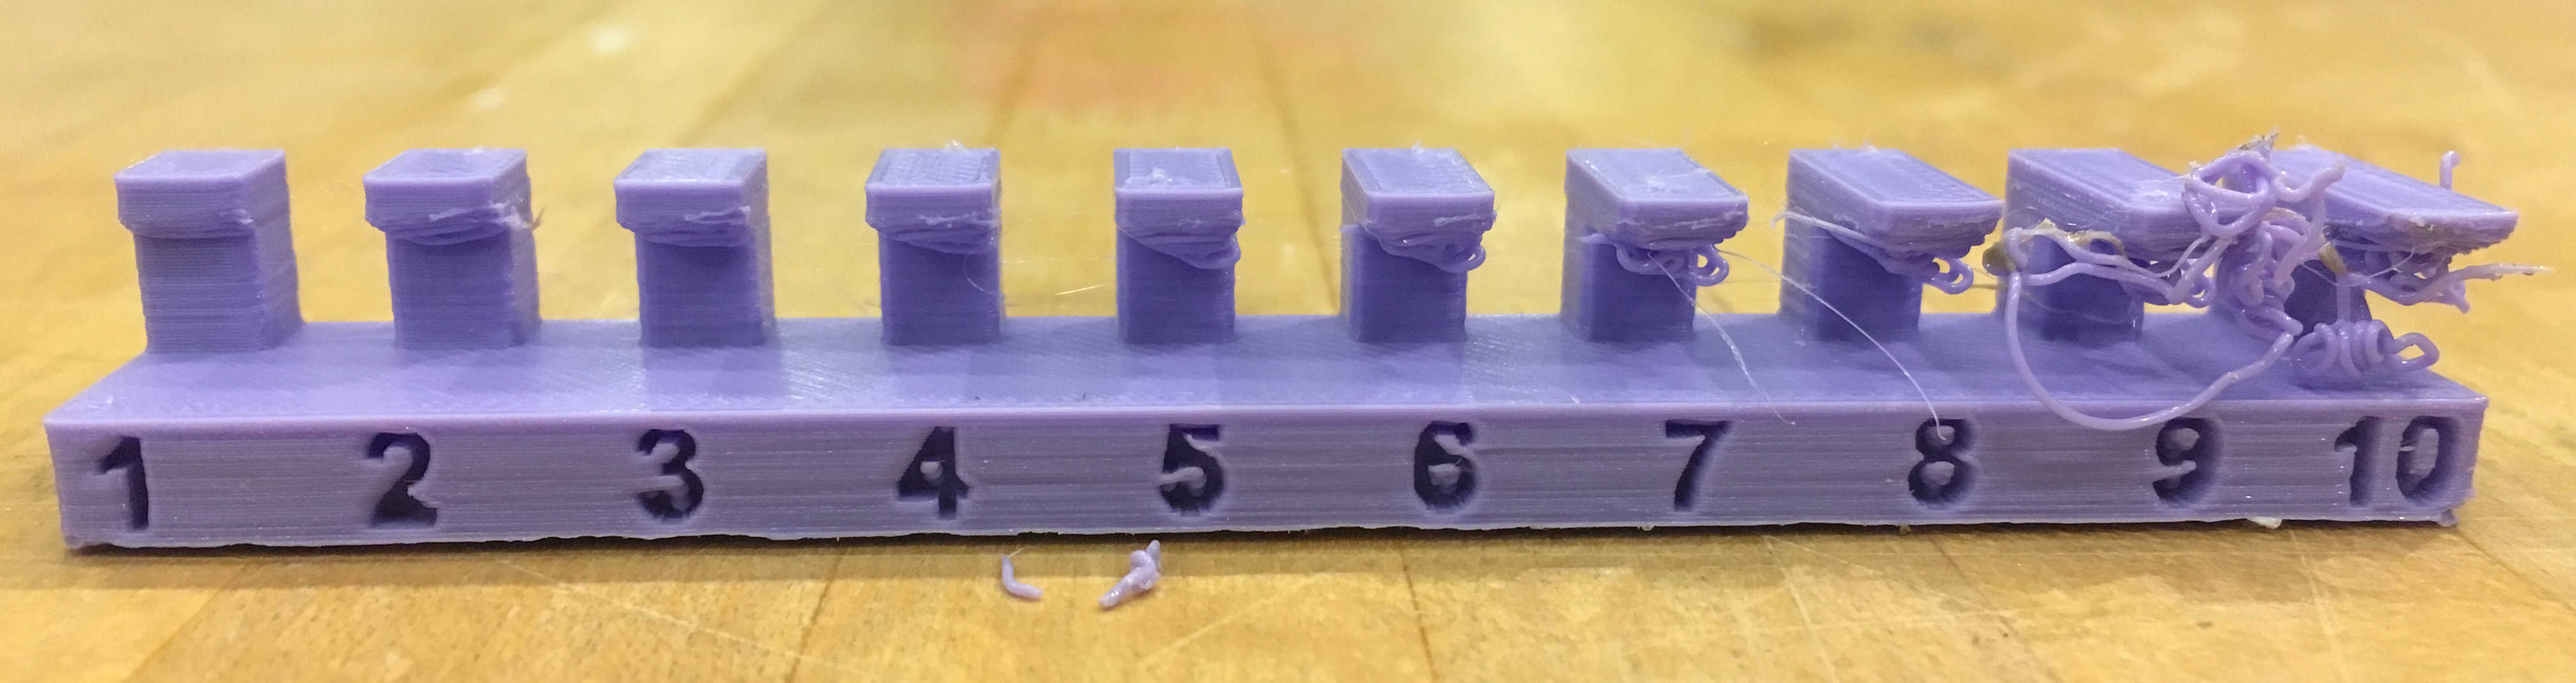
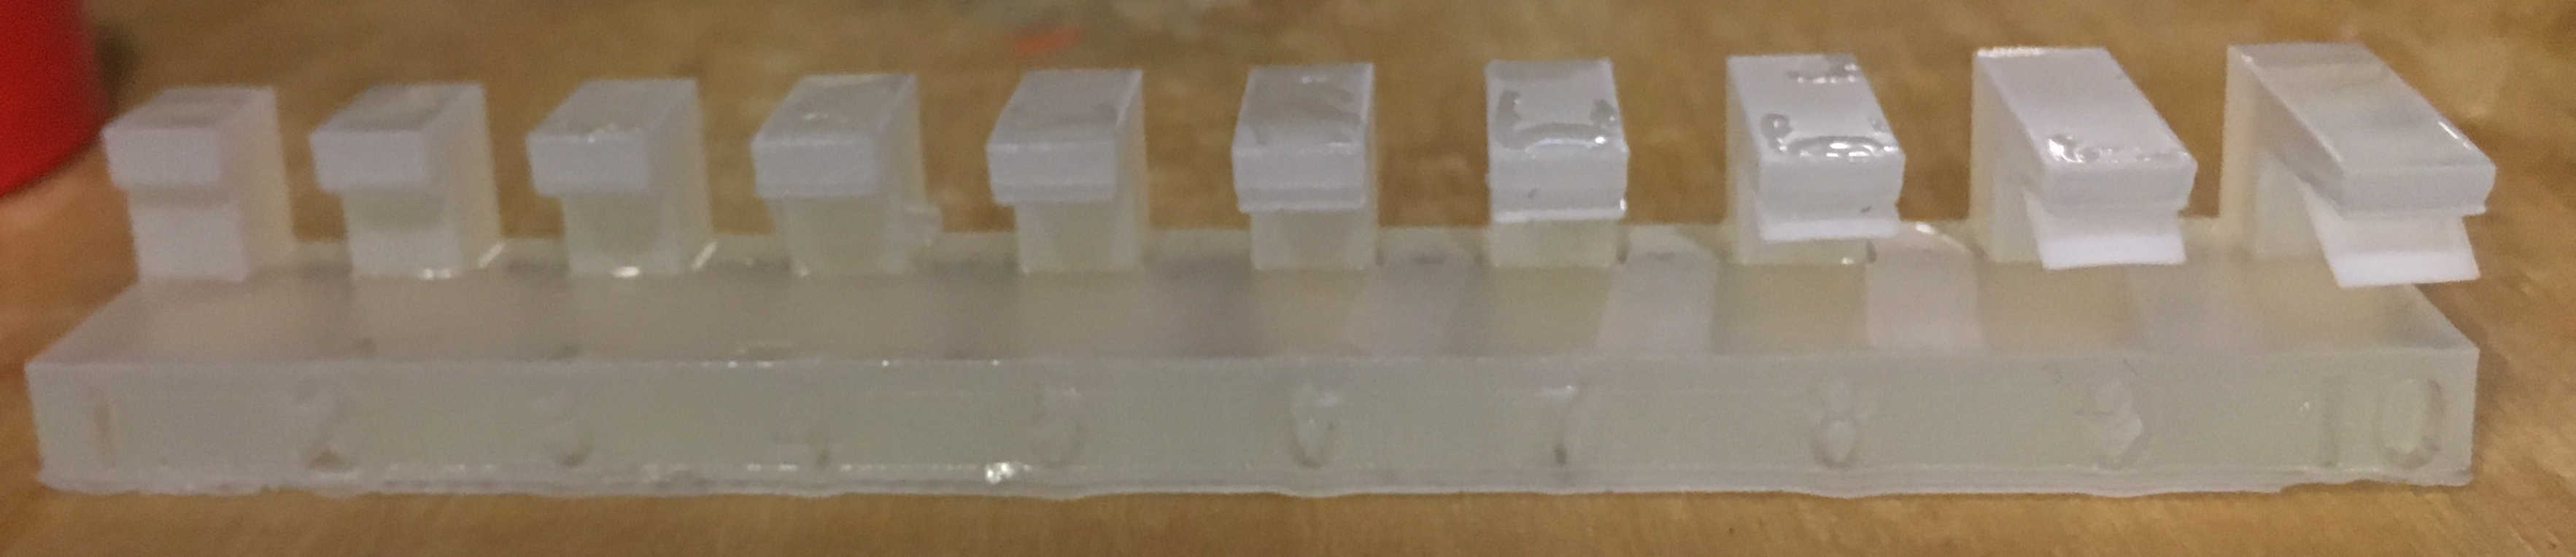
We also found that printing straight out into the void starts to experience notable issues at about 3mm, and at 10mm, is a tangled mess.
this is why we use supports
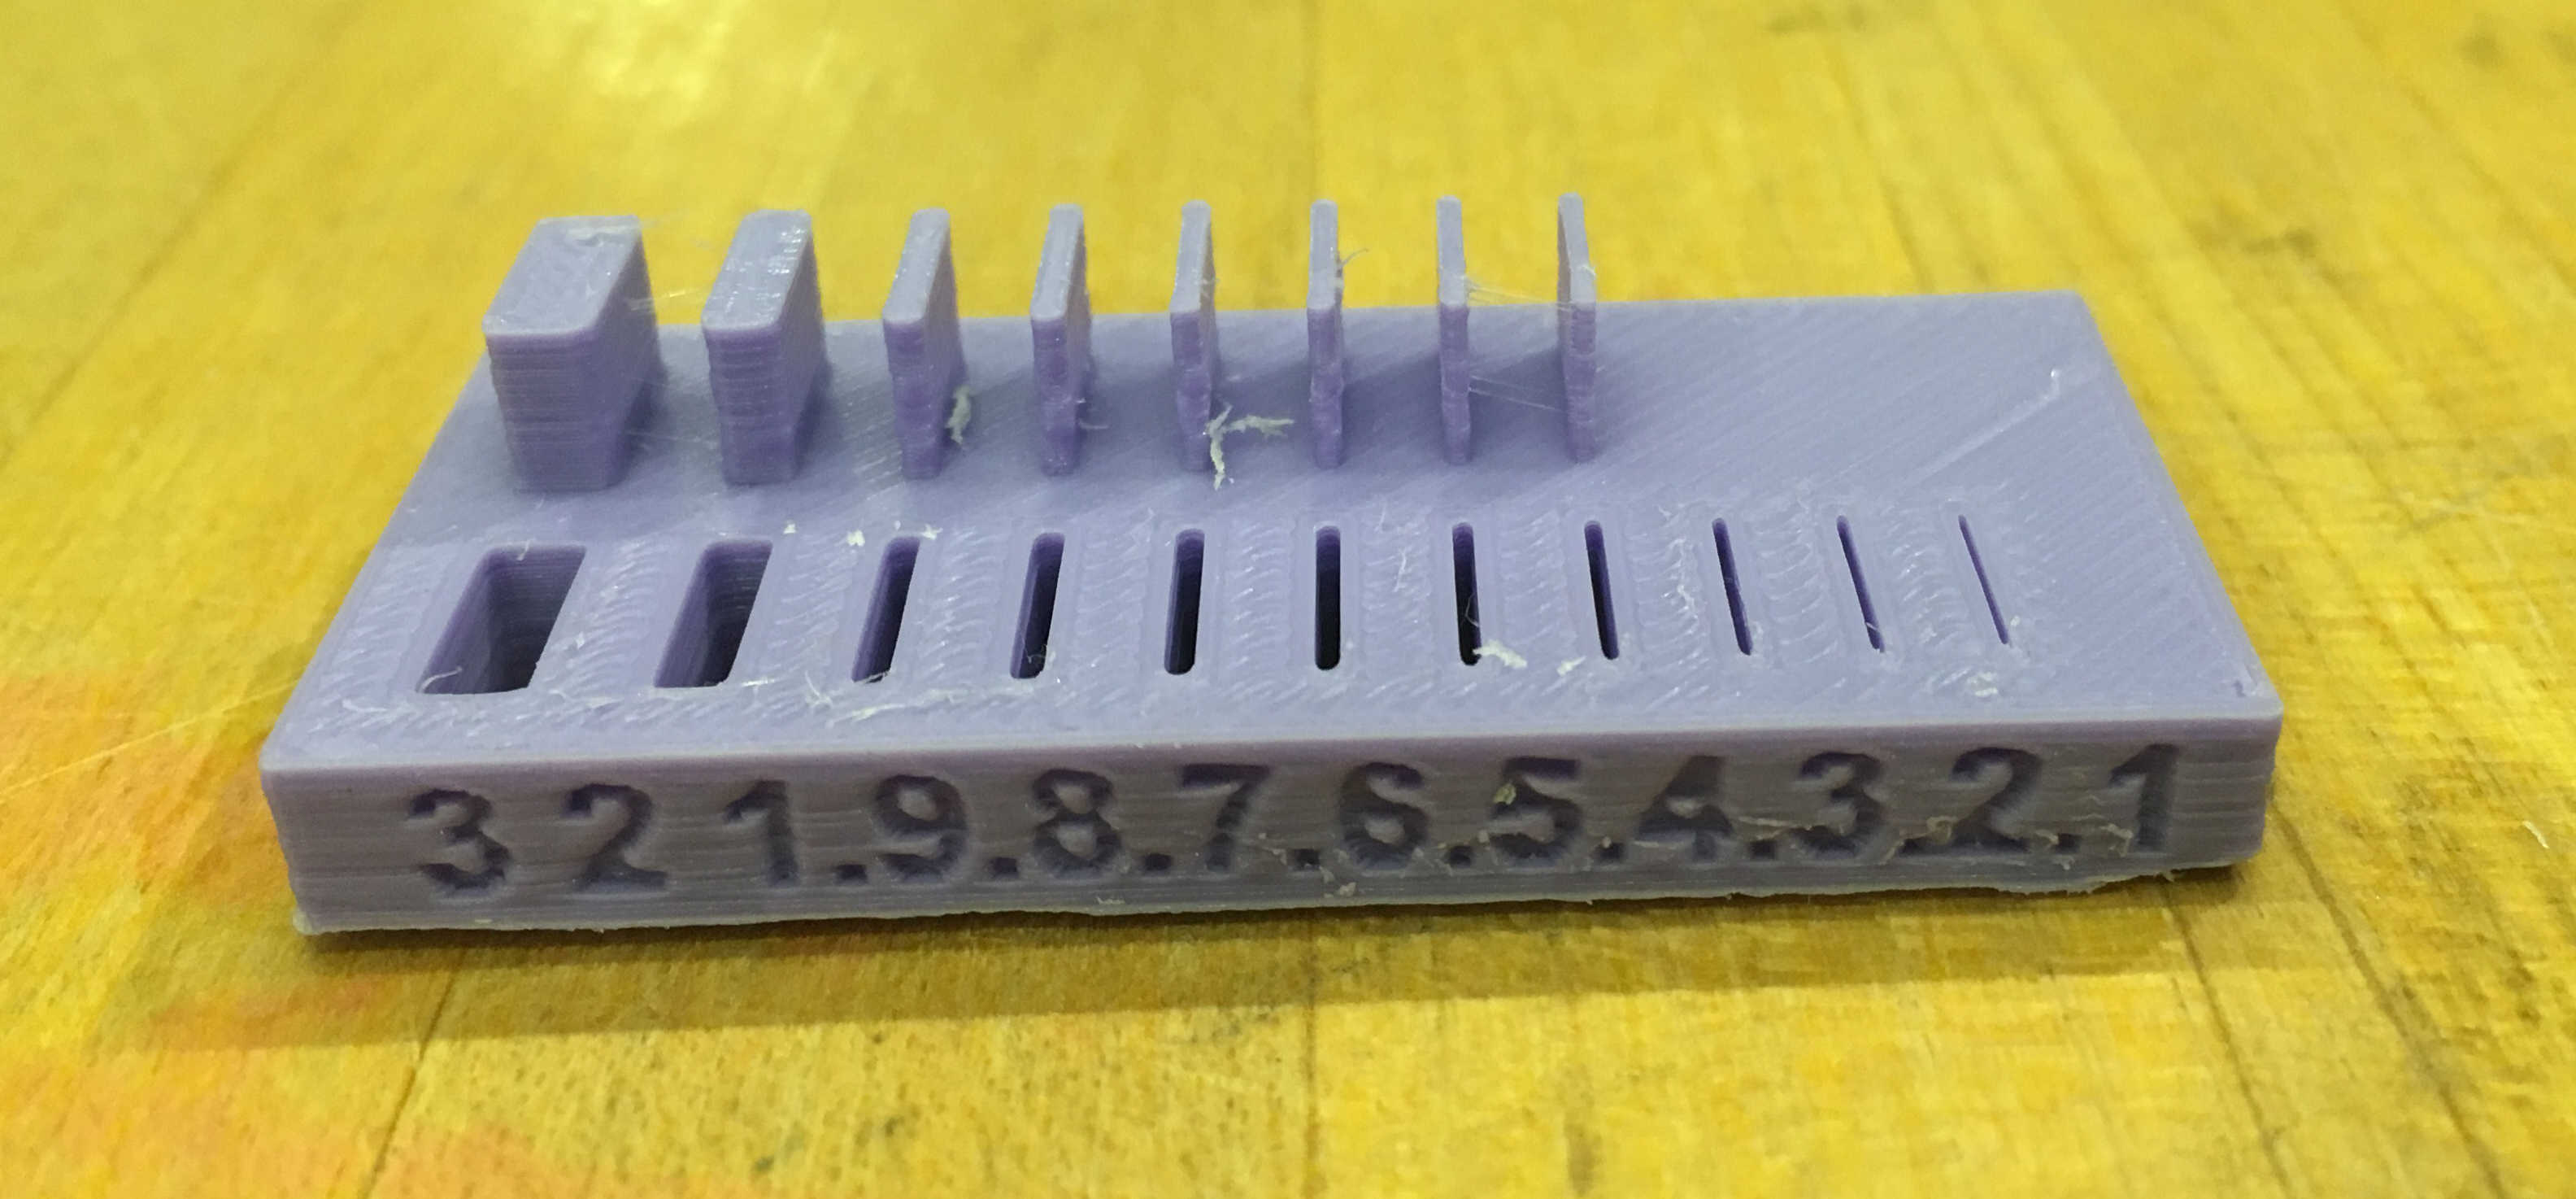
We found that the printer could leave much finer gaps between material than the width of material it could add. This is a lot like the mill, which was able to make traces smaller than the endmill by doing so subtractively.
We then compared these to some other parts which had been printed by the Form 3, which turned out more or less universally perfect.
The first layer does tend to flake when printing out into the void with this one, though.