This week we learned how to network microcontrollers together.
This week, our goal was to have microcontrollers communicate using a network with addresses. I decided to connect my microcontroller LCD board from Week 9 to an ESP-8266 WiFi chip so that I could have the microcontroller retreive messages from a website and then display them on the LCD.
In order to reduce work and increase modularity, I decided to simply make a board with the ESP-12E chip (ESP-8266 with antenna and interface) that I would be able to connect to my board from week 9 in place of the serial connection to the computer. Since my week 9 board received power through the FTDI connector, I would have to provide power another way, but I realized I could use the ISP header to provide power.
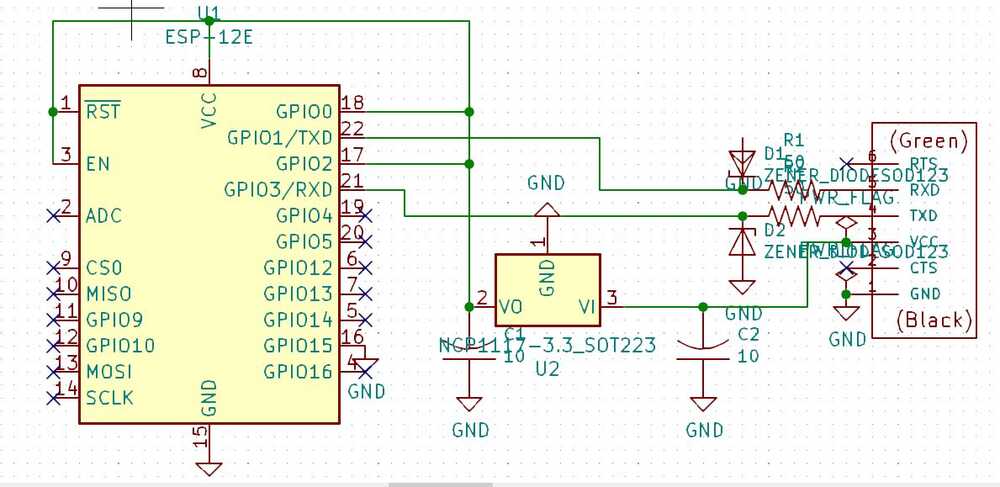
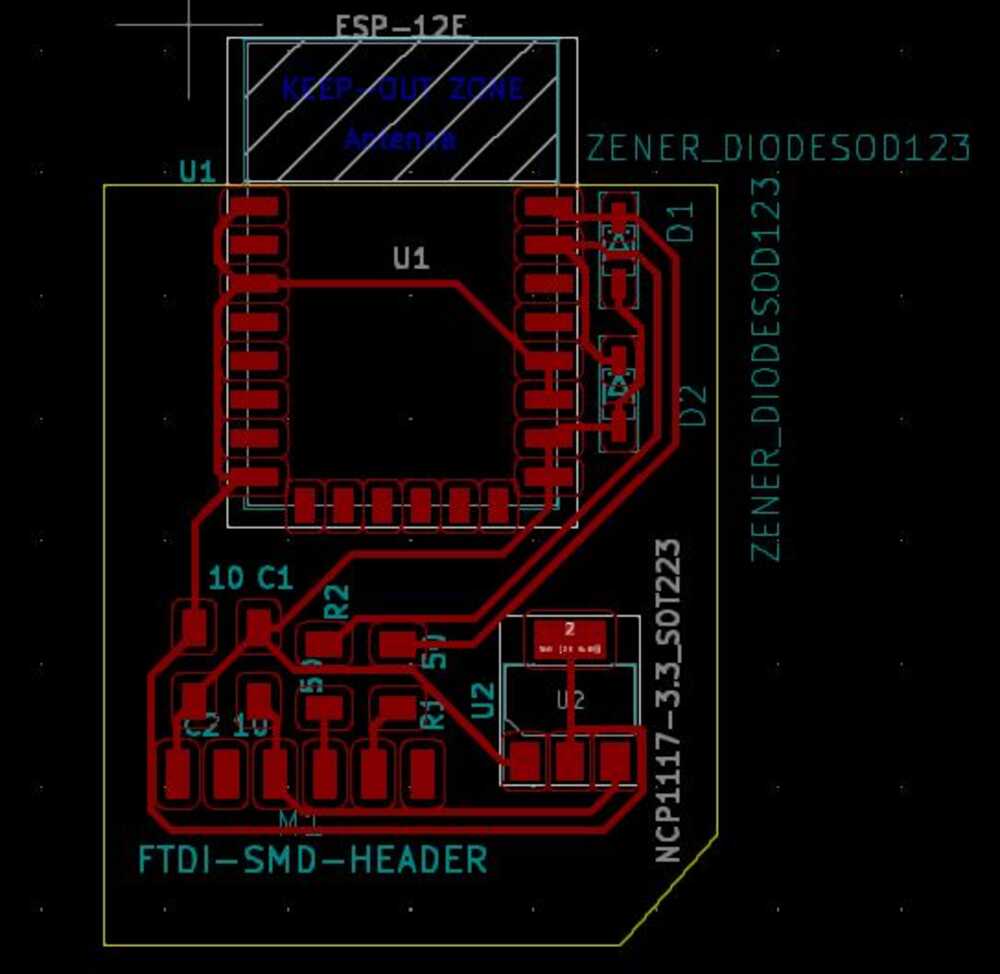
Another difficulty was that the ESP-8266 is a 3.3V chip, while the week 9 board must operate at 5V because of the LCD module requirements. I therefore included a 1A regulator for the main power on the WiFi board and put resistor-Zener-diode voltage limiters on the data lines, as in the FAB-ISP programmer from earlier in the semester. The schematic and PCB layout are shown below:
The fabrication was straightforward with no complications. I had learned a lot from previous weeks, so there is not much to document.
Before I began to program my ATTiny44, I plugged my ESP8266 directly into my FTDI cable to test commands and figure out how to connect to the internet. I started with the basic command set described on Neil's page. The board responded to the simple test commands, so it was time to try to connect to WiFi. On campus, unfortunately, devices have to be registered to connect to Harvard's WiFi, which is not possible for DIY boards, so I set up my laptop as a hotspot. This worked at first, but at a certain point, my laptop started serving 5 GHz WiFi, which the ESP8266 cannot use. I therefore had to figure out how to set my laptop WiFi card to use the 2.4 GHz band preferentially. The steps for this on a Windows 10 machine are as follows:
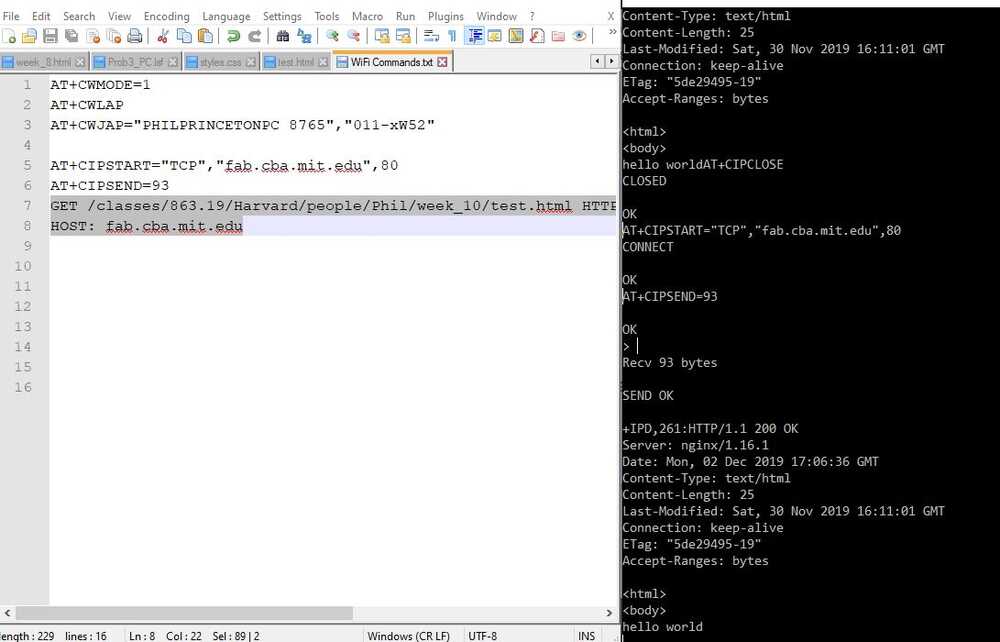
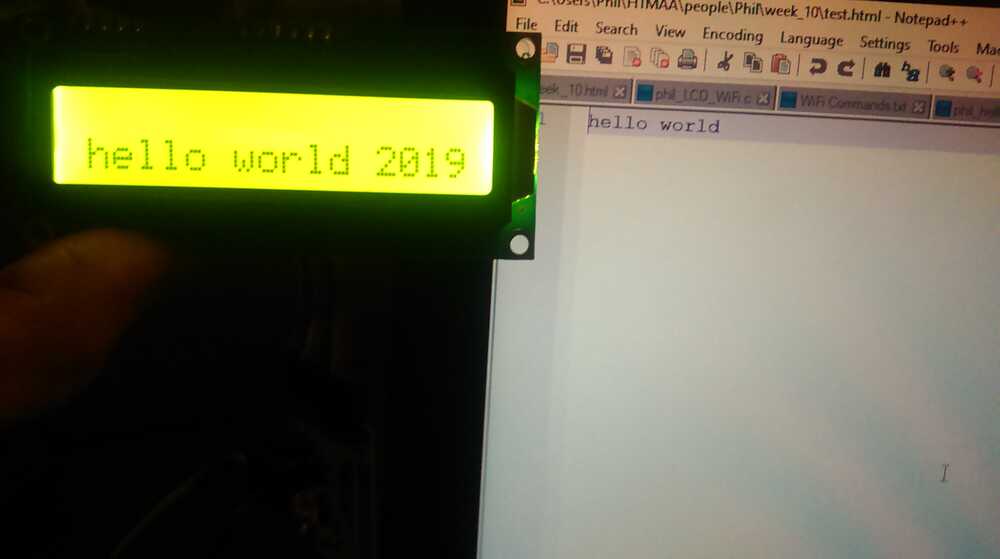
The board was then able to connect to WiFi, so I created a test file that I could upload to the git repository with the simple text of "hello world." Upon trying to access this, however, I ran into problems. Eventually, I figured out that the difficulty was the byte count I was giving as an argument to the CIPSEND command. This byte count needs to be exactly right so that the server reads the correct number of bytes. Once I got this figured out, I was able to use the following commands to access my test webpage.
Using this, I was able to read the contents of my test file (with a lot of metadata).
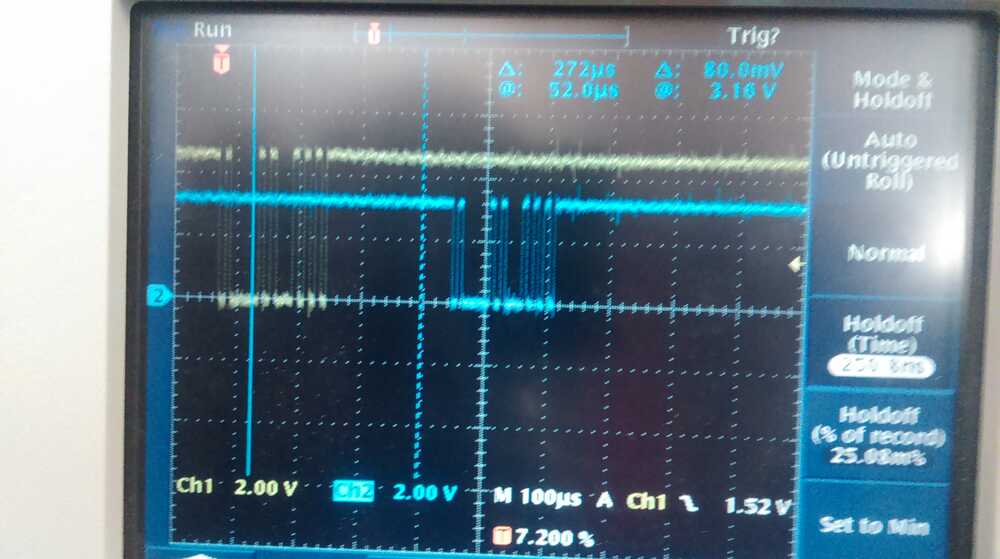
With this milestone passed, I next worked on getting my ATTiny44 to talk to the ESP8266. This was very difficult and held me up for many days. I used an oscilloscope to debug the communication, and saw that the ESP8266 replies to the commands after about 200 microseconds and sends all of its bytes with no extra spacing between individual bytes.
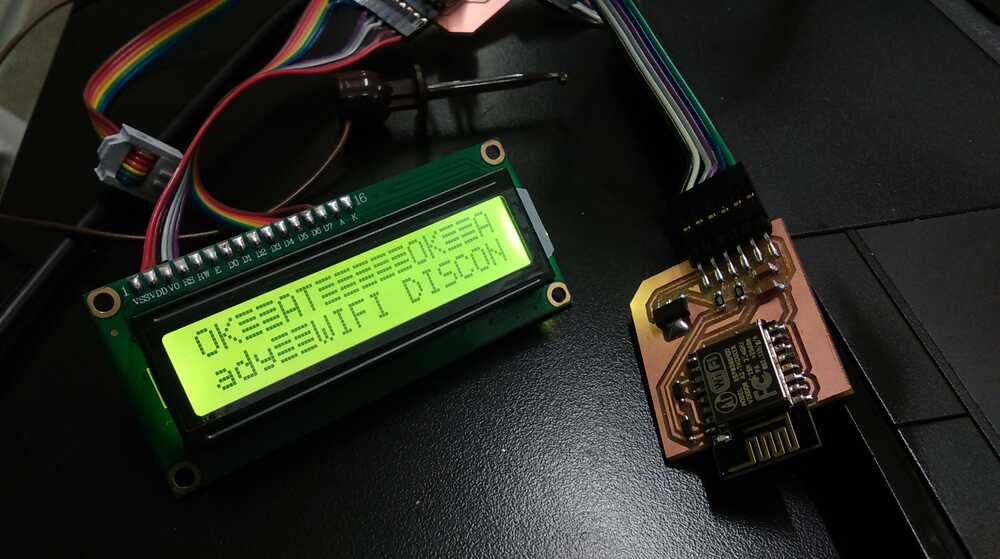
After a while, I figured out that the "bit_delay_time" parameter in Neil's bit-banging code was slightly too large. This didn't cause a problem for the Hello World board, for which input bytes were well-spaced, but for close-packed bytes, the slight error in each byte would add up and cause errors after two bytes. By reducing this bit delay time from 8.5 to 8.2 microseconds, I was able to have my ATTiny correctly send and receive messages to and from the ESP8266. I inserted some basic code to have the ATTiny send the "AT" test command when the button was pressed and then to display the output on the LCD screen.
Finally, I was ready to have the ATTiny send the commands necessary to connect to the internet and read the contents of my test file. I created an array of strings containing the six commands necessary to do this and then had the ATTiny send the next command each time the button was pressed. This allowed me to time the commands correctly to give the ESP8266 time to process the commands.
Because of the length of the command strings, I would have to keep them in Program (flash) memory. In order to do this, I declared each individual string as a constant variable in program memory, using the PROGMEM macro defined in avr/pgmspace.h:
I then declared the commands array as an array of strings in program space using the PGM_P macro:
PGM_P const commands[] PROGMEM = {command_0,command_1,command_2,command_3,command_4,command_5};
Then, I could access the strings as follows:
In order to get a pointer to a given string in the array, use &(commands[command_index]) to get the address of the desired string pointer from the table. This is not the desired pointer, but rather the address in program space at which that pointer is stored. Since address pointers are 16 bits (two bytes or one word), we use pointer = pgm_read_word(&(commands[command_index])) to read the pointer value from the correct location. Given that pointer, we can then use pgm_read_byte(&(pointer[char_index])) to read a character from the string stored at that pointer location in program memory. Using these commands, I was able to store and retrieve my desired strings from program memory.
The end result is a board that sends the next command every time I press the button. If I time my button presses correctly, it will connect to the internet and retrieve my test page. At this point, I do not have any string processing to separate my message from the metadata, so sometimes only metadata fits on the LCD, but I plan to work on that for interfaces and application programming week.