Review the safety data sheets for each of your molding and casting materials, then make and compare test casts with each of them [GROUP]
Design a mold around the stock and tooling that you'll be using,
mill it (rough cut + (at least) three-axis finish cut),
and use it to cast parts [INDIVIDUALLY]
My main motivation for this week was to improve my modeling skills and attempt something more ambitious.
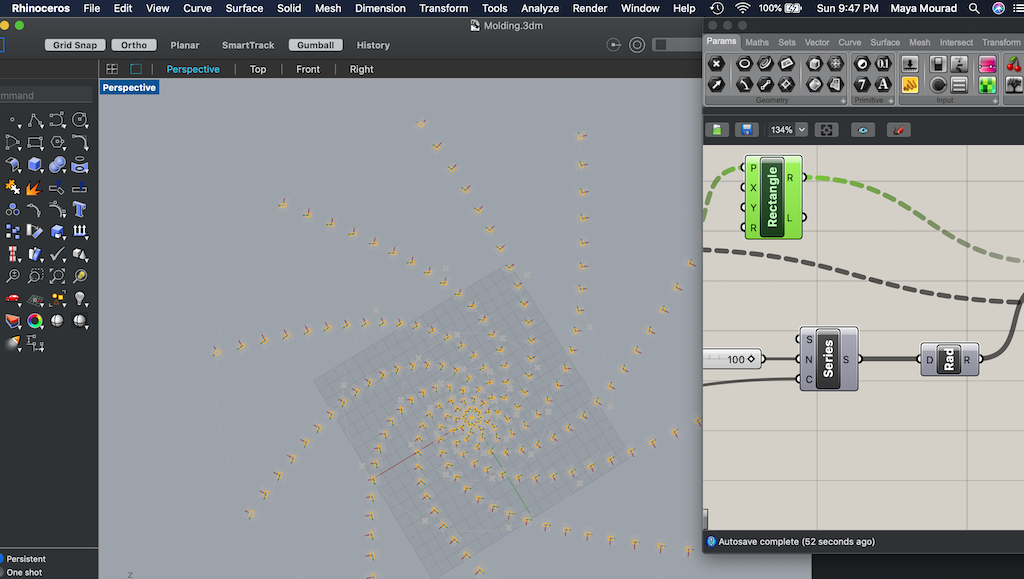
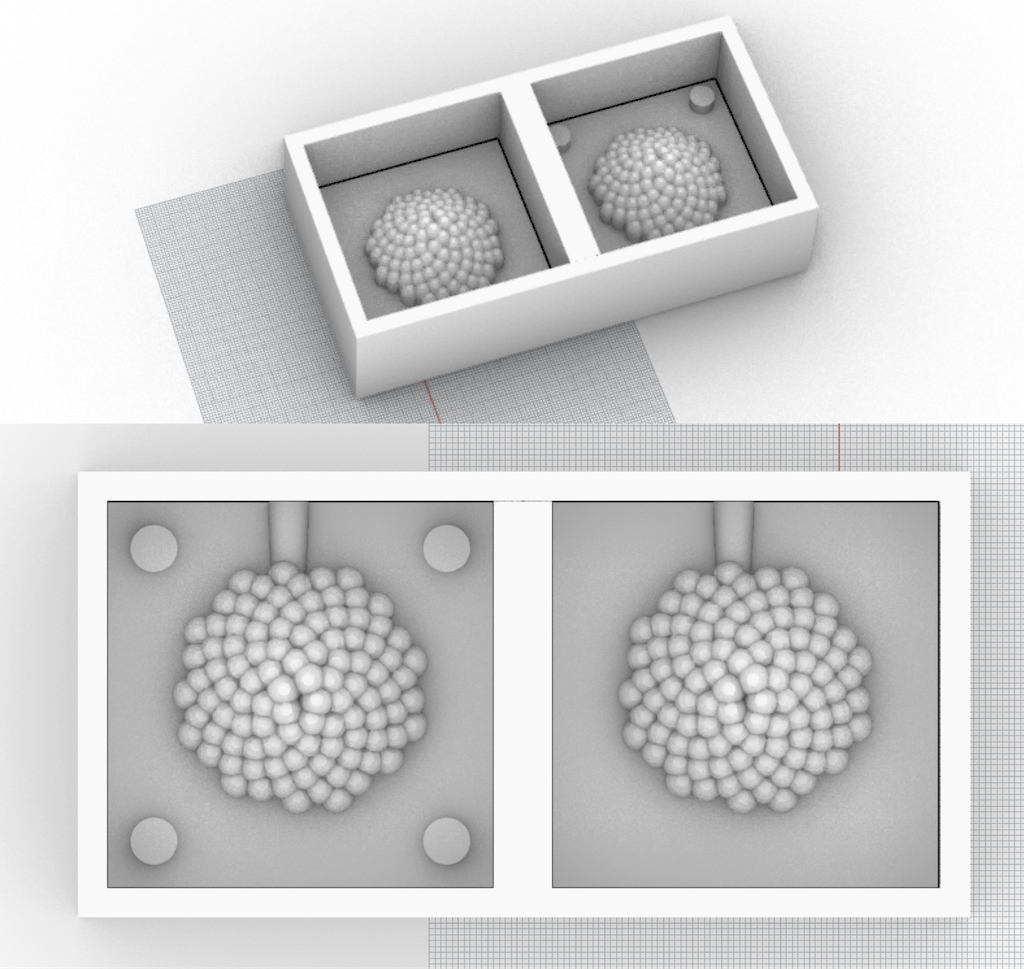
I was inspired by previous Fab Acadmy assignments using fibonacci curves, and decided to explore this week how to create generatove design using Grasshopper.
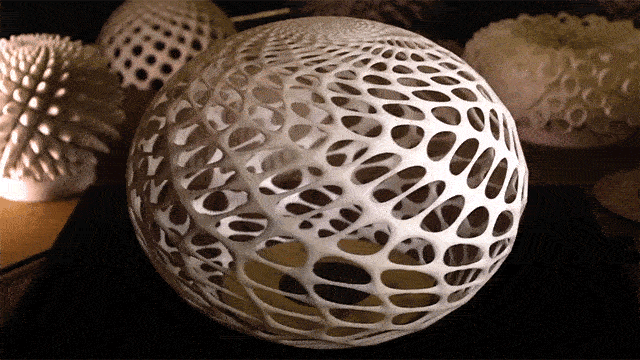
I discovered John Edmark's work creating which creates an optical illusion when spinned at the right RPM. I became curious if I could replicate this at a smaller scale.
I had never used Grasshopper before and tried using my hand at it by following a couple of tutorials.
There is definetely an experience curve to follow to get comfortable using Grasshopper and it might have been ambitious to learn in within a week.
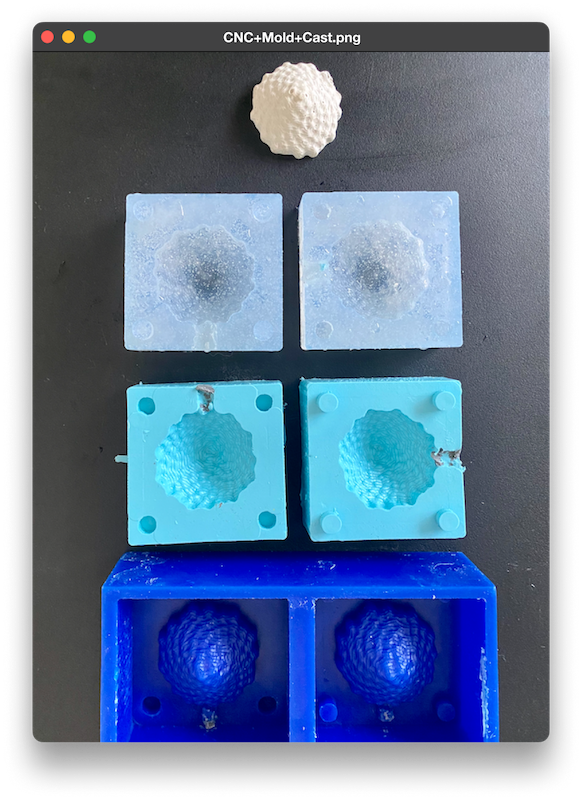
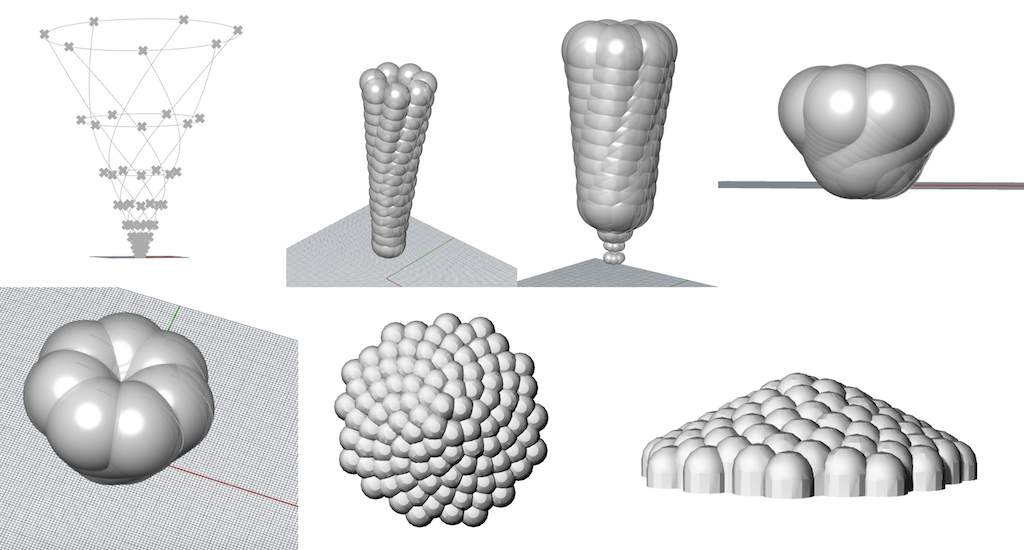
I used the Fibonacci function to place spheres along a Fibonacci curves. I tried several iterations before settling on flater rendering given the dimension restriction of the wax block (6' * 3' * 1.5').
I divided the wax block into 2 identitcal compartments.
I added a four fingers to each to ensure hold, as well as an opening to pour the casting material.
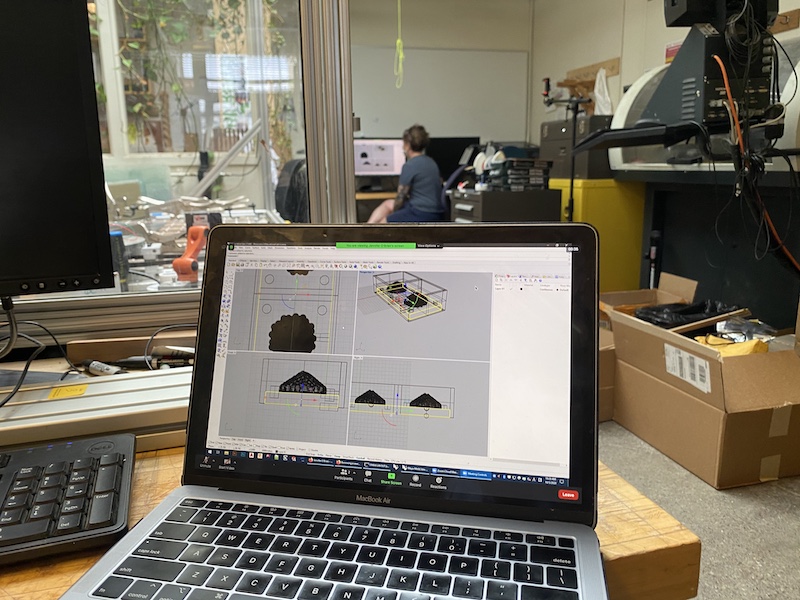
Jen was super helpful in helping set up the CAM.
One mistake I made (which we only realized later on), is that the main structure was created with in a very high resolution mesh.
This ended up creating over ~16,000 polygons. The CAM software had a huge lag.
We had to start over by using a simpler rendering of the design; the lag was still there but significantly decreased.
Key takeaway here is to keep the design simple when for CNC.
We have 7 toolpaths to define the walls & the structures using 3 different end types (1/4'', 1/8'' flat and 1/8'' round).
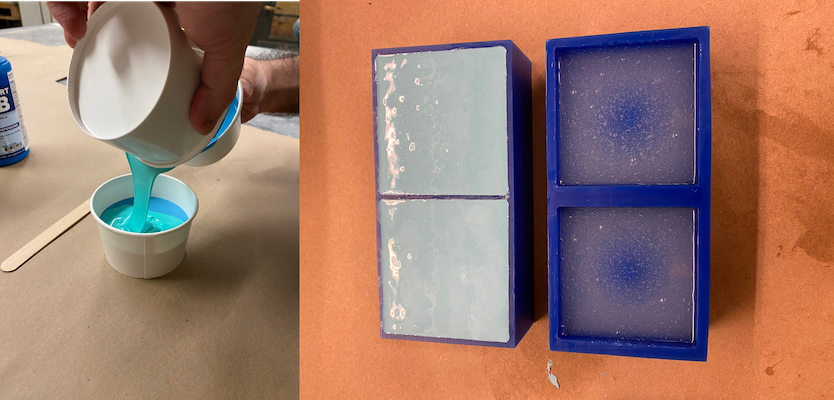
I used the ShopBot to mill the wax block. Given that we were using this machine, we had to manually change the drill bits.
Post CNC, I realized there was small error in the CAM where the pocket to pour then casting material got cut off. I filled with some clay for casting.
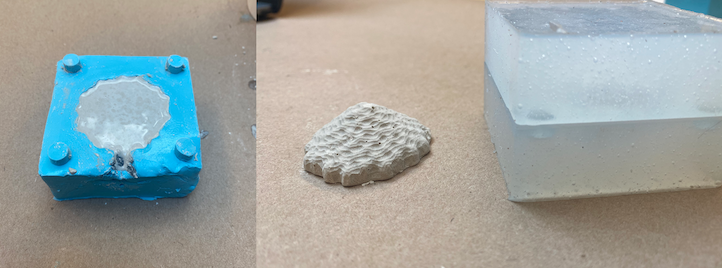
unfortunately, a smaller bit is required to get a better level of detail. I stopped here because it already took the full day to set up the CAM and CNC.
I wanted to cast the mold with clear casting material. I eneded getting some Epoxy (still waiting for it to arrive).
In the meantime, I cast hydrostone. It didn't turn out too well, there were some bubbles and crumbling on the sides.