Computer-Aided Design
To begin the class, we learned all about using CAD programs to help in our design process. Our task was to sketch and model a potential final project for the class. Before any pencil touched paper or any clicks were made on the screen, I needed to come up with an idea.
Thinking about all of the various skills I am to learn this semester, one of the most intriguing is making our own electronics and IoT connected devices. I wanted to do something that focused on interacting with someone that was in a different house than you, even if they were across the country (or even the world). This was inspired by both the COVID-19 pandemic, as well as a previous class I took in interaction design. I came up with quite a few ideas, but only two stuck out. One was a smart chess board, enabling me to physically play a game of chess with someone else, but after seeing that it has been done before, I went with something a bit more unique and personal.
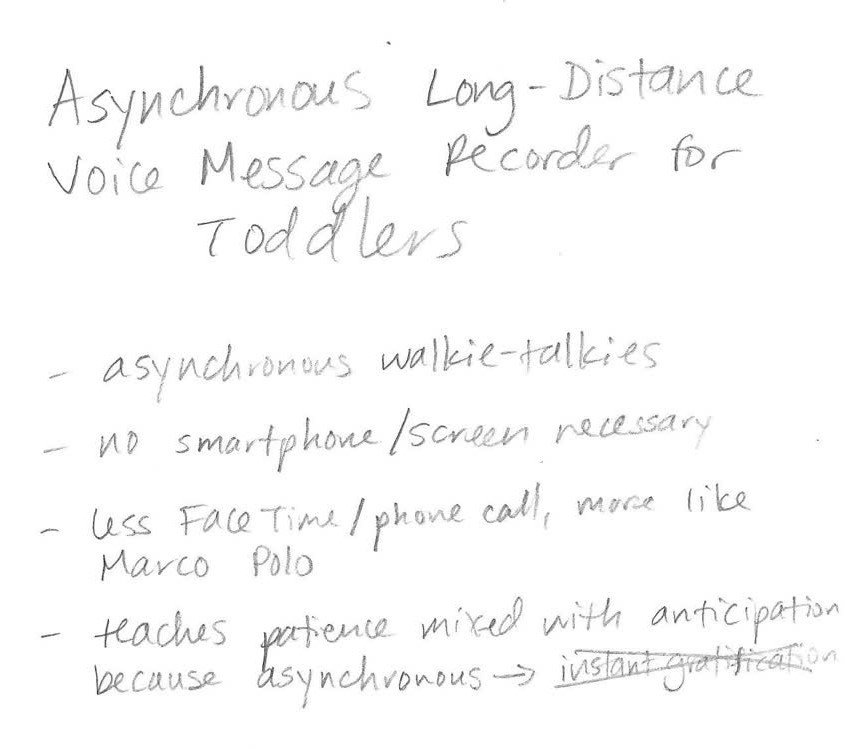
My idea is to make an asynchronous message recording and playback device designed to be used by my two-and-a-half-year-old daughter. It's basically like a long-distance walkie-talkie, but messages can be recorded and played back at the user's convenience. My daughter gets to talk to my family (her grandparents, aunts, and uncle) often on the phone or over voice chats, but they're not always available, and the last thing I need is a toddler demanding their own cell phone... There is an app that my wife uses (Marco Polo) to record asynchronous (and also sort of synchronous) video messages, but again, that requires a smartphone. I want to make something that is simple to operate and that doesn't have a screen. I think the asynchronous portion will also teach my daughter patience in that she won't get a response immediately, but can be excited throughout the day to periodically get a new message from someone (this also abides by the practical real-time communication limitations of such a device). So, with that idea in mind, let's sketch it out!
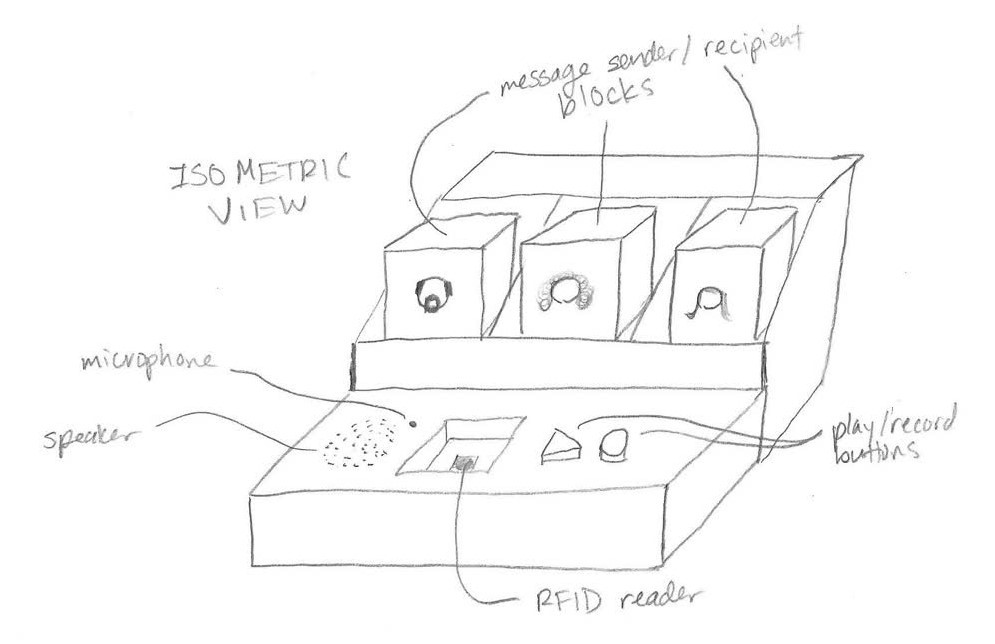
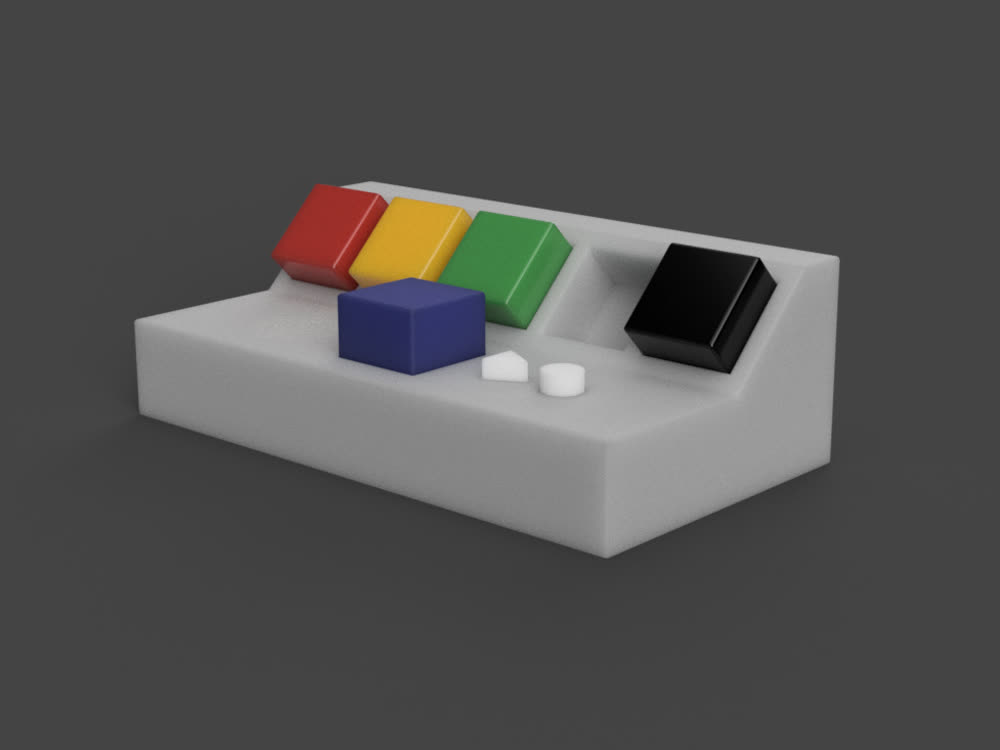
The aesthetic greatly resembles small children's toys with the block and slot design. I plan to have one block for every person she can send messages to, with an icon of their face on it. These blocks will have some sort of identifier embedded in them, such as an RFID tag, to allow them to be identified by the system. The blocks can be moved one at a time from their resting slot to the RFID reader slot, then a play or record button is pressed to play the message through the speaker, or record a message through the microphone, respectively.
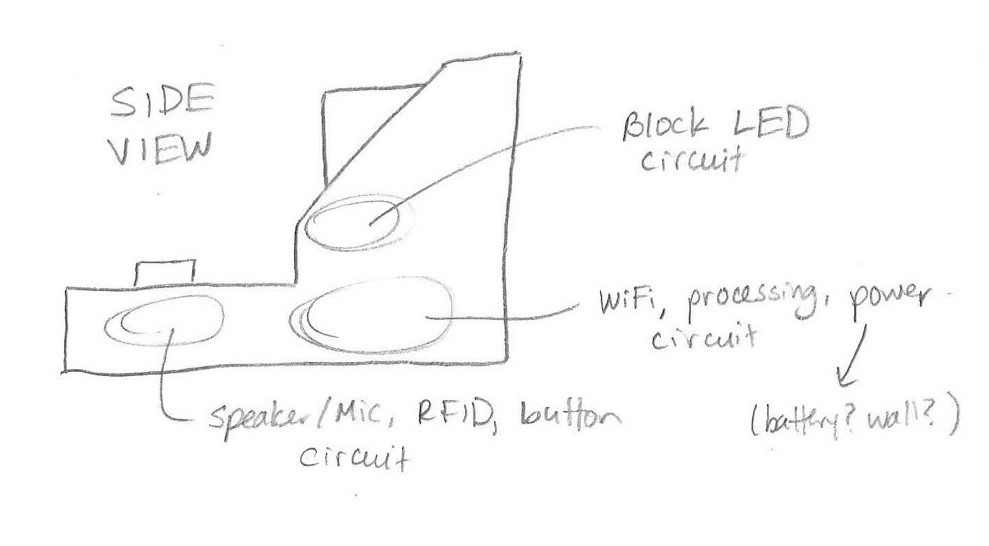
Looking from the side, you can see where I plan to embed the circuits to control the speaker, microphone, RFID reader, and buttons, the LEDs for the blocks, and the main brains of the system including the WiFi connnector, power, and processor. I will be sure to leave enough room for all of these components.
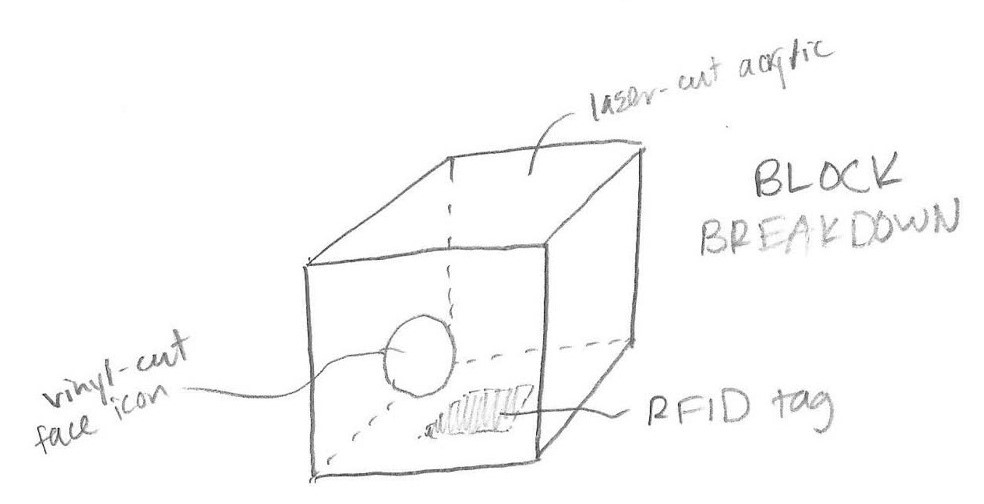
I'm thinking about making the blocks out of a white acrylic, excpet maybe making the bottom clear because 1) the LEDs will shine through better and 2) it would look awesome to see inside! The bottom will have an RFID tag embedded to it, and with my wife's artistic help, I'll vinyl cut a simplified icon of each family member's face to stick to the face of the block.
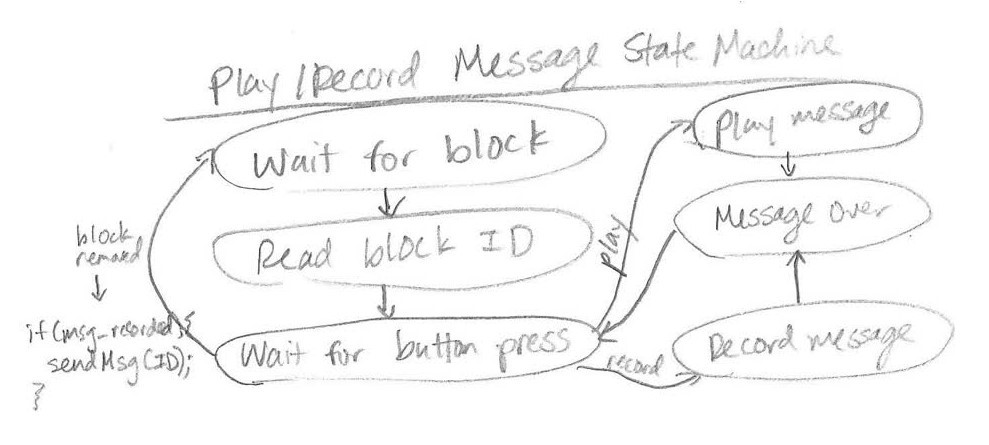
I know that I'll need some state machines driving the code for the system, so here is a first pass at figuring out how the system will work. The play/record system won't do anything until a block is placed in the reader (perhaps I'll have a contact switch in there to tell the system when to query the RFID tag). Once a block is placed, it will read the ID, then wait for either the play or record button to be pressed. If the play button is pressed, the latest message recorded by the person whose block is inserted will be played. If the record button is pressed, the microphone will turn on and record until either the button is let go or pressed a second time. Once the message is over, it will await another button press, or for the block to be removed. The newest recording will overwrite any existing messages. Once the block is removed, it waits for a block to be placed again. Any recorded message will then be processed and sent over the internet to the other device.
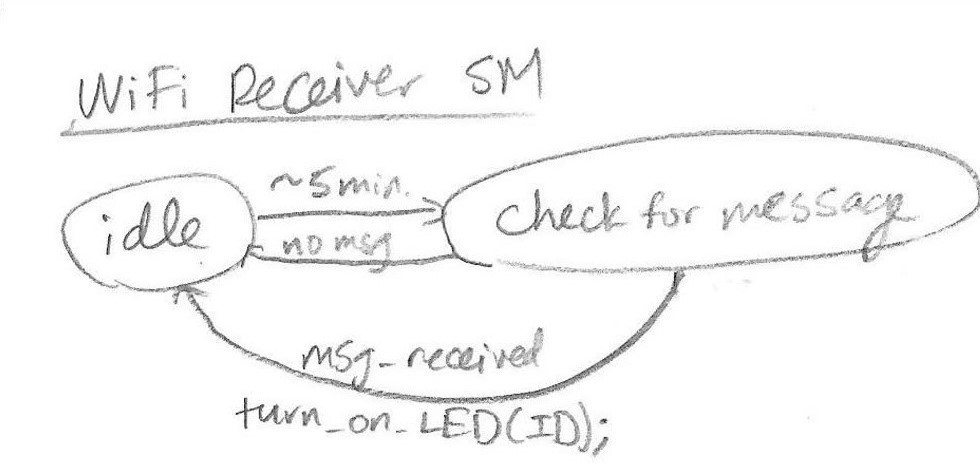
On top of sending messages once they've been recorded, the system needs to check for messages coming in from the other device. I don't want the device to use too much power and be constantly checking for new messages, so I'll have it check for messages every 5-10 minutes or so, depending on where that sweetspot is. If a new message that hasn't been played back yet is received, it will activate the LED in that block's slot to signify a new unopened message.
So, there's still a lot to flesh out with this project, but these are the basic ideas of what I want to make, and I have a pretty good idea of what materials/skills will be required to make it. The physical box and blocks will probably be made using laser-cut acrylic. I would like to make some soft silicone buttons using a 3D-printed model that I'll mold and cast. The smarts and the guts of the device will be made with various custom PCBs and electronics. Finally, I'll decorate it all with some nice vinyl-cut decals and I might even engrave something into the device. With all that in mind, it was time to design it with some CAD software!
I'll be using Fusion 360 to model my project because I have the most experience with it out of all CAD programs, and it's very well documented online, so if there's ever anything I can't figure out, I can look it up pretty easily. Alfonso's recitation was very helpful in giving some more concrete examples on how to use parametric design to my advantage.

I played around a lot with different sizes and dimensions of the various parameters, but finally decided on some nice values, then used this little cheatsheet to help me fill out the design properly.
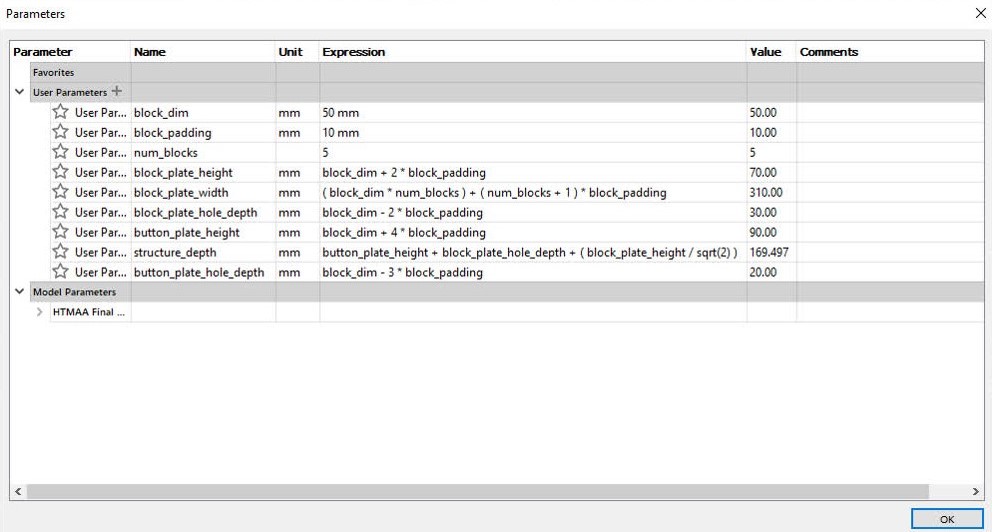
I spiraled quite a bit in developing these parameters because I wouldn't know that I needed a certain value or relationship saved, but it was still extremely easy and beneficial to keep updating as I went.


With all the math figured out, I made the side and extruded it.
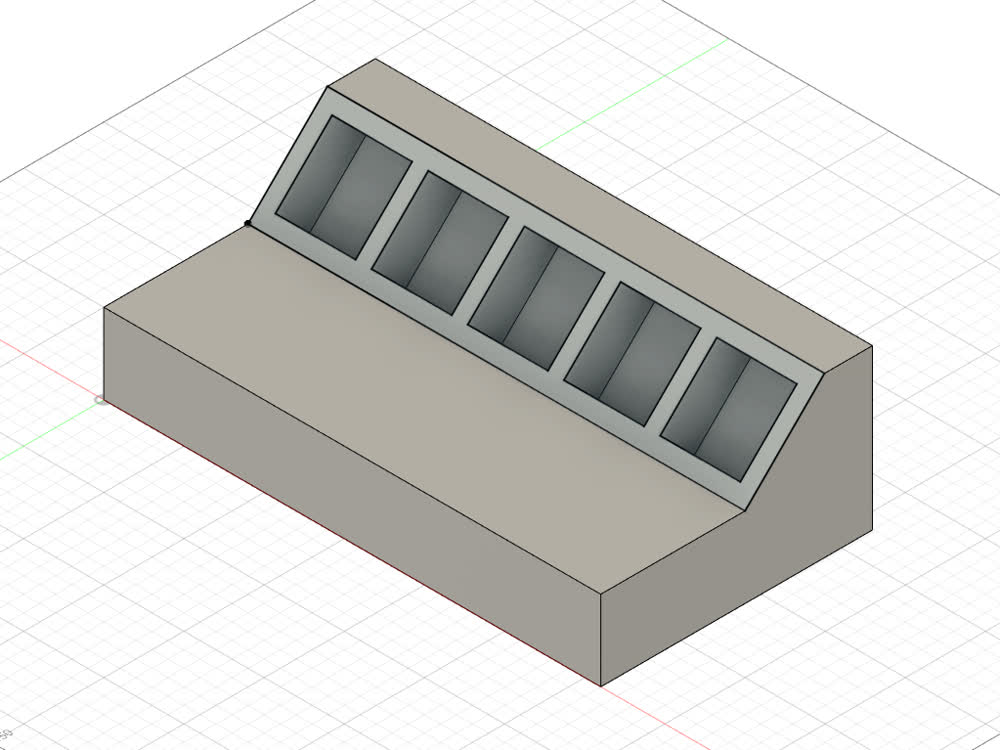
Then I cut in the slots for the blocks, making sure they would still be exposed slightly and easy to grab.
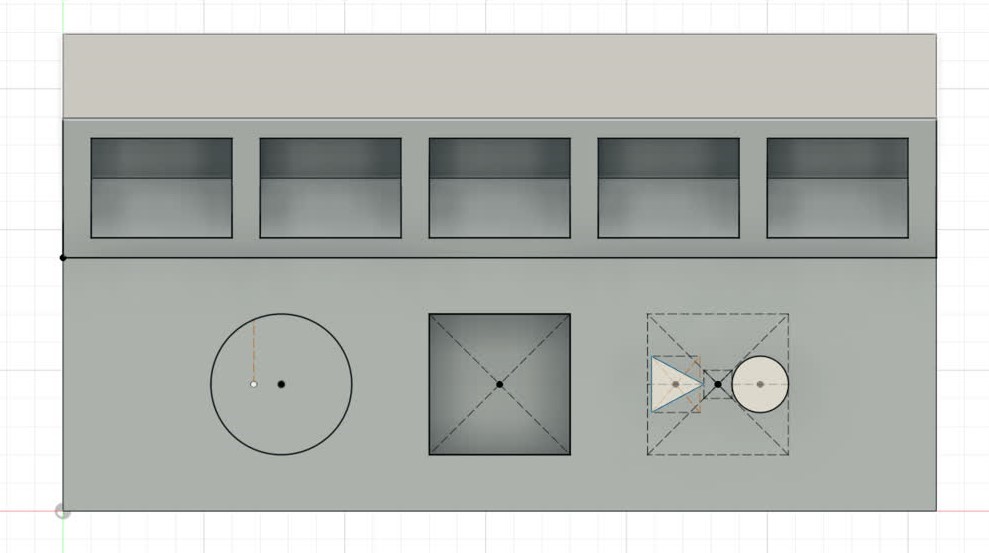
The reader cut-out was pretty straight-forward, then I added the two buttons as separate bodies. The circle on the left is a place-saver for the speaker hole-mesh I'll add in a moment.
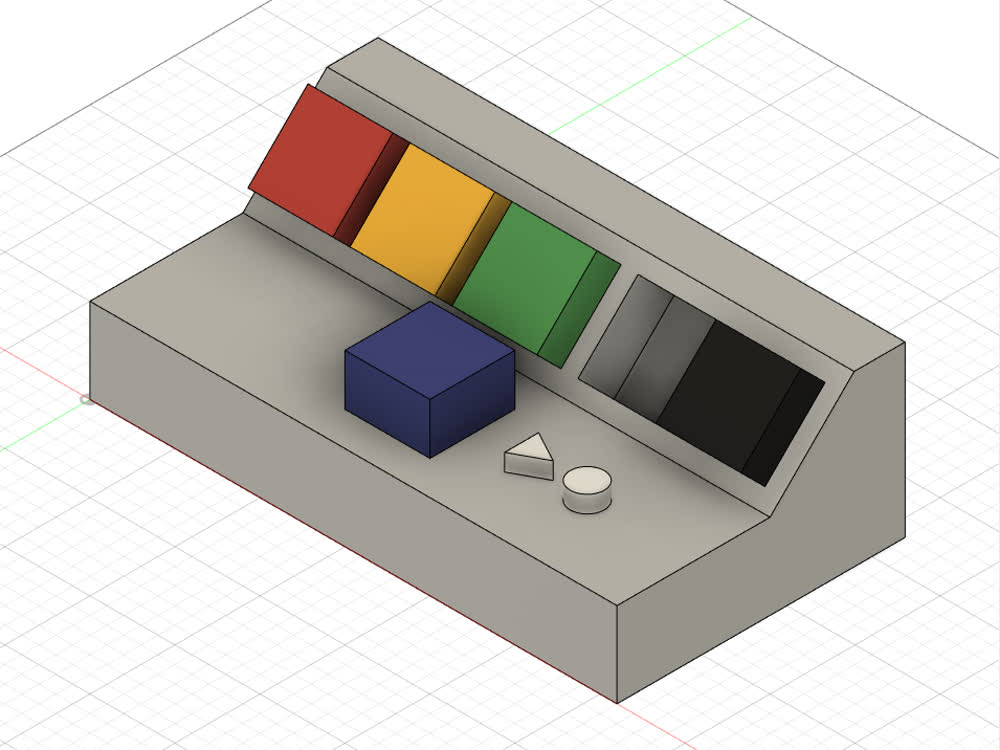
There will obviously be some changes that need to be made due to tolerances, but the blocks will rest in either their slots or in the reader.
I had some fun figuring out the math/design behind hole meshes for speakers. Rectangular and circular pattern tools saved the day! For future reference, starting at the center, each the number of holes (H) per ring (r) has the following relationship: H = 6(r-1) (very middle hole represents r = 1).
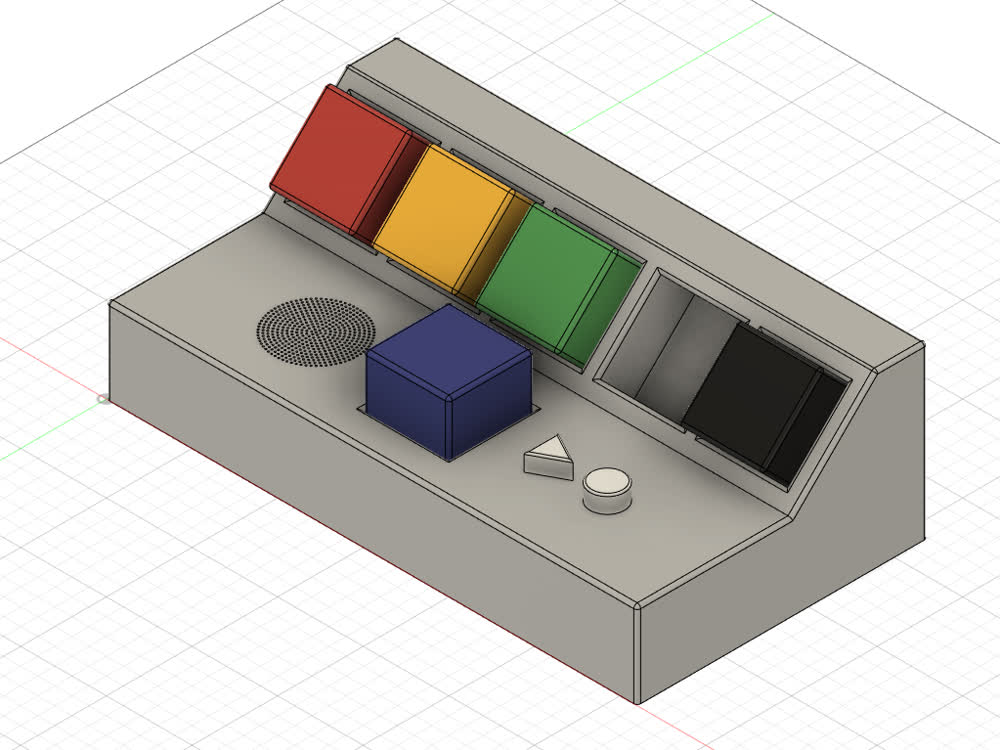
Finally, I filleted all the edges to give the whole thing a softer look, and now the initial design is finished! Rendering time!
Here's a quick attempt at animating the system in use.
And there you have it! I can't wait to actually get to making this thing!
Here are the files I generated for this week:
- final_project.f3d - Final Project Model Fusion 360 File
- final_project.step - Final Project Model STEP File