Computer-Controlled Cutting
Project Management
This week, we started off by learning how to do our own project management, as well as develop our own personal websites and properly version control the overall class website so that we can all show off the work we did throughout the week. Luckily, I have had some experience with HTML and Git through building my own personal portfolio website, as well as heavily using Git and GitLab as a CBA student. I still have a lot to learn about making more beautiful and interactive web pages, but the current simple and clean look of my site works for me for now. If anyone is curious, I have done this whole process on my Windows laptop using Ubuntu (downloaded straight from the Microsoft Store) for all things Git and quickly creating, copying, and moving files. I also use Atom to write my HTML, and when in doubt, I use good old Windows File Explorer to make sure all my stuff is in the right place. There are fantastic tutorials out there to get you started with the basics of Unix (Ubuntu/Linux) and HTML, so have a look at that if you'd like.
Vinyl Cutting
With all of that down, we learned about various tools that you can use to cut almost anything controlled by a computer. I've used a laser cutter on a couple of occasions before, as well as a wire-EDM for research, but I was excited to try it out again! We learned about vinyl cutters, laser cutters, water-jet cutters, plasma cutters, etc. We'll be using the viynl cutter and the laser cutter for this class. First, let's talk about the vinyl cutter.
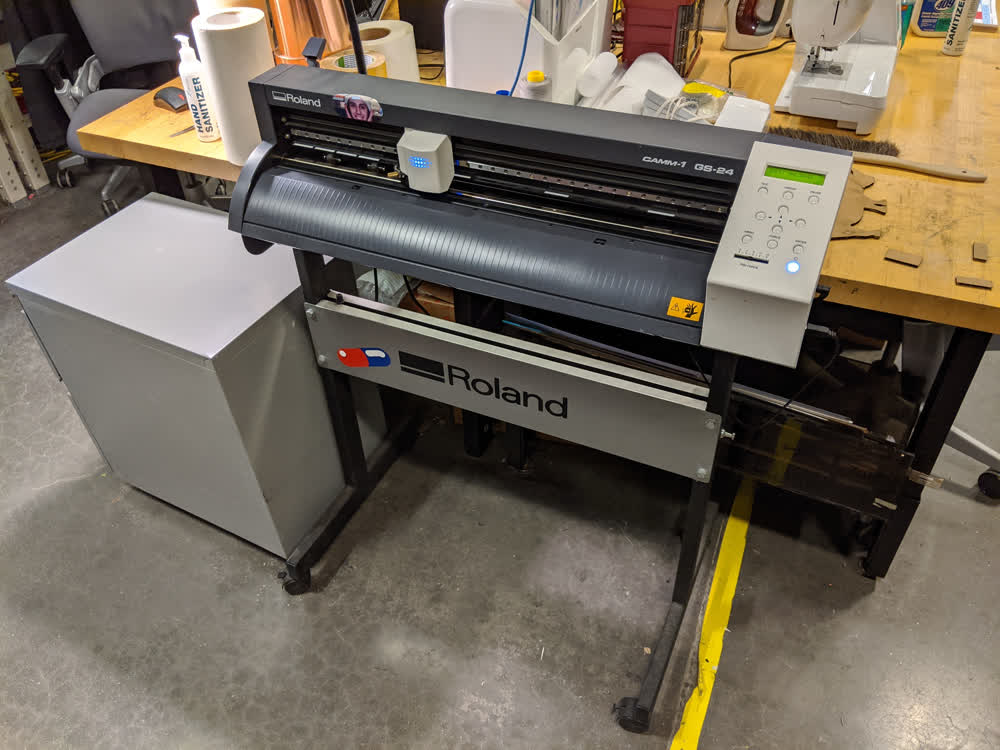
Meet our friend, Roland. The vinyl cutter can be used to cut all sorts of paper-thin stock, but it's heavily used to cut vinyl for signs and decals and that sort of thing. However, one intriguing application is by cutting thin cooper film sheets in order to make flexible circuits. It has even been said that we could do all of the electronics portion of this class using the vinyl cutter. I'm definitely going to have to check that out when we get to that point. Also, now that I think about it, I guess I do have a bit of experience with a much less robust, yet consumer friendly vinyl cutter-type machine: my grandma's Cricut. Hmm... I bet I could learn to hack that and make some cool stuff... That will have to wait for another day!
This is my water bottle. It helps me stay hydrated. I like to decorate it with stickers that represent stuff that I like. It's kind of a new found hobby, so it's still fairly bare. Good thing one assignment this week is to cut something on the vinyl cutter!
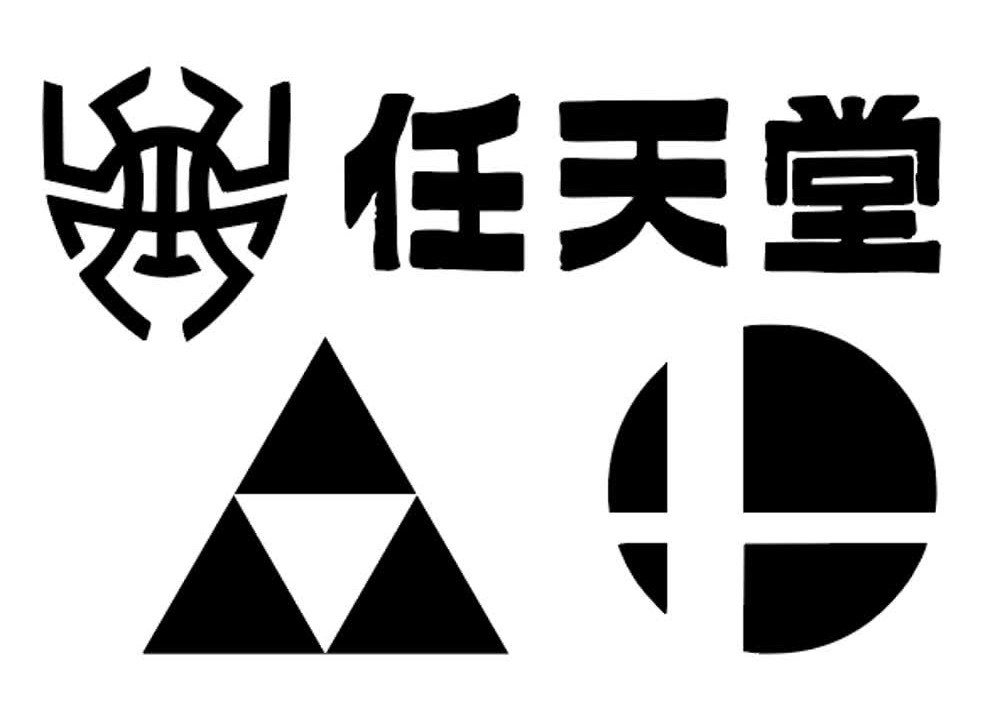
Here are the new stickers/decals that I decided to make for my water bottle. Most of the images were pretty able to extract and make vector formats of them. I got all of the images through simple Google searches, then I used a combination of Inkscape and Adobe Illustrator to trace the vector paths and create an .SVG file.
Tom gave an excellent training teaching us how to use the vinyl cutter and how to get the images to work properly in CorelDraw so that would cut well. I think the coolest tidbit he shared with us, though, was how the knife is fastened into the holding mechanism for the cutter. Essentially, the knife is a 45 degree angled blade at the end of a cylinder, which is held in place magnetically. This makes it so that when the knife is pressed to the material, it can swivel around to cut better according to the direction it is being dragged! Super cool! Anyway, after being trained and having my images ready, it was time to cut them out!
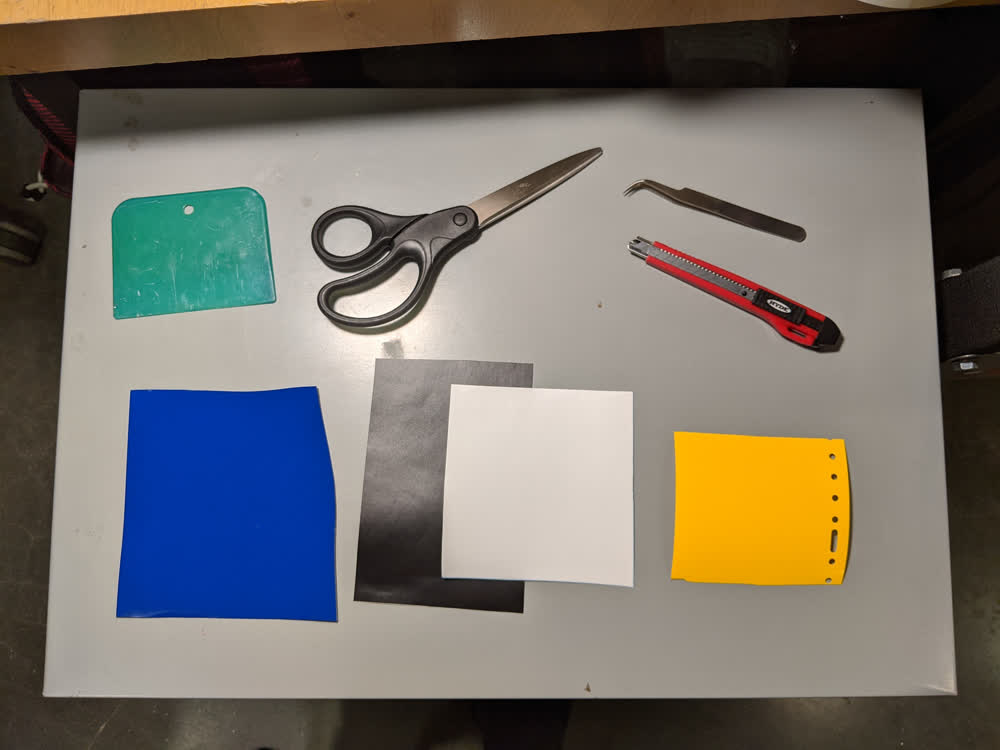
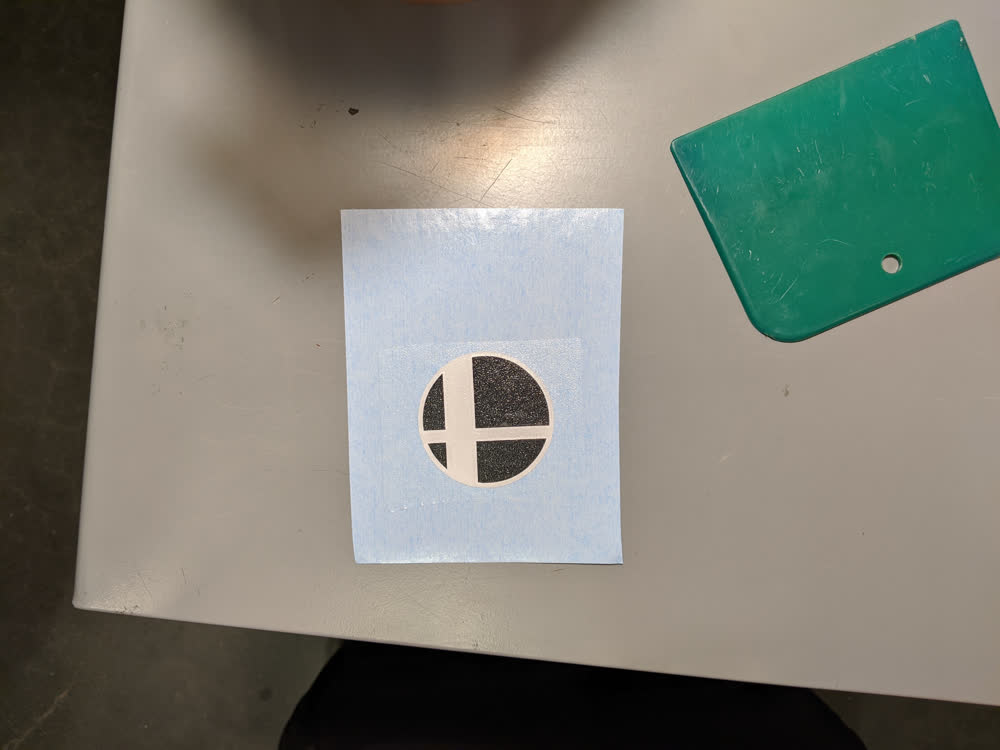
With all of my materials and tools prepared, I was ready to go. I cannot even begin to describe how satisfying vinyl cutting can be (when it works out well, of course). The feeling of everything peeling off so smoothly is amazing. I'm sure it would be less enjoyable if I did finer features and a lot more of it, but I had a good time.
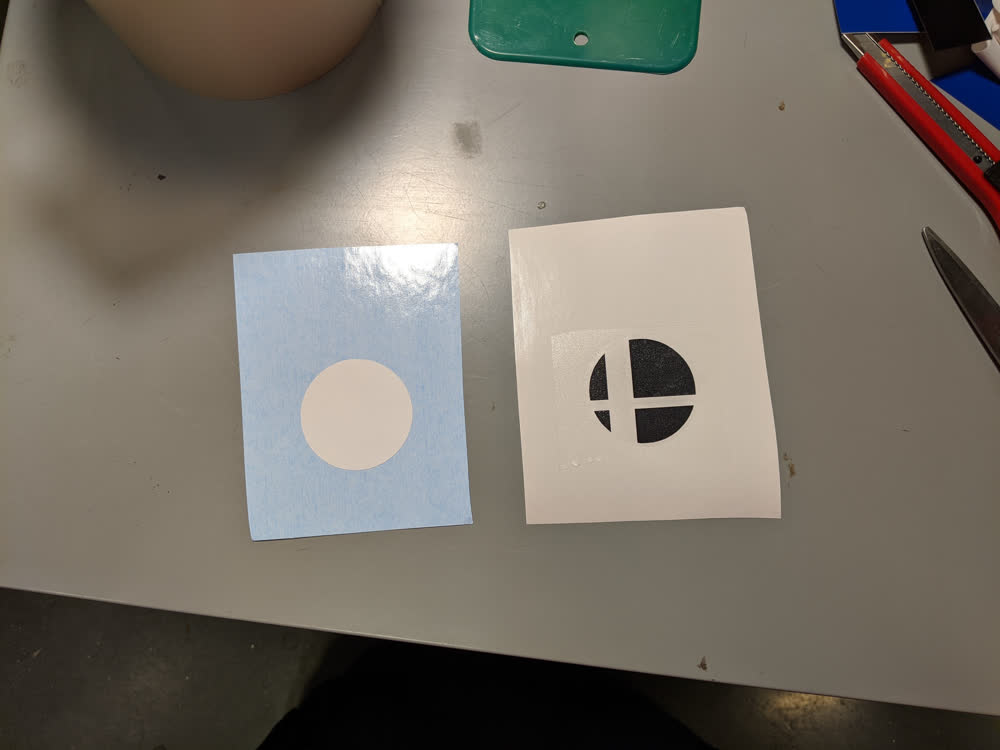
For one of my designs, I wanted to try out a multi-colored decal. This one was pretty simple, and I was able to eyeball it rather than using more precise alignment features to get it centered, but it turned out okay. It was a good proof of concept for me, and now I'm wondering about other more complicated designs I can do... I'll have to save that for another day.
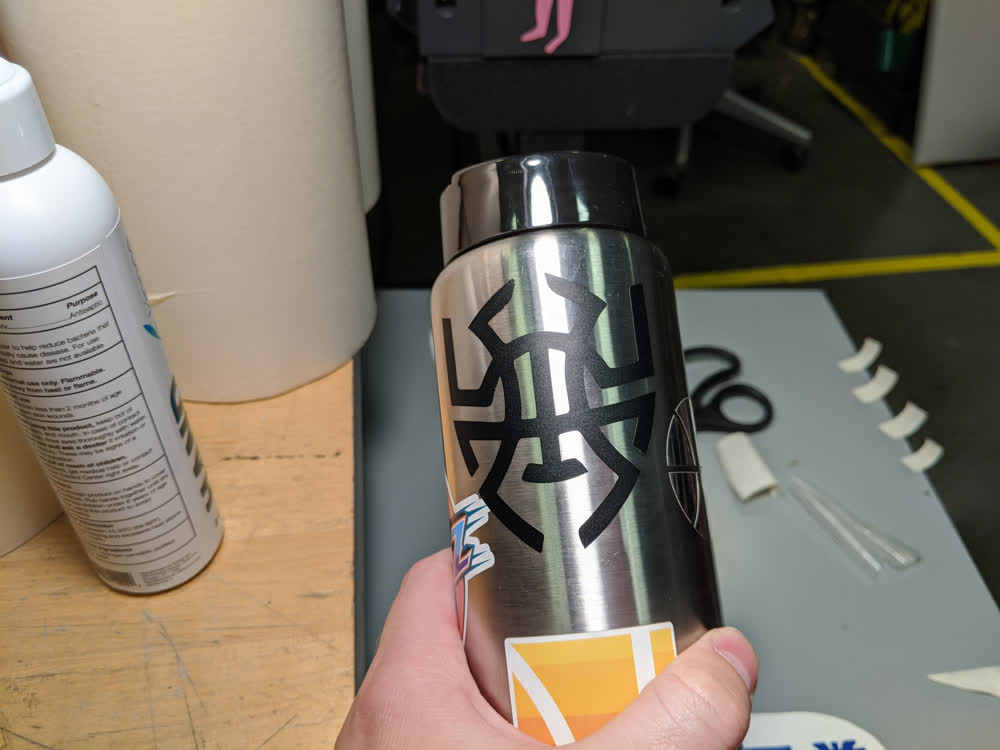

The first decal (the spider/basketball logo) went on smoothly, and the other three designs cut out very nicely. I got everything on the water bottle, and it filled up the empty spaces I had quite nicely! I love it!

As a bonus, I had my wife help me to draw/design one more image, but I'm going to save it for later to put on a project that will be coming down the line. Stay tuned to see what I mean.
Laser Cutting
Next, we needed to use the laser cutter to make all sorts of 3D structures using thin sheets of material and 2D cut paths. John gave a fantastic training, as well, and we were good to go. I had used a laser cutter before, but it was nice to learn how our particular machine worked and be reminded of some good safety measures. We don't want another laser-cutter fire... Before doing any of our own projects/cuts, though, we needed to dial in the laser cutter to make sure we knew the optimal settings for our desired performance. To see the results of this group work, click here.
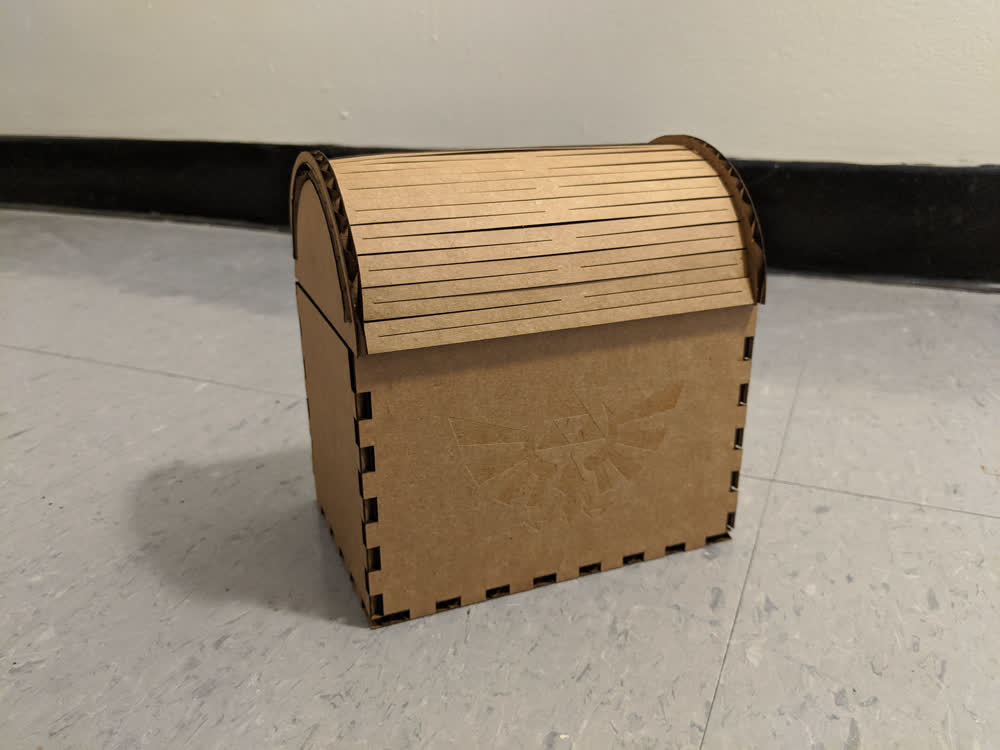
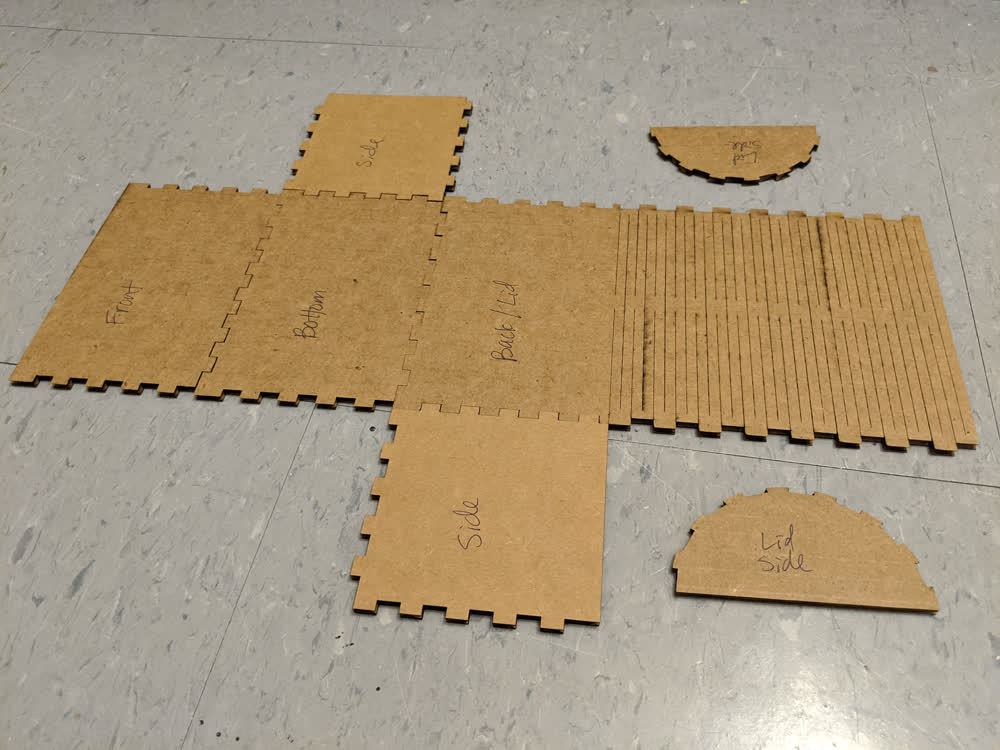
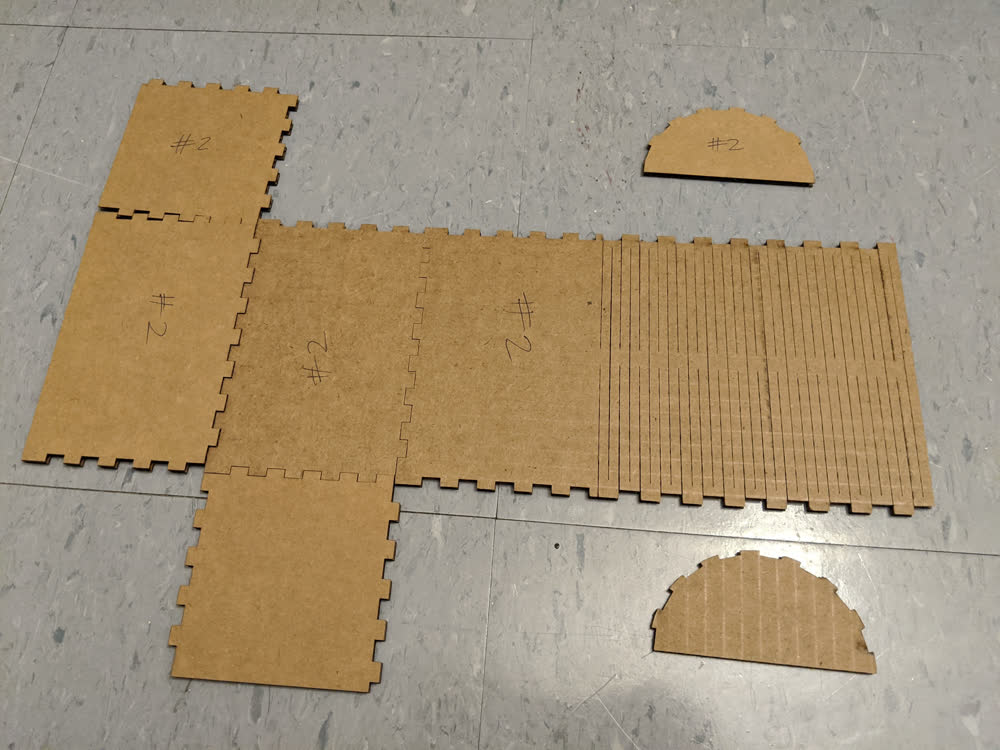
With all of the parameters tested and optimal settings determined, it was time to design/build a parametric construction kit out of cardboard pieces using the laser cutter and press fit joints. It took me a while to figure out what I wanted to do, but I finally decided on making a cool little cardboard chest using both simple finger box joints, as well as a living hinge for the lid. After studying both of those things up a bit online, I was ready to make my own design.
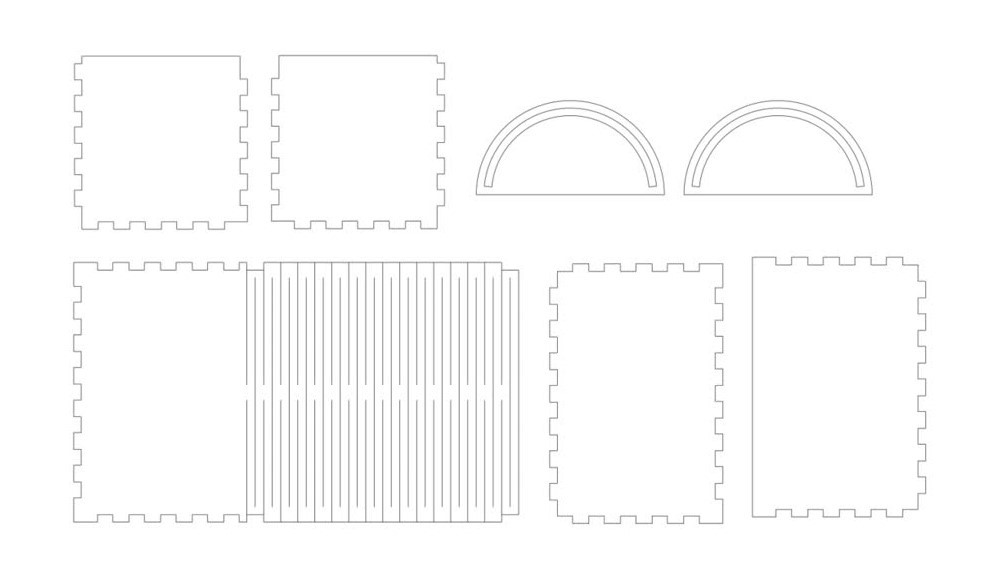
I could have used something like MakerCase to design my box, but I really wanted to try my hand at digging deep into parametric design. I learned a ton from the experience, but it is quite time-consuming, and I made quite a few mistakes. However, after a couple of hours working on the design, I was satisfied and ready to cut the next day. Note that I still hadn't figured out all of the parametric portions of the design, such as having an odd versus even number of fingers, and making sure that the fingers lined up with the other sides. Because of this, after deciding on the main dimensions, I saved the design under a different file name, then manually trimmed the lines to have the proper fingers in the proper places.
The cut went smoothly, and I was so excited to check out the living hinge! It is so wobbly and wavy! I love it!
Unfortunately, however, I had accounted for something incorrectly, and the joints just wouldn't stay together. There was too much space in between them, so friction couldn't do it's job.
I went back in and changed the cardboard thickness in my design to be smaller, which would be more in line with the joint testing comb results we had gotten earlier. However, this still didn't work. Then it dawned on me that changing the cardboard thickness would only change the depth of the fingers, but not the fit of the connections. Back to the design...
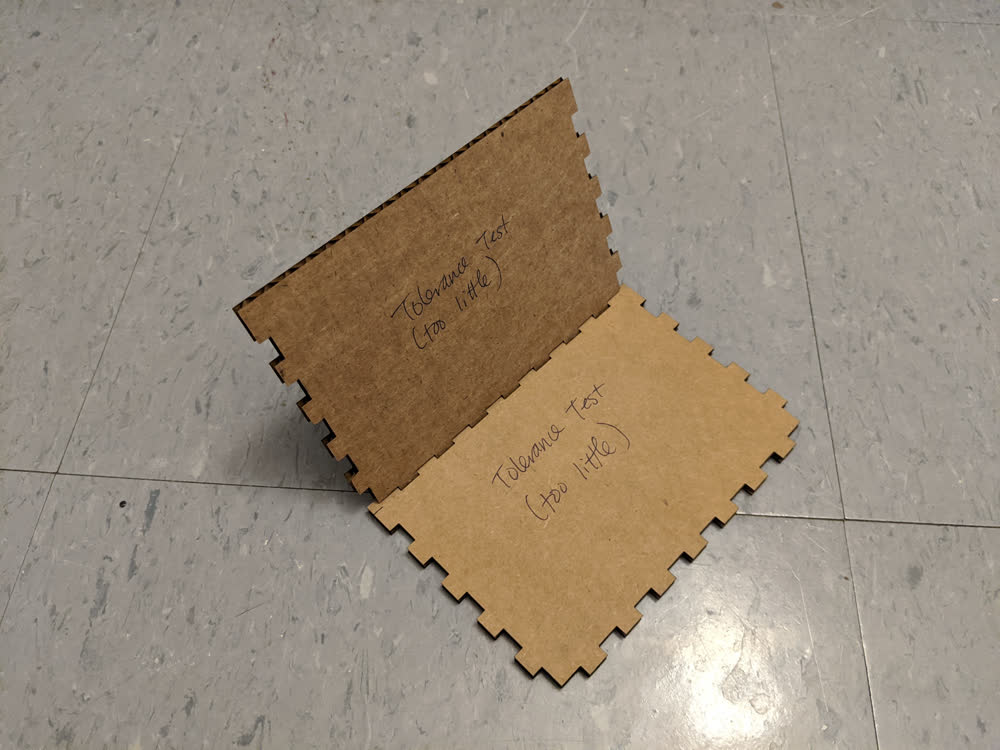
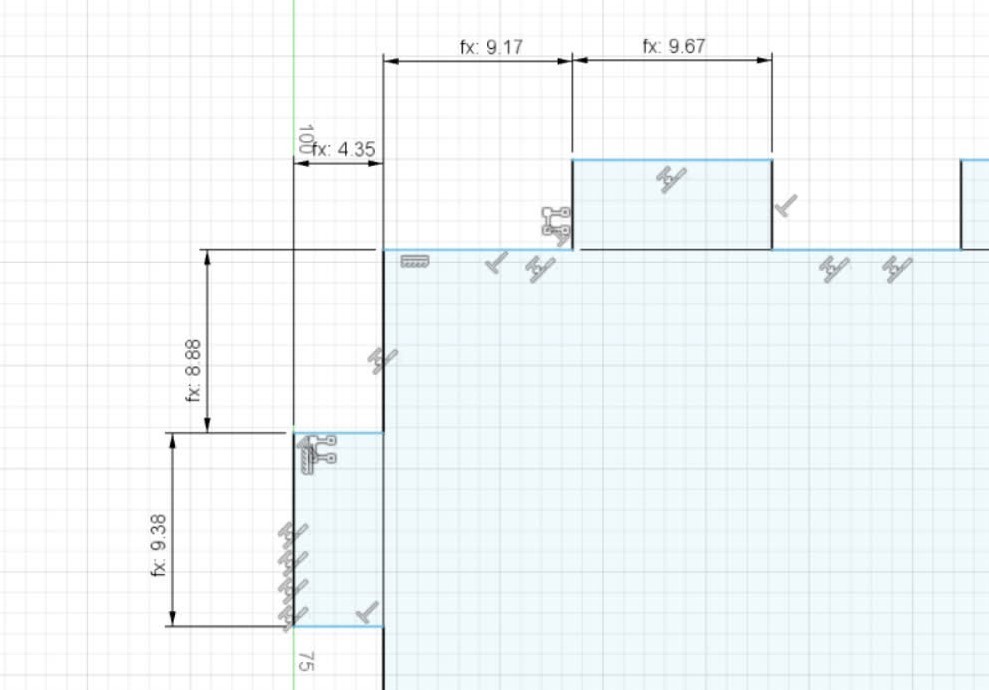
The way I decided to fix it was to create a tolerance/offset in the fingers. I would extend the male end by adding the tolerance, and shorten the female end by subtracting the tolerance. This seemed pretty easy at first, but in practice, it took a lot of manipulation of the rectangular patterns, but I was finally able to get something that looked reasonable. This raises even more questions I have about odd versus even numbers of fingers and getting everything to be exactly defined and generated parametrically, but I would probably just need to take a deeper look at the math and the order of doing things. Again, something for another day. The first tolerance test had better results than the cuts that came before, but it still was too small of a tolerance.
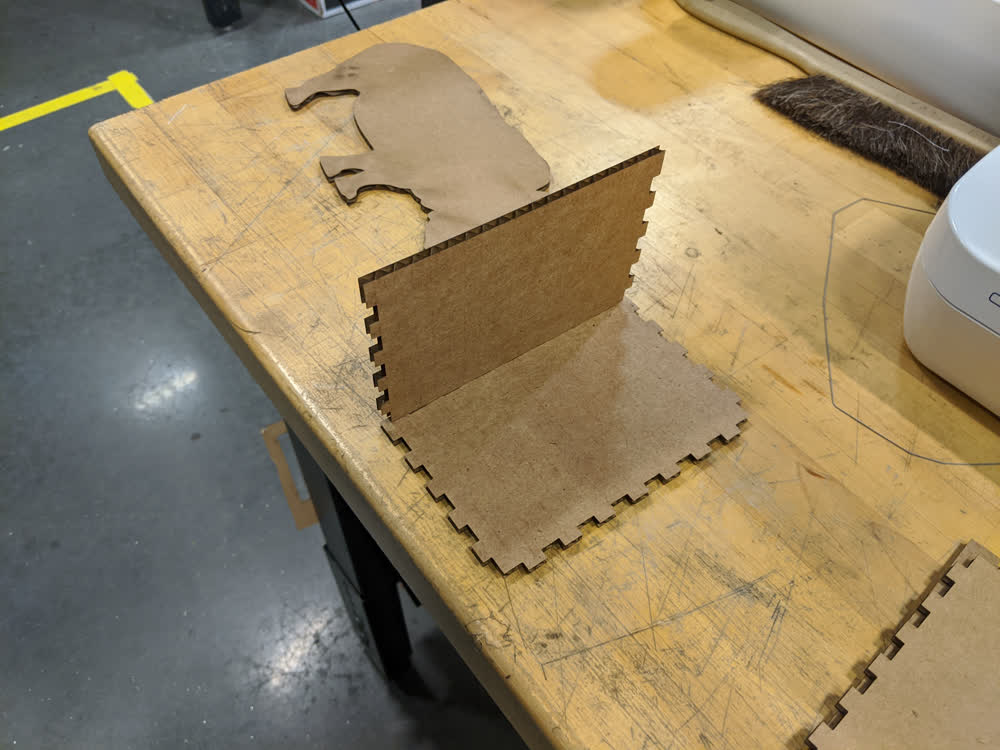
I increased the tolerance from 0.10mm to 0.25mm, and it fit very nicely! I was only testing the bottom and front piece at this point (probably should have done that for everything from the beginning...), but they worked well!
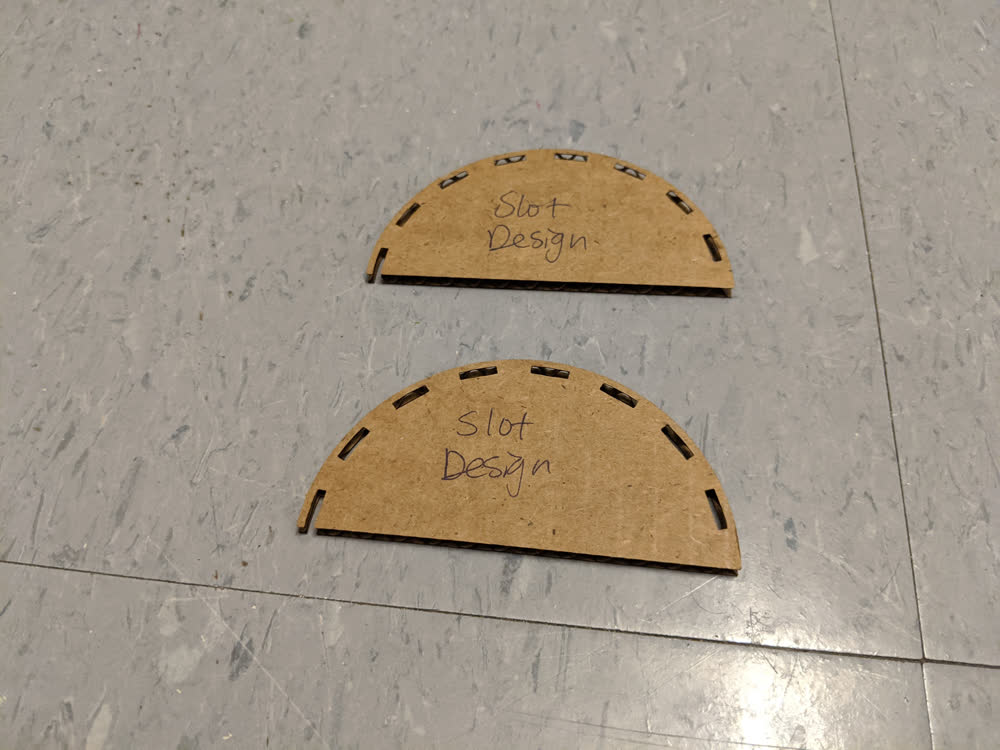
Before going ahead to cut the rest of the chest, I needed to figure out what to do about the sides of the lid. I was trying to combine the finger joints with the living hinge. It kind of worked, but just not well enough. I decided to try a slot design, but I guess I didn't do my math right again, and the slots were way too small to fit the cardboard through. I opted to just cut an entire arc out of the side for the final design.
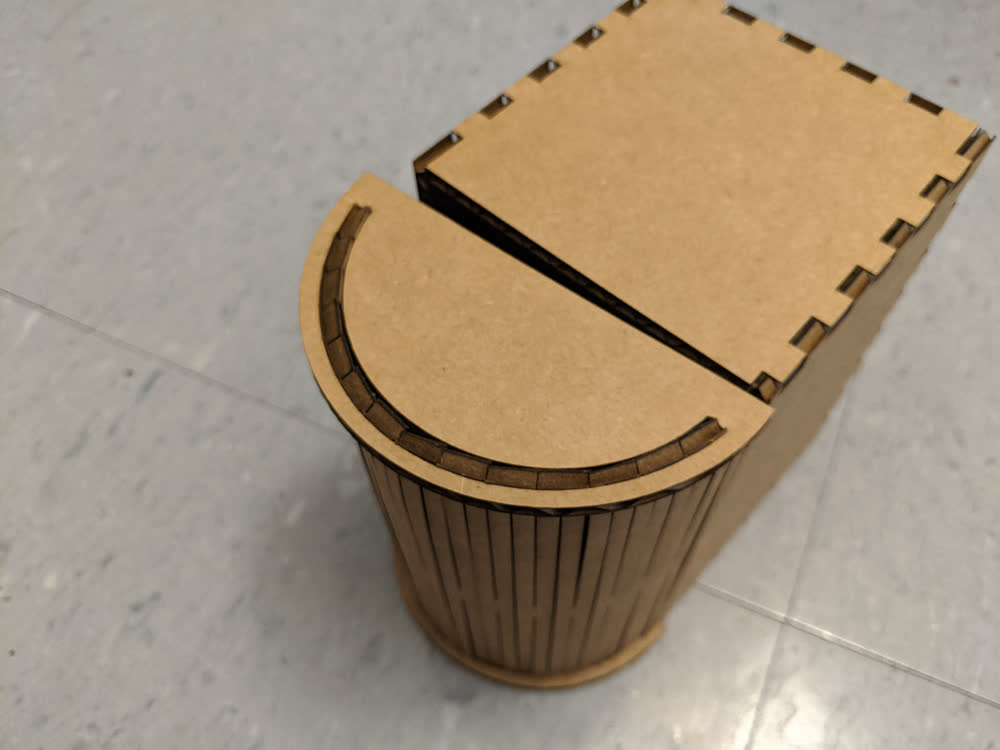
Now that the joints were fitting properly, I tried out the new sides for the lid. It was a super tight squeeze due to the curve, but it worked! Time to finish this project up!
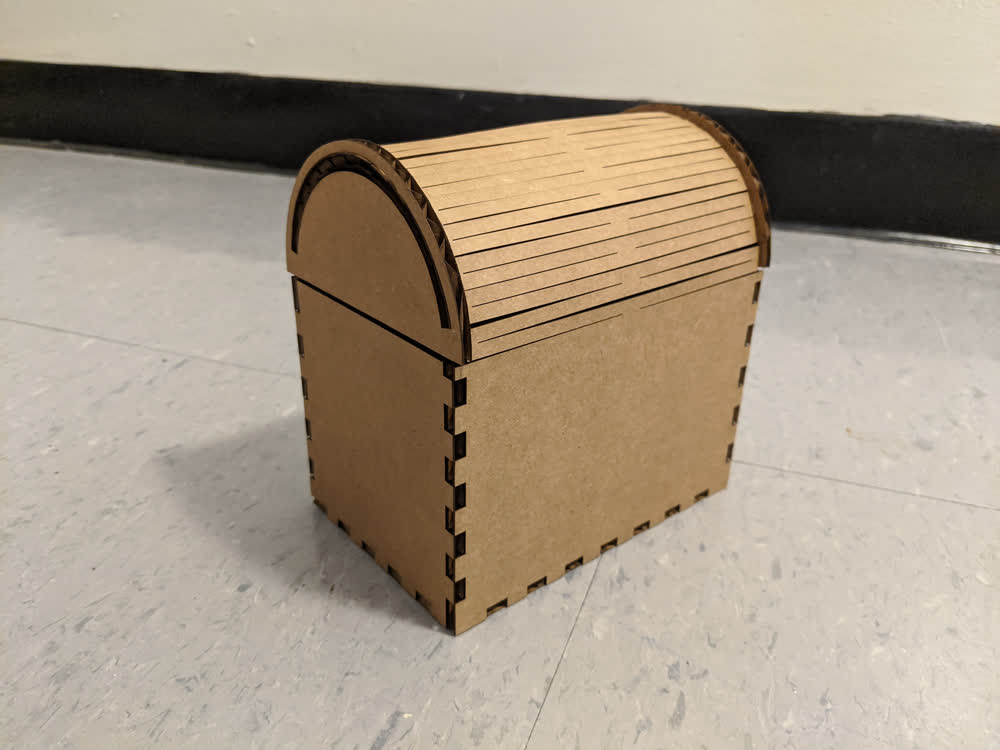
With the design locked in, it looked a little bare at first, so I had to add a bit of decoration to it, so I swapped the front plate with another that I rastered a design onto. Now that looks great to me! As a note, I manually toned the laser down really low to raster the image, so it barely scratched the surface of the cardboard, which I really like. You could potentially cut deeper and get a darker color to contrast more, but again, I really liked the look of this.
There are still quite a few improvements I could make on the design. I might want to extend the arc of the lid side slots to allow a bit more room. I also am not particularly fond of how the depth of the lid is slightly more than the base of the chest, so I would want to figure that out and make it look nicer. I could also add more embellishments and decorations. I even had some ideas of how to fasten a cardboard lock or pin to the front or something, but ran out of time for that. Overall, though, I'm really satisfied. Now that I know how to design for and built with the laser cutter, I want to tackle something a little more ambitious, like creating a new "Toy-Con" model for Nintendo Labo. If only there were more time in the day!
Here are the files I generated or modified for this week:
- smash.svg - Smash Ball Decal SVG File
- nintendo.svg - Nintendo Kanji Decal SVG File
- triforce.svg - Triforce Decal SVG File
- spida.svg - Donovan Mitchell Logo Decal SVG File
- hylian_crest.png - Hylian Crest (Laser Cutter Raster) PNG File
- parametric_chest.f3d - Parametric Chest Sketches Fusion 360 File
- parametric_chest.step - Parametric Chest Sketches STEP File
- 150x100x100_front.dxf - 150mm x 100 mm x 100 mm Chest Front Cut DXF File
- 150x100x100_bottom.dxf - 150mm x 100 mm x 100 mm Chest Bottom Cut DXF File
- 150x100x100_sides.dxf - 150mm x 100 mm x 100 mm Chest Sides Cut DXF File
- 150x100x100_back_and_lid.dxf - 150mm x 100 mm x 100 mm Chest Back and Lid Cut DXF File
- 150x100x100_lid_sides.dxf - 150mm x 100 mm x 100 mm Chest Lid Sides Cut DXF File