3D Scanning and Printing
3D Scanning
Now that we've constructed some three-dimensional objects using two-dimensional pieces last week, it's time to go full-on 3D this week. A big theme of this class is both reading and writing in all forms of fabrication possible. So, while we can scan papers, pictures, etc., then edit them using software, we need to do something similar in 3D. In this class, we have the privilege of using a 3D scanner. There are a variety of 3D scanning apps that can be downloaded and used on a smartphone, there is really high-end equipment that can be used to capture the information from any given object. We discussed a lot of different technologies for scanning in class, but we will be using the Artec Leo 3D Scanner for our projects.

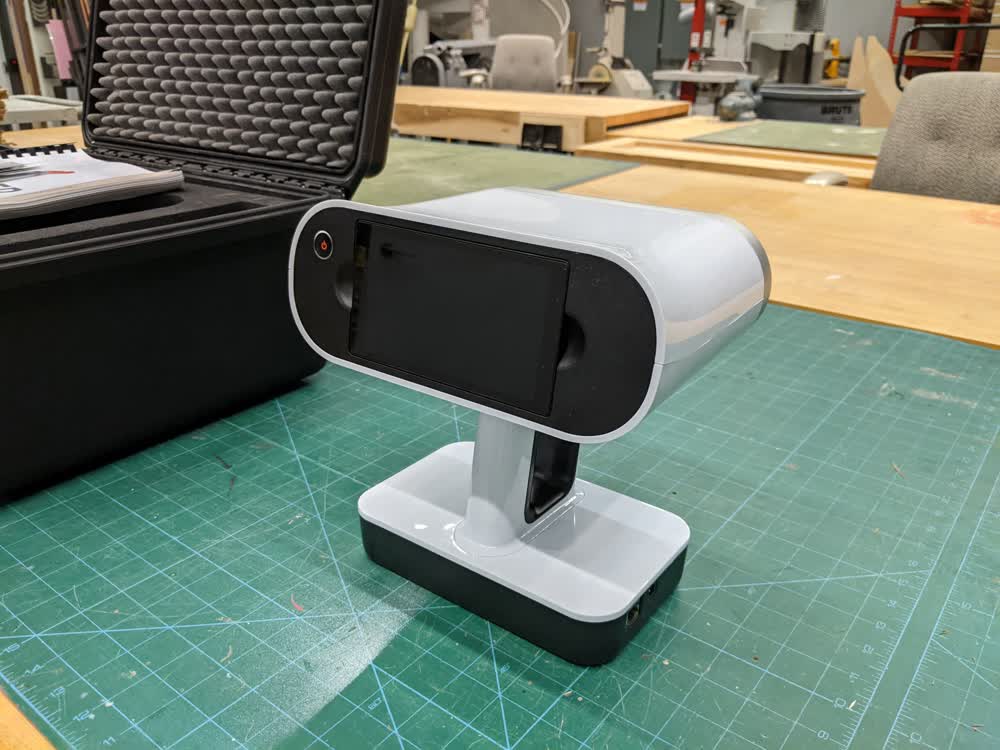
Tom and John gave a great training on how to use the scanner. In it, they explained what kinds of objects produce the best scans, as well as other various tips and tricks to get a successful scan. The Artec Leo is basically a massive radar/scanner that you point at the object and walk around it, capturing different details and angles. Once the scanning is complete, it will produce a point cloud to recreate the object and it's surrounding background/environment.
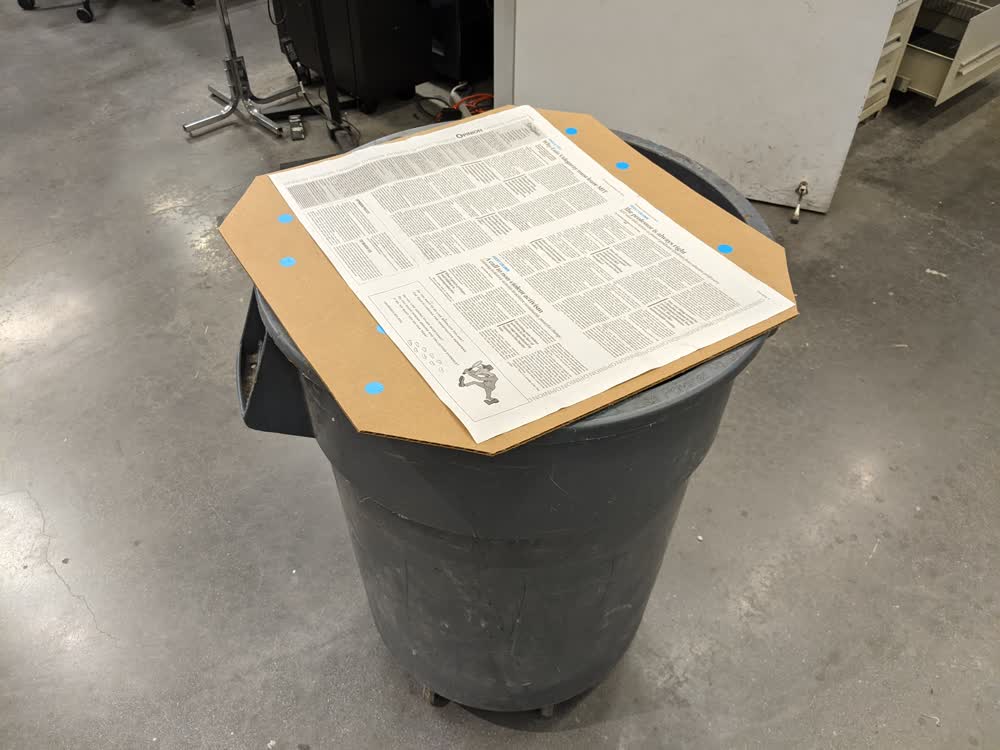
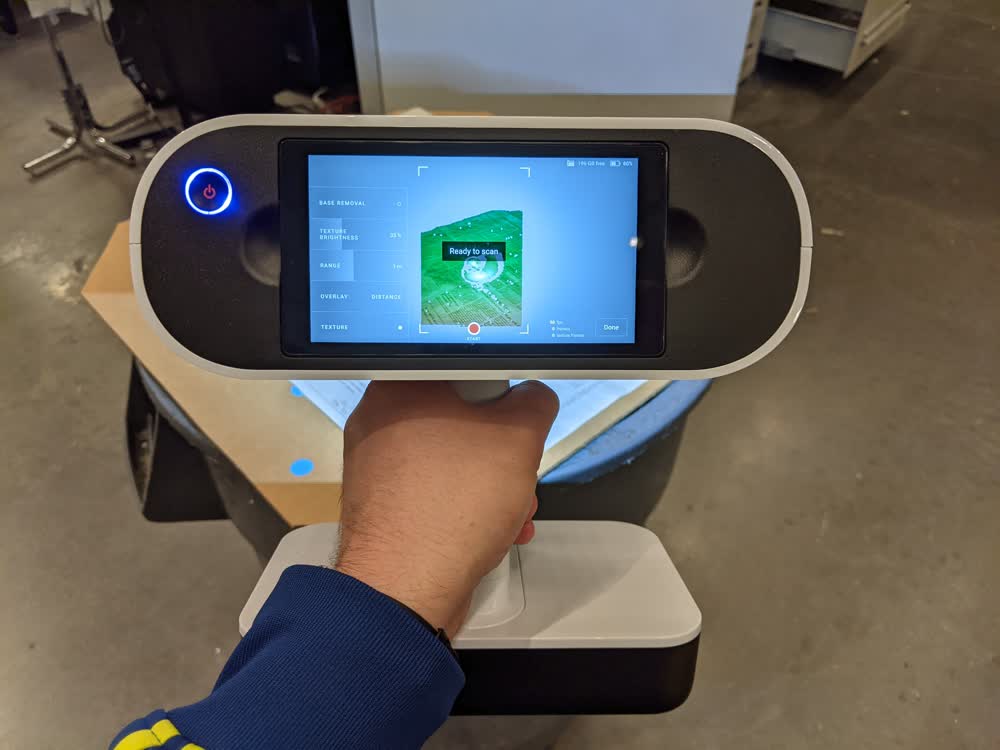
You place the object on the pedestal (a garbage can with dotted stickers on cardboard and some newspaper for better tracking details, in our case), then start the scan and slowly walk around the object getting various angles and views. After scanning and importing to the computer, we can use Artec's software to produce a mesh .STL model of the scan.
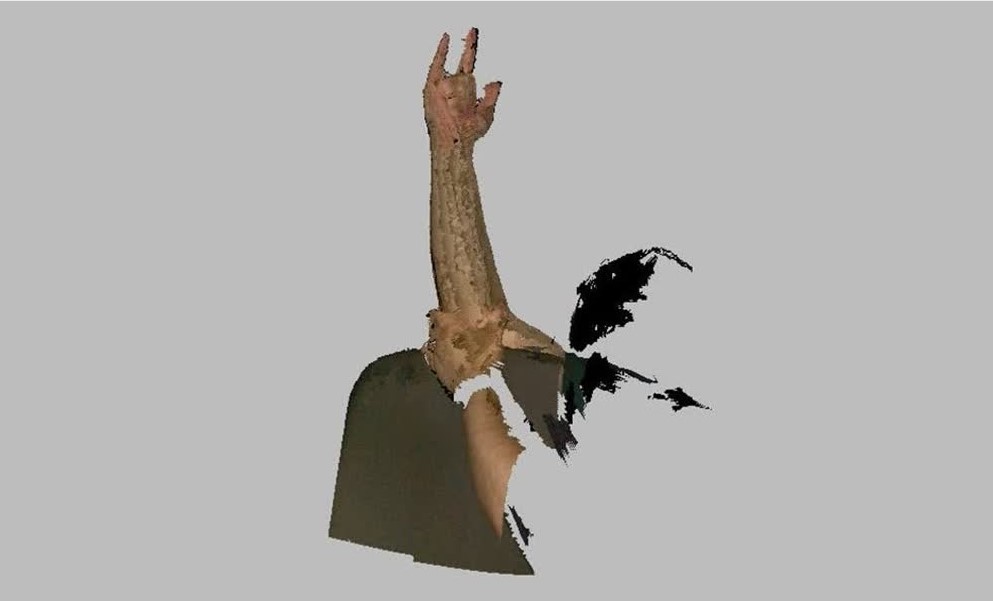
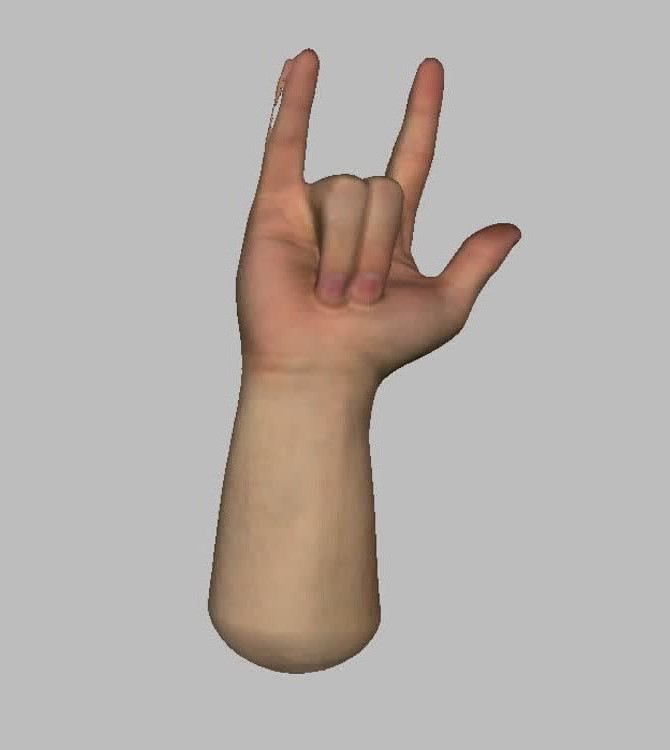
Here's an example of what happened when I scanned my hand. The software creates a pretty messy looking point cloud, but we get to clean it up all nicely.
I start by erasing some of the point cloud that I won't need as a part of my scan. Sometimes it's good to keep the extra info to better piece the scan together, but in this case, everything that I deleted wasn't necessary.
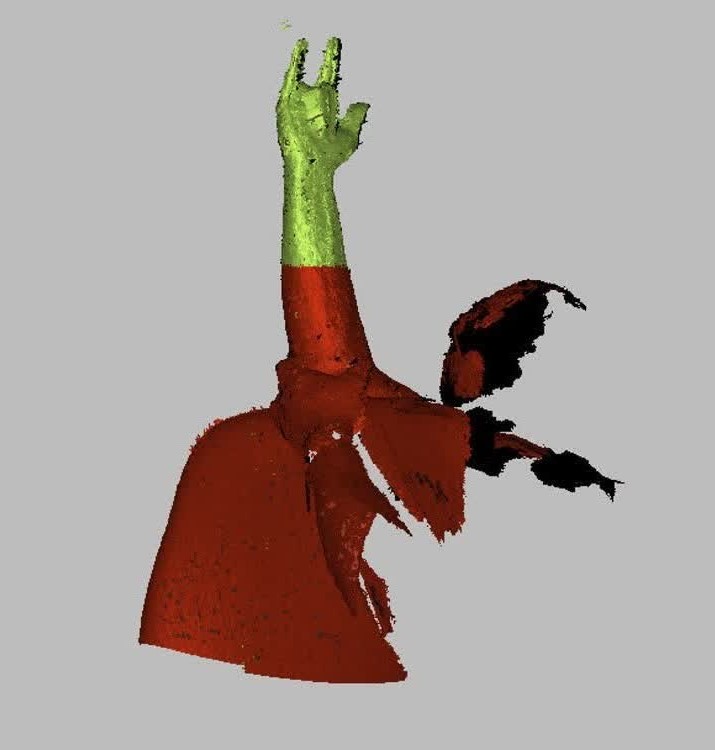
The software has a nice "autopilot" feature that does a bunch of the work for you. I'm sure if I had more time or was much deeper into making amazing 3D scans that I'd have a heyday playing with all of the different features, so I guess it's nice to know that it's there. In the end, it did a pretty nice job making a mesh of my hand/arm.

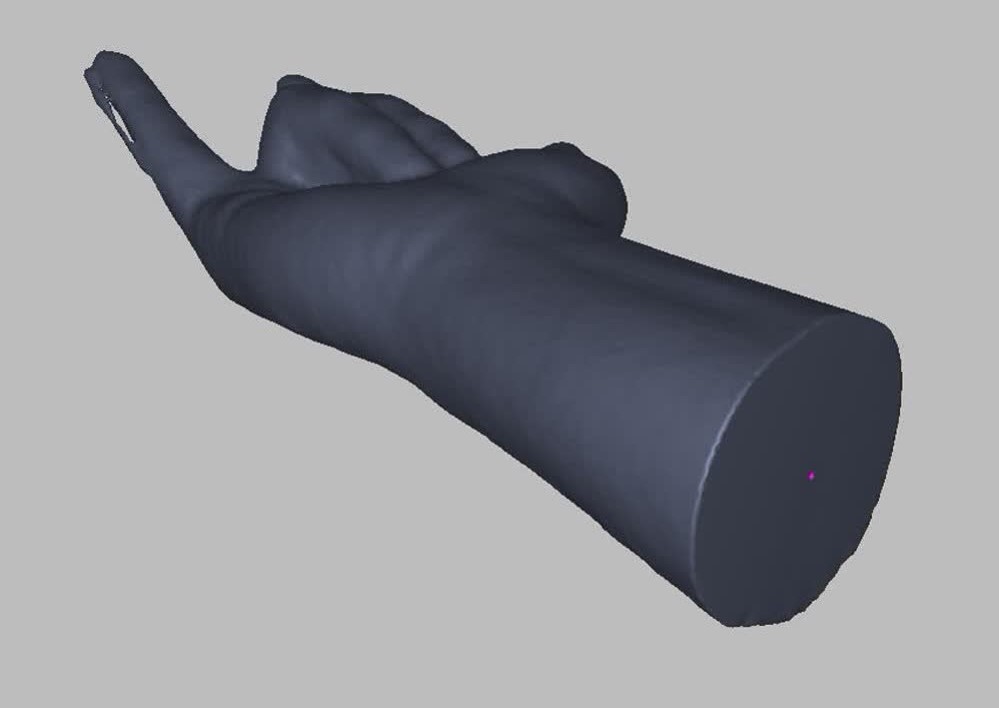
I wasn't a huge fan of the rounded bump that autopilot made at the base of my arm, so I cut that part off. But in doing so, I created a hole in the model and it wasn't watertight anymore. It's a pretty quick fix to fill the hole, though. Now my mesh is done!
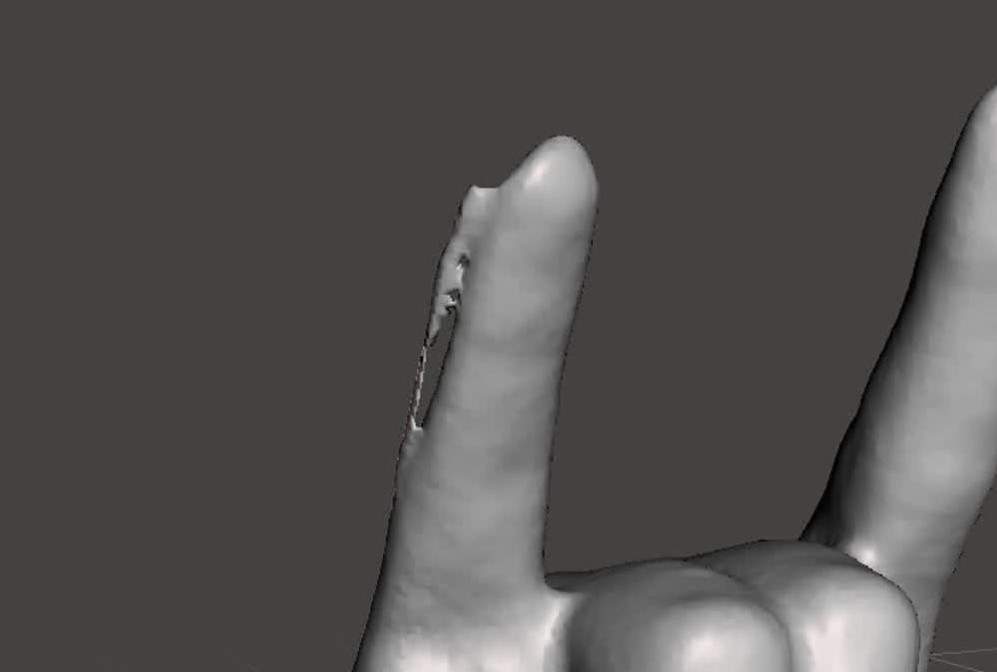
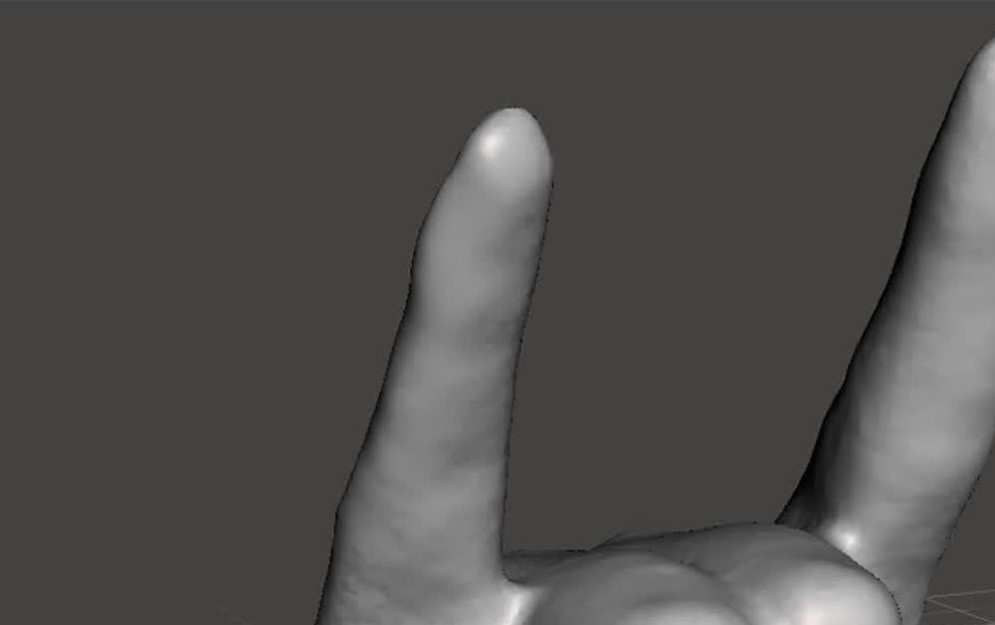
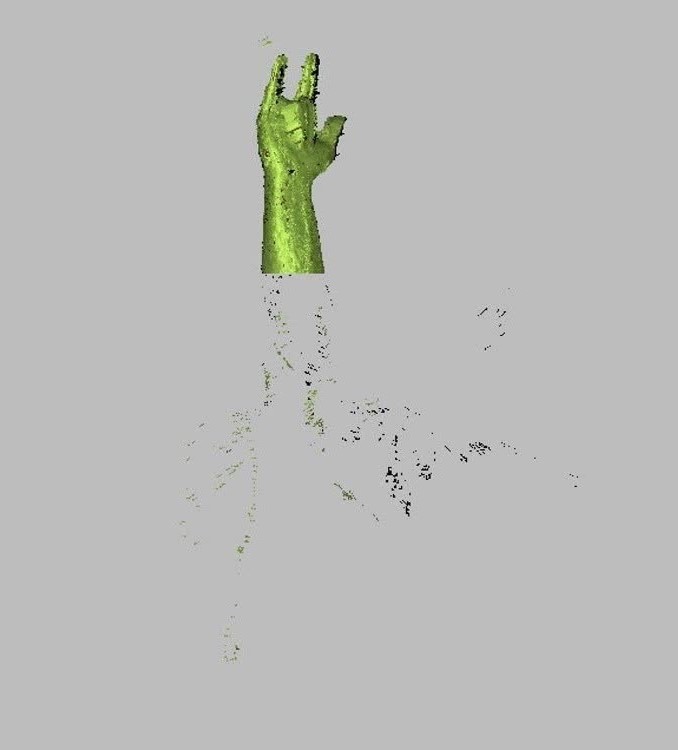
As you can see, though, there is some weird artifact on my pinky finger that doesn't look super great. I'm sure there's some stuff I could do using the Artec software, but I found it easier to import the .STL file into Meshmixer and sculpt the mesh to look nicer. After playing with a couple of different flattening and smoothing brushes/tools, it didn't look absolutely perfect, but it was still decently good and I was satisfied with how the whole model looked.
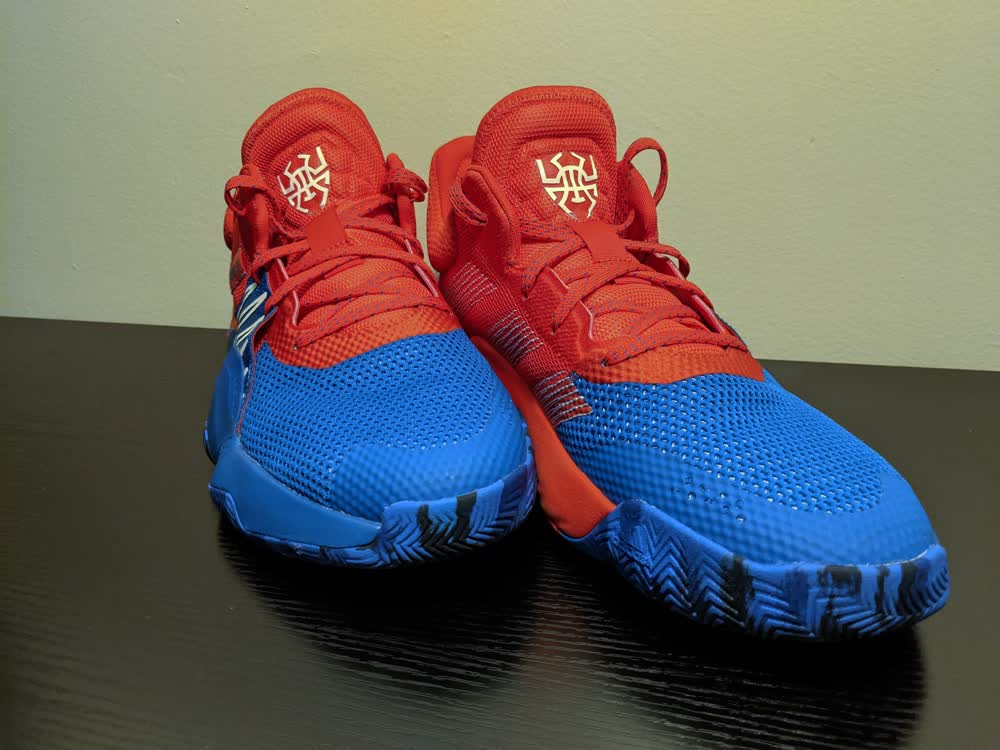
In the end, on top of the test scans we all did in the training, I was able to successfully scan in my hand/arm as referenced above, as well as a pair of basketball shoes. I experimented with doing the shoes one at a time, as well as set next together. The scanner has a hard time figuring out the details of what's going on between the shoes, so the best results came from the shoes individually, which is what I would have guessed. It was really cool to use the scanner, but it's definitely a high-end luxury tool. The 3D scanning apps on phones just aren't as good and powerful. So I'm wondering what the best value scanner there is out there that's better than the free smartphone apps, but still decent and not as expensive a semester or two's worth of tuition...
3D Printing
Now, to the part of the week that I actually do have some experience with! When I was doing undergraduate research, I got a bit of experience modeling some things using SolidWorks, but I mostly took pre-made files and printed them using the FormLabs Form 2 printer. It was mind-blowing, and I still think 3D printing is the coolest thing, even though I now know better some of its limitations. Also, over the summer while I was back home in Utah for the pandemic, two of my brothers-in-law and I went out on a whim and bought a Prusa i3 MK3S (the kit version). It was an absolute blast to put together (like a LEGO set or IKEA furniture), and it was really exciting to get printing! We have been showing it off to friends and family and taking commissions to print them various cool things. We're hoping to start a full-blown business with it sometime, too! Anyway, back to what I did for the class this week.
We had three main assignments in terms of 3D printing this week: 1) test the design rules of the 3D printers we were able to use in our respective sections, 2) design and print something that can only be manufactured using an additive process like 3D printing, and 3) (optionally) print the items that we scanned. For the first assignment, you can check out what our section did collectively to test our printers here.
Designing something that can only be created using an additive process was quite a bit of fun. I've seen videos on cool gadgets and trinkets 3D printers can make, and you can find a ton of awesome stuff by searching "print-in-place" on Thingiverse. A couple of people in our group liked the idea of gyroscopes, so I tried my hand at making one into a little toy for my daughter. Thank goodness we learned some awesome stuff regarding parametric design last week, because that definitely came in handy.
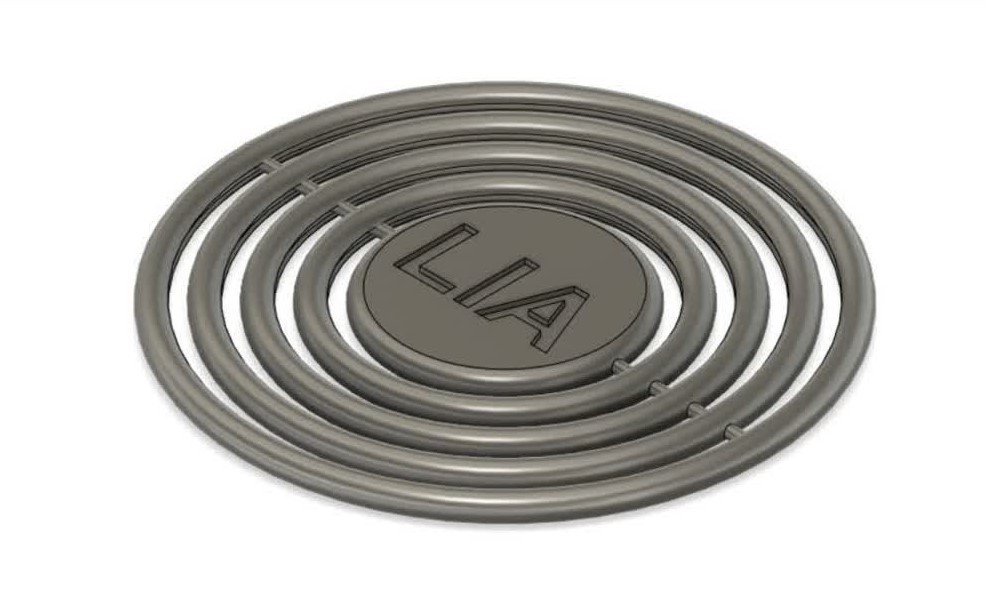
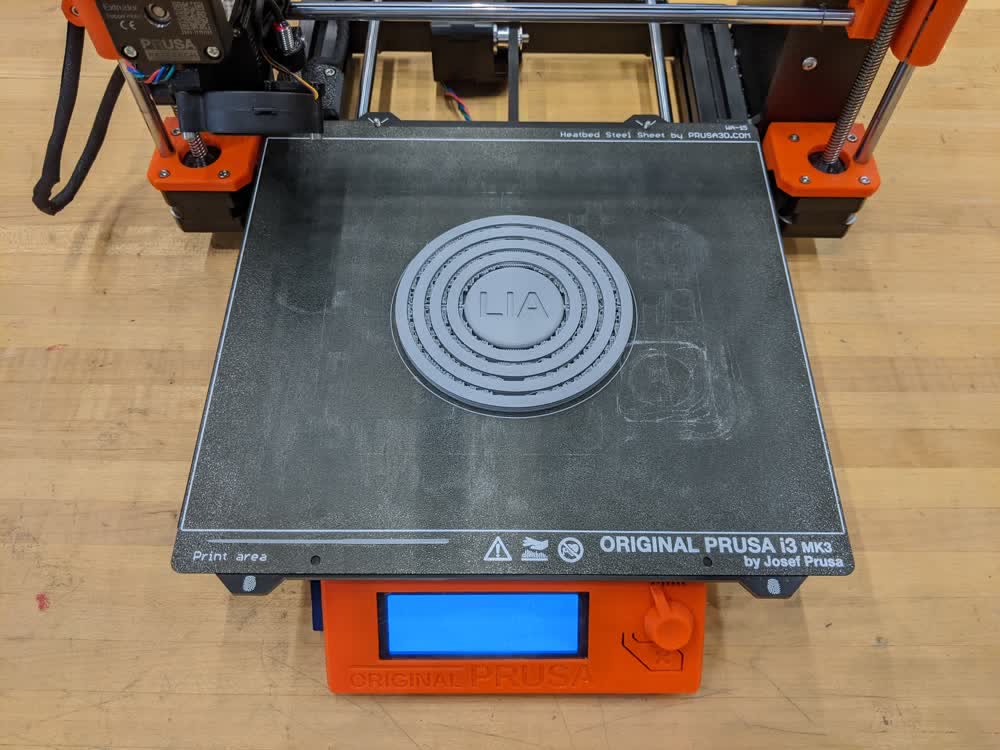
With the design in hand, it's time to prep it for the 3D printer.
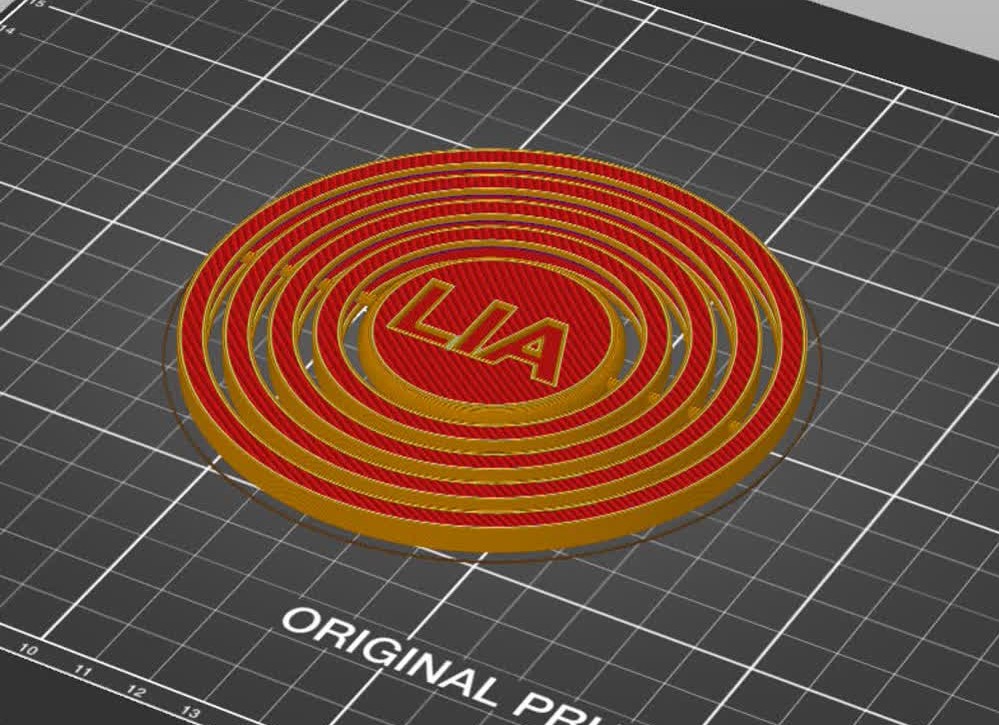
I've gotten to know the Prusa Slicer decently well over the past few months. I've been really satisfied with all it can do and it's pretty simple to use. Not much to it besides importing the model, deciding on supports and a few other basic settings, then exporting the gcode. Time to print!
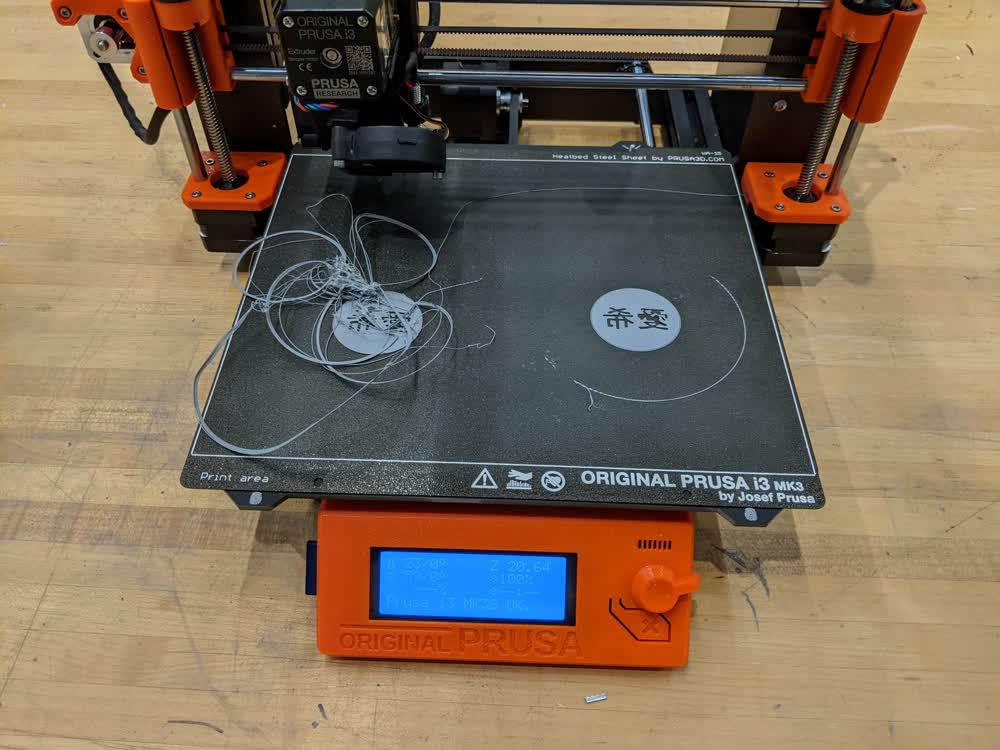
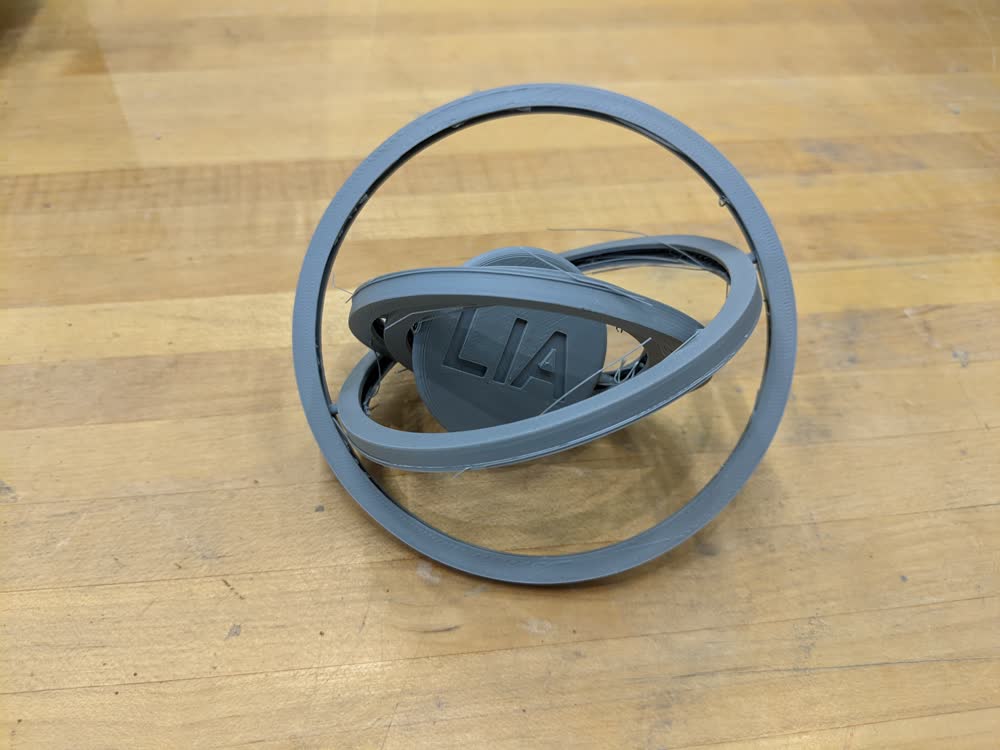
Uh oh. Something went wrong here. I like to call this type of error "spaghetti". Something must not have stuck to the bed properly, or something happened to the extruder itself (debris or something), making the filament try to deposit midair. Let's try this again.
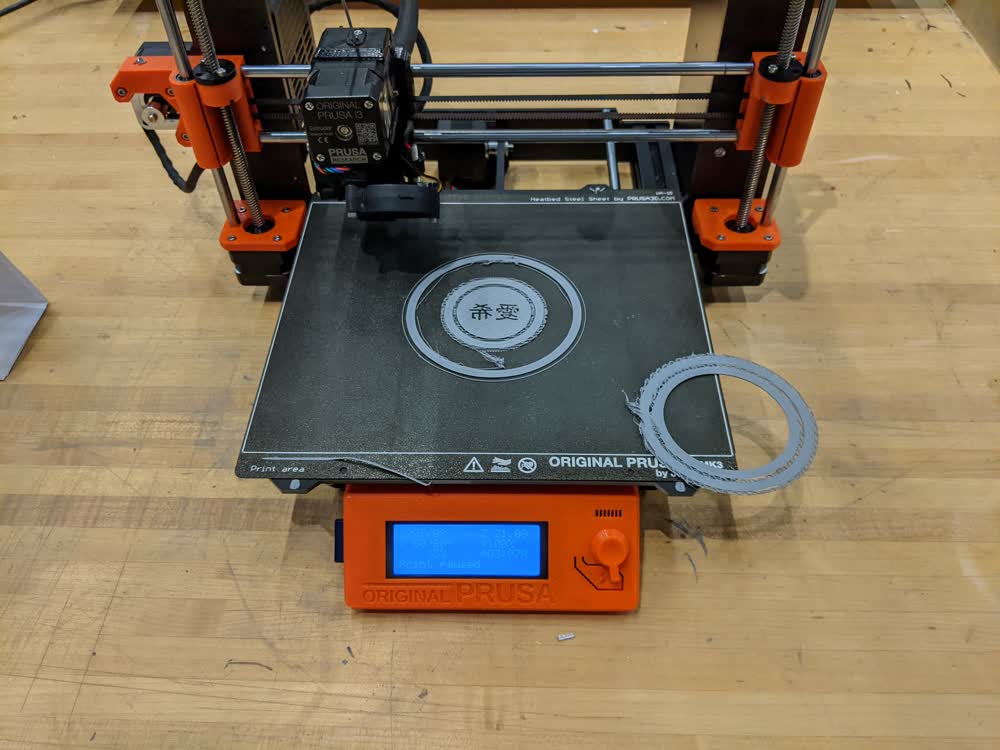
Better, but with a whole section not even sticking, I was bound to get some more errors and possibly more spaghetti had I not caught this as early as I did. I decided to take a step back and figure out what the best option was. The problem could be anything from not having the first layer height calibrated properly to the model just not being ideal for bed adhesion in general. I dug back into Fusion to find that not all of the rings of the gyroscope were actually parallel. I fixed that, then even decided to get rid of the fillet across all of the rings to make an easier geometry to print (and to get to stick to the bed). Let's try this again.
Everything is looking pretty good, so let's check it out! Unfortunately, I didn't turn supports off because there are some overhanging features that can't take advantage of bridging, and so there are a ton of supports on the print. I spent some time with tweezers and micro cutters to clear out the groove in each of the rings, but then it dawned on me that 1) the whole point of the assignment was to not have to do something as painstaking and tedious as this and 2) there was something I could change about the design to make this work even better, and still be printable with minimal supports or even no supports at all!

I will say, though, the current iteration that is finished printing still shows some functionality in terms of not being able to be made any other way but additively, so it all still rotates, although stiffly. It doesn't quite do everything that I wanted it to, at least not without a lot of post-processing.

Here's the new design. I realized I don't need the pegs to be "locked" into the grooves with a ball joint as I had previously, they just need to be long enough to not be able to come out. Now, there aren't free-hanging features on any layers and the top of the rings can use a combination of bridging and a slight overhang to get the desired outcome.
I was feeling pretty good about this design, but mid-print, I realized I had forgotten about something that was going to make the print fail more than likely, and that was the fact that the inner circle of the top portion of each of the rings would be printed without any support underneath, which would create a thin circle of filament around the object that would fuse to the rest of it and make it not work as well. I decided to just let the print finish, and I was right. This design was much easier to clear the grooves out, but it still was going to be extremely time consuming, and I wanted to get it right by just printing and not needing any post-processing. Let's do this one final time...
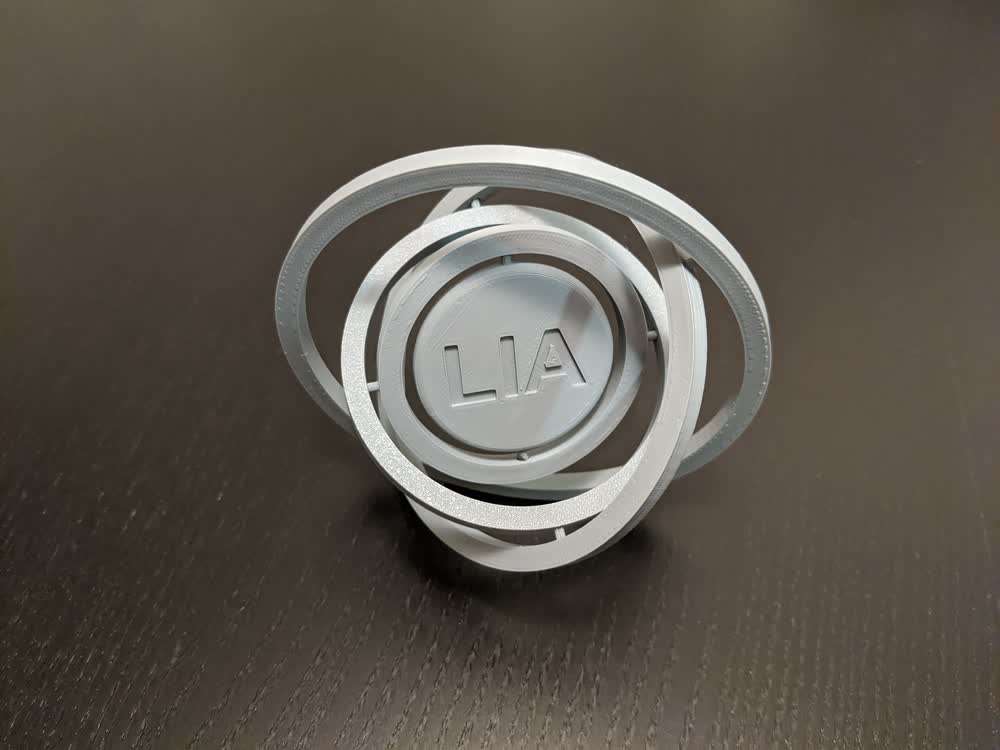
I opted to get rid of the grooves entirely, and just made every other set of pegs line up, with the other ones being offset by 90 degrees. And to my delight, it finally worked! There was a tiny bit of fusing of the pegs to the holes, but with a gentle twist, it freed the rings from each other, and everything starting rotating properly! The rotation is a bit stiff in some areas, and one of the pegs was fused a little more strongly than the rest, so that ring in particular needs to stay put, but I finally got a design that could work straight from the printer without any post-processing. I might do one more iteration in the coming weeks where I increase the gap between the pegs and the holes, but in terms of the week's assignment, I'm calling this a wrap. Also, as a fun follow up, my wife dropped the final version and all of the rings came apart. To my surprise, though, none of the pegs had broken off, and I was able to insert them all back into the rings without a problem!
So, additive manufacturing processes make some really cool things possible, but there are still quite a few limitations that you need to be aware of in order to take full advantage of the benefits. You've got to be pretty clever to do certain things, and it helps to really think about all of the design rules and limitations while you're designing, rather than waiting a couple of hours to find out you forgot about something and just wasted filament. Subtractive processes just can't get into all of the nooks and crannies to mill out material for complex objects. That's why additive processes are so neat, you can just print in place with or without supports, and if you're clever enough, no assembly is even required (batteries not included, unless you print your batteries, too, which honestly probably has actually been done already).
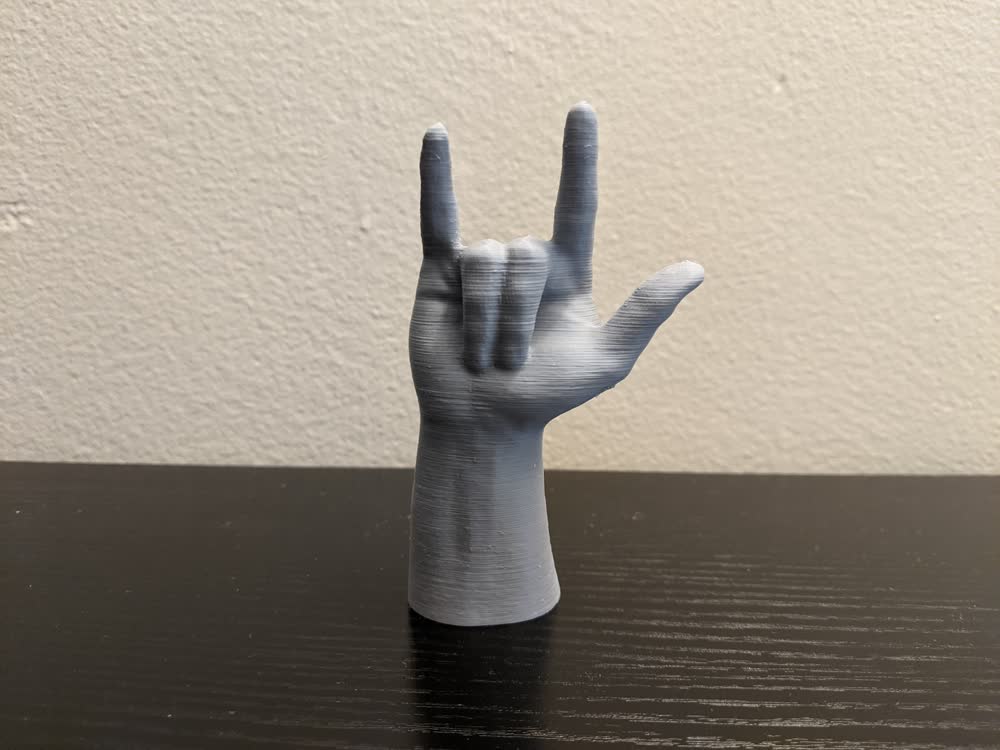
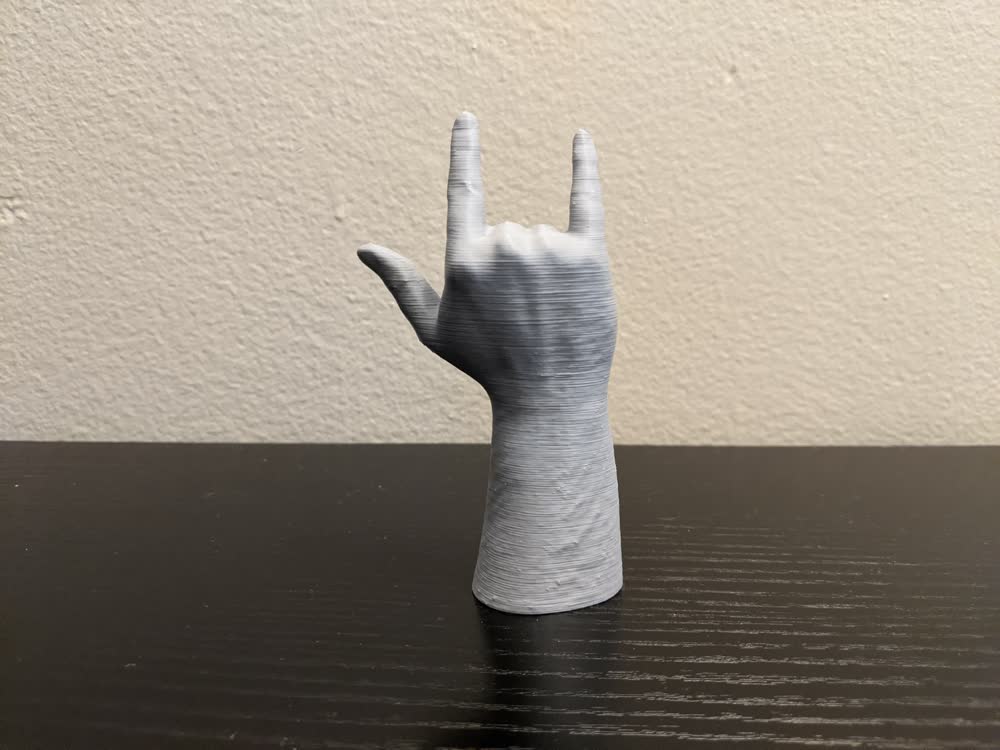
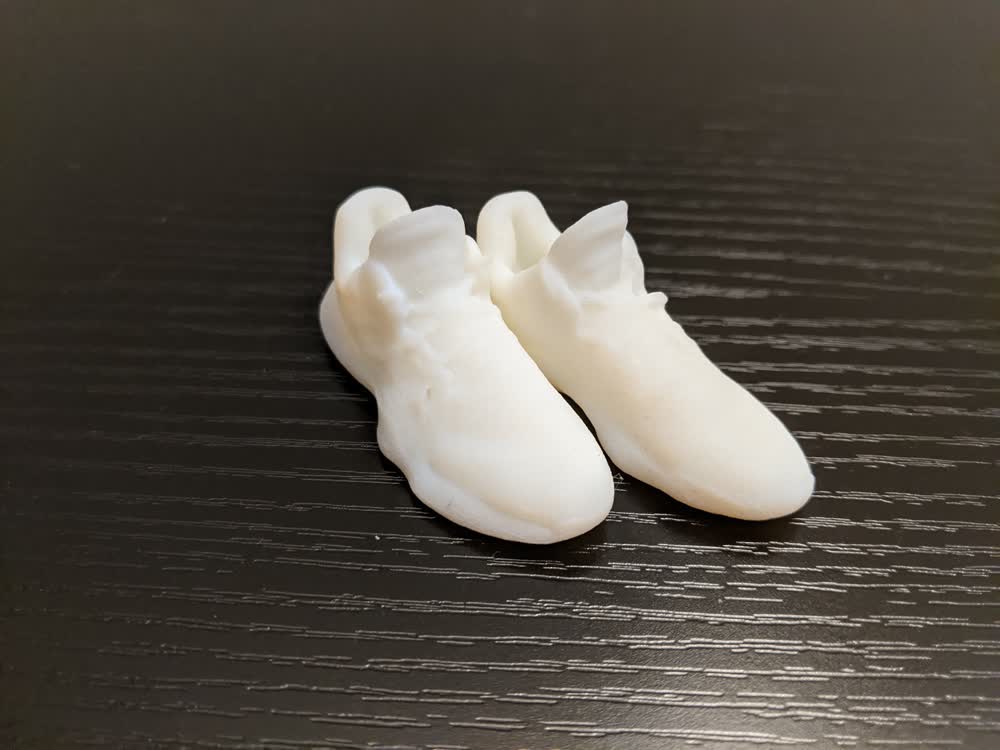
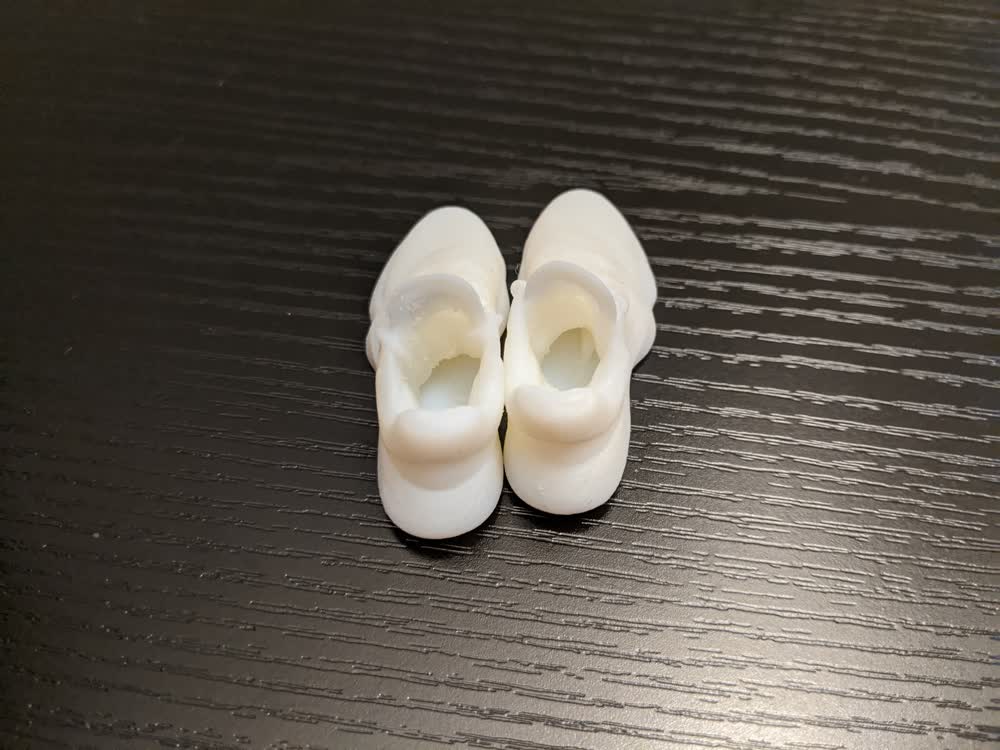
Finally, I also wanted to actually print off the objects I scanned. I decided to print my hand on the Prusa and my shoes on the Objet.
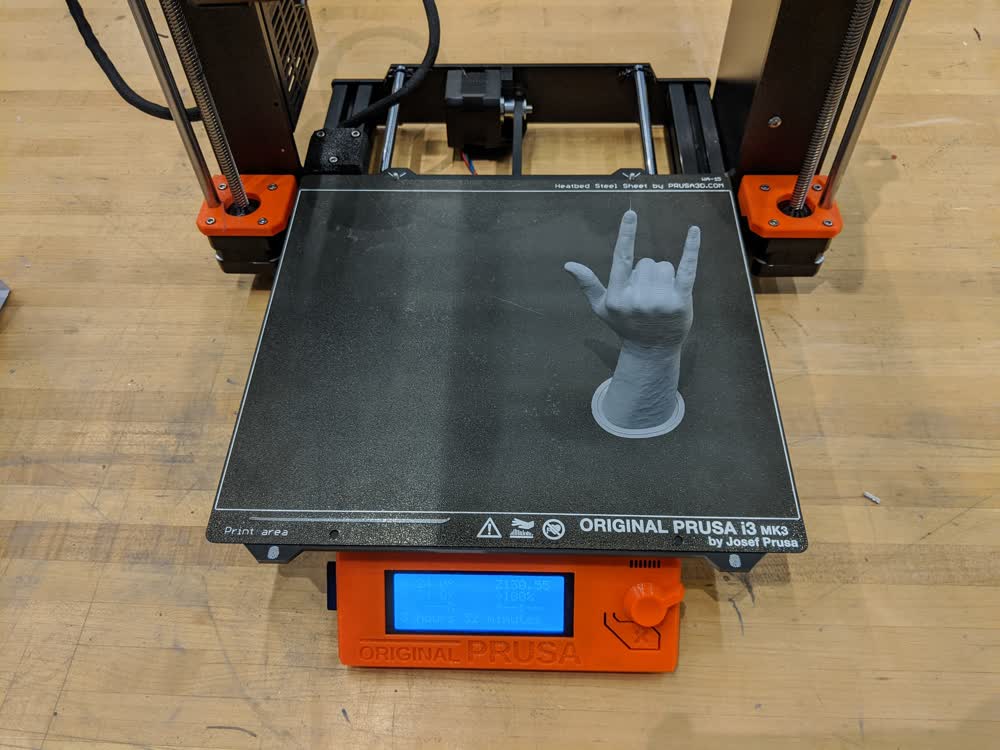
It was a little disturbing, yet awesome, to walk into the shop to see a miniature version of my arm just sitting there. But it printed successfully, and I didn't even need to use supports for it, so that was pretty cool!
The shoes also turned out pretty great! It's hard to see a lot of the detail because of the color, so maybe I'll have to paint them... However, the coolest detail that was captured by the scan and still transferred to the print was the webbing design on the tongue of the shoes. Here's a comparison of the actual shoes to the prints.
I still think that 3D printing is one of the coolest fabrication technologies out there, and it's even cooler that it has become so accessible to the average consumer lately. And the applications for it keep on growing! Pair that with 3D scanning, and we're getting even closer to being able to capture and recreate any object within our physical world. Star Trek replicator, here we come! I do realize that there are still many drawbacks and limitations invovled with 3D printing, so it's not always the answer, but it's a pretty good place to start to give yourself a good idea of how something is going to work!
Here are the files I generated for this week (note that I did not include the actual scan data or STL files for the scans because the files are very large):
- gyroscope.f3d - Gyroscope Model Fusion 360 File
- gyroscope.step - Gyroscope Model STEP File
- gyroscope.stl - Gyroscope Model STL File