week 2: 3D-scanning and printing
September 23, 2020
assignment
1. test the design rules for your 3D printer(s)
2. design and 3D print an object (small, few cm^3, limited by printer time)
that could not be made subtractively
3. 3D scan an object
testing design rules of our 3D printer
This week our EECS section tested the design rules for our 3D printers by printing a bunch of different objects
with supports and without supports to see how the 3D printer would behave. You can see the results here.
I learned the importance of supports when we are working with overhangs. Without the support, there are excess strings of
plastic that stick to the bottom of the overhang. As our overhang becomes less and less parallel to the base, we don’t see this
problem as much and can note that an overhang may not be needed.
design and 3D print an object
I chose to design and print a small water mill for this week’s project. The main constraint for this
assignment was that the object could not be made subtractively. I had trouble grasping what this meant, but
after looking through some examples from prior years and doing so research online I got a better idea of what
I could and couldn’t make subtractively. I decided to make an object with an axle that could rotate freely,
and a water mill instantly came into mind. In order to make sure my 3D printing job didn't take 10 hours, I
had to ensure that it was relatively small. I made the base 19 mm x 25 mm. I took the information from the
clearance exercise we completed in our groups to make the clearance between the axle and support 0.8 mm which
provided the right amount of room such that my axle could rotate freely. I also made the thickness of my wheel
2.0 mm after observing the best thickness from the wall thickness experiment. Below is my CAD design I created in
Fusion360 to 3D print.
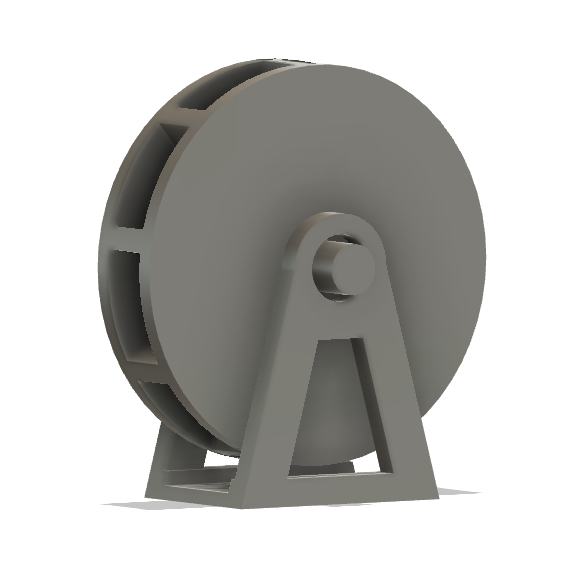
My watermill CAD on Fusion360
An interactive display of my 3D design
I exported the CAD file to an STL file and uploaded my STL to the 3DWOX software. Here, I enabled the setting to turn on
supports everywhere in order to keep the shape of my original design. This is important because I saw in the experiments
without the supports, overhangs and non-vertical pieces didn’t always keep form.
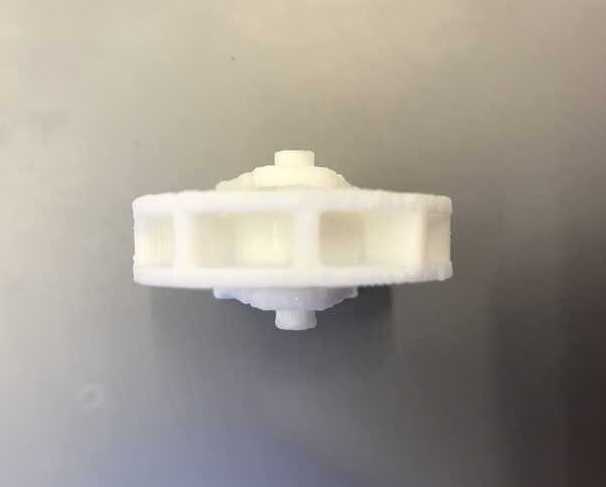
I left the other settings set to the default and then sent the job to the Sindoh 3D printer. The job took 50 minutes. When I checked in on my watermill, I was surprised at how thin the base and legs were. This would prove to be noteworthy when I had to remove the supports. I had to be extremely careful to not snap the legs when I removed the supports.
I left the other settings set to the default and then sent the job to the Sindoh 3D printer. The job took 50 minutes. When I checked in on my watermill, I was surprised at how thin the base and legs were. This would prove to be noteworthy when I had to remove the supports. I had to be extremely careful to not snap the legs when I removed the supports.
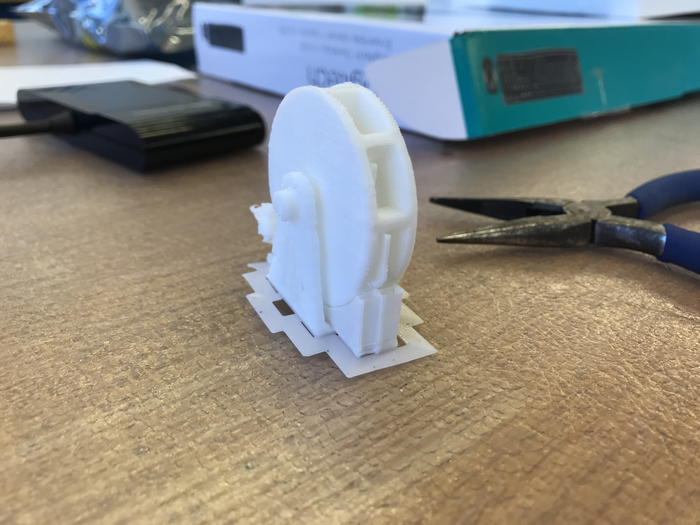
The 3D printed watermill with all supports still attached
I started to remove the supports using pliers and tweezers. The large supports that were sitting on the outside of the
object were quite easy to remove, however there were lots of smaller supports between the wheel and the base, which was hard
to remove due to the small opening. However after carefully sticking the tweezers underneath the wheel, I was able to spin the
wheel and remove all of the supports. I removed the supports that surrounded my axle so that my wheel could freely spin. However,
the supports on the axle were still extruding by a small amount on the axle. So I sanded these extrusions down to allow the
wheel to spin smoothly.
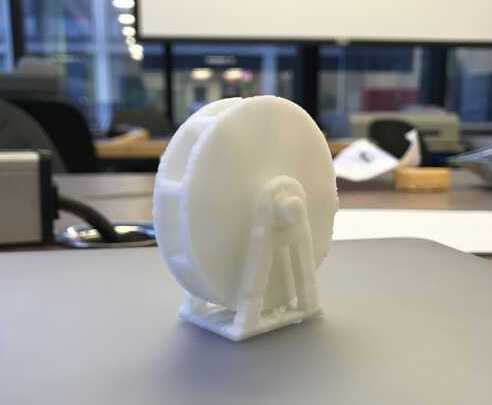
Final product side view
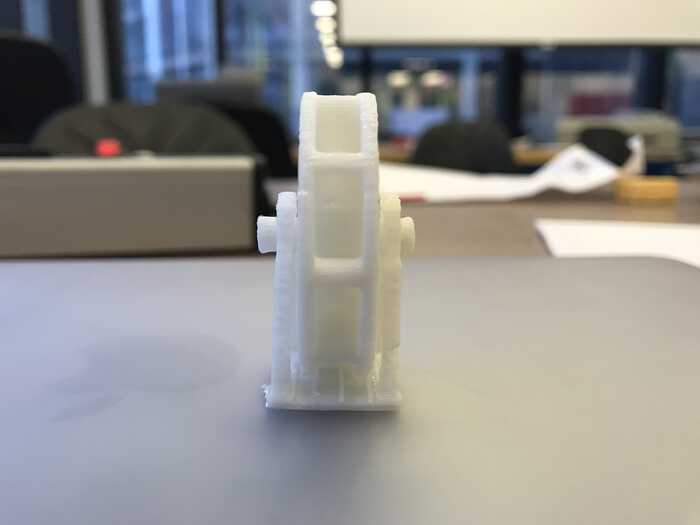
Final product front view
Final product top view
Once I placed it under flowing water, it worked!
The watermill in action
My mini watermill worked great, but if I were to do this project again, I would make the blades curved
so that it would catch water easier.
I would also make my pieces a little thicker. It was hard to get perspective of how thick the pieces would be when the
CAD watermill was zoomed in many times on my computer.
3D scan an object
In the EECS shop we had access to a Sense 3D scanner. The Sense is a hand-held scanner that uses Kinect
technology to scan 3D objects for 3D printing. For this assignment I chose to 3D scan one of my airpods.
Based on recommendations from our section leader, I clamped the airpod vertically to help the Sense scan the object.
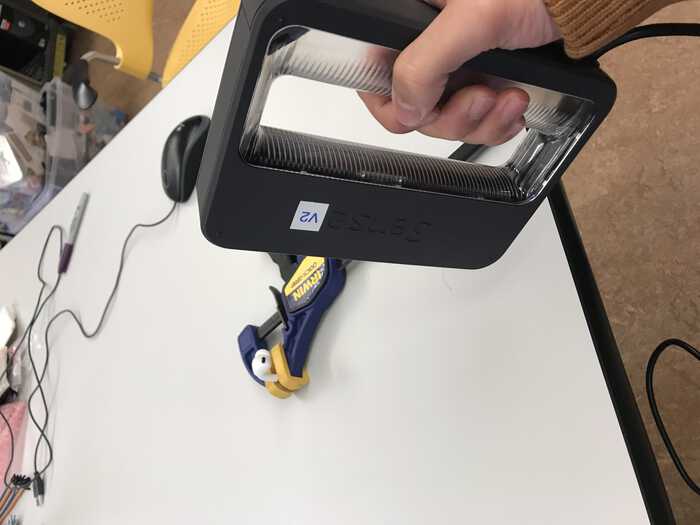
Using Sense 3D Scanner
When scanning the object, it was crucial to keep the object as close to the center as possible.
If the object moved too far away from the center of the camera, it would prompt an error and I found it
hard to realign the object. I also observed that it was important to stay a relatively constant distance
from the object when scanning.
After scanning the object a couple times, I finally got a good result. However in my 3D scan, the clamp also got scanned in my model. Luckily the Sense software allows users to erase objects, so I was able to remove all of the clamp. There were also some regions of the airpod that didn’t get scanned properly (specifically the vertical handle under the base since I didn’t get a view from below from the Sense camera). But the Sense software also had another functionality to fill shapes, and this helped fill up the shape nicely.
After scanning the object a couple times, I finally got a good result. However in my 3D scan, the clamp also got scanned in my model. Luckily the Sense software allows users to erase objects, so I was able to remove all of the clamp. There were also some regions of the airpod that didn’t get scanned properly (specifically the vertical handle under the base since I didn’t get a view from below from the Sense camera). But the Sense software also had another functionality to fill shapes, and this helped fill up the shape nicely.
An interactive display of the 3D scan of the airpods
NEXT>