Week 0/Updates to Final Project Proposal Planning
This page entails my original, initial design, the thought process behind my choices, and acts as a timeline of my work.For my final project, I thought about the things I'm interested in: tech, fashion, music. Specifically, I have been thinking about the pop punk cover band my friends in Illinois and I used to follow, X-Krush.

Thus was born: the music-activated, light-up punk rock spike hoodie (crown?).
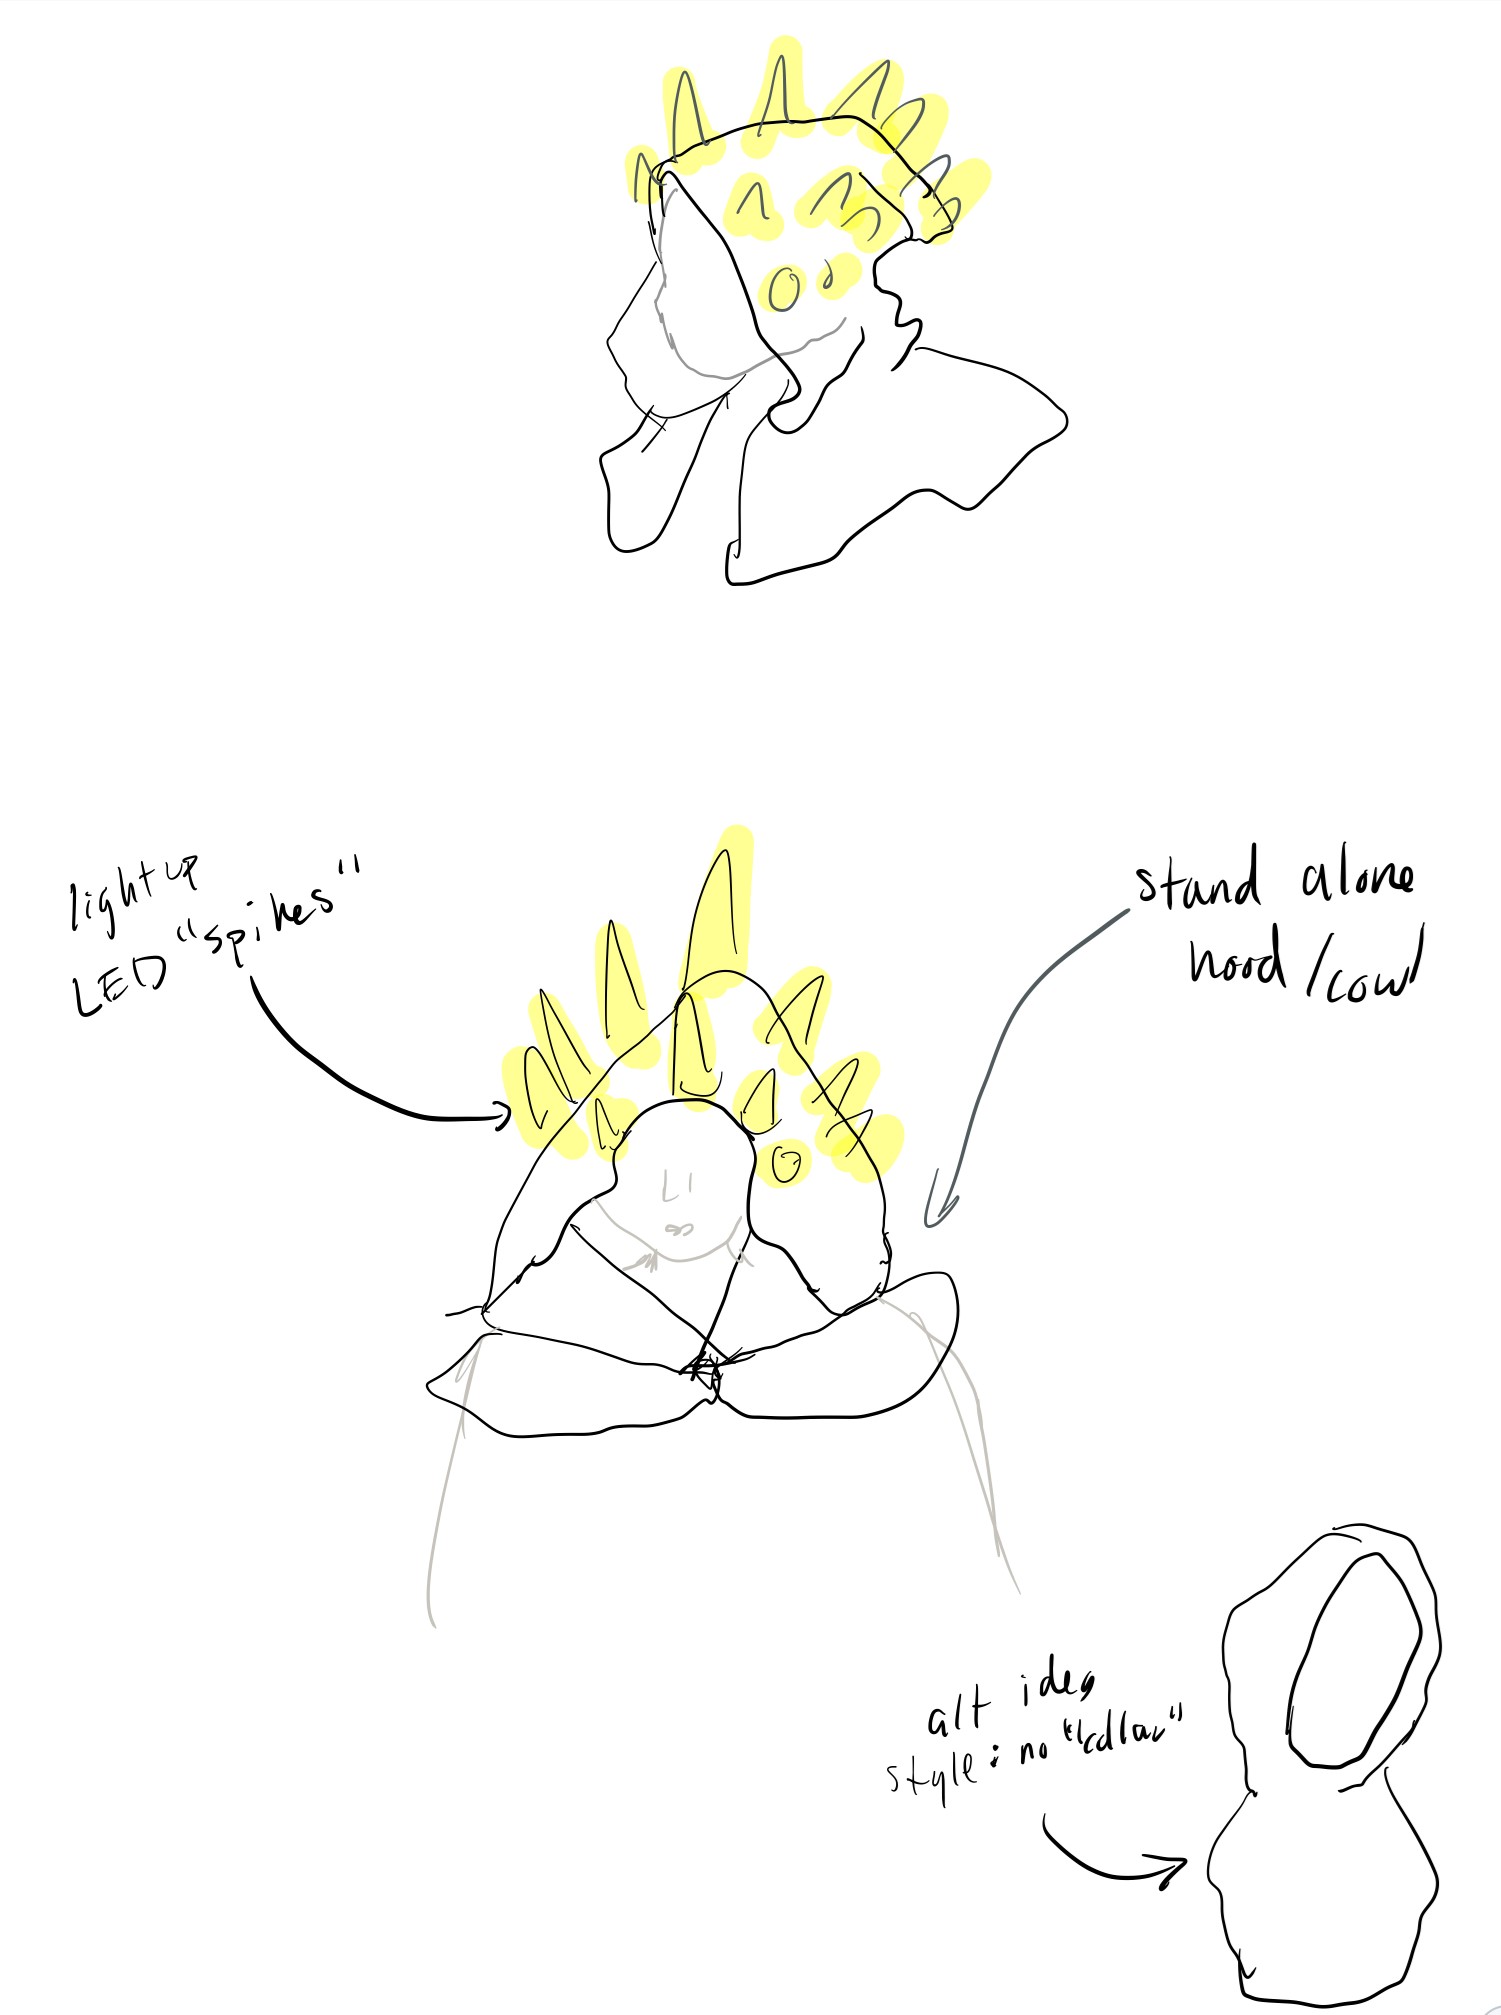
I'm debating between a crown or a hoodie; a hoodie would be more within my usual skillset, and likely more comfortable, but I wonder if it would fulfill course requirements.
Week 1
Limited progress outside of looking into hoodie types I may want to consider. I spent a lot of time on the laser cut/vinyl cut/learning OnShape/learning 2D programs.Week 2 progress
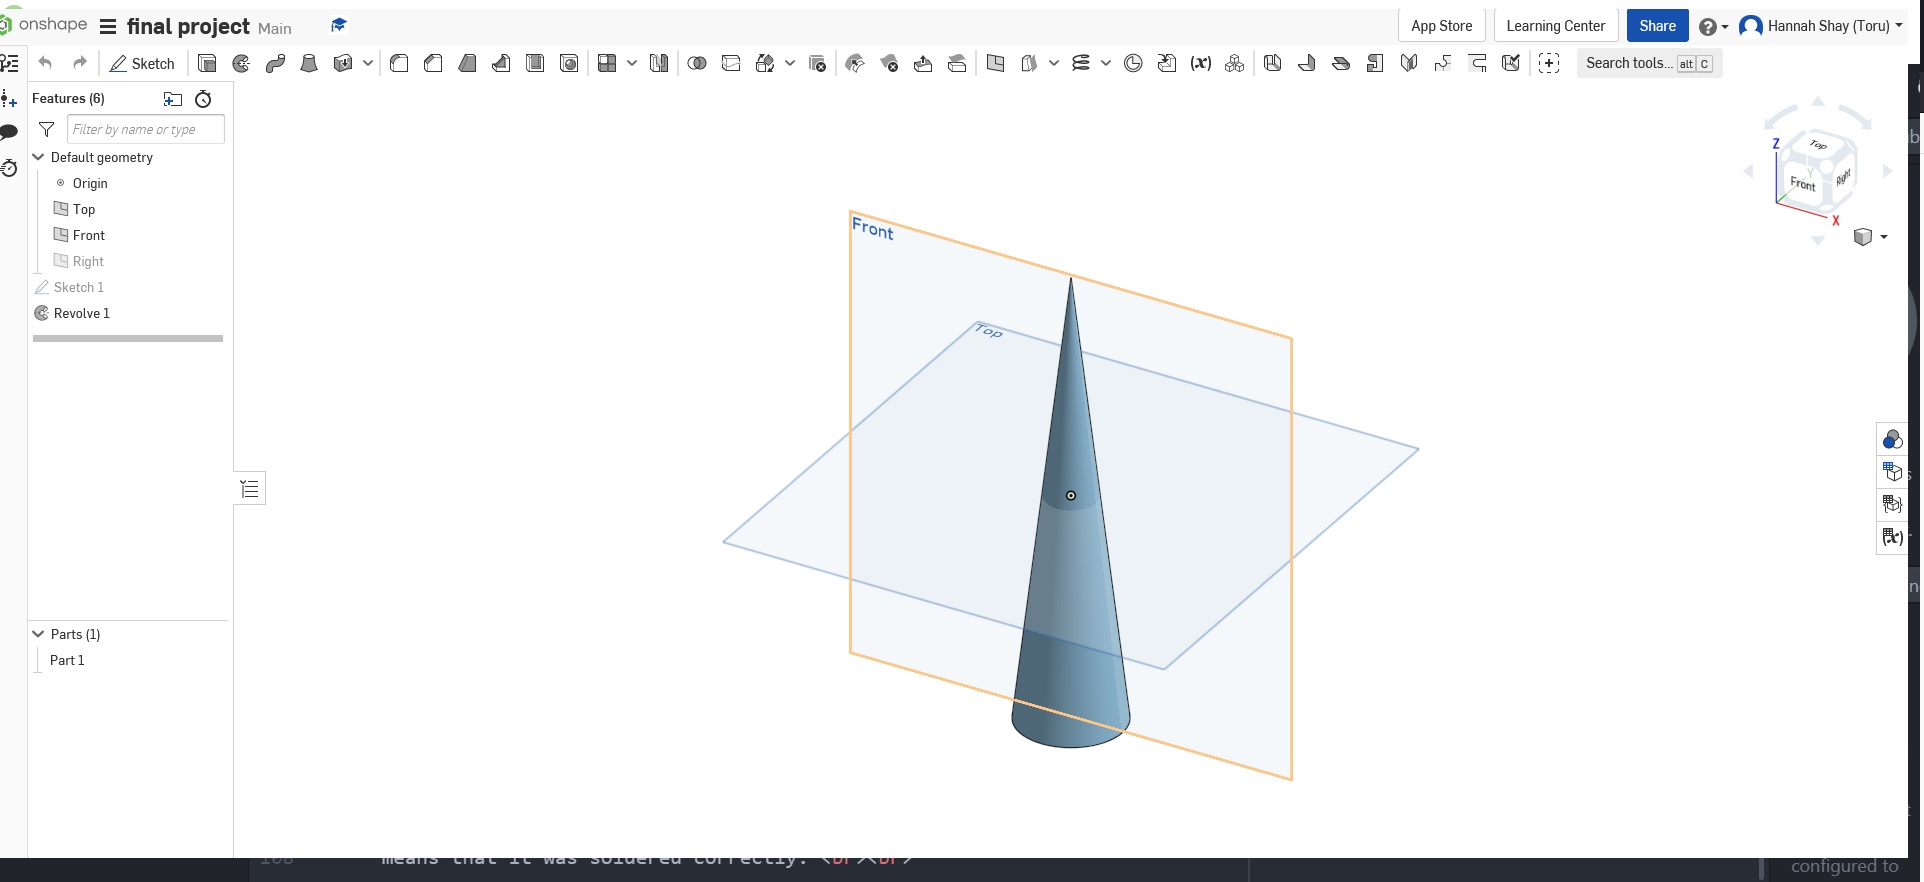
This week I started trying to model the cone shapes. I think I want them to be made of some type of soft, flexible material, so I'll have to think on that; some type of plastic I can laser cut. If the material isn't able to diffuse LED lights, I think I could always buy and cut adhesive frosted privacy window material? They make a very lovely rainbow pattern and I think would be cool on a LED spike.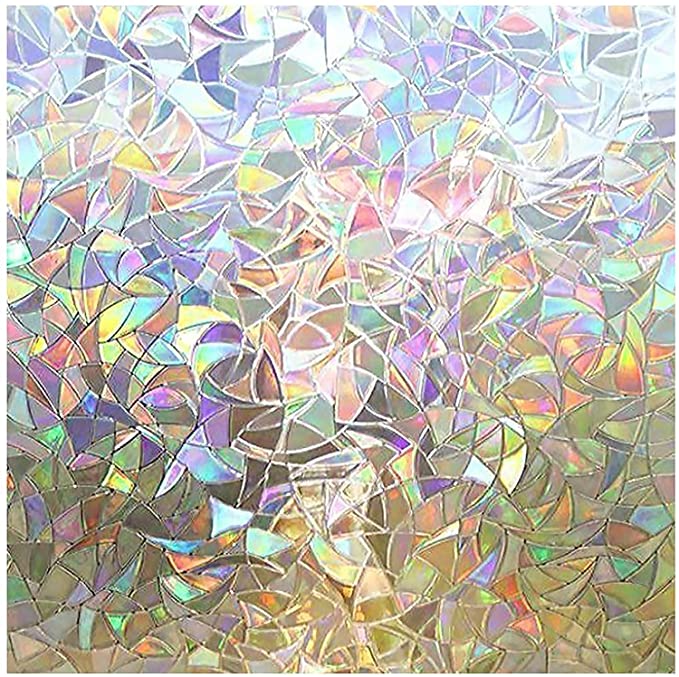
At any rate, I ran into a wall with OnShape--I can't figure out how to unfurl my cone so I have a flat shape I can laser cut. Searching seems to indicate I'll have to add an app(???) to it, so I wonder if now is the time for me to switch to a CAD program a TA can actually guide me in
Week 3 Progress
This week I considered more about the final assignment requirements. Per course description:
Complete your final project, tracking your progress:
what tasks have been completed, and what tasks remain?
what's working? what's not?
what questions need to be resolved?
what will happen when?
what have you learned?
I am concerned that maybe I don't have enough additive/subtractive examples of techniques learned in class, so i constructed a table of what I would need to do.
I had been struggling and decided to really hunker down and plan out the circuitry I would need for my project. I knew that my best bet would be the SAMD21E board, because it has many many pins, likely more than I would realistically need. But better to have more than to run out, right? Additionally, many of my classmates and previous guides had used it, so I would have a lot to reference.
I need to think about exactly what I want this board to do. Sure, I want it to light up my spikes, but how do I want THAT to happen?
Since I'd like to bring this back to Illinois to show off to my friends, it had to be something portable, relatively lightweight for wear and of course, battery-operated. My initial ideas were:
1. Use an LED inside of an epoxy spike I would mold and cast. I think this would look neat, but I didn't want the wiring to be seen. Additionally, I thought this might be really heavy to wear.
2. 3d print some sort of spike structure I would then wrap a light-diffusing material around. It would ideally be hollow inside, so I could again place an LED inside. I think this could work, but is fairly inelegant.
When I was called on during BIG week, Neil pointed me in the directoin of Miriam Choi of the Seoul FabAcademy. She had made a Smart Helmet that would turn red when she stopped biking and green when she moved.
She had the clever idea of laying some neopixels underneath a cast of a silicon spike. The silicon diffused light from the neopixel through the spike nicely.
Week 4-7 Progress
These weeks were intense learning/planning for me. I focused a lot on the actual weeeks themselves (when I wasn't sick). I don't have pictures as most of what happened was discussions with rough hand sketches.
This week made me realize it would likely be better for me to mold/cast my spikes instead of 3d-printing them like I initially planned to. That way, I don't have to attempt to unfurl my cone in CAD. On the downside, depending on the type of material I use, my spikes might be a bit heavy/inflexible.
However, I have since decided to make a helmet instead of a hood as I originally planned. As such, a heavier spike is probably less of an issue.
Additionally, during this period, I talked to both Anthony and Laura about my final as part of my course "midterm." Anthony recommended I look into Neopixels, which are "individually addressable" LEDs. So this means they are LED strips/rings that have their own microcontroller! This sounded perfect, and while a bit pricey, I wouldn't need more than maybe 1 meter for my final.
Additionally, this week Laura and I talked about logistics for my project. She helped me think through how I could place my Neopixels on a helmet, and I chatted about my plan to mold/cast the helmet piece. While I had initially thought I might need to 3d scan my head to then make a mold out of wax like we did for that week, she noted that it didn't have to be an exact fit, so measurements or an existing helmet as a mold would also be a good idea.
This part was trickier than I thought it would be. I initially thought I could get away with just using my head measurements to design something in Fusion to 3d print. But I'm not sure the 3d print would be secure enough. Plus, this is an opporutnity to use a custom head shape, right?
It has to be:
1. Lightweight: if I do wear this to a show, I don't want to be weighed down.
2. sturdy: it's going to be holding several spikes and the light system
I think maybe 3d scanning my head and using that as something I can then make a mold out of. I probably don't want it super tight, as I'm sure there's something bad about wearing tightly fitting plastic/epoxy/resin/i don't know yet.
I think if the spikes are light enough, I can make the head piece quite light as well. This will let me know if I can make it by 3d printing, or some other way.
I'm deciding between the materials:
1. Crystal clear - https://www.smooth-on.com/product-line/crystal-clear/
2. ClearLite - https://www.tapplastics.com/product/mold_making_materials/casting_products/tap_clear_lite_casting_resin/75
3. Epoxcast = https://www.smooth-on.com/products/epoxacast-690/

Week 8 and 9 Progress
These weeks I attempted to get a working board and try the existing microphones in the inventory. They were significantly smaller than expected and I don't love the look of them. I had initially thought that a classic-round-bulb vocal microphone hung over the forehead would be good because it is near my head--ostensibly where I hear music. However, the simple set up of the analog microphone in the inventory was also interesting.
Similarily, because I was still hesitant about ordering neopixels, I attempted to set up a chain of LEDs. It was not successful, so this week I finally decided with the number of LEDs I would need, to just buy some neopixels.
You can see this in Week 9: Output Devices
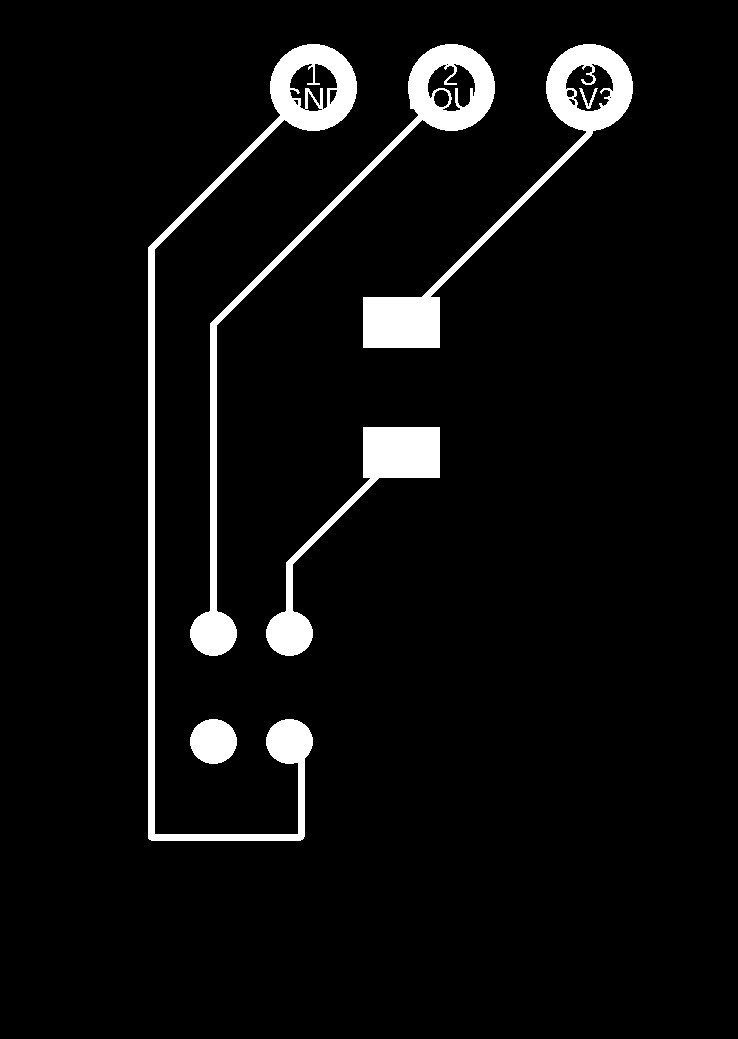
I began toying with the idea of a devkit board. We had been introduced to them so far, but a few of my classmates were doing them. Although an unfamiliar concept, it made a lot of sense. In preparation, I designed a microphone breakout board.
Week 10 Progress
This week, I realized my previous devkit board was missing a few necessary connections, so I re-milled. I was still having trouble with understanding the Arduino IDE messages (see Week 6: Embedded programming), so brought my board to Anthony to look over. It looks like I had actually successfully bootloaded my new board, but it turned out to be a good thing I had brought it anyway--One of the grounds on my devkit board was not connected! Anthony taught me how to best jump this with wire, and recommended when i was certain of my design to hot glue or epoxy it all down. Noted!
[[picture of devkit board here]]
Week 11 - 12 Progress
Honestly this week I ordered the last of my necessary items, made an appointment with Laura to talk about ideas for my helmet and did some sketching on what I thought was possible for my helmet design. It certainly SEEMED straightforward at first, in which I would use an existing skate helmet as a mold and cast from there. However, as I quickly learned, everything is harder than it seems.
My ideas where this, initially:
1. I was initially thinking to use an existing helmet as the mold. I saw some people online are using a type of thick rubber they brush on to make layers of the helmet mold, and casting from this brushed-rubber mold. (https://www.smooth-on.com/tutorials/rebound-40-captain-america-helmet-mold-maketwo-castings/). This seems like it could work but seems geared for designs with a lot of details and seems quite expensive as I’d need to buy several types of casting material
2. My second idea was to cast/mold my helmet by pouring a lot of oomoo into a bucket and using my existing helmet to make the shape in it and pour my casting material in that after. However, I was wondering if this would conflict with the nature of the course and if I should design one to be cut on a CNC instead. As of now, I’m worried I wouldn’t have “used enough” fabrication techniques.
3. I would use a CAD model to cut something out of some type of large foam or wax material and mold/cast like we did in week 8.
However, between cost, difficulties with CNC details/foam cutting, Laura recommended I try making a negative mold by thermomolding. This was a technique we hadn't covered in class, but according to Laura and Shah, is a fairly straightforward technique.
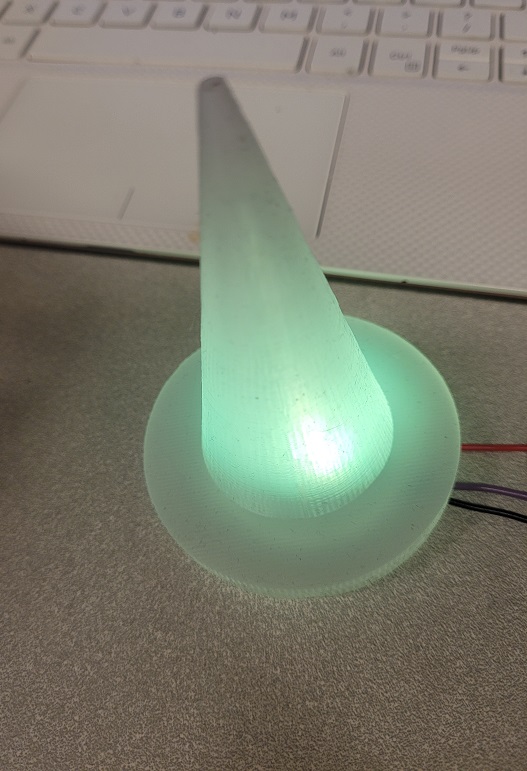
Laura and I also discussed a mold for my spikes. Initially, I thought I would maybe vinyl cut it, but Laura mentioned 3d printing, which I for some reason hadn't considered. This way I could make it the same material as the rest of my helmet--flexible like I wanted. However, I did have to find a way to make it hollow so that it wouldn't be so heavy. Additionally, we setlled on Ecoflex 00-30, for something that is light-diffusing, lightweight and easy to use.
She helped me think through a design to visualize how I could work it through.
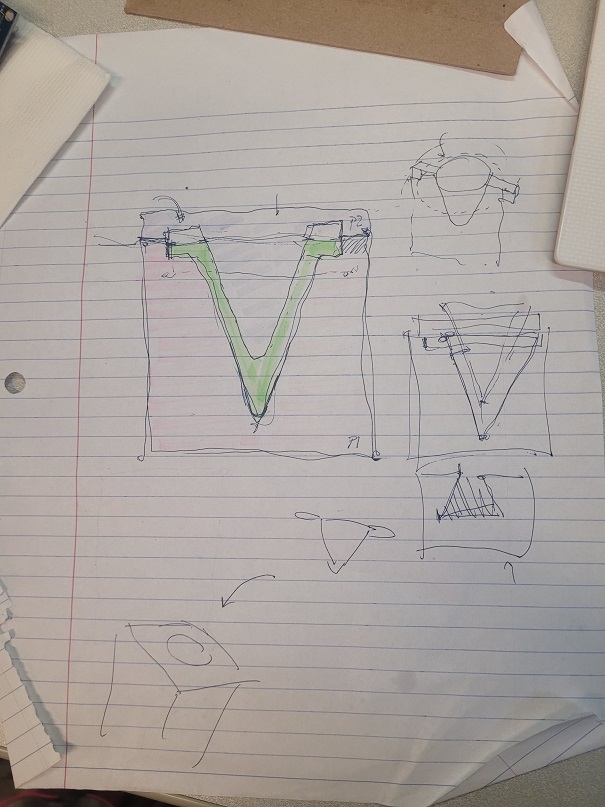
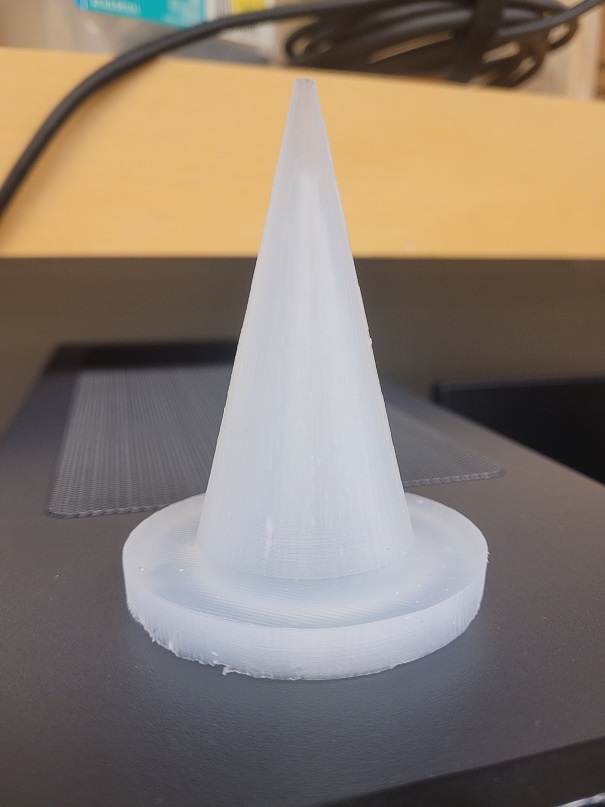
I then went home and designed a 3-inch tall, 1.5 in diameter base, with no point at the end in Fusion.
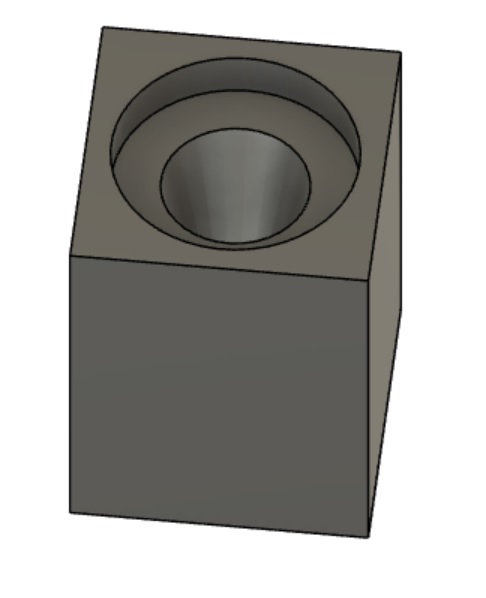
I brought this to the archshop 3d printers afterwards.
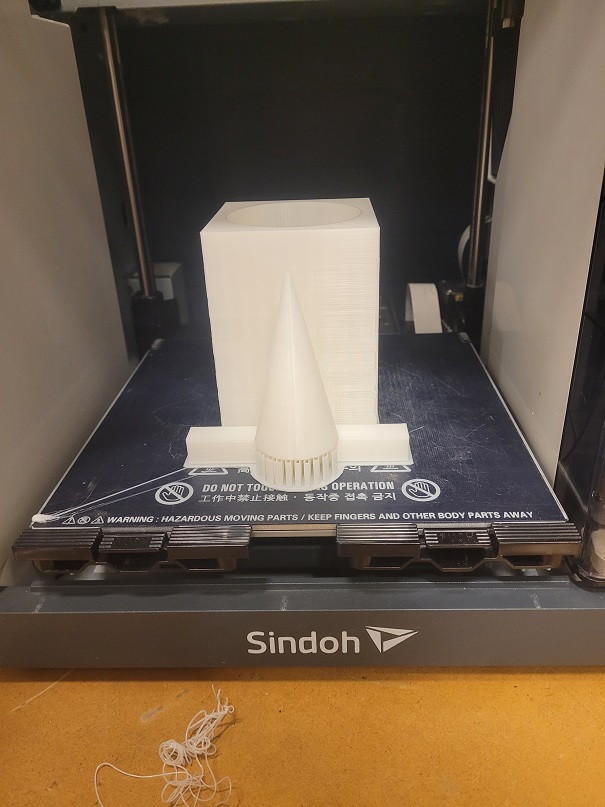
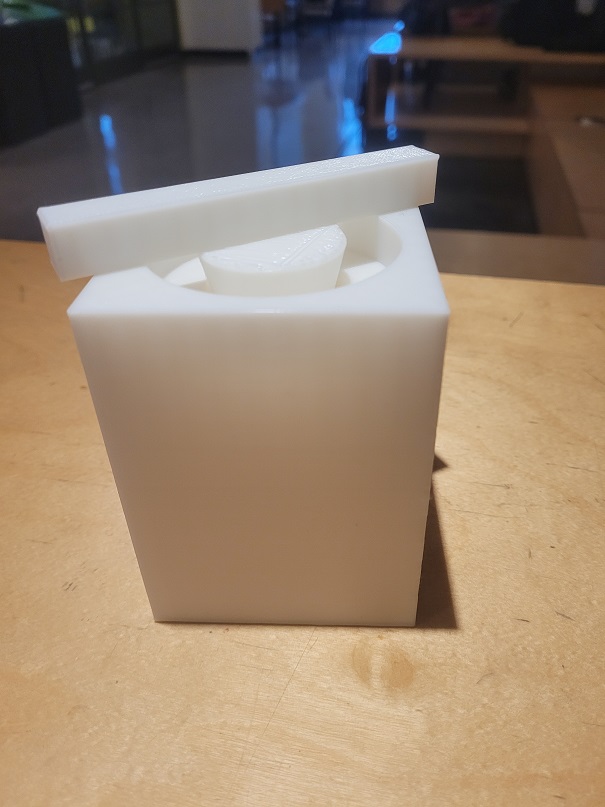
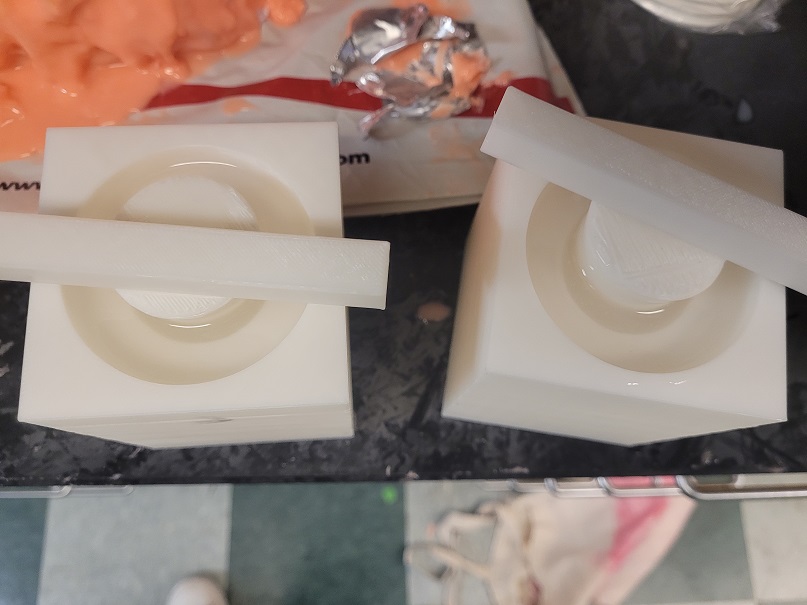
Finally, I cast ecoflex into it and got my shape after four hours!
Week 13 Progress
This week....... proved tricky for a number of reasons. My labmate tested positive the for covid, so I immediately went home to isolate. My first test was negative; however, my lab mates took several days to start showing symptoms and didn't test positive until he started showing symptoms.
I started feeling sick with covid symptoms, so it didn't help my anxiety. Thankfully I continued to test negative and started feeling better, but I did lose a good amount of time since I couldn't work on anything. I also got Murphy's Lawed--it turns out my plans for using thermomolding would likely destroy my existing helmet. Additionally, when I had made a hard shell mold with the free form air, Jen informed me the thermoformer was broken.
So unfortunately, I spent most of this week fairly sick and anxious. Thankfully, it looks like it was bad timing and my cold was NOT covid.
Last week push
So... almost everything did NOT go according to plan. You can see my devkit progress in week 6.
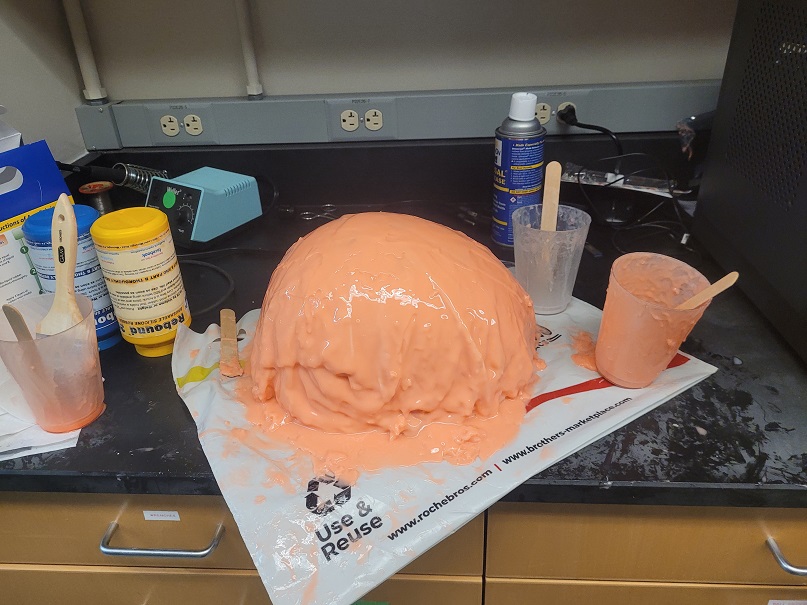
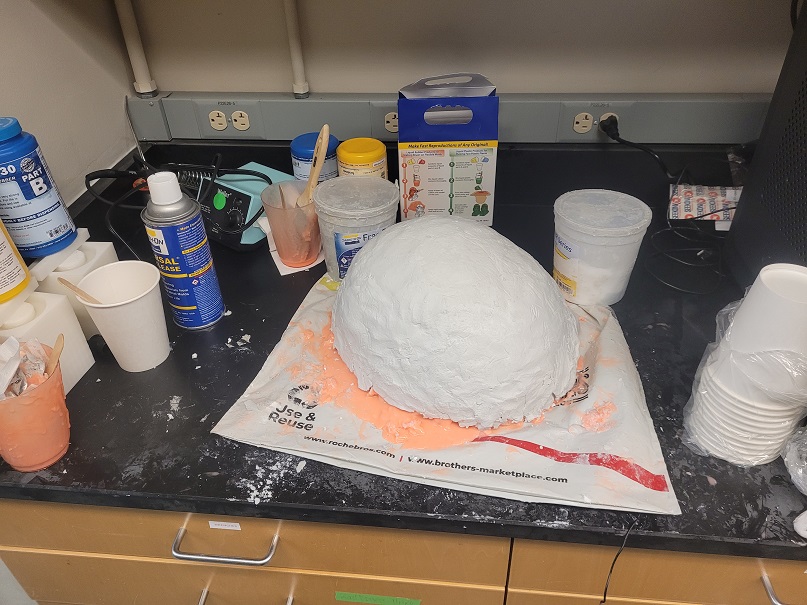
I spent two days making my initial mold. While in hindsight, I likely could've just directly dipped the helmet into ecoflex, but since the only material I had used so far was oomoo and plaster, I wanted to play it safe. Rebound25 is similar to oomoo in that it is a silicon base; however, it requires a hard outer shell as it cannot hold its own shape. The free form air acted as a very sturdy and hard shape. I had hoped to thermoform around it, but with the machine down, I couldn't.
With these layers, done, I went on to do as Laura suggested. I dripped some amount of Ecoflex into my free form air mold, trying to ensure I got some in the crevasses I had in the Rebound25. I liked the dripping look that shell had. Once ecoflex was in the mold, I swirled it around the mold until it began to cure, about 30 minutes in. About 5 layers in, I placed some vinyl cuts I had designed inside.


It turned out to be to a bit too many layers past and wasn't that visible from the outside.
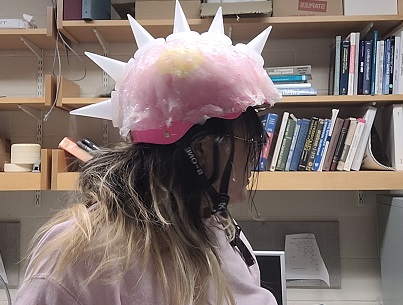
At the same time, I was making my spikes. I ended up making about 15, the amount I predicted I would need to entirely cover the helmet.
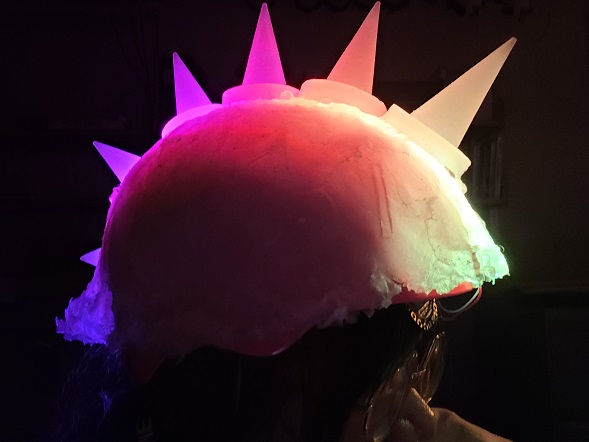
I embedded my board, my neopixels and then lay it on my skate helmet as a topper. It weighed a LOT.
Anyway, I had a lot of fun and here are cool pictures of it. There's video on my Final presentation page.