Week 6: Embedded Programming
This week I got really ill and was bedridden. This page was written afterwards and should act as a tutorial for the steps to get started. I wrote this page using my devkit, as opposed to one of Neil's sample boards.
Embedded programming is the term for programming small computers/microcontrollers that control or drive devices. For the microcontrollers used in this course, it refers to an overall process (as I understand it).
Bootloading
For later generations (i.e., the D11C and SAMD21 come to mind; NOT the ATTiny 45, for example), a bootloader refers to a program that runs inside the microcontroller to be programmed. Without a bootloader, an existing microcontroller can't "speak" USB. If it can't "speak" USB, it cannot connect to your computer and doesn't understand whatever code you've written.
The D11C and SAMD21 microcontrollers have some amount of memory that can be dedicated to bootloading, and the rest can then be "programmed" using whatever you have. IF you are coming across this page and the board you are using is Neil's D11C board, which is what I would have worked off of,there are some additional details, noted below, about the multiple pins and headers. However, I will be going through this documentation with my d11c devkit board.
This tutorial is a good tutorial if you already have some background in these topics.
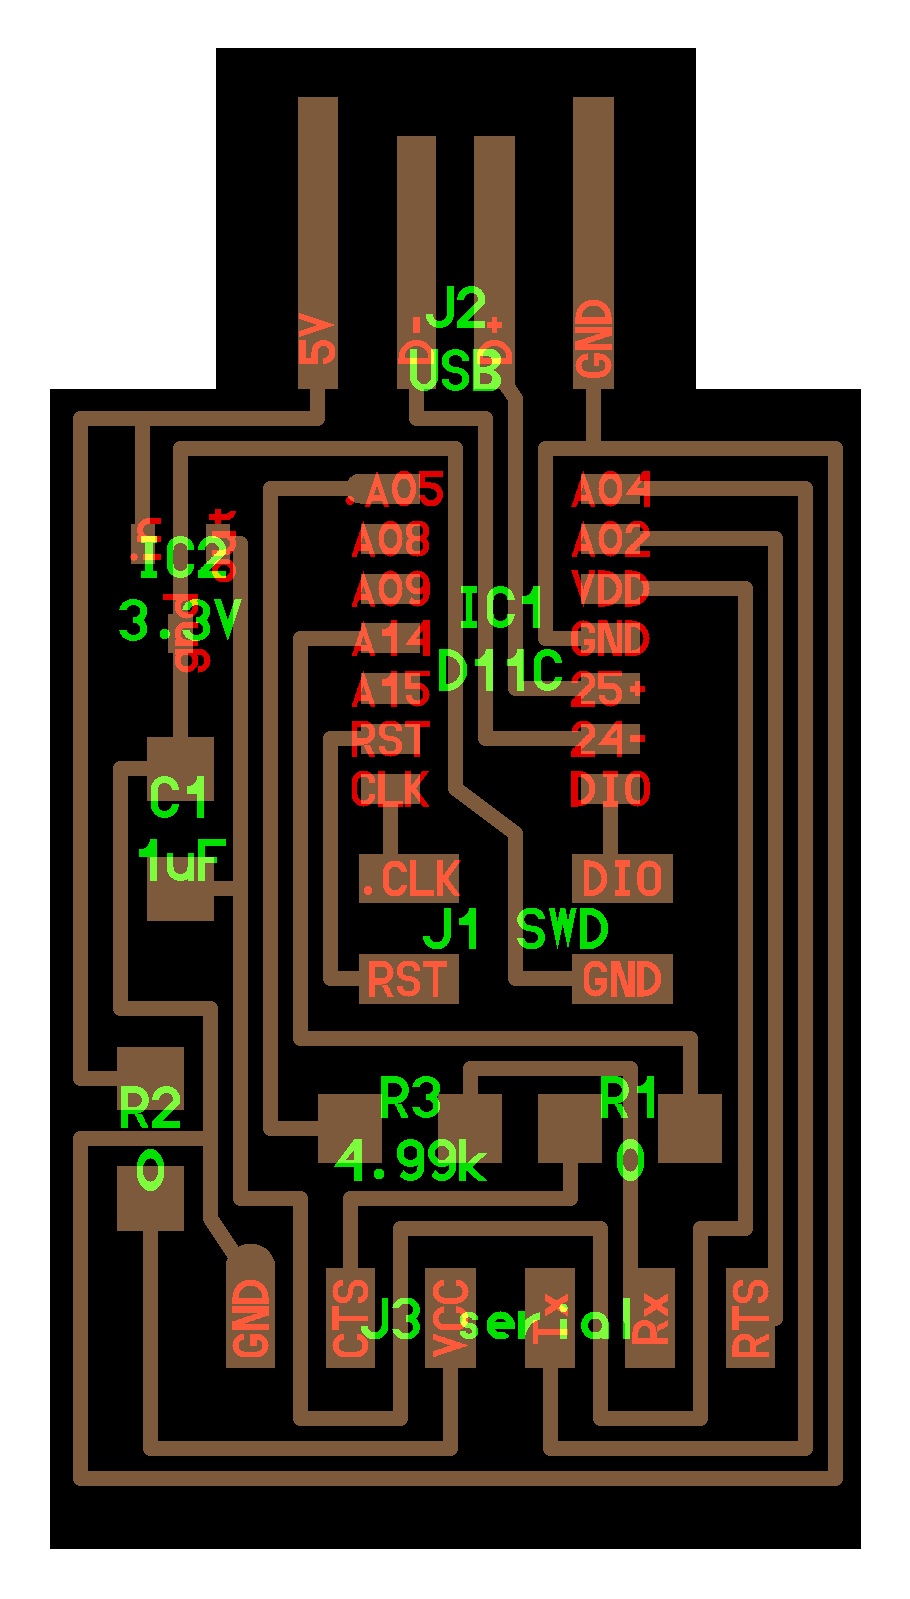
In short, what you are looking at in this board is a microcontroller with a 4pin and a 6-pin connections. Of course, there are other details (i.e., capacitors) but the 4-pin and 6-pin tripped me up.
The 6-pin speaks "serial"--the "brand"FTDI--which is a standardized method of communication in bits along the same wire. The tricky thing about this board--and a part of the lesson-- is to understand the d11c microcontroller, once programmed, can be used to program other boards.
This is because once you have successfully bootloaded, your microcontroller can understand the code you wrote/modified to do *something else*--maybe it'll go online, or maybe it'll light an LED. This week used the bootloaded d11c microcontroller to further program another board. The reason Laura's page above and Neil's video of the serial board uses three separate PCB is because the D11C microcontroller (connected to usb) is attempting to program an ATTiny chip. The attiny chip is on a board with just a UPDI connection head, which similar to FTDI, does not "speak" usb OR serial. The PCB in the middle is "translating" serial from the d11c pcb into UPDI.
However, I will primarily talk about embedded programming in the context of my d11c devkit board as the basis.
We were initially given a set of instructions to bootload our boards, which are also reflected in the link to Laura's tutorial above. However, it was later revealed you can bootload from Arduino IDE.
What hardware you need and what these objects do (assuming you are using a d11c board devkit inspired by Quentin's tutorial, here):
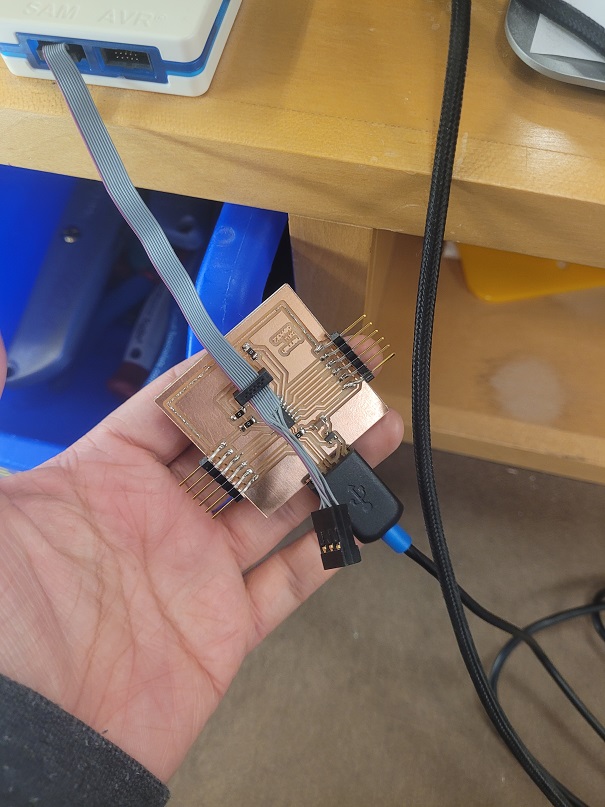
-your board, ideally with both a USB connection and a 6-pin connection.
-connection cables because you ideally never want to directly plug your board into your computer. For this board, I needed a USB connector cable
-atmel-ice. In the context of this class, the ATMEL-ICE is a programmer. I think of it as a translator that teaches my microcontroller how to speak USB. This programmer should be used in conjunction with the edbg program
What software you will need and what they do:
-edbg program as I understand it is the "onboard debugger" of the Atmel. EDBG is a short hand for "embedded debugger." Think of this as the program the programmer (atmel-ice) uses to teach your microcontroller how to speak usb.
- Arduino IDE which is the arduino "integrated development environment." This is a way of saying it's a user interface to write code. There's a lot more that can be said about it, but for absolute beginners, it's easiest to approach the IDE as this. - correct arduino libraries. this isn't really its own "category," but rather a detail.
A short summary of bootloading, using the Arduino IDE:
1. Download Arduino IDE.
2. Access the necessary libraries. This is usually a reference link from github/gitlab for the microcontrollers in this class.
3. Connect your board--in most cases for this class (D11C/SAMD21) , this means using an atmel-ice.
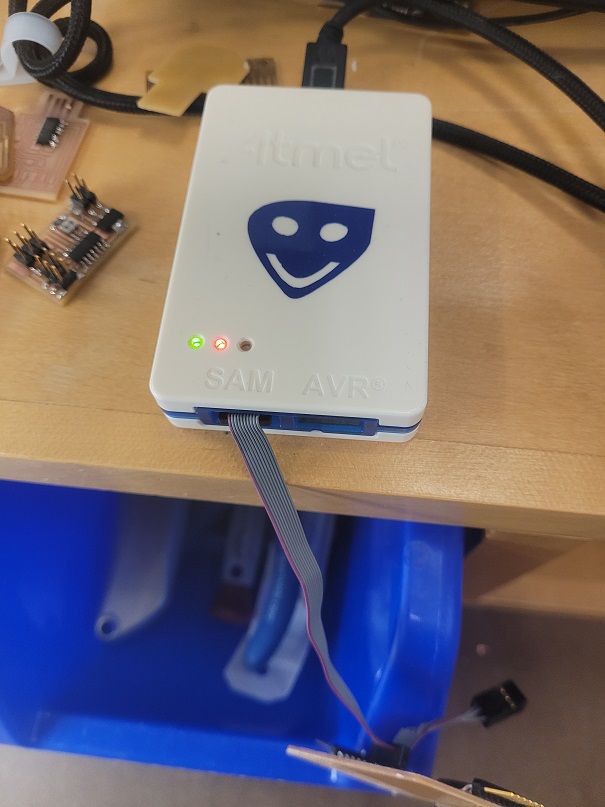
important to note is that there are two sides to the ATMEL--AVR and SAM. make sure you are connected to the right side! This depends on your microcontroller. For the D11C/SAM21 microcontrollers, use the SAME side.
4. connect your usb head to the USB connection cable--this will power your board.
5. In the arduino IDE, you'll want to go Tools > board. You'll notice at the bottom there's an potion for "Burn bootloader"--this will do the bootloading for you!

6. If it all goes according to plan, you should get this message
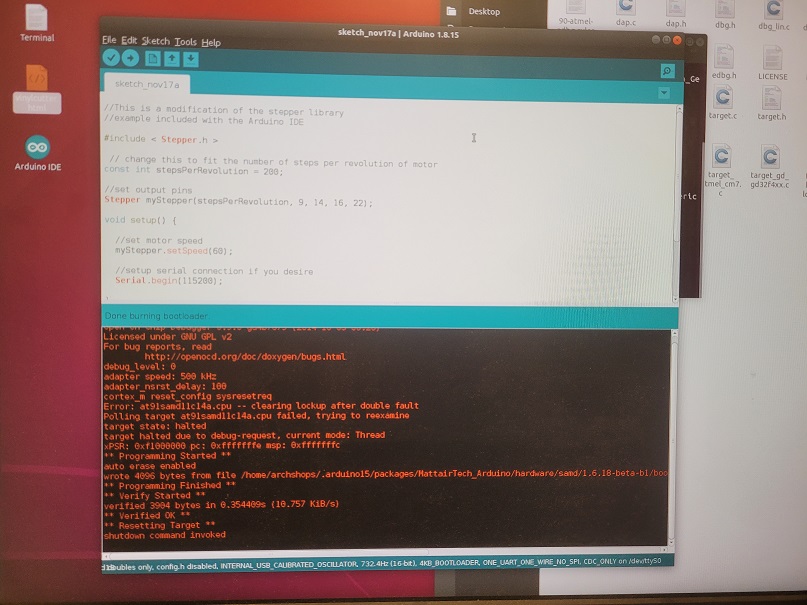
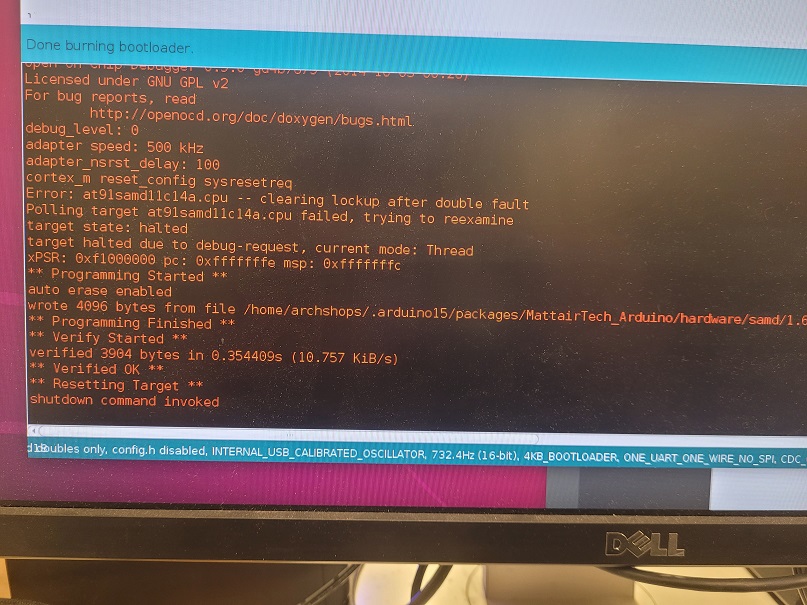
Personally, what confused me was that I've always interpreted red as "bad! bad! wrong! turn back!" so the finishing up message being in red sent me for a loop.
Later at office hours, I was able to confirm with Anthony that I had, in fact, successfully bootloaded my devkit board! Success!
Programming
So I have one confession: while I had heard about Arduinos before this class, I actually had no idea what it was. This was the part I was initially way more worried about; however, it looks like actually with the Arduino IDE, it should be more straightforward to do than I initially thought.
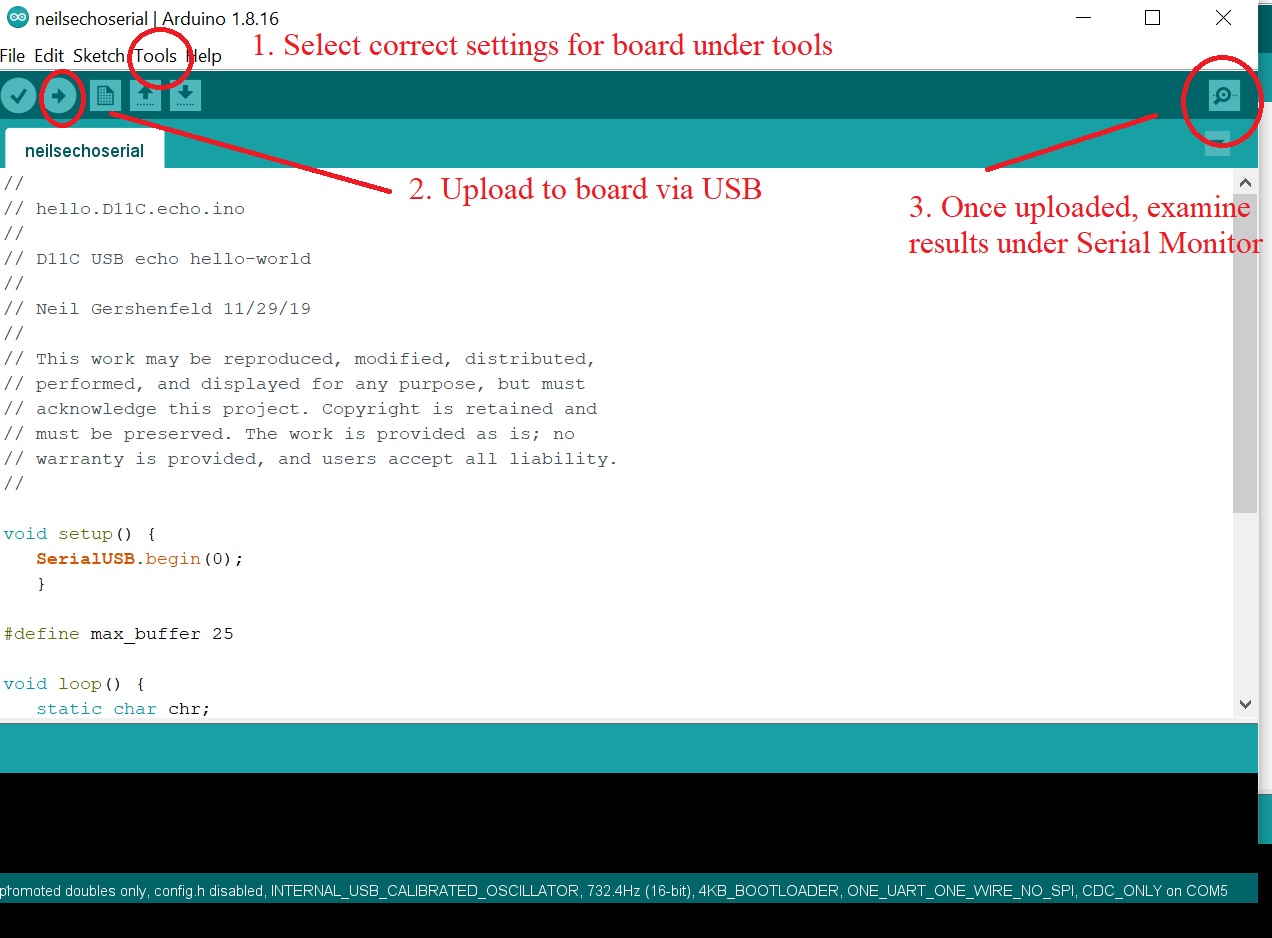
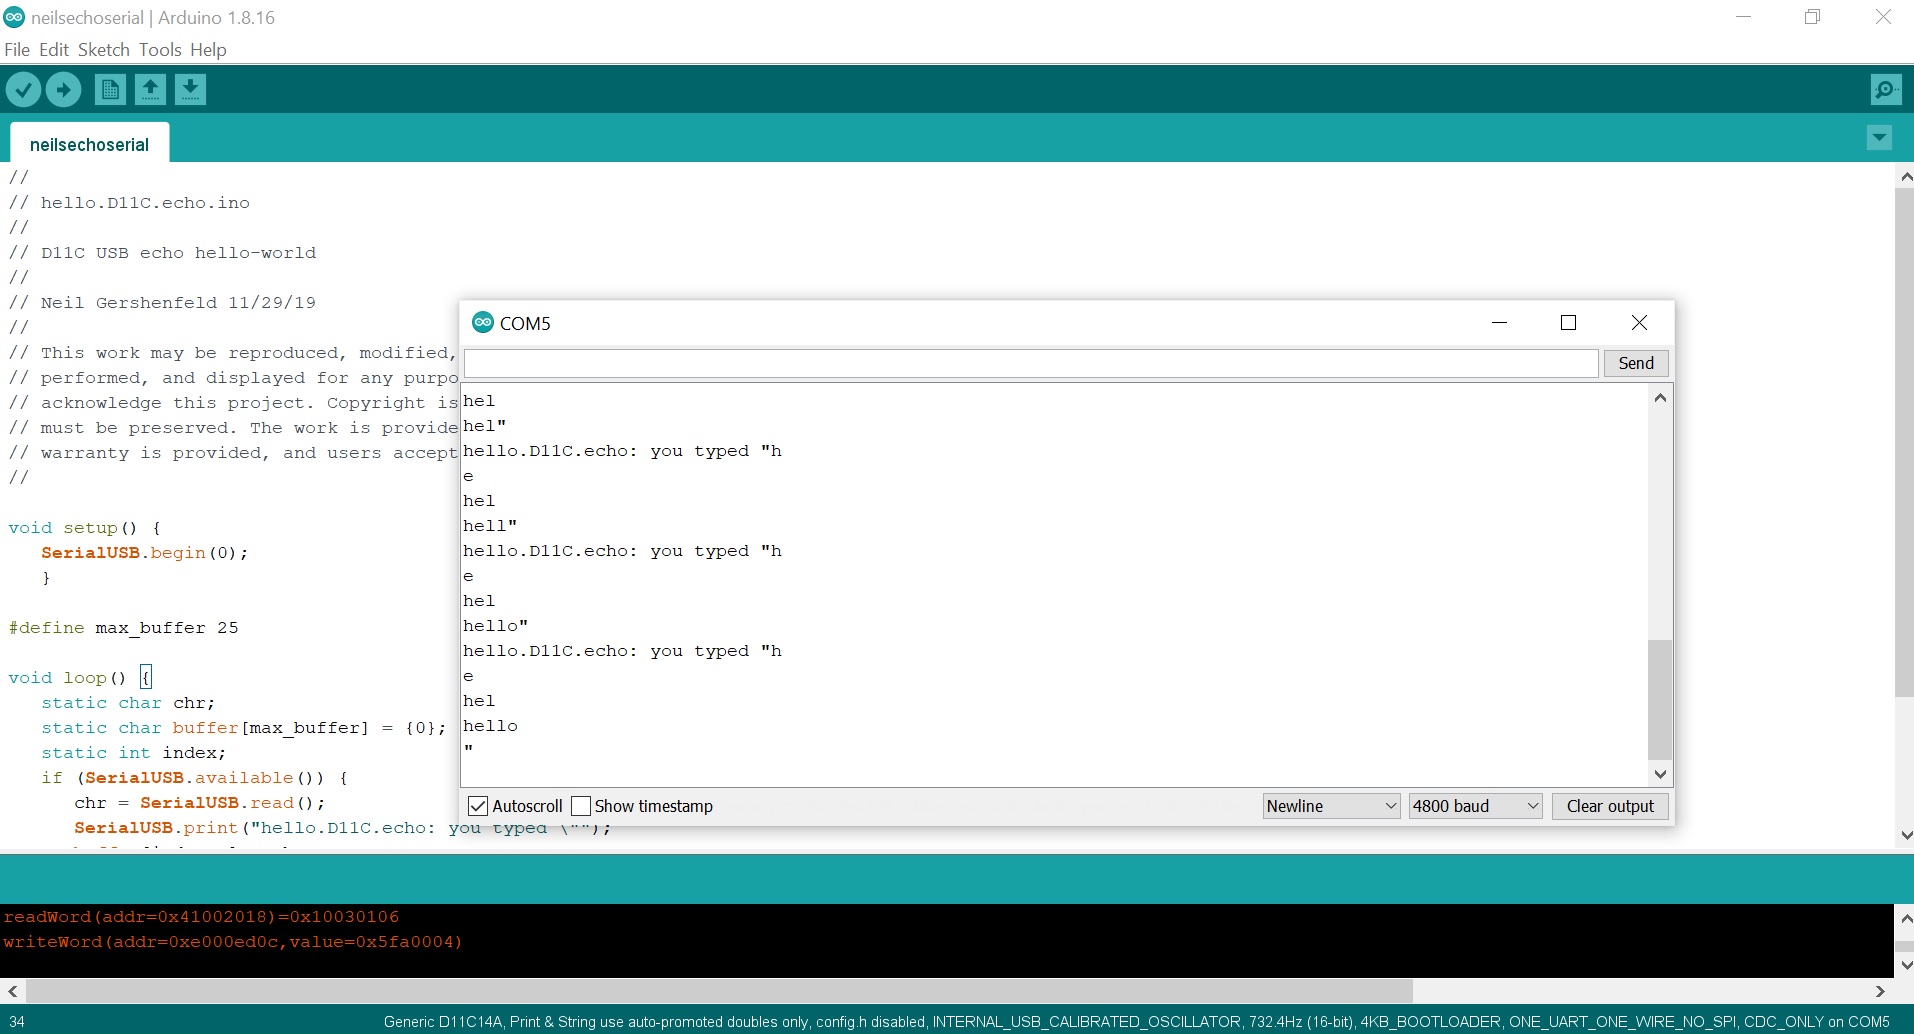
To check if my board worked, I took Neil's D11C serial echo code, copied and saved it to my Arduino IDE. Then I selected the correct board/port, hit the UPLOAD button. After it successfully uploaded, I clicked the serial monitor.
To any other beginners like me, I'd recommend looking through the helpful Arduino libraries.