Week 10: Networking and Communication
Instrument/Programs used: PCB Mill, Eagle
External resources used: Serial-to-WiFi Tutorial using ESP8266
https://create.arduino.cc/projecthub/muhammad-aqib/arduino-rgb-led-tutorial-fc003e
terminology: Web server vs access point
Week 9 Lecture notes
External resources used: Serial-to-WiFi Tutorial using ESP8266
https://create.arduino.cc/projecthub/muhammad-aqib/arduino-rgb-led-tutorial-fc003e
terminology: Web server vs access point
Week 9 Lecture notes
I decided to try the vinyl cutter this week since the Archshops were apparently running low on copper boards. That was something I had had issues with earlier; sometimes there weren't enough boards or only small ones; sometimes we would have just one endmill in the shop and someone would break it. I don't know if it's how the class is normally run (budget issues?) or if it's because the class is concerned about backordered items, but it feels like there's very little space for error or mistakes.
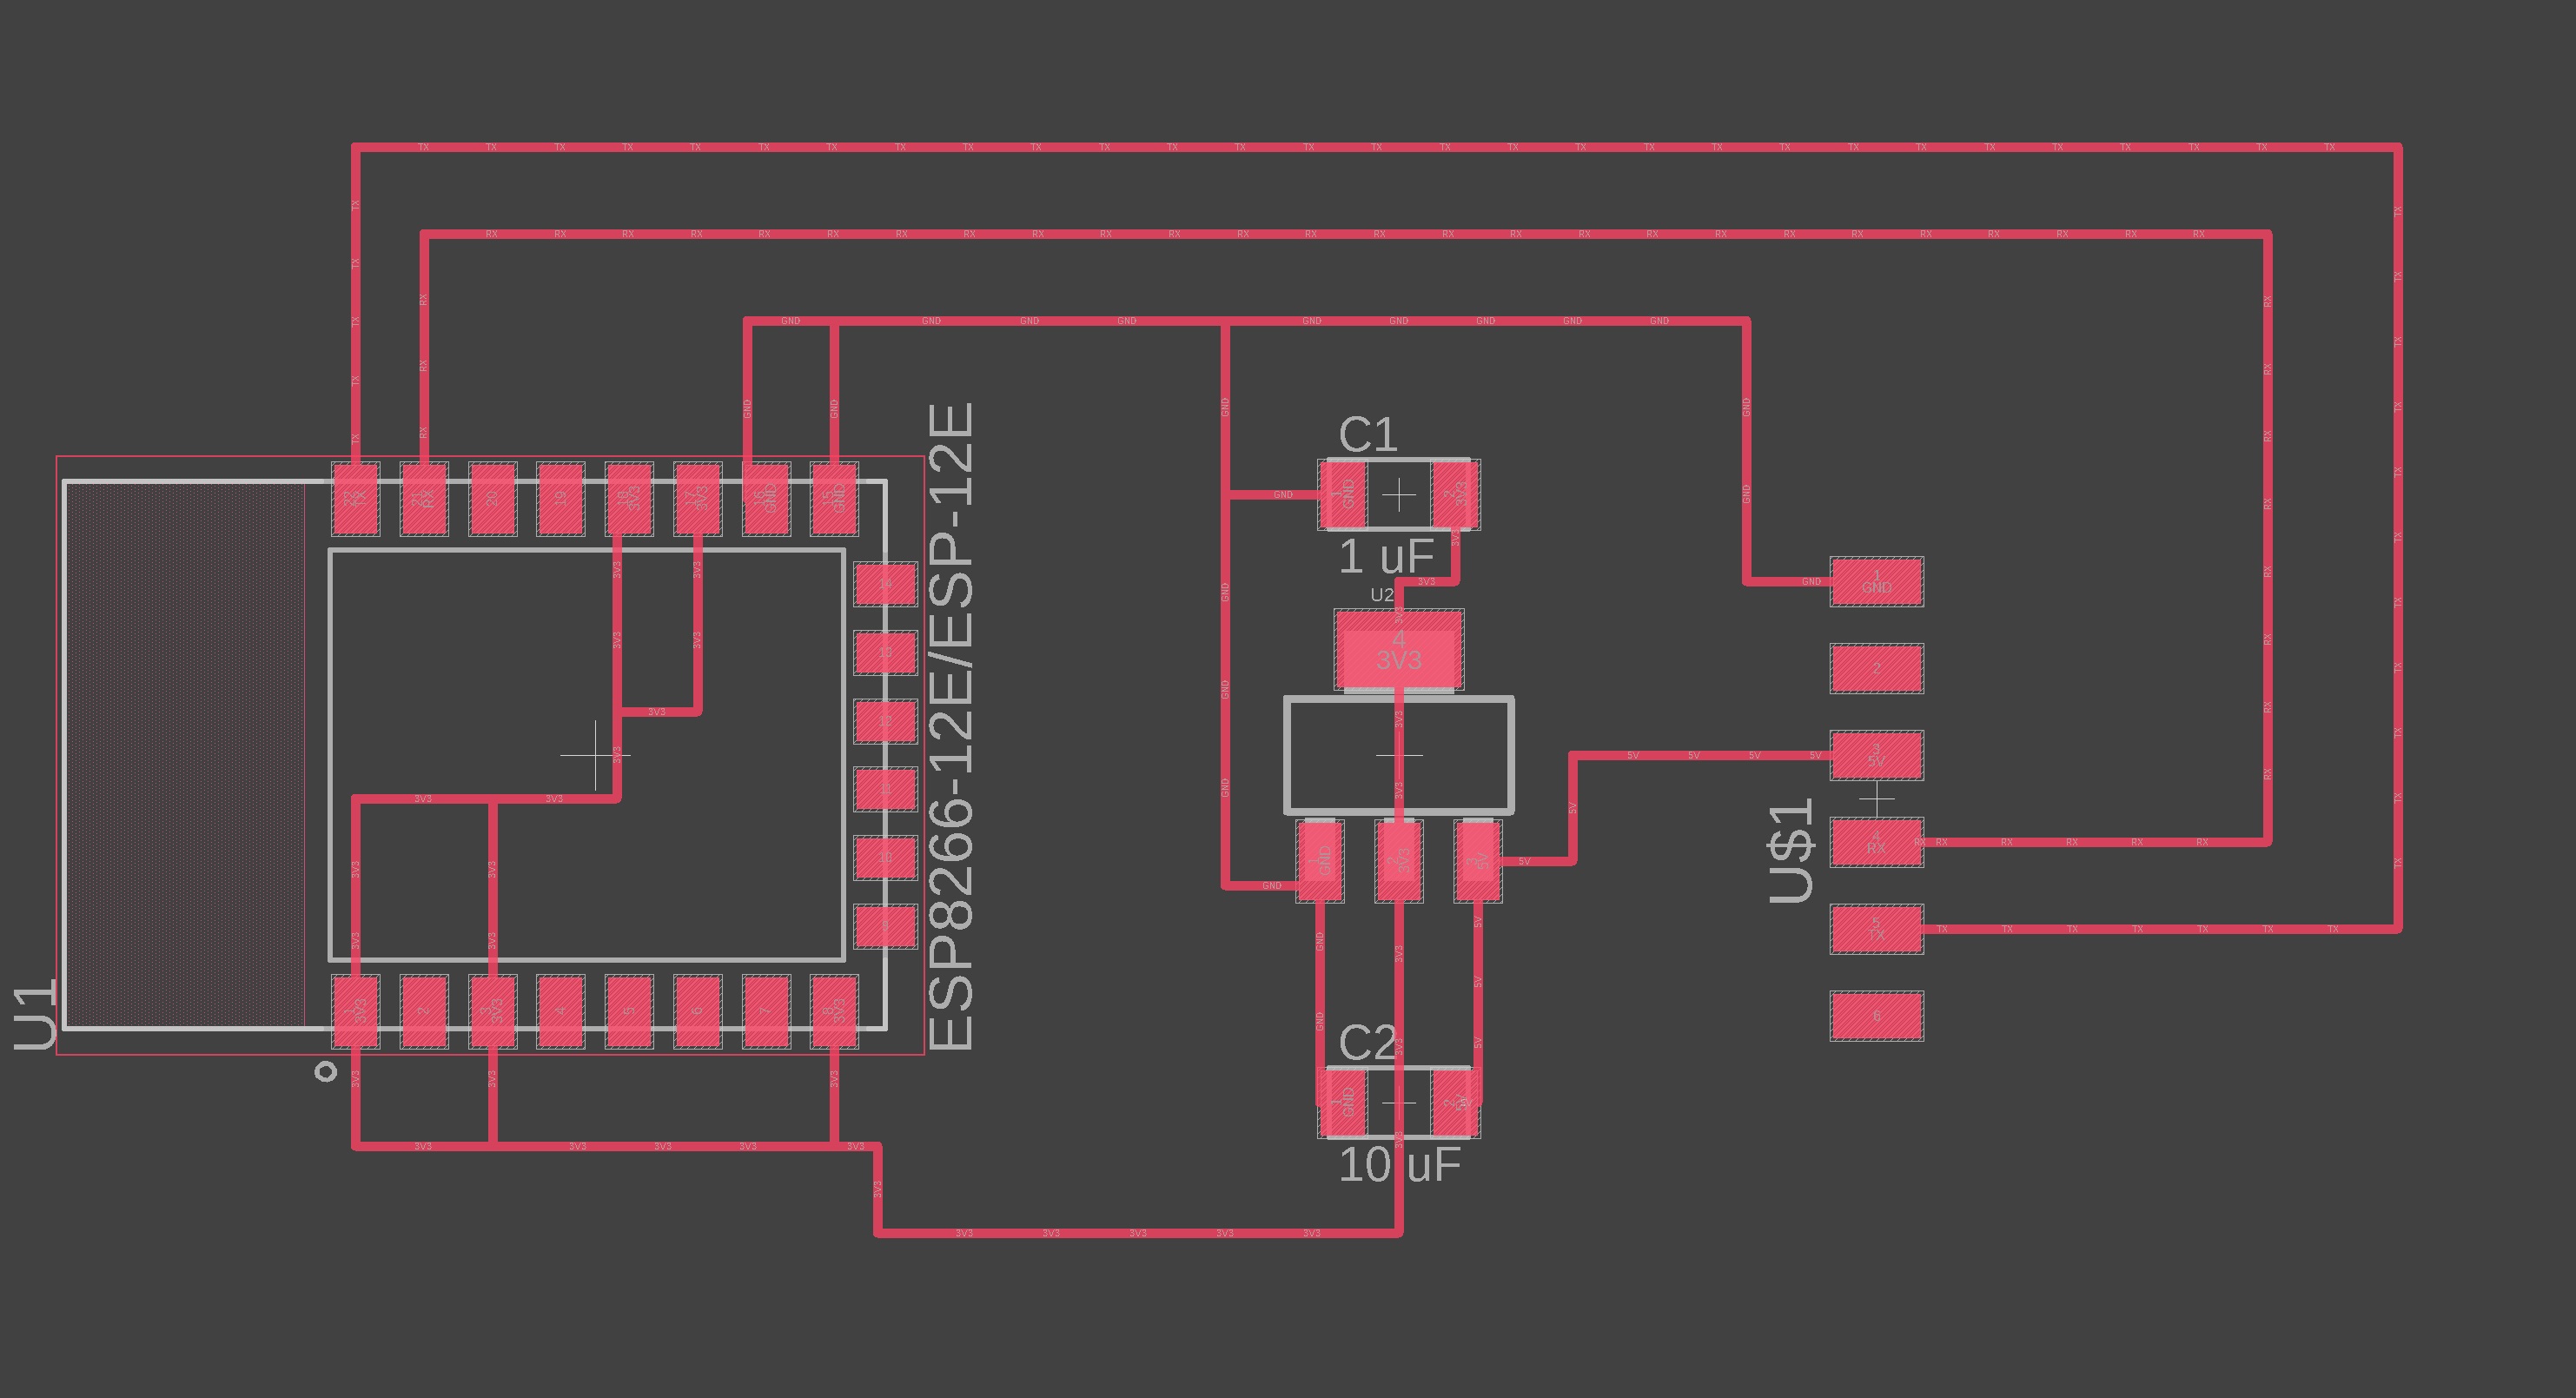
I wanted to work with the ESP8266 board, since I was a bit hesitant to work with the ESP32 and the ESP3266MOD was what was had in stock in the archshops. The board examples on Neil's site were for a different board, but I was able to download the footprint from snapEDA and make a design. It was heavily borrow from Neil's board which I found through a previous year's site [link].
For some context, I did geochemistry in my master's thesis and was usually surrounded by rocks in my office. As such, I wanted to put it on a rock, mostly because the idea of a rock as a webserver just tickled my bones. "Dumb as a rock"--not this SMARTRock! A part of me was concerned that minerals in the rock could lead to possible issues in wiring. However, I literally couldn't find any rocks. After bemoaning the lack of rocks near me in Cambridge, a colleague in the chemistry department showed up with a core sample for me. So I had to try.
However this proved to be just as (if not more?) difficult as milling under pressure from waiting classmates. Despite following this tutorial to a T, I could not get a single flexible pcb traces. No matter what I tried--dynamically changing the mill pressure, adding an additional layer of tape, widening the design--I couldn't get a single good cut. Either it would lift up halfway through and cut through previous traces, or be too light. Below, you can see just the few that weren't outright terrible; the real carnage was massive.
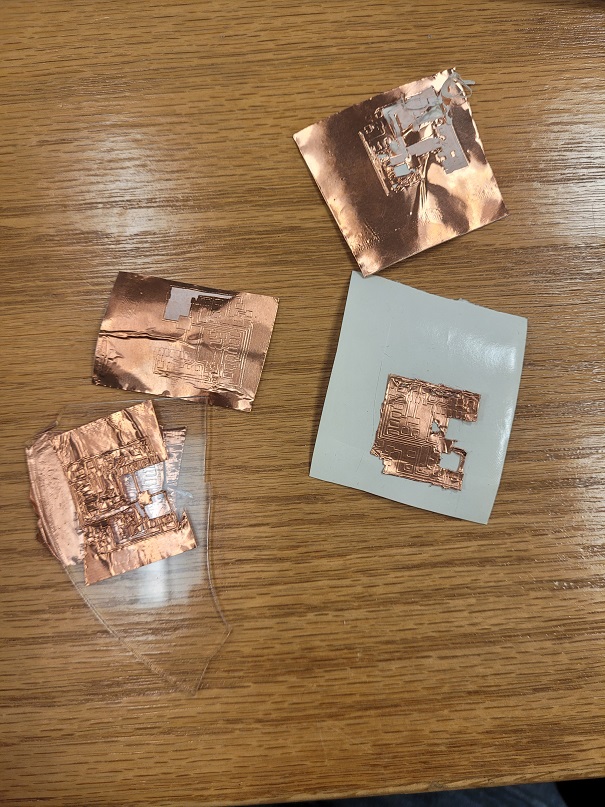
I tried cutting it out on a different surface (rock, paper, spare plastic parts); I tried taping it down with another material as it cut; I tried cutting very lightly multiple times. Nothing worked in that way of nicely giving me a smooth, reasonable flexible pcb trace. I tried to ultimately make a lightly cut version and cut it out myself. Of course, the Archshop had no exacto knives on hand, just box cutters. I tried my best but this led to a few injuries and honestly, severe eye pain.
Having spent a few days and many hours on this endeavour already, and with the looming need to finish my devkit board for my final on my mind, I just gave in and decided to mill a board. The copper boards on hand were all extremely small, so my design didn't fit. With no TA in sight, and no one to get me a larger board, I just decided to use Neil's for the ESP32 and ESP8266, primarily because I've learned to have a back up plan in this class, after several weeks in which I've had accidents happen to an almost-finished board.
Programming the boards
Initially, I tried programming the ESP8266 on the ArchShop computers, as I don't own an FTDI header. Unfortunately, I kept running into this error:

According to answers on the issues tracker, the likely cause was a python syntax, as the tutorial I used was several years old.
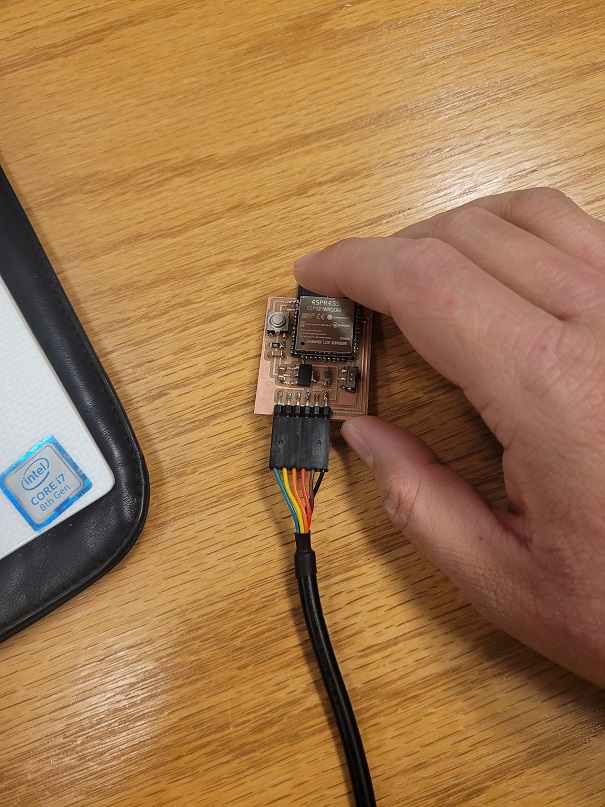
However, as I was unable to attend my section's office hours due to TAing and research duties, I just decided to once again visit Anthony at the EECS shop on Tuesday. We talked about my final project, my input board and finally the networking assignment. Based on this, I decided to instead move forward with the ESP32 board, and was thankful my backup plan had worked.
To start the process, first you need to make arduino able to communicate with the ESP32 board. To do this, you add ESP32 to Arduino IDE. This should be similar to previous weeks but this is a good tutorial/refresher for ESP32 setup.
I kept running into this error until I switched from the righthand USB-c connector to the top left-handone. They both called COM3 and were "detected" so not sure what the real issue was. I was able to fix this issue by changing the connection order and port on my actual laptop.
Once your board is hooked up, programmed, etc, you'll open up Arduino serial to scan for wifi. This allows the ESP32 to search and see what's nearby. However, I came across the below error:
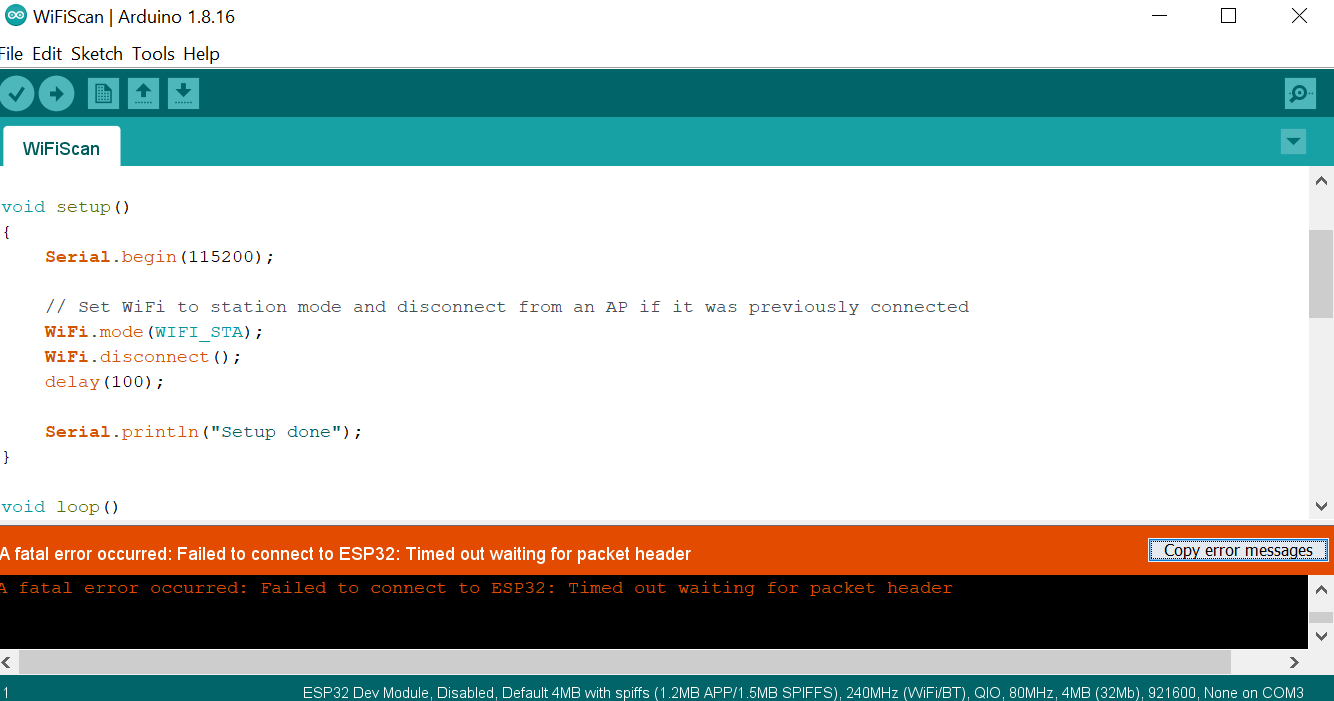

When I changed the baud rate, i was able to see a list of available Wifi networks.
When I connect and reconnect, I have to reset and turn the board on:
Finally, when I got it all working, this was the website I had set up:
[image of website with video]
![[rickrooll]](assets/changed-code.jpg)
For fun, I modified the code so that I could embed a youtube video in the page. Sure the joke is over a decade old by now, but the embedded video leads to a rickroll!
Final Notes and Lesson Learned
1. The fab DRC make traces too small for vinyl cutters. In my next attempt, I'll be trying wider routes and possibly curved turns instead of 90 degree angles.
2. The ESP32 and ESP8200 boards have SO MANY resources! Almost anything you can dream of doing with them, there's a tutorial on. This was super cool and this was the week that I felt like I finally understood a lot of what was going on--pretty late, admittedly, but better than nothing.