Molding and Casting
It's week 7 and I still haven't been randomed..
Mold Design:
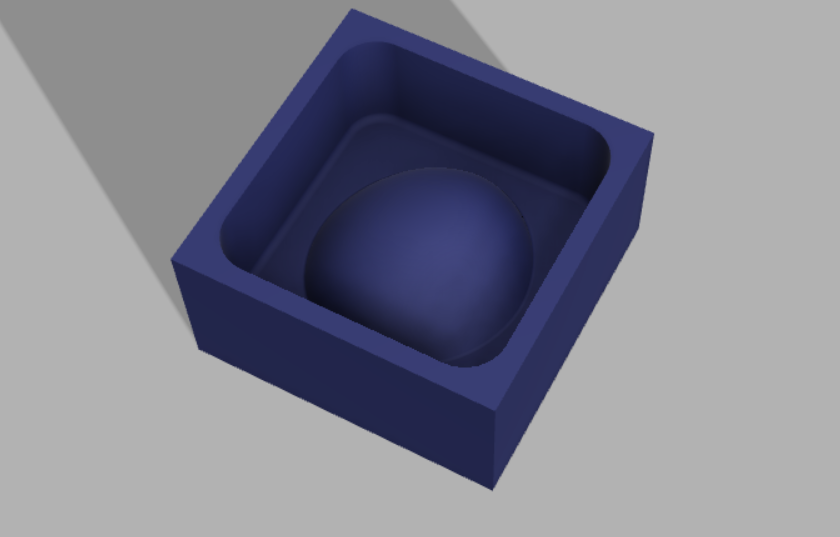
In week one, I used Fusion360's form function to design a 3D form, which I then deformed and fed into Slicer.
It was really easy to manipulate a 3D form like clay in Fusion, similar to Blender's clay-like scuplting capabilities. I decided to make a simple one part mold, which consisted of a section of a deformed spheroid.
 While waiting for the CNC to open up, I started thinking about the moments in class when Neil proverbially asks, "Now.. was that a defect or a feature?". Bubbles are the biggest defect in mold making, so I started thinking of ways to create bubbles
in a controlled fashion and in controlled patterns. I was also inspired by a classmate, Lingdong, who has algorithmically generated all sorts of cool 2D and 3D designs for this class.
In a previous project, I wrote a phyllotaxic pattern generator in LISP for AutoCAD to create a photolithography mask for a microfluidics device.
I was compelled to build an interactive website embeddable version in P5.js, which I could use to generate vinyl-cut stencils for my candidate bubble inducing materials (powders and liquids).
While waiting for the CNC to open up, I started thinking about the moments in class when Neil proverbially asks, "Now.. was that a defect or a feature?". Bubbles are the biggest defect in mold making, so I started thinking of ways to create bubbles
in a controlled fashion and in controlled patterns. I was also inspired by a classmate, Lingdong, who has algorithmically generated all sorts of cool 2D and 3D designs for this class.
In a previous project, I wrote a phyllotaxic pattern generator in LISP for AutoCAD to create a photolithography mask for a microfluidics device.
I was compelled to build an interactive website embeddable version in P5.js, which I could use to generate vinyl-cut stencils for my candidate bubble inducing materials (powders and liquids).
Milling:
I followed the guide shared by Tom to create the toolpath on Partworks3D for the desktop ShopBot. After entering the default parameters for the roughing and finishing path, I was ready to mill. Because I designed in fillets to prevent my Oomoo mold
from getting trapped in the milled wax, I directly modeled the desired mold and used Partworks3D to embed my model in another 7"x3"x1.5" block. This was done by setting the separation on all sides of the model to 0.
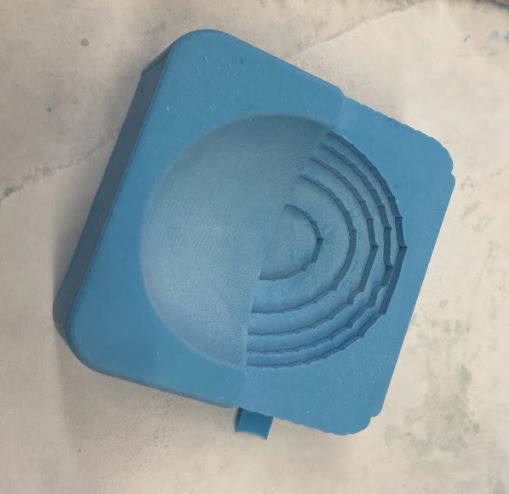
The first mill went off the board, and I stopped the job. I realized that I zeroed Z but not X and Y. I ended up stopping the job halfway through the finishing cut because I liked how it looked.

Casting:
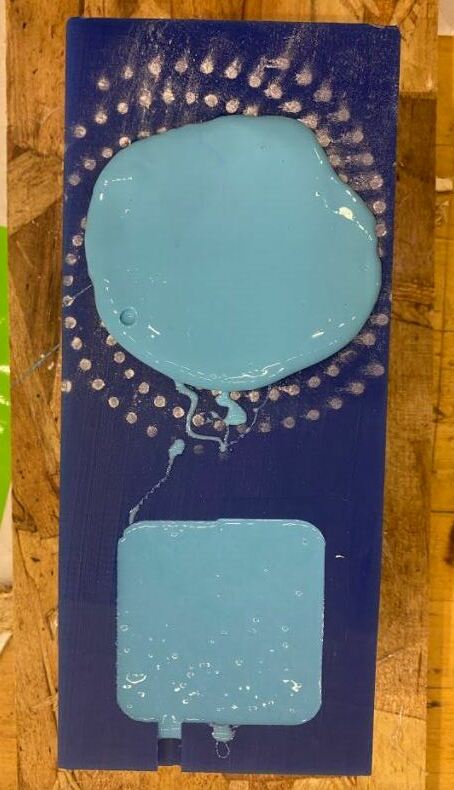
I broke my wrist earlier this year, so mixing the Oomoo was a decent physical therapy-esque exercise. With the excess Oomoo, I tried pouring it on baby powder stenciled by my vinyl-cut phyllotaxic spiral as well as the stencil itself. After some useful chats and brainstorming with Grant,
I hypothesized that powder would trap enough air to initiate the formation of bubbles during pouring. Turns out Oomoo gets bubbly in the bulk, but is formulated to wet surfaces pretty well. The exception is large aspect ratio, thin holes and tight corner geometries that trap bubbles.
Oomoo is a RTV silicone, a room-temperture vulcanizing silicone. So it starts to solidify and become more viscous after the part time (15 min).
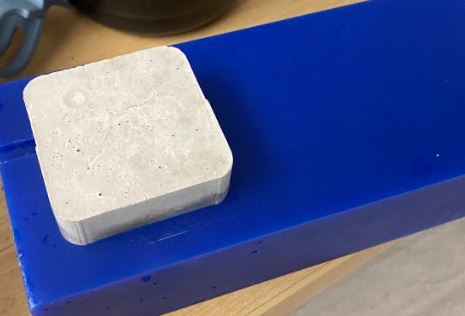
Here's the mold after I popped it out of the wax.
Casting Metal:
We cast a tin-bismuth alloy similar to to pewter that has a low softening temperature around 400F. It's essentially a block of solder. After heating it up and lining the Oomoo with baby powder,
the metal can easily be poured and cooled in the mold.
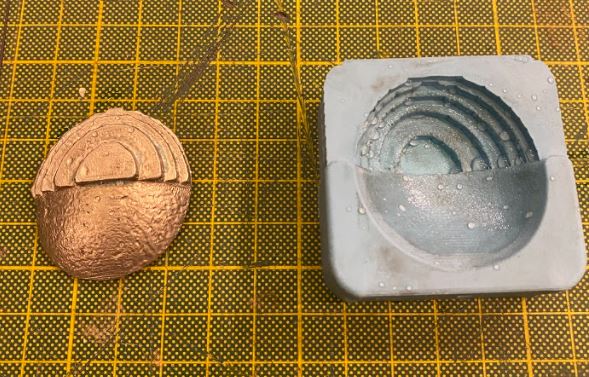 I tried pouring metal on baby powder islands stenciled by my vinyl spiral, and here's the result. Not too bad but not spherical enough.

Casting Hydrostone:
Hydrostone had some cool properties in uncured, mixed form. It's a non-Newtonian fluid like Oobleck! I mixed some up and poured it in my Oomoo mold. Again, I had extra so I poured some into the wax mold too, hoping for the best.
After an hour, the Oomoo mold released perfectly, but I could not get the hydrostone out of the wax mold. I was hoping it would shrink and release, but I could not mallet or grip it enough to come out.
I ended up taking it home and throwing it in the microwave for 30s upside-down to release it.. and it worked! There was enough water left in the hydrostone to pressurize the space between the wax and the hydrostone and slowly pushed the hydrostone out.
Turns out it also melted the wax, which probably helped with a release. Don't try this at home!! The hydrostone is porous enough to release excess pressure but it could still blow up!