Week 7:
Embedded Programming
The button really bounces... like 20 times each time
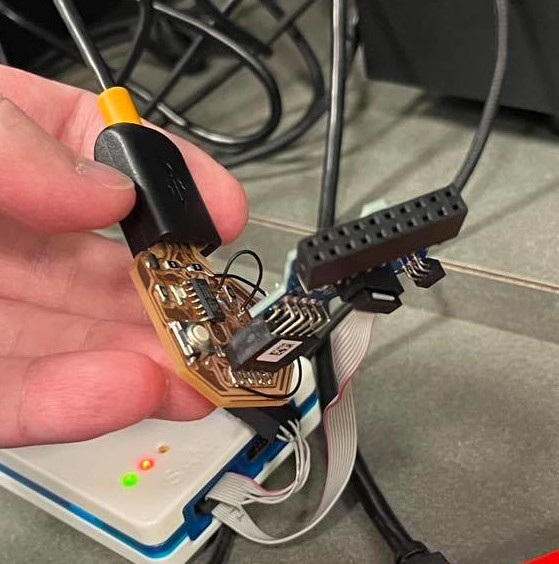
So I moved on to program the board with my one button and one LED. At first, I wrote a code to simply change the state of LED whenever the button was pressed. Only to realize that the button bounces naturally due to the mechanism. I had to rewrite my code to debounce the button, here is an Arduino example. I also made the board count how many time the button has been pressed, didn't end up integrating that into my program, though. My code looks like this:
#include
    const int led = 15;
    const int button = 2;
    int led_count = 0;
    int buttonState;
    int lastButtonState = LOW;
    int ledState = HIGH;

    unsigned long pressTime = 0;  // the last time the output pin was toggled
    unsigned long waitTime = 50; // the debounce time; increase if the output flickers

    void setup() {
      // put your setup code here, to run once:
      Serial.begin(9600);
      pinMode(led,OUTPUT);
      pinMode(button,INPUT);
      digitalWrite(led,lastButtonState);
      while(!Serial);
      Serial.println("all system go");
      Serial.println(String(lastButtonState));

    }

    void loop() {
      int reading = digitalRead(button);
      if(reading != buttonState){
        pressTime = millis();
        }
      if(millis() - pressTime > waitTime){
        if(reading != buttonState) {
          buttonState = reading;
          if(buttonState == LOW) {
            ledState = !ledState;
            led_count= led_count + 1;
            Serial.println(led_count);
          }
        }
      }
      digitalWrite(led, ledState);
      lastButtonState = reading;
    }
Nothing too complicated in that code, there was no much to control anyways. One thing did happened in the process of programming and debugging. All of sudden, my laptop would not recognize my board anymore, the port was not detected and there was no response at all. The Arduino IDE threw an error code like this:
processing.app.debug.RunnerException
	at cc.arduino.packages.uploaders.SerialUploader.uploadUsingPreferences(SerialUploader.java:152)
	at cc.arduino.UploaderUtils.upload(UploaderUtils.java:77)
	at processing.app.SketchController.upload(SketchController.java:732)
	at processing.app.SketchController.exportApplet(SketchController.java:703)
	at processing.app.Editor$UploadHandler.run(Editor.java:2091)
	at java.lang.Thread.run(Thread.java:748)
Caused by: processing.app.SerialException: Fehler beim Ansprechen des seriellen Ports "COM6".
	at processing.app.Serial.touchForCDCReset(Serial.java:107)
	at cc.arduino.packages.uploaders.SerialUploader.uploadUsingPreferences(SerialUploader.java:136)
	... 5 more
Caused by: jssc.SerialPortException: Port name - COM6; Method name - openPort(); Exception type - Port busy.
	at jssc.SerialPort.openPort(SerialPort.java:164)
	at processing.app.Serial.touchForCDCReset(Serial.java:101)
	... 6 more
Today I Learned:
1) The button actuallty bounces pretty consistently, ~20 times each time you press.
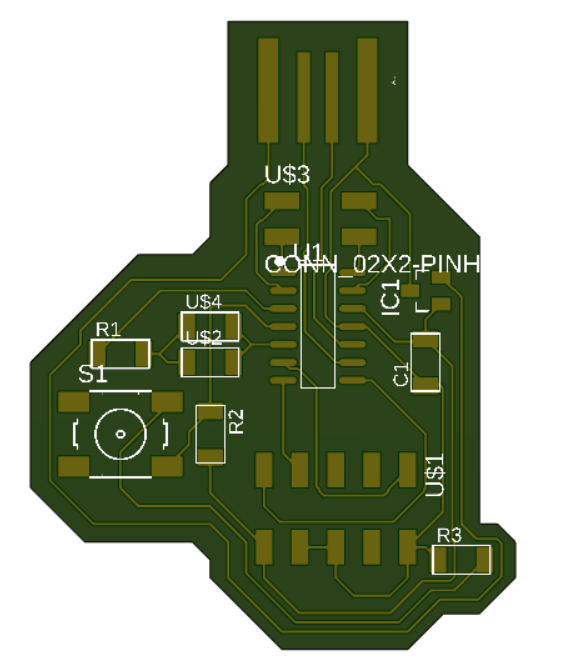
2) Part placement is so important for routing a PCB... I wish I had done it better two weeks ago.