Interface and Application Programming
The assignment for this week was: write an application that interfaces a user with an input and/or output device that you made.
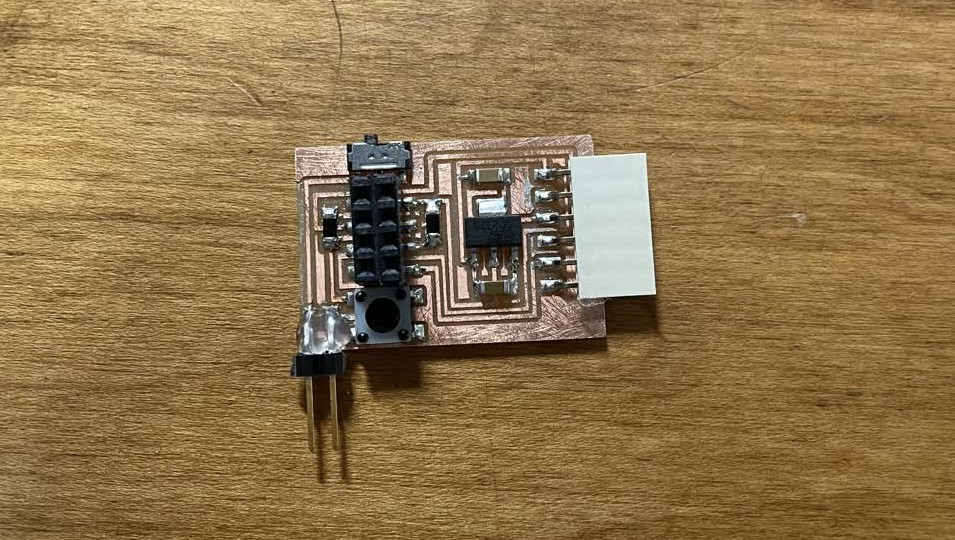
[1] Board Design & Fabrication
Since I was busy working on my final project this week, I decided to do something simple -- create a web server interface for an ESP8266. I modified the existing ESP8266 board on the course website and added a break out connection for GPIO 2 on the ESP8266. Then, I milled out the board and soldered on the components:
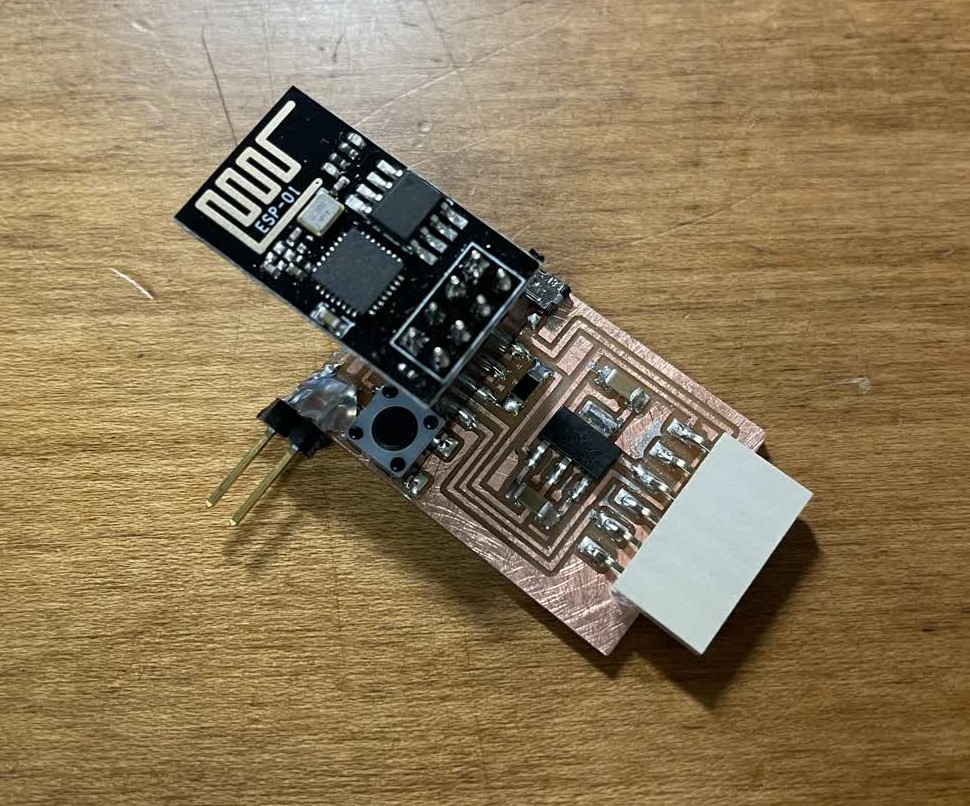
This is what the board looks like with the ESP-01 module plugged in:
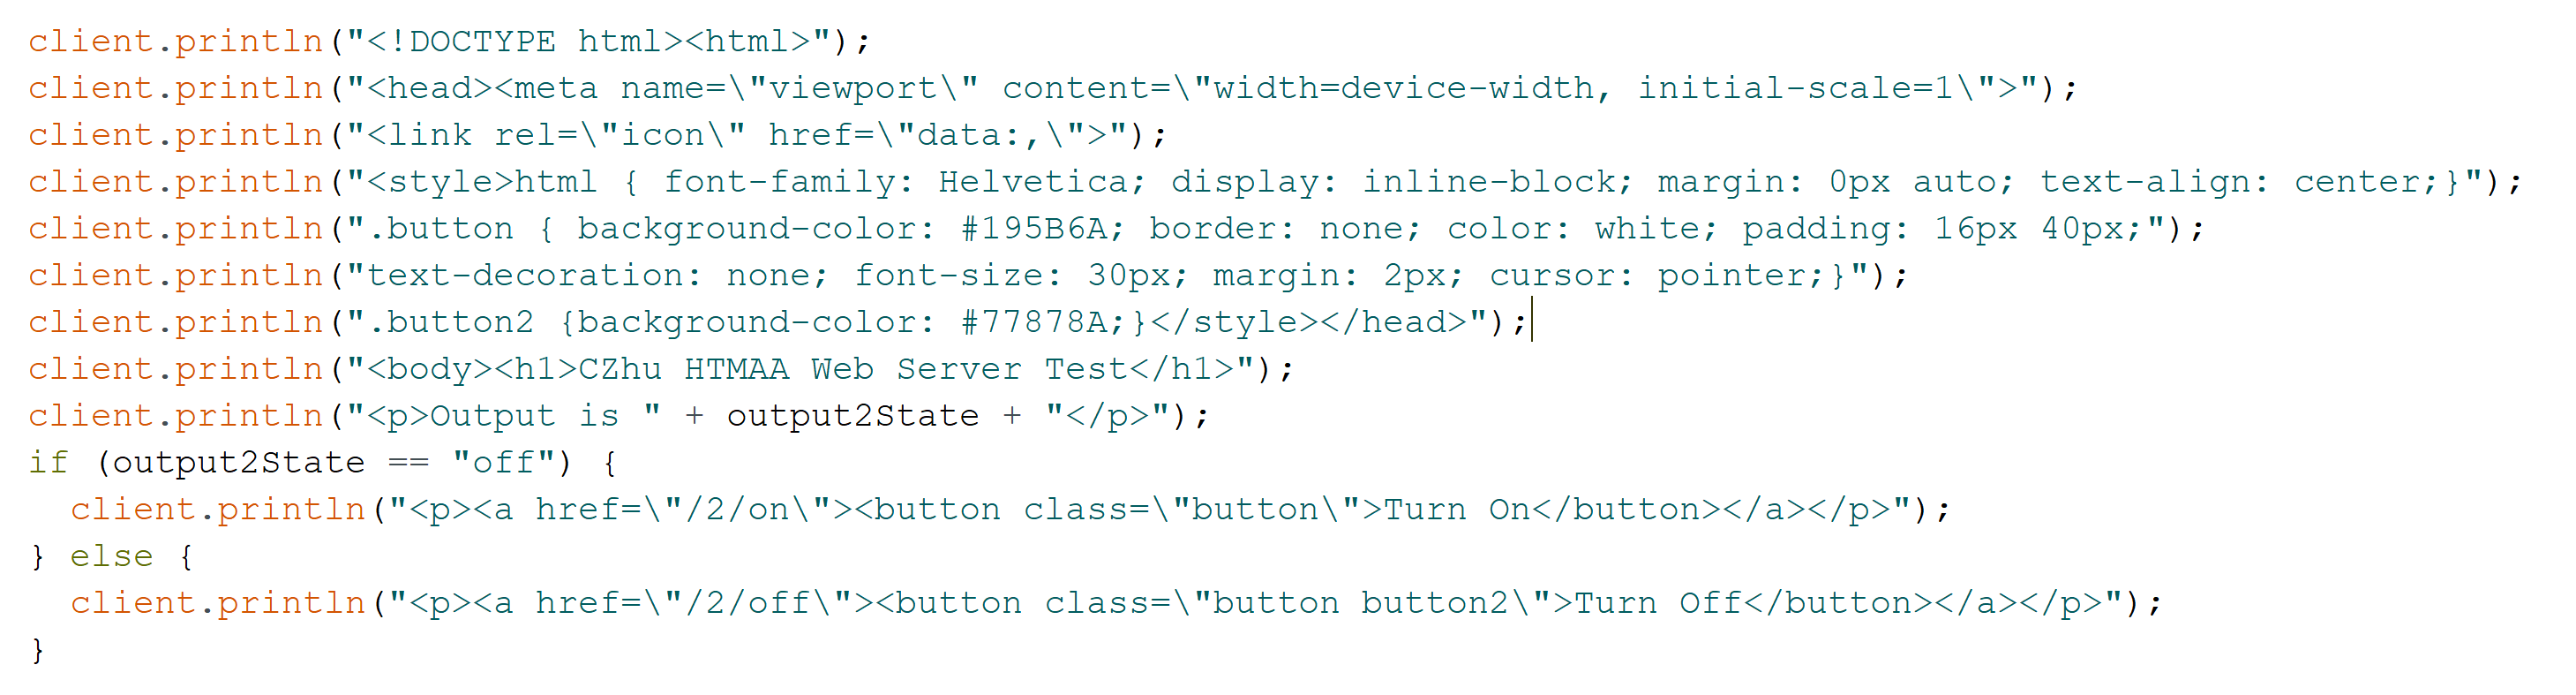
[2] Web Server Interface
I then wrote some code using the ESP8266WiFi library to create a web server on the ESP8266 which would allow me to interface with it through a web page. Hosting a website with the ESP8266 is quite simple, since the WiFiClient class in the ESP8266WiFi library allows directly printing out HTML, which simplifies a lot of the web server logic. For example, this is how part of the web page I am using is rendered:
After setting up the code to allow me to toggle the state of GPIO 2 through a web page hosted by the ESP8266, I was able to control an LED from my laptop over WiFi:
Taking this one step further, I connected a relay to the output pin instead of an LED. The relay I am using is IoT Relay, a nice all-in-one solution that uses logic-level input to control 120VAC mains devices. The input is opto-isolated which ensures it is safe to use with sensitive microcontroller pins. This is what the relay looks like when connected to the ESP8266 board:
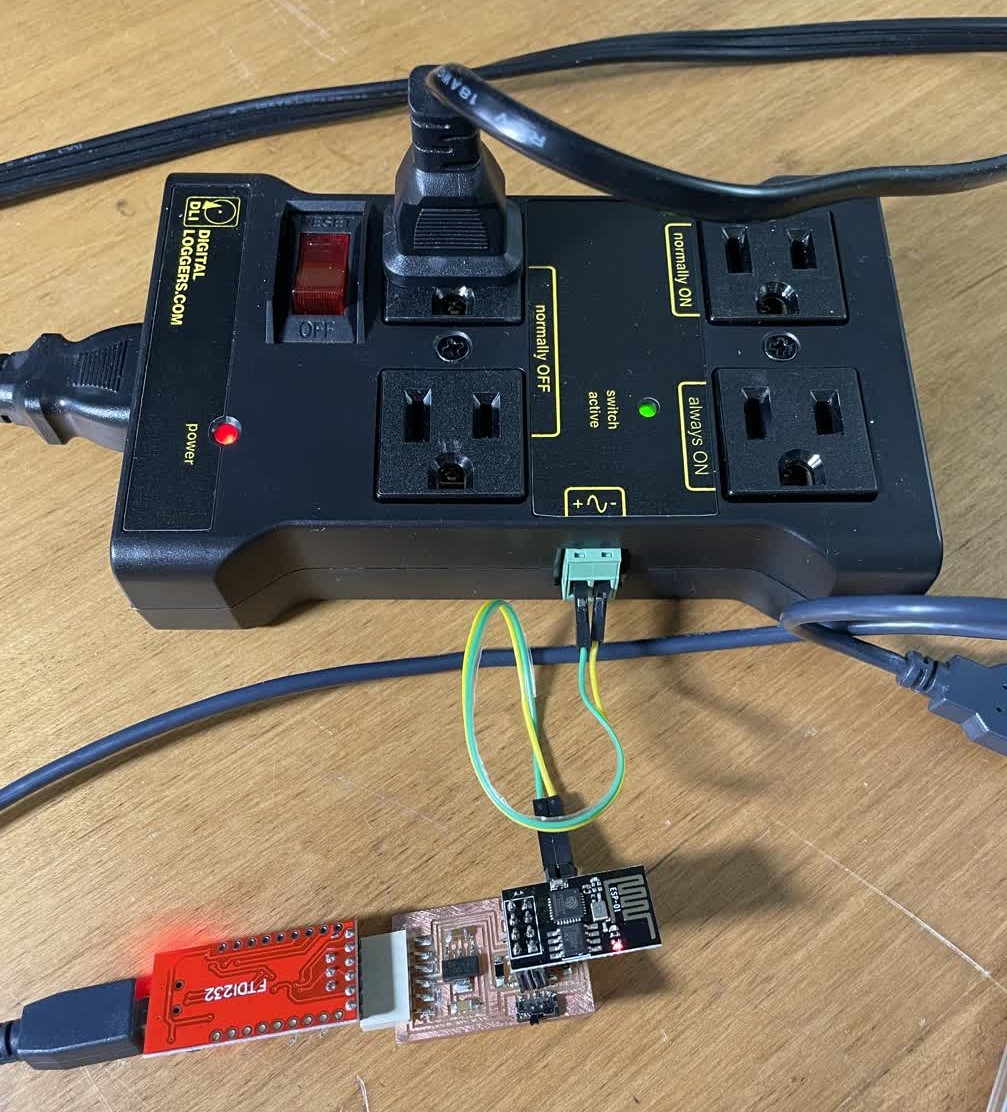
After plugging in some lights into the relay, I was able to control them using the same web page interface from my laptop: