
IMPORTANT NOTE: This week was a failure for me. In service of my final project, I did what I thought was some clever corner cutting and it blew up in my face. Molding and casting is hard! Documenting for posterity but don’t do the same stuff I did.
This week I started cracking on my final project. I wanted to cast two halves of a soft rubber ball, which I’d join with magnets. The ball would have a void in the center where eventually I’d be able to place some electronics.
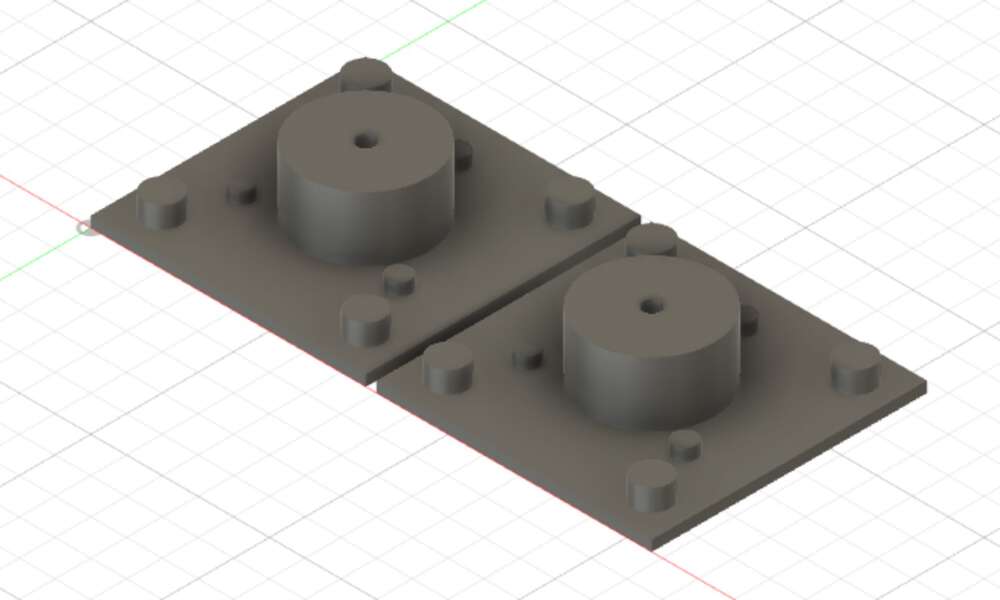
Since this is a prototyping class, first I decided to give it a crack with the 3D printers, since I already know how to use those. Here’s my design, which I’d have to print twice. I’m planning to use the 6mm x 3mm magnets that we had in our shop.

This is quite a bit smaller than what my final project will be. I’m constrained by the width of the wax block.
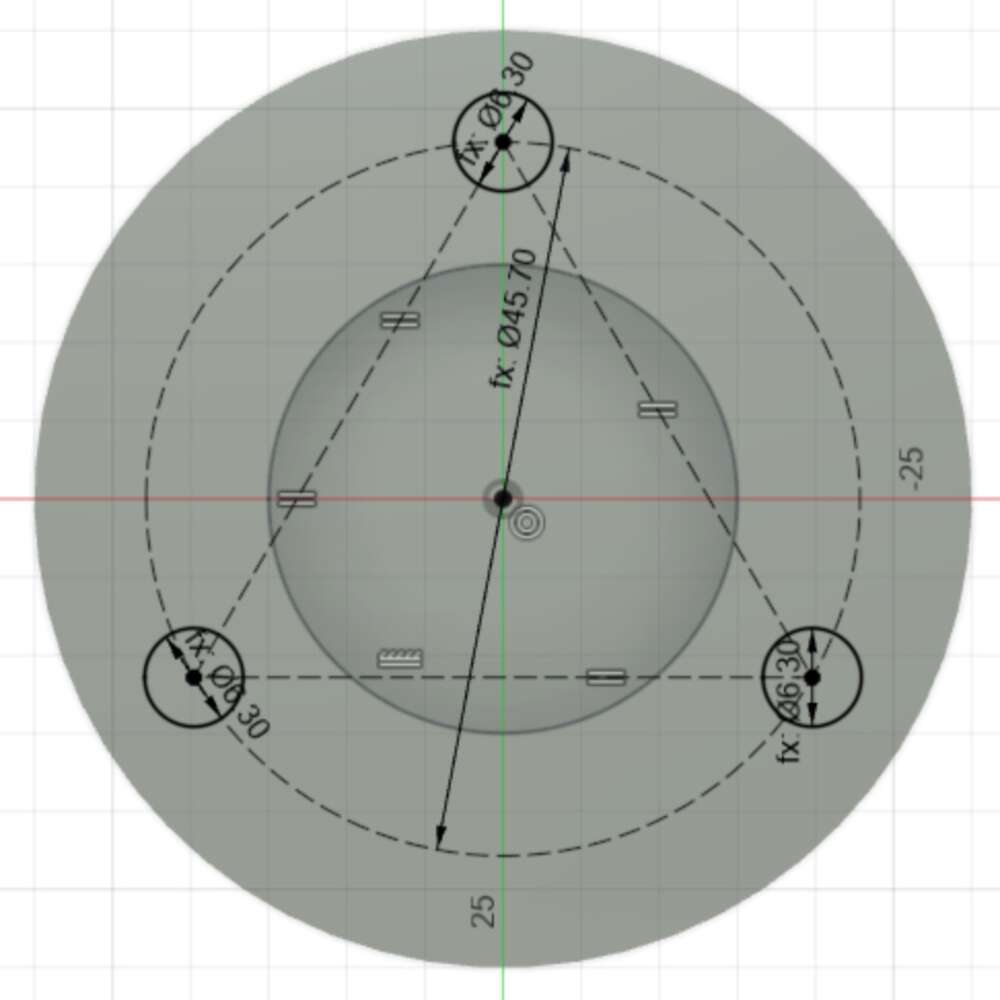
This isn’t a super complicated design, but it’s still the most complicated thing I’ve ever made in Fusion! Two things I was proud of figuring out: How to make a hemisphere (revolve a half circle) and how to get the three magnet circles positioned evenly (place them at the vertices of an inscribed equilateral triangle.)
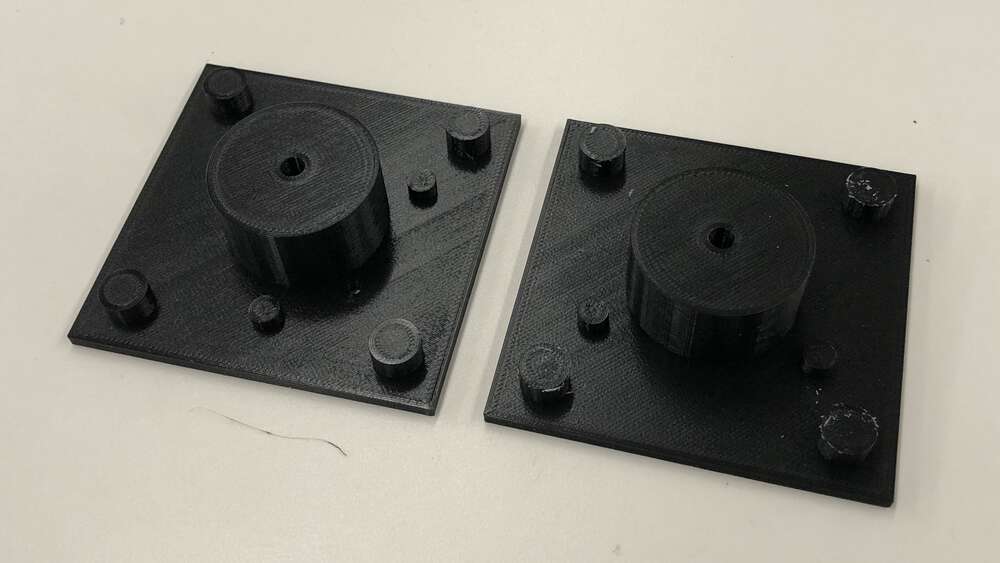
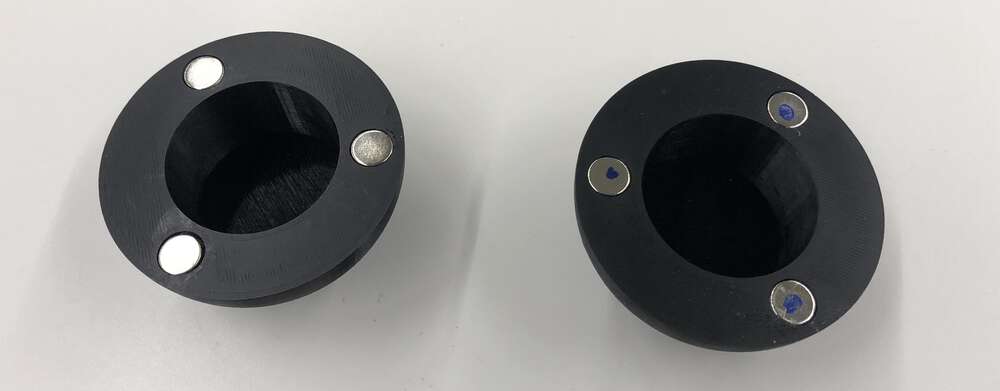
The hemispheres printed lovely, although I made two small mistakes.
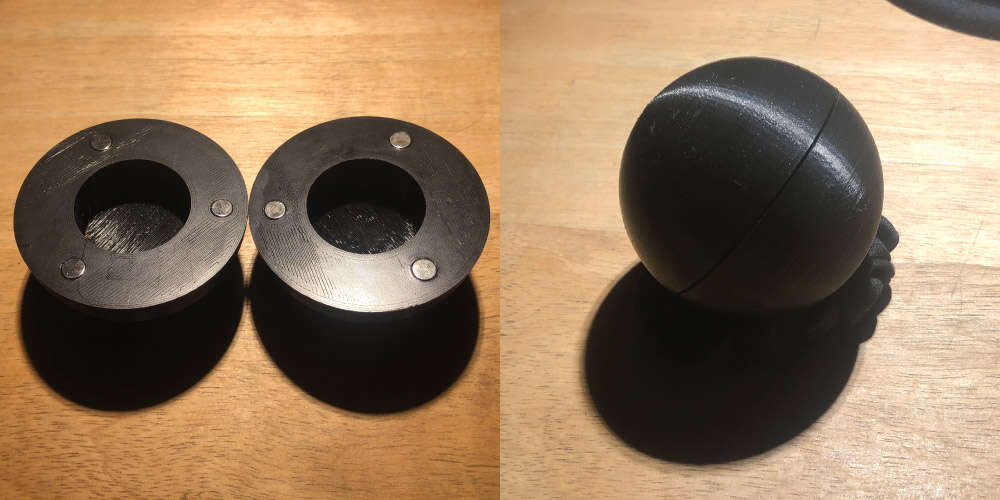
The first is that I forgot to add some tolerance into the size of my magnet holes – I tried to print them exactly 6mm. For a scary moment there, I thought I wasn’t going to be able to fit the magnets, but I was able to press them in. For similar reasons, my magnets weren’t quite flush with the flat surfaces of the hemispheres, so I have a small gap.
For a tight fit, I’ll probably want to sink my magnets slightly. That will make the bond a little weaker than it is now, and it’s already pretty easy to shear. So for my eventual final ball I’ll probably want more or bigger magnets.
The second mistake was that I uhhh forgot that magnets have directionality. I pressed the first three magnets without considering that, so one of my hemispheres had a mixed orientation. Luckily I remembered before I pressed the second hemisphere! So my two hemispheres can connect, but only if the rotation is correct.
Ok but on to molding and casting. My first big cheat of the week was that I went with a two-step process instead of a three-step process. The rest of the class is mostly going from hard wax to soft silicone to hard hydrostone (or bismuth). But for my use case, I actually wanted to end up with a soft object. So I just did the first two steps!
On Monday I watched Joon give an Aspire demonstration, and bounced some ideas off him for how to make my mold. He suggested the diagram below, a two-part mold where the bottom is just a hemisphere, and the top adds the detail. Plus alignment pegs.
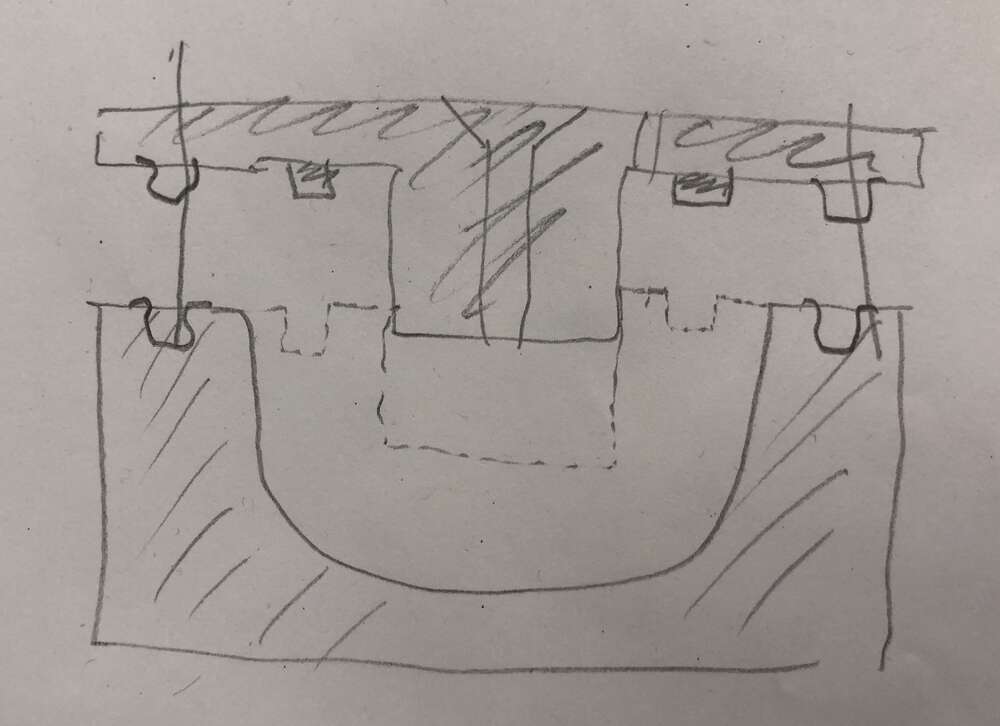
The challenge here was that top part, which would be a huge pain in the ass to machine out of a wax block. Which brought me to my second big cheat of the week. I made a hybrid two-part mold: Bottom part wax, top part 3D printed.
The wax can supposedly get me a much nicer finish. So my justification was that once I join my two hemispheres, my outside surface area would have that nicer finish! Here’s the wax bottom of my mold. I doubled it up so I could save time when I cast.

And here’s the PLA top. The hole right through the center is for pouring, the smaller hole is for air.
This is larger/more complicated than the other 3D models I’ve made, so it was going to take six hours and I had to run it overnight. While the top of my mold was printing, it was time to mill my wax block. I set it up on ShopBot Desktop, and used Aspire as my CAM.
I started with a rough cut with a 0.25” end mill. I make a dumb math mistake after my air cut and sent my drill too far down when I re-zeroed my Z, which caused me to lop off a corner of my block. This was survivable, as the corner wasn’t being used.
I forgot to take a pic after the rough cut was done. But it went pretty well! Obviously it was quite terraced but hey, it’s a rough cut.
For the finishing cut, we had 1/16 ball mills, but it was quite short and my hemispheres are pretty deep. So I was nervous there would be a collision. We had a long 1/32 ball mill, but there was a bit of a line for the ShopBot and I didn’t want to take too long. I settled on a 1/8 flat for my finishing cut, which would still leave it pretty rough, but I thought that could be kind of cool. Textured rubber ball!
Then I made a small mistake that cascaded into a series of bigger problems. I air cut my finishing cut, and stopped it in the middle when it was clearly looking good. Then I sent it back to 0, 0, 0.
Don’t do this. The correct move is to set X and Y to 0, and then set Z to 0 so it goes straight down. My end mill moved on a diagonal to the start position, which means it touched the corner of my block with some horizontal momentum, which broke my hot glue bonding and caused the block to lift/shift.
I glued it back down and re-zeroed, but when I started my cut again it was clear that something was off. The finishing cut was digging into the surface of my block more than it should have. I stopped the cut and tried to adjust Z, but it didn’t help. It turns out that when my block shifted, some shavings got under the back end. So it wasn’t level any more.
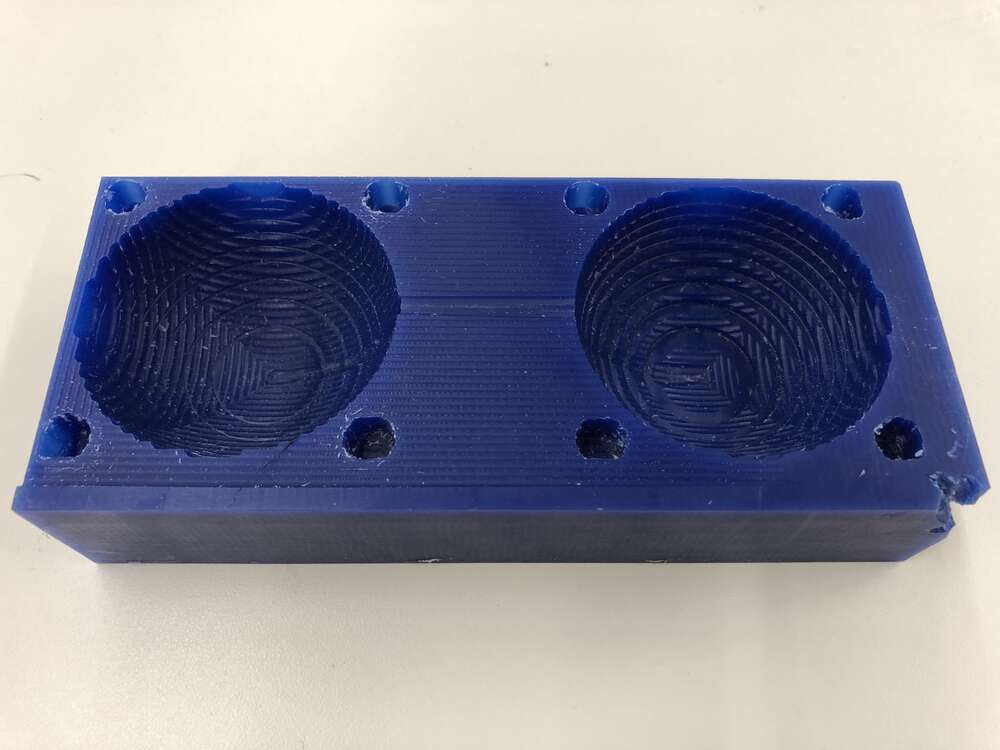
As a result of that problem + the 1/8 “finishing” mill, I was left with a roughhhh looking final wax mold. My peg holes were especially nasty.
The next morning my 3D tops were done as well. Look how precise they are! This week is making me love 3D printing.
I was able to hollow out my wax peg holes a bit more and to get a tight fit with the 3D printed pegs.

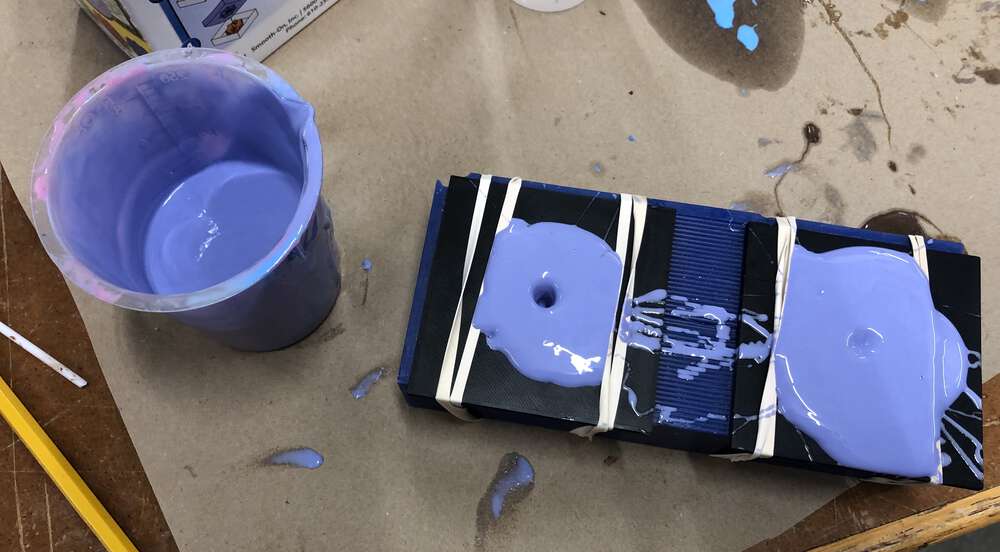
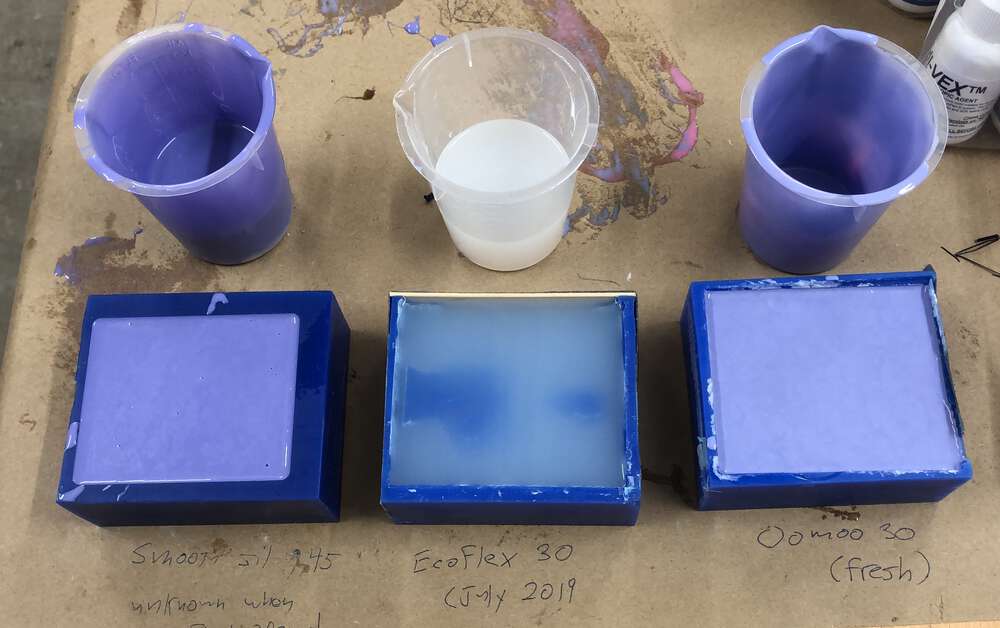
So it was time to cast! My plan all along was to pour Oomoo 30 into my mold, and boy was that a dumb idea. That stuff was like 20x more viscous than I was expecting it to be. It was impossible to pour it into my 5mm holes.
In a desperation move – with my pot time ticking down – I took a large drill bit and punched a hole right in the top of my mold. But it still wasn’t enough. I think Oomoo is just really, really meant for open-faced molding. I was trying to do something more similar to pressure injection.
My material piled up on top of my pour hole, and eventually spread enough to cover my air holes. I was only able to get about half of my Oomoo into the mold before my pot time was up. So I’m going to call the casting a failure.
Instead of taking another crack at it – I think my entire approach was bad and I’d have to start from scratch – I decided to help out with the group assignment. You can see my progress on this page! It was very satisfying to do some molding the correct way (and skip the machining part.)
The next morning I opened up my mold, and sure enough, total failure. I knew I hadn’t gotten enough material through the hole, but I wasn’t even close.
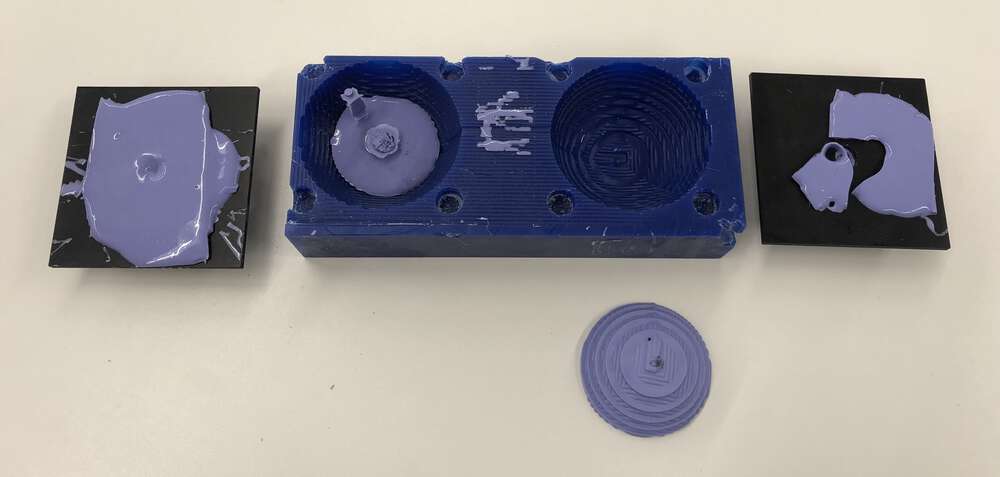
The stuff that did get through had a nice texture finish though, just like what I was hoping for. And the consistency was great for a rubber ball. I think I’ll take another crack at molding and casting in the future, with a different setup.
I had been pleased with my 3D-printed version though, so I’d taken a crack at printing a larger version that corrected the tolerance errors in my first prototype. I ran this job overnight as well, because I went with utradetail to see how smooth I could get my surface without finished. It took 17 hours.
I’m really happy with how this came out. The tolerances were just right, my now-larger magnets were near flush and fit in no problem, which meant that I glued them as I always intended. (I used a plastic/vinyl superglue this first time, I might have to experiment with this.) I also used a sharpie to make sure I had my magnet orientations right.
The surface is still a little 3D printy but I think if I sanded it down I could get something very close to what I’m hoping for for my final project.
After class update: I spoke a little soon on the bigger 3D ball. The glue on one of my magnets failed, so I think glueing is probably not the way to go going forward. The accidental press fit in my original prototype was probably better, but also I talked with Joon and Niccolo about a more complex 3D print that involves a pause, which would let me embed the magnets slightly below the surface of each hemisphere. I want to try that!
Files: Lots of STLs to link this week. Here’s the original 3D-printed ball and the larger second version (zipped). Plus my wax bottom mold and 3D-printed top mold.
Final note: I‘d hoped to return to the skill for my final project, but I never got to that spiral. Maybe I‘ll get a chance to try again next semester!