Output device

01

This week, for the output device, I want to use the DC motor. Since it would be related to my final project. So I want to know how to control the motor. Since I have no electronics background, this is the third board I have made. I haven't still fully understood the schematic of the board. I tried to follow Neil's board design (Hello H-bridge.44) which uses an A4950 motor driver. The main reason why I used this A4950 motor driver was it was the only motor driver in archisite stock. So I quickly decide to use this board design.
I realize that this board design uses Attiny 44 microcontroller, which I have never used before. I didn't know that different microcontroller needs different setting for the programming. In Archisite, nobody has used the Attiny microcontroller before, so even TA dosen't familiar with how to use the Attiny microcontroller since the Attiny 44/45 are very old microcontrollers. But I already milled the PCB board and soldered the components. But I wish I had known this earlier because I spent so much time debugging the board and learning how to program this microcontroller.

02

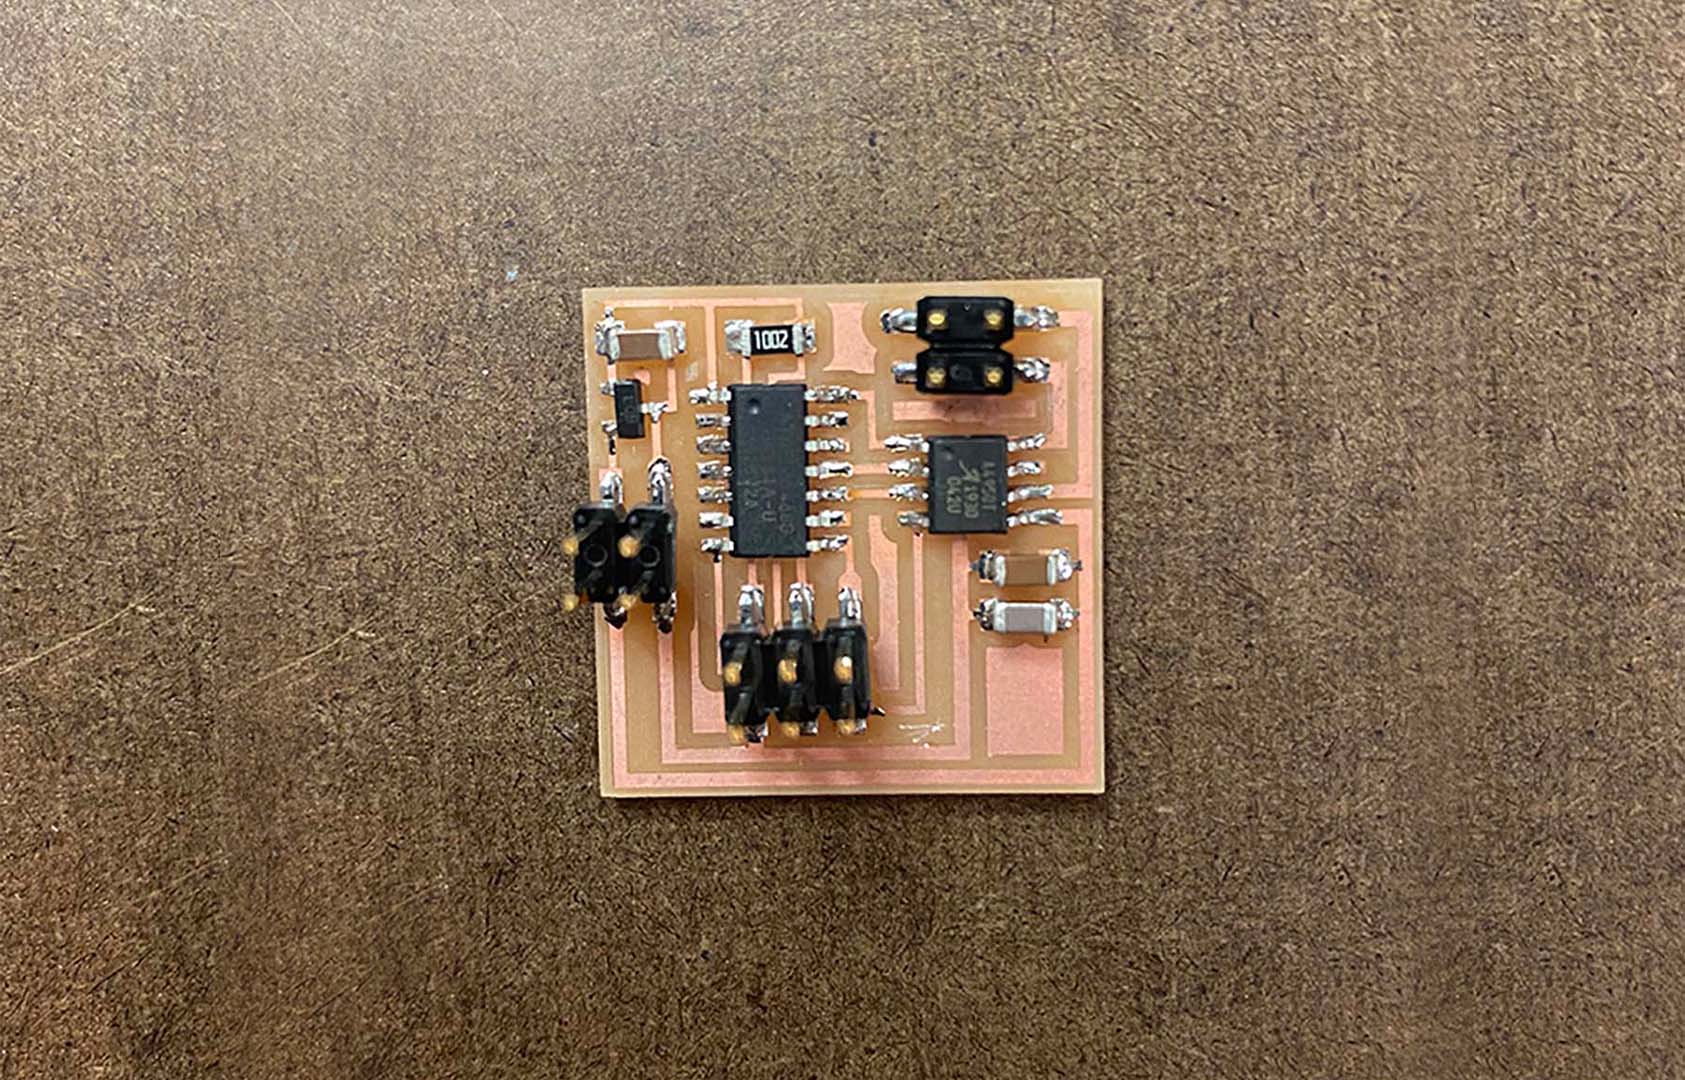
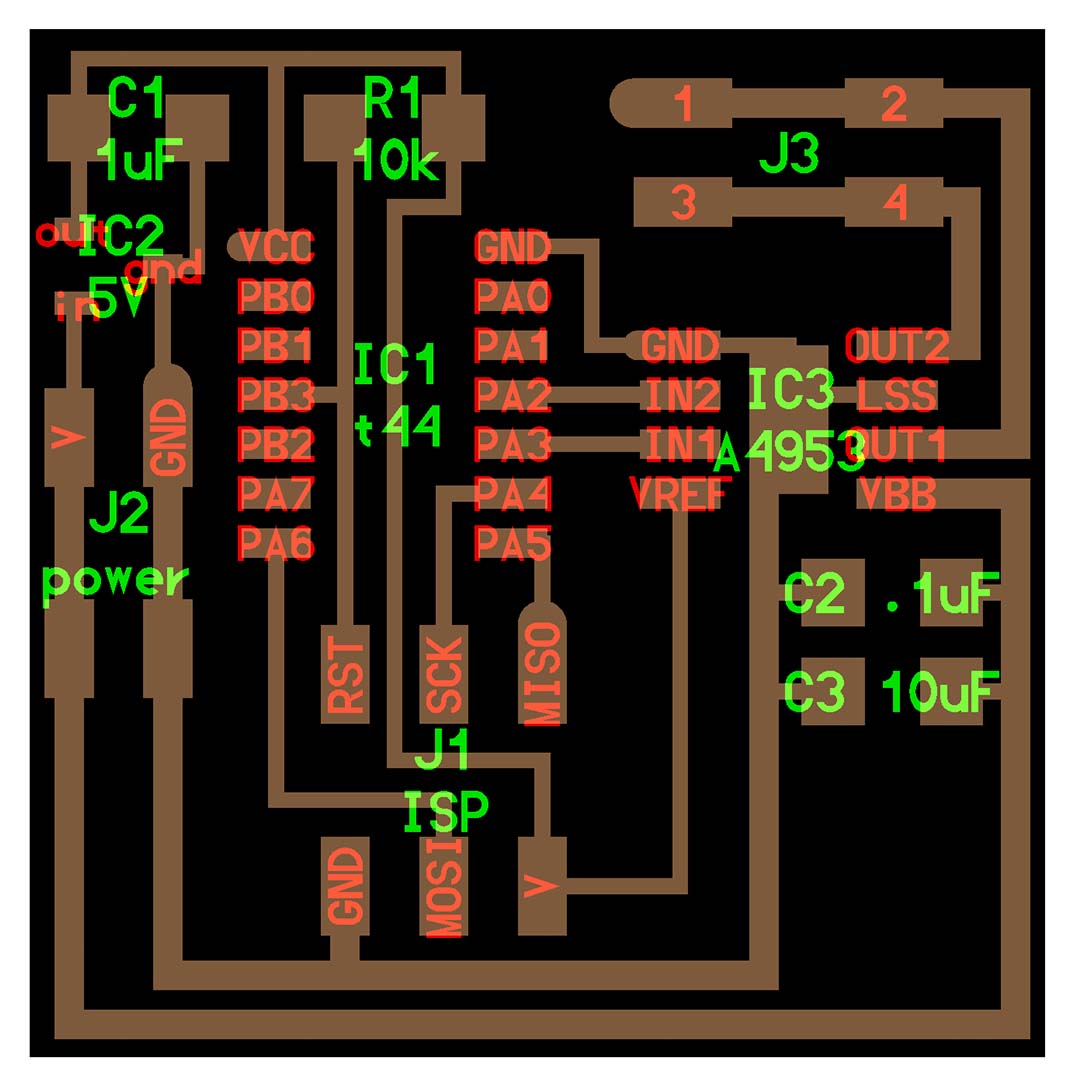
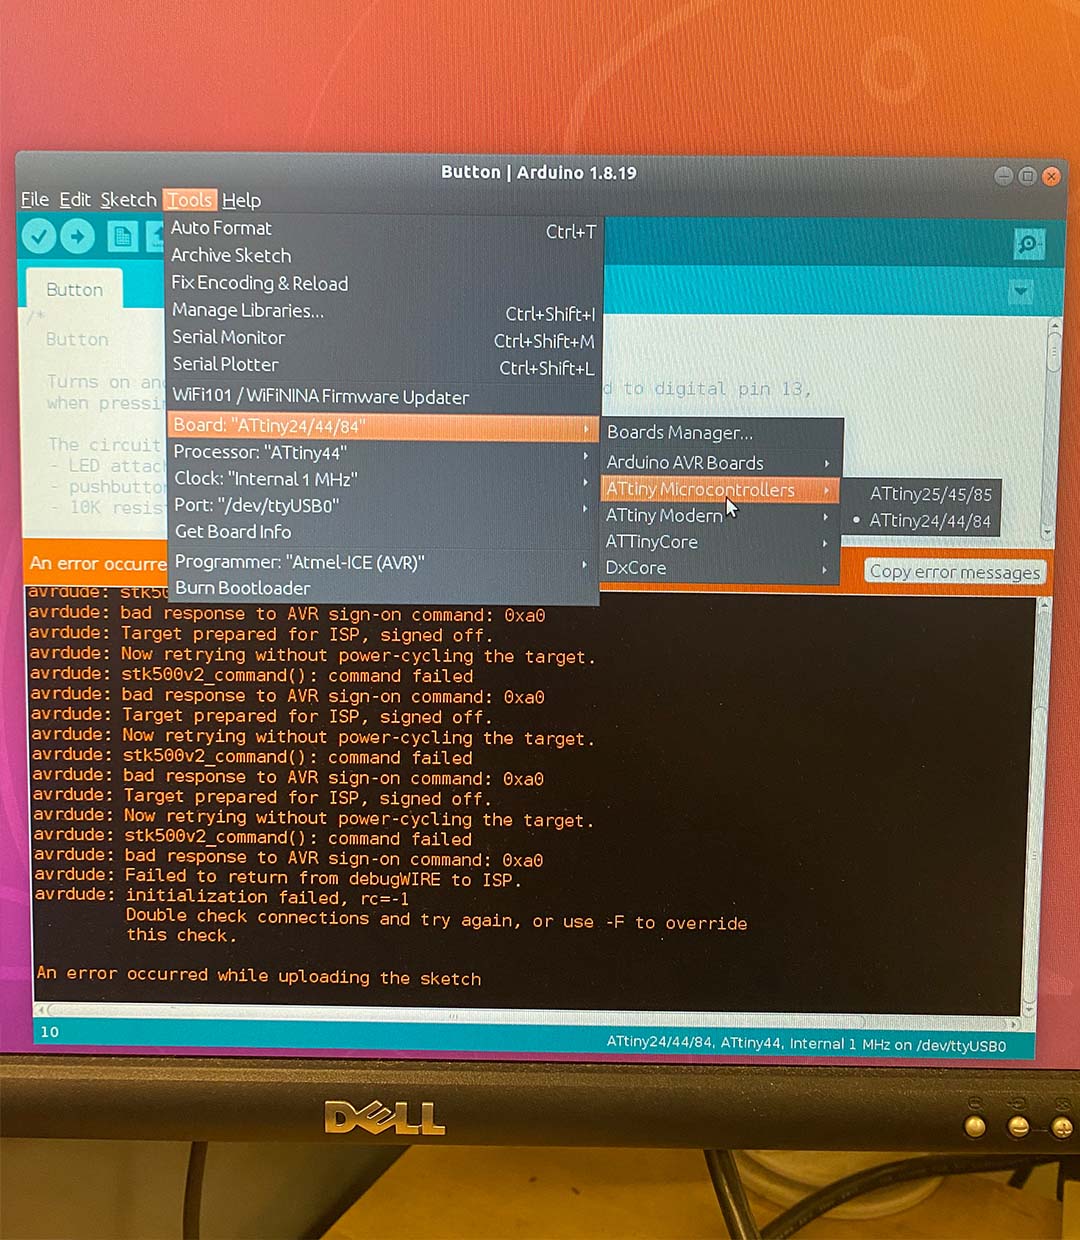
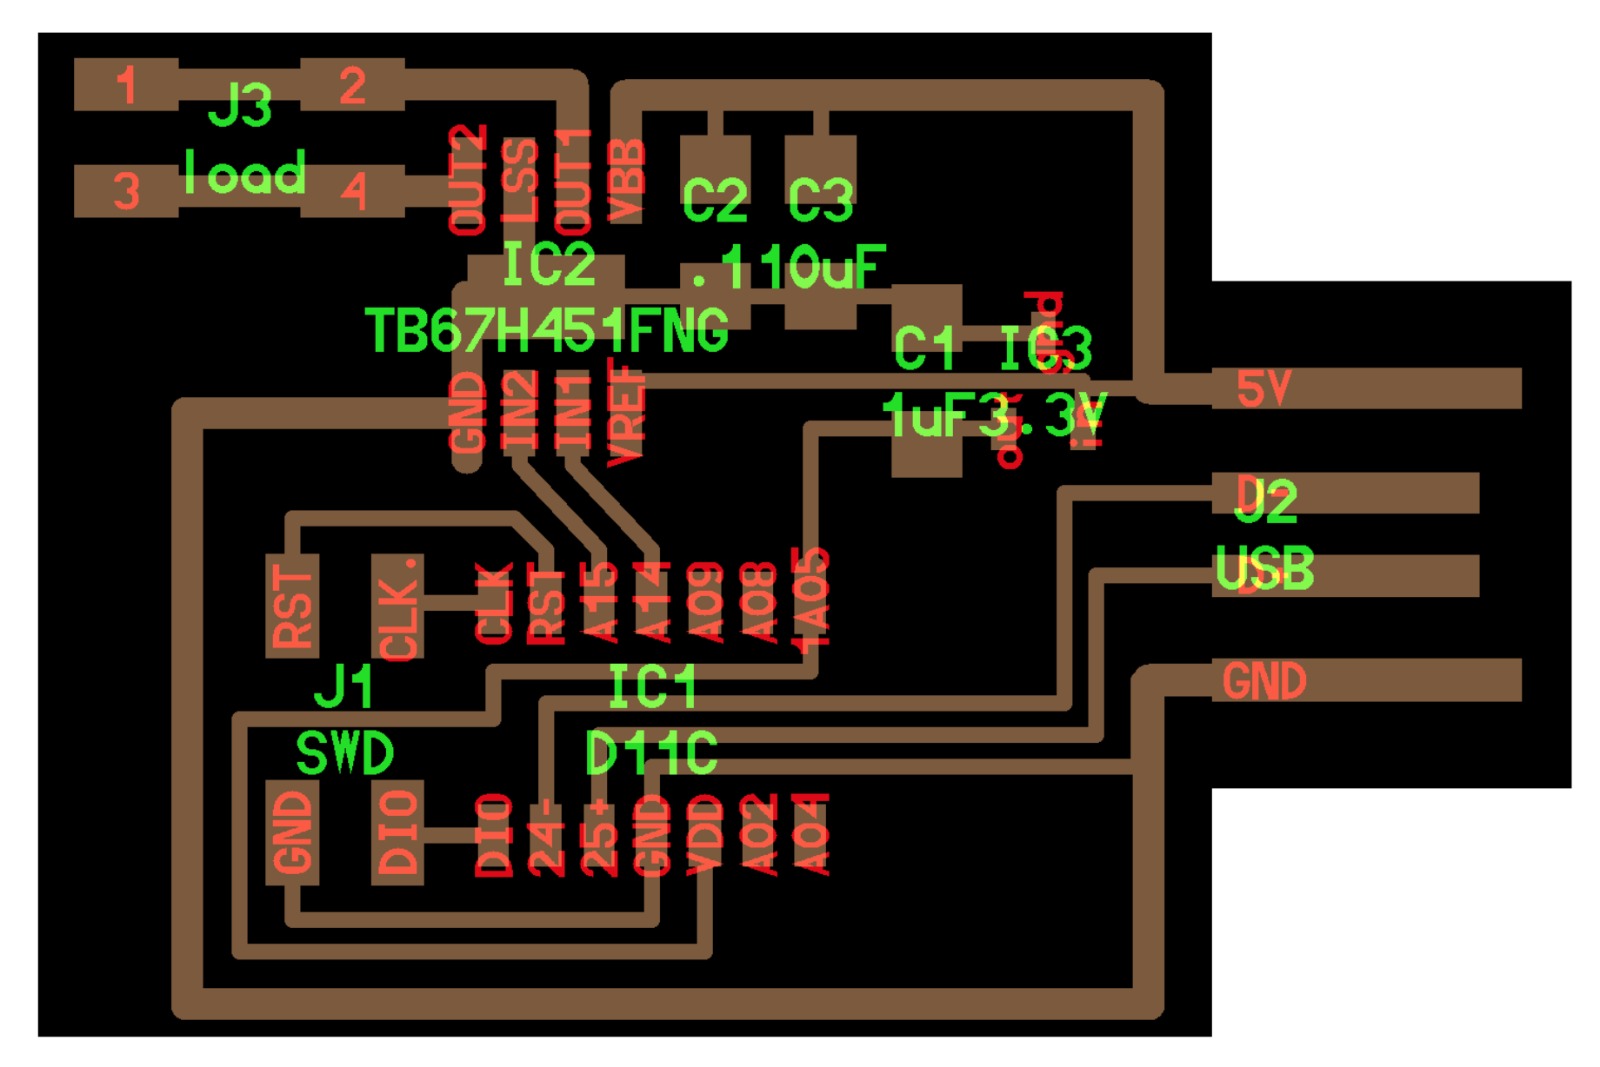
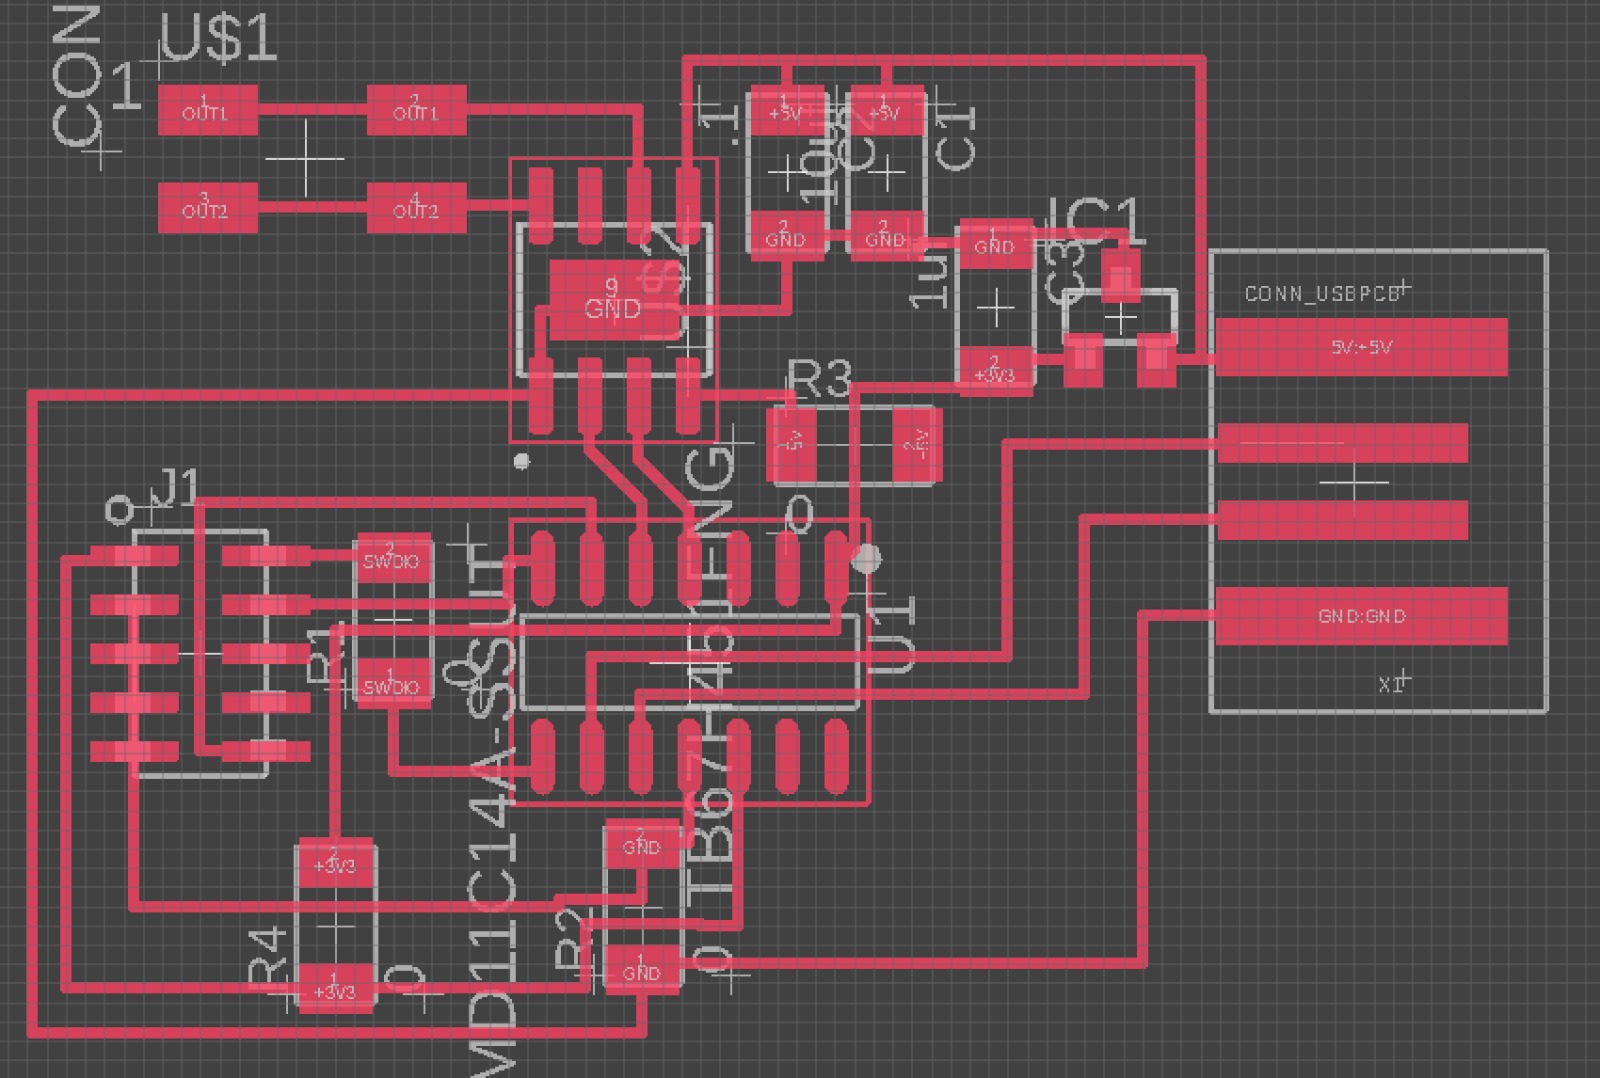
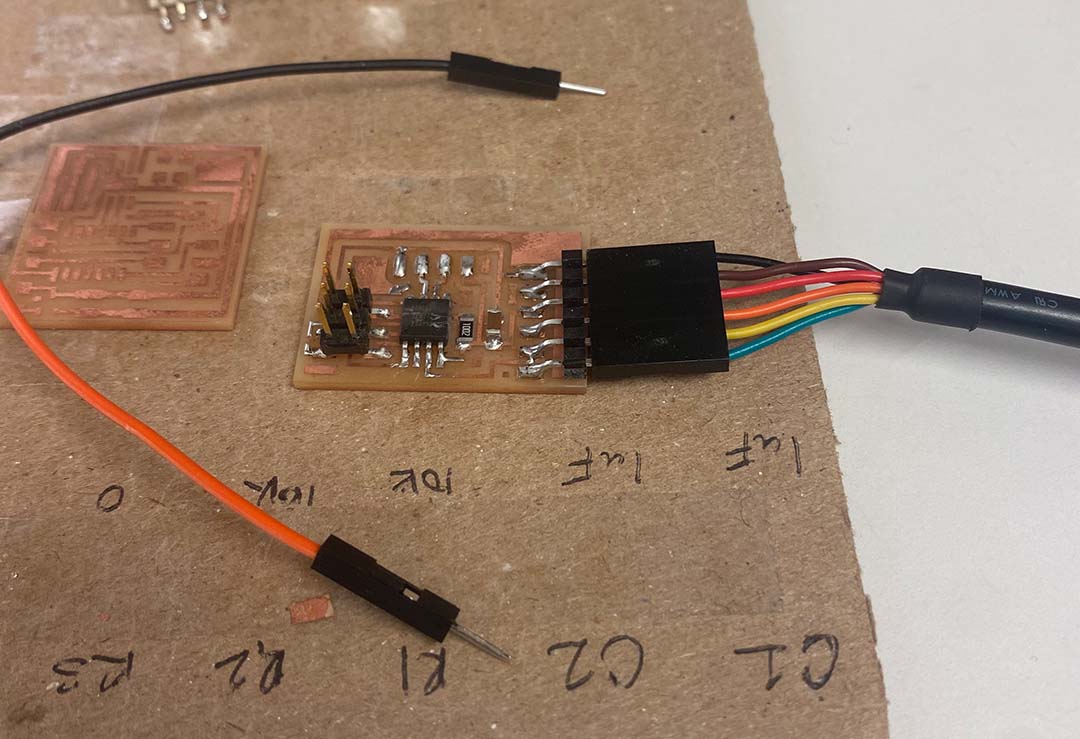
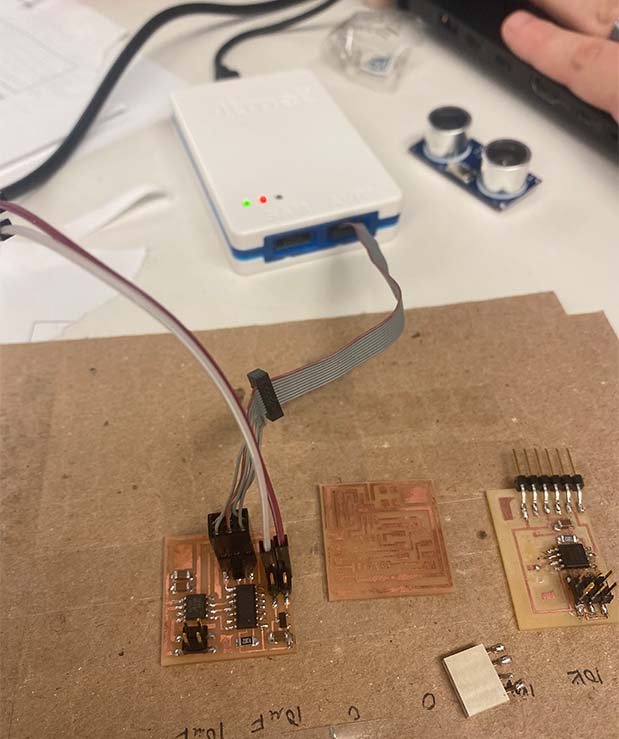
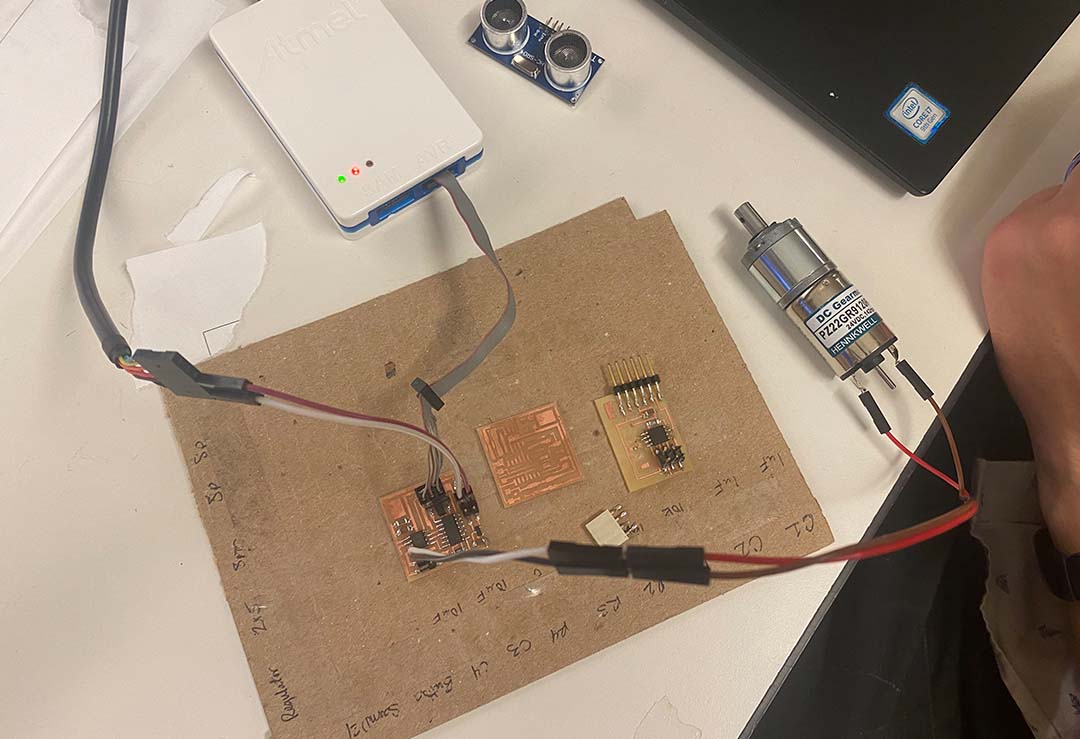
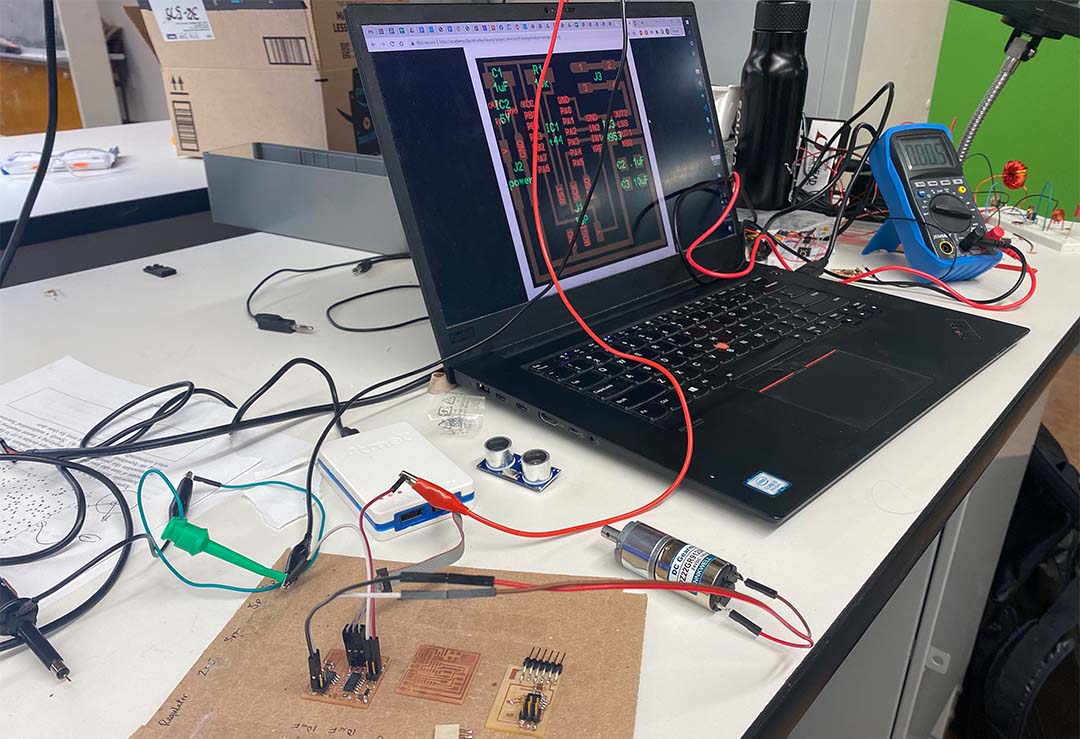
I realize that the Attiny board doesn't need to boot load, But 
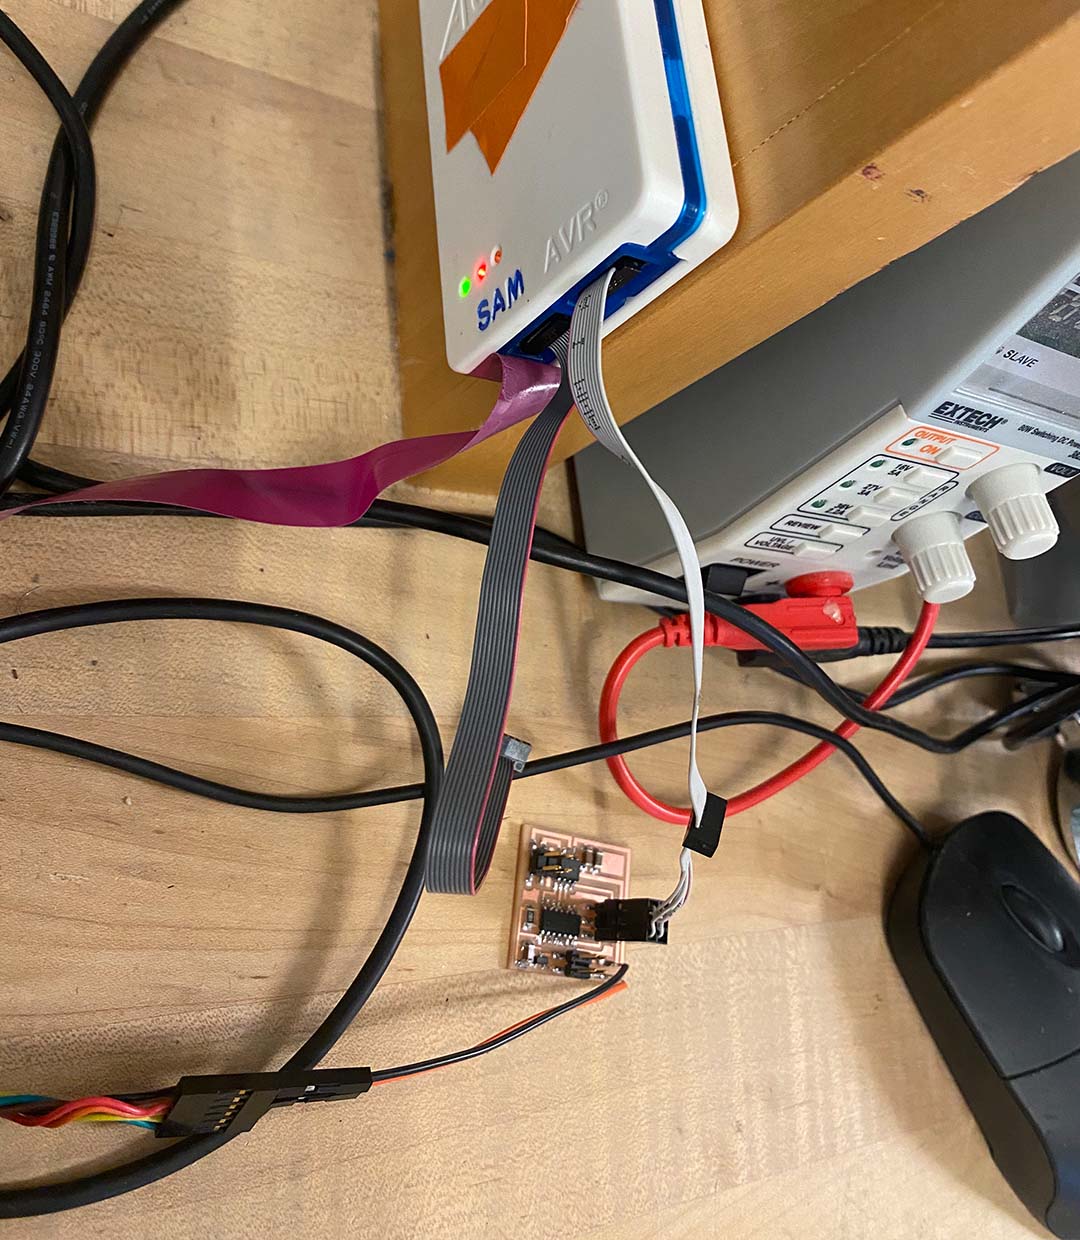
whenever I want to program the board, I have to connect to the Atmel. 
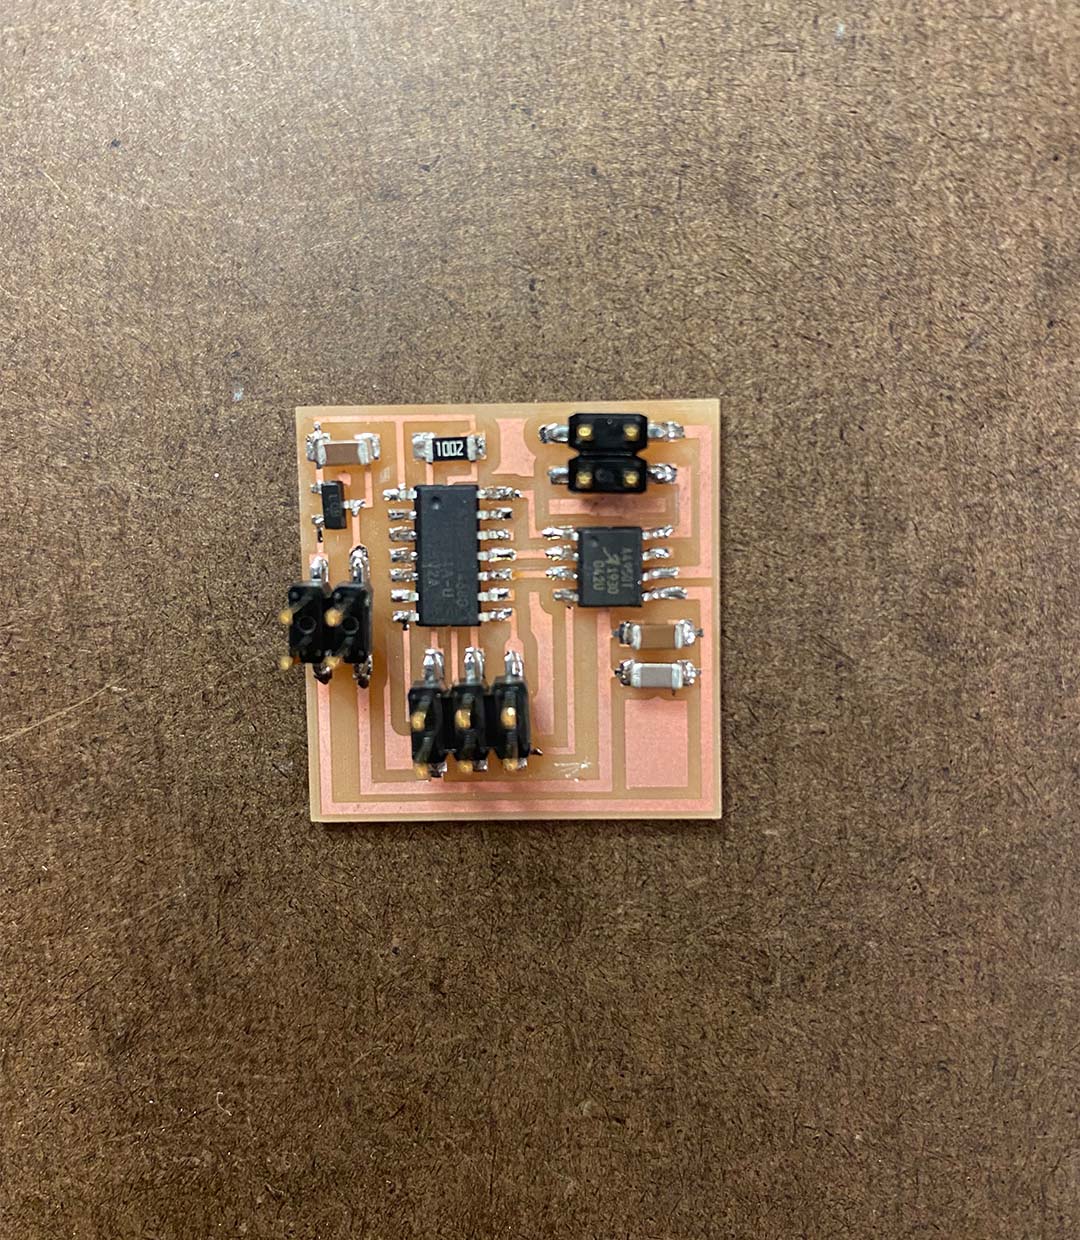
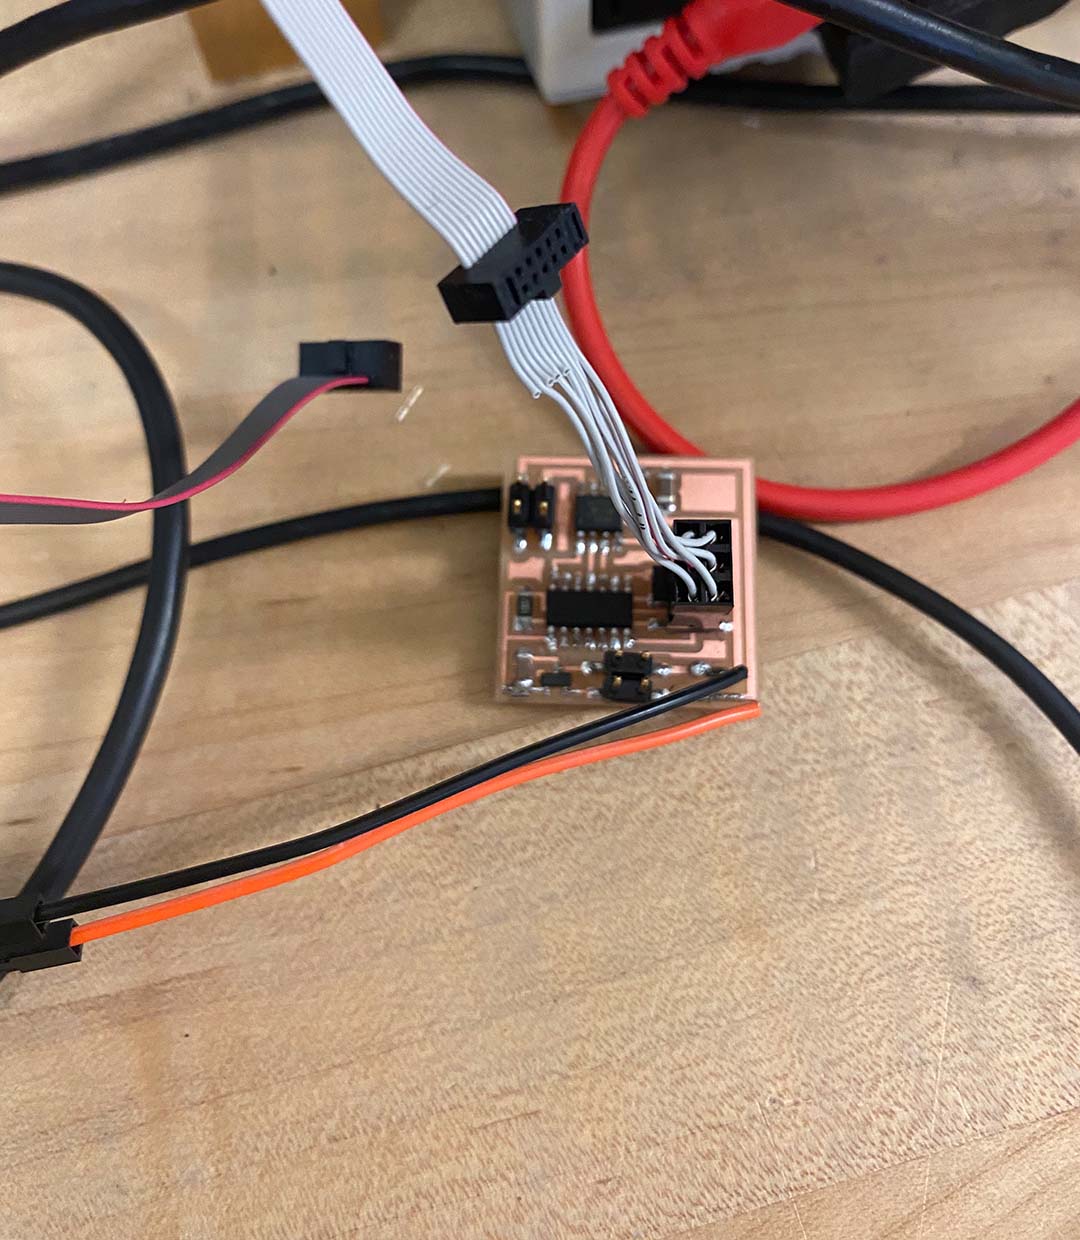
So It was the giant huddle for using the Attiny 44. Also, the Attiny microcontroller needs a power source to program it. When I connect the 
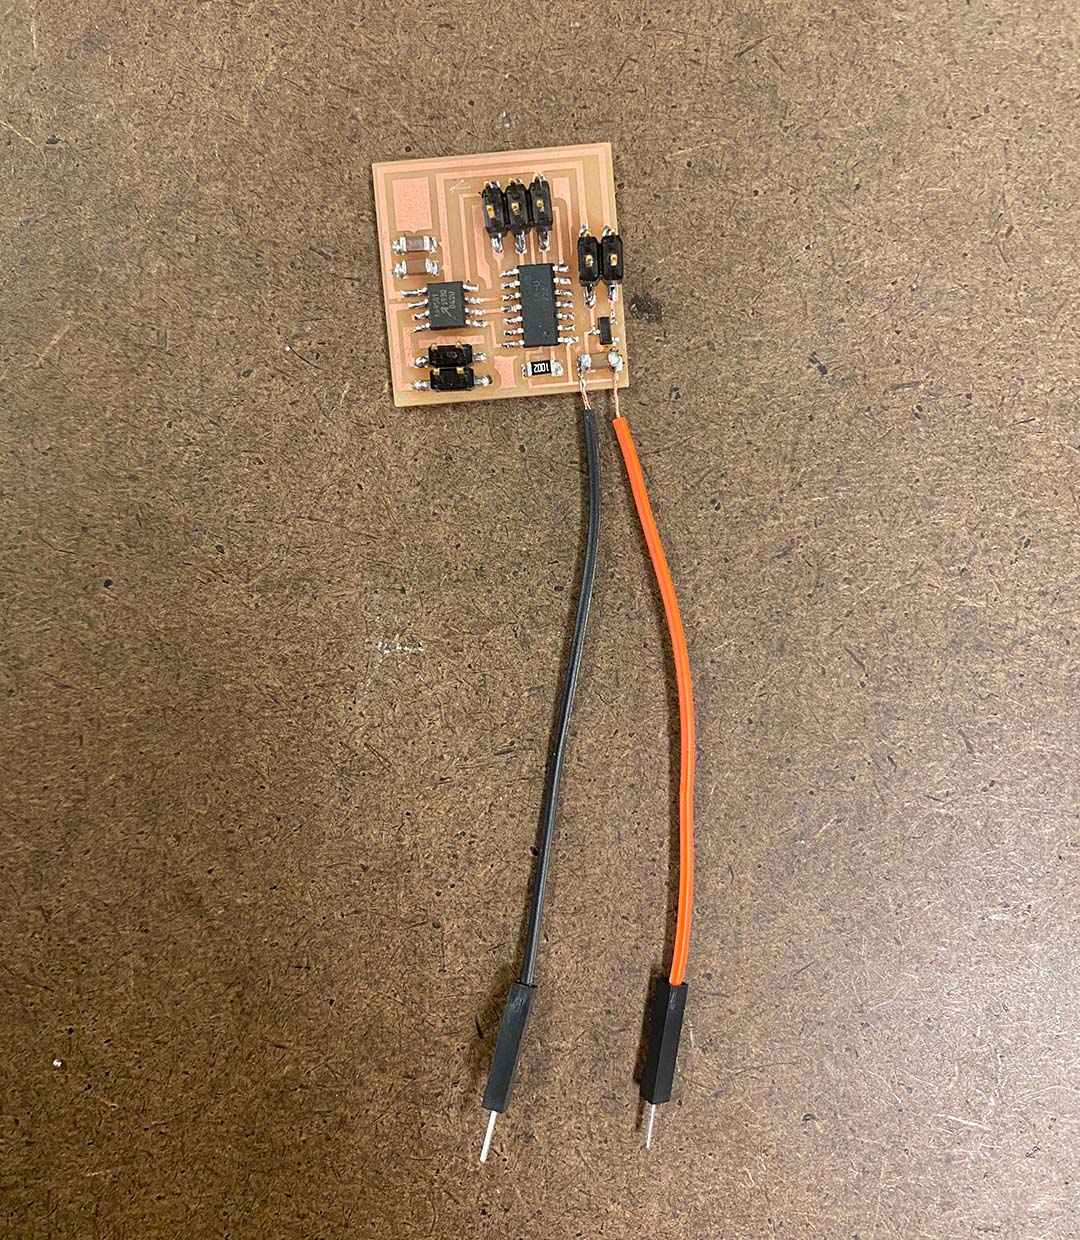
board to the Atmel using J1 6pins, It doesn't read my board. I need to plug in another power source. So with TA Demicran and Reina's help, I realize that we need to attach the jumper wire to provide the power source. So I attach the two jumper wires, one is ground, and another one is power near the capacitor. And when we connected both pins, it 
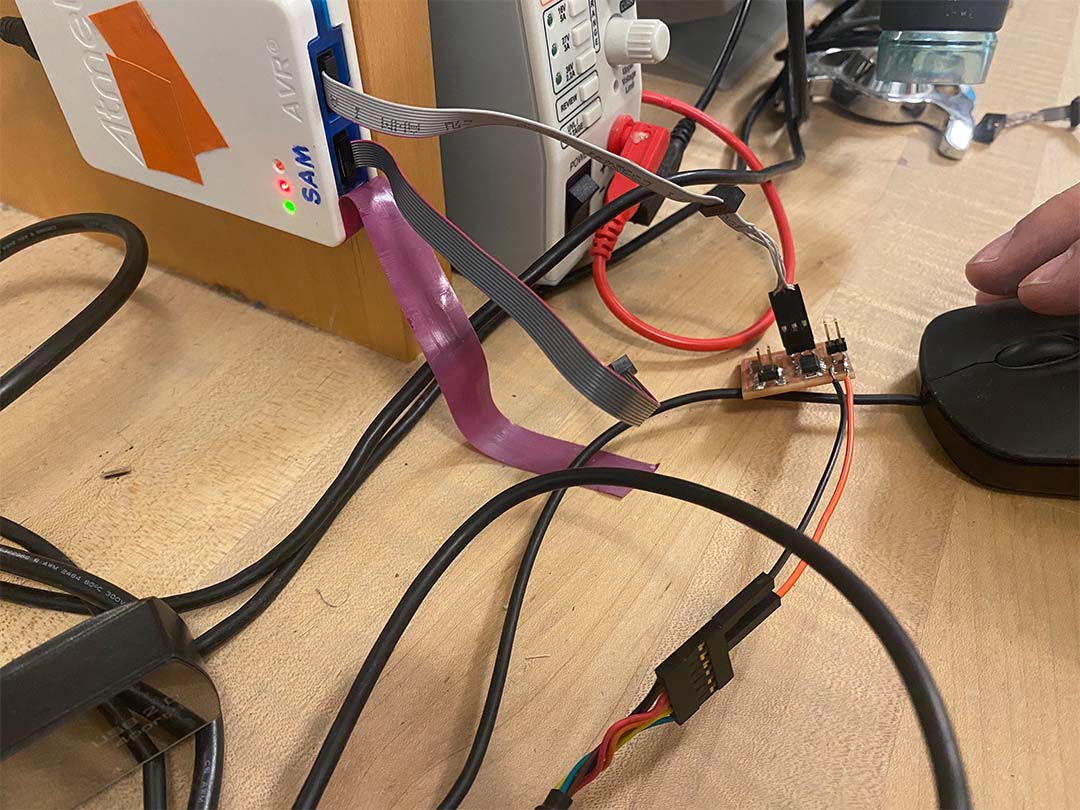
could read my board, and I could see the green light on Atmel. 
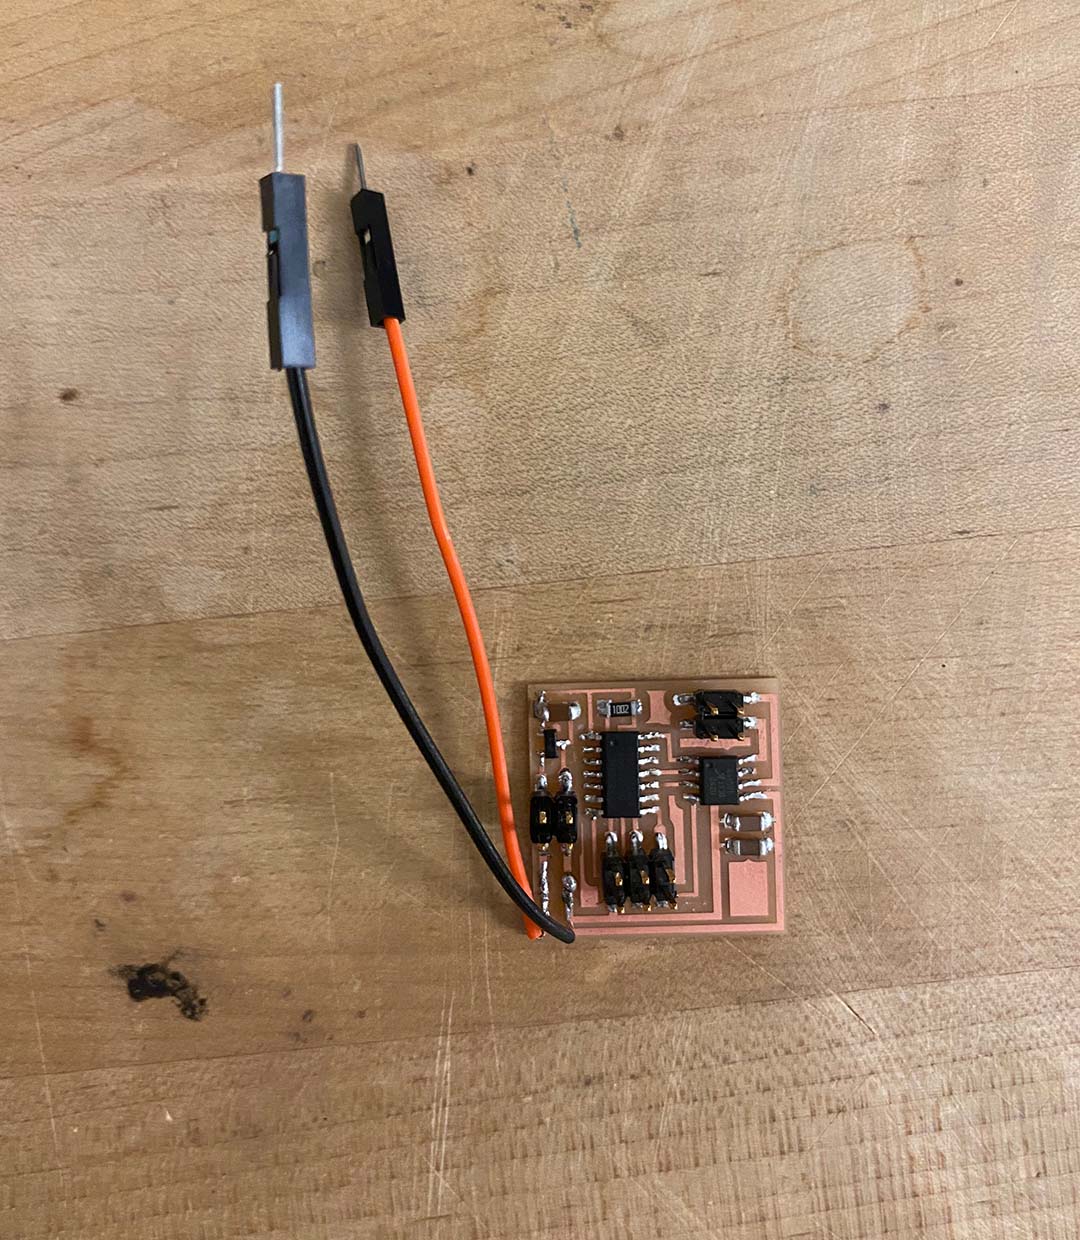
However, the board got really hot. So we plugged out and moved the jumper wire's location to another place far from the microcontroller.
After soldering the jumper wire to another place, we connect the board again to the Atmel. and it won't get hot anymore. and I could see the green light on the Atmel which means it was connected properly. but the problem was I couldn't upload the coding..I keep getting the error msg. but I don't know really why. I am really stuck at this stage...and I was going to mill another board using the D11C microcontroller... I was really frustrated.

03

I redesign the whole board again using the D11C microcontroller. I made a whole new schematic referring to Neil's other board design which uses a D11C microcontroller. I was about to mill this board and re-do everything again. but before I move forward to redo everything again, I wanted to try debugging my boards for the last time. so I visited TA Antony to ask for help debugging my boards with desperation and all of my failed boards.
Thankfully, Antony helped me to figure out what is the problem on my board. It was mostly a soldering problem. Most of the pins are not connected properly. so I had to re-soldered again following Antony's advice. I was so glad that It was only a connection problem. and I also realize we don't need to solder the two wires for the power. There was a pin that I could use to put the power through already on the board. haha, I didn't realize that. so I took the two wires out.
We connected again to Atmel. Finally, we could program the board and upload the code successfully!!! I was so happy, actually almost cried. but there was another problem, somehow when I connected the motor, the motor didn't work.
We thought there is a problem with the motor, so we change to another motor which is a small one. and It was working!
We figured out DC motor needs more power. so we increase the power to 12V. and connected the DC motor again.
Finally, It started rotating!!!!!! working!!!