- wk8
- ∨ design node for diamond cubic lattice
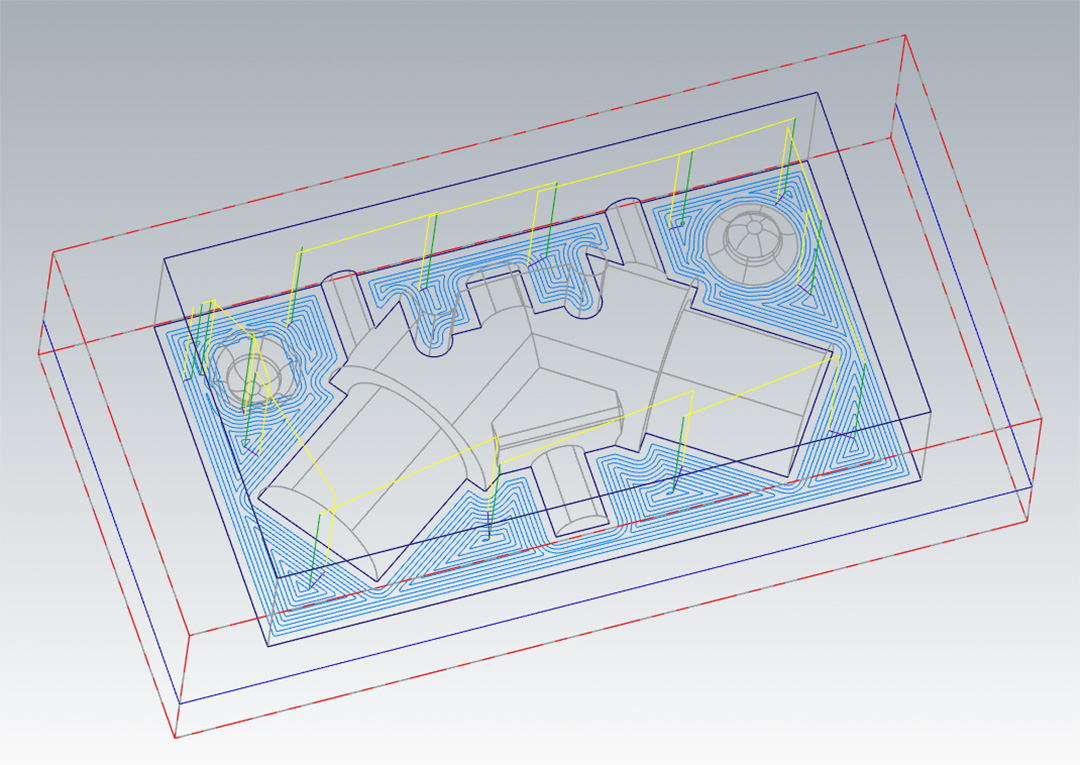
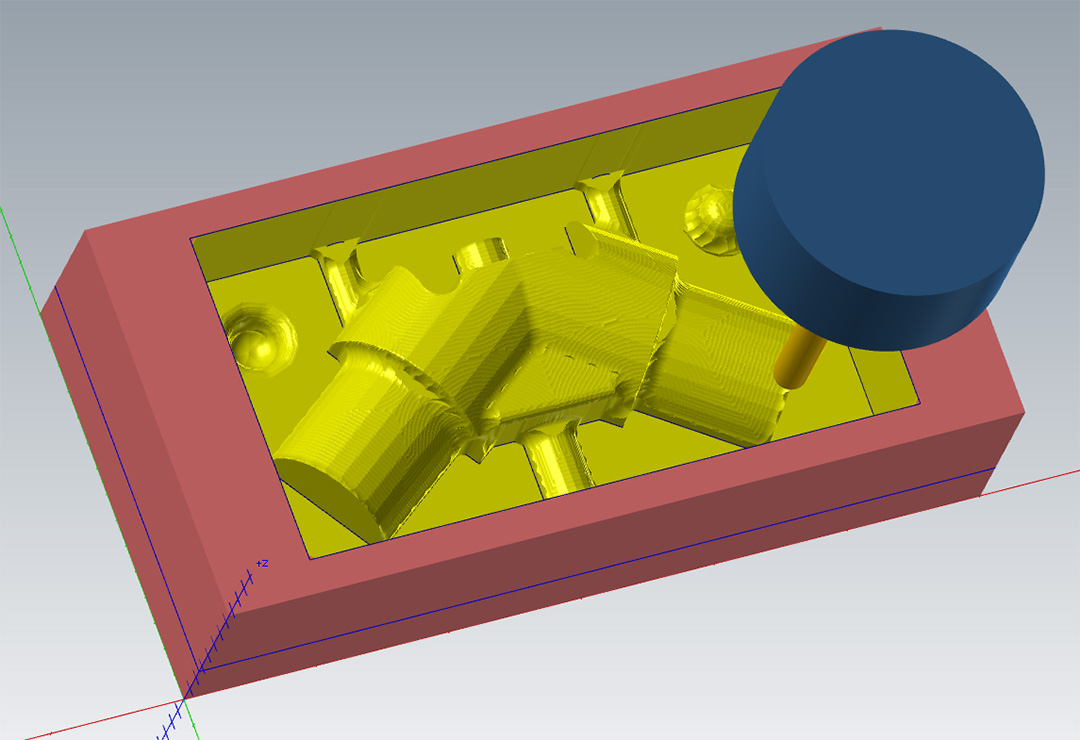
- ∨ create toolpaths with mastercam
- ∨ mill master model on intelitek
- ∨ pour reoflex 30 urethane mold
- ∨ cast parts
- ∨ assembly
this week i'm gonna explore the geometry of the tetrahedral skeleton further
looking back at CAD from wk4 and wk6 the skeletal (voronoi?) has an internal angle of 109.471 degrees between members, not 120 degrees like i previously thought.
three members are always 120 degrees to the other normal member.
i have a bunch of sch 40, 1" pvc pipe
for which the parts will tenon into.
• ID: 1"
• OD: 1.315"
• master constrained by 3x6x1.5" machinable wax stock
• master-mold (wax) wall thkness: min 1/4"
• mold (urethane) wall thkness: min 0.26"
halves connected by 5/16th bolts
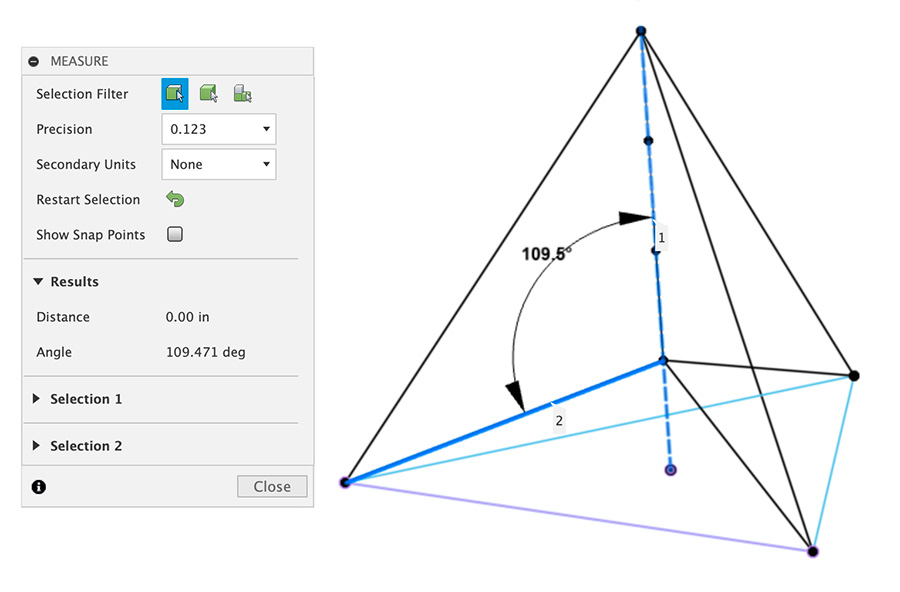
109.471 degrees internal angle
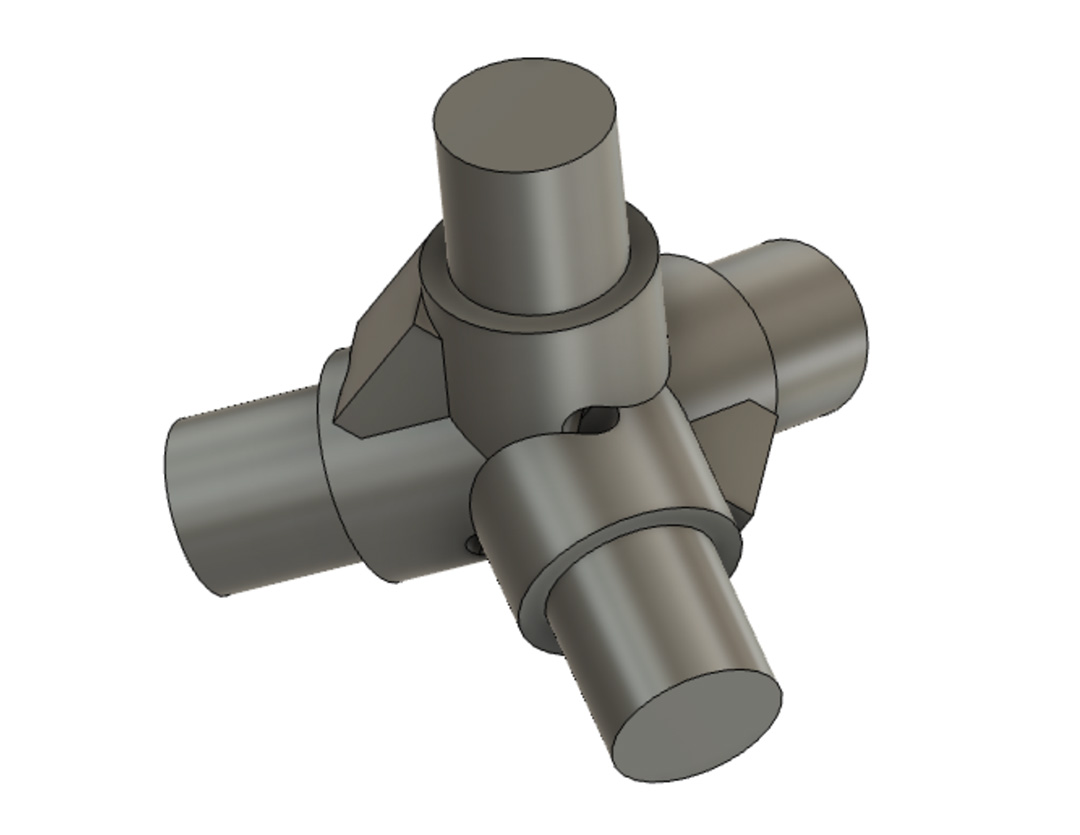
assembly of diamond cubic connector
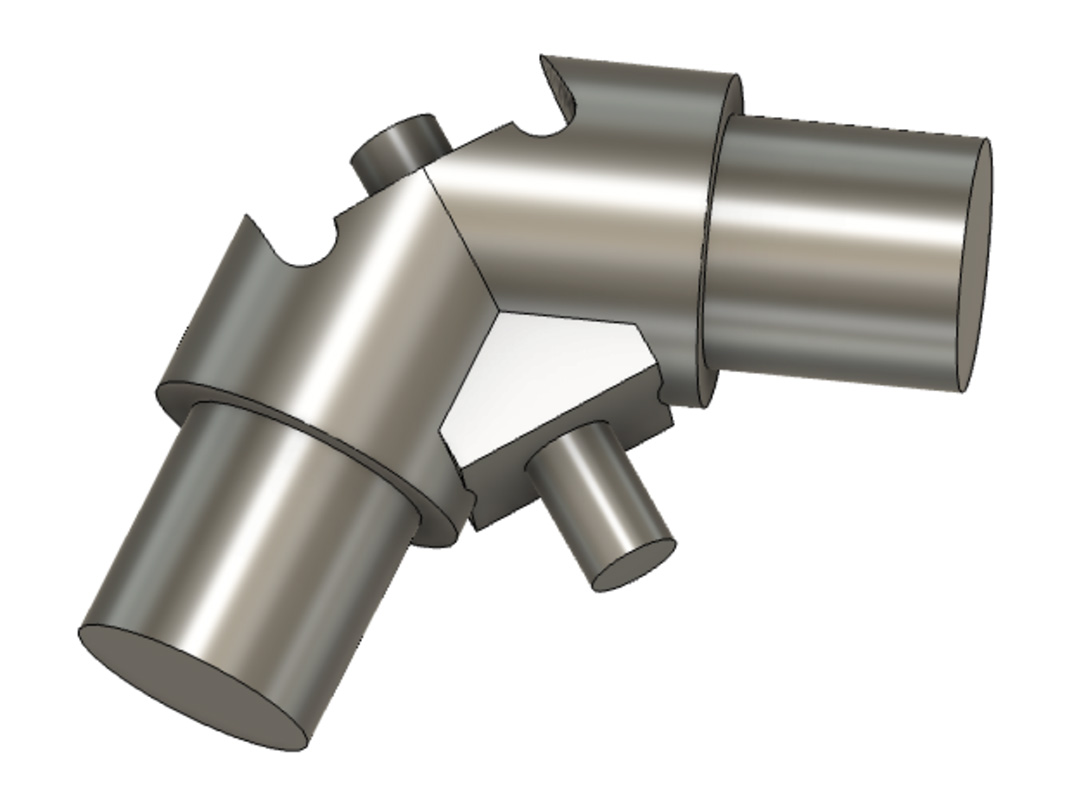
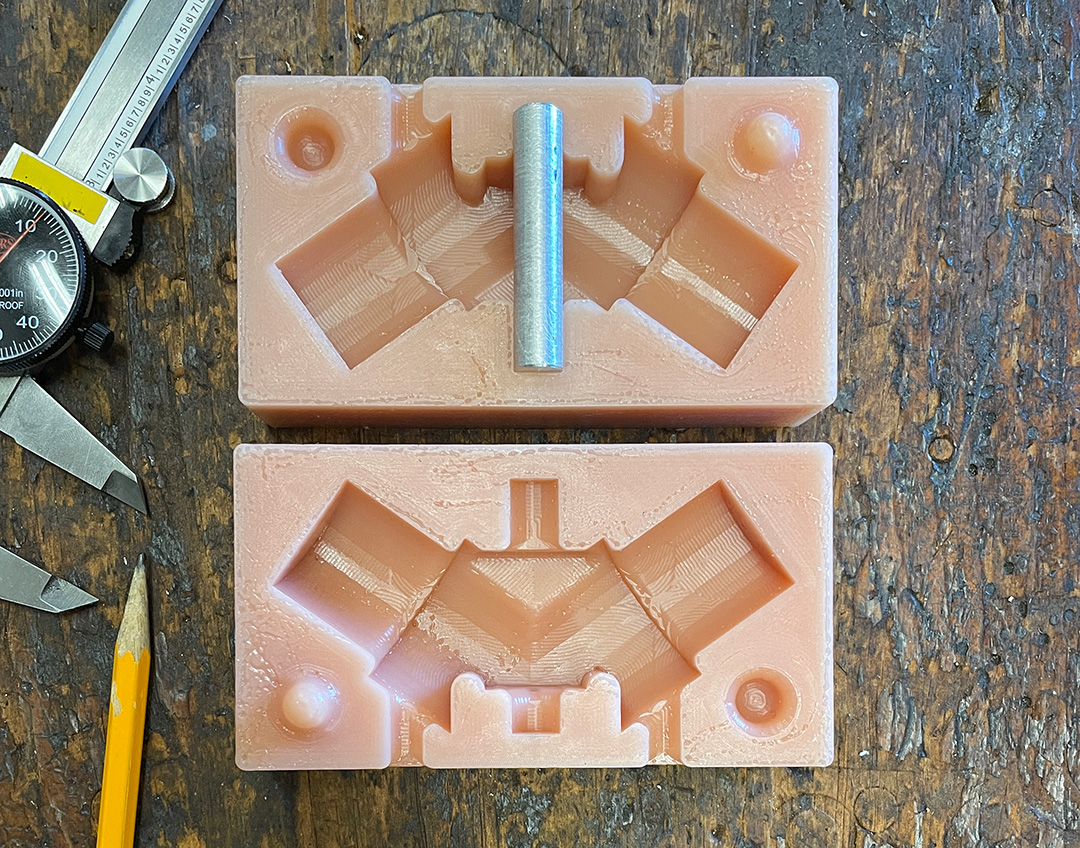
half component with removable core
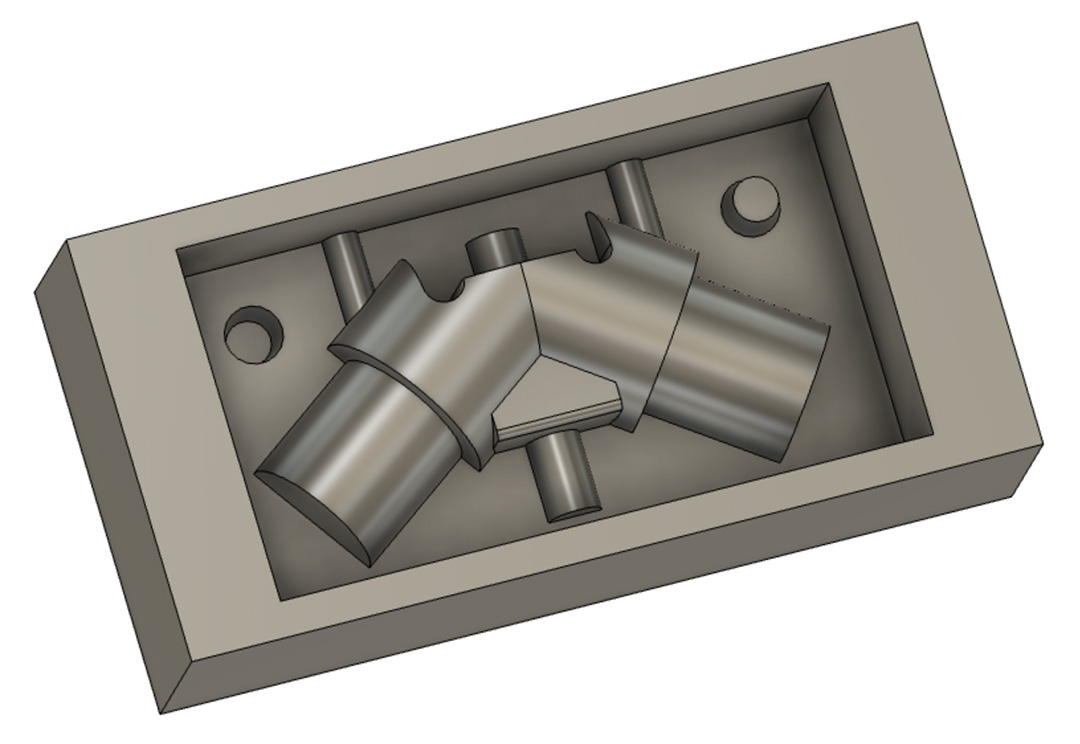
quarter component with sprue and registration
half of half the component
for a two-sided mold
• add sprue(s)
• add registration bumps
• no taper added..
• 3/8" ⌀ removable core
• 0.26" tool clearance between part and wall
• 0.26" t-bone for mating face
• export as .step
mastercam
1/8" flat, bottom and internal corners
1/4" ball, finishing pass
thurs
mastercam ain't easy (thnks jen!)
• check surfaces = avoid surface
• containment lines = tool boundary sketch
• parallel (1/4" flat) for roughing
• contour (1/4" flat) to clean wall
• scallop (1/8" flat) for bottom, internal corners
• scallop (1/4" ball) for finish surfaces
• simulate with "verify"
• "G1 icon" is post
• check post-processor
• tool library (offsets) is checked by jen
feeds and speeds:
• SFM for wax = 270
• S4000 F76 (for 1/4")
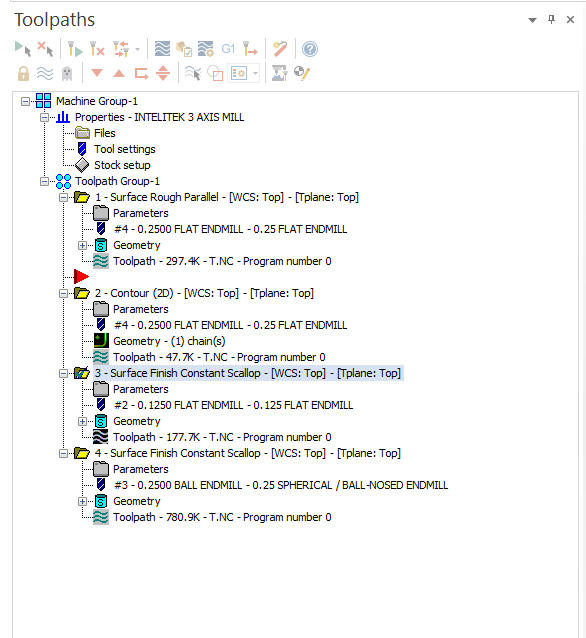
3 tools, exported separately

cnc controller - zero XY under "setup"
intelitek is locked out. get permission.
home machine
• open gcode file
• double check tool #
• insert tool into spindle
• jog to XY (eyeball)
• zero XY under "setup"
• Z0 is spoilboard.
• square stock to bed (eyeball)
• hot glue to spoilboard
rough mill (1/4" flat)

vacuum between toolchange
finishing pass (1/4" ball)
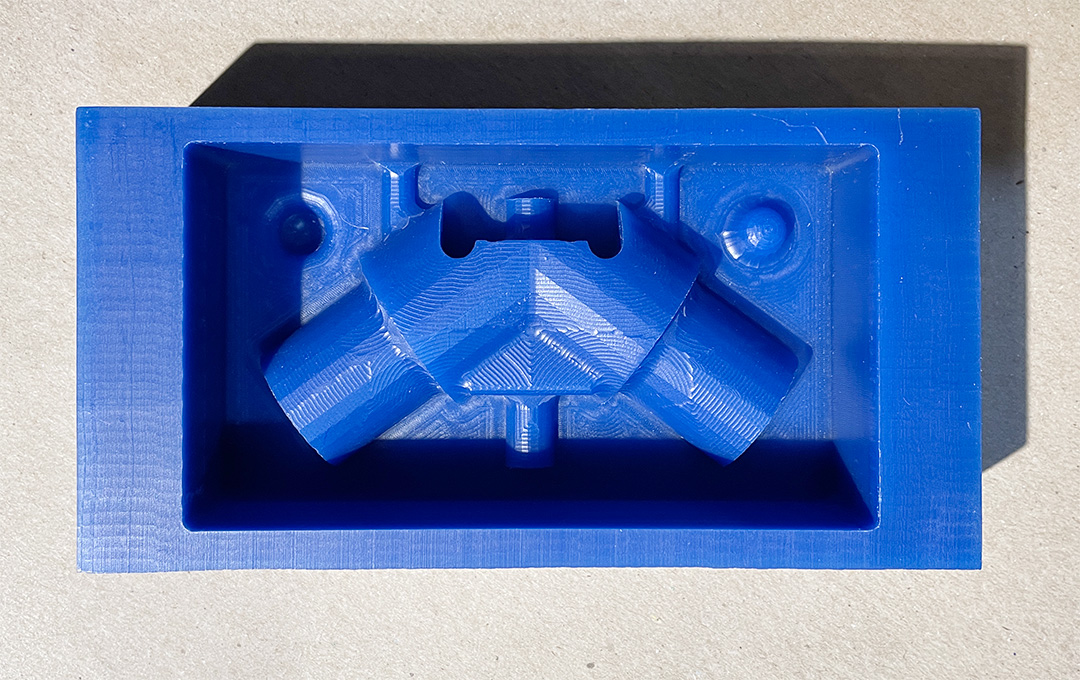
master model
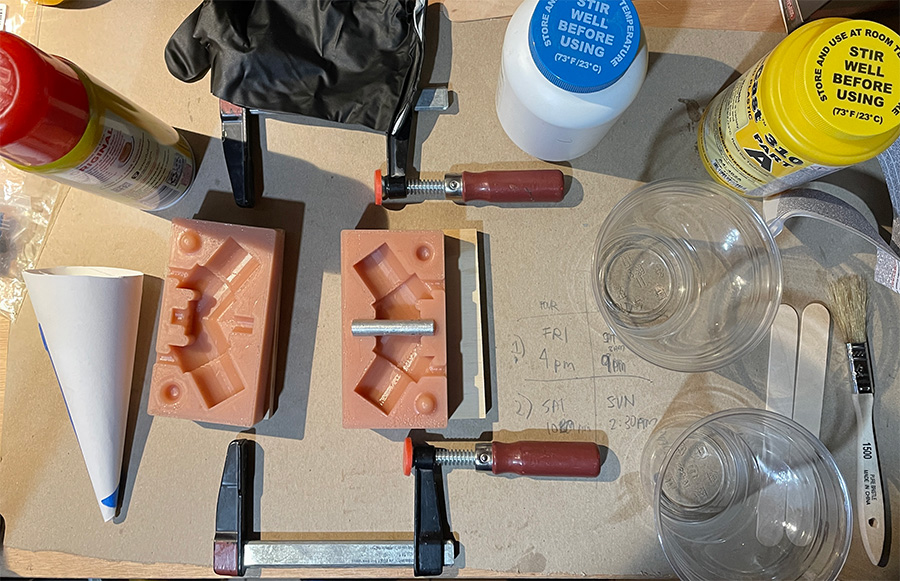
pour the mold
fri noon
1st half
using reoflex 30, urethane
pam for mold release, brush in corners
1:1 ratio
pour A or B into the other more viscous liquid
stir well, try not to fold air into it
• chip brushes
• gloves
• plastic cups
• tongue depressors
• fan+hepa for ventilation
• n95
should de-gas
basement shop
sat noon
2nd half
potlife: 30mins
cure: 16hrs
sun 10AM
demold 2nd half, looks good
go to shop to make core
• find 3/8th round stock in scrap bin
• cut close to length
• face
• break edges
facing 3/8" core
core
cast parts
dry run, make paper cone
turn on hepa fan, don't spill
2 pours on sunday
2 pours on monday
smooth-cast 310 - hard white plastic
1:1 ratio
potlife: 7mins
cure: 4hrs
air was getting trapped at the top of the mold
at two different locations.
i cut some relief into the urethane.
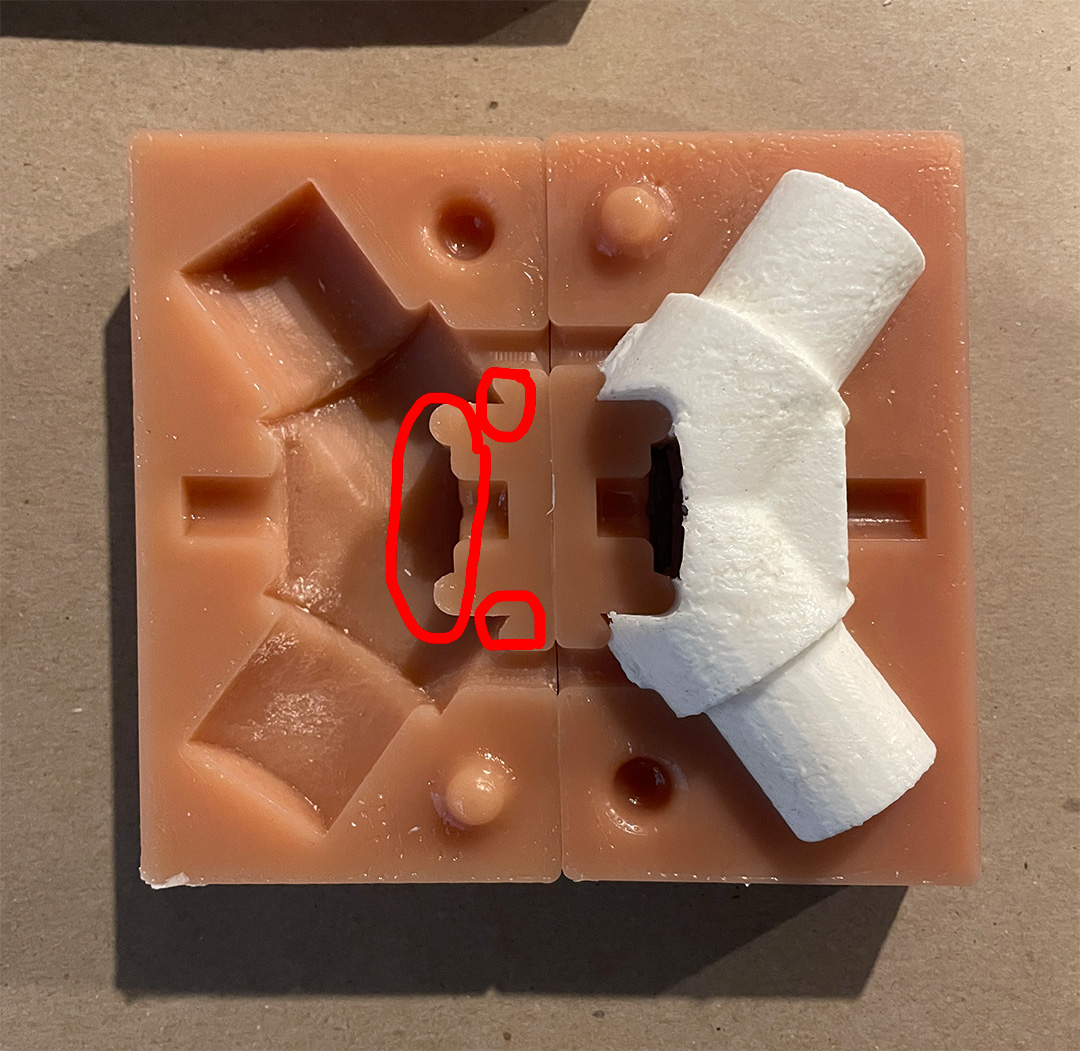
mold needs surgery
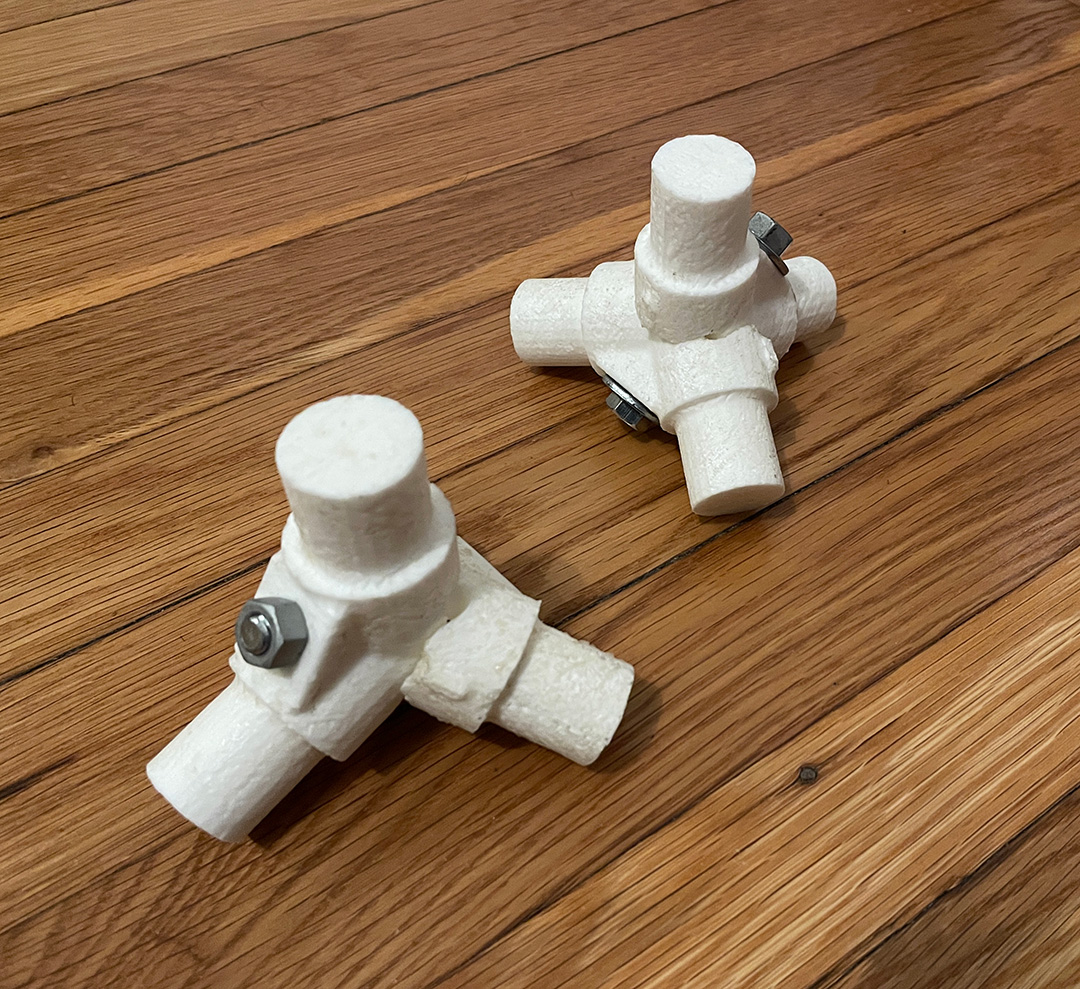
2x tetra / diamond cubic connectors
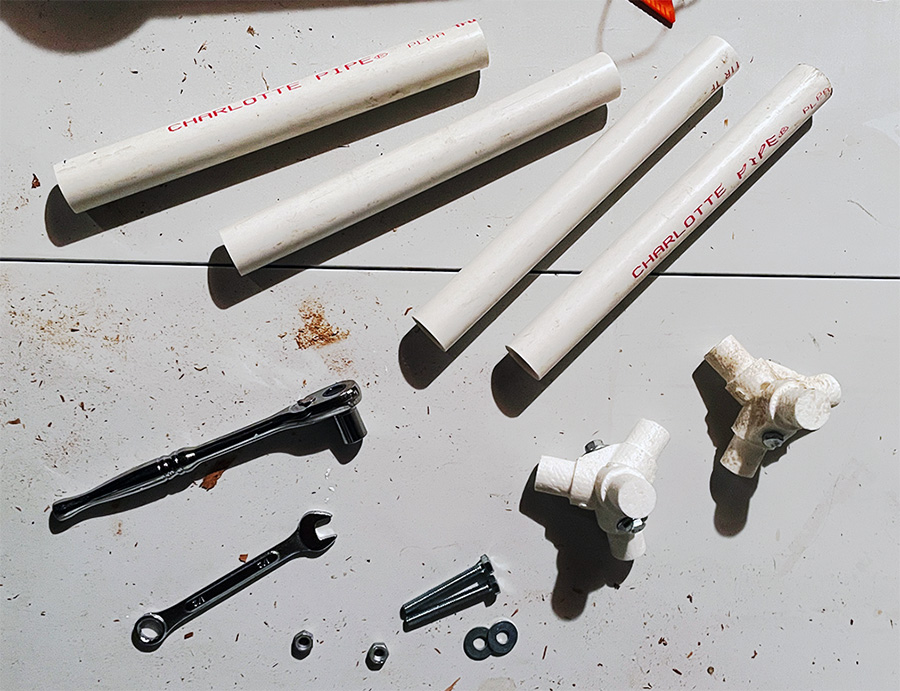
the kit
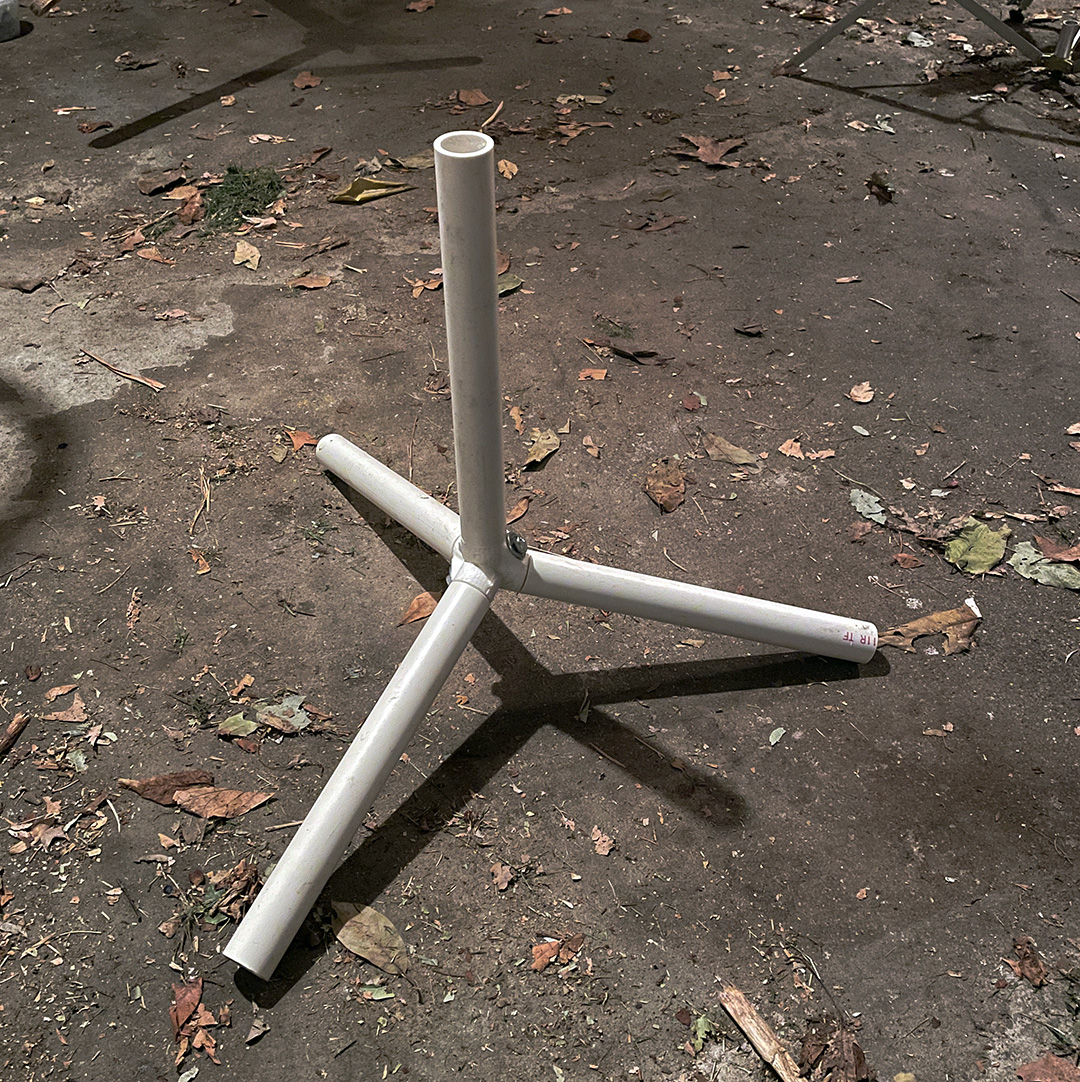
connected to 1" pvc
debrief
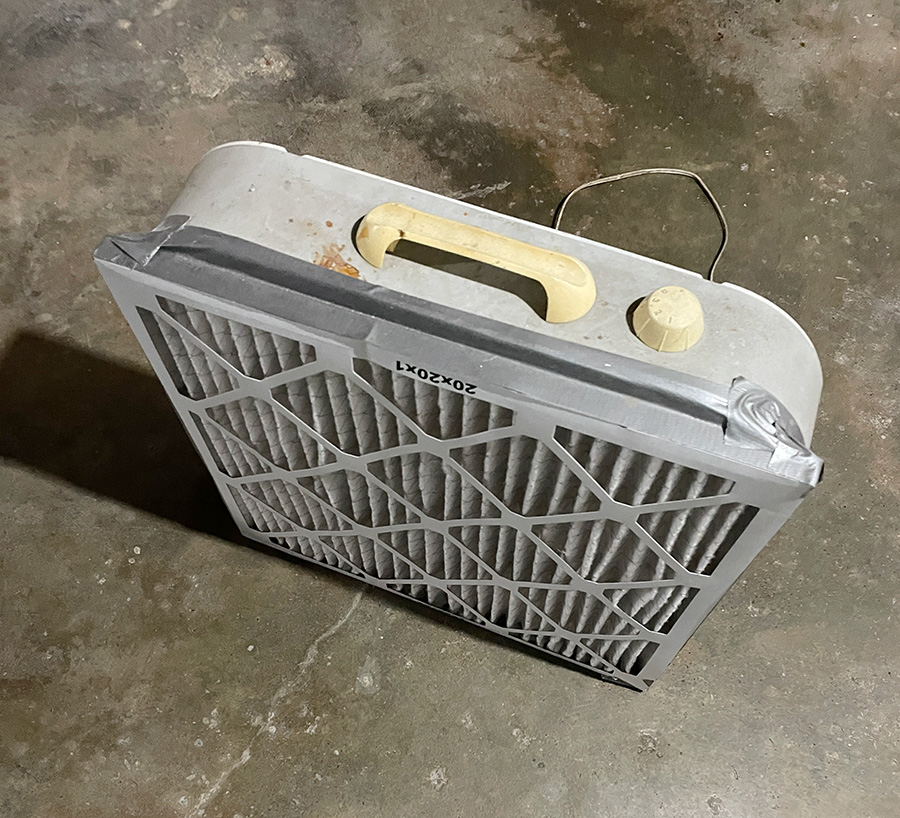
need better hepa fan
i should build this one.
• 2 spills - need to calculate mold volume
• restock: gloves, stirrers
mold started failing after 3rd cast
• got sticky. i didn't demold soon enough?
• is it because i used pam and not real mold release?