Concepts
2D/3D Design, Laser Cutting, 3D Printing, CNC, Molding and Casting, Input and Output Devices, Embedded Programming (in progress)
Software
Illustrator, Fusion 360, EAGLE, Sindoh 3DWox, Mods, Arduino IDE
Assignments
1. Make a final project masterpiece that integrates the range of units covered
Documentation
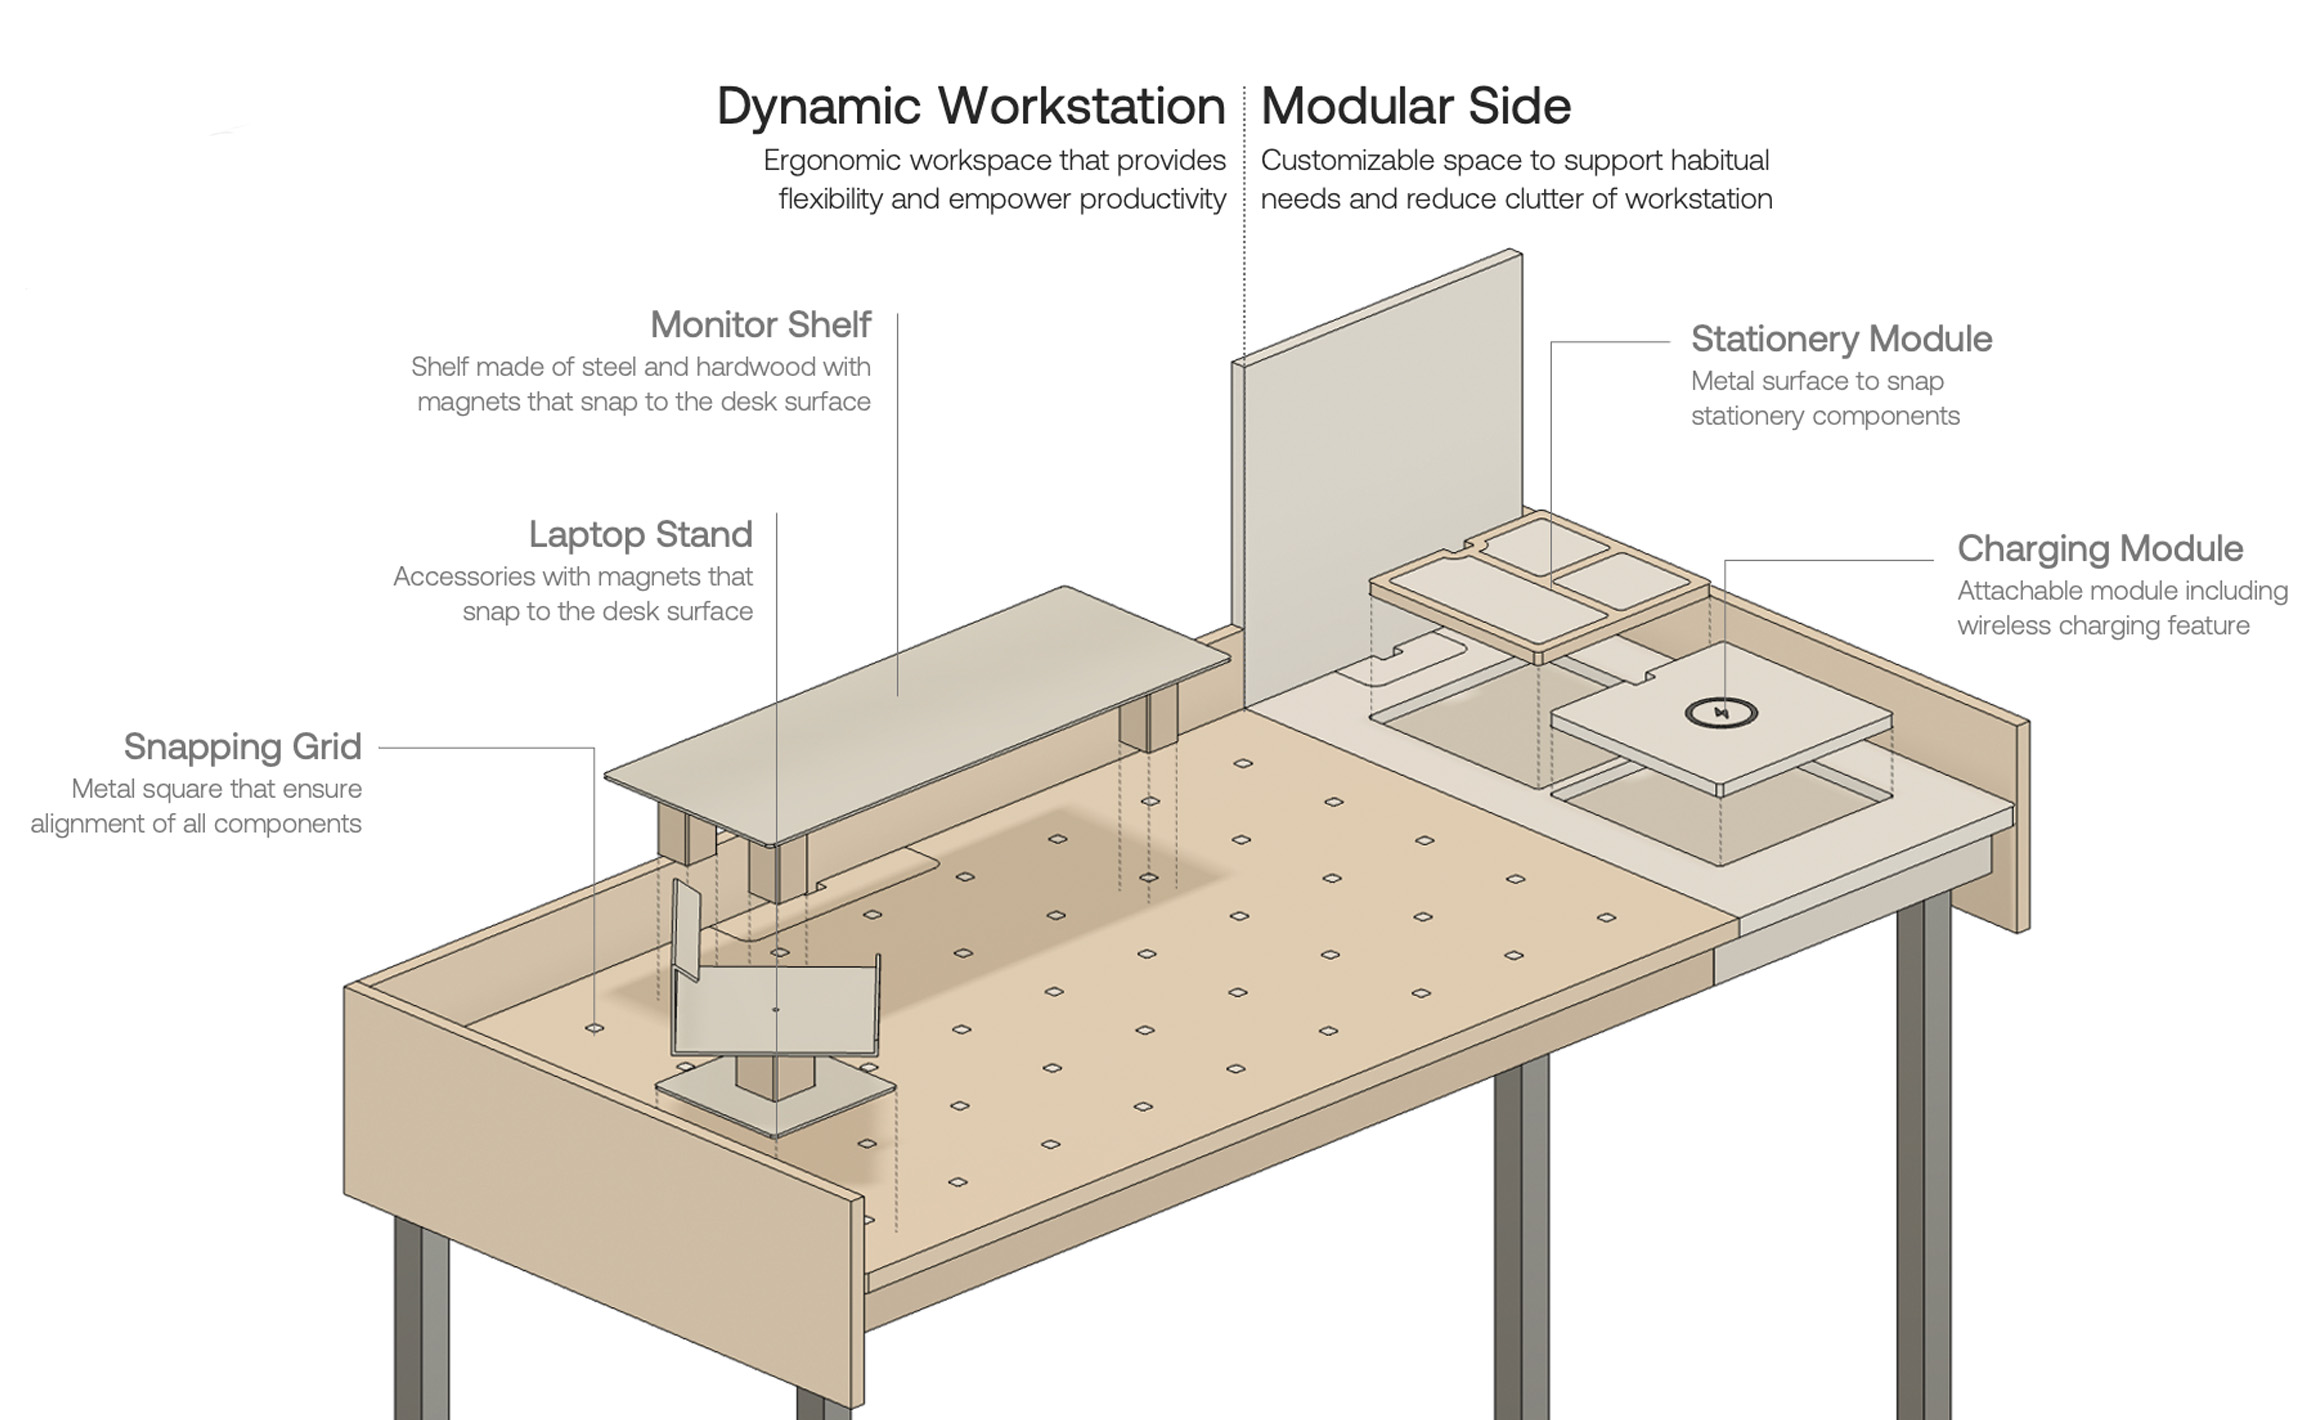
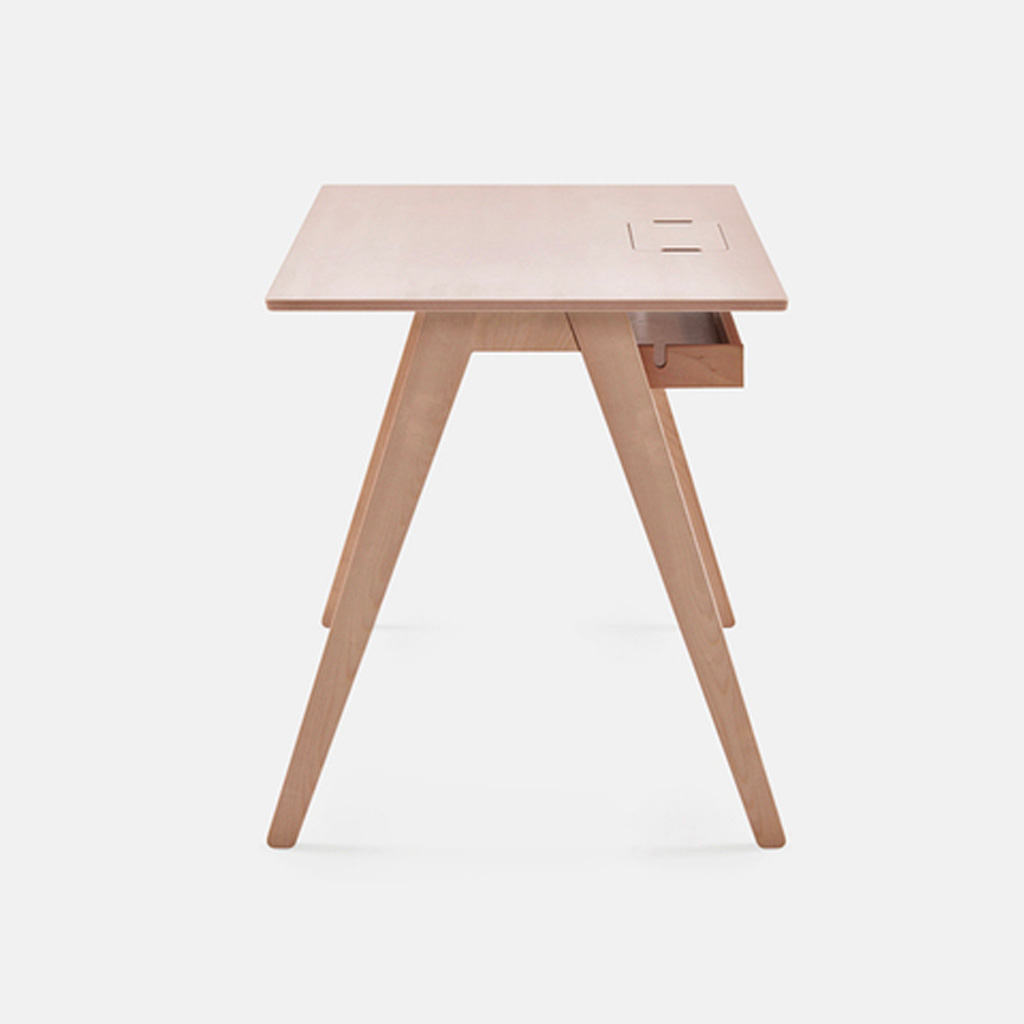
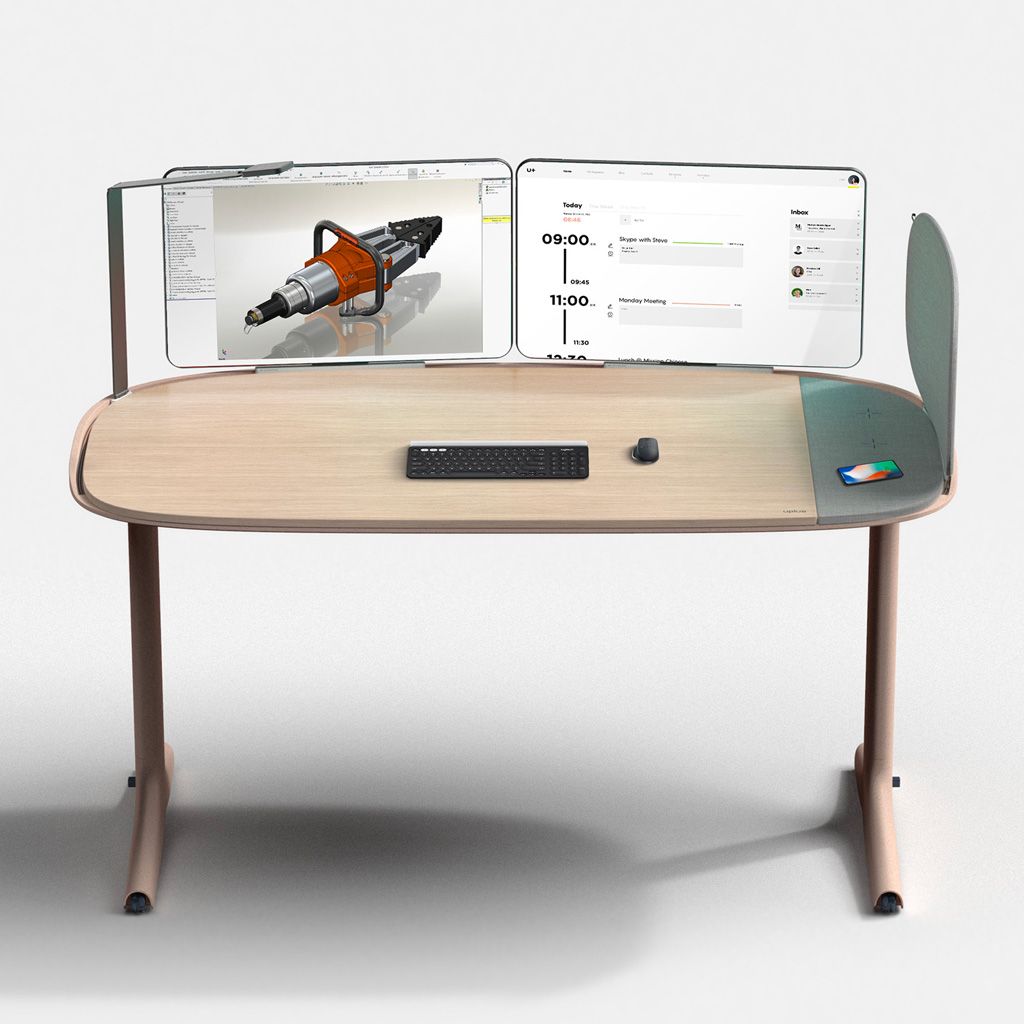
My goal was to make the Gridding Desk, a modular desk that is highly customizable and smart, integrating electronic components.
The keys aspects of the product are based in a few references:
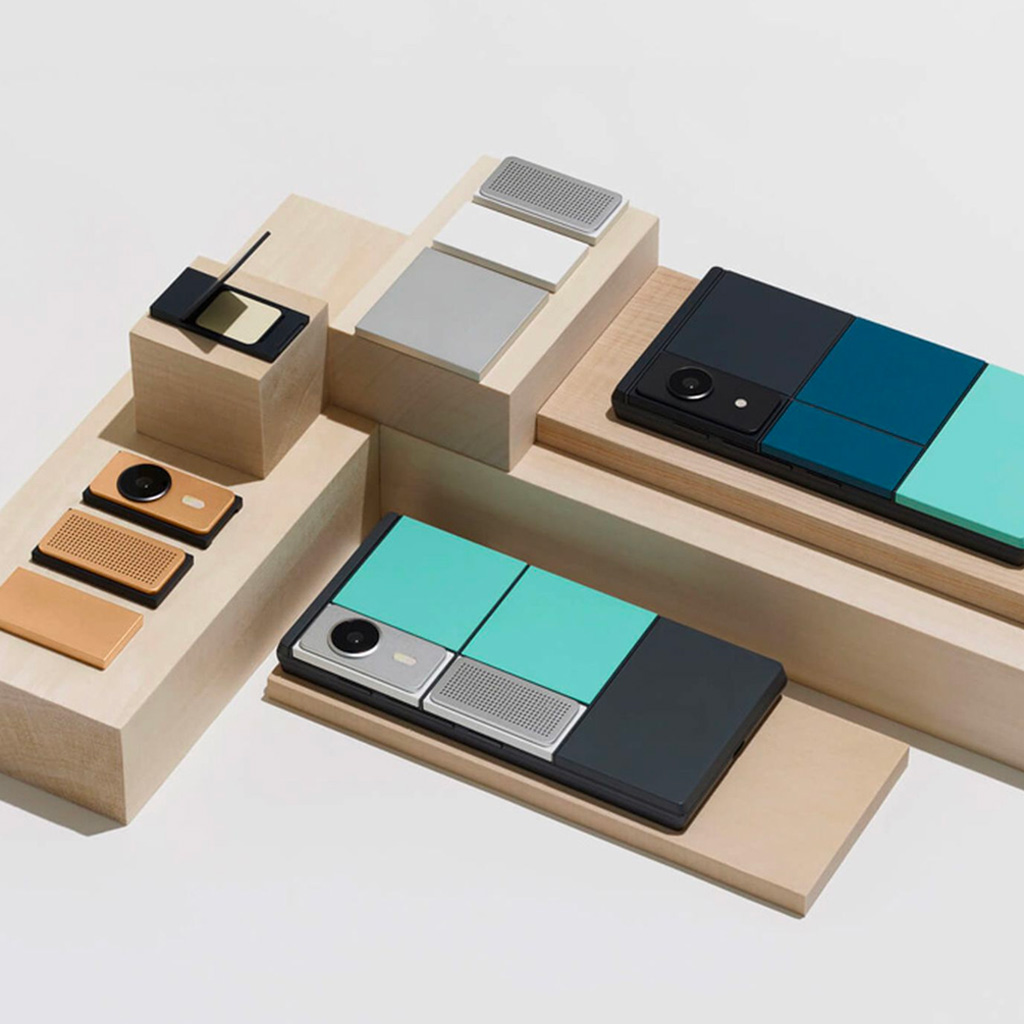
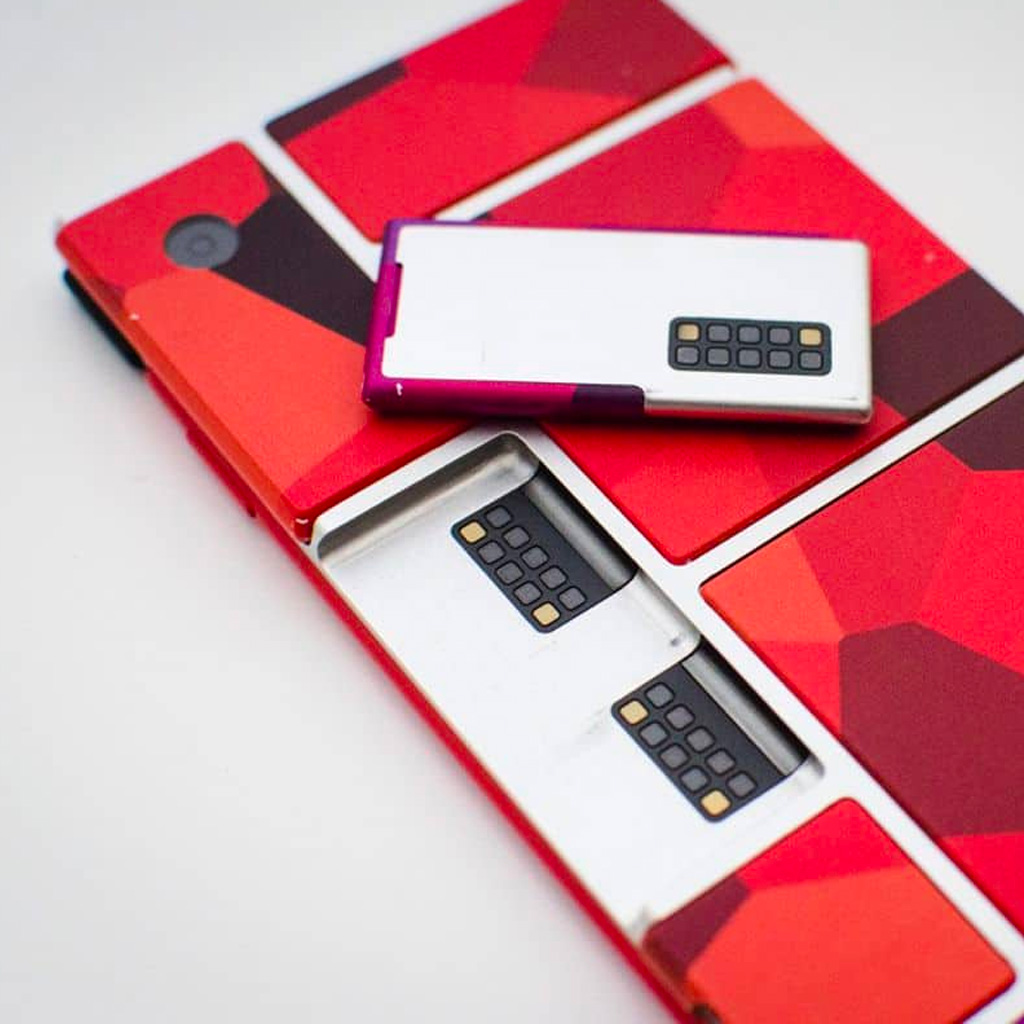
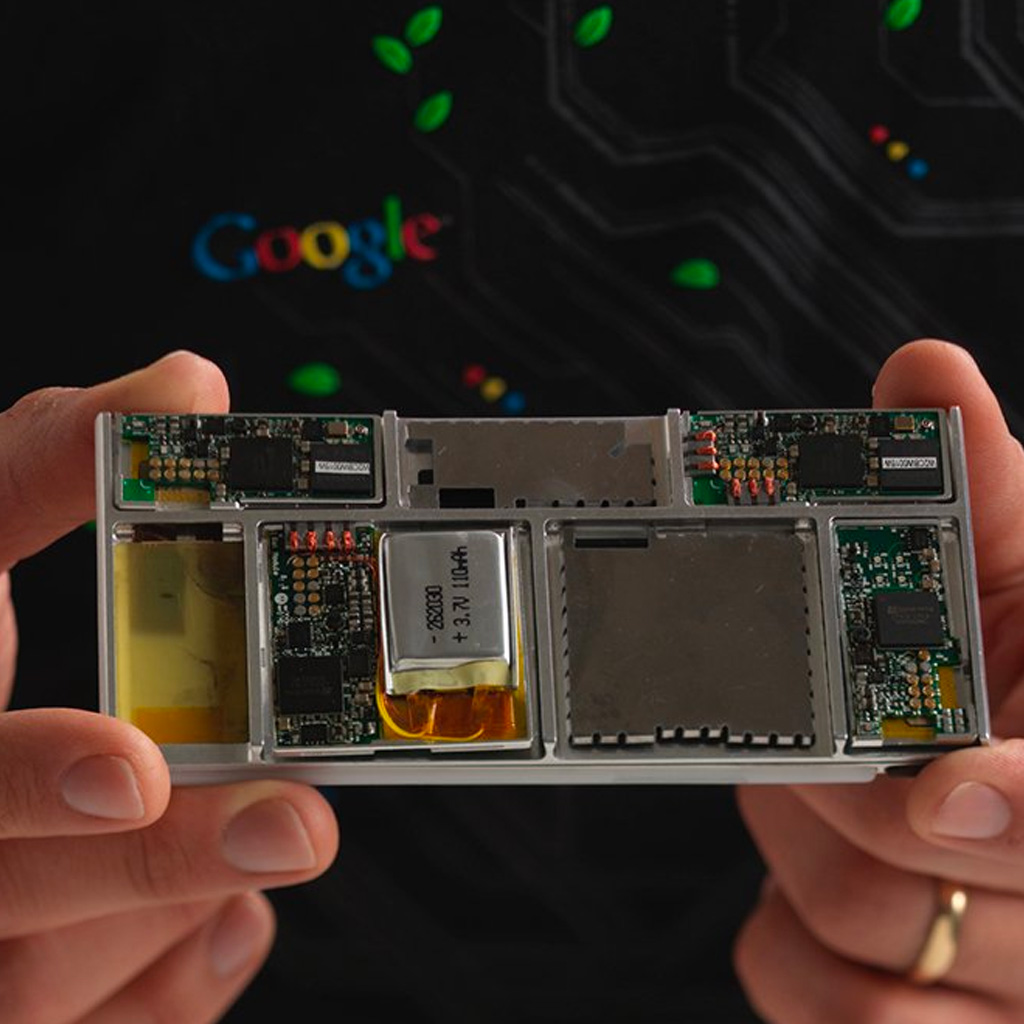
• Modularity: Create a grid system in which different analog or digital modules can be attached.
Project Ara: initiative to create a smartphone frame in which you could attach different modules, such as camera, speaker or battery.
Vitsoe 606 Universal Shelving System: system designed in 1960 with a metal structure and several modules.

• Customizability: Design a furniture system that leverages digital fabrication and allow users to customize sizes, materials, features and more.
Opendesk: digital and open-source furniture company
Ugmonk Gather System: magnetic system to organize a desk and that can be customized according to customers' needs.
• Smart: Include electronics components, adding smart features such as wireless charging and automatic lighting.
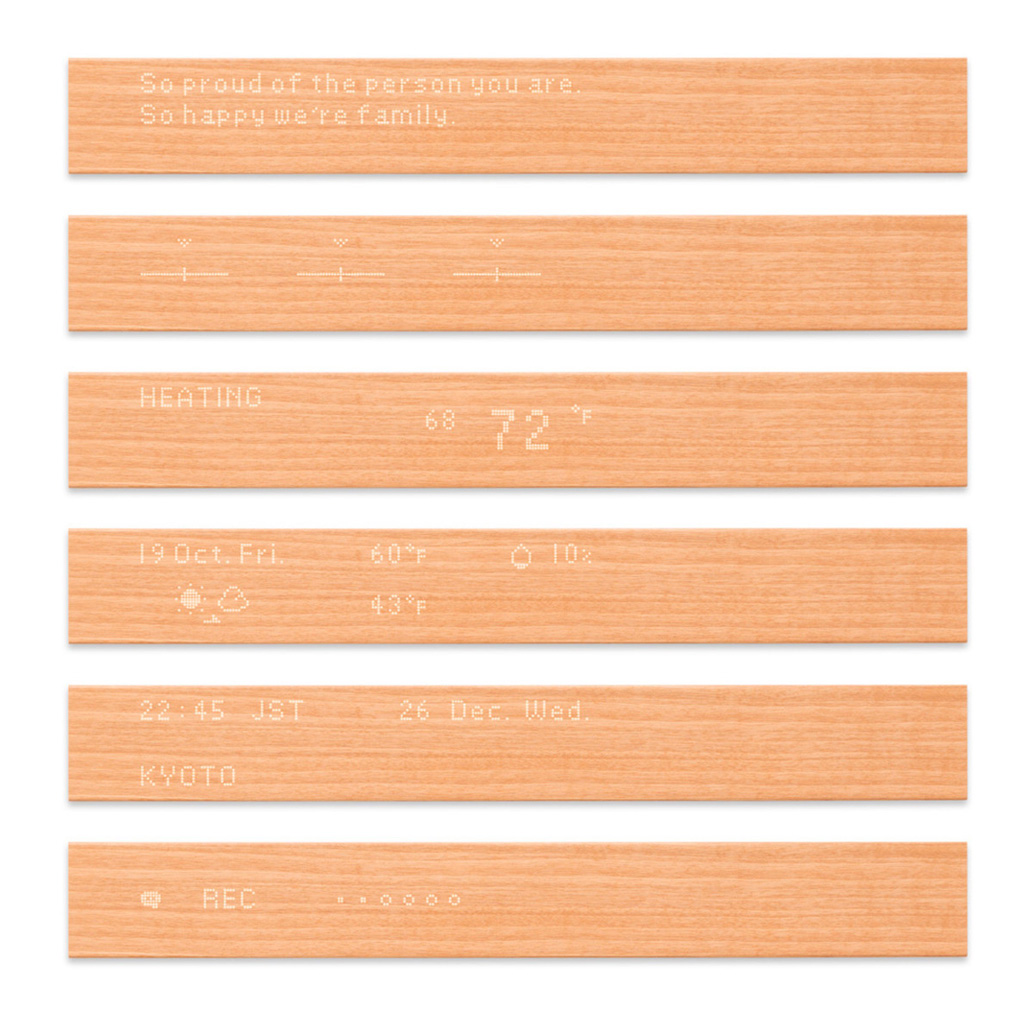
Mui Interface: LED display and capacitive touch panel that digital features for furniture
Uplus Modular System: office system that includes electronic modules such as screens, charger and camera.
The initial idea was to divide the desk in two blocks and integrate one or more of the following features:
1. Dynamic Station: Workspace area that provides flexibility address different needs from daily tasks. Focus on ergonomics and well-being.
Tabletop: Desktop surface with components arranged to ensure ergonomics.
• Wooden Desk
• Desk Shelving System
• Laptop Stand
• Desk Pad
• Outlets and Chargers
Back Panel: Vertical surface with attached mounts, lights and sensors.
• Adjustable Lighting (i.e., Backlight, Video Conference, Focus Light)
• Sensors (i.e., Ergonomics, Lighting)
• Monitor Mount
• Camera Mount
2. Personal Side: Static modular area that supports habitual needs and helps to track goals. Focus on customizability and productivity.
Main Features: Static componenents that track habits and productivity.
• To-do Tracker
• Calendar
Modules: Magnetic attachments that can be chosen according to specific needs.
• Wireless Charger
• Book Shelf
• Mug/Bottle Holder
• Paper Tray
• Headphone Holder
First, I limited the scope of the project and tried focus on the following parts:
1. Desk: wooden tabletop with pockets for modules. If possible, I will add a back or side panel with spaces for lighting system.
• Computer-Controlled Cutting: to make the structure.
2. Smart Module: wooden module that includes a wireless charges to be attached on the tabletop.
• Computer-Controlled Cutting: to cut the module.
• Laser Cutting: to engrave the surface.
• Input Devices: include a sensor and to understand when the module is attached.
• Output Devices: to indicate that the module is attached and provide power to charge devices.
• Embedded Programming: to control all the desired functions.
3. Cable Management System (TBD): different pieces made of silicone and plastic to hold and organize cables.
• 3D Printing: to design a cable roller and desktop accessories.
• Molding and Casting: to make a cable holder that will be placed on top of the table.
4. Lighting System (TBD): LED dynamic backlighting
• Input Devices: to include a light sensor that gets information about the ambient light.
• Output Devices: to include an LED bar whose intensity changes based on the ambient light.
• Embedded Programming: to control all the desired functions.
*If there is additional time available, I plan to work on a cable management system and a lighting system that will be attached to the desk.
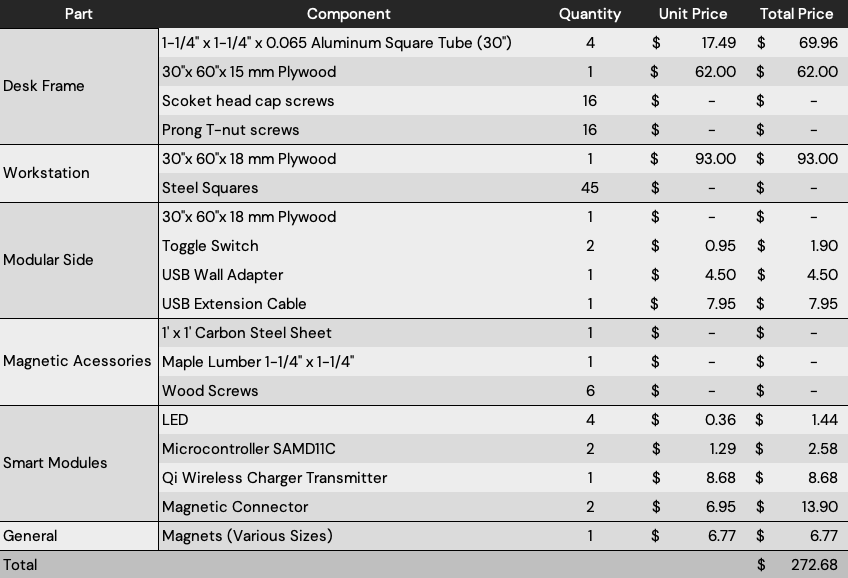
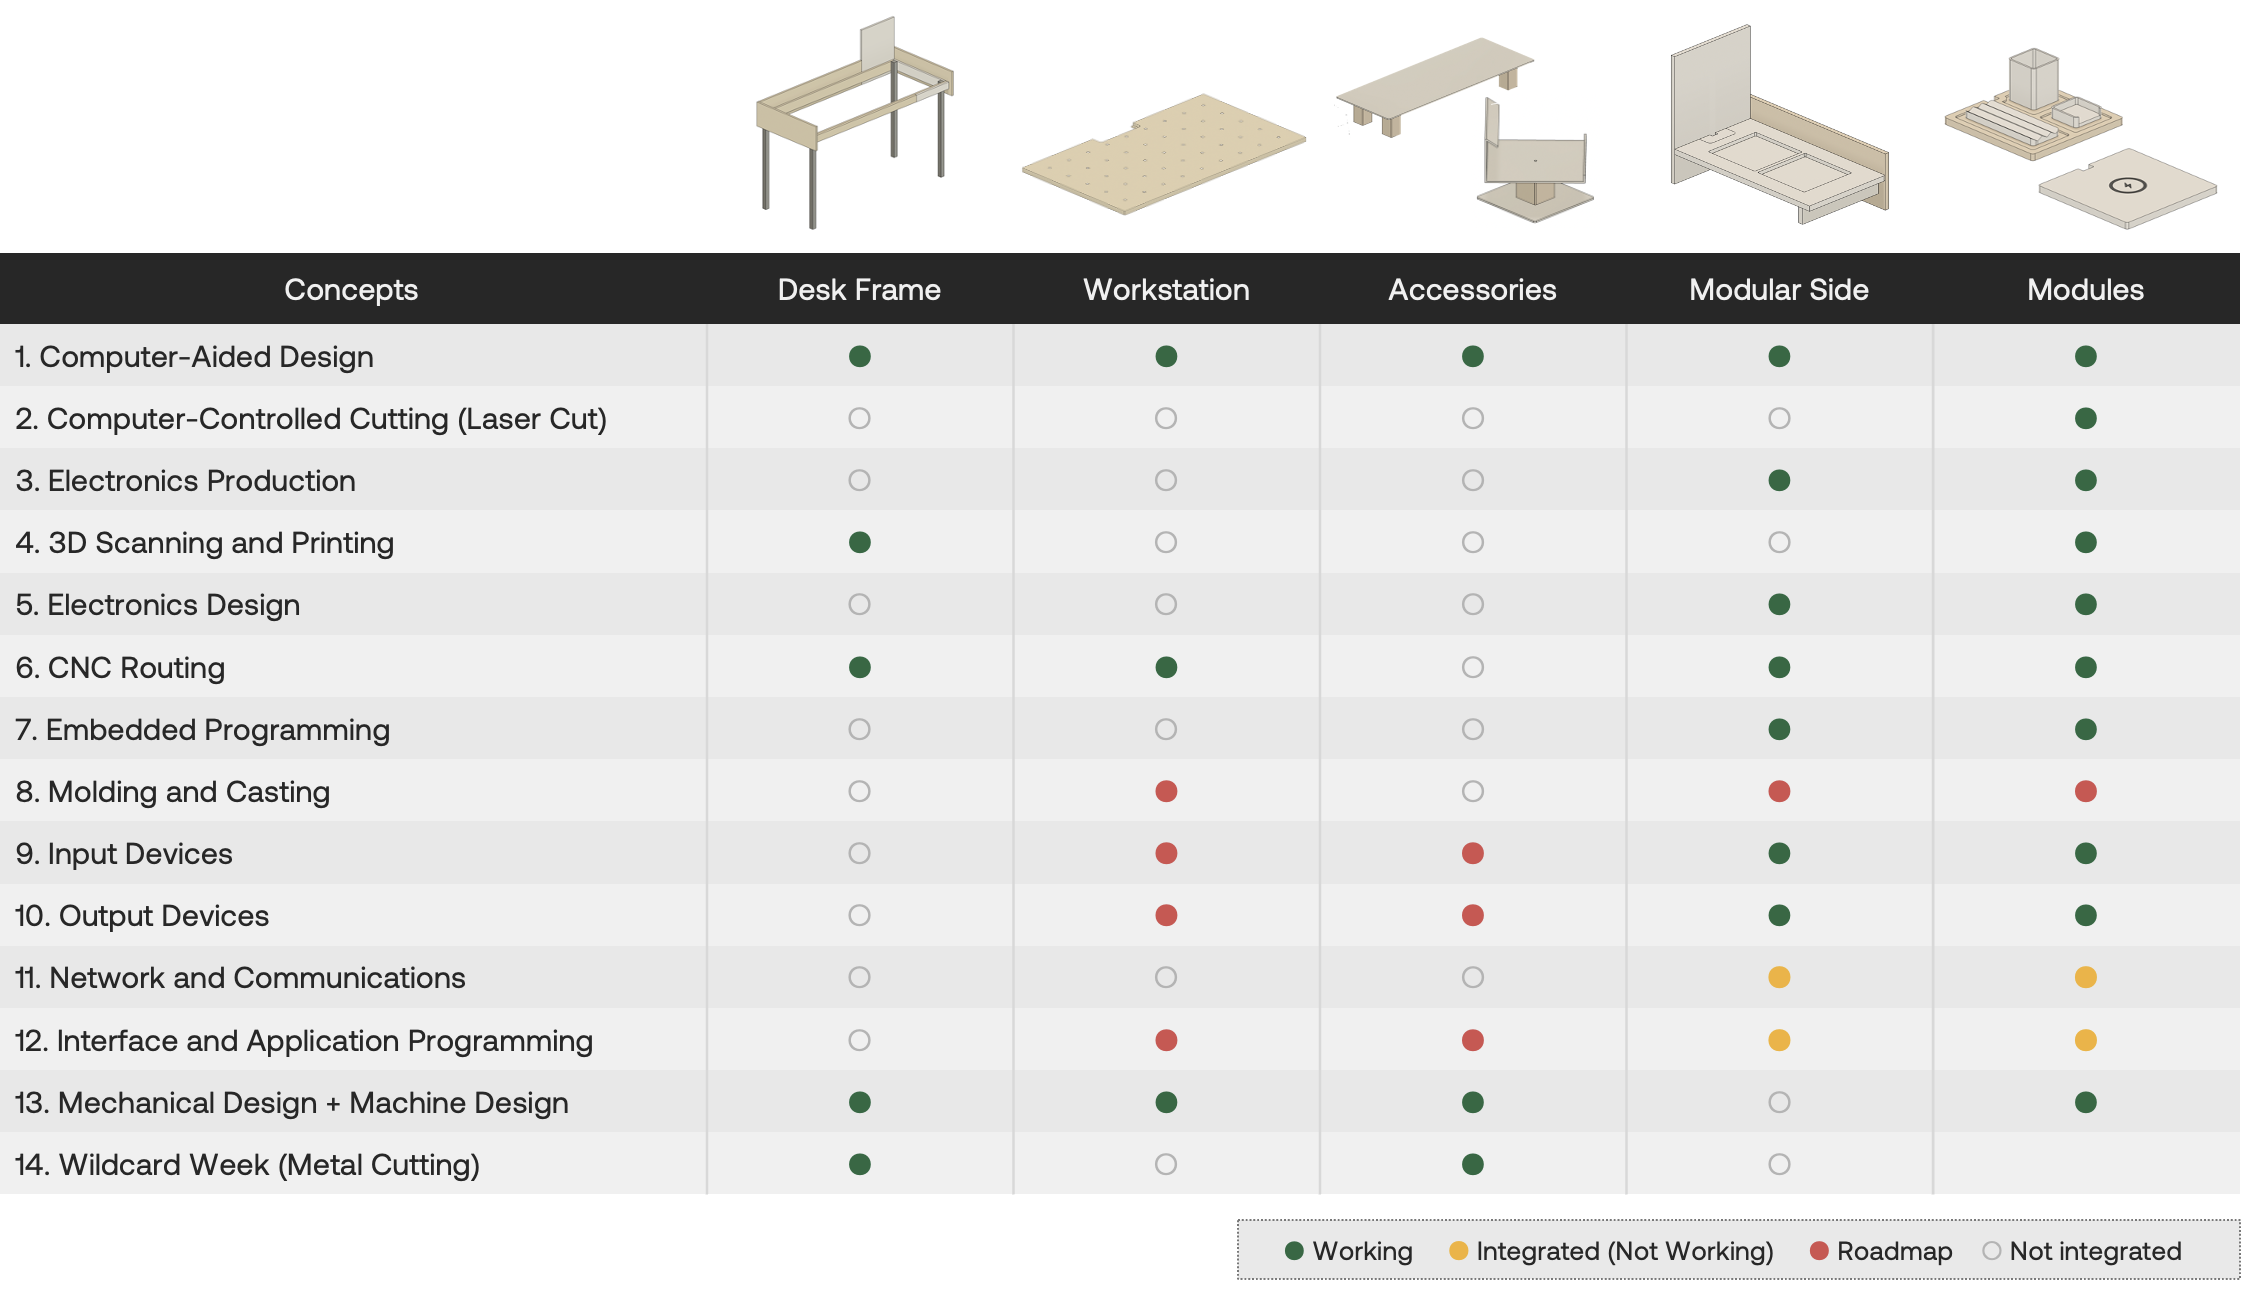
I divided the documentation in each of the 5 parts of the Gridding Desk. Also, I included a table at the end summarizing the techniques used throughout the process.
Desk Frame
I discussed several ideas with the instructors and TAs for building the desk supporting structure. The first was making 4 wooden legs from the same plywood, but I thought I should try something new.
After the wildcard week, in which I learned how to work with metal, I decided to make a structure with both plywood and aluminum tubes.

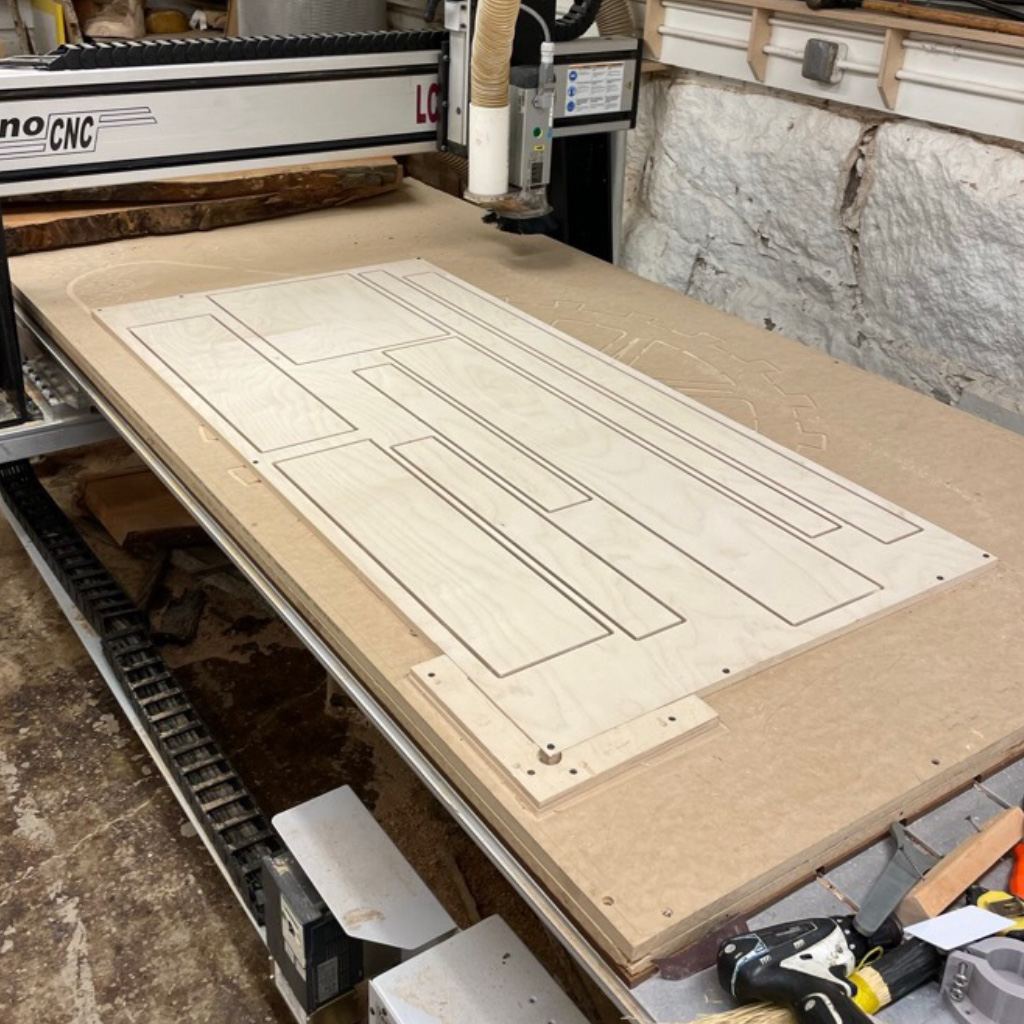
1. First, I planned and cut all the wooden pieces using Fusion 360 and the Techno CNC.
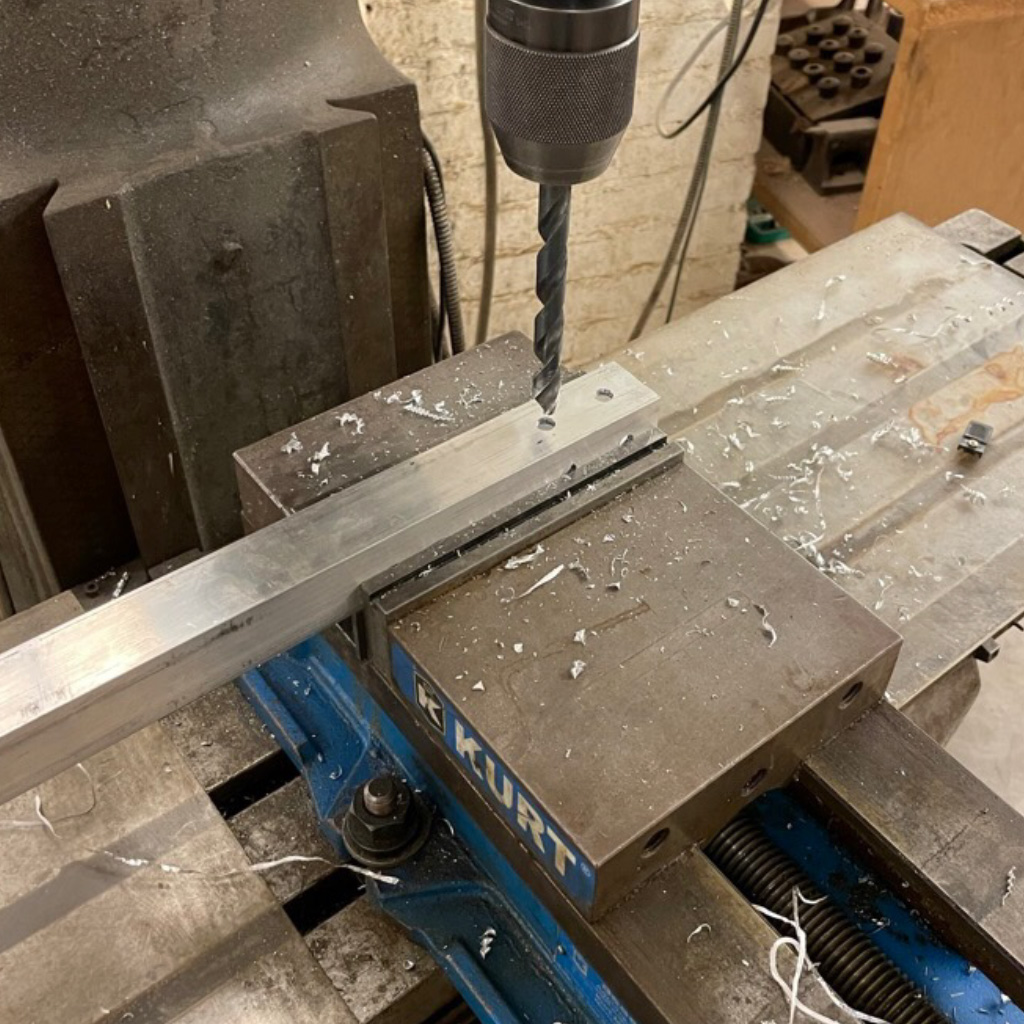
2. Then, I measured and drilled the holes in the 4 aluminum legs with a Bridgeport milling machine.
3. To hold the structure, I used socket head cap screws and prong t-nut screws.
4. After some adjustments in the aluminum holes, I finished the desk frame.

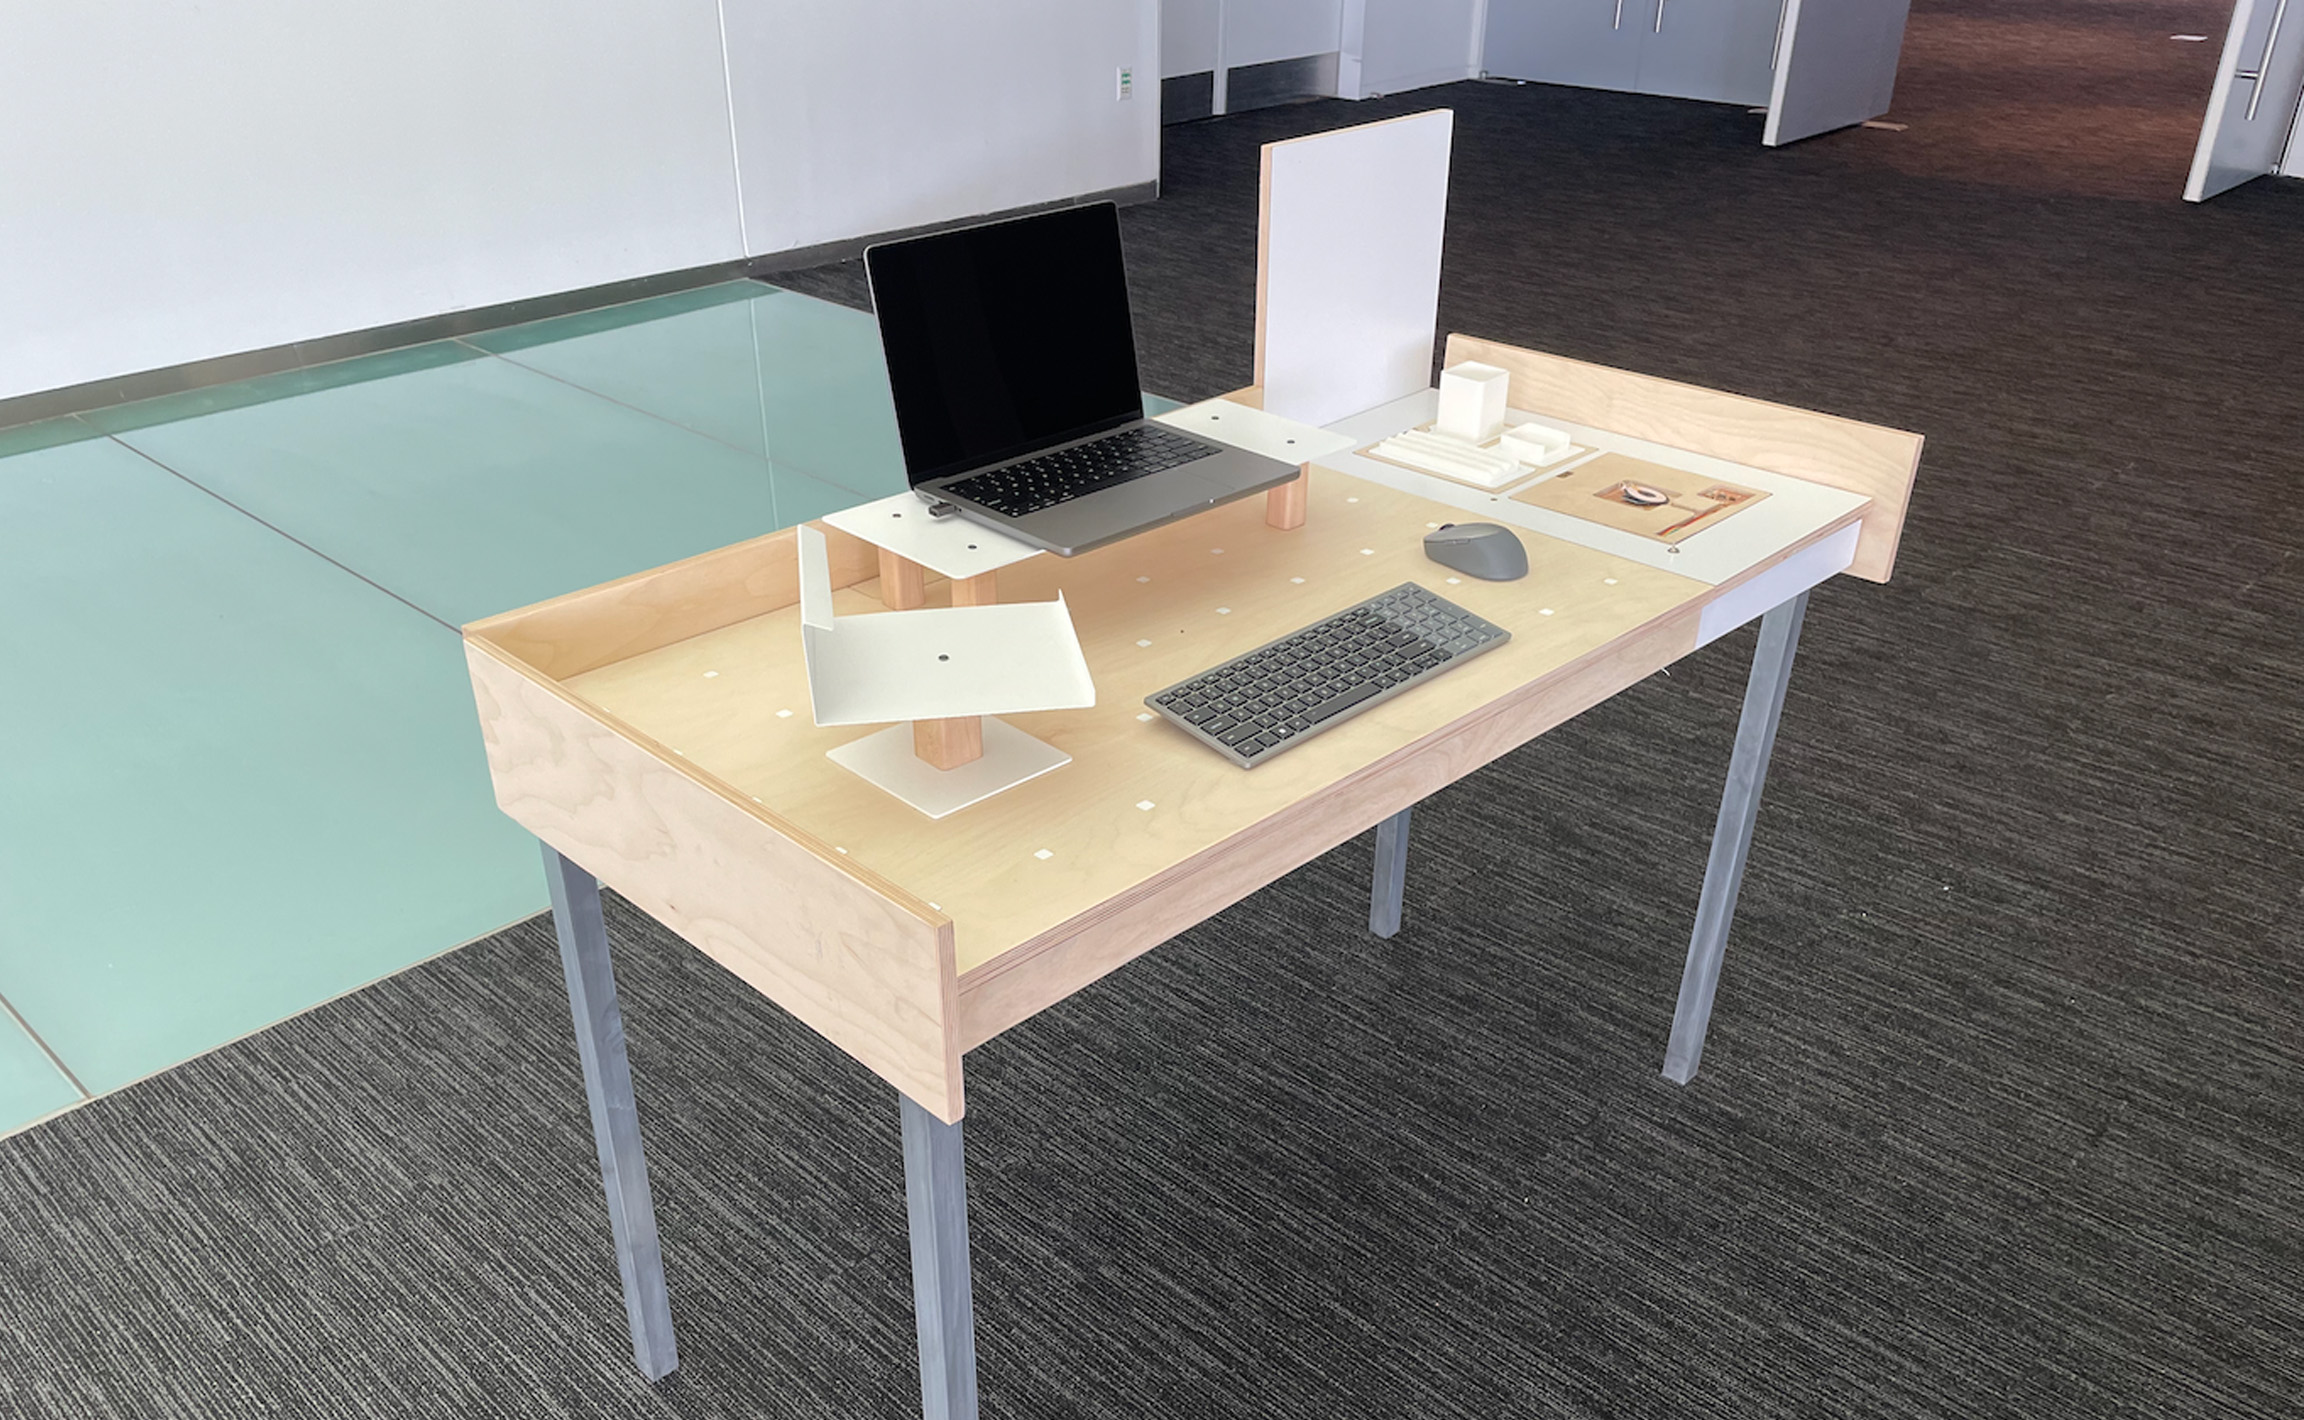
Workstation
The left side of the desk is a dynamic workstation, in which there is a magnetic grid that works as a guide to position various accessories. The idea is to keep the work area clean and organized and be adaptable according to users' needs.
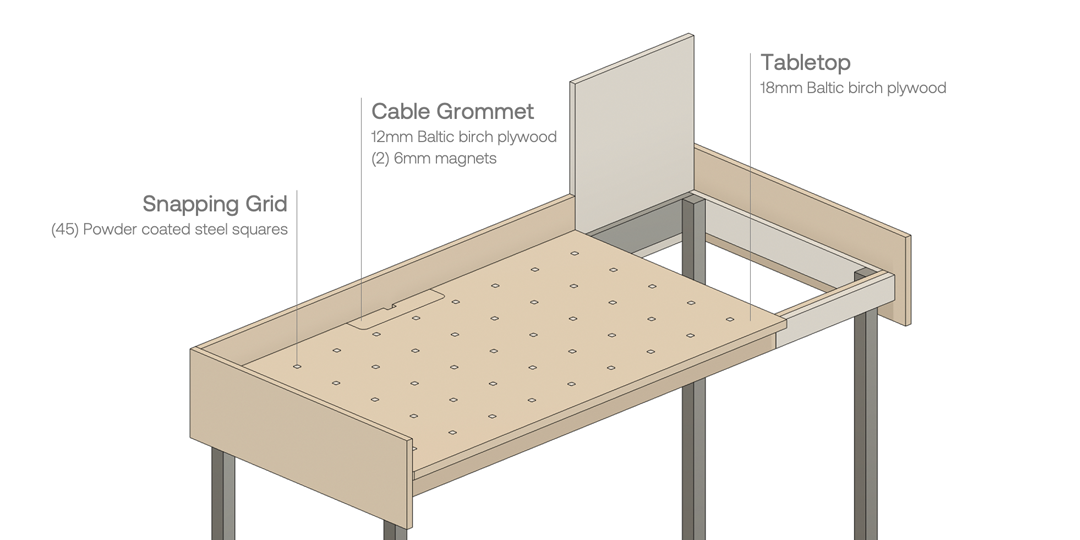
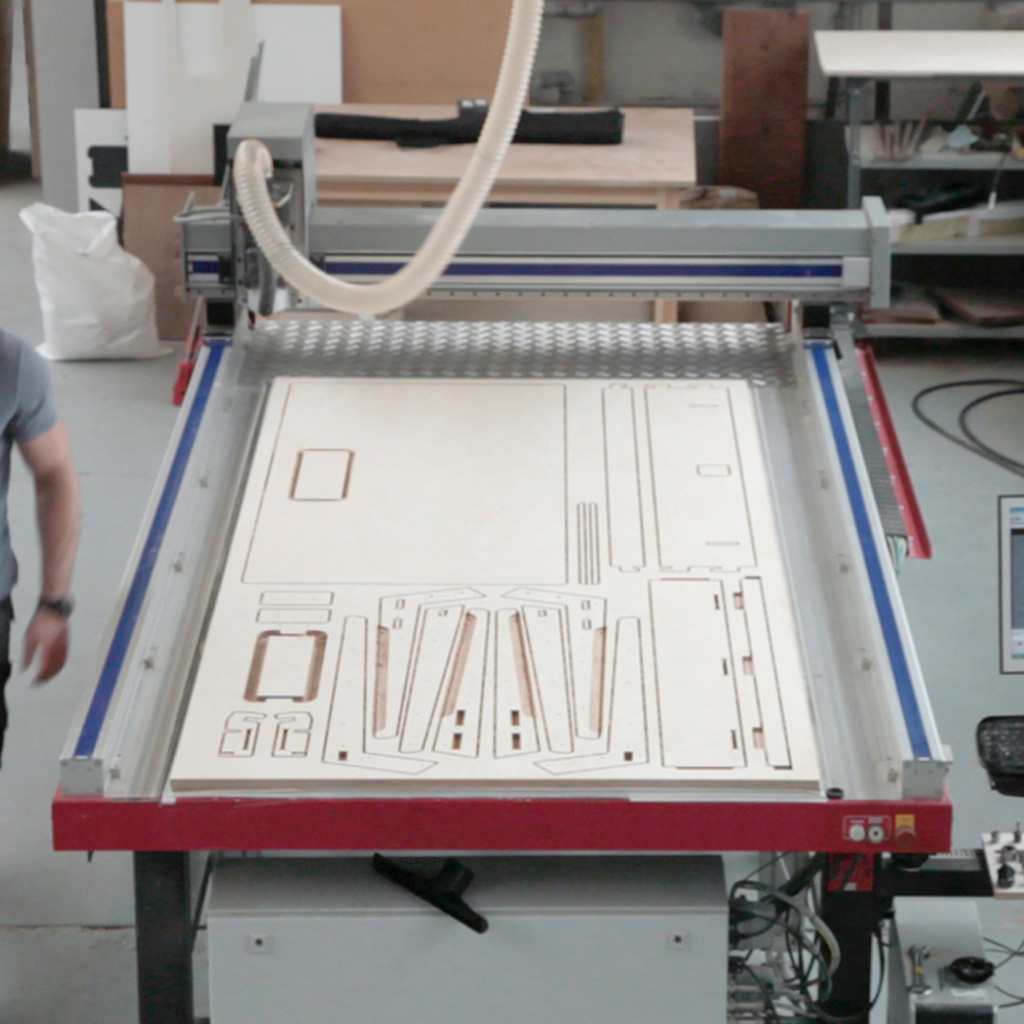
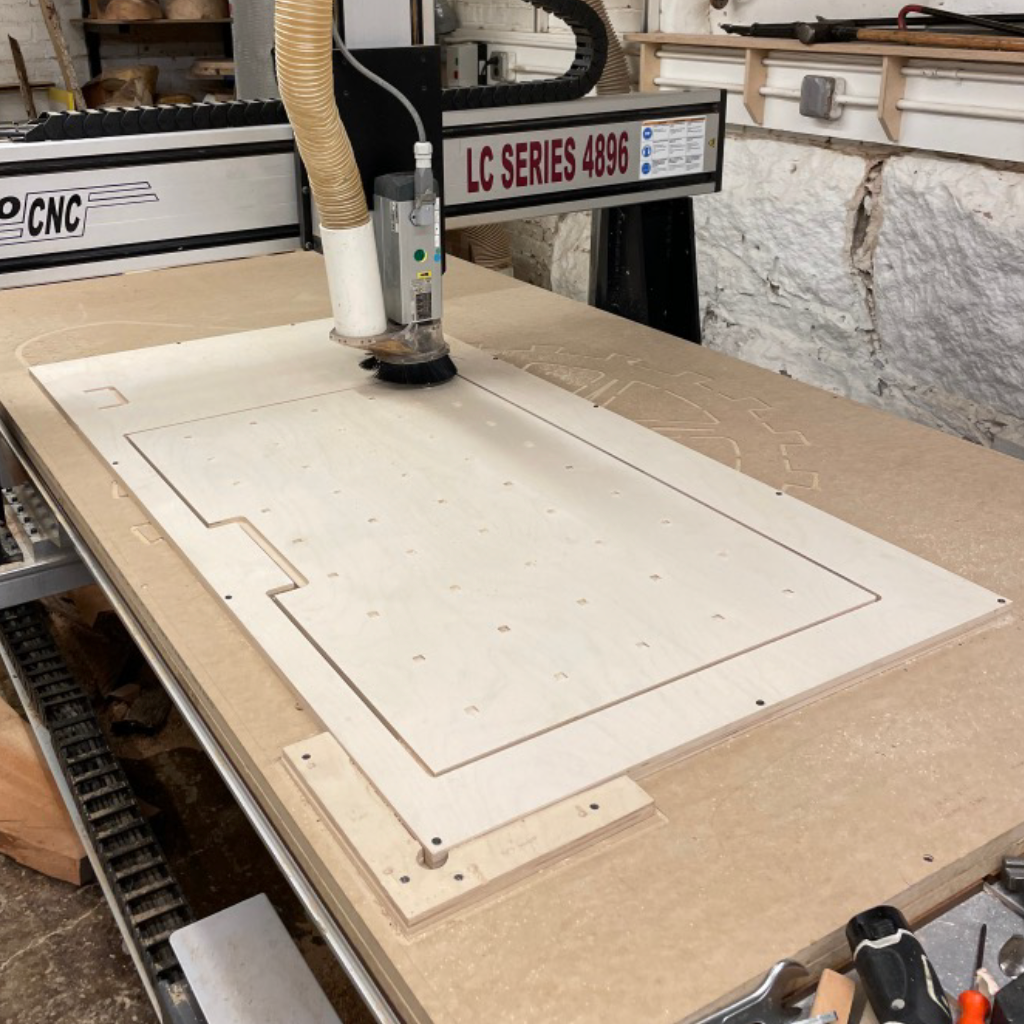
1. The workstation surface was also cut using the TechnoCNC. The only difference is that the little squares and the cable management cover should be very precise. For this reason, I had to run a few tests with the machine to find the best size for those components.

2. The little metal squares were cut using the waterjet machine during the wild card week.
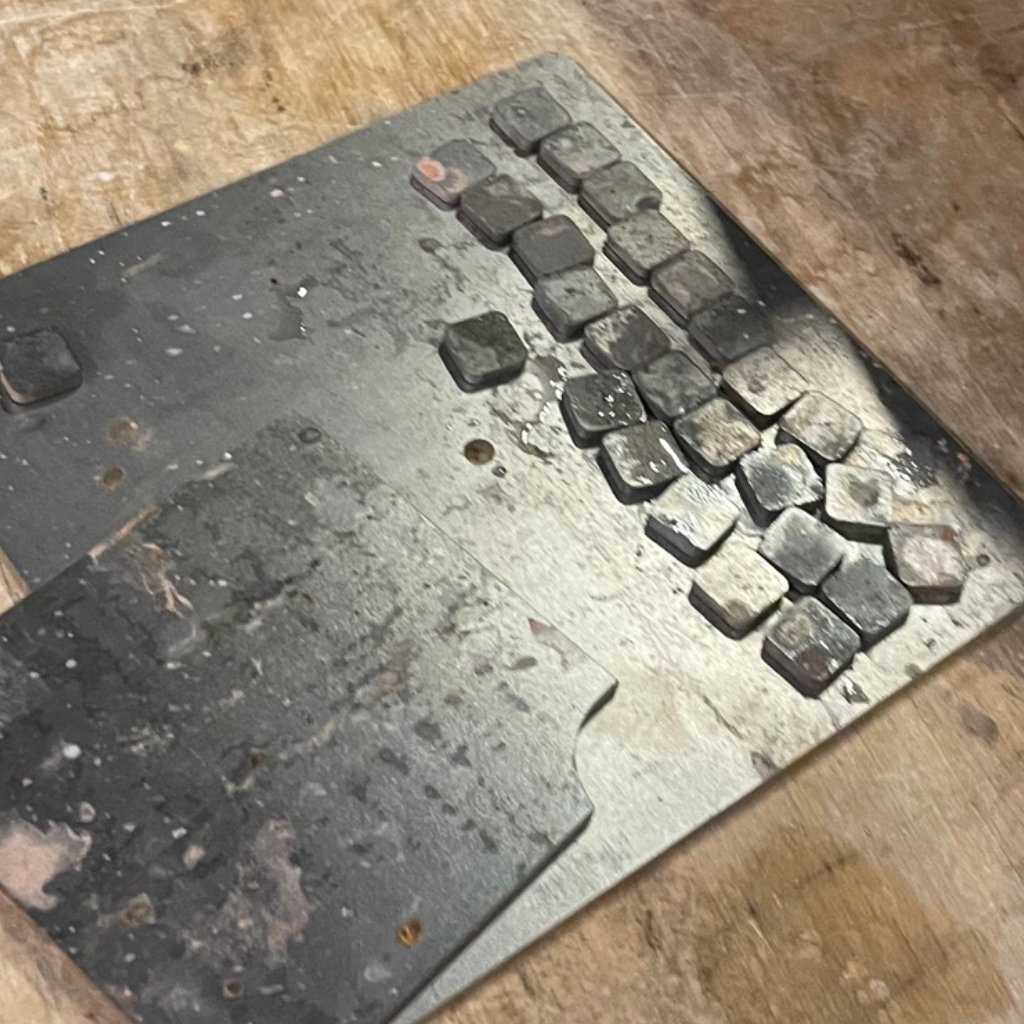
3. I glue the metal pieces with super glue, building the snapping magnetic grid.
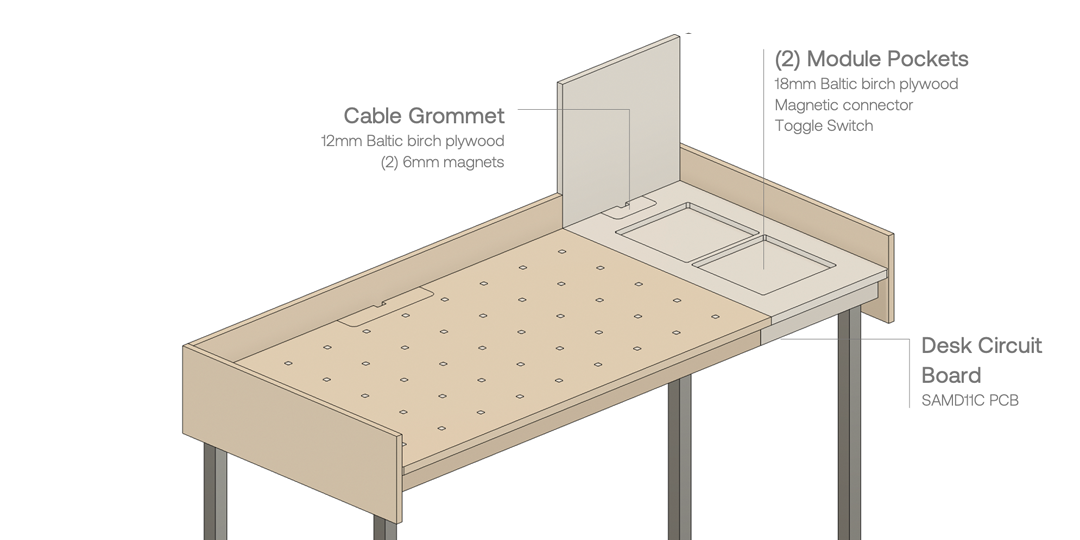
Modular Side
To complement the workstation area, I designed the Modular Side. This should be a customized space, in which the user can attach multiple modules that can be powered by the desk.
Given the challenges I had with electronics, I decided to make something simple - a wireless charger that communicates with the main board on the desk.
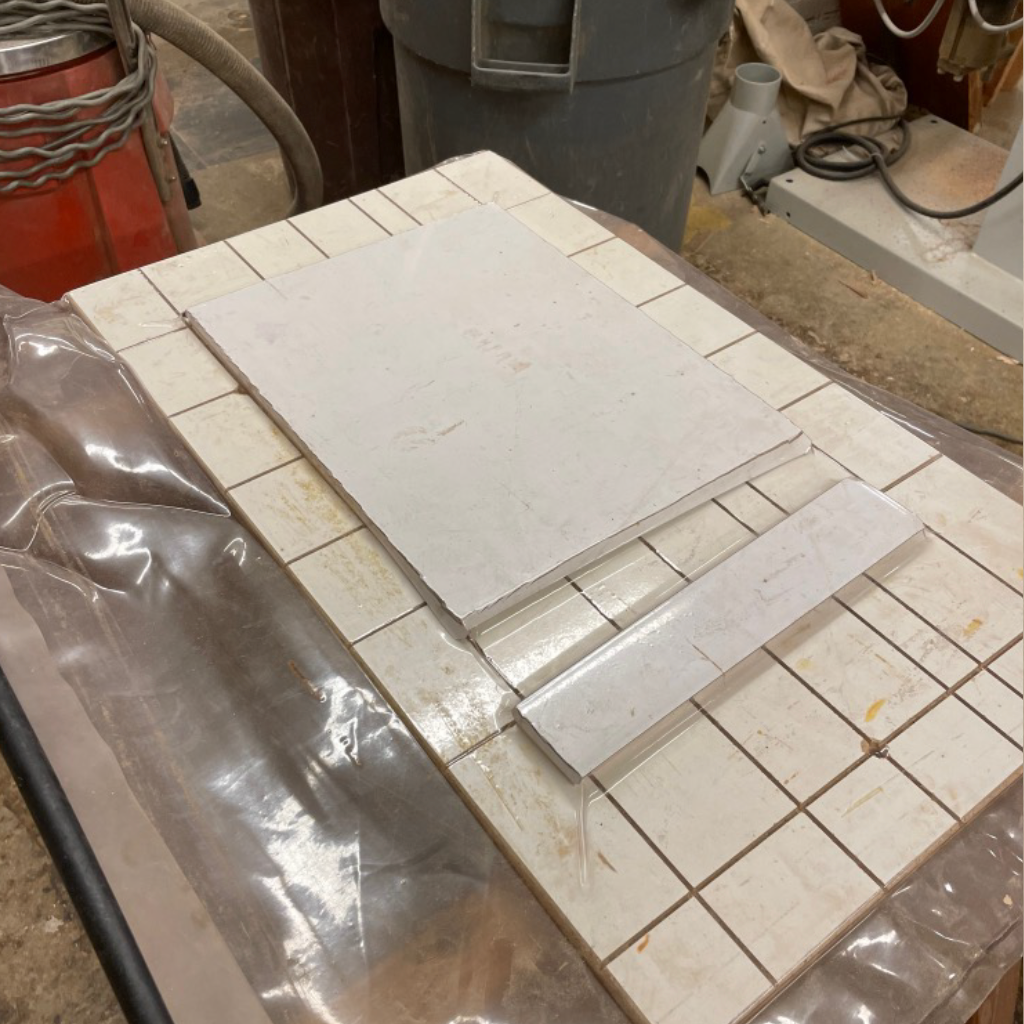
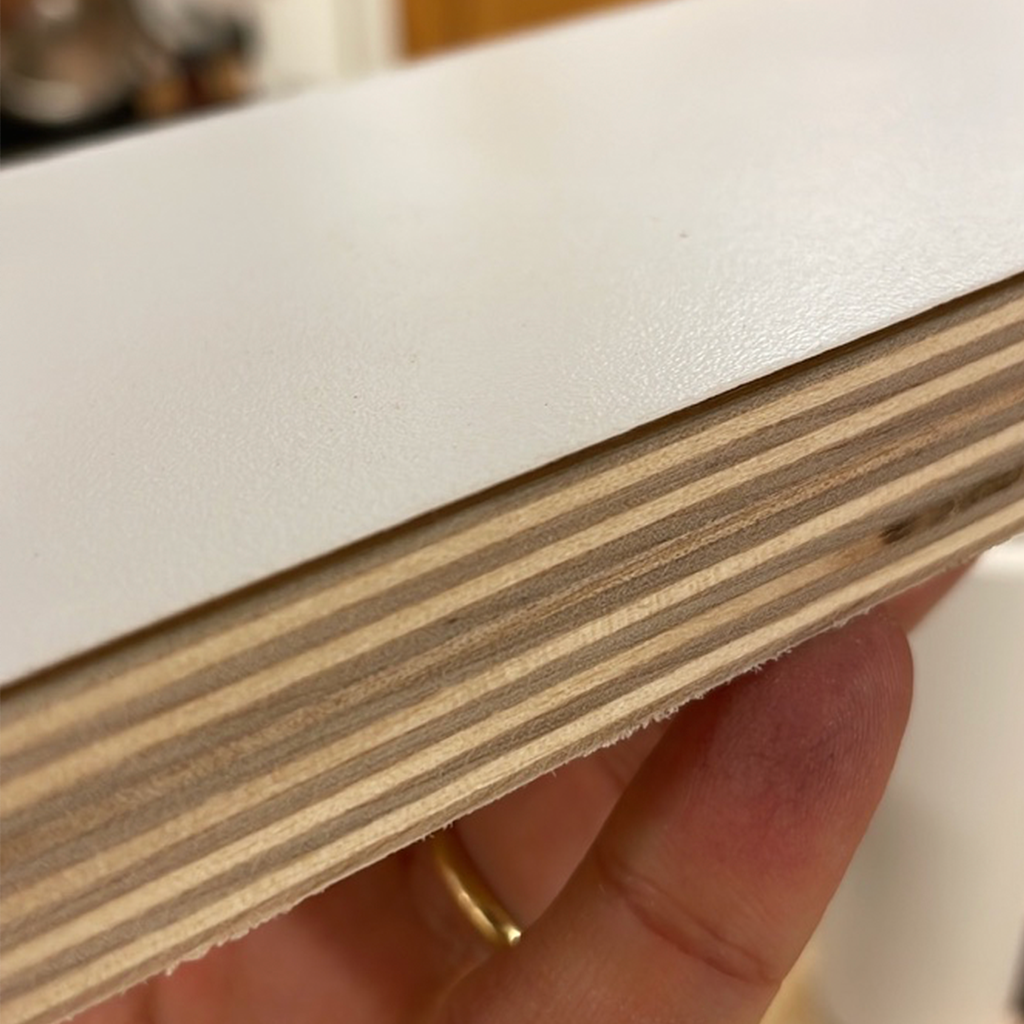
1. Again, I cut the parts using the TechnoCNC. However, I wanted to have a distinctive visual for the side and also test a new technique. So applied a white laminate (formica) on the desk using a vacuum bag.
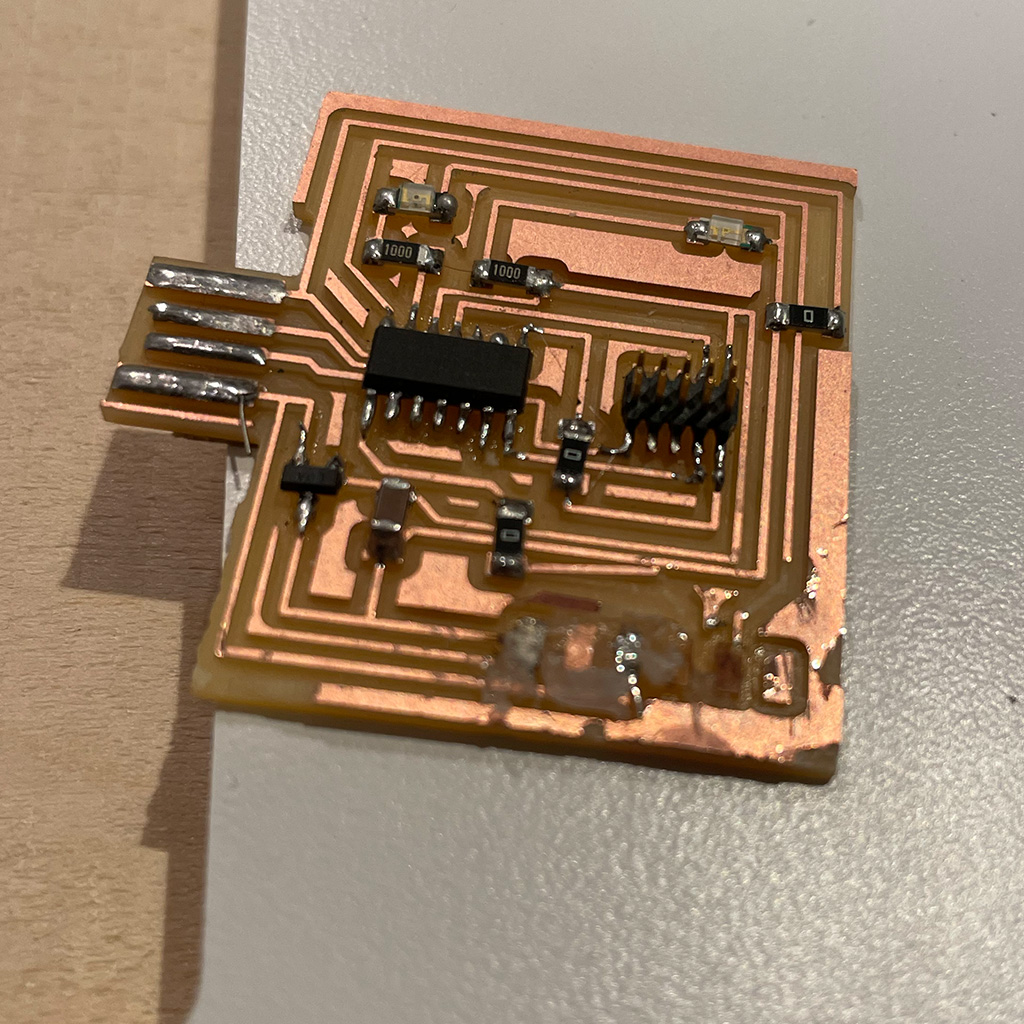
2. The electronic part was the biggest challenge for me.
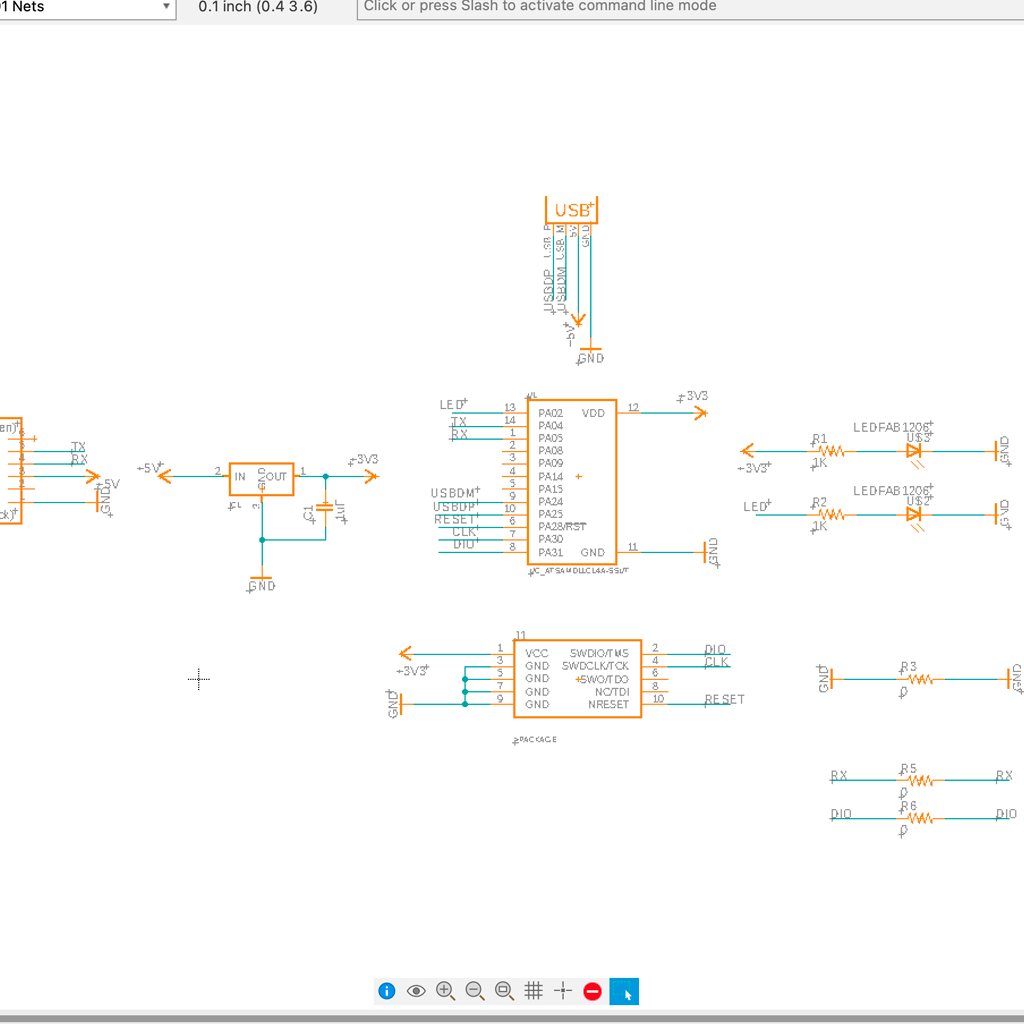
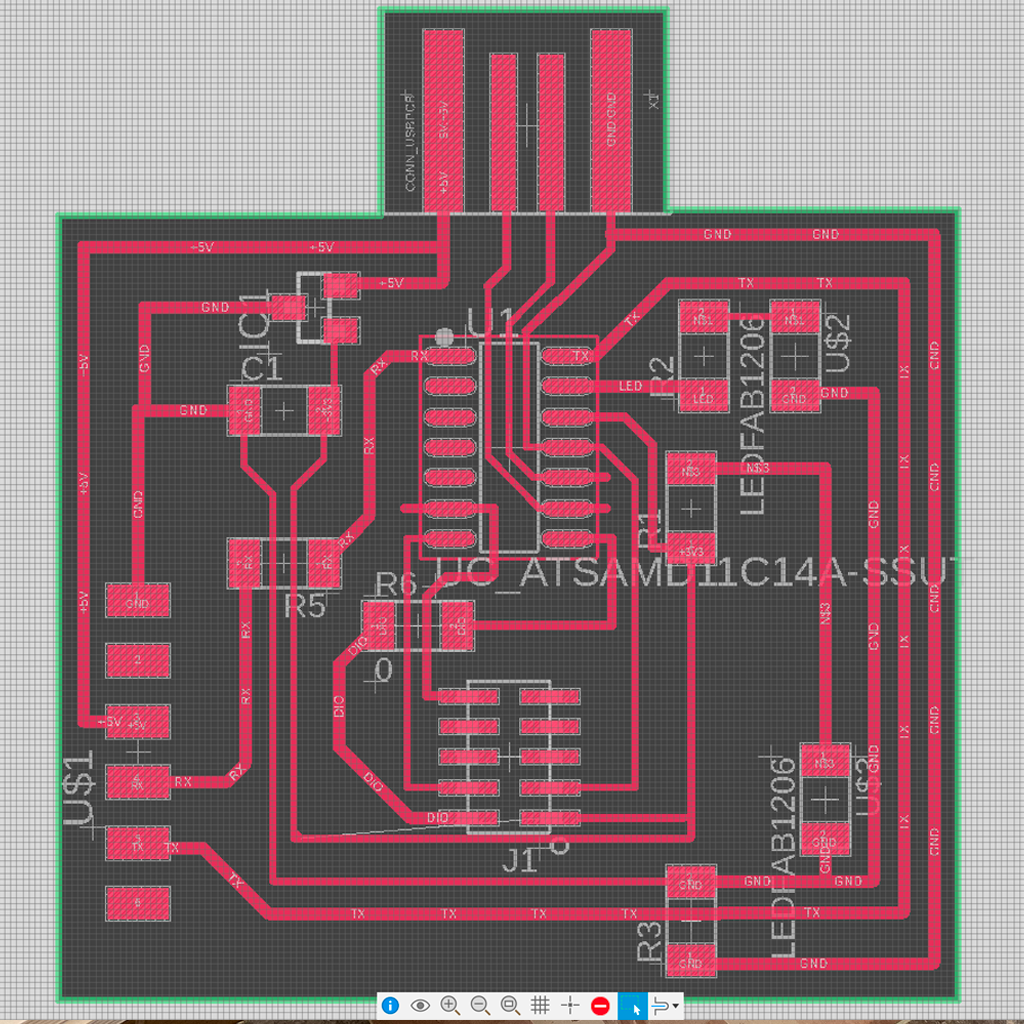
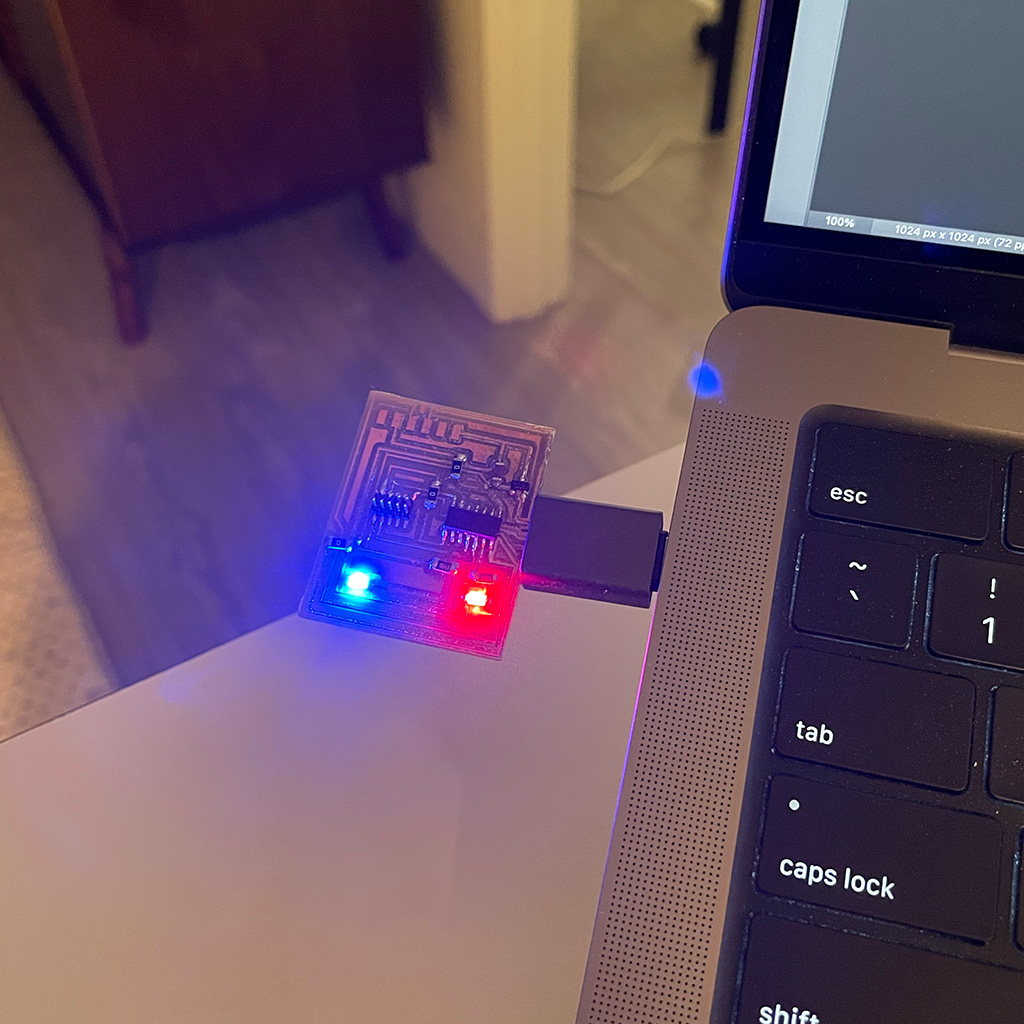
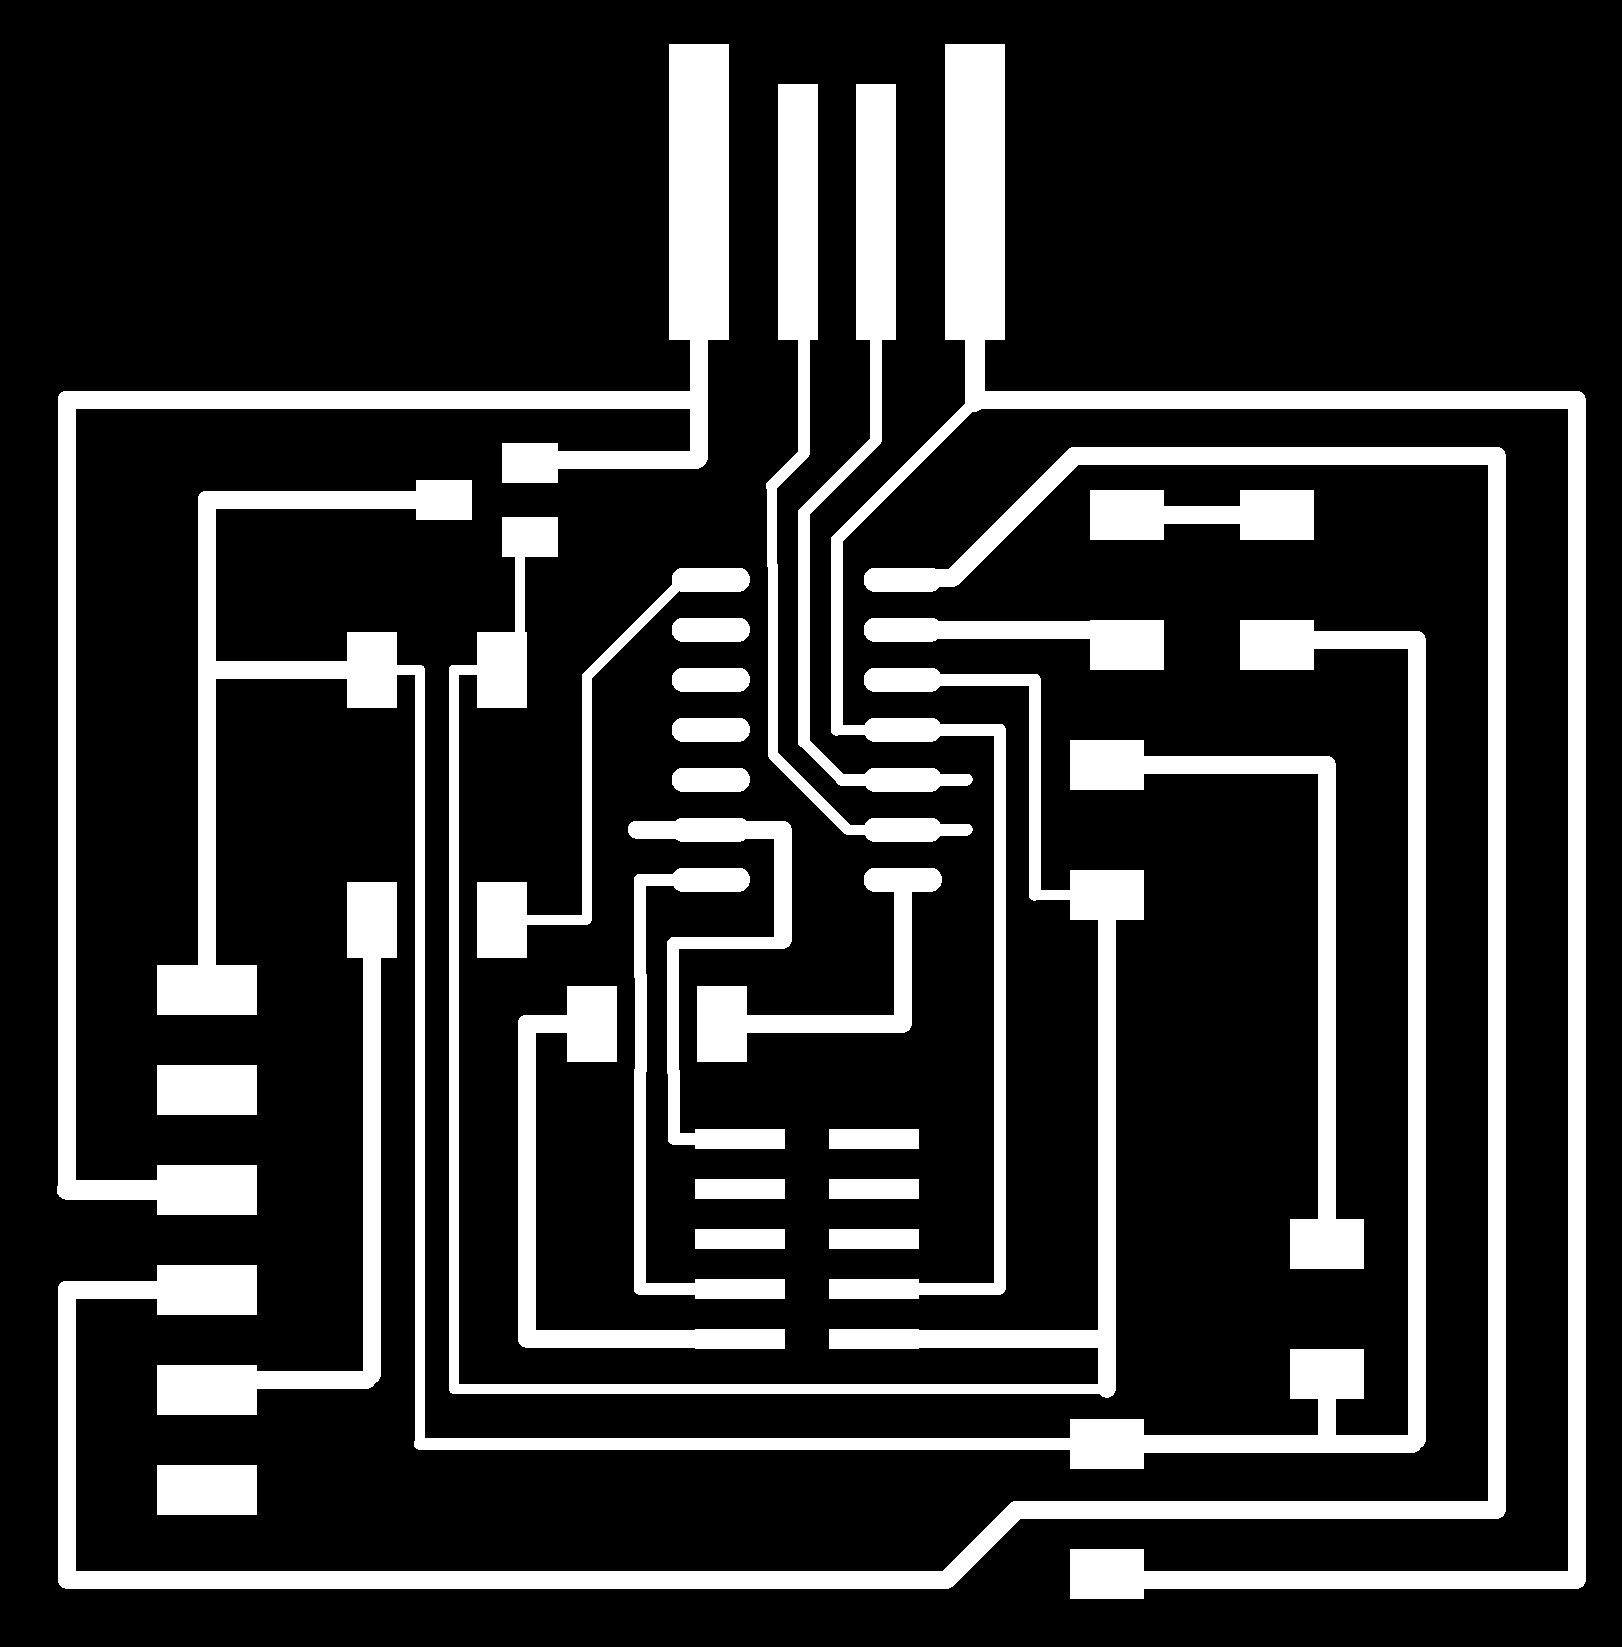
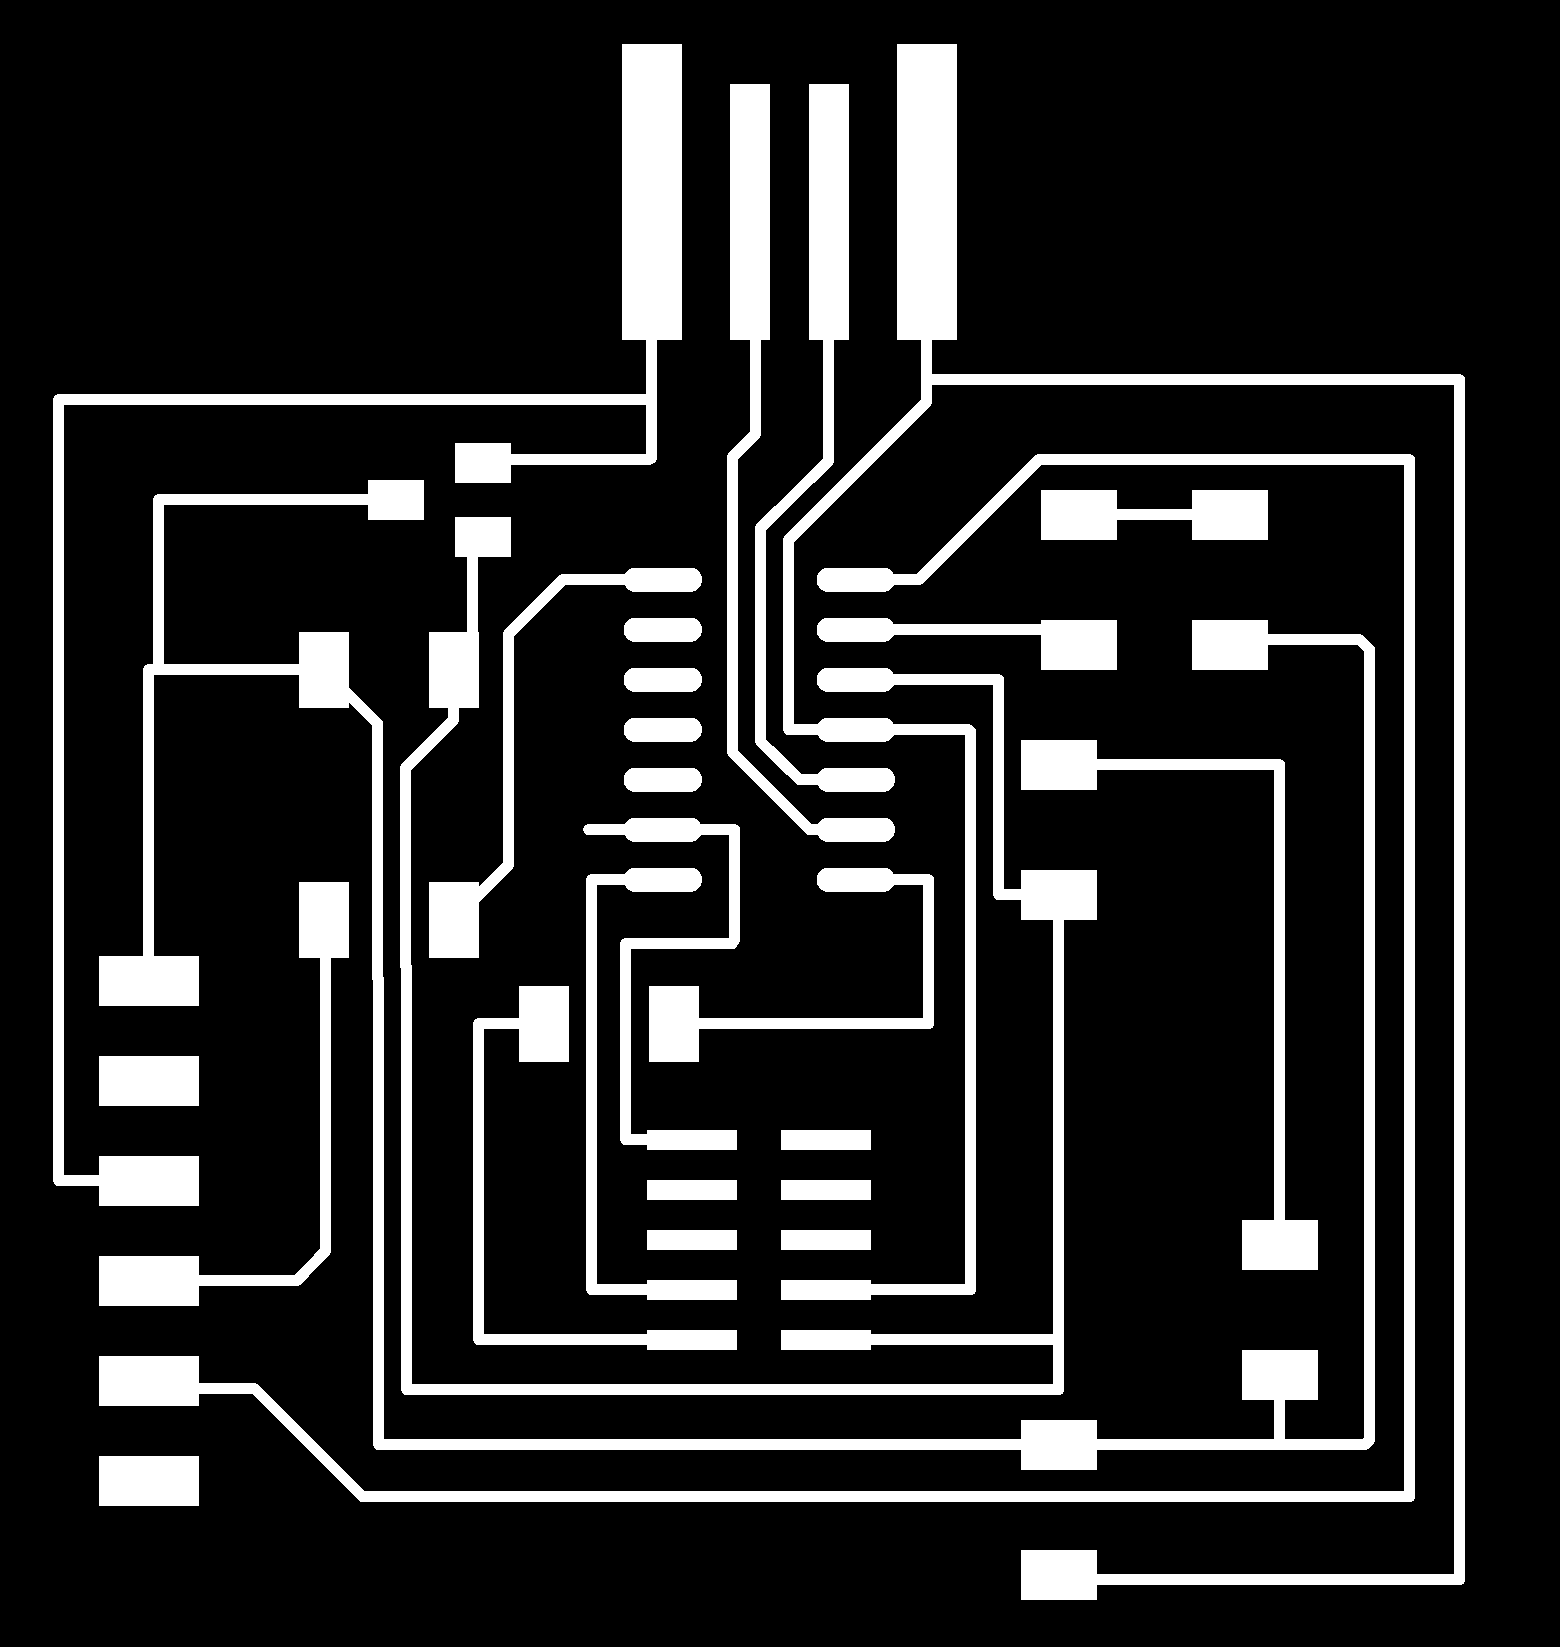
Essentially, I designed two boards on Fusion 360. They had SAMD11C microcontrollers, 2 LEDs and three connections: The first was used to bootload the board. Then, I used the USB to program it. And finally, I created 6 pads that would be used to send information between the desk core board and the modules' boards.
For communication, I used serial connection. Thus, in addition to VCC and GND, I included TX and RX pads in both boards, making it possible to send and receive information from the module to the desk and vice versa.
3. I milled the board with the Modela machine and soldered all the components. Both worked well and I could program it to blink indicating that the code was loaded.
In addition to the board, I bought a toggle switch to turn on and turn off the modules and a magnetic connector.
Accessories
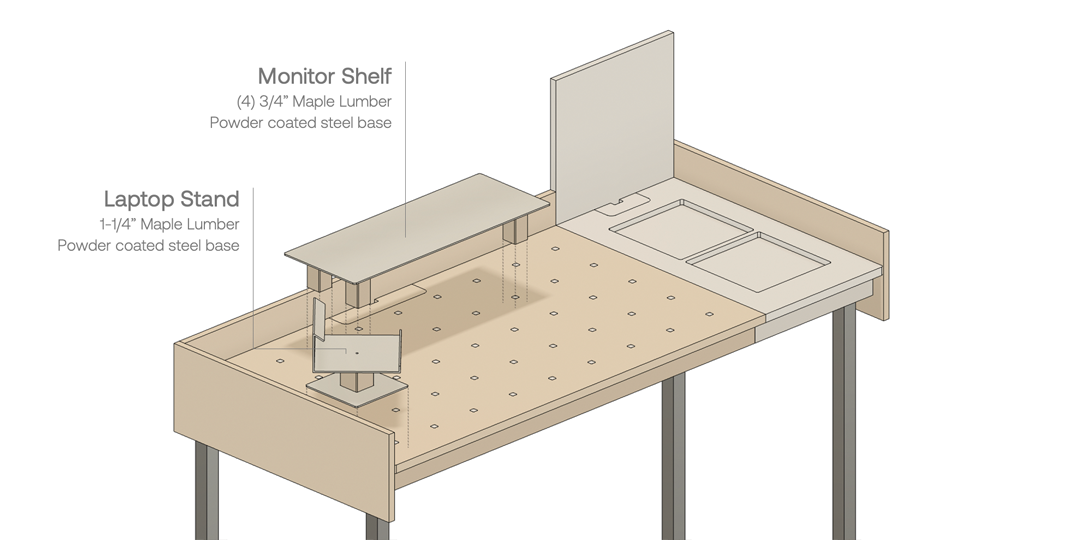
In addition to the desk structure, I wanted to make at least some accessories to test how the general concept would work. I chose to create those that were more useful for me - a monitor shelf and a laptop stand. Both were made from steel sheet and maple lumber.
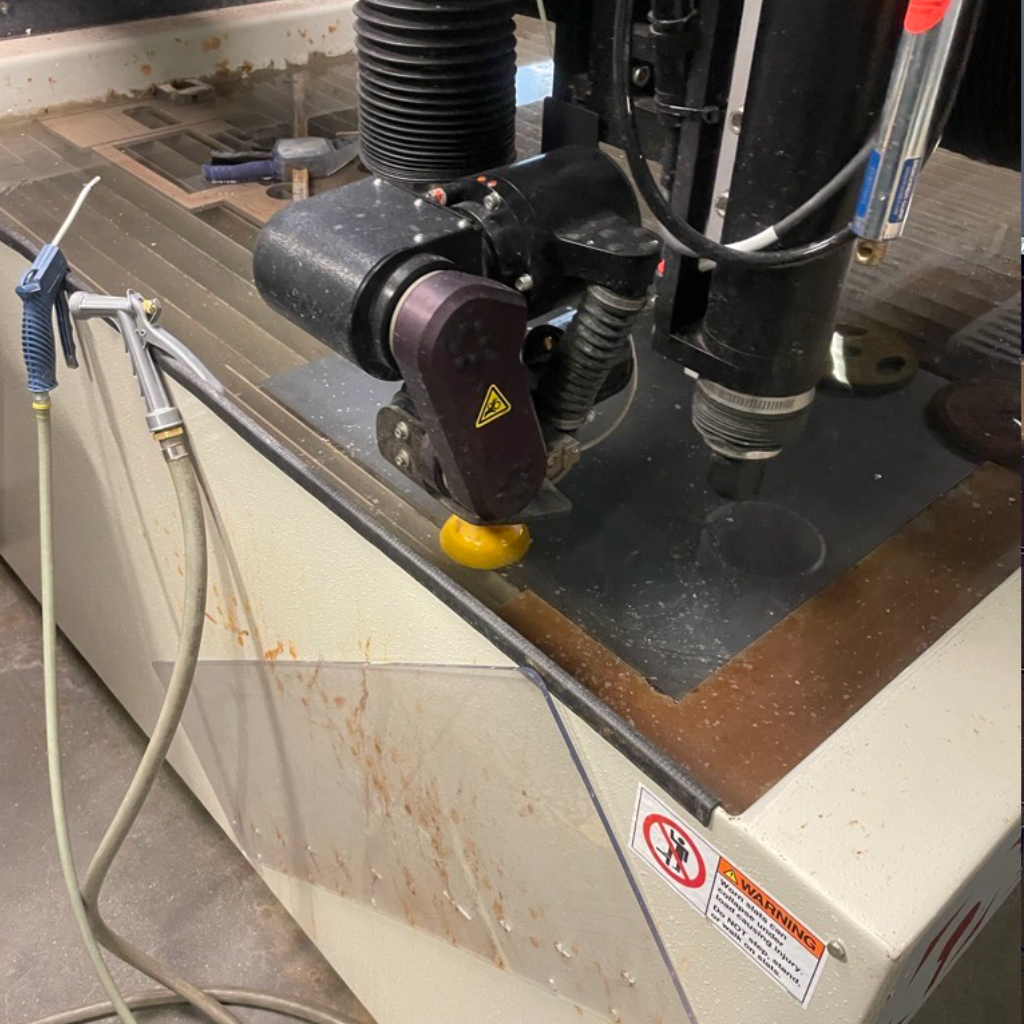
1. With the waterjet, I cut some parts for the shelf and the stand. Then, I bent them with the finger break, creating the desired design.
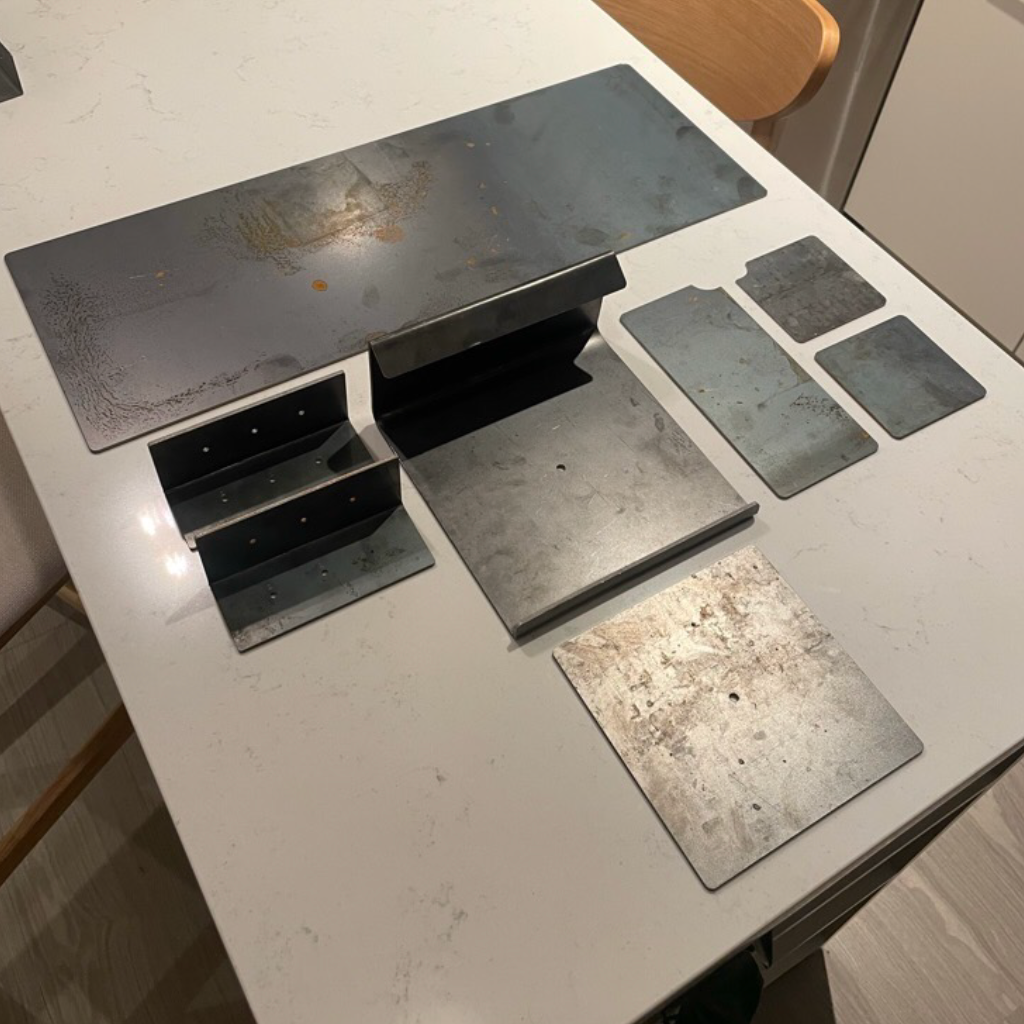
2. I send the metal parts for powder coating to get a better finish and used some maple wood lumber a friend gave me.
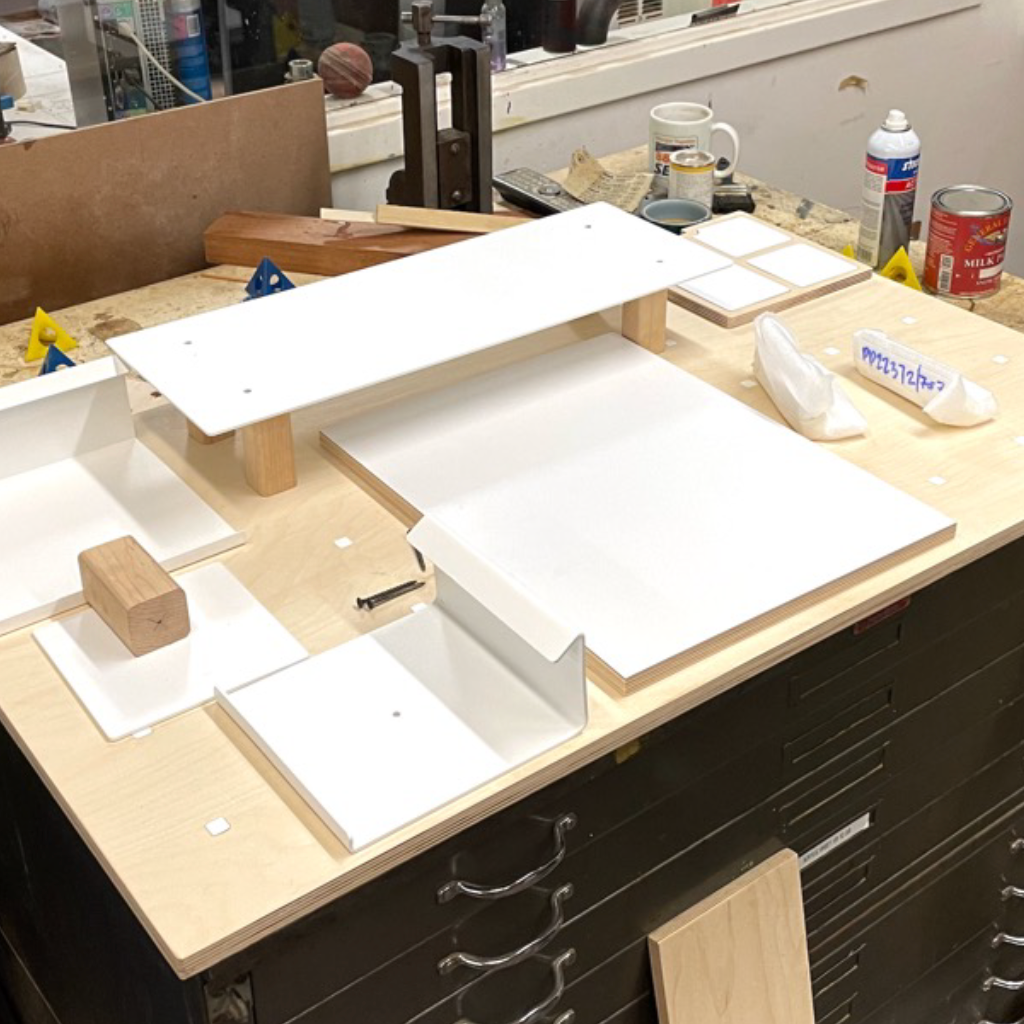
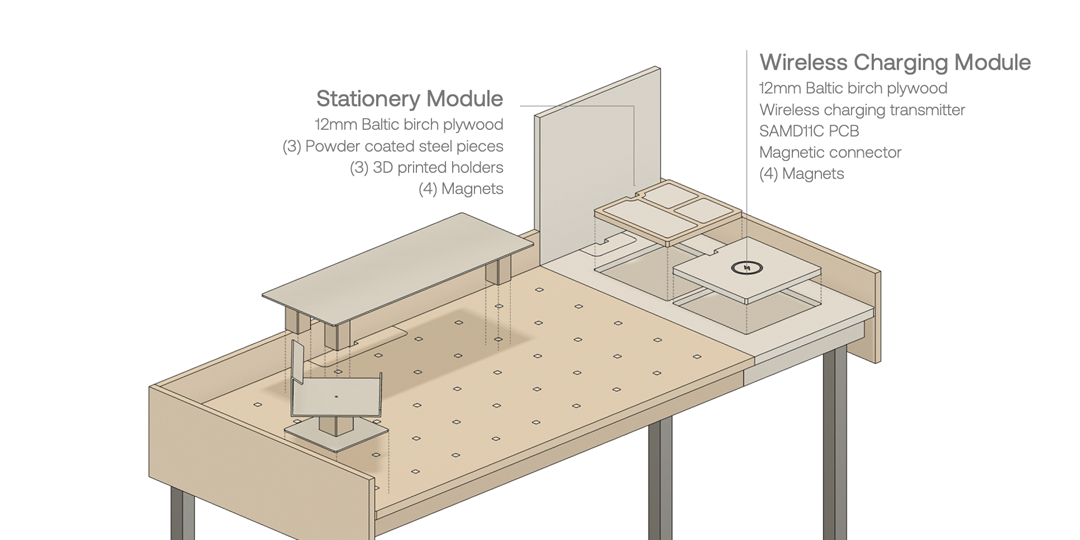
Smart Modules
For the modules, I wanted to create two basic option that could show potential ways to explore both electronic and non-electronic features.
So, I designed a stationery module, which functions as a way to get your daily objects, such as pen and pencil, organized. And a wireless charging module, in which I put a board that communicate with the desk main board and a charging transmitter that could transmit powder to any device that has a Qi receiver.
1. For the electronic module, I used the same design as the one for the desk board, but switched TX and RX. The board also worked and was ready to be connected.
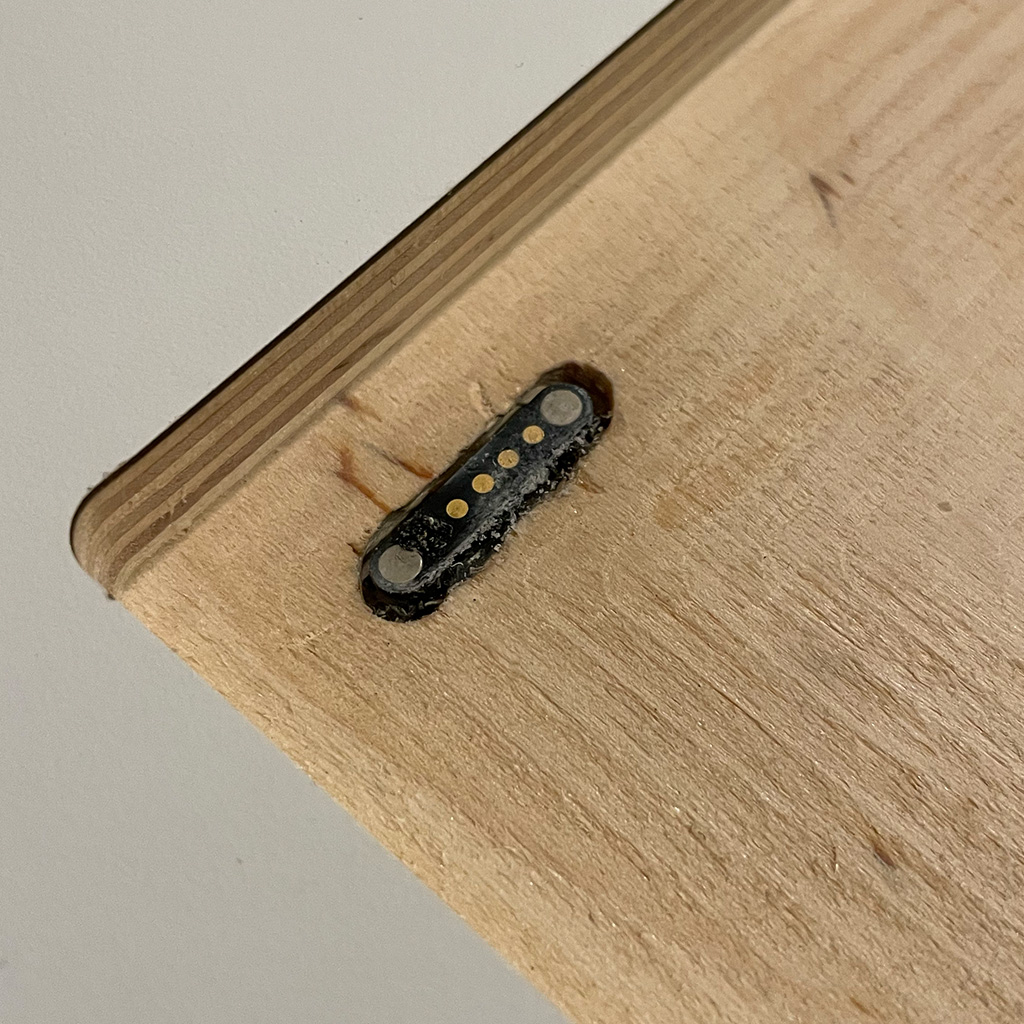
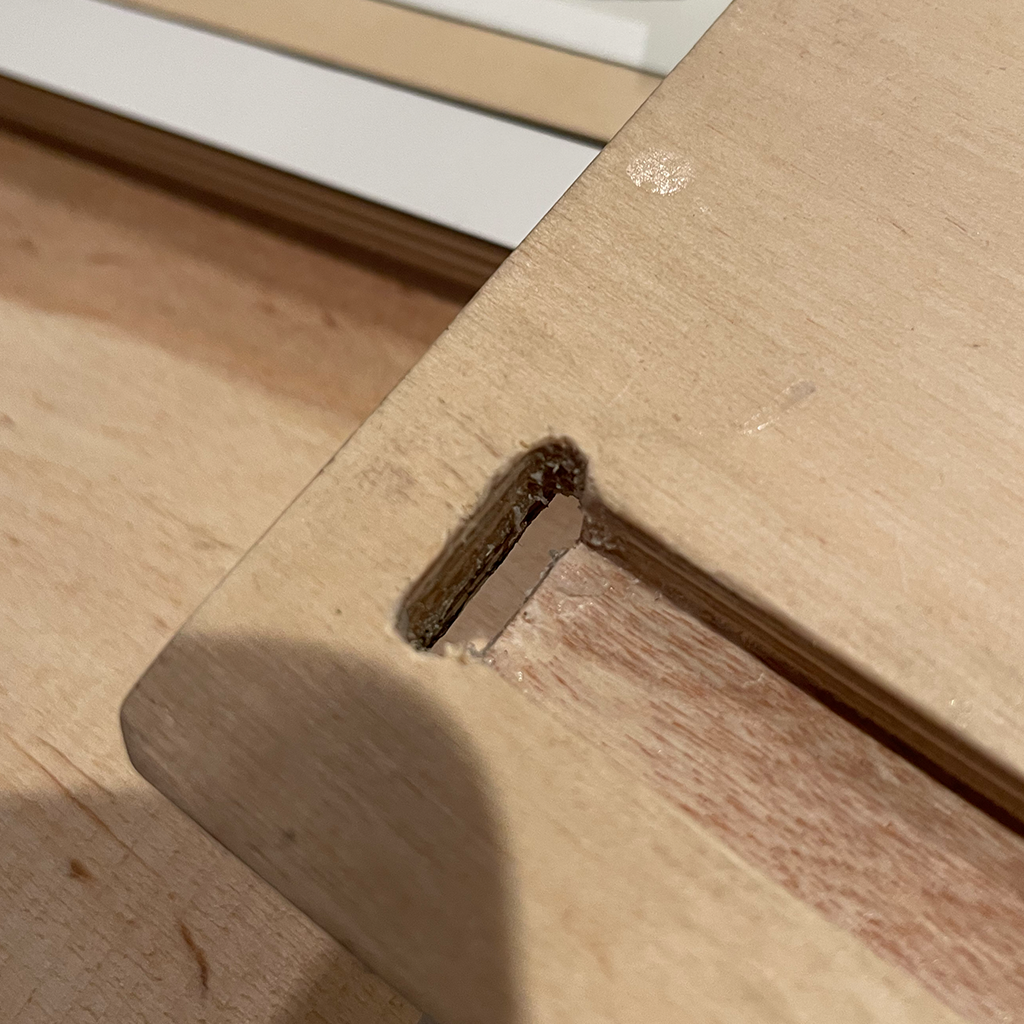
2. Then, the only big fail of the project happened.
To connect the desk to the module, I bought a small magnetic connector with pogo pins - I thought it would be a great option since it helped to align the components. However, I didn't think too much about how I could attach these connectors to my board and to the desk itself.
I spent more than 2 days trying to solder the wires directly to the magnetic connector. For a brief moment (less 30 seconds), the system worked perfectly.
But because of my limited skills, the wires broke again and, after lots of hours I ended up damaging both magnetic connectors I had for the project.
These are some images that show the connector that didn't work. For the module, I tried to put hot glue when I finished but the connection was broken again and I removed it, also breaking my board.
This was the only big frustration in the final project. However, I'm planning to keep working with the concept of smart furniture and I'm happy to have designed everything in a modular way, so I can create a new module for the same desk and design several components for it.
3. For the non-electronic component, I cut steel pieces, hold them in a wooden module and 3D printed accessories to put on top.

4. I like the idea of both modules but I look forward to designing and making new options.

The Gridding Desk was a great way to recap most of the skills we learned during the class. There were a few moments of frustration, but it was one of the most exciting project I've ever done. Overall, I'm very satisfied with the last version.
To summarize the skills I applied in each part of the desk, I create the following table dividing each component by weekly techniques.
Files
Gridding Desk 2D Design - Adobe Illustrator (.ai)
Gridding Desk 3D Design - Fusion 360 (.f3z)
Stationery Module 3D Print - 3D File (.stl)
Desk Core Board Schematic - EAGLE (.sch)
Desk Core Board - EAGLE (.brd)
Desk Core Board Traces - Image (.png)
Desk Core Board Exterior - Image (.png)
Module Board Traces - Image (.png)
Module Board Exterior - Image (.png)
Questions
What is the project? What does it do?
My goal was to make a modular desk that is highly customizable and smart, integrating electronic components.
The different parts were described above, but essentially it includes a workstation with a magnetic grid to organize accessories and a modular side, in which electronic and non-electronic module can be attached.
Who's done what beforehand?
I've seen a few projects of furniture in the HTMAA website, especially in the CNC week. However, I didn't find anything very similar. However, throughout the whole project, I used several specific references, such as the PCB designs and the desk frame structure.
What did you design?
Basically everything. From the desk frame, to the tabletop, modules and electronic components - the only board I bought was the wireless charger. Also, I used Fusion 360, Illustration, Eagle, Mods, and a few other specific tools to design.
What parts and systems were made? What processes were used?
Most of them were made and the processes are documented above.
What worked? What didn't work?
Most part of the project worked well. The biggest issue I had was with the electronic connection. From now on, I will think a lot about how to properly connect my board and other components I use.
How was it evaluated?
My main objective was to be able to apply most of the skills I learned in this class. In that sense, I consider the gridding desk a success, even with the stressful issue I had with the electronic module.
Moreover, I'm exploring ideas related to the concept of smart furniture and I wanted to see the final project as an MVP of a potential product to sell. Regarding this secondary objective, I'm even more satisfied - I was able to create a desk that, although is far from a product that could be launched and sold, can serve as a prototype for future smart furniture objects.
What are the implications?
I'm planning to keep working with this project and explore new ideas for other modules and maybe other furniture pieces. I really want to understand if this might be a potential product to be launched.
Overall, this was the best experience I could have had at MIT. The class is even more interesting, challenging and engaging than what I expected when I applied in the beginning of the semester. Lastly, I just wanted to document how awesome everyone was during the whole process and how much I appreciate some people that were especially supportive in specific moments over the semester (without their help is key moments, I wouldn't be able to finish) - Alfonso Parra Rubio, Anthony Pennes, Jen O'Brien, Christopher Dewart, John Difrancesco, Quentin Bolsee, Neil Garshenfeld, and Coby Unger (from the Hobby Shop)!