02
COMPUTER CONTROLLED CUTTING
This week we used on a laser cutter to make a cardboard article and a vinyl cutter to make a sticker.
| Tools: | Fusion 360, Rhino 7, Photoshop, Laser Cutter, Vinyl Cutter |
| Files: | Laser Outlines, Vinyl Outlines |
| Date: | 09.19.2022 |
Group Assignment
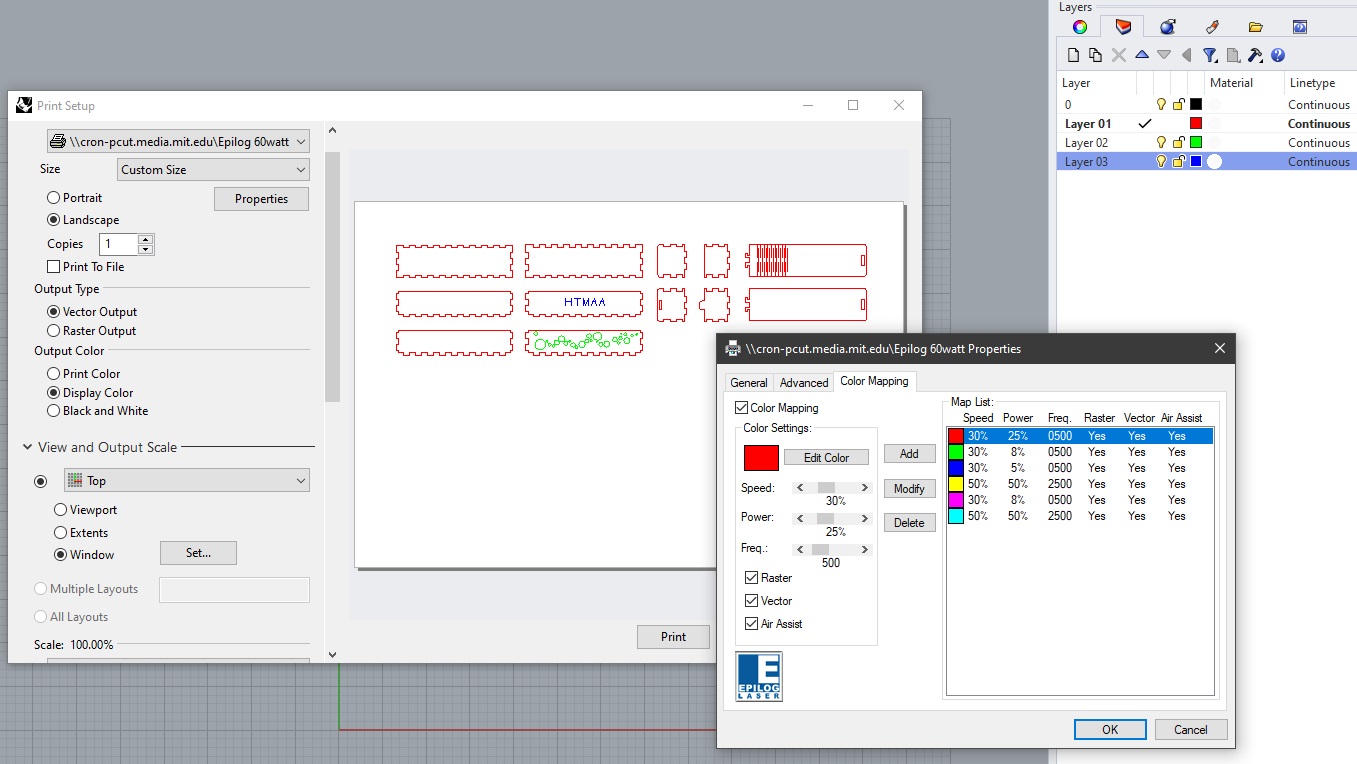
First for the group assignment, McKenzie and I measured the thickness of the cardboard using the digital calipers as 3.81mm. Using the 60Watt Universal Laser Cutter, we cut some test pieces with joints 3.81mm, 3.84mm, 3.87mm of which the largest joint fit the best. Before cutting, we adjusted the height of the laser so that it was 2in from the top of the cardboard. Since this was a test, we used a scrap piece of cardboard that was not very flat; we noticed that the areas with the greatest warps did not cut as well. We used 30% speed for these tests, 25% power, and 500ppi. For other pieces, we tested decreasing (10%) and increasing the power (27%). The 10% power did not cut all the way through, but rather scored the material. Based on these test cuts, we measured the kerf to be 0.25mm.
Design
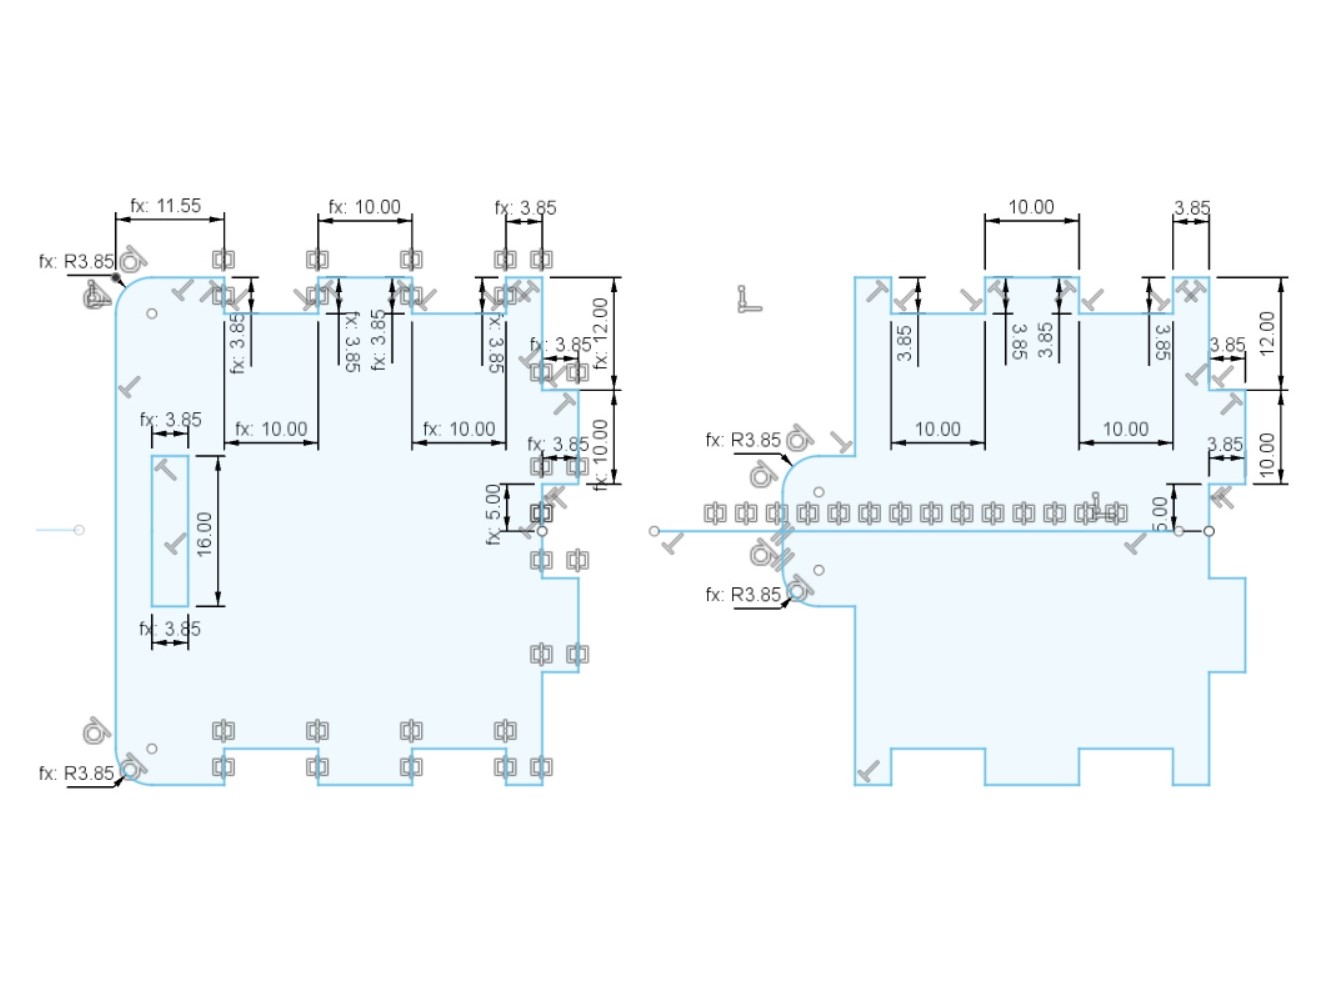
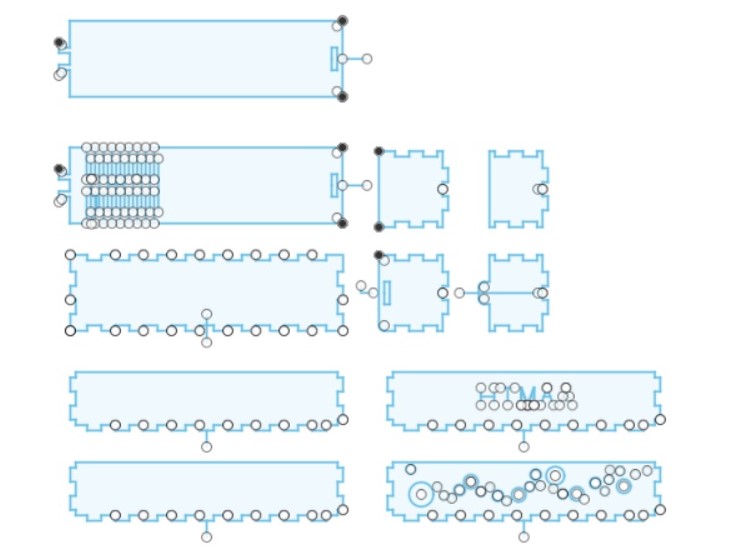
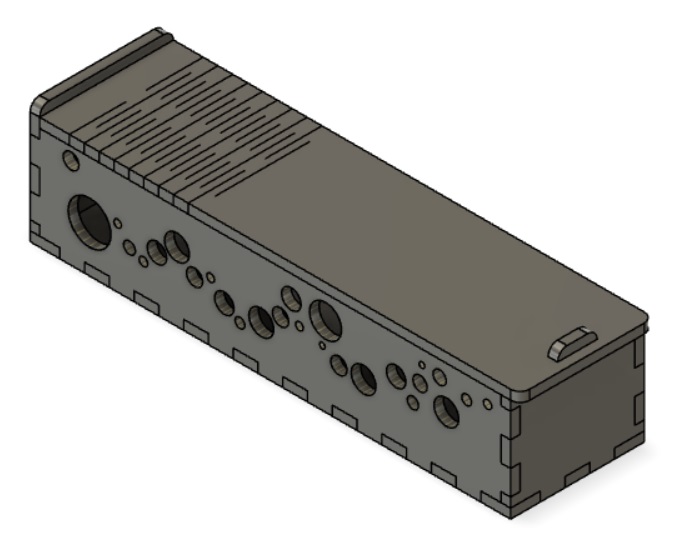
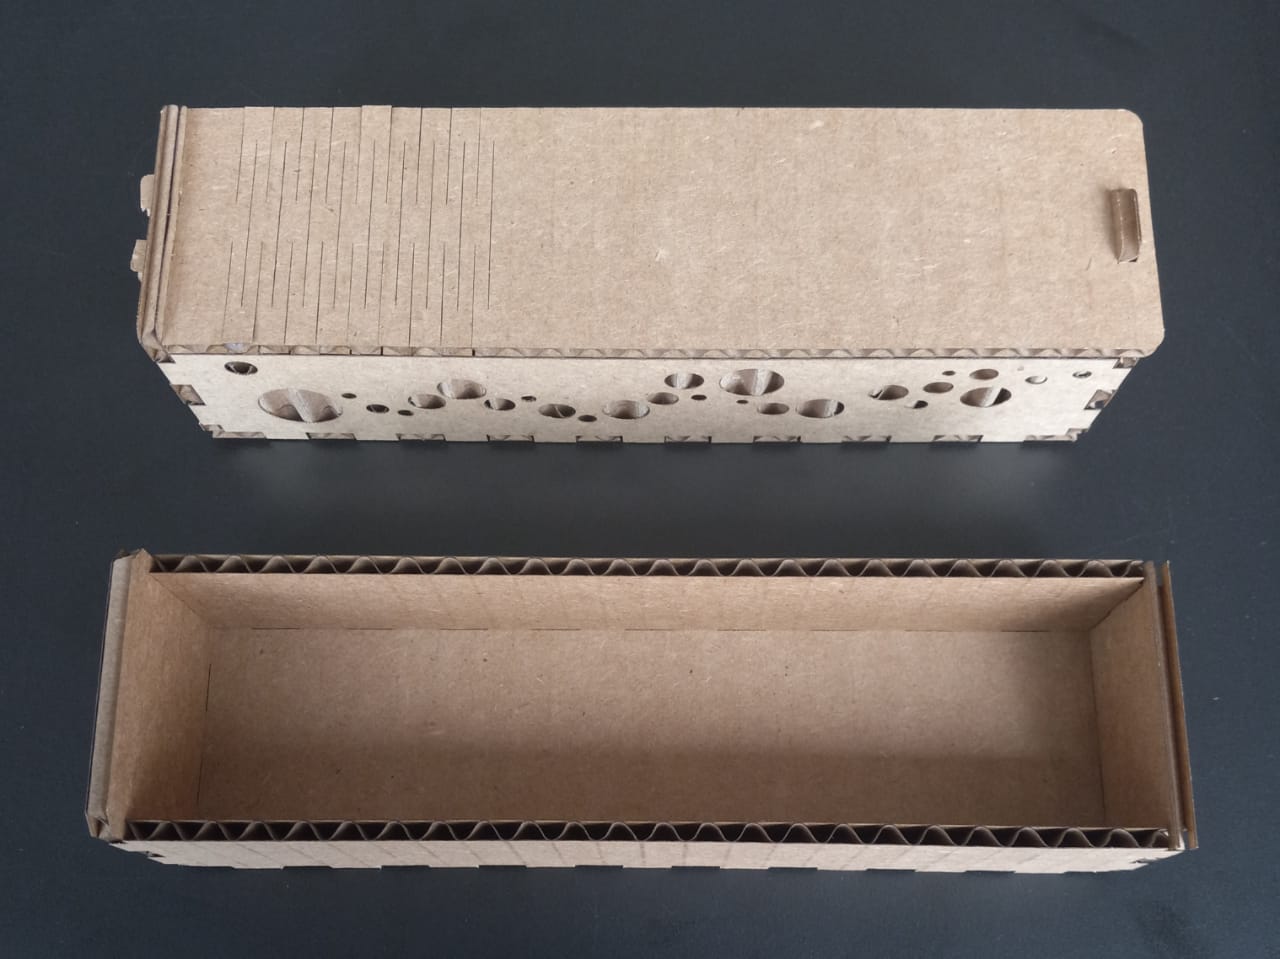
For the week's assignment, I decided to explore a variety of joinery details and the kind of surface designs the machine would allow. I must admit I missed the prompt that the article needs to be modular to allow multiple ways of assembly. The pencil case I made only allows two alternate ways of assembly without yielding a new result.
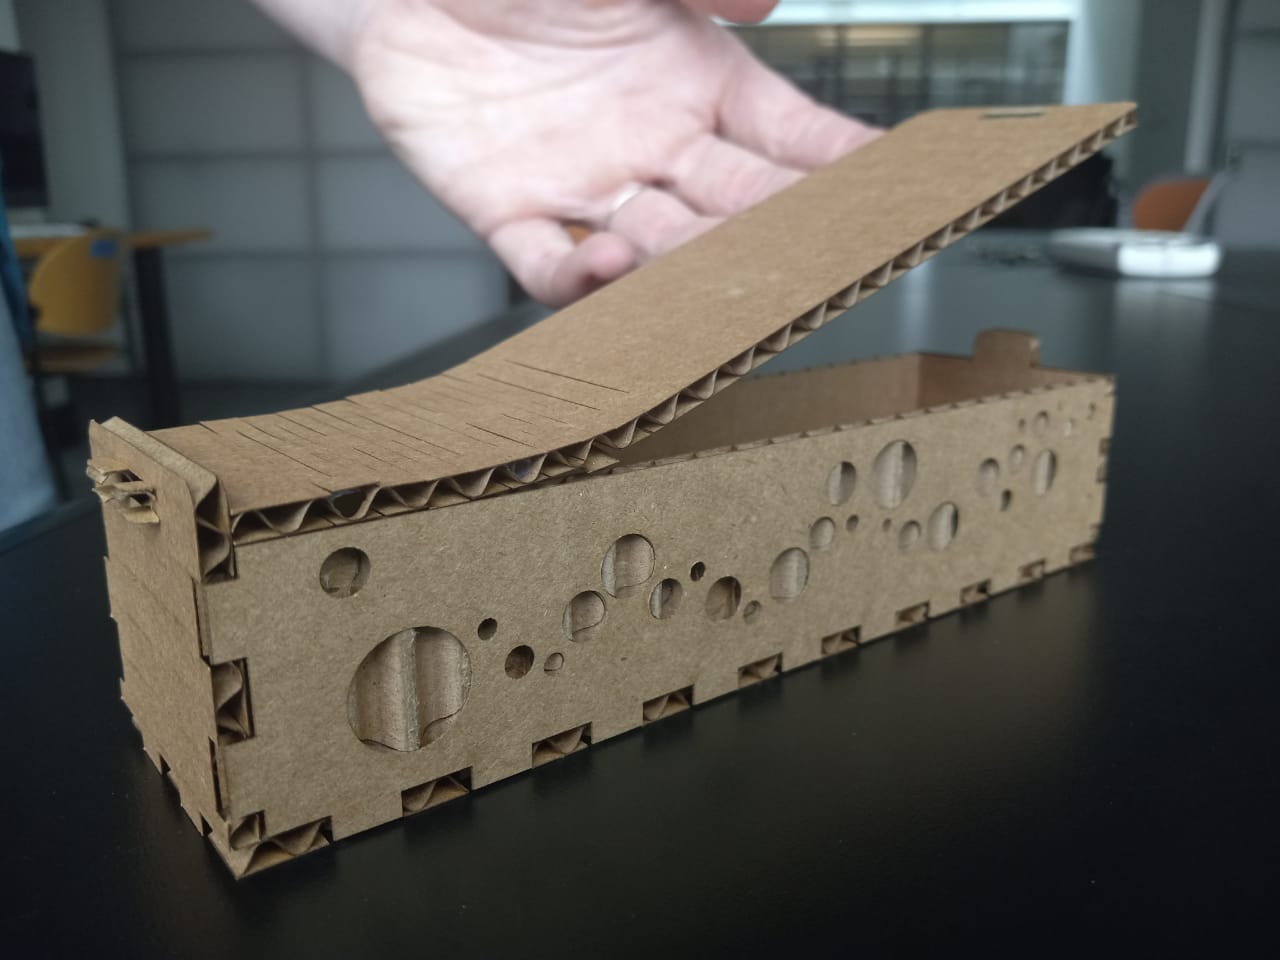
It was my first time using Fusion. Though I liked the timeline feature, I find myself much more comfortable with Rhino. I hope to get to more familiar with Fusion during the upcoming weeks. The following is the design of the case which relies entirely on joints, i.e. no glue used for assembly. I used finger joints for most edges. I used a mortise and tenon joint for the edge where the top surface opens and closes. I used a snap-joint at the other of the top surface, to fix that edge to the rest of the box so it can act the fulcrum. I used flexure on the top surface to allow the opening and closing of the box without disturbing the snap-joint much. In terms of surfaces, I wanted to capitalize on the material properties and the laser's power settings to achieve an interesting design.
Laser Cutting & Assembly
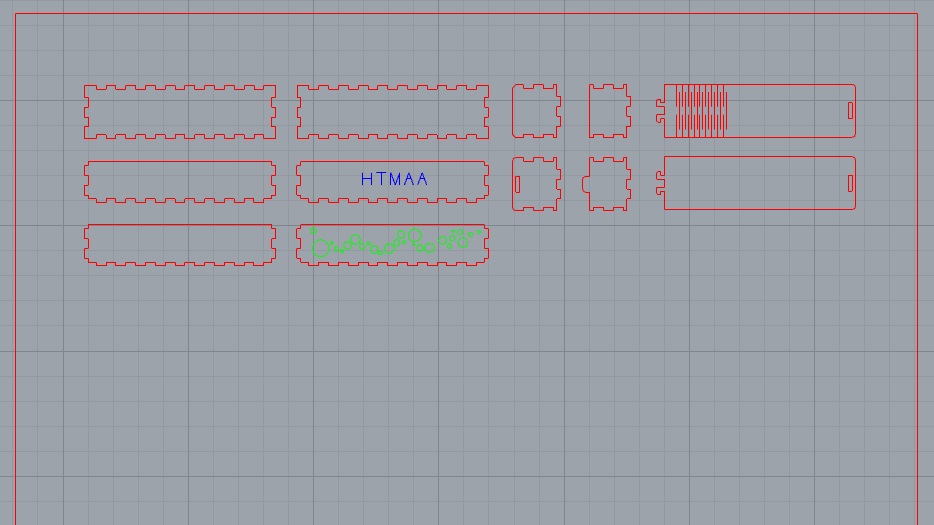
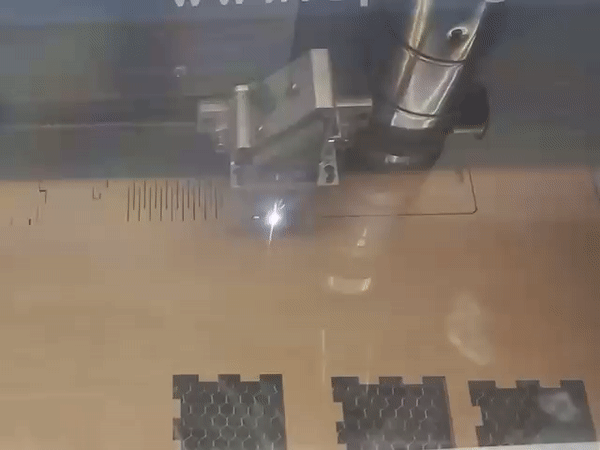
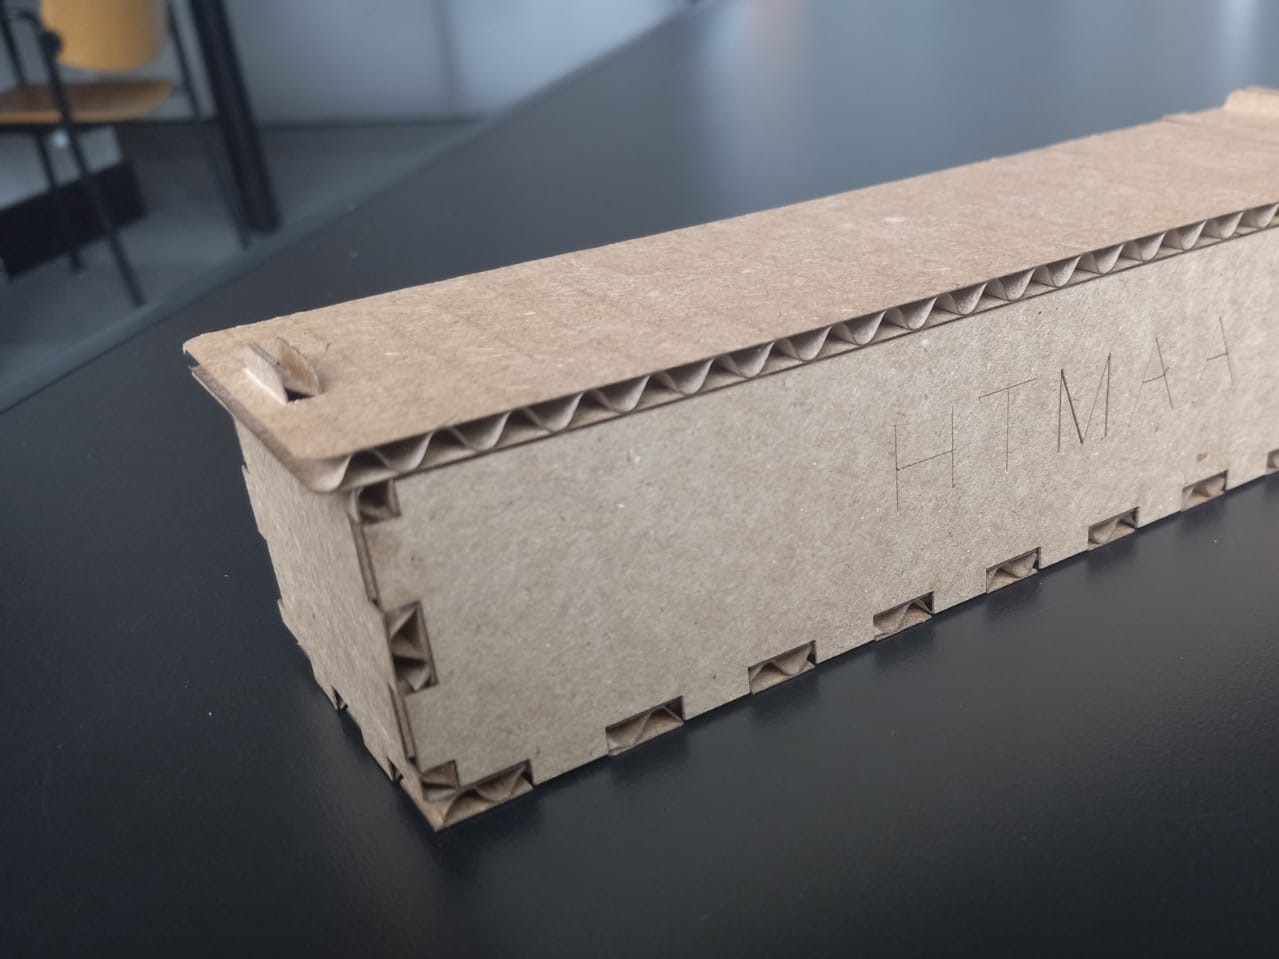
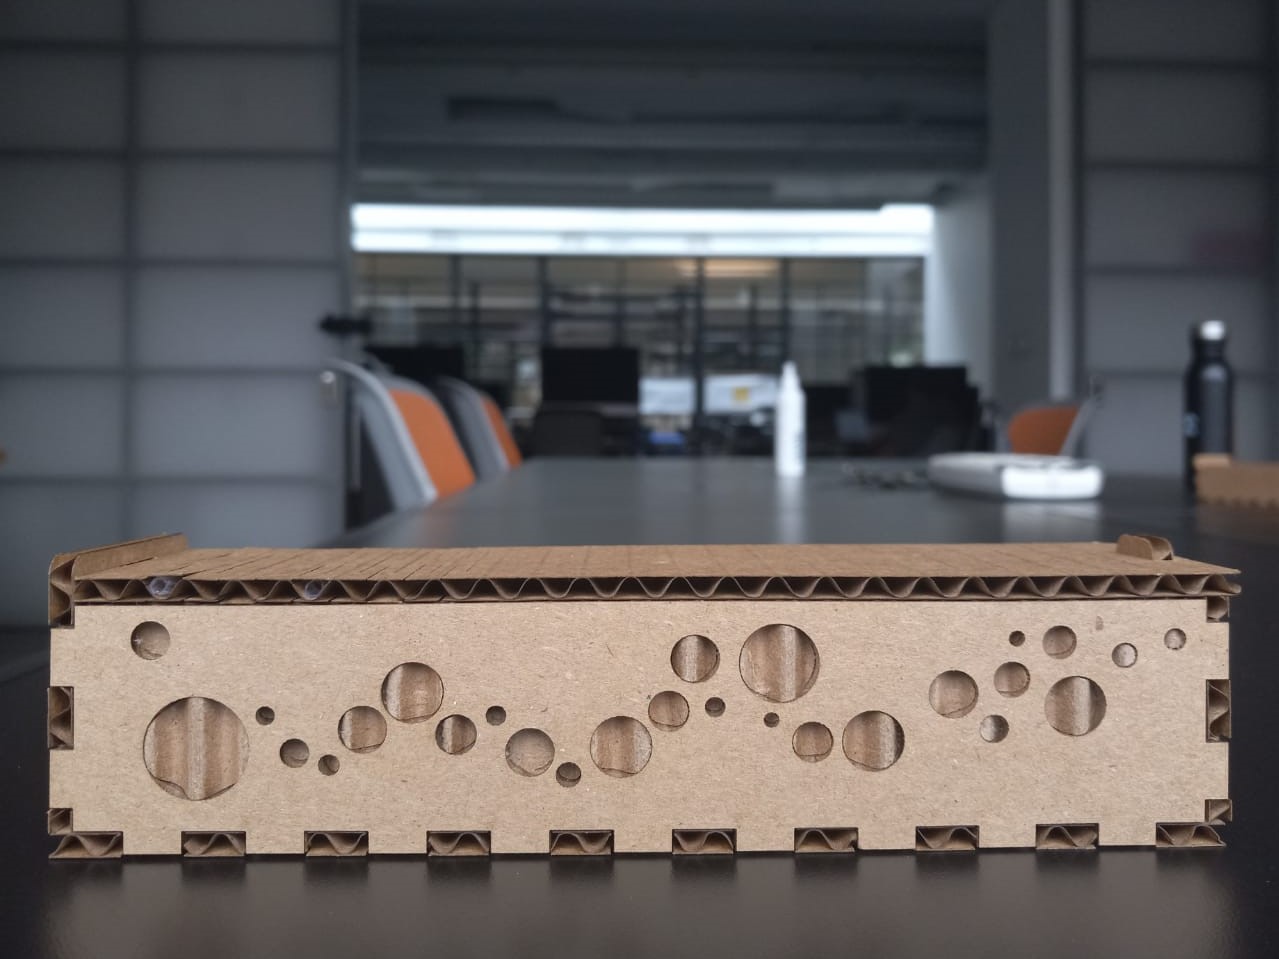
The cutting went smoothly. I used multiple layers for different intensities of the laser for full-cuts and half-cuts, i.e. scoring. The surface with the pattern came out exactly as I had anticipated. I had decreased the power for this so the laser doesn't cut through the entire thickness, and peeled of the circles on the outer layer. This resulted in the pattern seen below, where the corrugated layer of the cardboard is visible through the circles, adding more detail and depth to the surface. I also scored the side surface to show "HTMAA", just as a further exercise in controlling the laser's power.
The assembly of the different parts was easy. There were three main problems. Firstly, the finger joints were not snug enough so the surfaces are not locked in tightly. Secondly, the snap-joint was not ideal--though I had my doubts about it working while designing, I thought I could bend the cardboard enough to squeeze the joint in. However, that wasn't the case, I had to wrestle the joint into place, which caused some damage but utlimately seemed to work. If I attempted this design again, I would use a wedge joint here instead. Lastly, the flexure, though it worked for making the top bendable, did not look great. The edges kept popping up because of the how I oriented the piece along the direction of the corrugated layer. In a different try I would alter this orientation and see if it yields betters results.
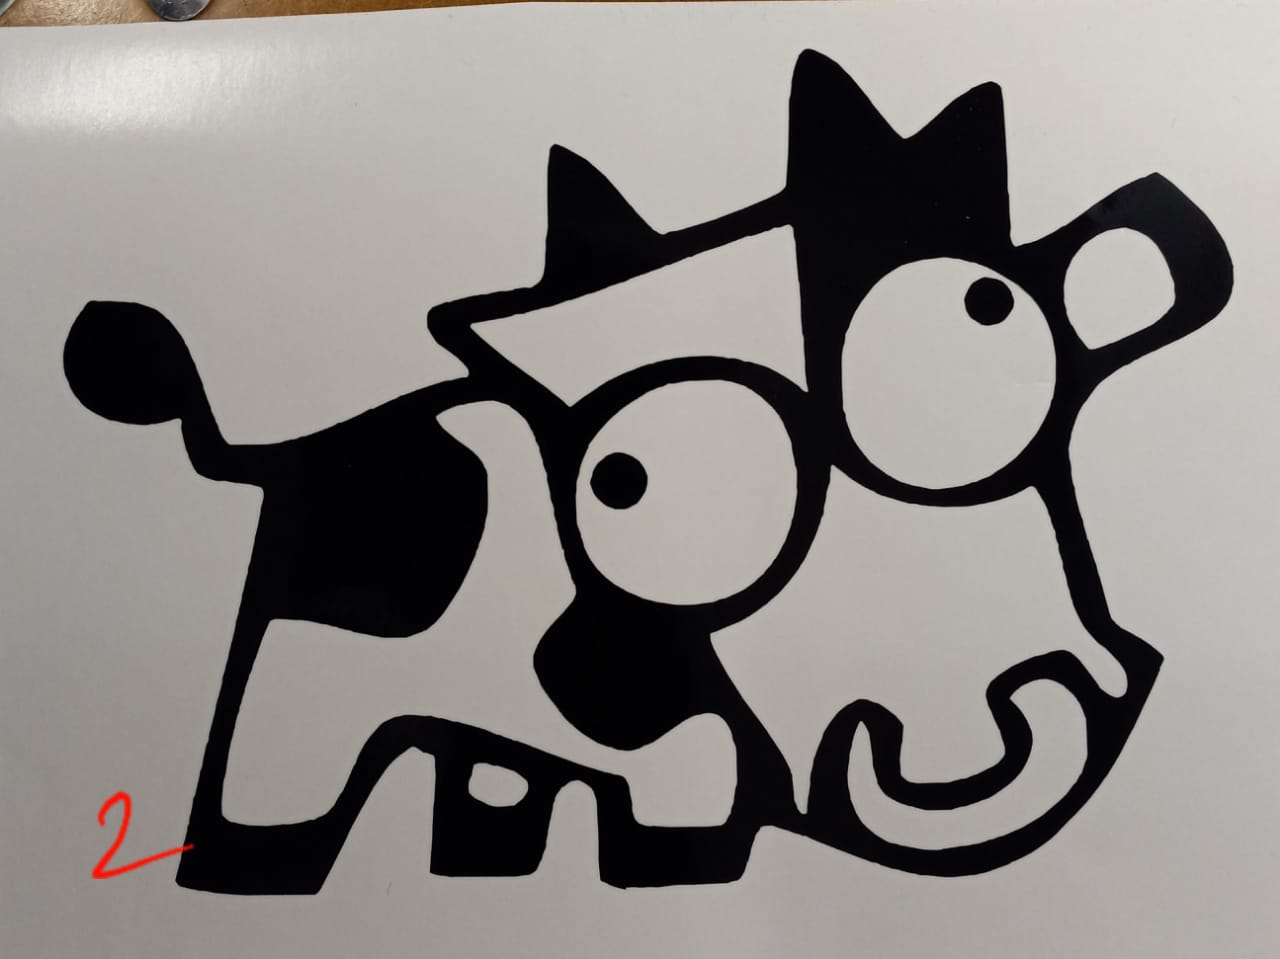
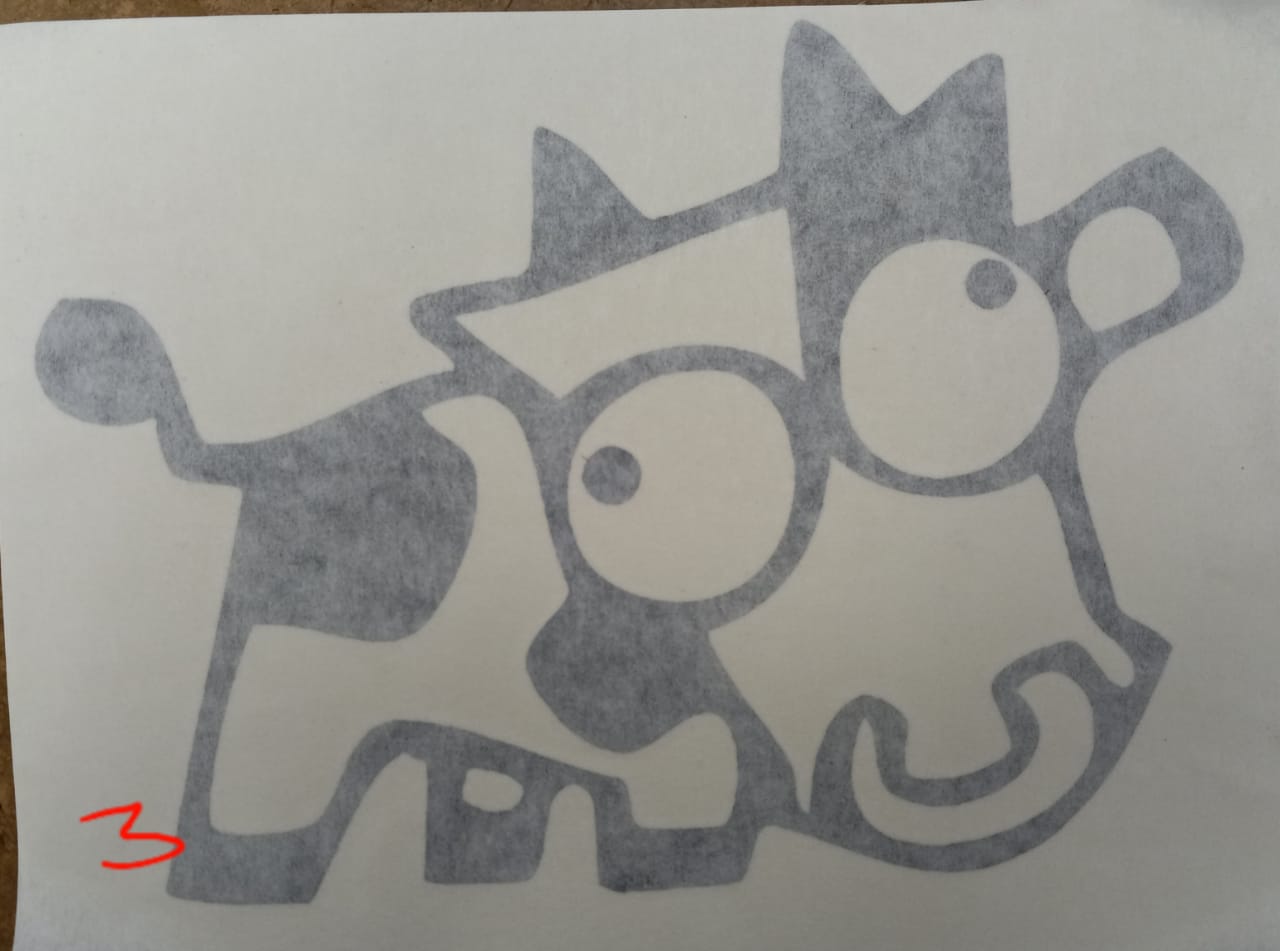
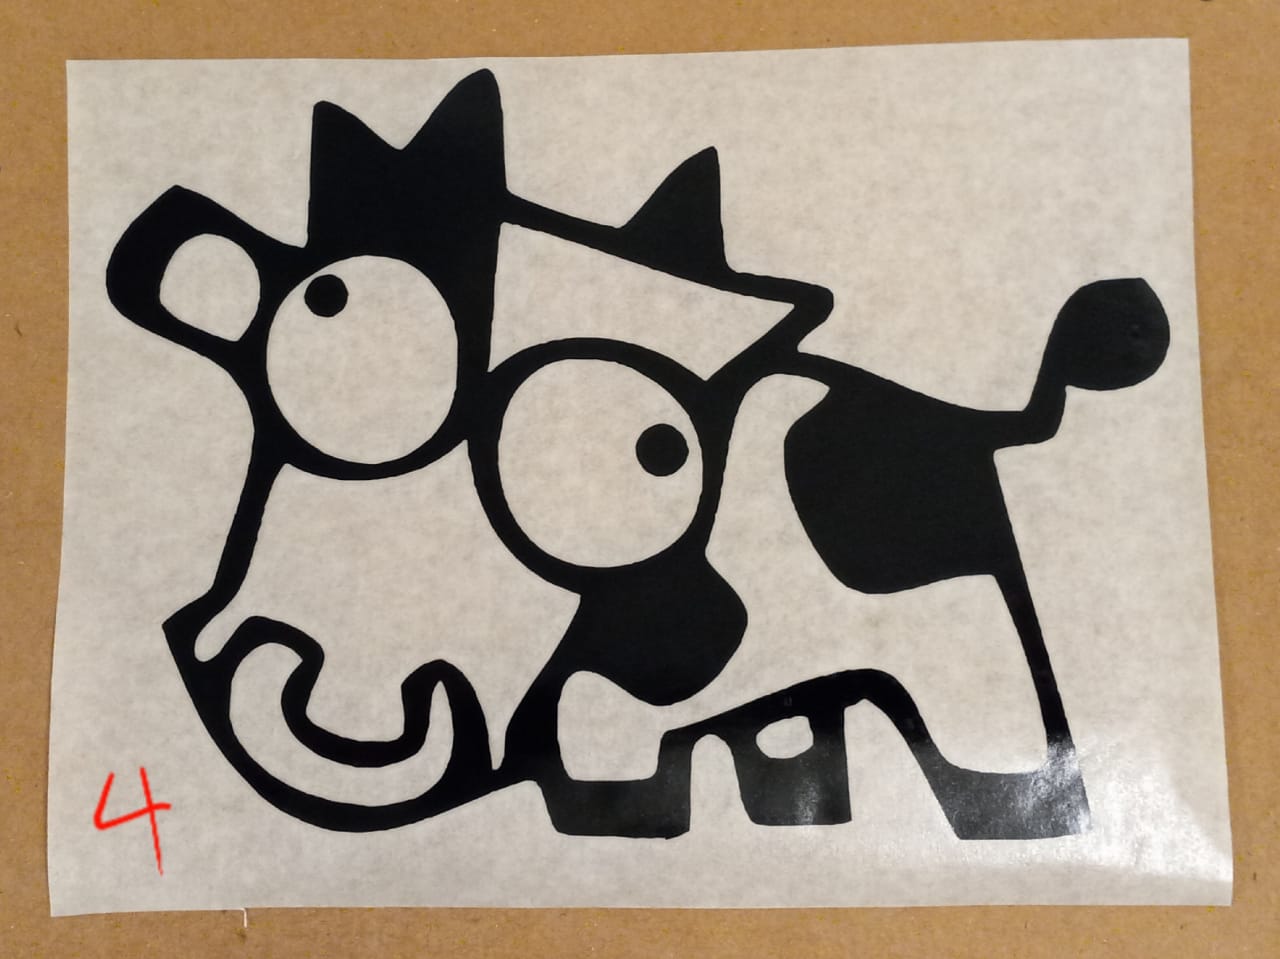
Vinyl Cutting
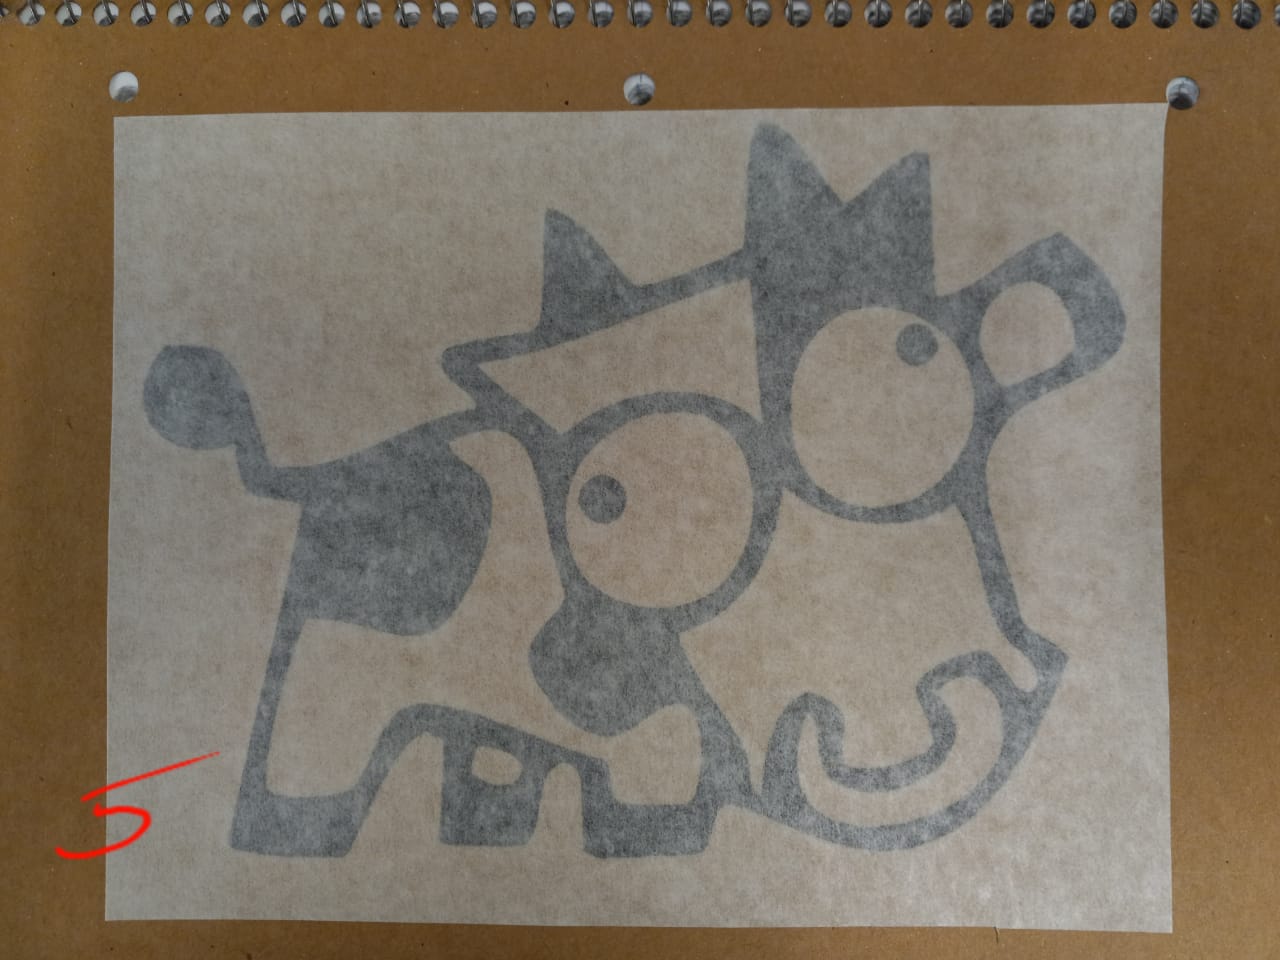
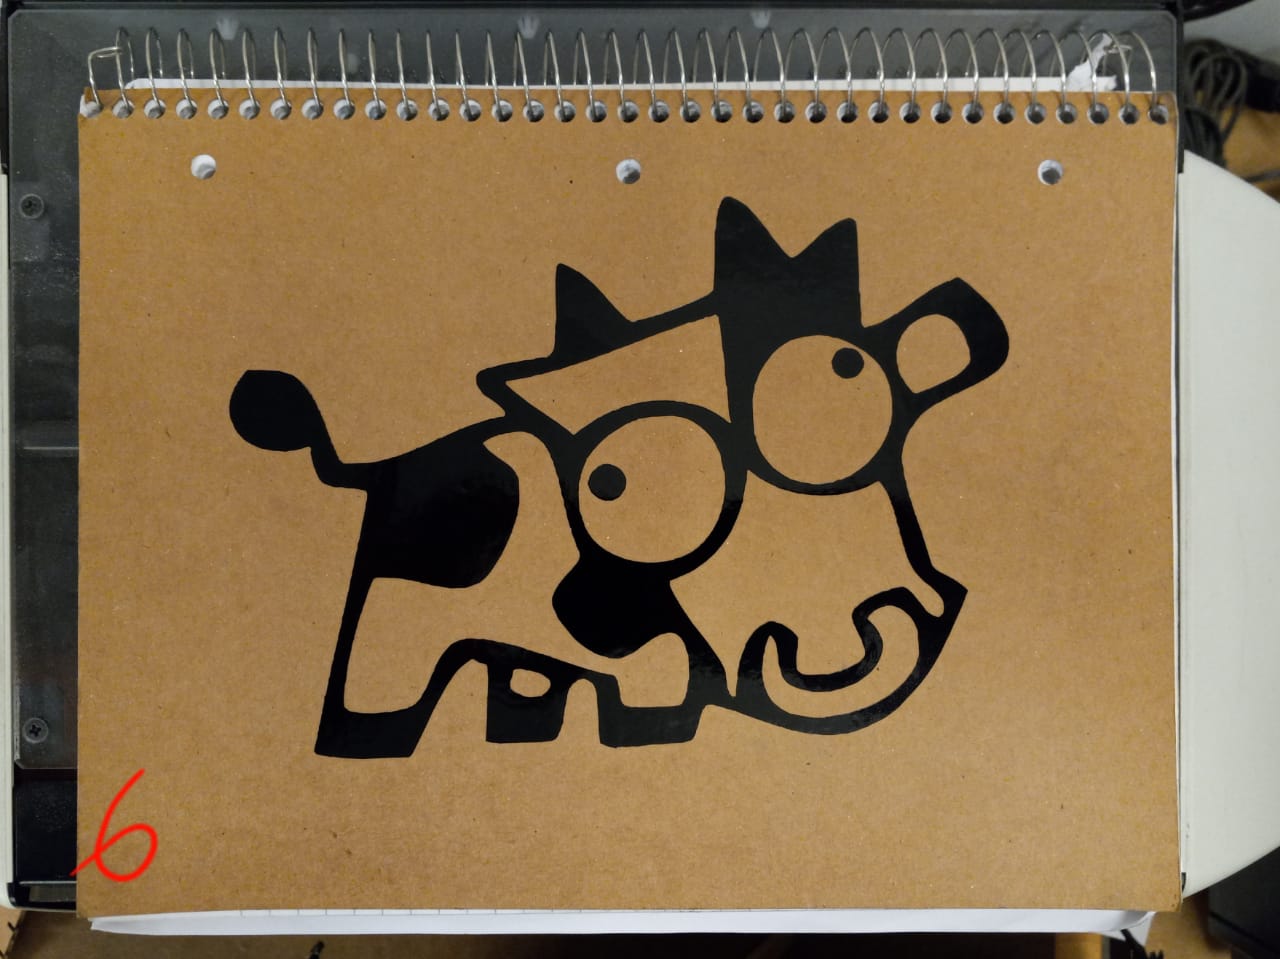
I googled something along the lines of "mad cow" to find an image that I wanted to cut in vinyl. After some basic photoshopping, the png was ready for cutting. The following images illustrate the step-by-step process of cutting the vinyl, peeling off the excess, transferring the material onto a different sheet, then pasting on the final surface--my notebook. I had to be careful during the transferring process, to avoid any bubbles from creeping under the layer.