08
MOLDING AND CASTING
This week we worked on designing and making a mold to cast an object.
| Tools: | Rhino, Mastercam, Intelitek |
| Files: | Lamp Model, Lamp Parts Layout |
| Date: | 11.04.2022 |
Design
The inspiration for this assignment came from the festival of Diwali. During the celebration, we light diyas which are small earthen lamps lit using wicks and oil. I decided to make a mold for a diya so I can cast some for next Diwali, and maybe gift to friends and family.
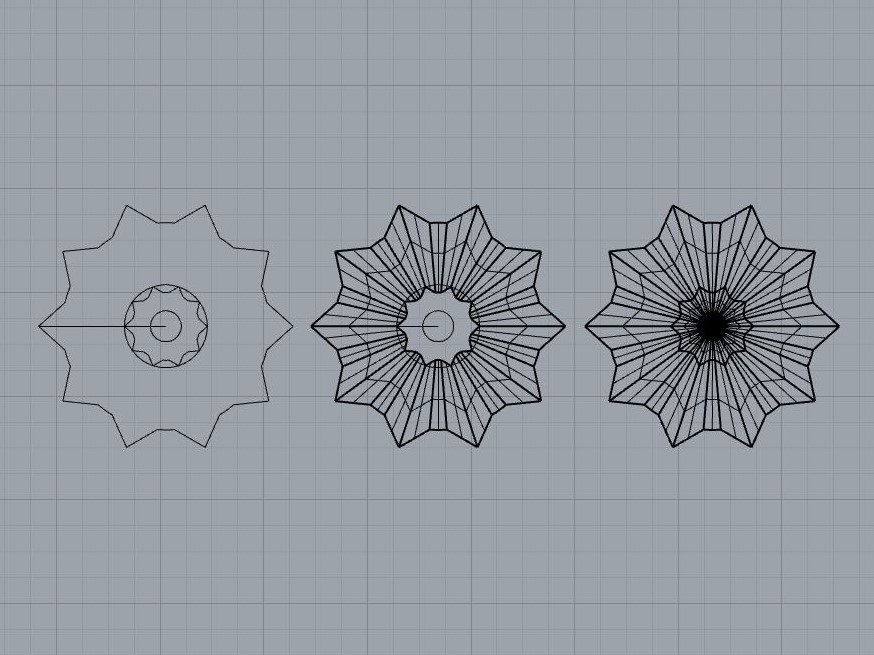
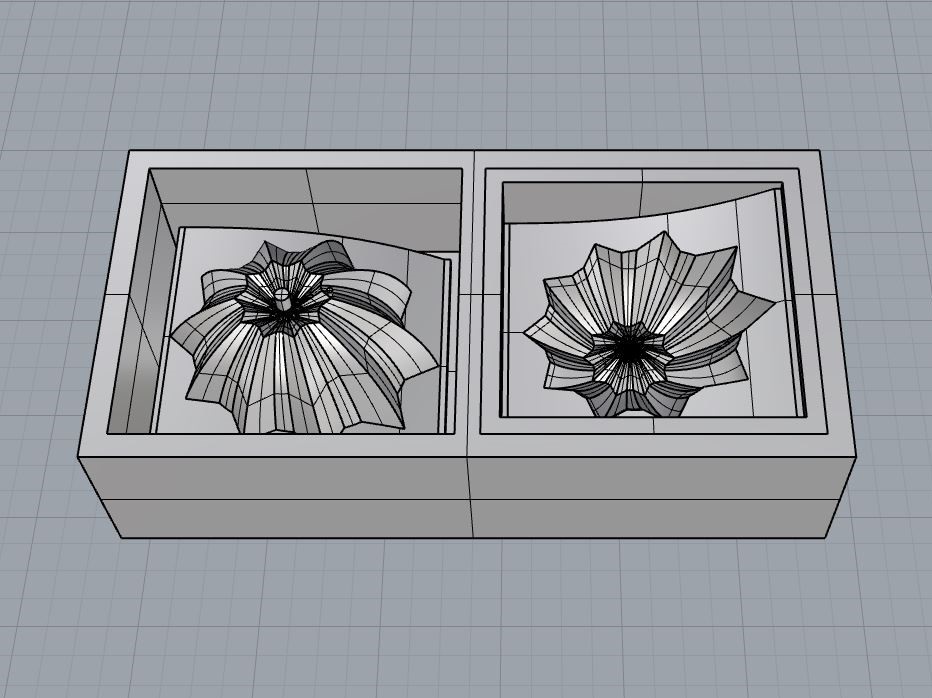
In keeping with the festive spirit, I designed an intricate pattern based on a basic floral motif. I fell in love with the RailRevolve command on Rhino. Thus far I had mostly only used the SweelRail commands. I sliced the hemisphere using a doubly-curved surface (with the BooleanSplit command) to add some more drama to the design. This gives the lamp a direction to point the wicks in and keep them from drowning in the oil. The resulting assymetry from the slicing would also result in interesting patterns when the lamps were stacked atop eachother.
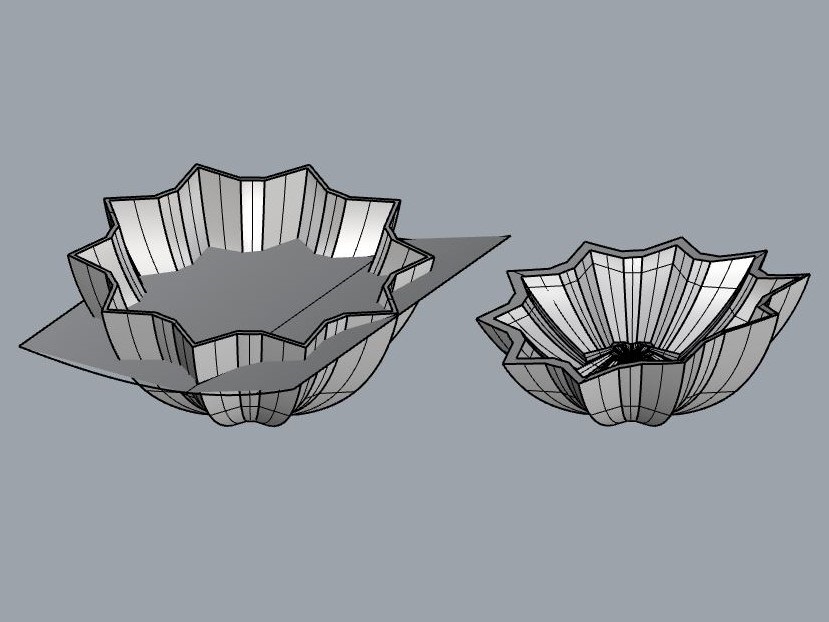
Finally, I had to split the lamp such that I could machine a wax mold for using as a cast for a cast (so positive to negative to positive). I needed to keep doing the mold-cast/mold-cast dance in my head to avoid making any mistakes. Since it was a bowl like shape, I separated the outside and inside surfaces for the molding. I used the same doubly-curved surface from before for registration, i.e. for fitting the two sides of the mold together in the right orientation. I further embedded this within an outer box to allow one mold to slide inside the other, thus keeping them both in place for the eventual casting. The biggest mistake I made was with respect to the size of the sprue, which ended up being too small, but I only realized this much later.
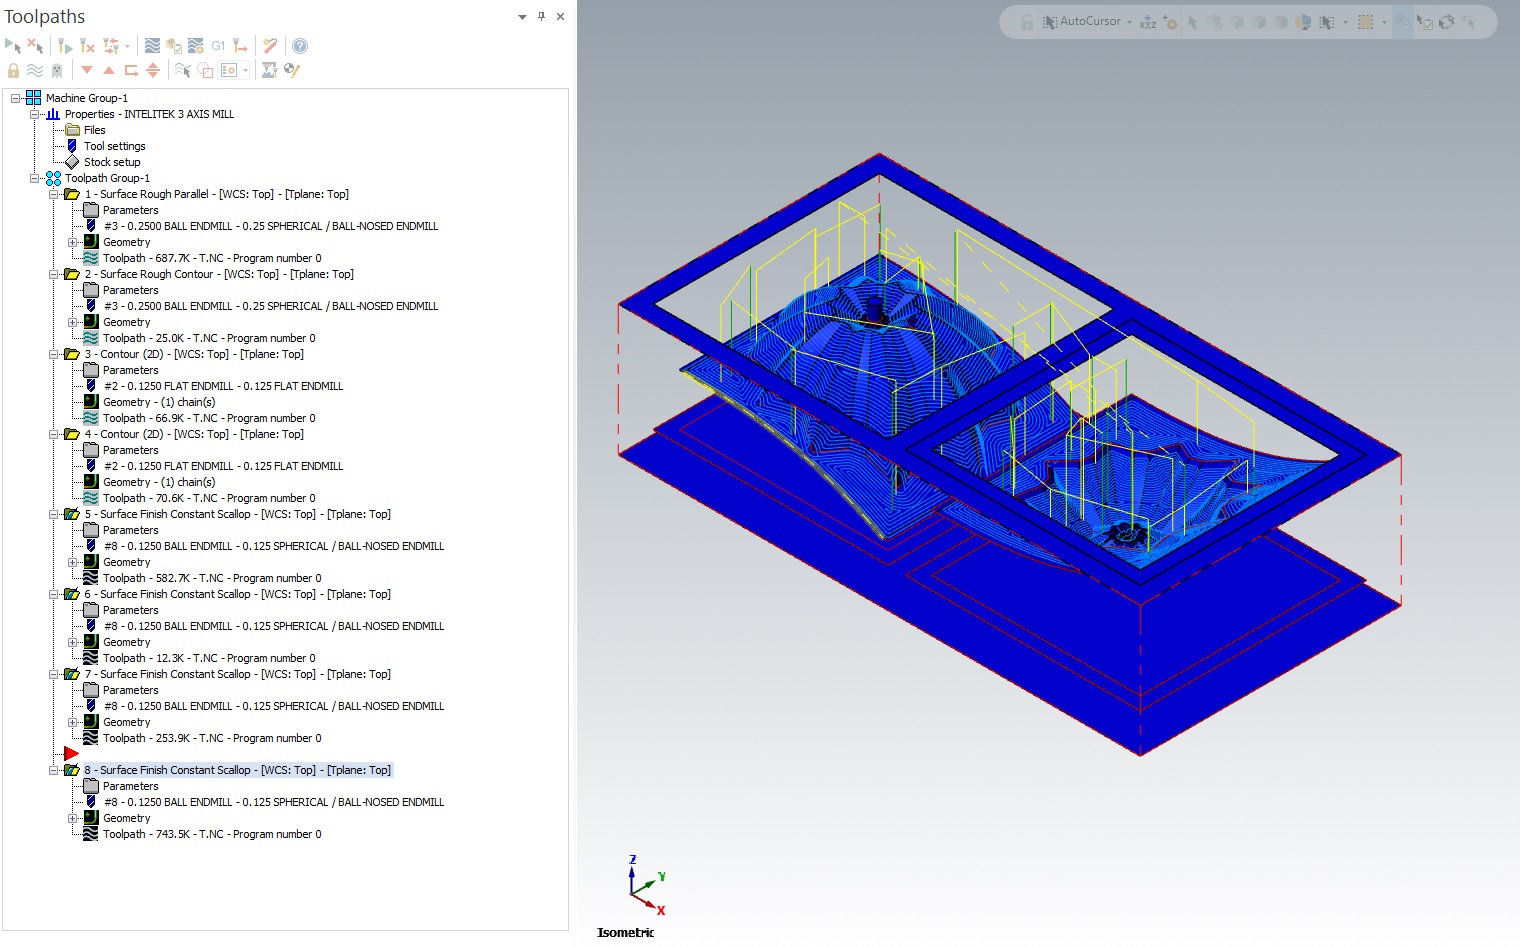
Setting up Mastercam
In designing the mold, I was aware that the sizes of the bits used for milling would not allow the level of detail I modelled at the center of the lamp. However, I was confident that any machining effects would be symmetrical and hence alright. The bit sizes would also dictate the clearance between various surfaces, so I followed the archshop website to accommodate at least 0.125" (smallest bit size used for the assignment) of clearance while modelling the wax mold. Jen helped me with setting up the Mastercam, and talked me through the various tooltip setup and speeds/feeds.
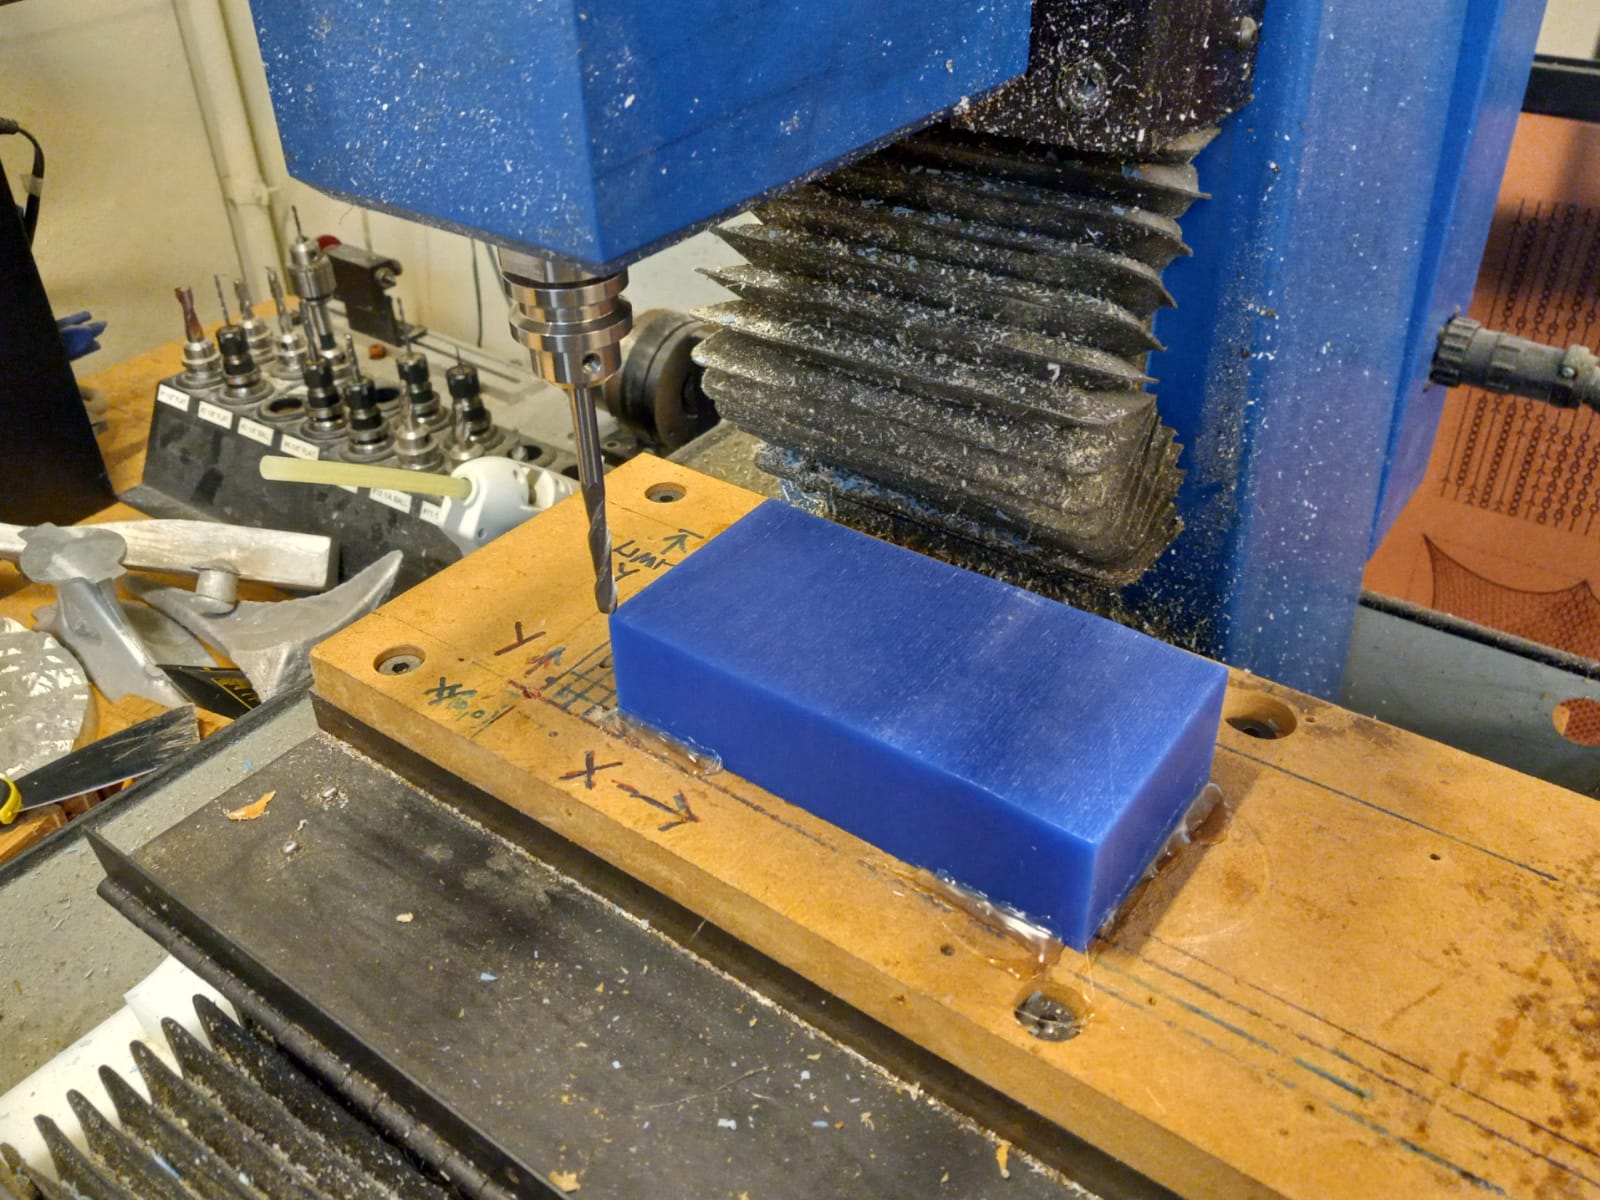
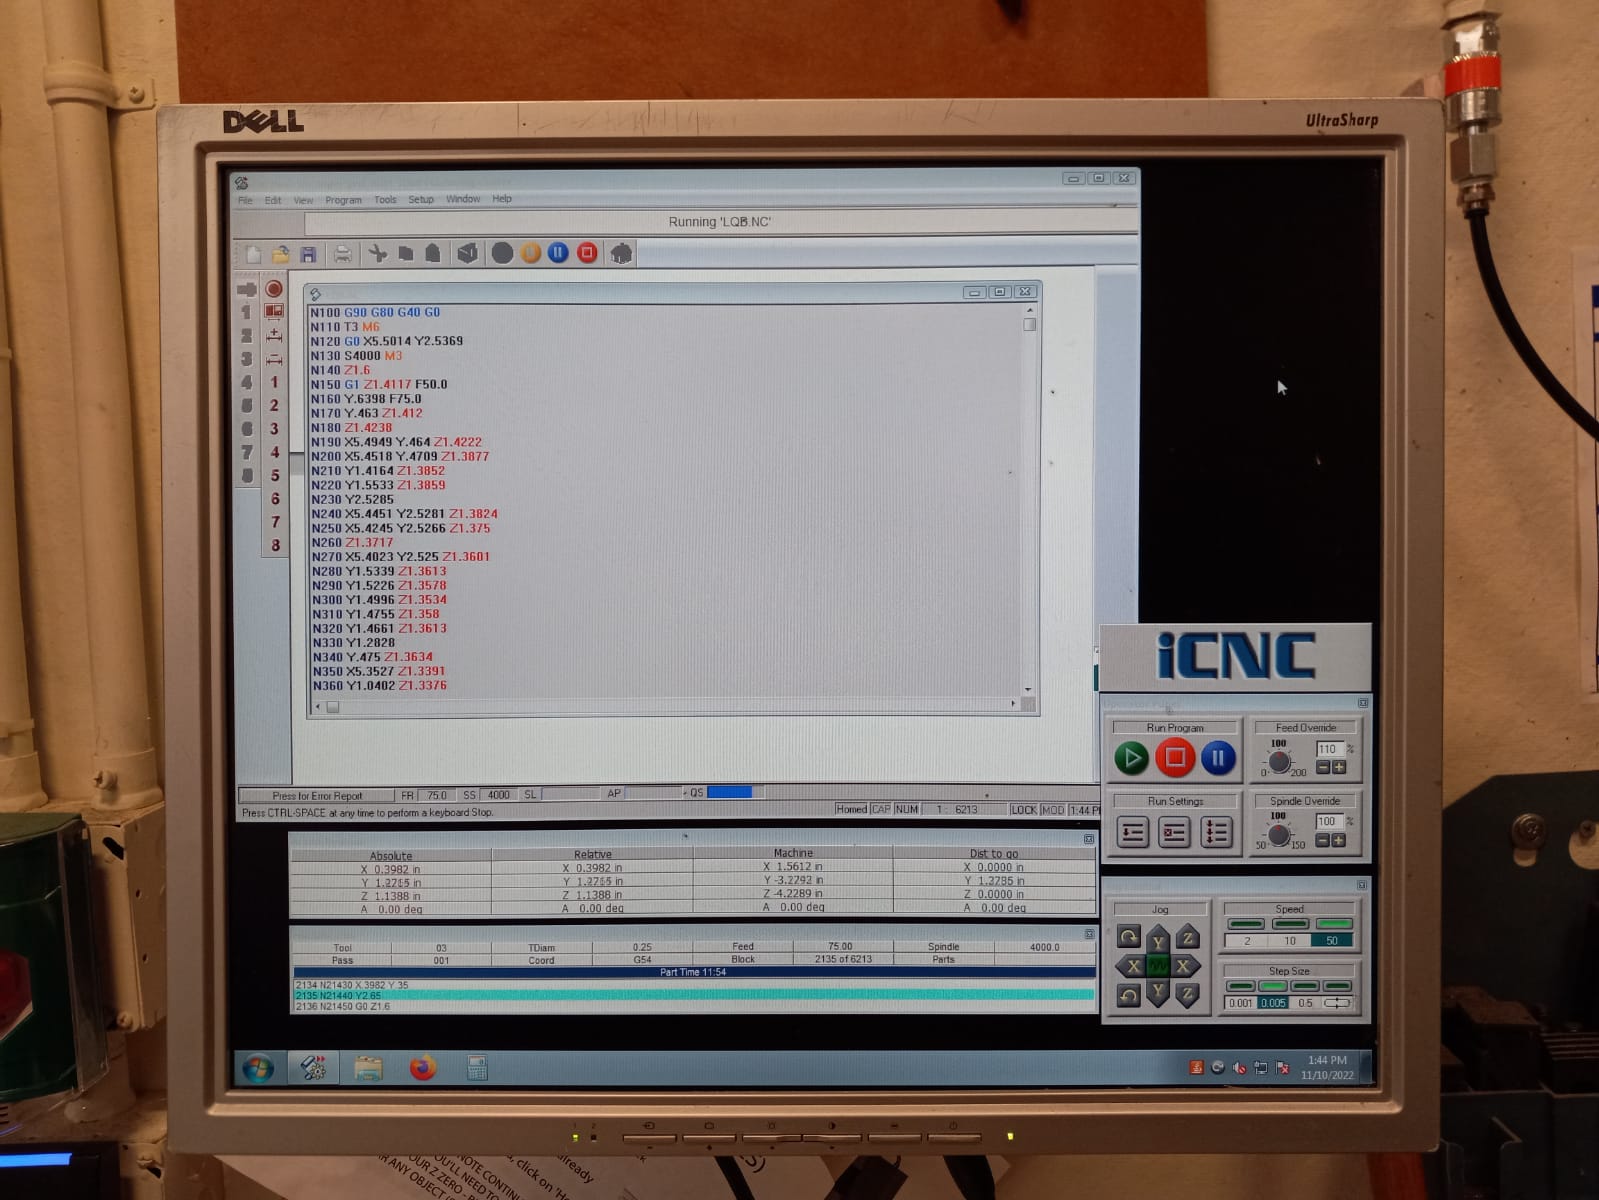
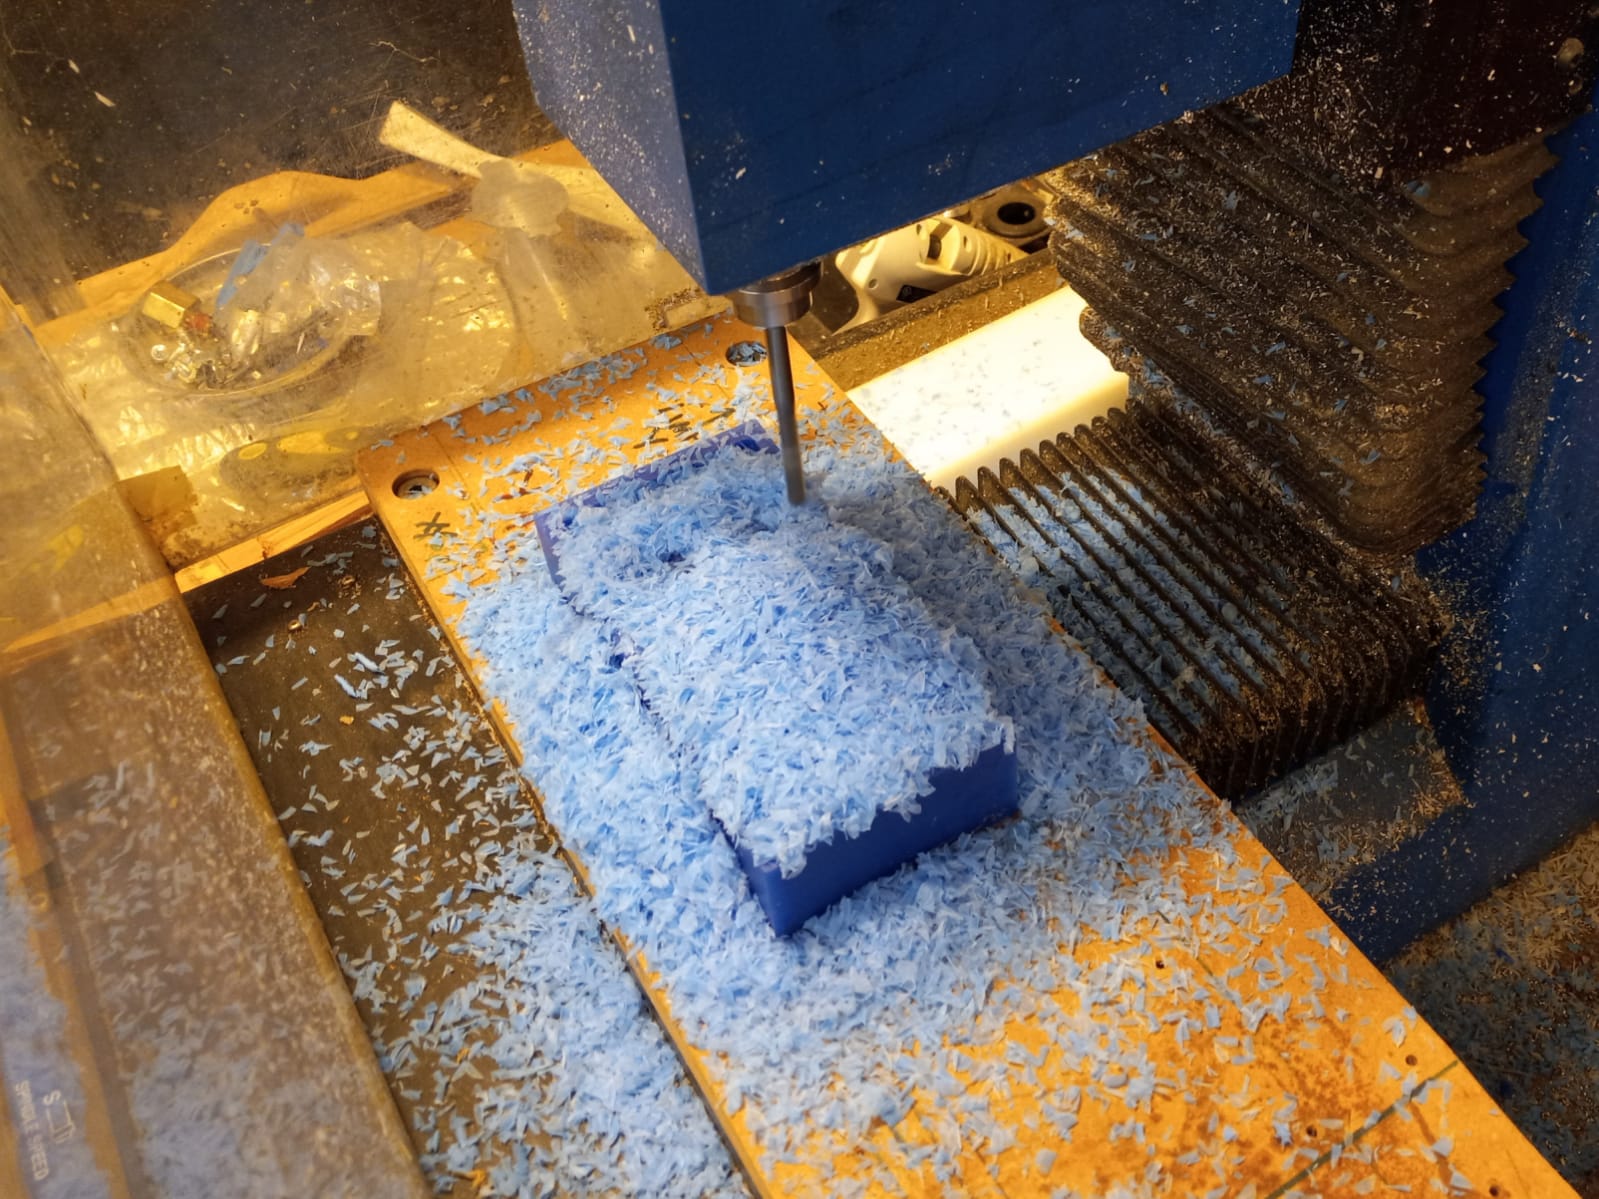
Wax Mold Milling
The 6x4x1.5" wax mold is glued onto a flat MDF spoilboard. Intelitek seems to work much like the SRM 20, with physical origin setup and manual tooltip changes. Jen demonstrated how to set Z zero using a paper and a nice flat spot on the spoilboard as shown on the archshop machine tutorial page. The milling itself took a lot longer than any other subtractive processes used thus far.
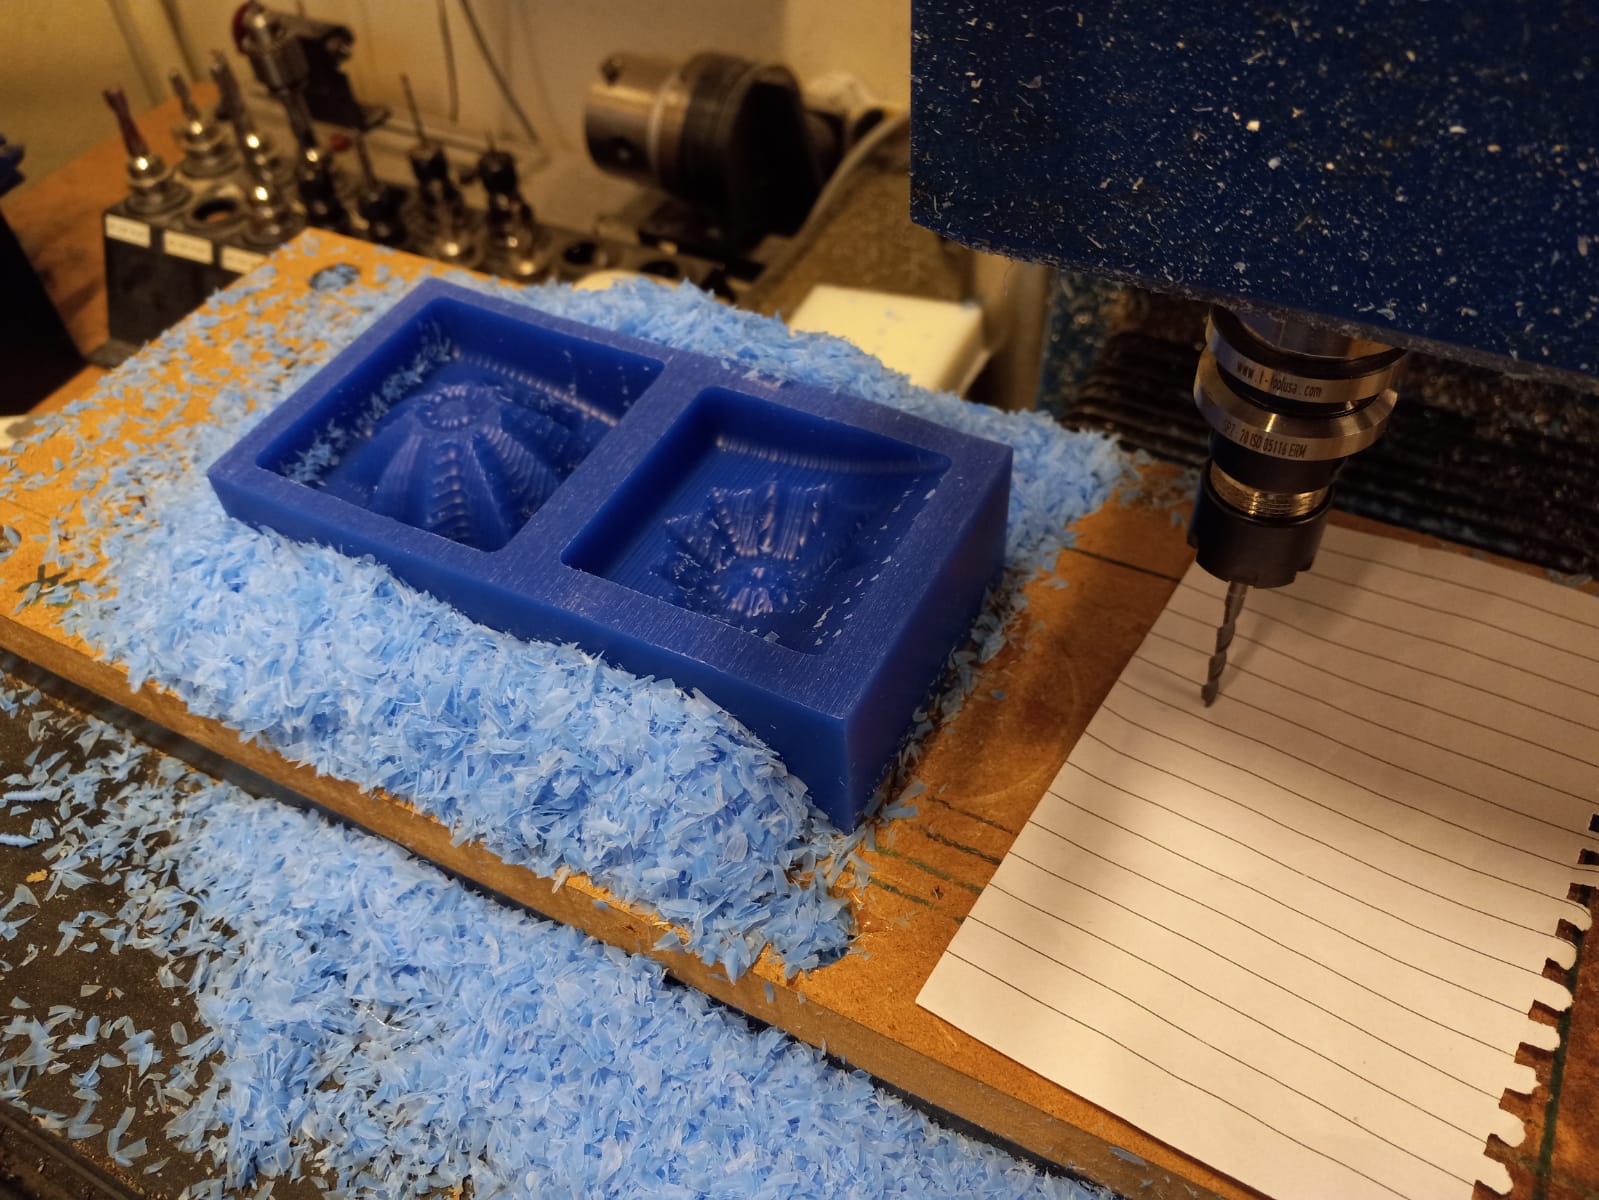
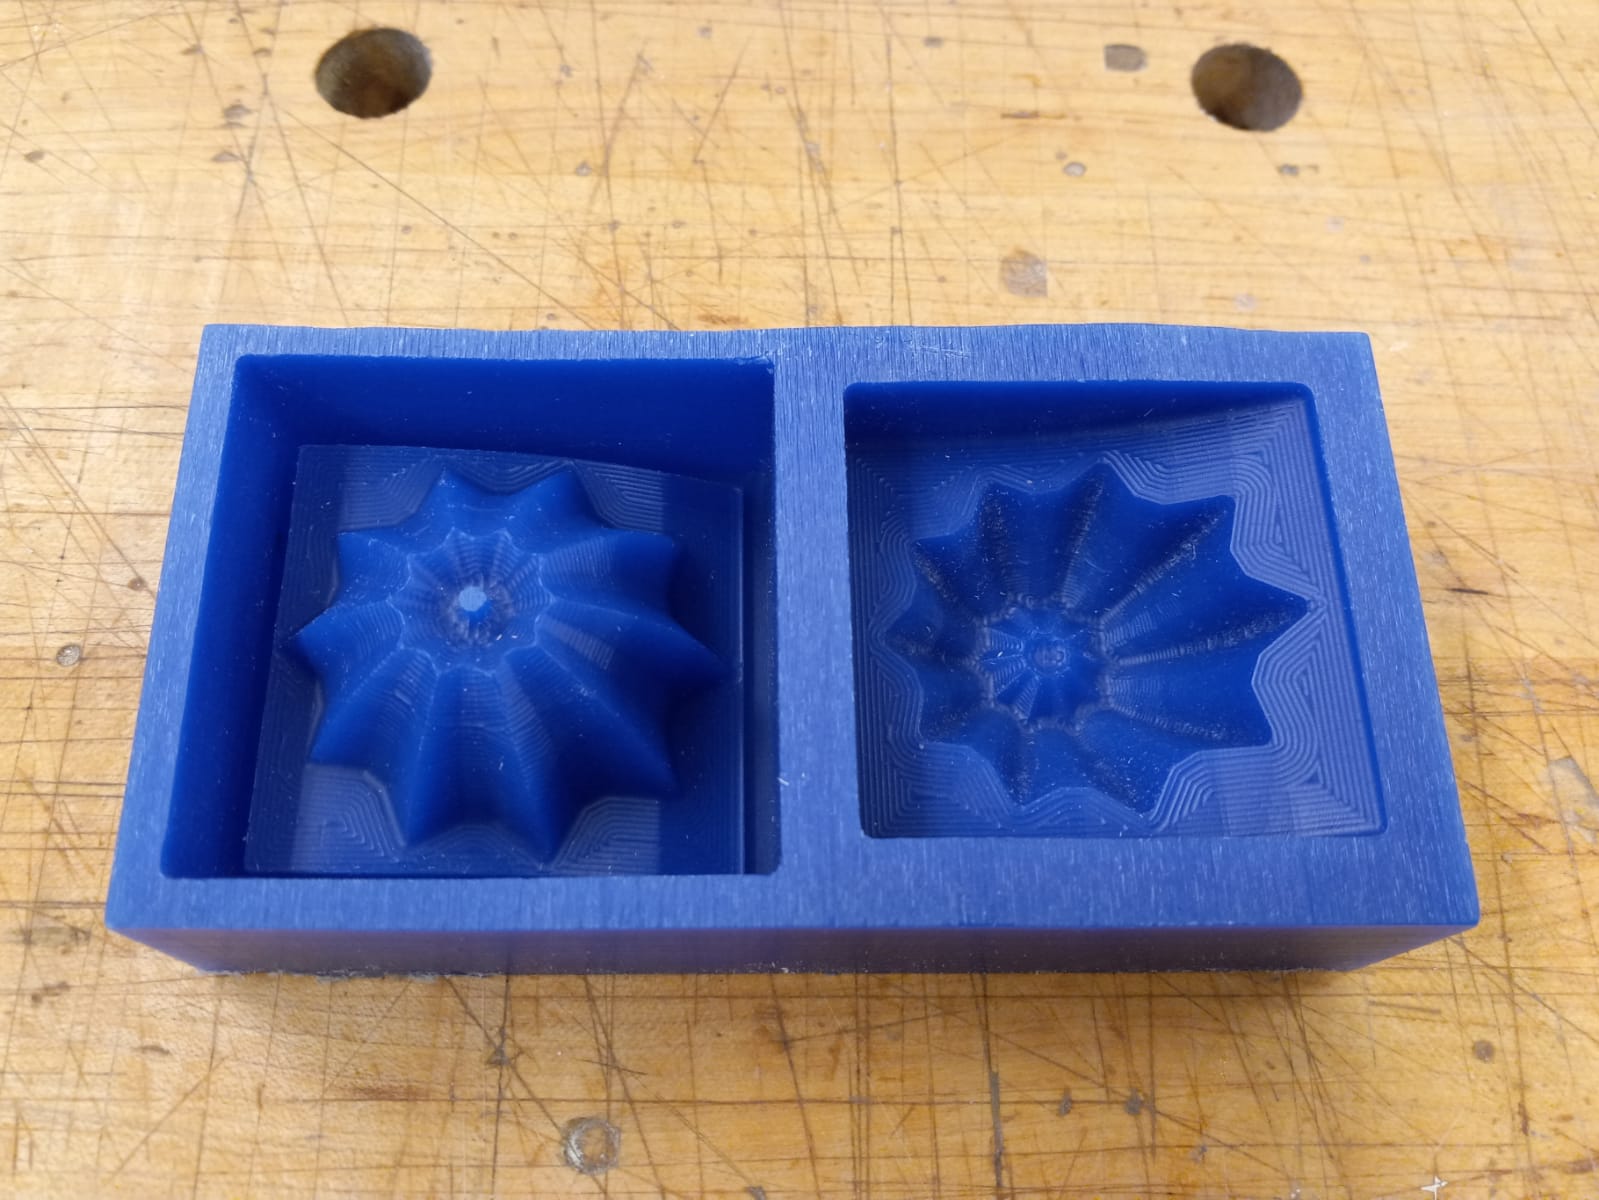
Preparing to Cast OOMOO
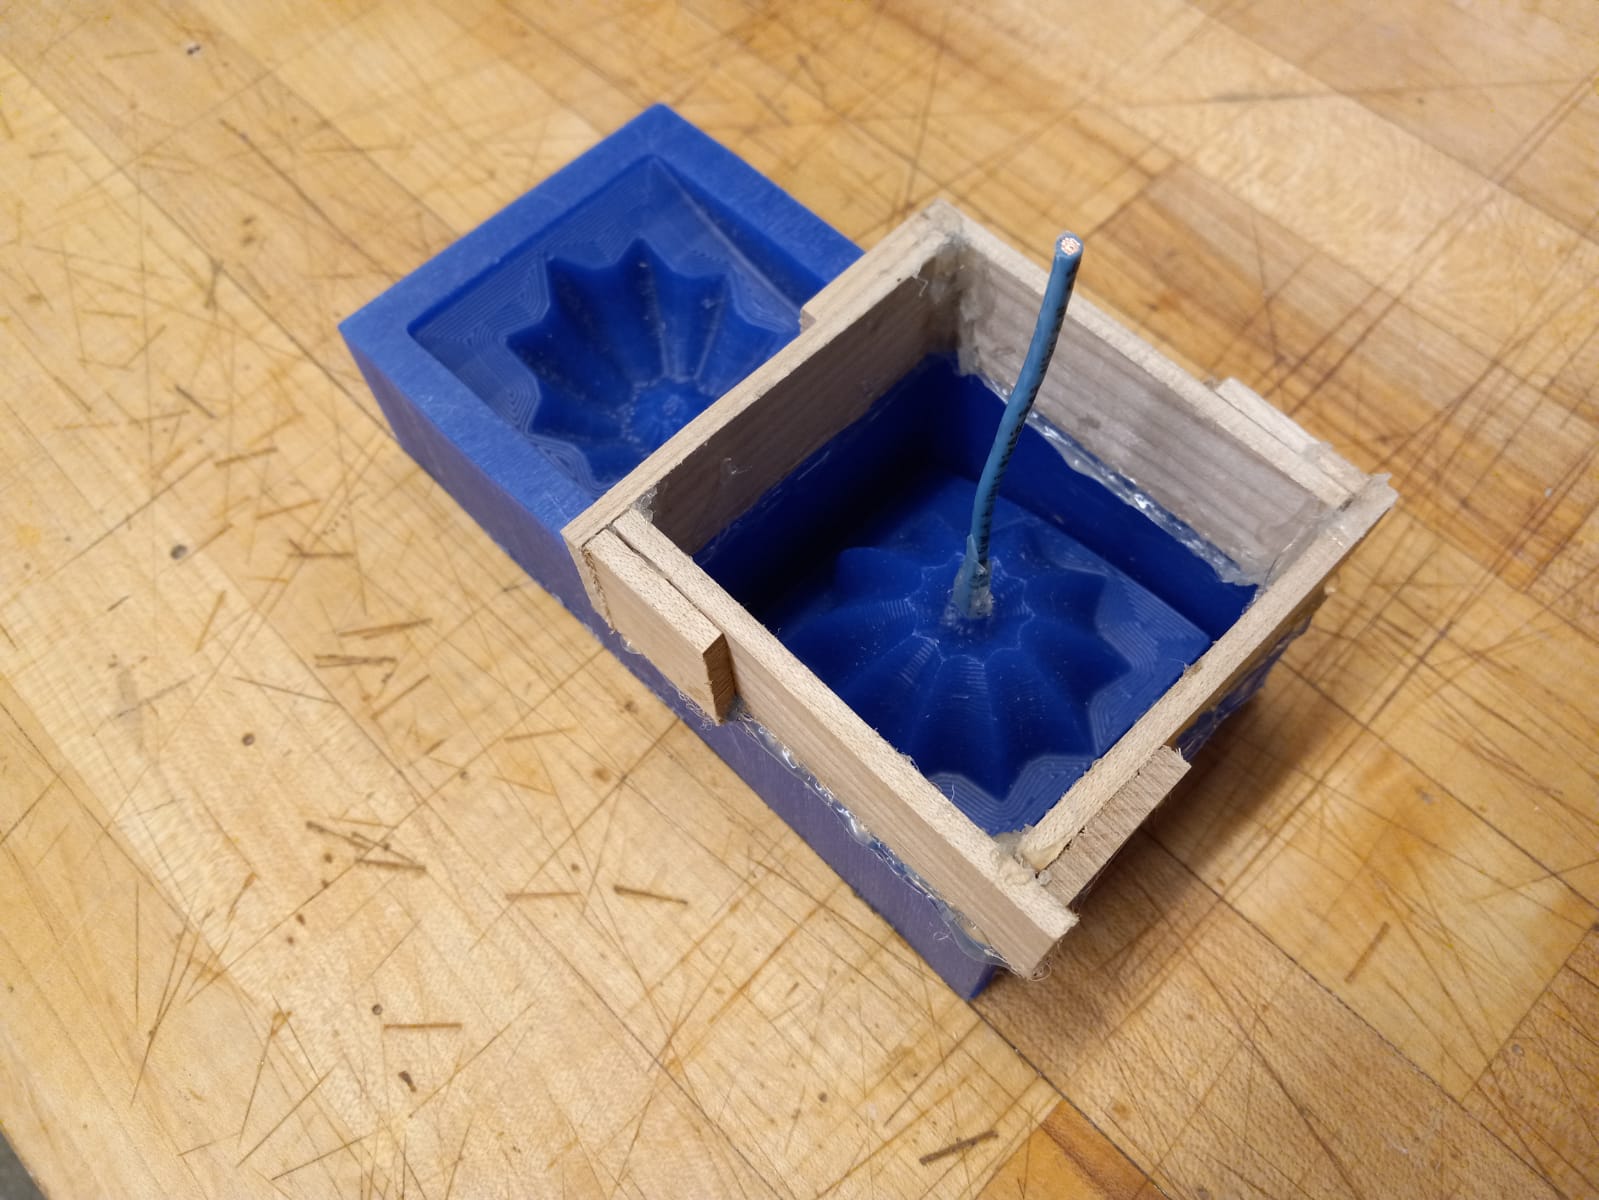
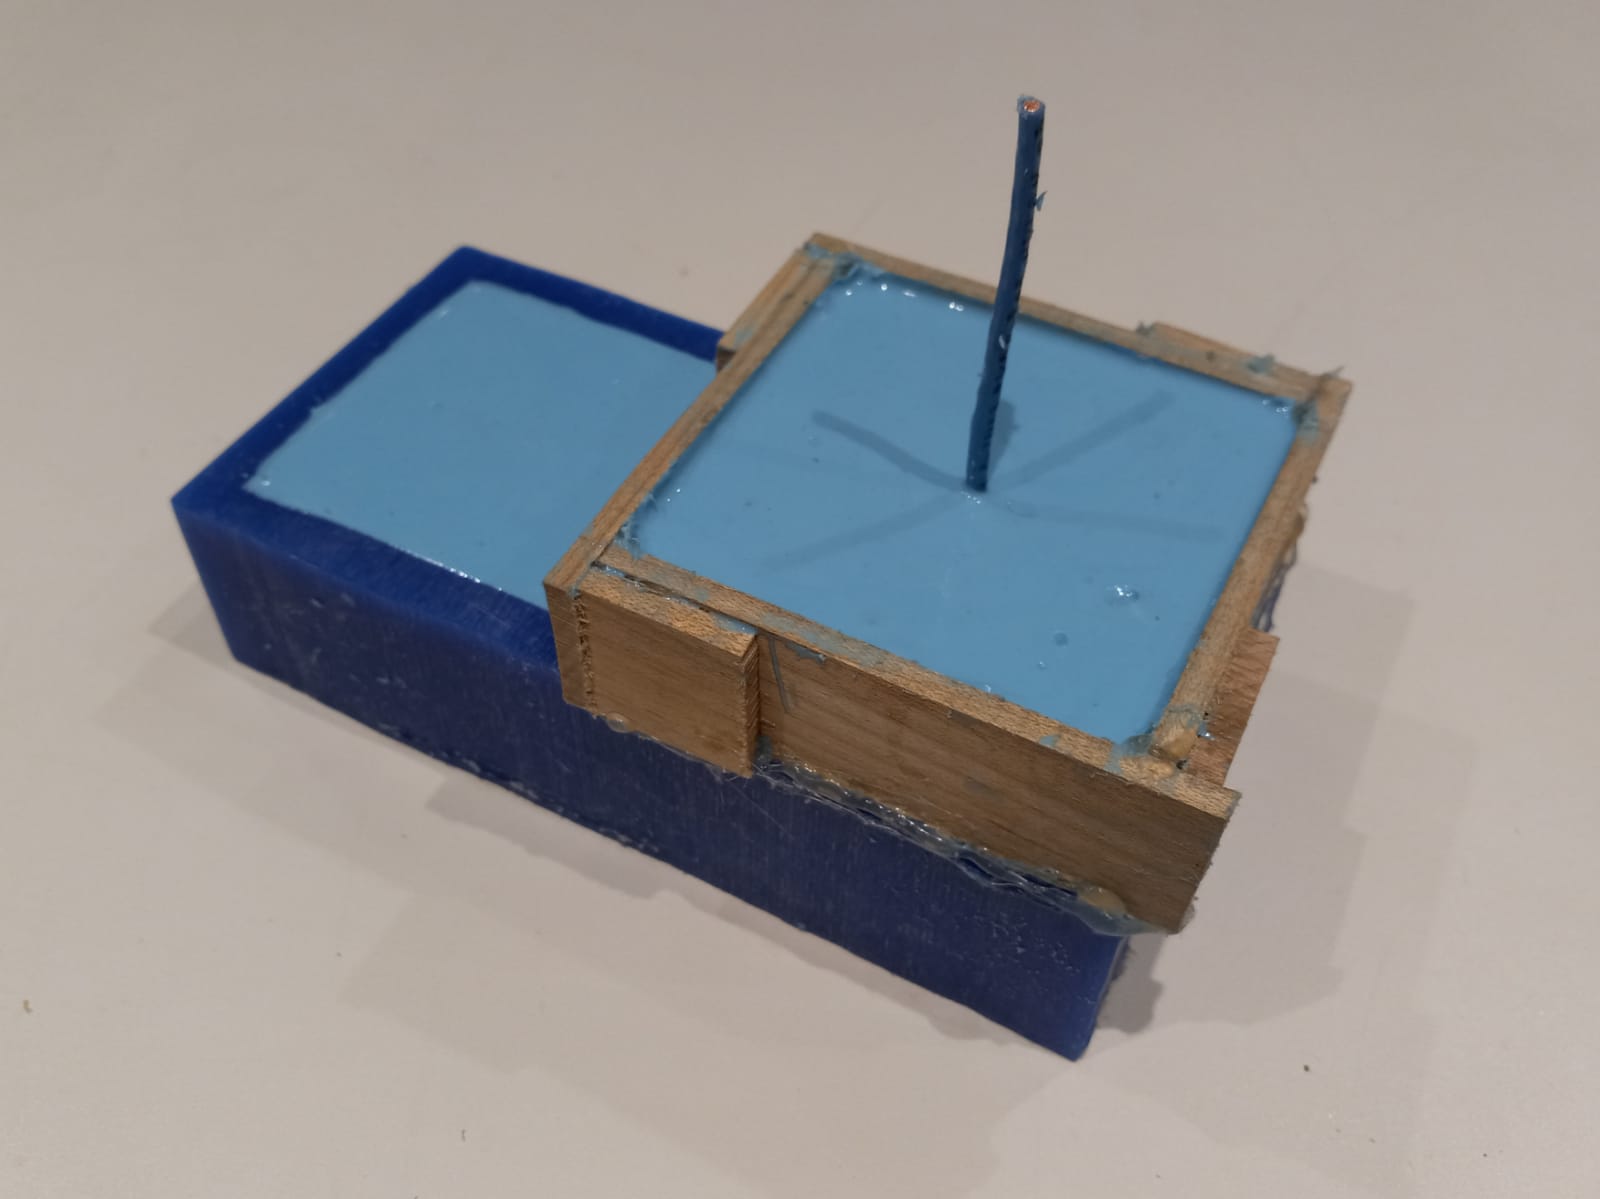
The mold surfaces came out looking pretty good. I was satisfied with the level of detail achieved. Even the linear patterns left by the toolpaths added some intricacy to the mold. There was one big problem however. Unfortunately, I hadn't embedded the casting surface deep enough in the mold to allow for the eventual OOMOO cast to have a sufficiently thick base. OOMOO seems to tear easily too as evidenced in the samples in the shop, so I decided to build up the sides of the surface using wood scraps from the neighbouring shop. I used superglue to paste these sides, which also helped plug potential leaks because of the uneven wax surface. I also increased the height of the sprue using a found wire. The resulting mold can be seen below.
Casting OOMOO, then Hydrostone
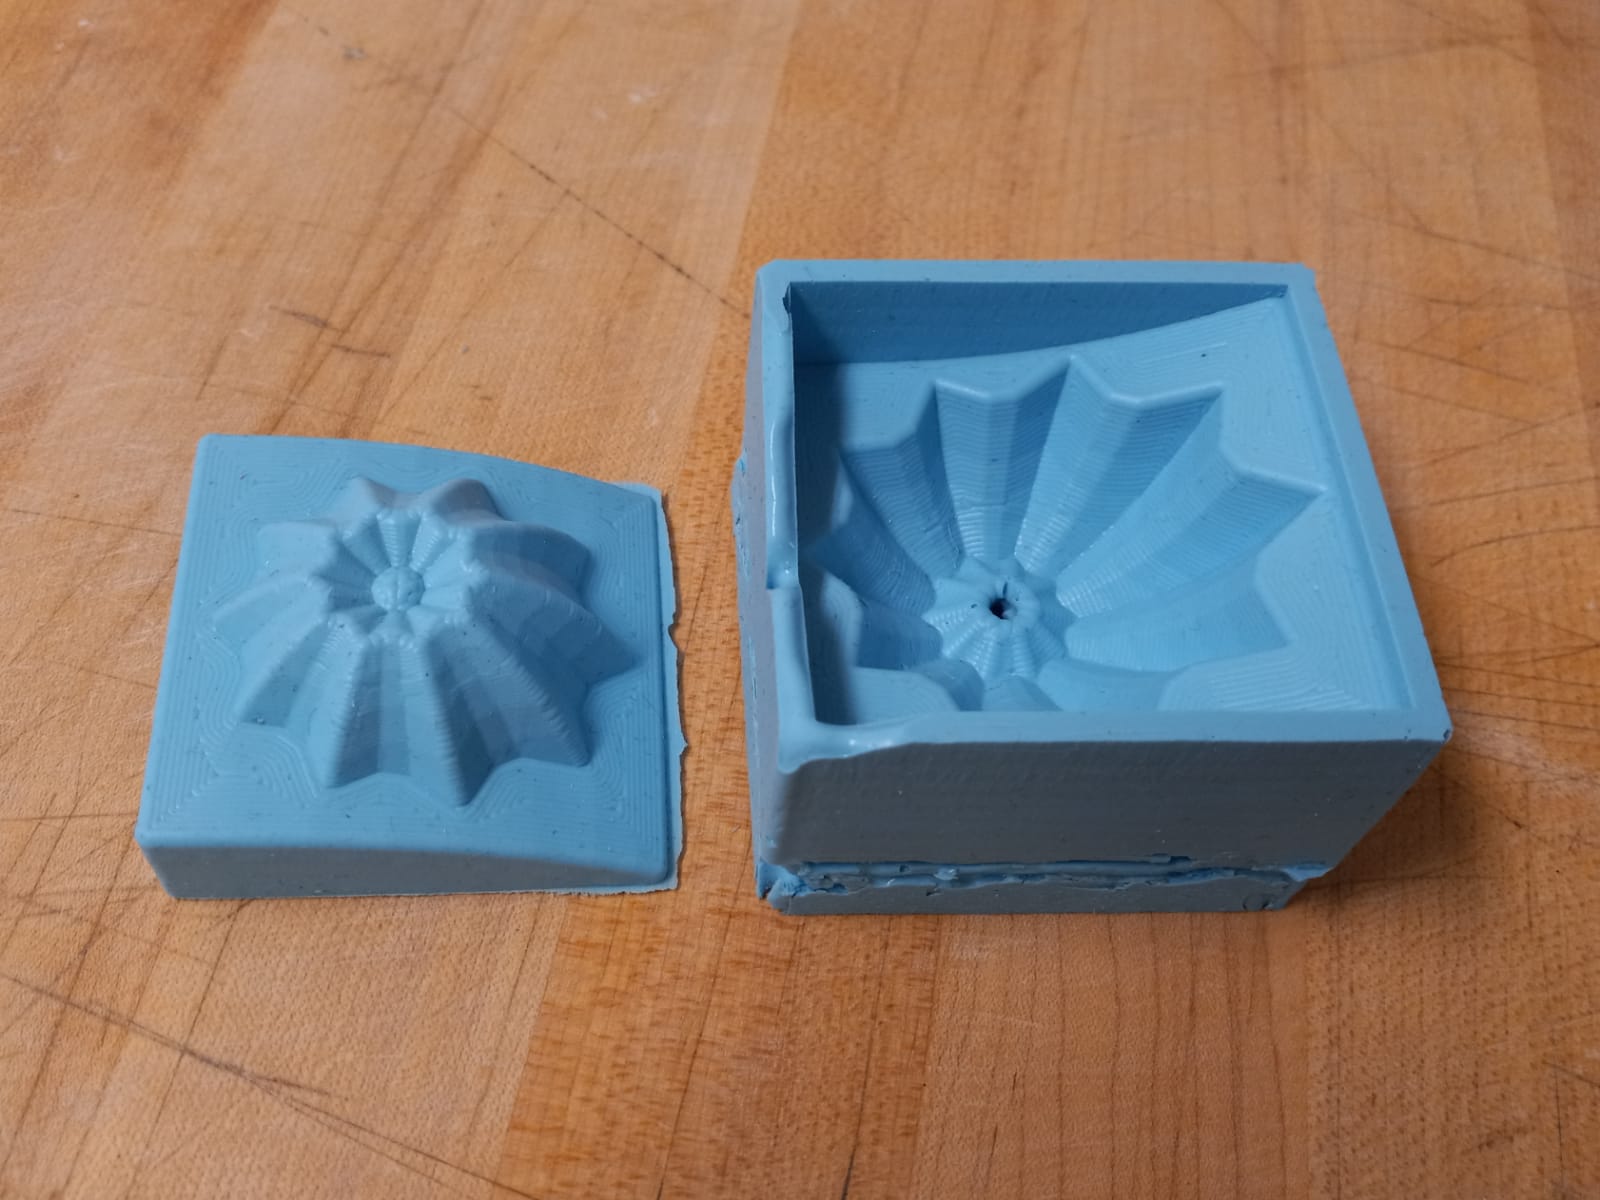
This part needed patience. I poured the OOMOO components into cups in a thin flow to avoid bubbles, stirred them separately and tried to get more bubbles out of the them, and then mixed them together using the same pouring process in 1:1 ratio. After more stirring to release bubbles and achieve an evenly coloured mixture, I poured the OOMOO into the ready molds. Steady, even, thin flow.
The resulting molds came out okay, but despite the caution, there were some small bubbles. It was very diffcult to remove the mold with the added edges because the superglue made a bounding rim that locked the OOMOO cast into the mold. Lots of tugging and pulling did the job. The indentations made in the cast show this superglue edge.
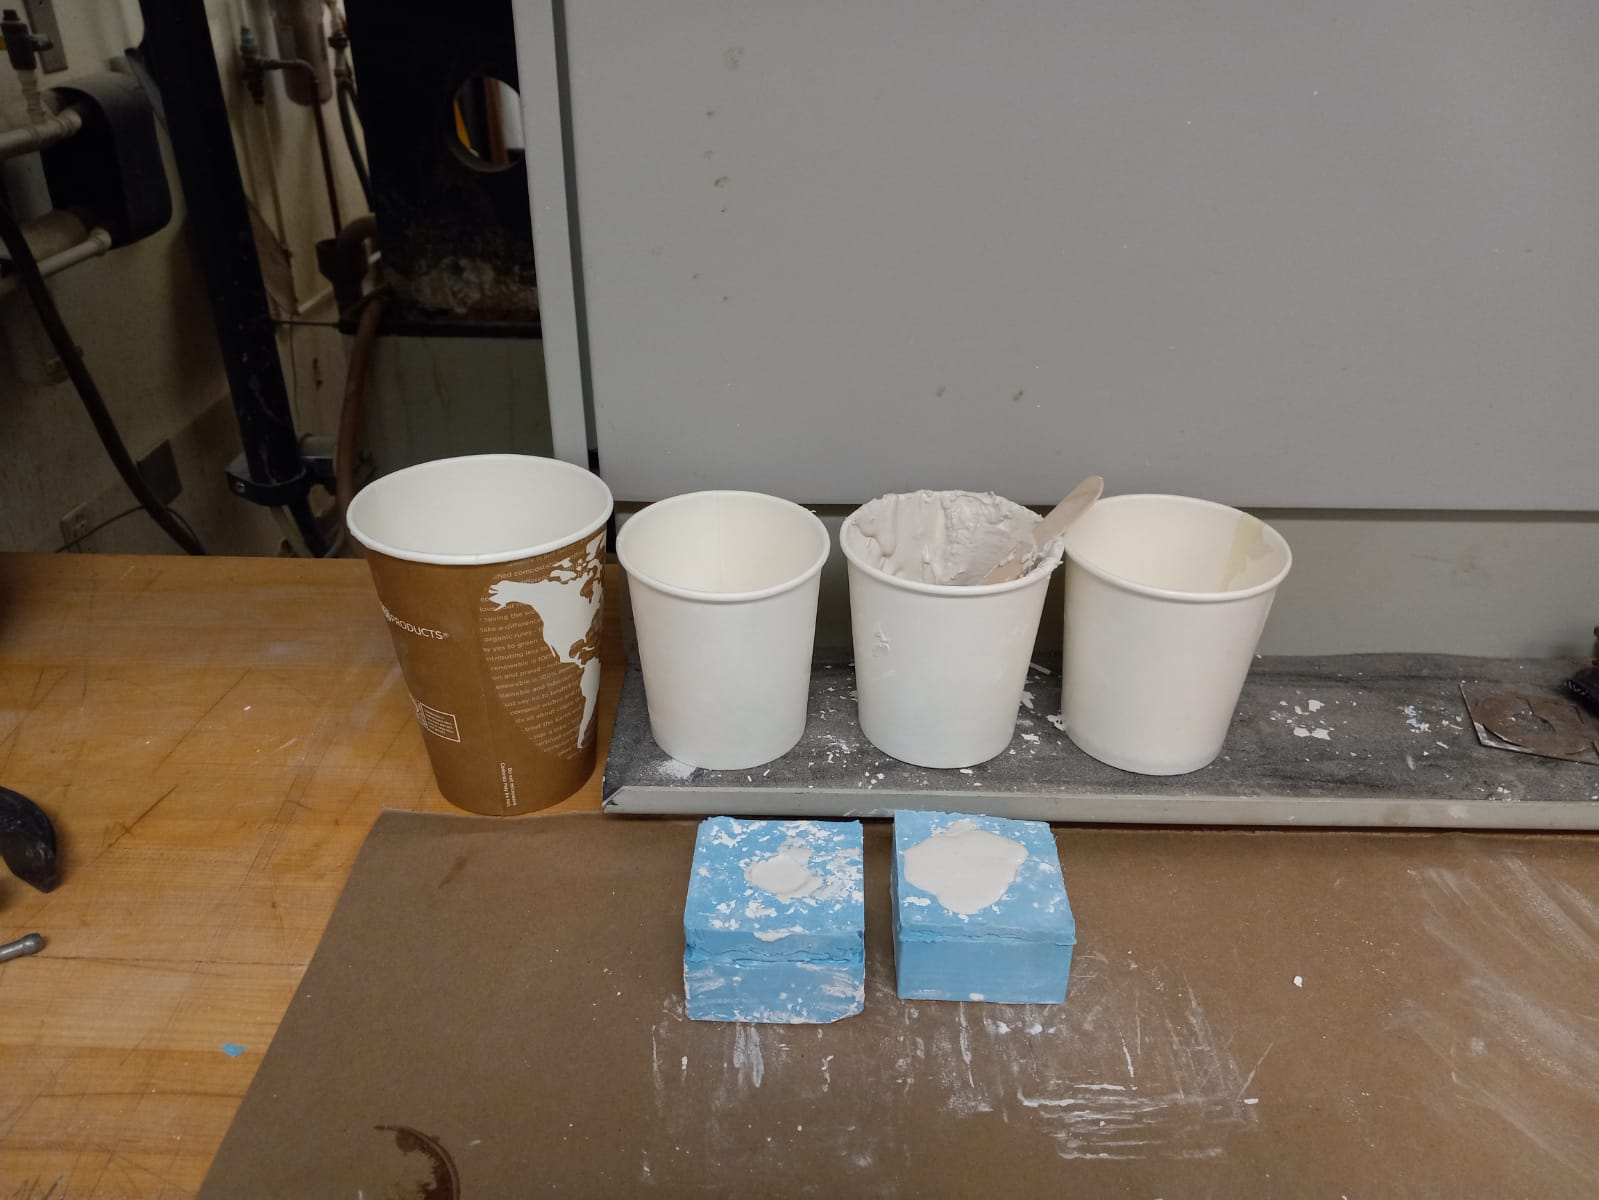
As per various internet sources, hydrostone casting needs about 1 part water and 3 parts hydrostone. This does not however result in a mixture that has the runny yogurt texture I was looking for. So I started adding water in small quantitites to achieve the texture. The stirring and removing of the bubbles was similar to the OOMOO mixing. I tapped the cup on the table to further encourage more bubbles out. However, the sprue wasn't big enough for pouring this mixture in, even though I cut it wider. So I poured the hydrostone mix into the hollow mold and pressed the other mold into it, squeezing the contents out until they fit into place and the surfaces were flush. Messy.
I checked on the mold about 2 hours later, much longer than recommended for the original 1:3 hydrostone mixture. Maybe I should've accounted for all the extra water I added to make the mix pourable, because when I opened the mold, the cast cracked. It was still vaguely wet and crumbled entirely the minute I took it out.

Second Hydrostone Cast
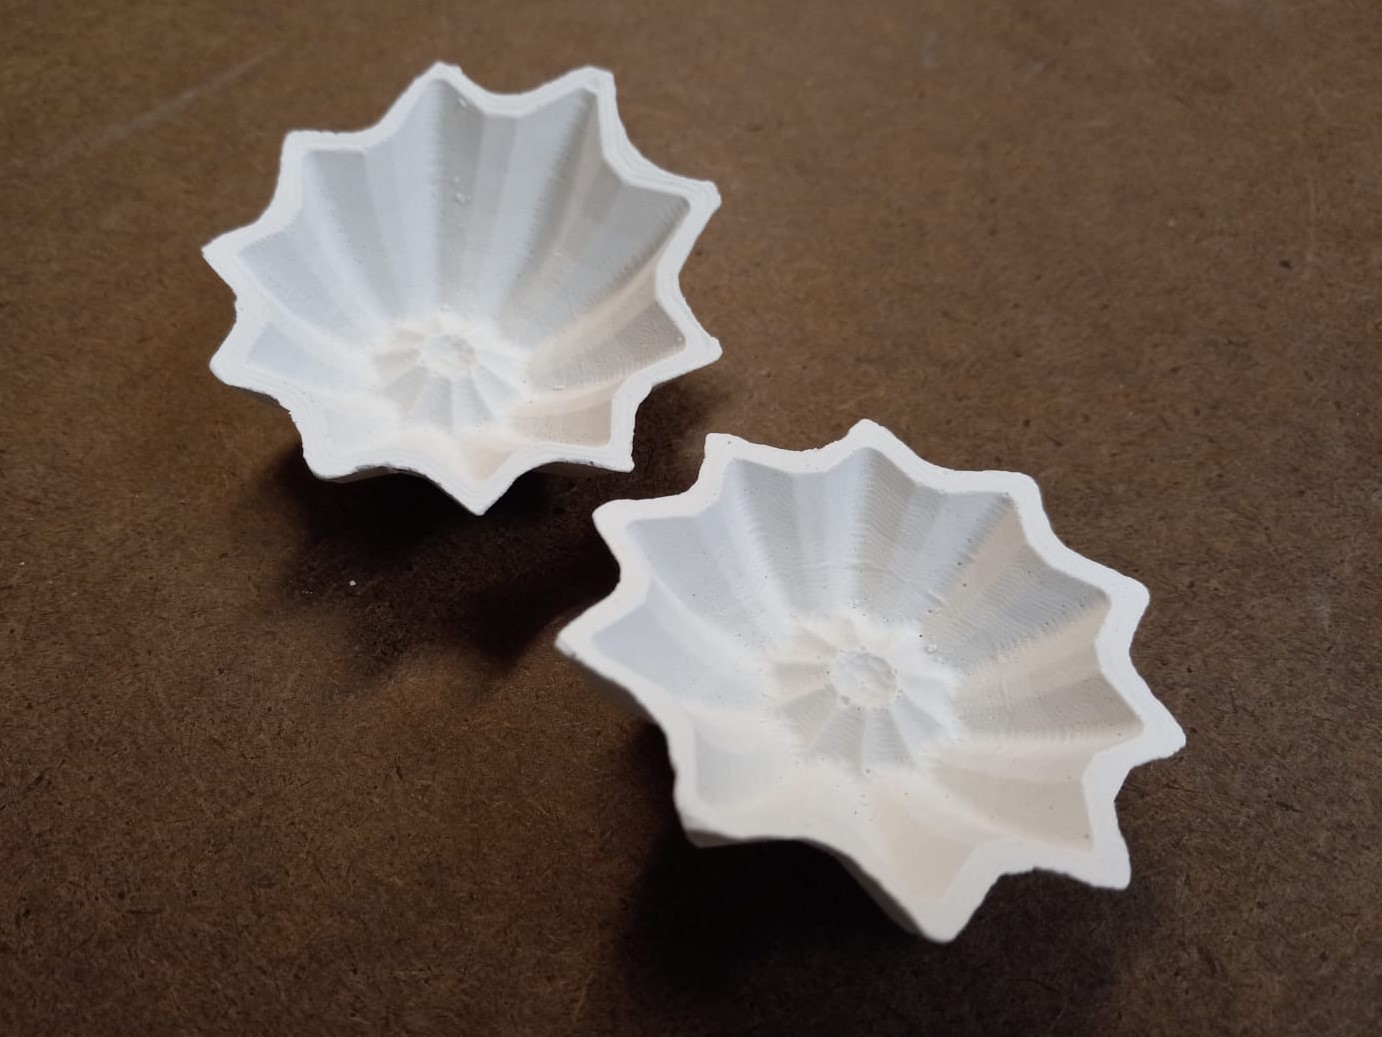
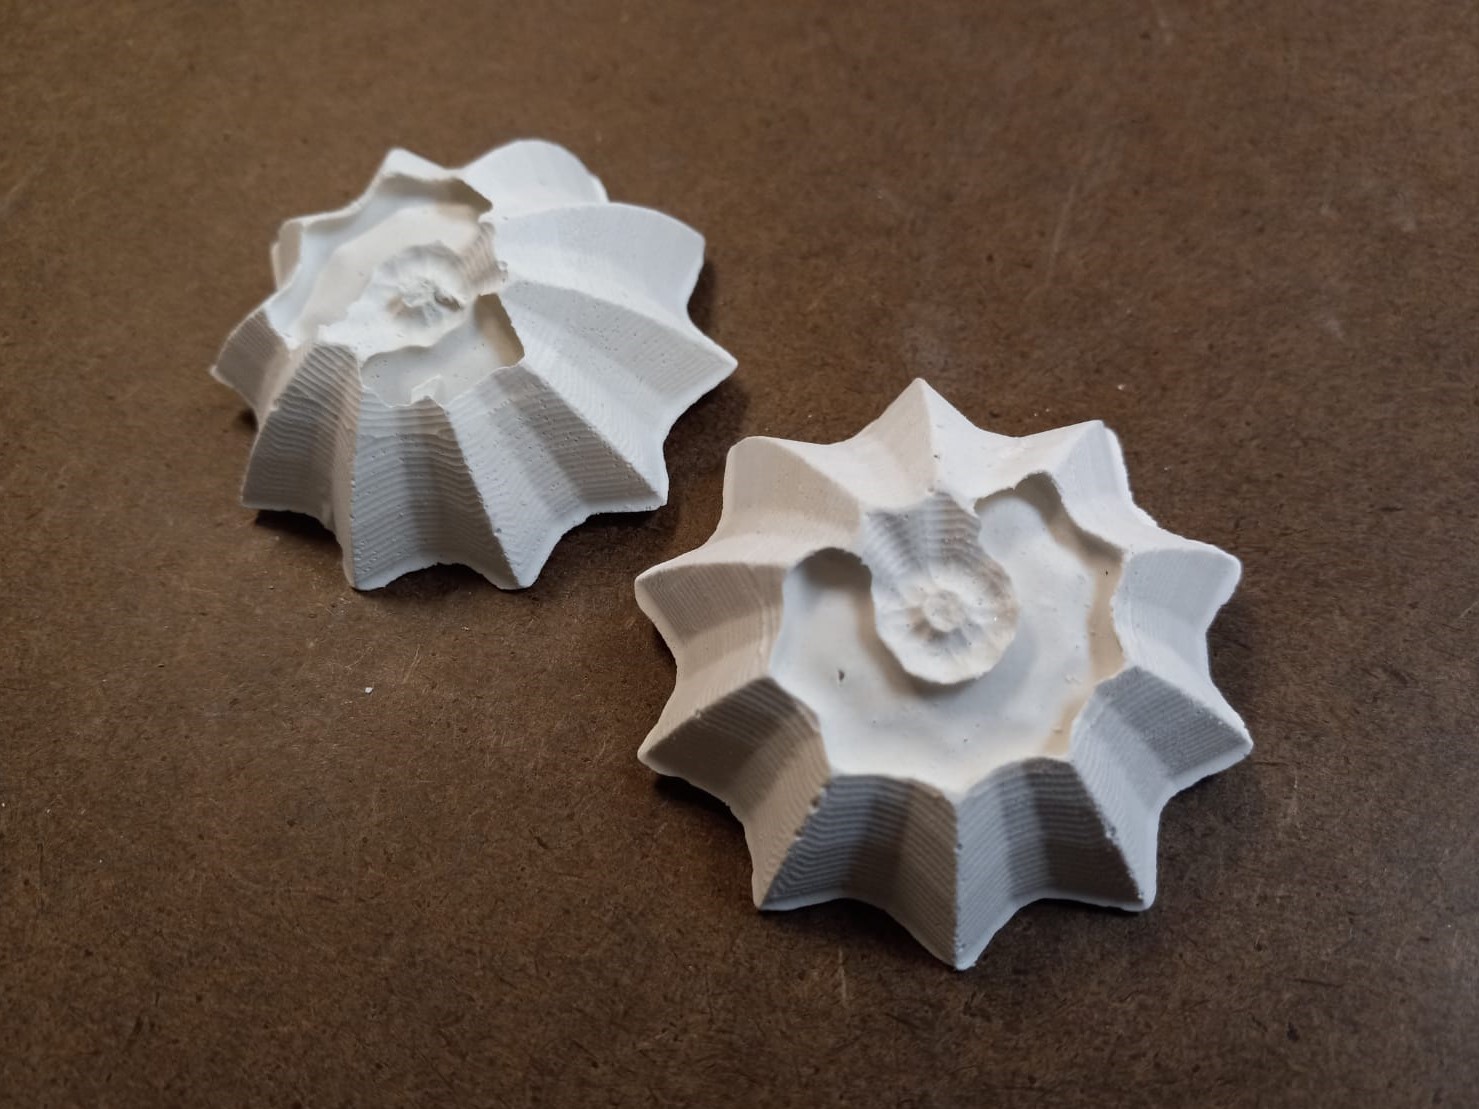
I made another set of OOMOO molds to speed up the hydrostone casting and testing to achieve the intended product. I added an airhole in this one by supergluing another wire onto the wax mold. For the hydrostone, I followed the same casting steps as described above, but this time left the mold undisturbed for over 2 days. This time around the casts came out mostly intact but the bottom of the diya was hollow somehow. I realized I may have squeezed out too much hydrostone. But the casts were still pretty. They looked like weathered shells!
Third Hydrostone Cast
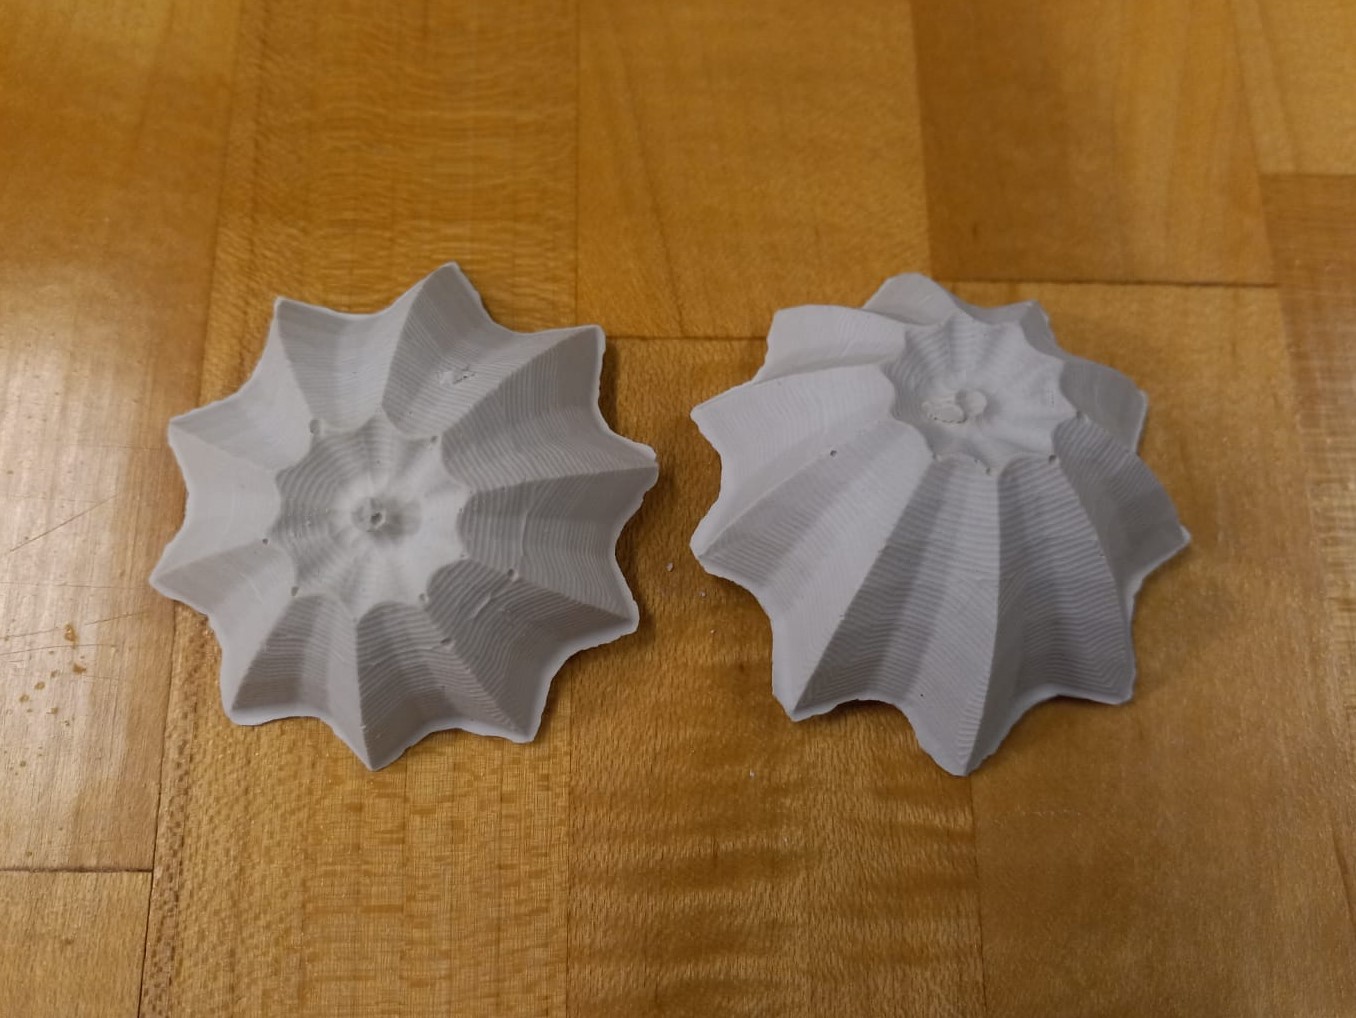
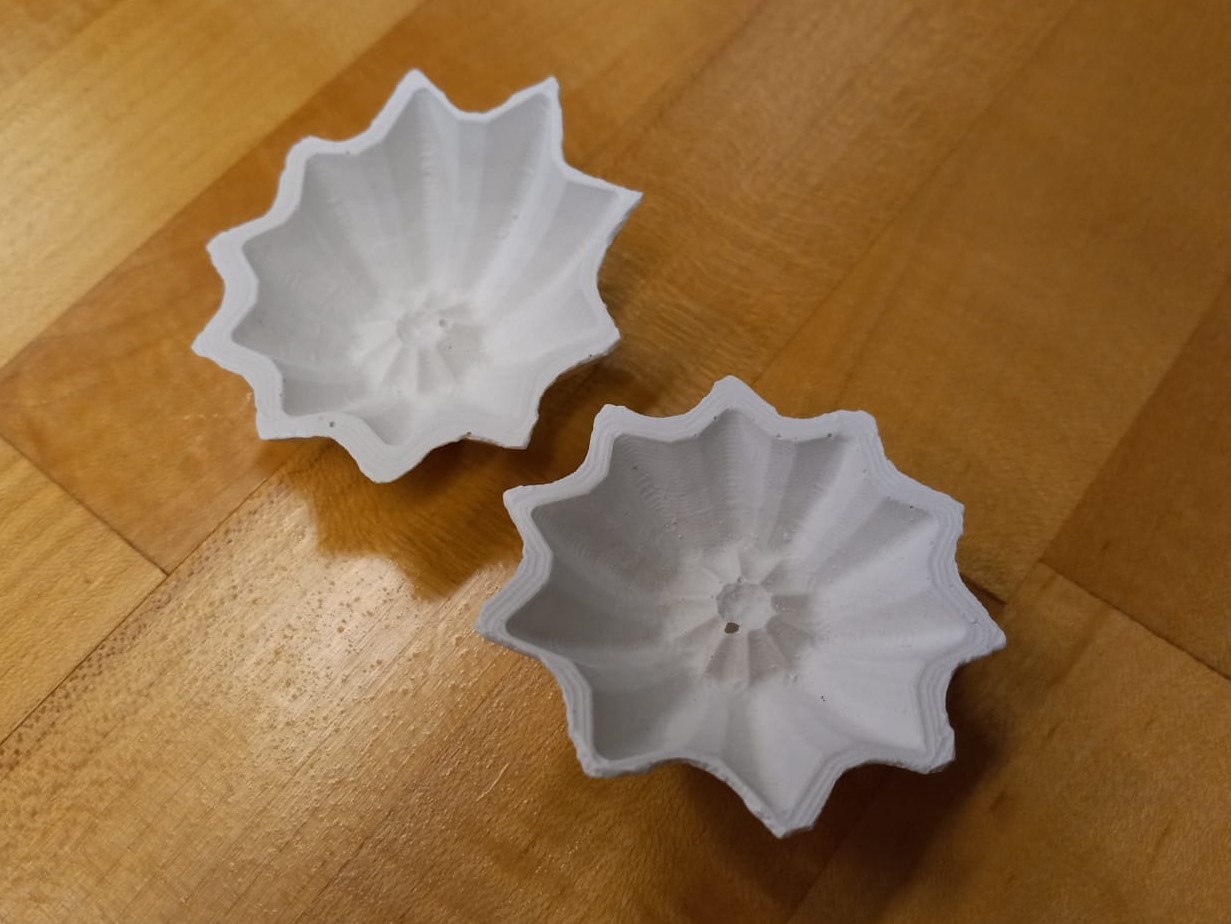
This time I was careful not to squeeze out too much hydrostone. And, I decided to flip the orientation of the mold before leaving it for setting. This was just to test if somehow the mixture was settling at the bottom of the mold, leaving the top a little hydrostone-less. After more than a day of setting, I checked on the molds and was happy to see that they came out well. I had to sand the edges a little remove the excess. I guess it was the too much squeezing rather than the orientation of the setting mold that had caused the previous casts to have crumbly bottoms. They are a little delicate for the use I'd imagined for them, but that's a design note for the next molding/casting attempt.
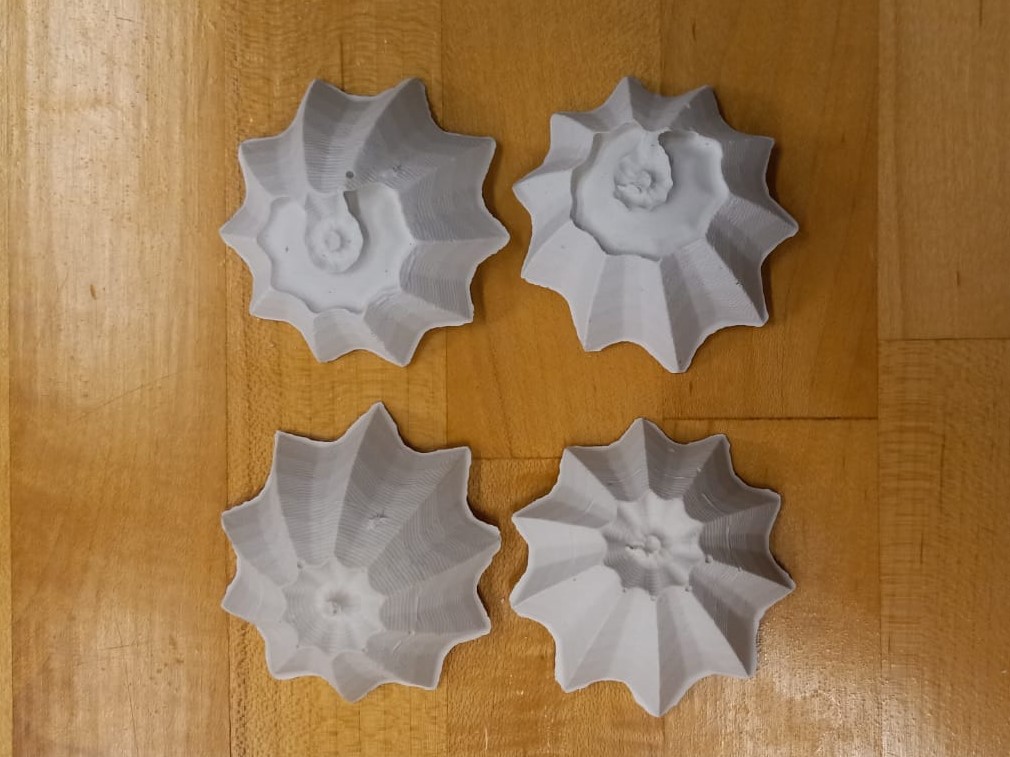
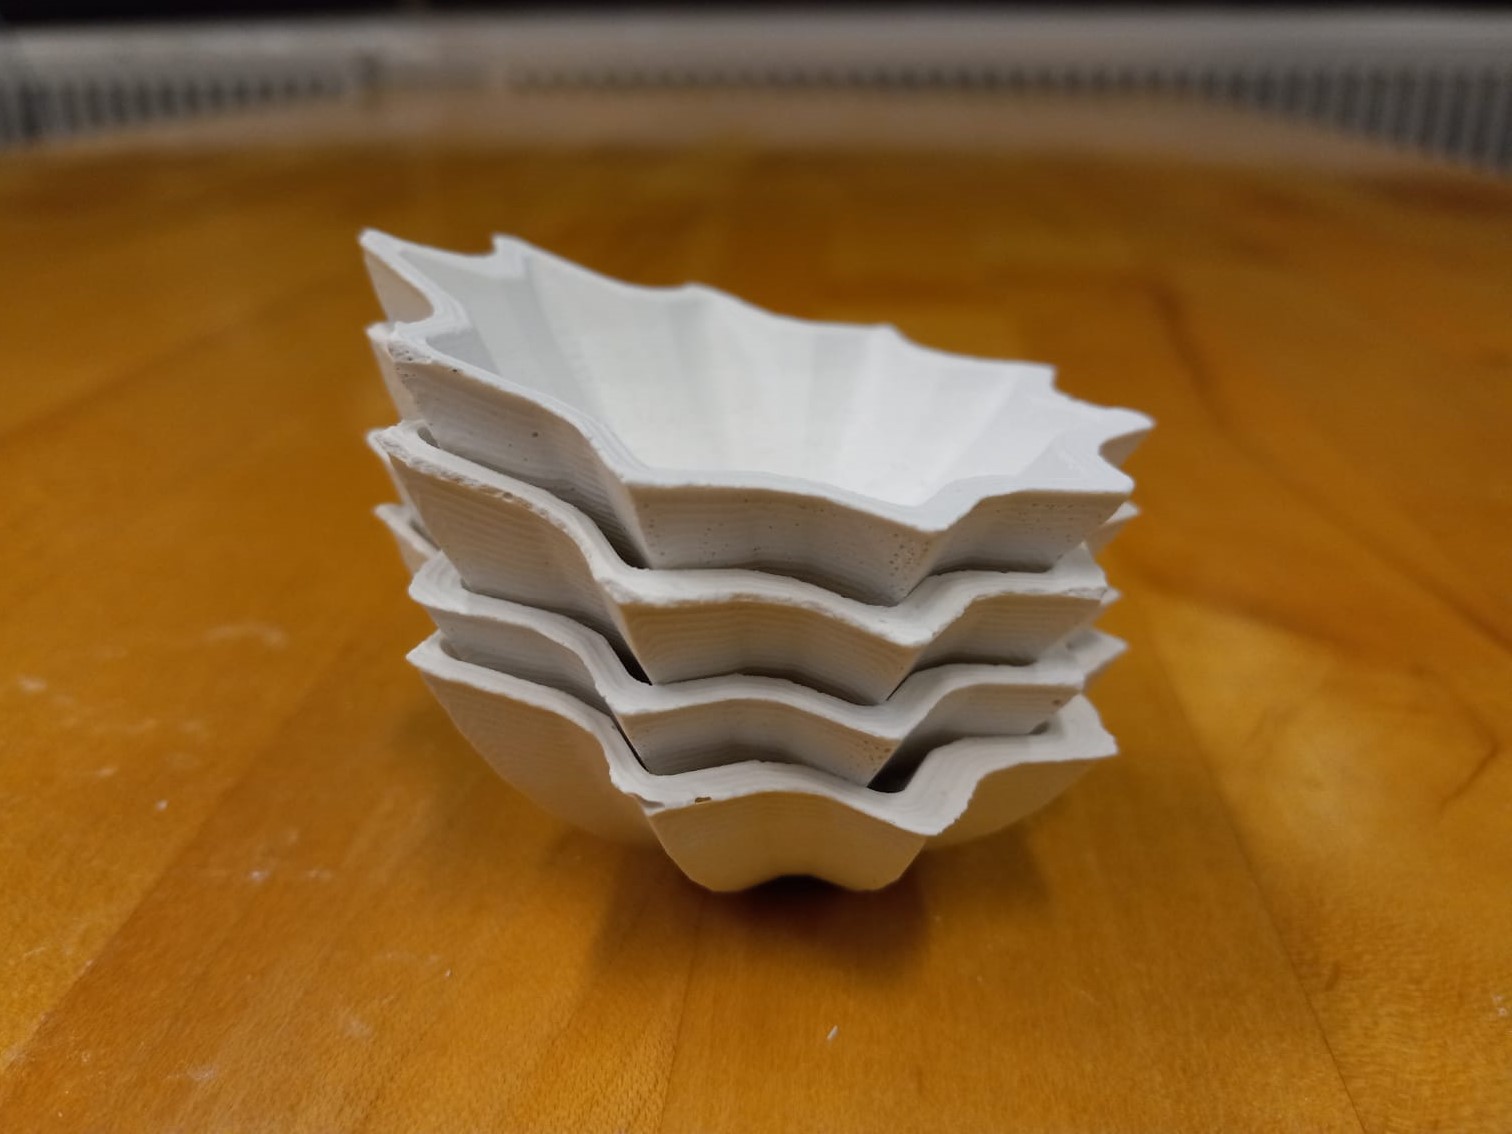
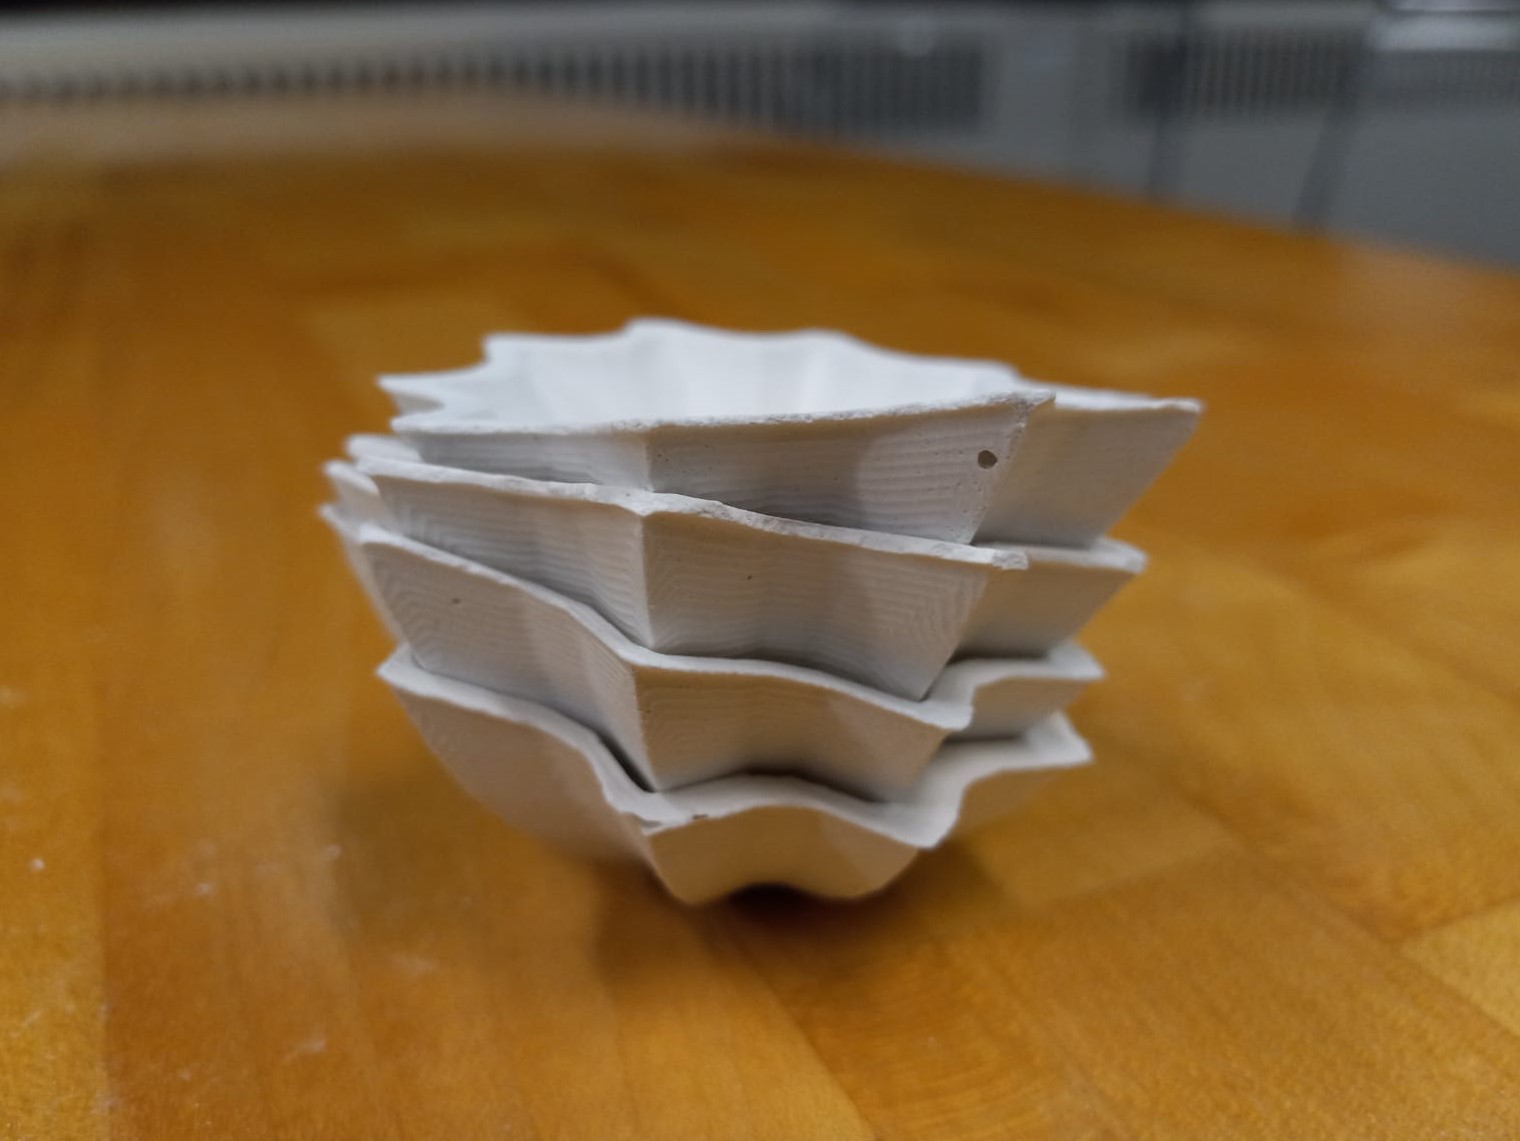
Stackable Diyas
Finally, I stacked my four surviving casts to test if they fit well and if the stacking effect I'd imagined while designing them actually shows. I like the assymetry. The rotating and staggering of the diyas while stacking does result in interesting shapes (more so in plan than in elevation), but nothing too dramatic.