INTRODUCTION

This week was on gaining skills for 3D scanning and printing. The assignments were two-fold; a group assignment where we characterize the design rules for an FDM 3D printer using PLA as the go-to filament for overhang, clearance, angle, bridging, wall thickness, anisotropy, surface finish, infill, tapers etc. The individual assignment consisted 3D scanning something (with optional printing) as well as modeling and 3D printing something that can not be made subtractively.
Weekly Struggles
Where I struggled most with this week was to choose something for scanning and it feels like I spent a good and unnecessary amount of time on finding something cool, useful or meaningful to scan. And did I succeed? Of course not! Another struggle was to access a high temp 3D printer or hack into an existing one by swapping the thermistor kit so the hot end would go up to 400-450°C. I wanted to work with PEEK due to coming across this notoriously cool paper. I will talk more about this paper and at least a few simple initial tests I managed later in the Individual Project section. I had high hopes for this one, but I ended up with presenting my "backup" 3D print ast the individual project. Nevertheless I will totally explore this 3D printed light-actuated shape-memory PEEK in the coming weeks as it relates a lot to my final project in light activated polymers!
GROUP PROJECT
1. Design Rules for Prusa Mini
For this part of the work, as a Prusa-lover, it was no brainer that I was going to use the Prusa Mini or MK3S+ at our lab. I also felt quite privileged having access to two awesome printers this week, nevertheless having power outage at our lab several times didn't help much. The tests were based on print files provided as the course material to determine the design rules for an FDM printer of choice.
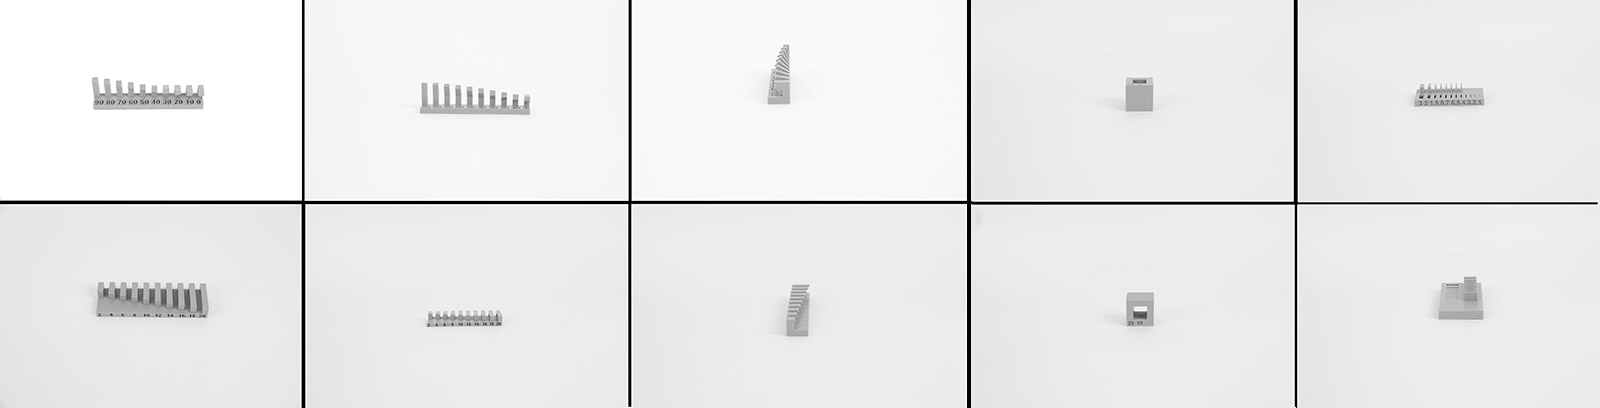
1.1 Clearance
Together with Wedyan and Liu, we characterized the clearance to be 0.15mm.
1.2 Angle
The prints from Prusa mini came out perfectly without support at 60 degree angle with the new firmware upgrade as this used to be around 45 degrees which is very impressive!
1.3 Overhang
For the overhang test, the filament started to detach for the 6mm long right angle overhang. The angle test showed that the printer performed well up to the 90 degree overhang.
1.4 Bridging
The bridging test came out pretty neat from Prusa mini, without any longitudinal strings which shows that the print parameters were set nicely.
1.5 Anisotropy
We tested a similar rectangular structure by interfacing different faces of the geometry with the bed. When we interfaced the larger surface area side on the bed, the print was more robust to mechanical stress, while when we interfaces the smallest surface area on the bed, the print was more prone to breaking in the Z axis.
1.6 Surface Finish
In the past years when I was trying to print with ABS or PETG, I found an easy hack to safely and easily remove the print from the bed without causing any issue to the print and neither the bed after doing some research in the Prusa community. One print geek was covering the bed with polyamide tape and calibrating the Z accordingly, and printing directly onto polyamide. This was a great finding and saved my prints and own Prusa printer since then! Another biproduct of this process was that the surface of the print that is interfacing polyamide would come totally shiny! So I showed Wedyan how to achieve that by printing a simple cube to see the difference in mattness/shinyness across the different faces of the print.
INDIVIDUAL PROJECT
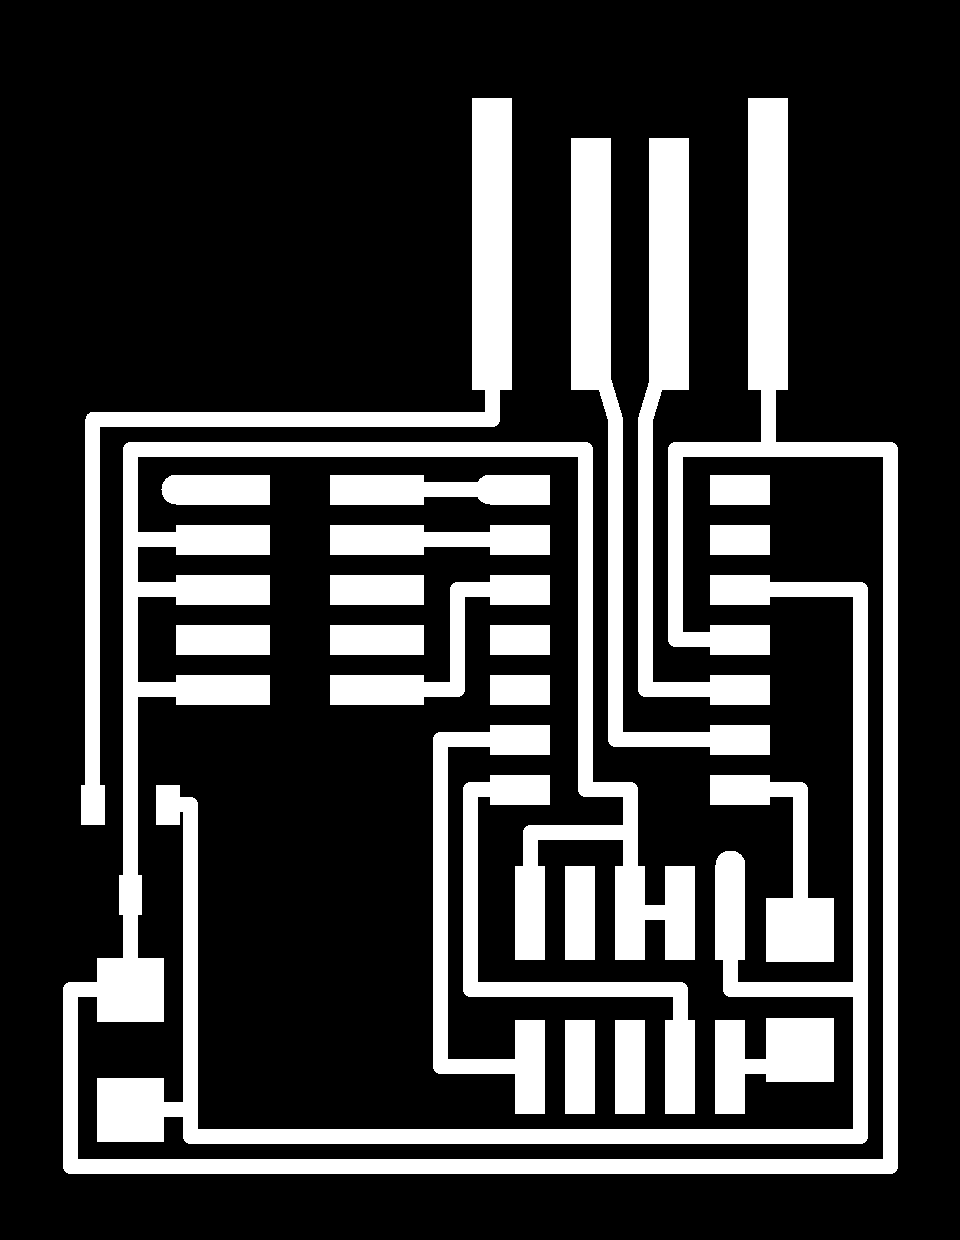
This week’s individual assignment was to fabricate Neil's "Hello World" board in-house, stuff it with electronic components and finally program it.
1. 3D Scan Something
Not sure where to start. After having two days of blank mindedness on what to scan, I settled on a BIG project - scanning the Shima Seiki MACH2X at our lab, to make a small 3D print of the knitting machine and present it to our Japanese partners we work closely with. However I ended up with one might call "shima with a tumor". This week, I was self-training on the knitting machine and managed to pull off 4-5 different knit outs (tapping myself on my shoulder) successfully. Due to the success I achieve last Sunday with being able to both code knit data and operate a highly complex machine, I thought, what could be better than scanning the machine to celebrate the success. I was spectacularly wrong and naive.
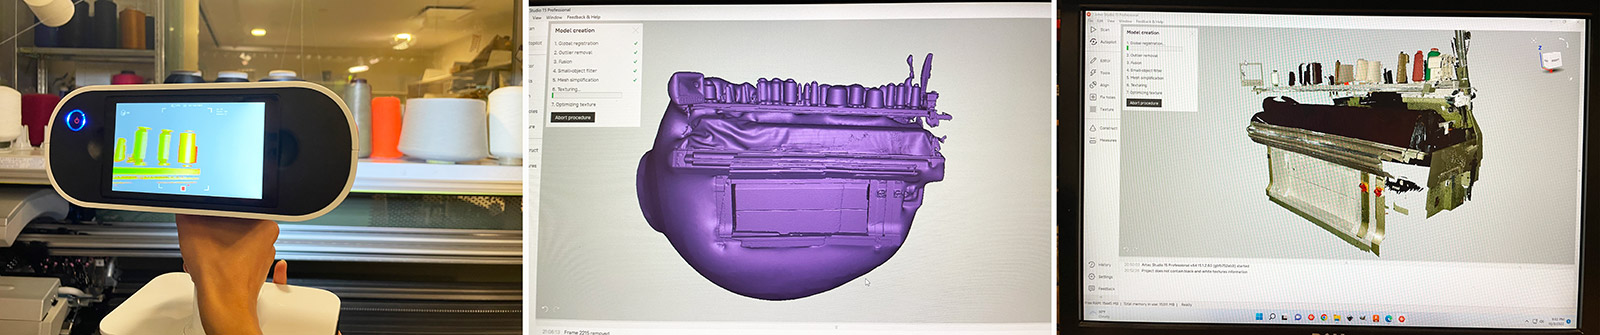
1.1 Scanning Shima Seiki MACH2X Industrial Knitting Machine
The first step was similarly to attach the plate to a flat and clean cutting bed using double sided tape. Next step was to fit the 1/64" end mill loosely to the head prior to setting the origin for etching (fig a). Using MODS interface, we set the origin to the part of the plate which would reduce the amount of waste material, but also provide us enough distance to etch and cut later. The Z axis was set at 8 mm, afterwhich we dropped the end mill to touch the copper plate and jammed it in place using the allen key. Once this step was complete, we uploaded the hello world traces .png file to MODS for etching the conductive traces and let the machine do its magic (fig b). Once etching was complete, we vacuumed the dust and particles (fig c).
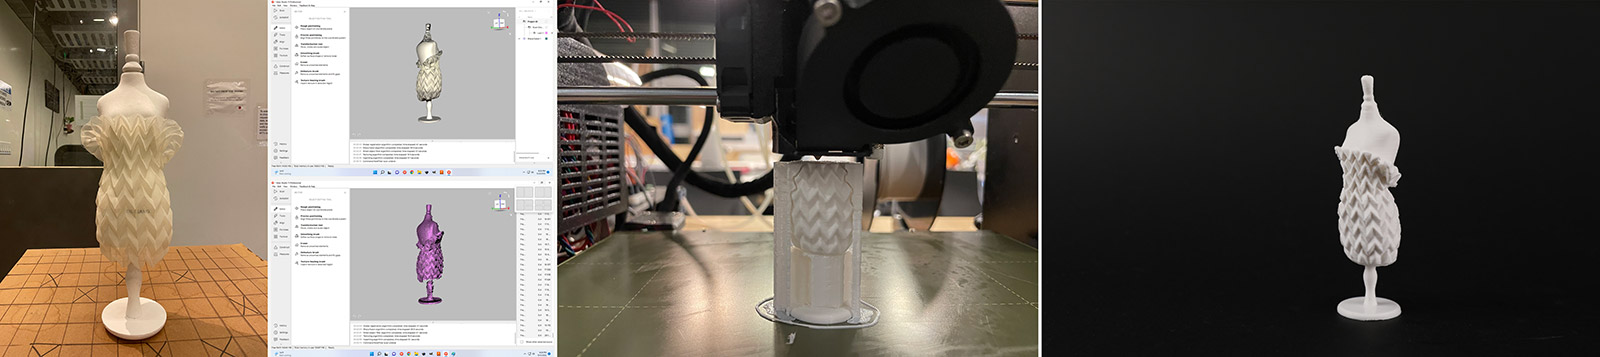
1.2 Backup: Origami Dress on Miniature Dummy
After the super messy data from the Shima scan, my mind and eyes craved for simplicity. Hence, I went back to my very first idea of scanning a small dummy mannequin with a dress from one my favorite designers and dear friend Jule Waibel's Unfolded Universe. I donned the mannequin with this simple origami tulle dress and with a single scan I managed to get quite clean data with minor fixes to be made. I could have done a second scan and avoided that too, but I was at this point, I was done with scanning. For several reasons, it has been my least favorite toy to play with thus far and I don't see myself using it in the future (I'll revisit this remark in a year).
The model came out beautifully and since I was quite late on completing this assignment, I printed it on Prusa MK3S with white PLA. I will send this away as a thank you gift to Jules for her sending several samples and a full beautiful dress to me she made with the Plisse technique.
2. 3D Print Something: To Actuate or not to actuate
I had very high expectations from myself for this week's assignment, however part of me knew the unrealistic side to it. I wanted to print with PEEK. program the shape memory (SM) behaviour, and eventually make a simple piece to demonstrate an actuated 3D print in the class with a UV trigger. As the days passed and as I learnt more about the difficulties of working with PEEK, I started losing faith in the applicability of the ideas within a few days, so I started to also design a back-up. Still, I wanted to give the PEEK test a go even if I knew I wouldn't go far, it would give me an entry to working with light as a trigger. So I educated myself about the material, printing requirements by reading through a lot of papers, making a Zotero Library for Light Activated Polymers (LAPs) and this way with that I partially did the initial literature survey towards my final project. And I am very very excited! As a reminder, I would like to explore photoresponsive fiber actuators triggered by photoisomerization provided by the embedded and corresponding LED/optical fibers within the same fabric assembly. This may be inlay knitted, or in woven form.
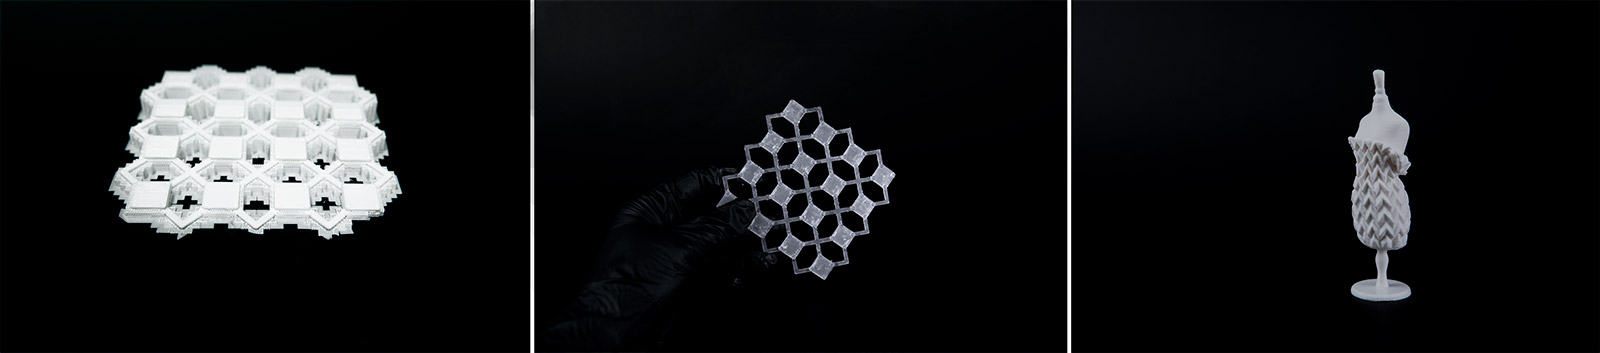
My backup project, which I detail below in 2.2, is a very cool structure inspired by this mesmerizing web gallery which I suggest everyone to visit. I did a single degree of freedom assembly toy utilizing the knowledge from clearance tests.
2.1 Light-Driven Shape Memory of 3D-Printed PEEK
In this paper, researchers detected a strong absorption -as high as 93.4% (with mean value of 89.4%)- in the UV region (400–250 nm) due to the bonds of ketone and ether in PEEK chains. This means, UV and visible lights have the potential to trigger the shape memory effect (SME) of PEEK.

Hacking into the Ender-3 and High Temp Print Prep
Materials purchased:
- Spider High-temperature Hotend | All Metal Hotend Kit: https://www.creality3dofficial.com/products/spider-high-temperature-hotend
- All Metal Hotend Kit for Creality: https://www.amazon.com/Micro-Hotend-Creality-Printers-TronXY/dp/B0789V2D7C?crid=3UDMLBDP0O5HS&keywords=micro+swiss+all-metal+hotend+kit&qid=1653546985&refresh=1&sprefix=micro+swiss+all-metal+hot+end+kit%2Caps%2C122&sr=8-3&linkCode=ll1&tag=3dly-20&linkId=32755fa2c1730e6f3423de6cae3671ee&language=en_US&ref_=as_li_ss_tl
- Vision Minor Nanopolymer Adhesive: https://visionminer.com/products/nano-polymer-adhesive?variant=39412520517681
- Vision Minor Nanopolymer Adhesive: https://visionminer.com/products/nano-polymer-adhesive?variant=39412520517681
Resources to Read and Watch:
- Shttps://3dprinterly.com/how-to-increase-the-max-temperature-on-a-3d-printer-ender-3/
- https://www.youtube.com/watch?v=mPh1b2EOOz0
- https://d3dprinting.com/product/peek-3dprinting
2.2 Single DoF Geometric Toy
As a back up I started designing a single degree of freedom structure and printed using Black Resin on Formlabs 3. It took three iterations to find the correct clearance of the Formlabs printer. One challenge was the post-processing as I'm not an expert of SLA printing. Thanks to this assignment, I became more familiar and found a setup that works well for this particular print.
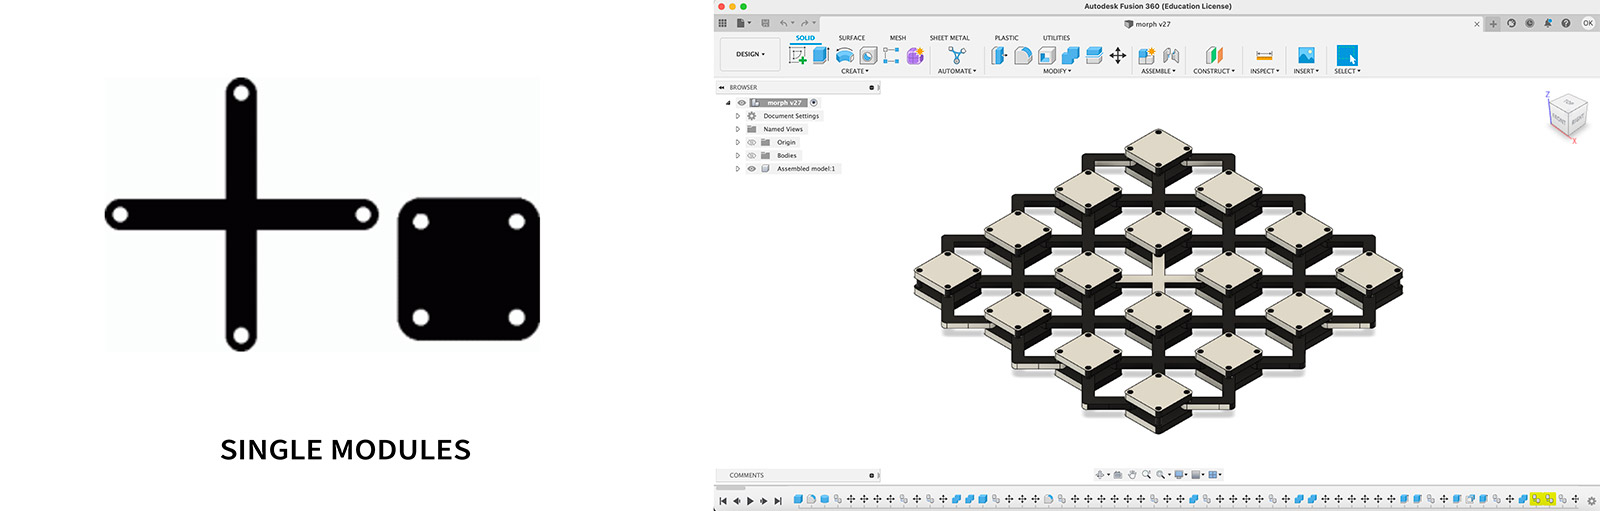
Another struggle was cleaning the support structure without harming the slightly fragile connector parts. Once the support structure was removed and the print was cleaned with IPA wash of the excess resin (15 mins per tank), it was cured under UV light for 25 minutes. With that, I got a dynamic structure that is working! Before the wash as I was removing the support, I accidentally broke one of the cubic modules hence there's a missing part in the video. Regardless, I was happy that it finally worked!