Week 1,
Ideation Phase: The assignment for this week was to vinylcut anything and make a construction kit using lasercutting.
Before this week, I had done lasercutting and vinylcutting before so I wanted to use this as an opportunity to do something I hadn't previously experimented with.
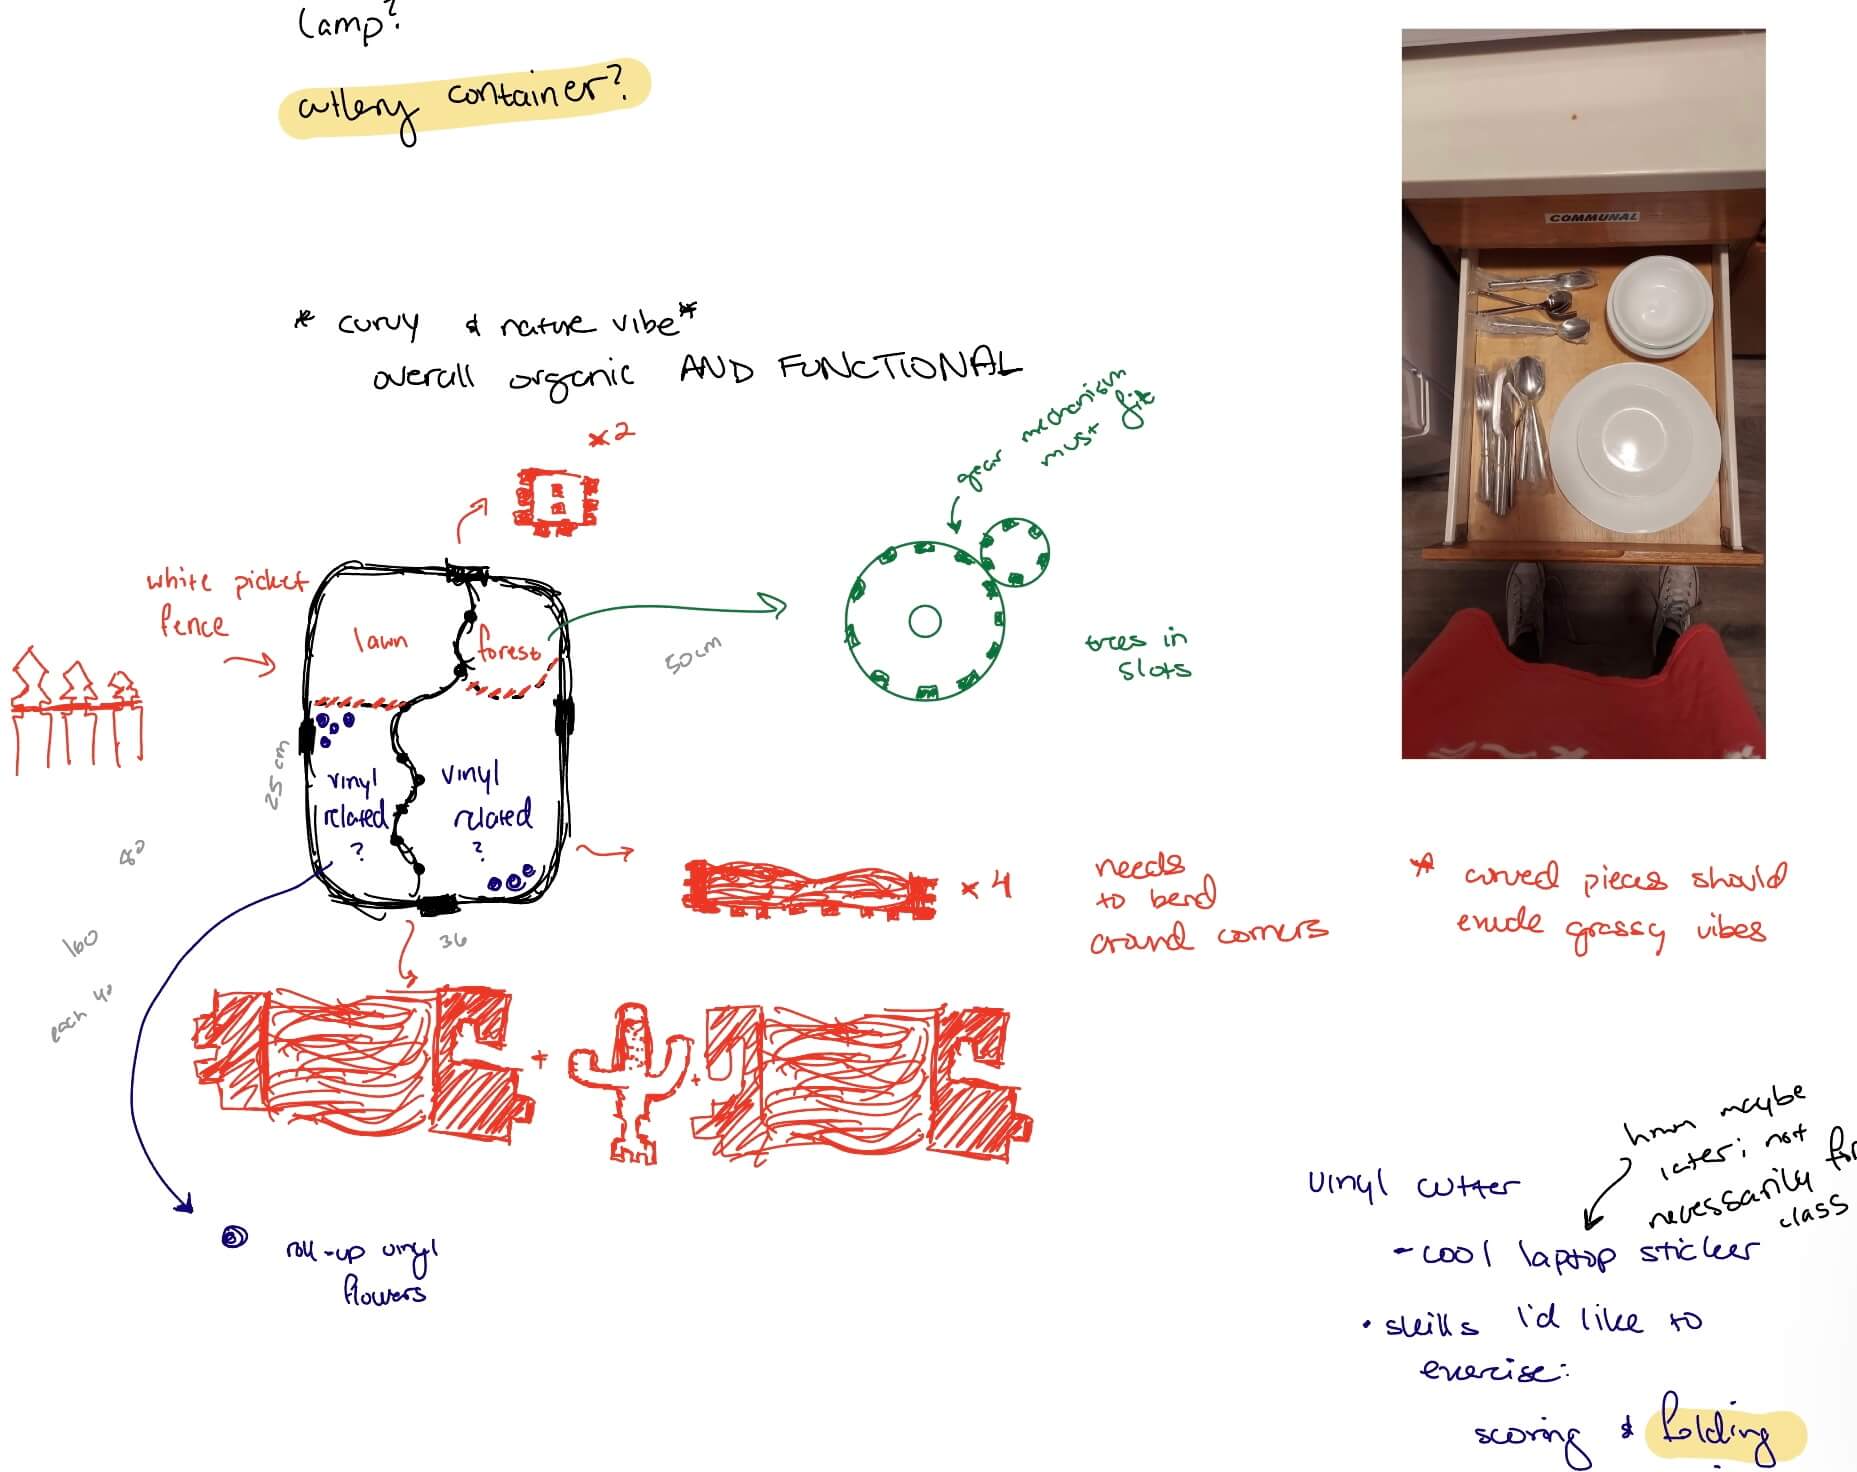
I knew I wanted to experiment with living hinges and overall just using the laser cutter to make more "organic"
shapes. What I didn't know was what I wanted to make. Luckily, one of my friends was in need of a cutlery container
and with those constraints, I got to work.
The container had to be small enough to fit into her drawer which was approximately 46 x 35 x 8 cm, but
large enought to hold cutlery and plates and bowls of two different diameters (26 cm and 15.5cm). Since I wanted something
curvy, I decided to start with the exterior and have the container have rounded edges. This meant the joints would have to meet
in the middle of each side of the container, rather than at the corners, to ensure a smooth & rounded edge. I then needed to focus
on the internal partitions --> what would separate a bowl from touching a fork?? heaven forbid. Since I wanted something that was still
fun and playful while retaining functionality, I decided to lean fully into the organic theme and try to create a container in which
distinct section could play into a different natural environment. For shorter utensils, I decided to section them off with a picket fence
to exude 'lawn' vibes while longer utensils and wider plates were to be framed with vinyl cut flowers to give off a 'garden' feel. Lastly,
I wanted to play with a rotating element, perhaps even a gear of some sort. This would be the section of the smaller bowls and plates. I
wanted this section to be lined with laser-cut trees to capture a 'forest'-y vision. With the ability to rotate, I could form something
with a dynamic partition that allowed the container to transform from having 4 distinct sections to 3, to back to 4 again. All of these
creative stipulations resulted in this sketch:
For vinyl cutting, I didn't really know what to do. I don't really use stickers often so printing those didn't really intrigue me. I wanted to use the vinyl as some sort of means to an end.
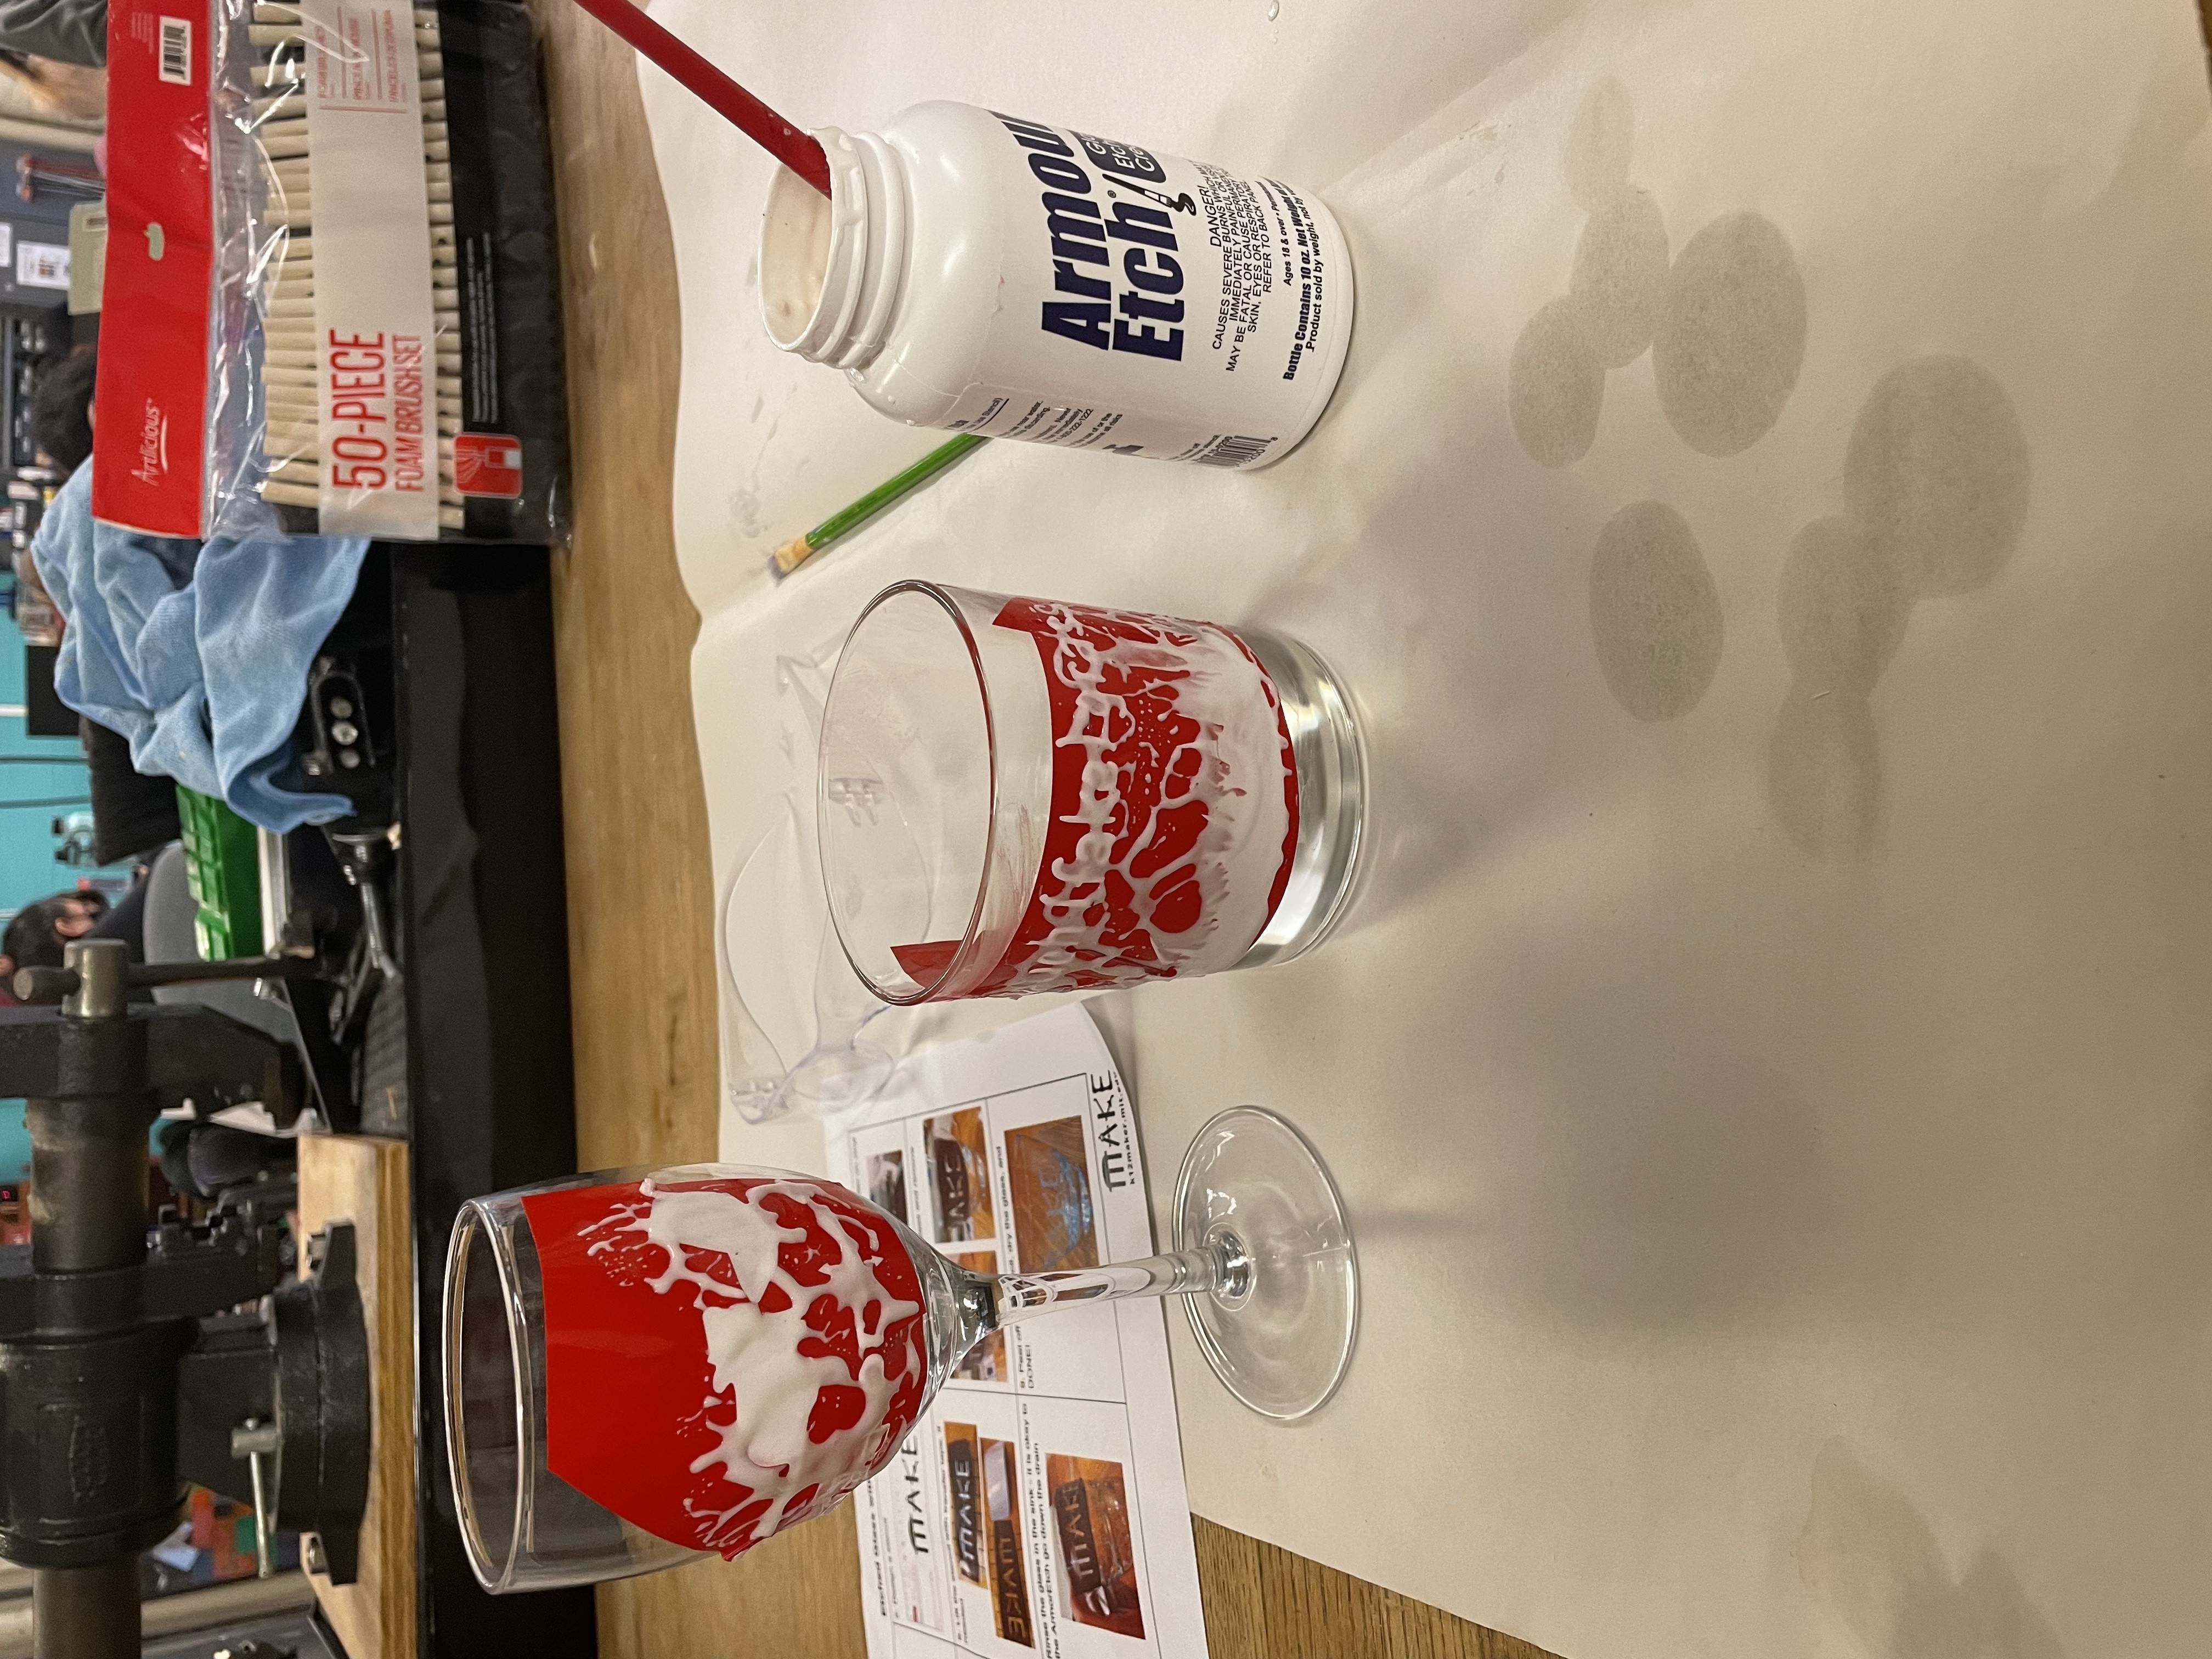
That's where glass etching came in! Glass etching is the process of changing the surface of glass, through, in this case, a chemical reaction caused by etching cream. Using the negatives
(or positives) of my vinyl print, I could etch those designs into glass.
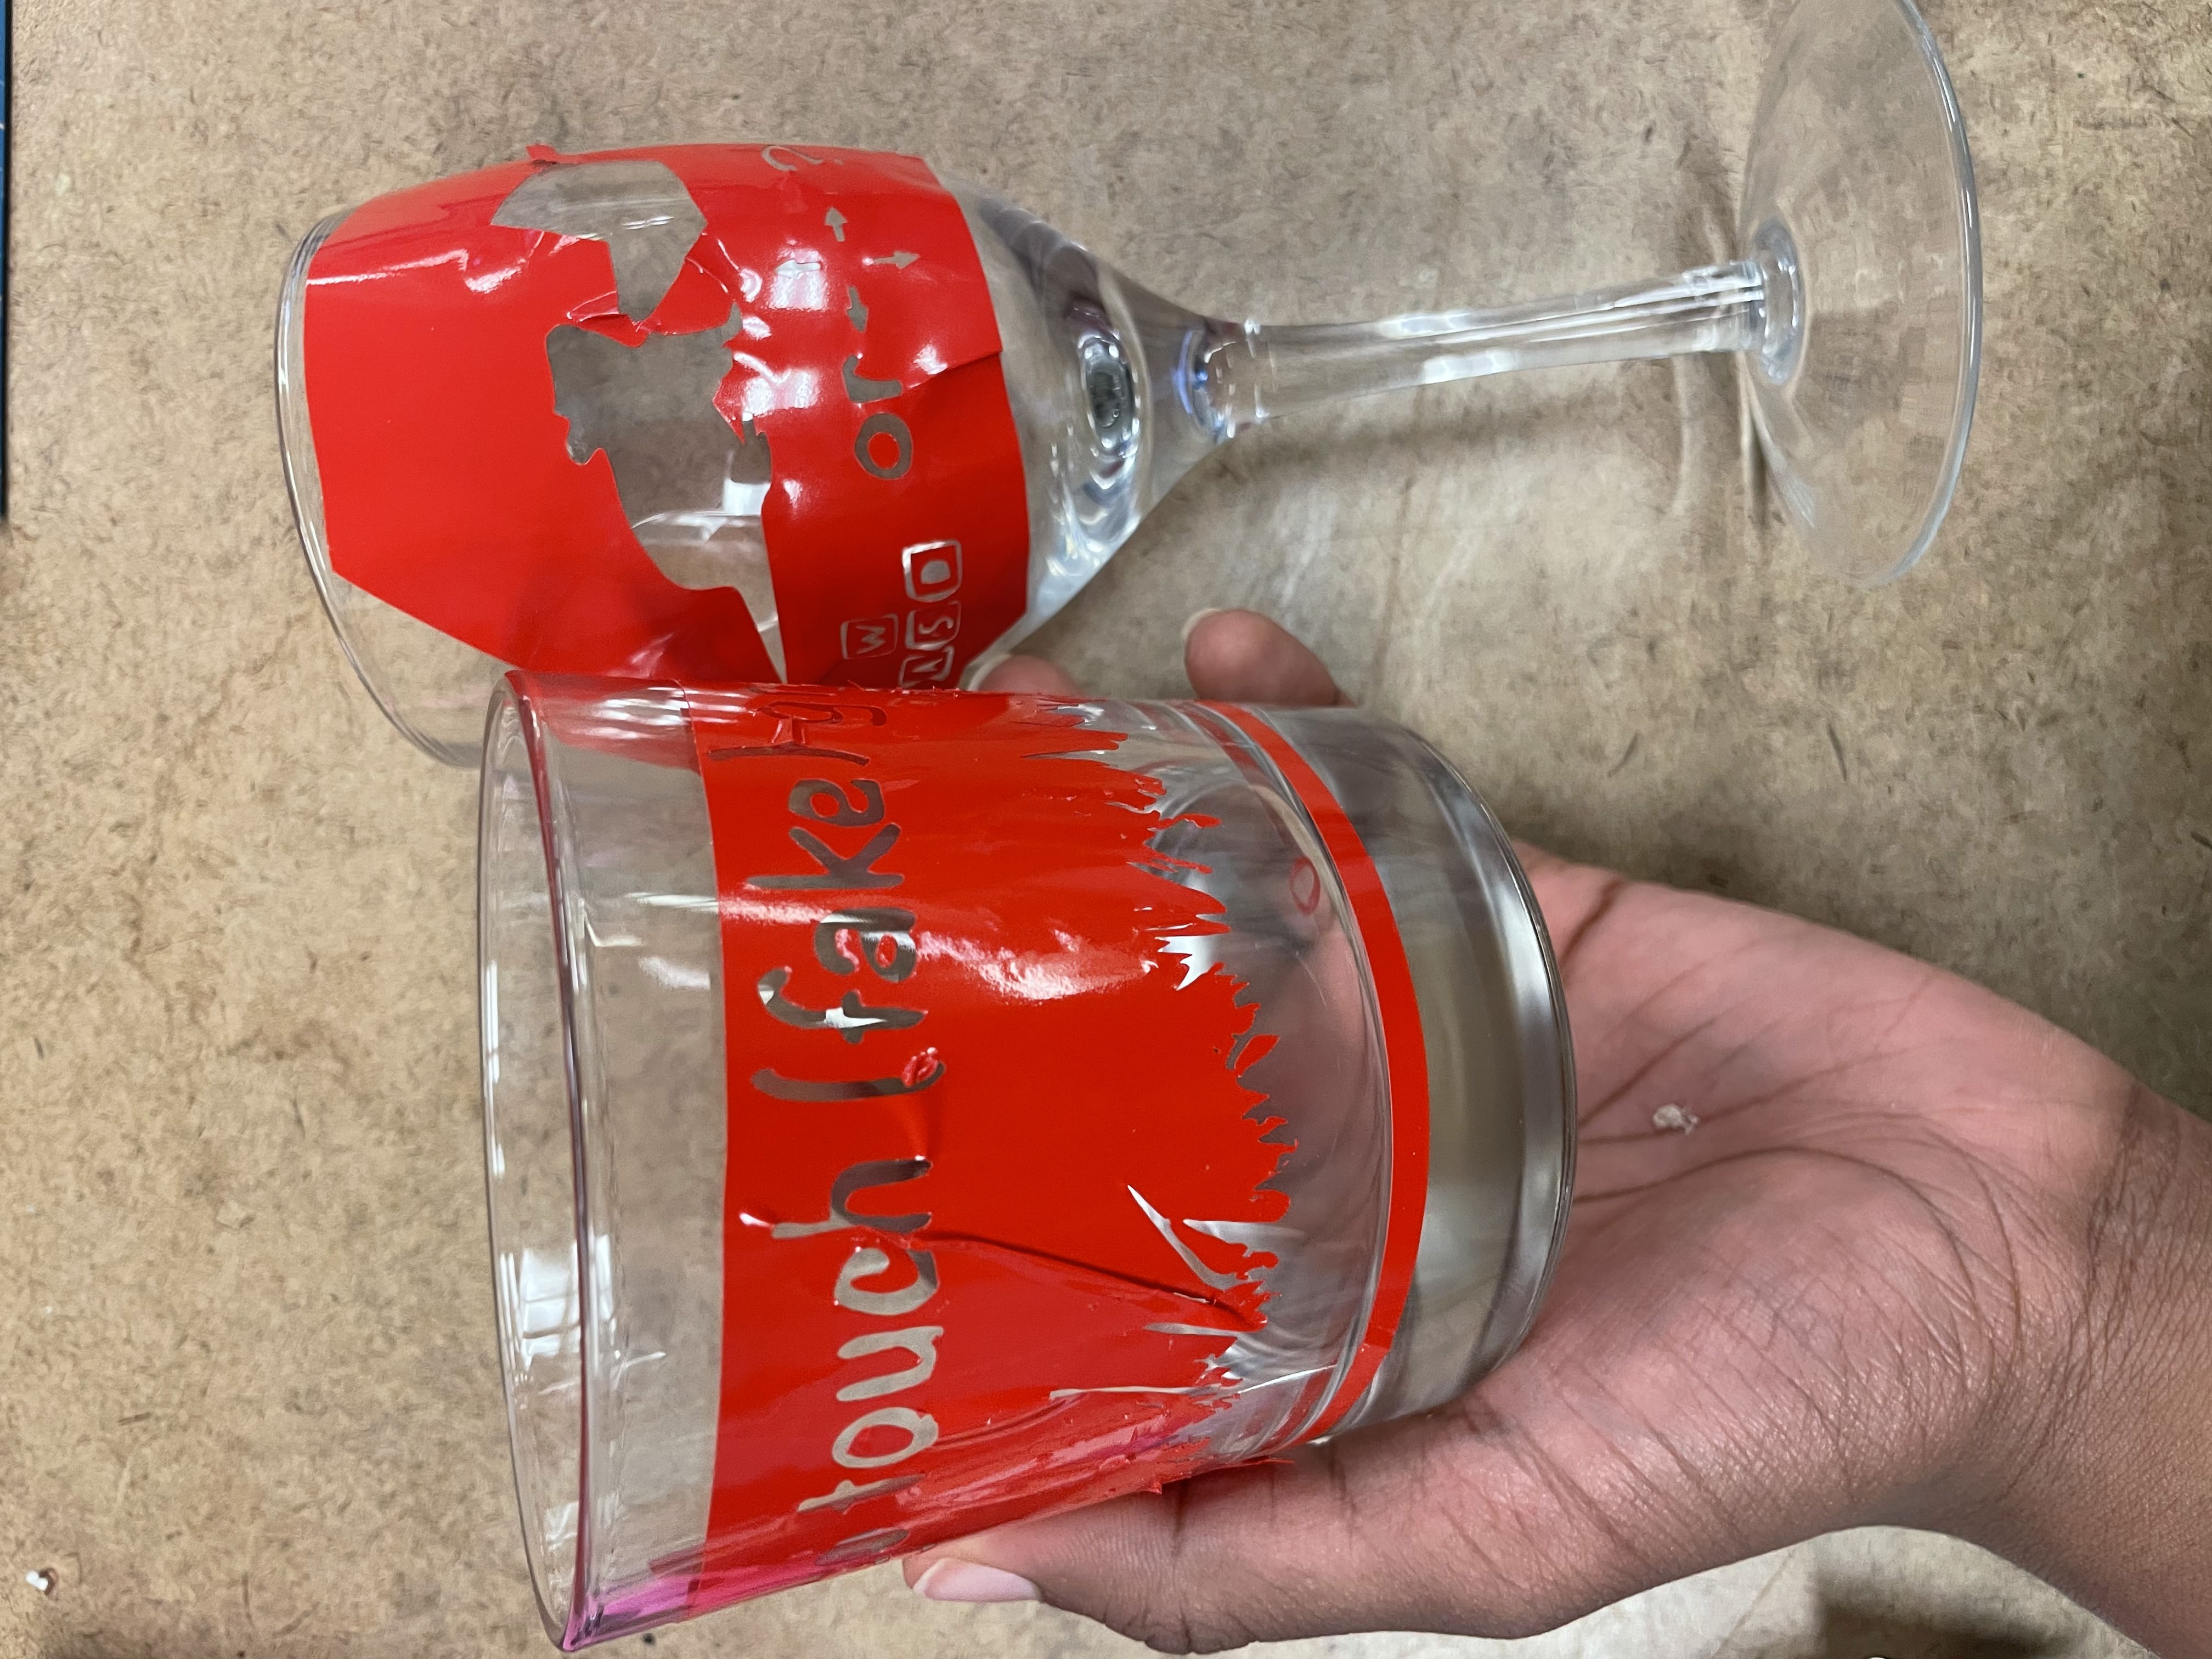
I wanted to make communal glasses for my suite in my dorm, Burton Conner, so I thought of two ideas: a mouse on a laptop with the keyboard letters WASD under it (to commemorate BC's rich mice-filed
history...and the fact that I know many gamers) and grass with the words 'go touch (fake) grass' above it (in honor of the turf wall in my suite).
Design Phase: I began to CAD my sketched design for laser-cutting.
One stipulation of the assignment was that the design must be a paranetric model. I hadn't really worked with parametric models or CAD-ded
with precision before so this was a new experience but it forced me to approach CAD-ding my design with more thought. Once I was finished, I exported
my file as a DXF and got to printing it using the laser cutter settings the EECS group had discovered.
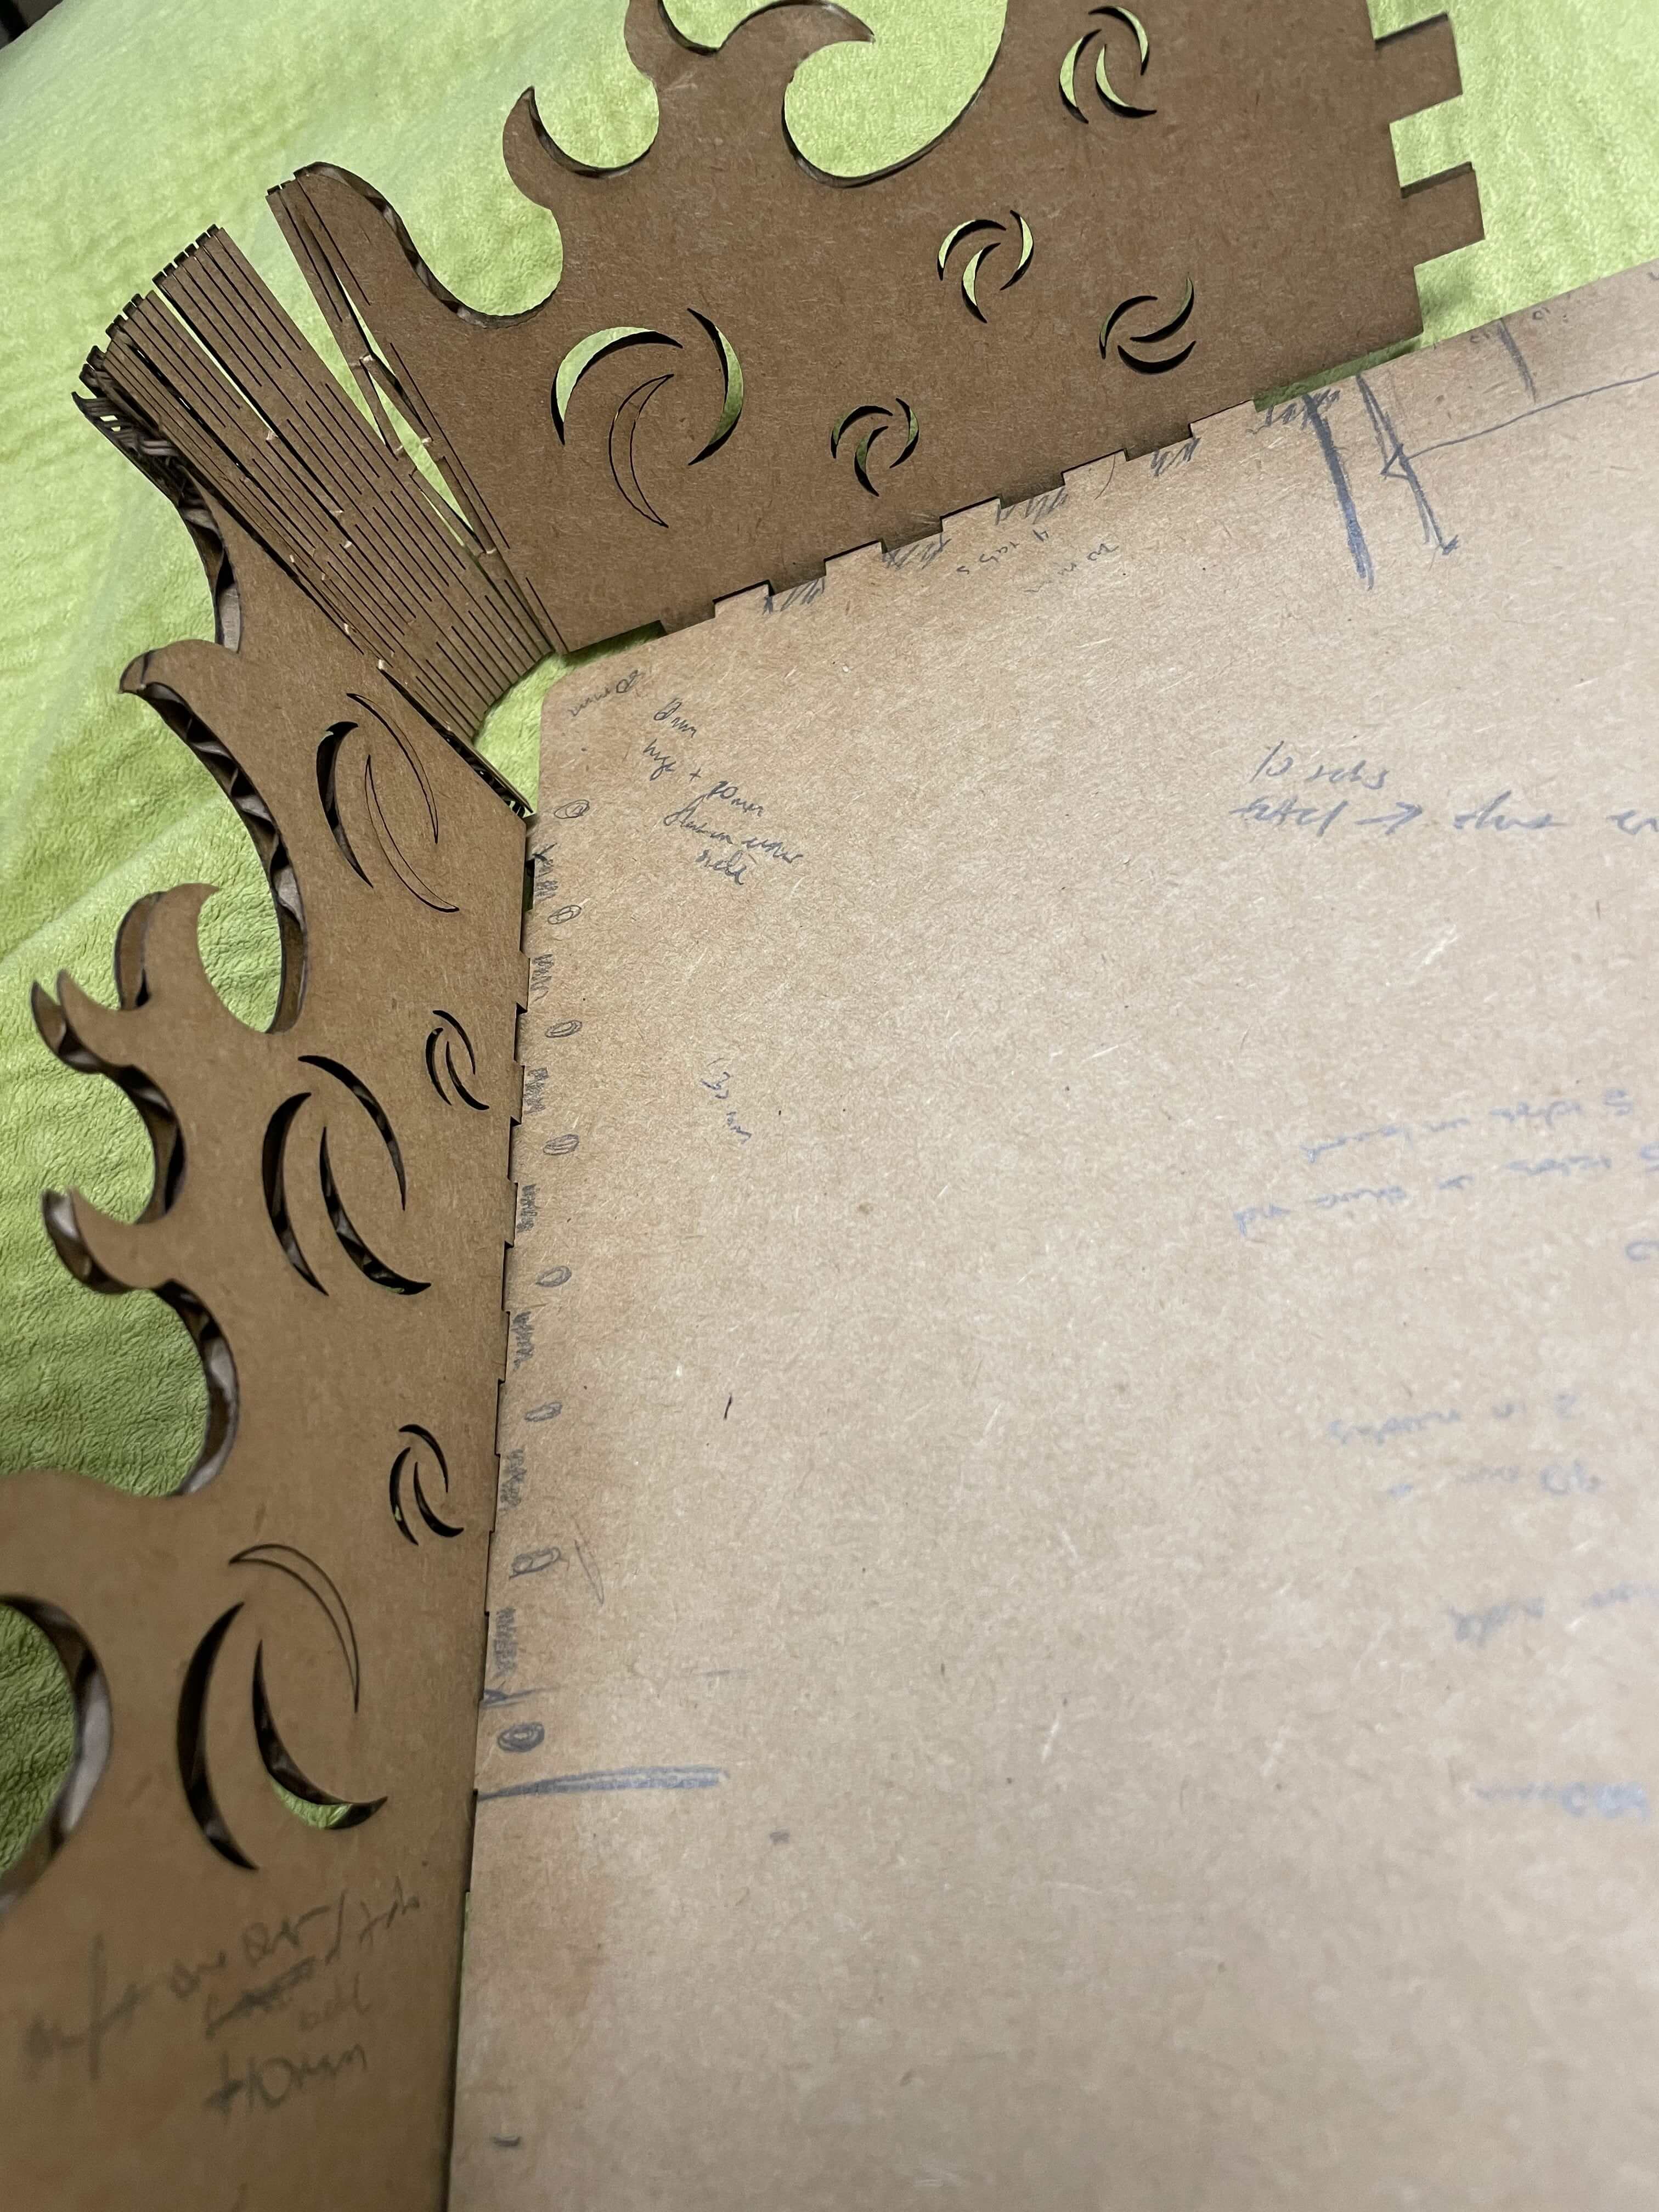
Unfortunately, my journey was not that easy. After lasercutting my first attempt, I realized the fits were all off. The notches I had designed to connect
the walls and the base were misaligned and also too loose. I had initialy failed to account for kerf when dimensioning the notches so I did so in my second
attempt. I also used the failings of my first attempt to reconstruct the dimensions of my second attempt.
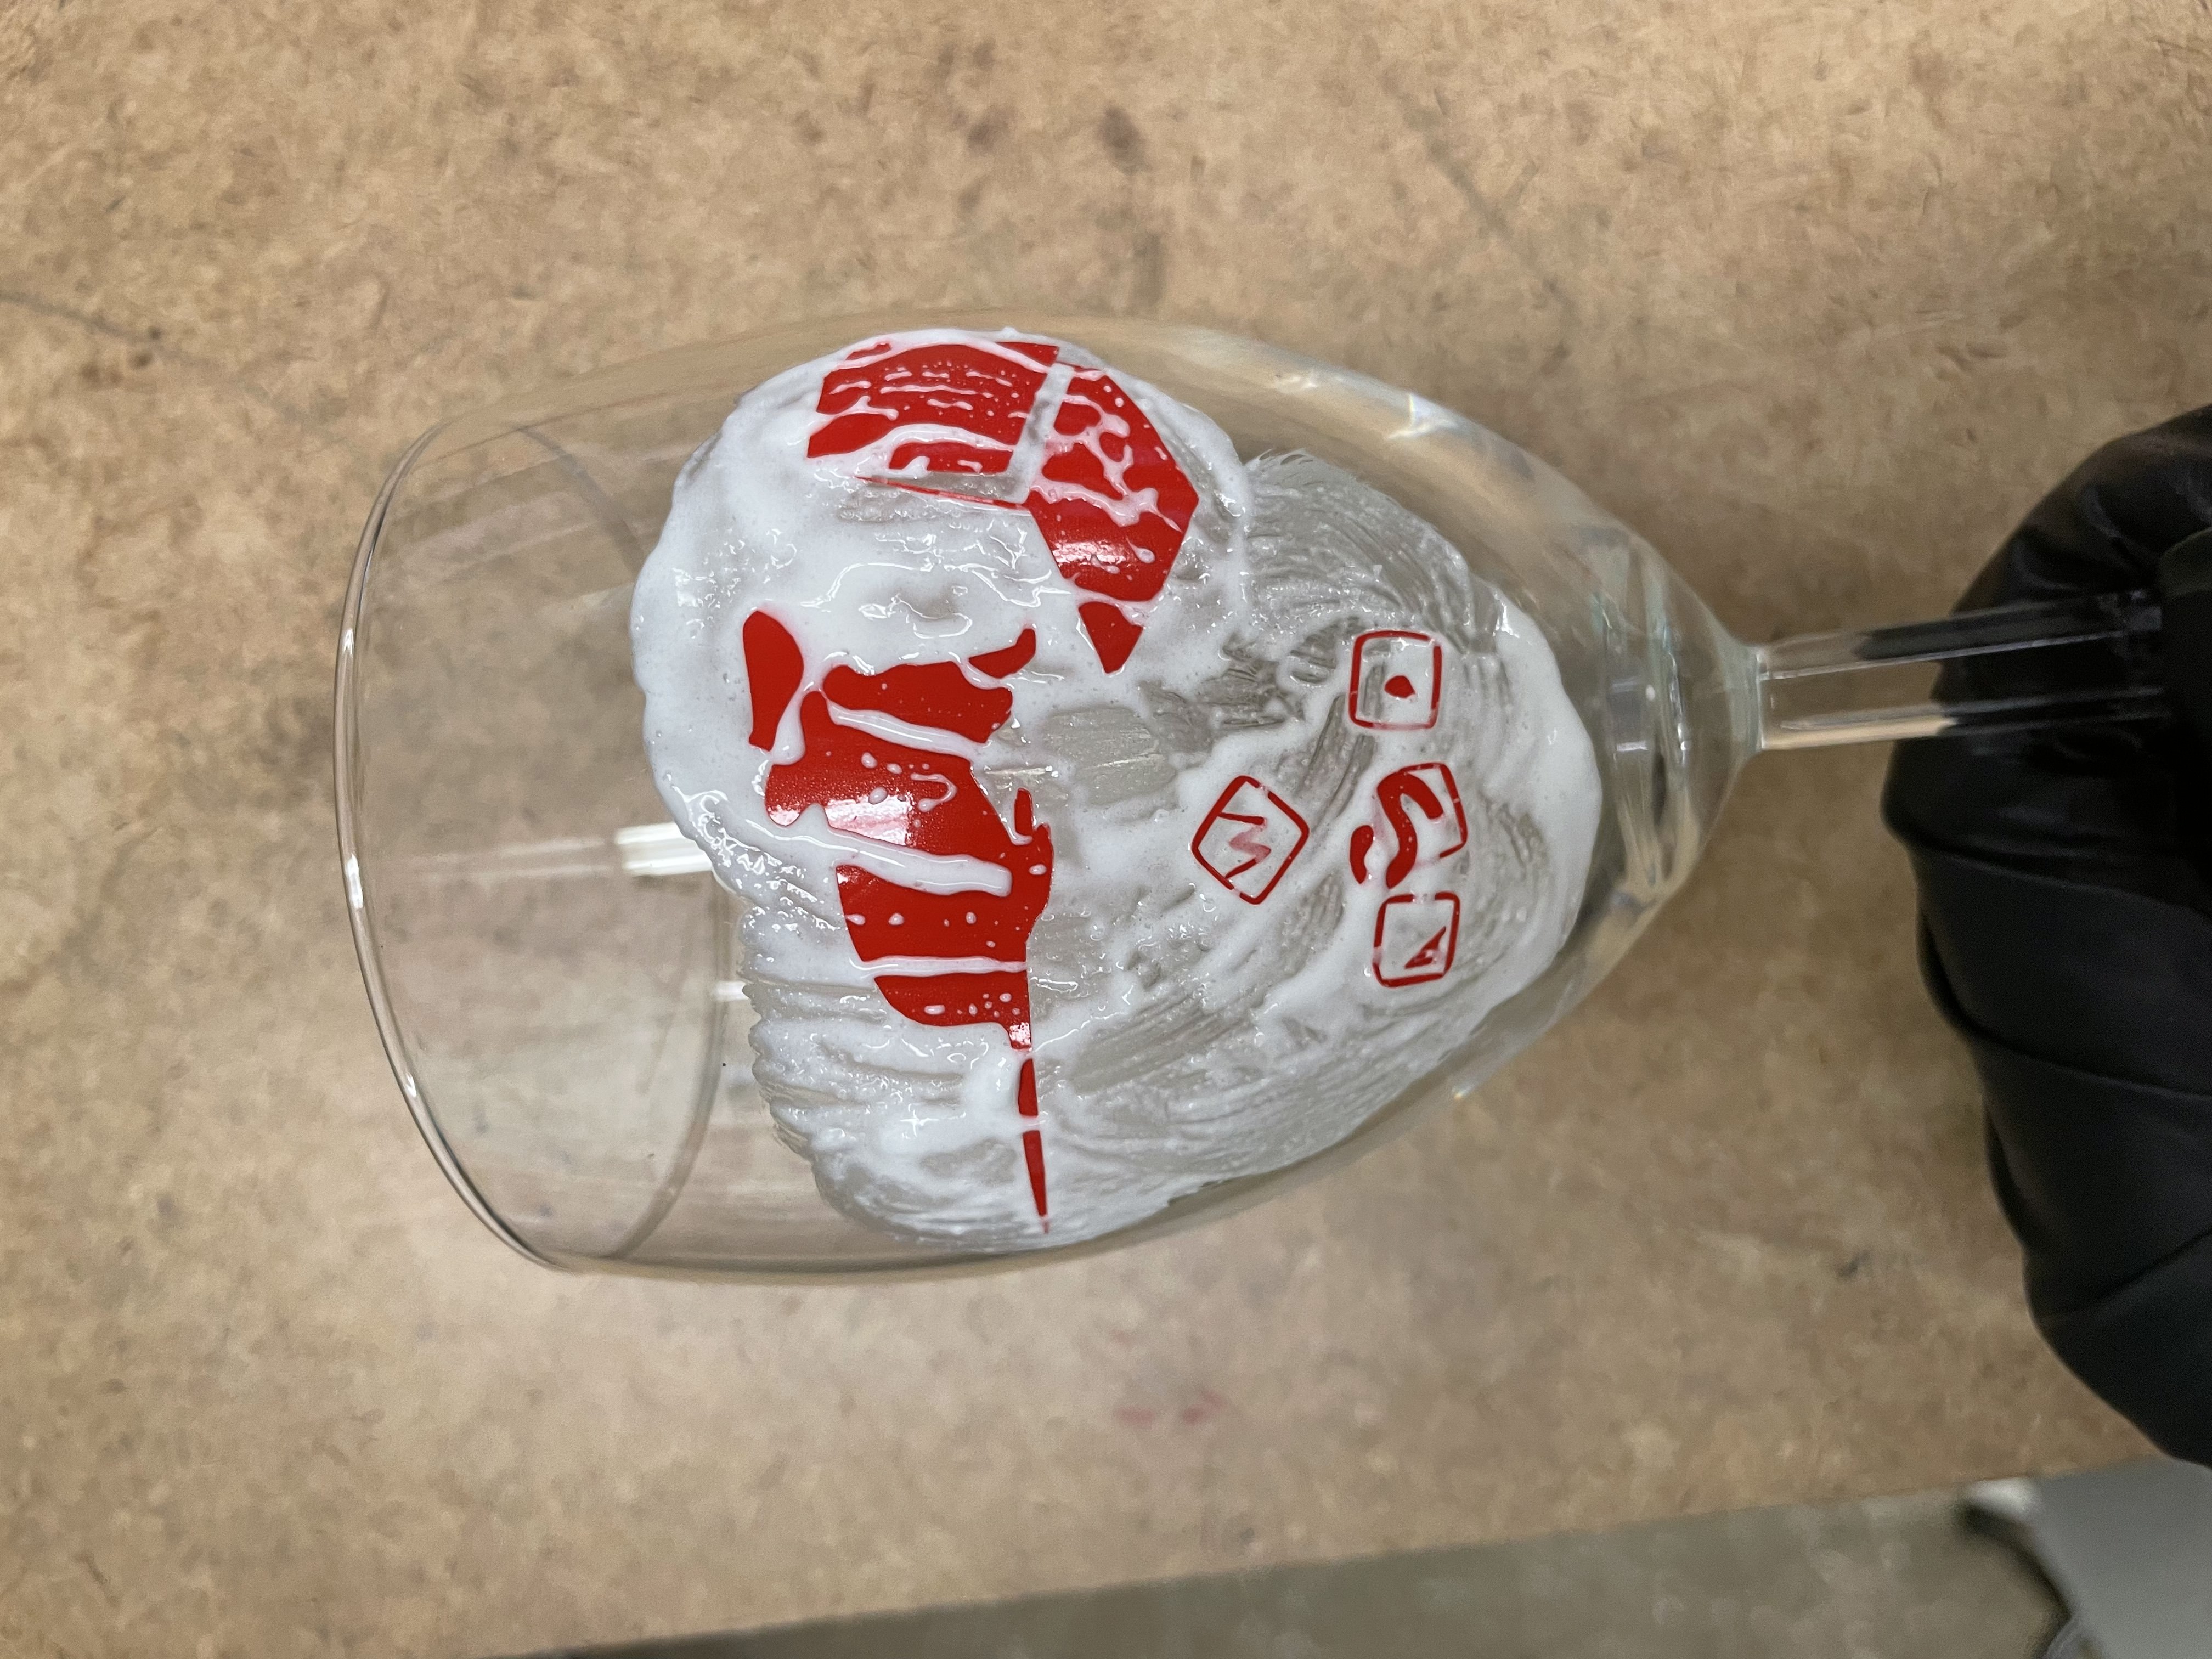
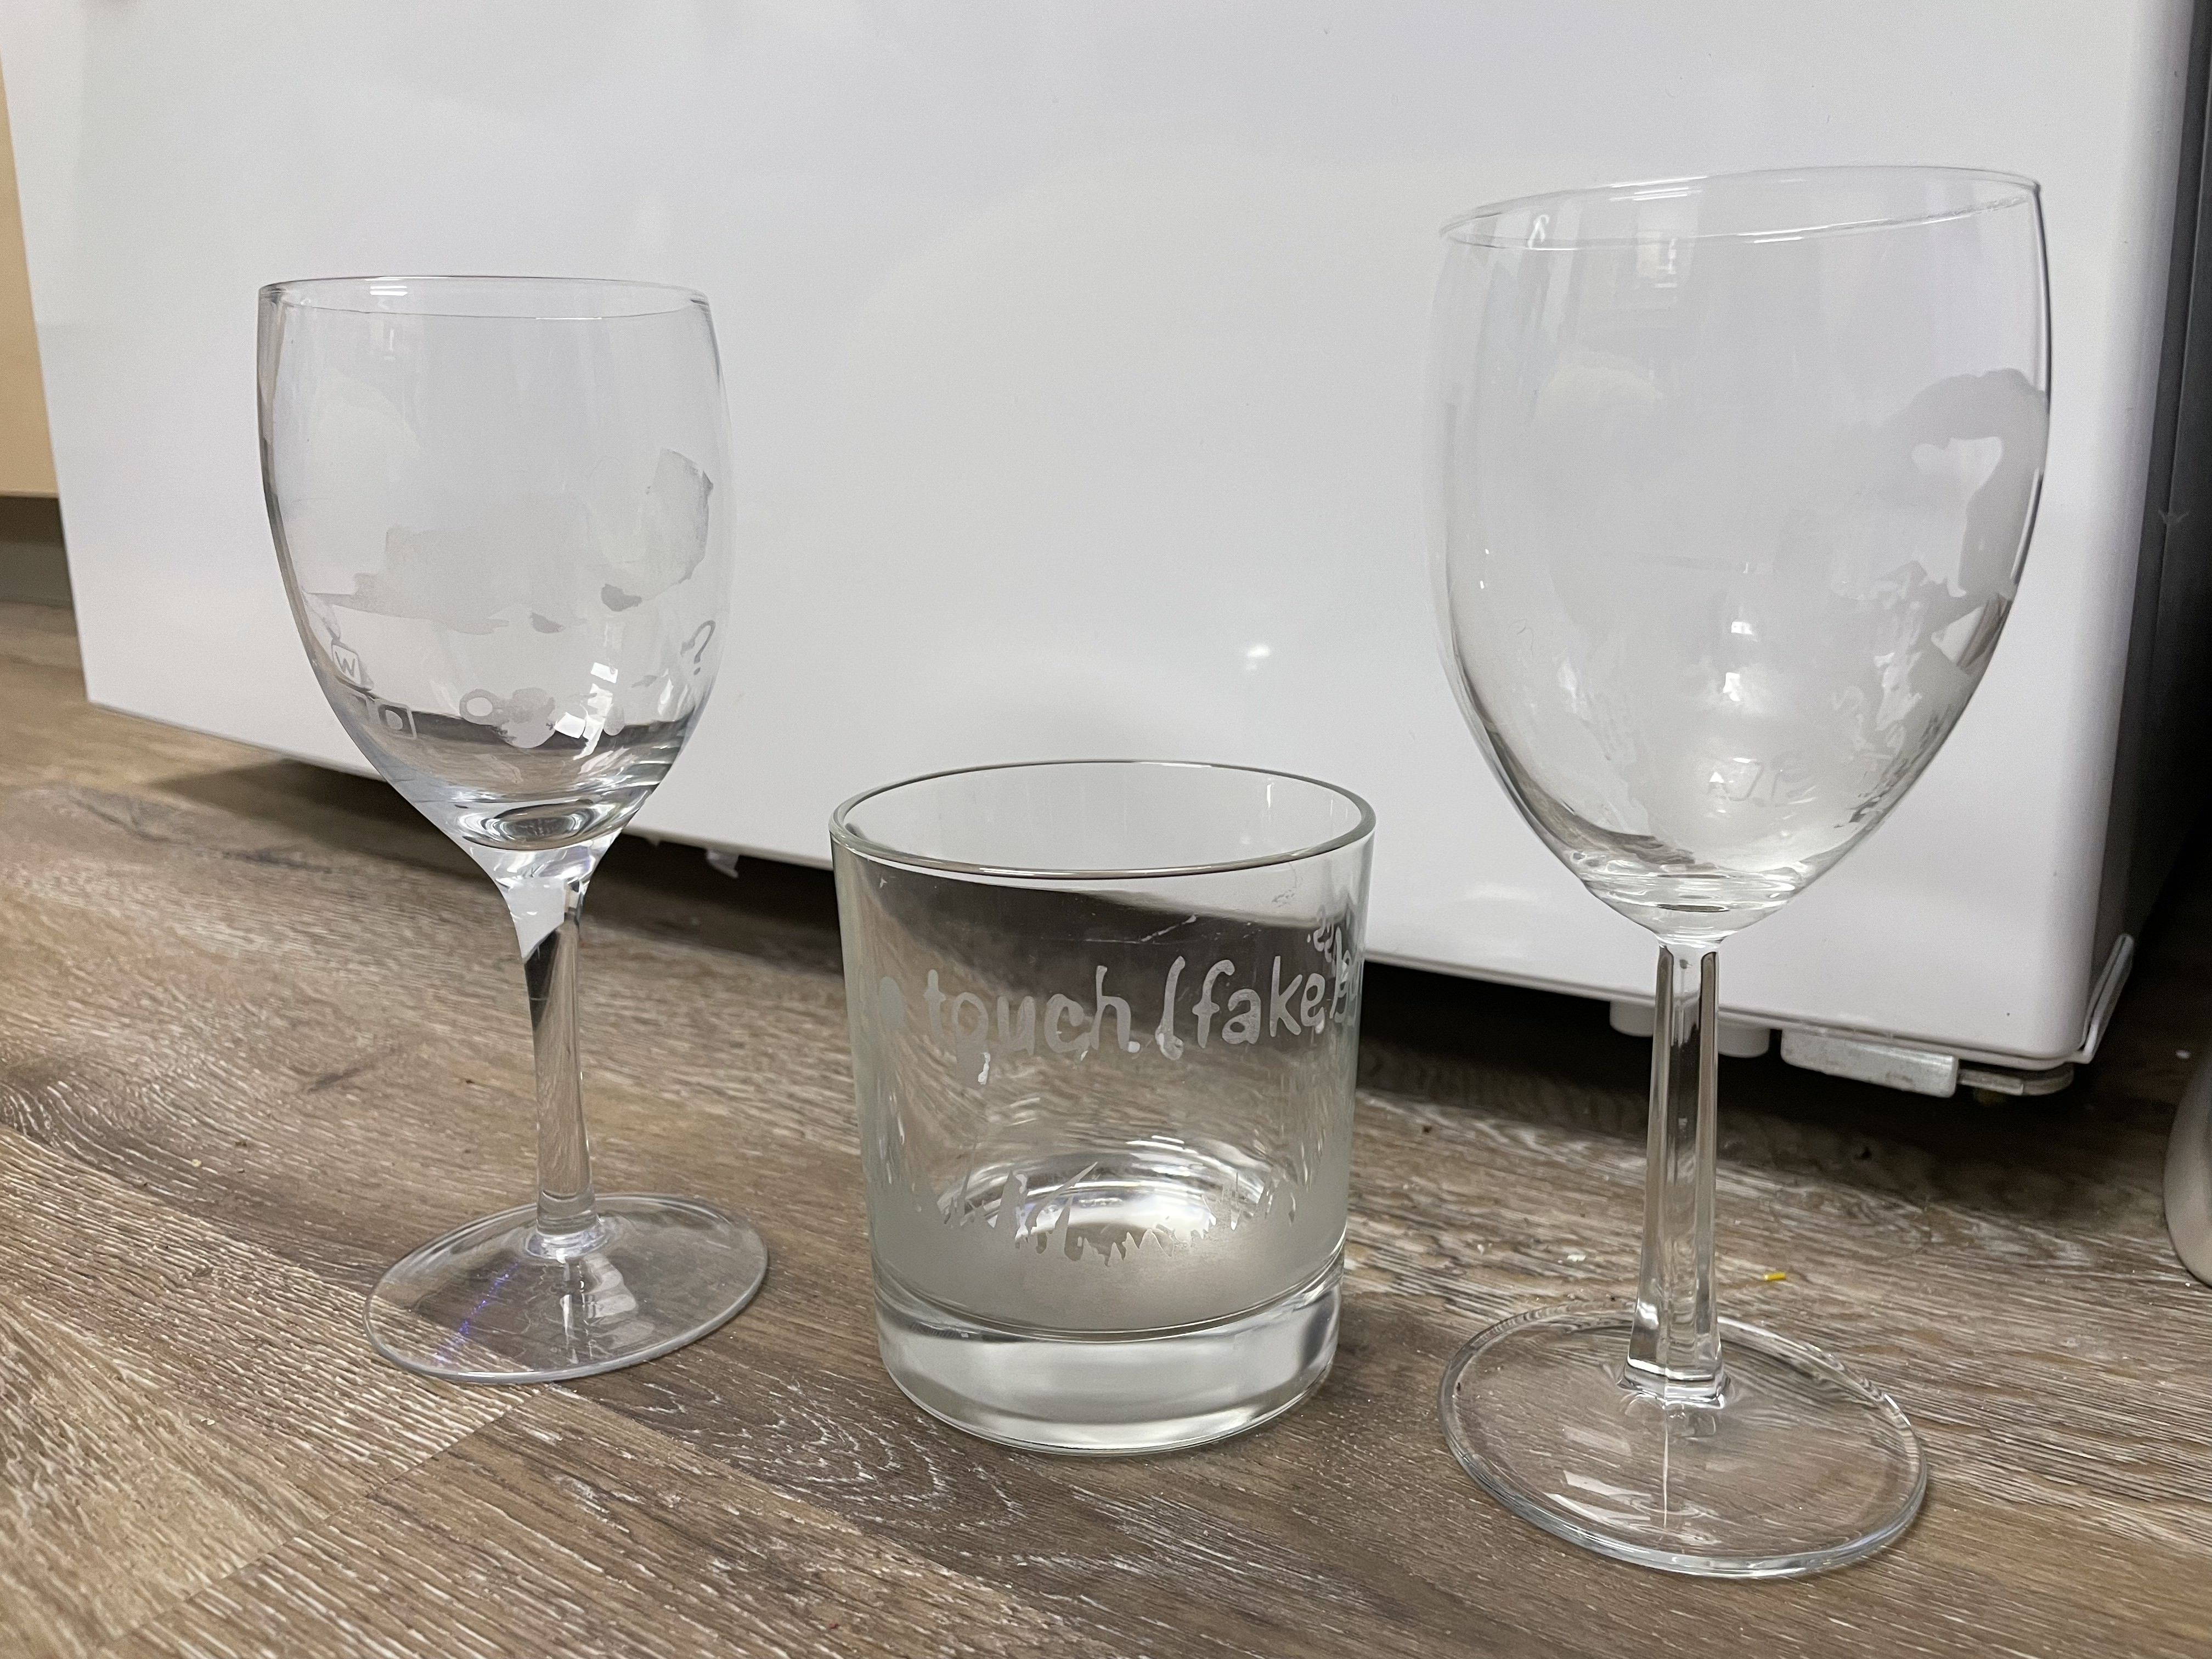
On the vinyl front, after I'd cut my vinyl (keep this hush hush but I used a Cricut machine instead of my lab's vinyl cutter), I had to gripe with the fact that curved surfaces are in fact,
curved, and therefore it's hard to apply a flat sticker. I ultimately ended up etching
three glasses, two of which were wine glasses. While the glass that wasn't a wine glass turned out fine, the wine glasses had way too much curvature to lie flat. I was much too impatient or else
I would have made small cuts in the sticker to get it to lie flat. On an unrelated note, the wine glasses were done with both the positives and negatives of my vinyl print which made for interesting effects (despite both being
smudged beyond belief).
Final Product: The second attempt worked! The notches fit a bit tighter
than I would like and in doing so, weren't as structurally stable as they'd been designed to be. Ultimately, they had to be supported with glue and tape in some instances.
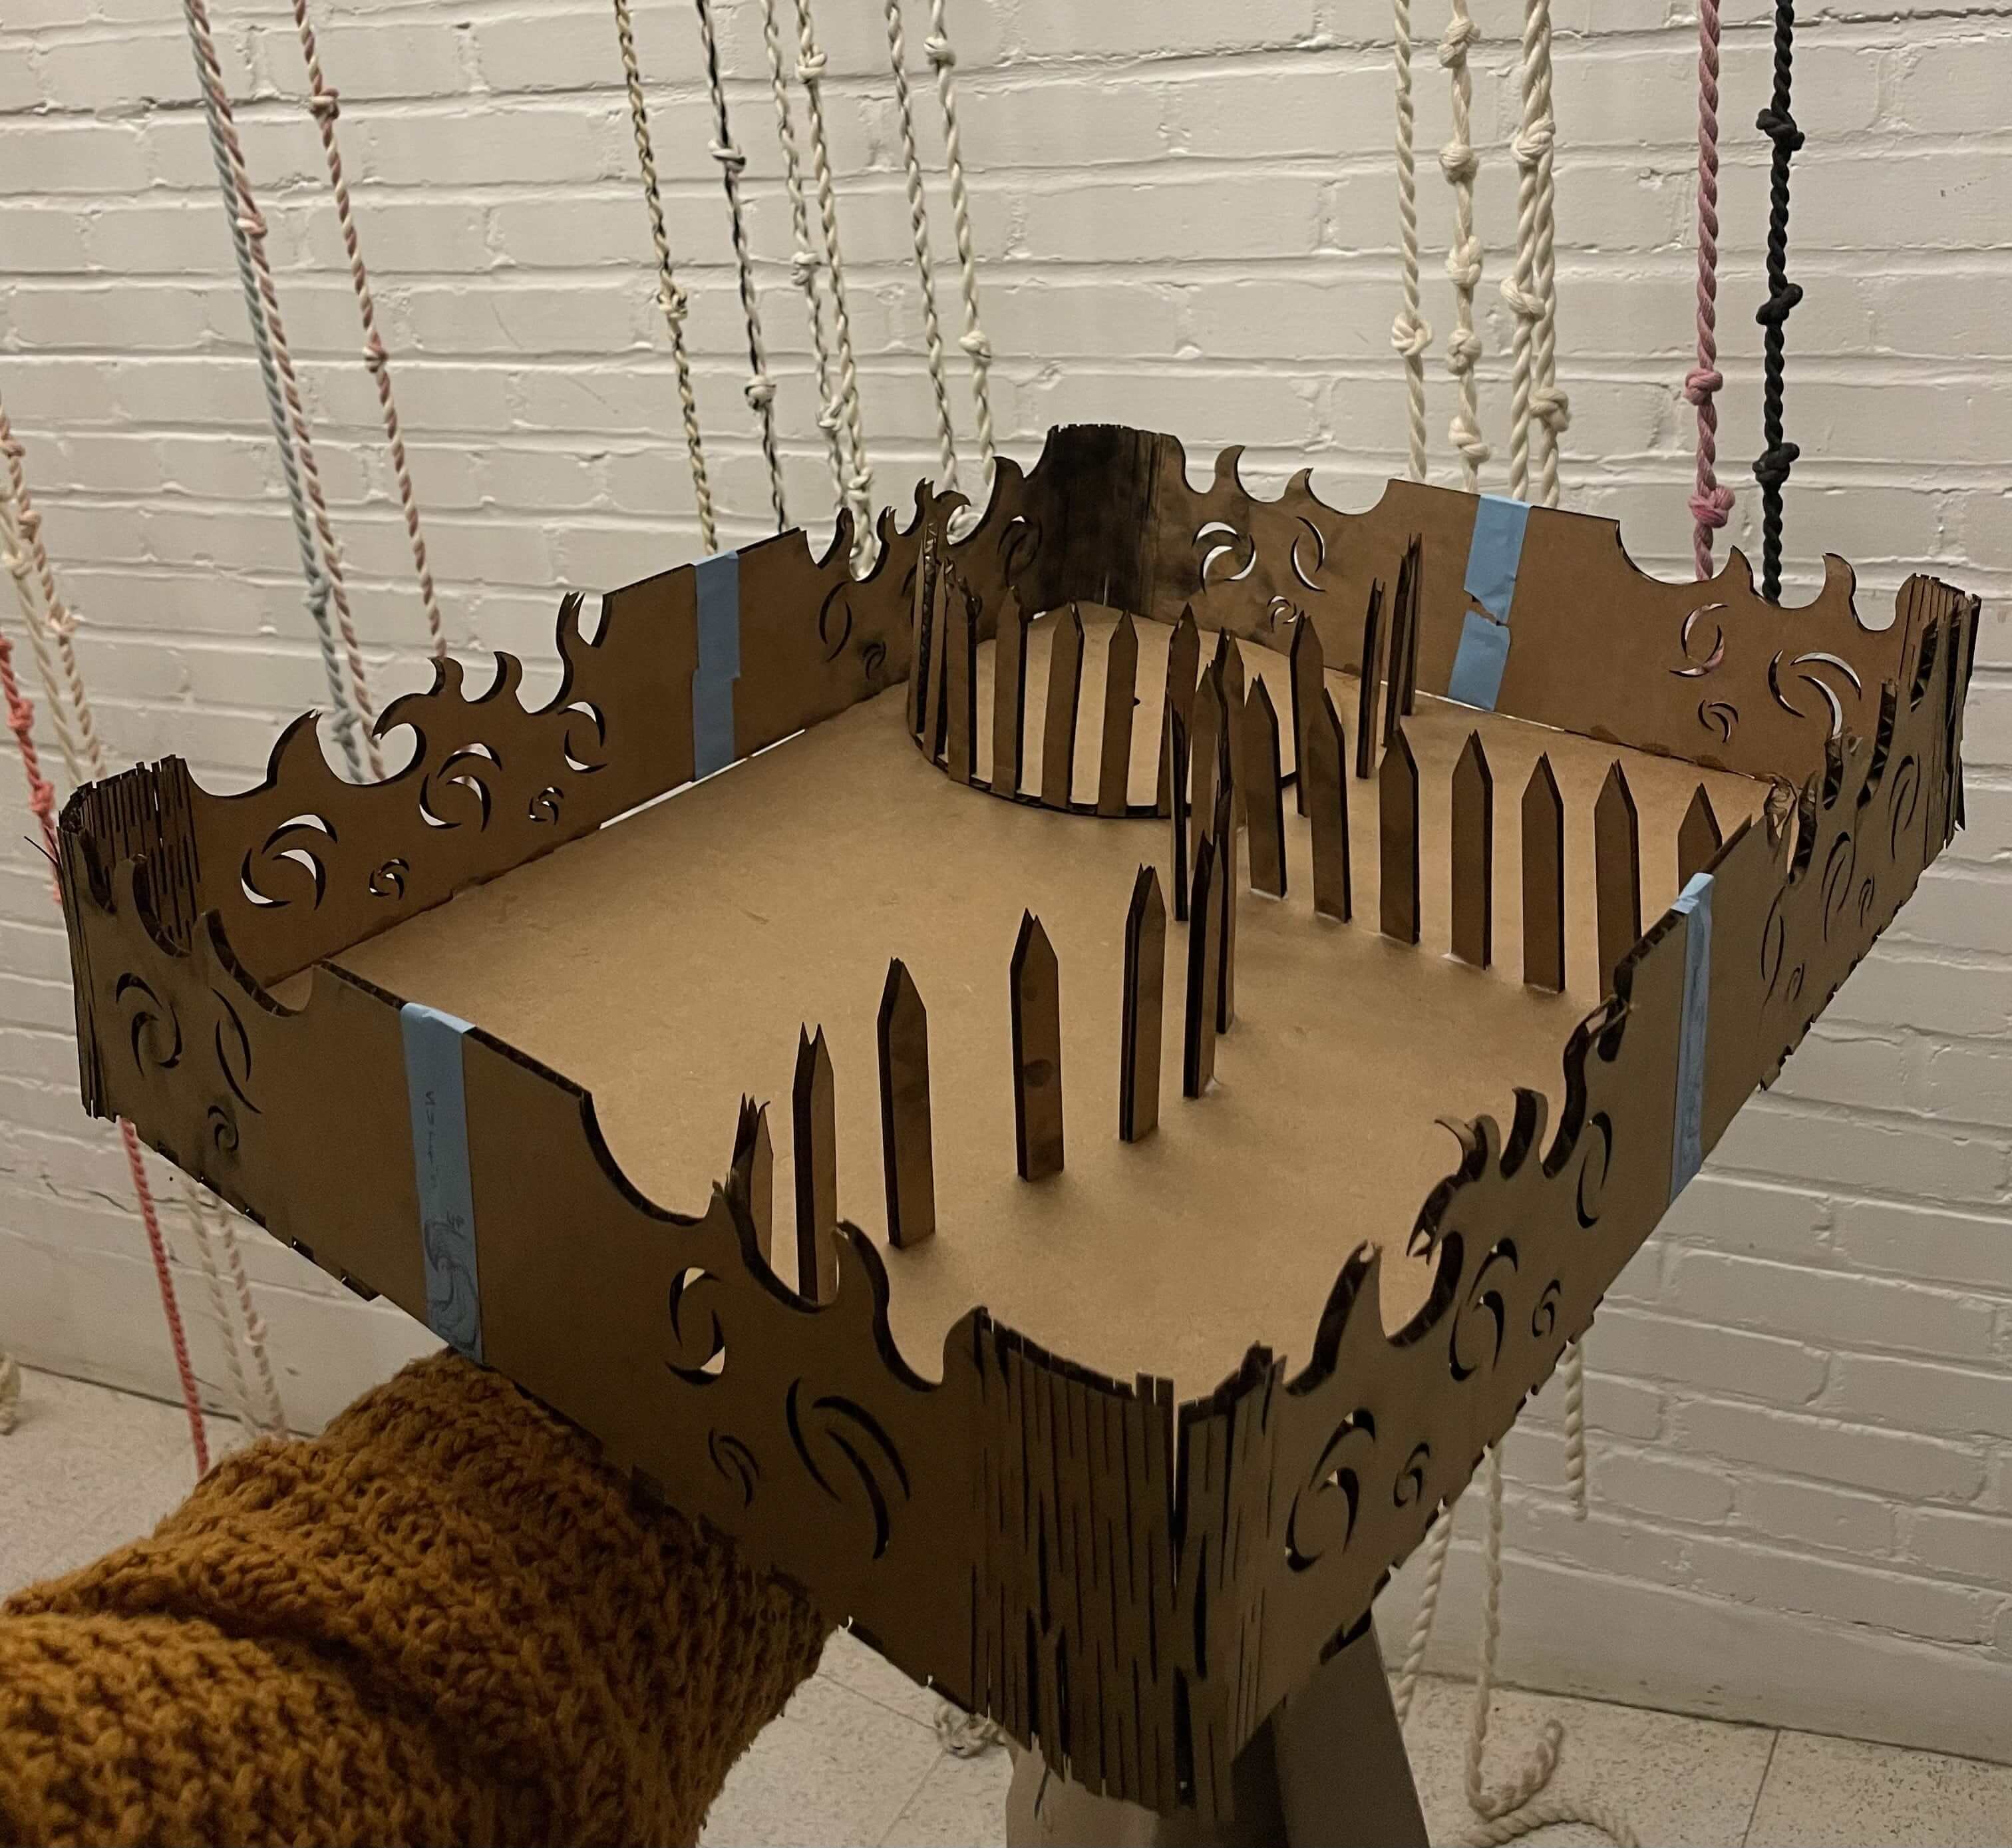
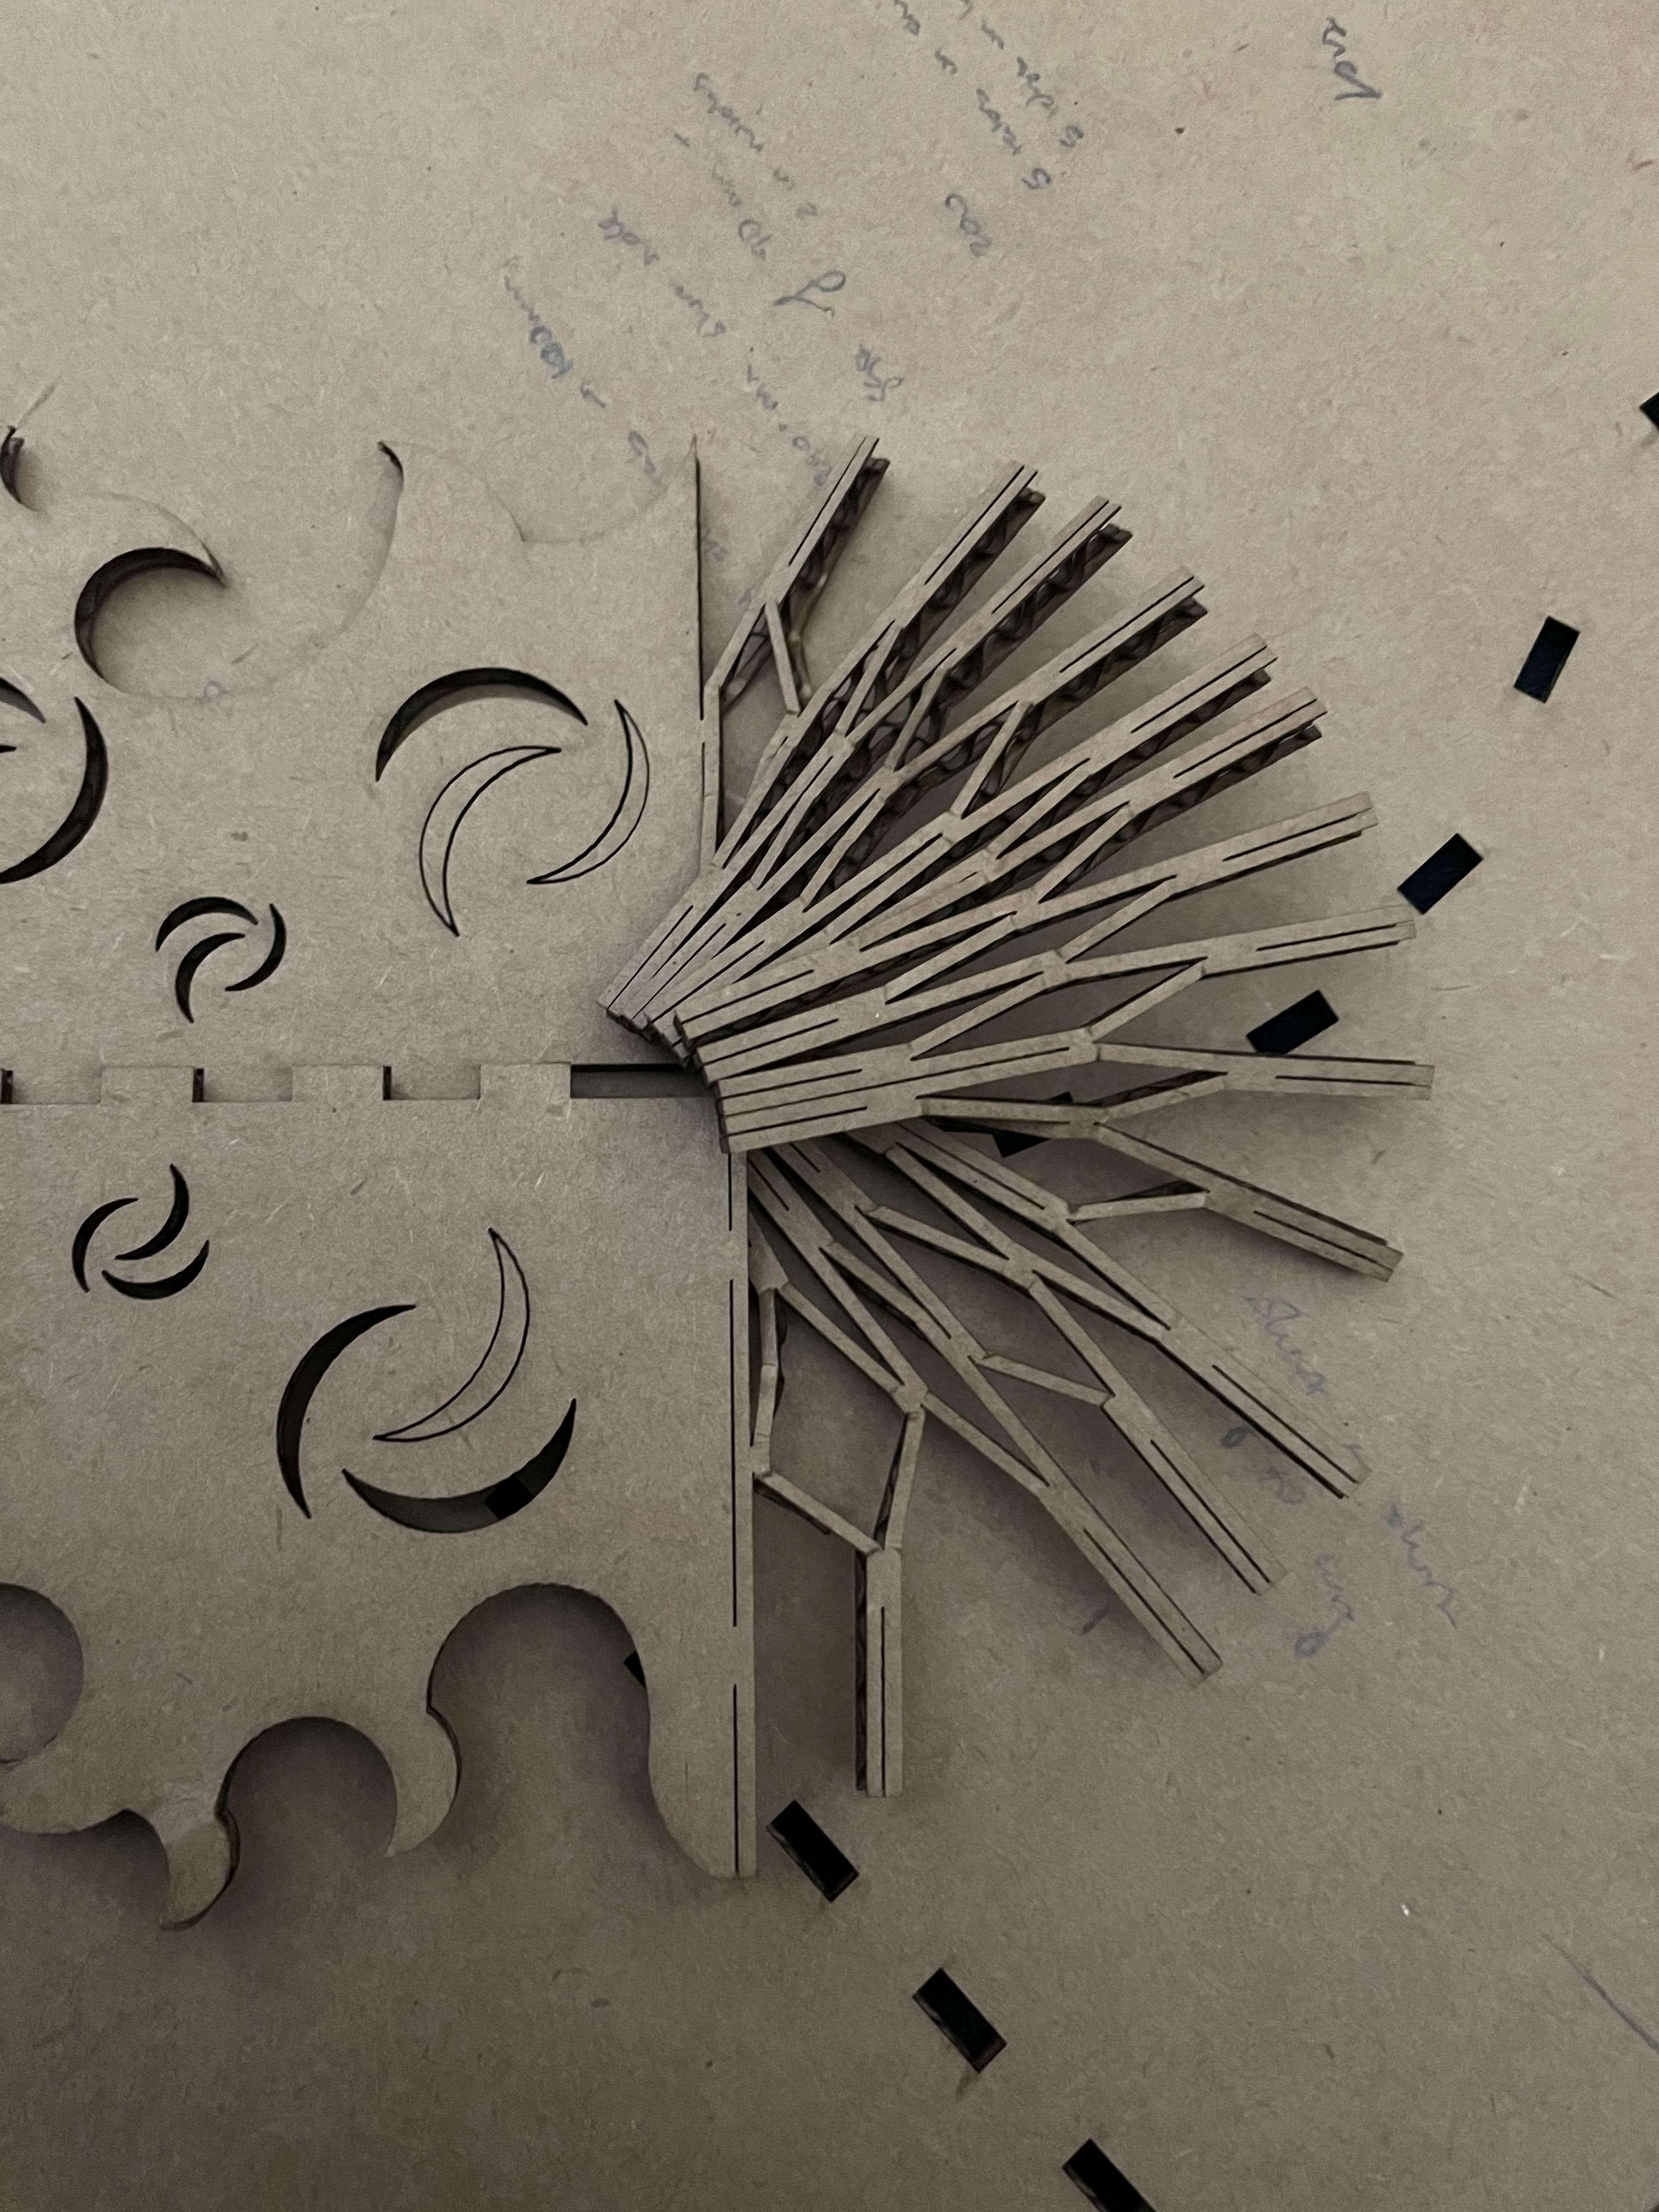
Bonus: I got to experiment with different kerf spacing to form living hinges! I ended up not needing my hinges to be as flexible as they were with a 2.5mm spacing so the final living hinge
ended up being 3mm. Below is the curviest kerf!
The finished glasses!! In my opinion, only the non-wineglass looks good but on the bright side, I have three new glasses through the power of vinylcutting.
- Alex