week 1: cut, design, and print!

the vinyl cutter.

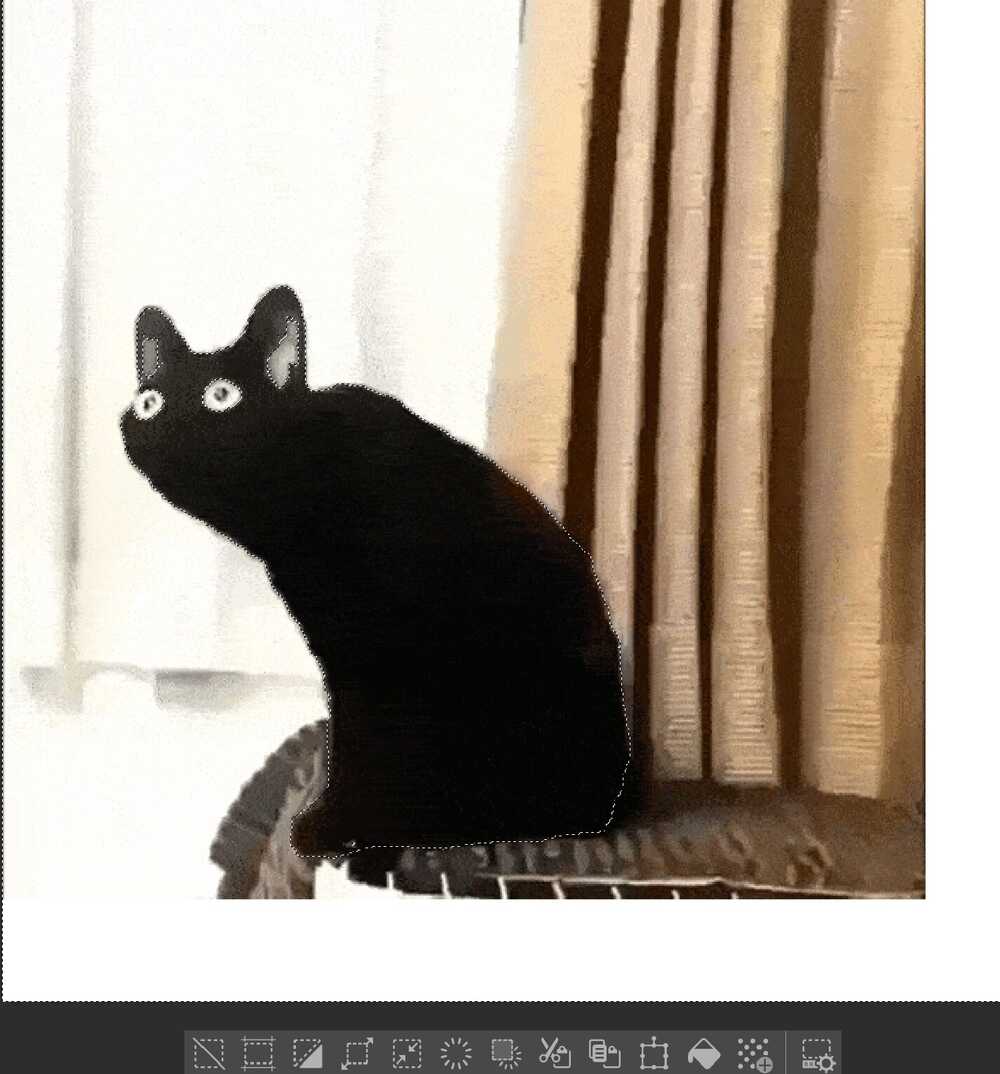
people like cats, right?

For the vinyl cutting assignment, I wanted to make a laptop decal. I never put on laptop decals on my own devices so I figured I'd do a generic decal and give it away. I felt like cat stickers were pretty widely loved so I just went with that.

I wanted to use this assignment to test the vinyl printer's abilities:

  • What happens when a picture is bumpy/ hand drawn?
  • How hard is it to manage nested cuts?
  • Does the image have to be an svg to be smooth?

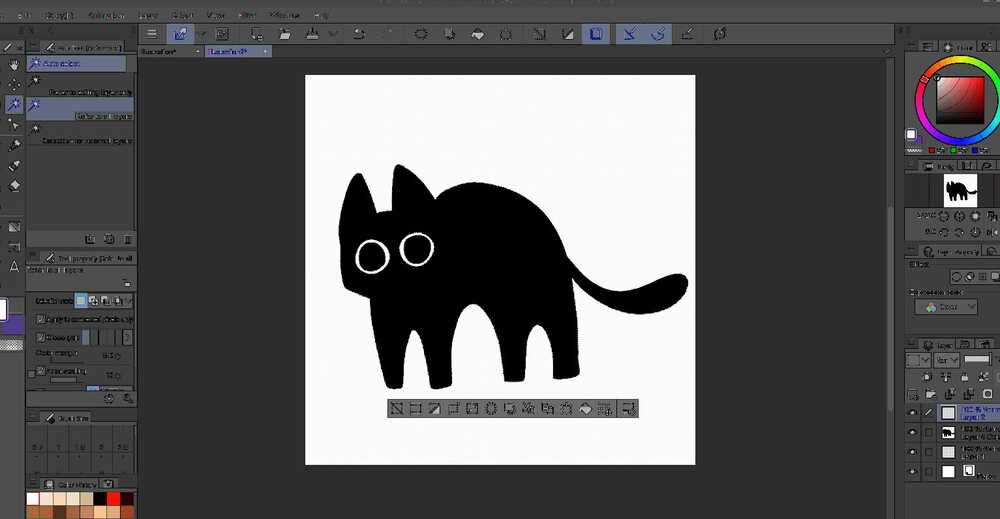
To answer these questions, I elected to use the following images:

Source: Redbubble + Reddit

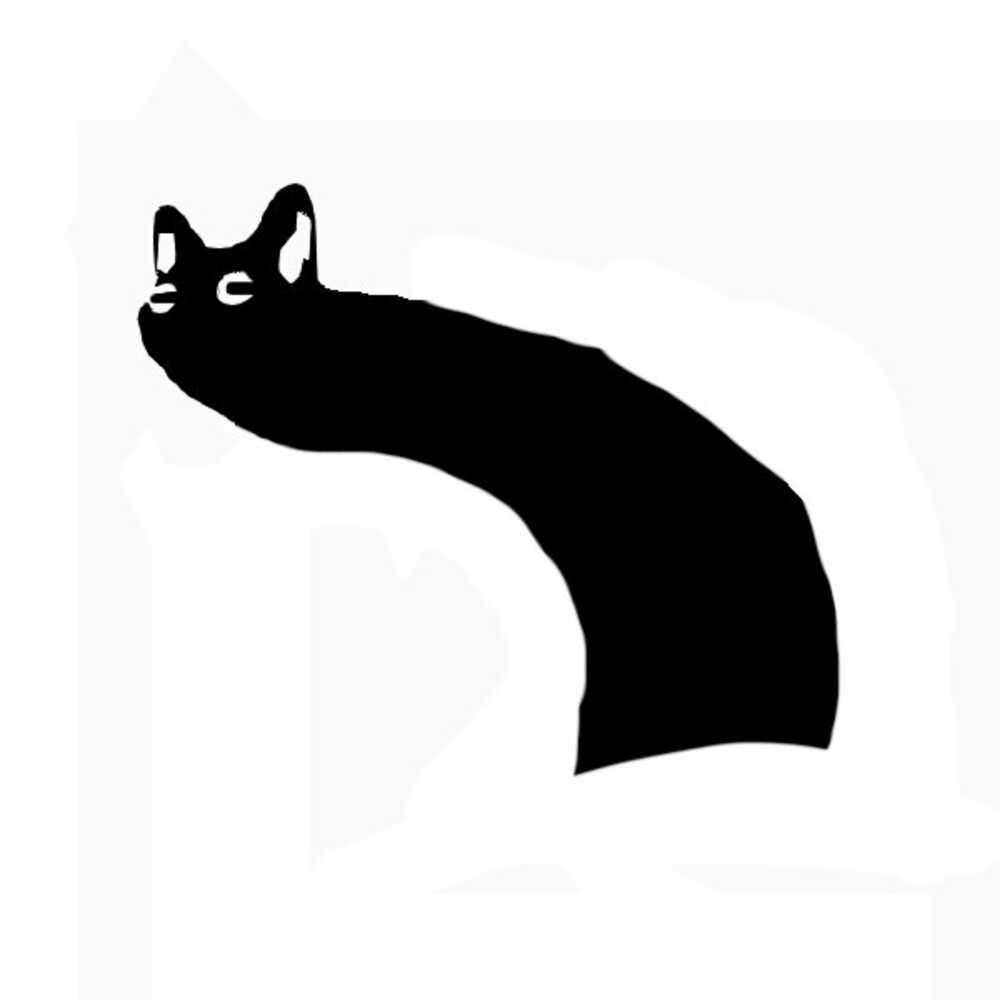
I found these images through Google. The one on the left was downloaded as is, with light editing to remove its background. The other image was cut from a real image, cut out, and giraffe-ified. I wanted to see the quality difference between a hand drawn and (likely) svg generated image. Also, the Redbubble image has nested cuts (the whites of the eyes), and I wanted to see how hard it would be to get those out.

Program: Clip Studio

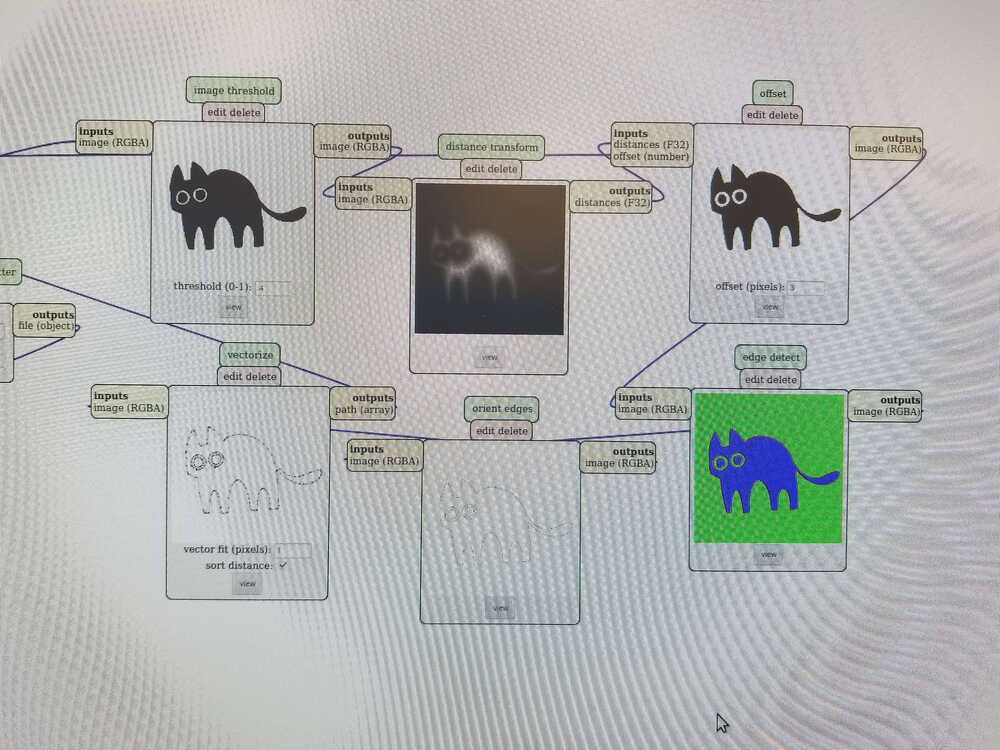
I tried different settings on the vinyl image-to-print program we have connected to the cutter. I tried different offsets (one being shown in the image below) to see how drastic the change, but the offset did not seem to affect the print. I also tried different dpi (from 100 - 300) to take the image from less than 1 in to 1-3in.

The first time I sent an image to the vinyl cutter, I forgot to lock the material in place. The cutter began cutting anyway and the material started to shift. I stopped it quickly, noting that the machine would run sort of regardless of the state it was in.

Weeding the cut outs was very straightforward, given that the cats were large simple shapes. When it came to the giraffe cat's eyes, the pupil had to be held down. Similarly, the other cat's eye whites were removed with a combination of holding down the pupil and tweesing out the extras.

Looking at the giraffe cat, I noticed that much of the bumpiness of the image remained. Some smoothing occured based on printing settings (like increasing/decreasing image scanning threshold, I had the threshold set to 1) but for the most part, much of the small details of the original image remained.

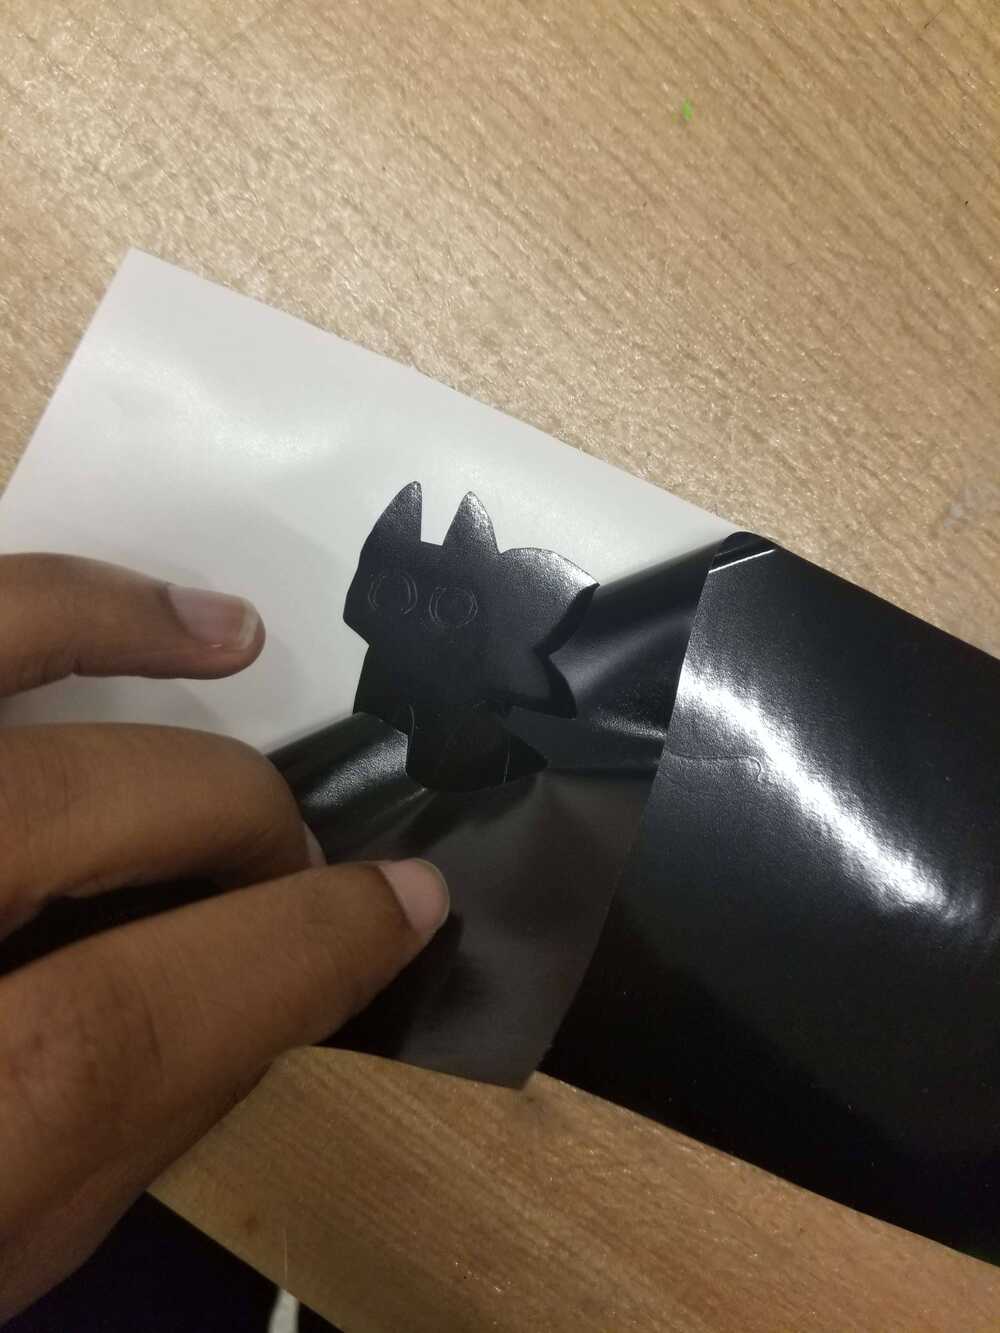
With the transfer sheet applied, this part of the assignment was complete!

the laser cutter: ideation.

designing a laptop vent stand

I was in desperate need of a vent stand for my laptop. The vent on the back of my laptop reaches temperatures that rival the surface of the Sun when it is covered. I wanted to print and construct a small stand that would raise the vent of my computer, while also being discrete enough of a kit that I could quickly store it in my laptop case.

The image above shows my ideation process for the design of the stand. My idea for the design continued to change even as I design it in fusion.

Looking at the concept image above, I settled on a minimal design that could be flattened and fit into a laptop case. I kept the idea of flaps that could flip up and removable pieces that held those flaps together.

I didn't want any sharp edges on the outside of the base shape that held the flaps since I knew those edges would be bumping up against the sides of a laptop case and would likely wear first. Modeling the flaps too way way more work than I thought it would. My main issue was that the flaps were internal so getting the program to select the correct areas to bend was difficult. I finally got around the issue after a lot of sketching and re-sketching and re-extruding. What really got it to work was offsetting the hole in the base from the actual size of the flap being flipped.

Next, I moved to design the removable press-fit pieces that would hold the raised flaps in place.

I cut the press fit holes from the cardboard using the flaps themselves. Cardboard is a slighlty flexible/squishy material so this cut would allow for a good fit that allowed for some slight shifting. I wanted some space for shift because I knew that, in reality, the flaps would not be able to perfectly be lifted to the same position every time. To store the press fit pieces, I used the sides of the base to store the shapes. Cardboard is a layered material so just cutting the press fit parts out of the base will allow for a fit that would hold the side pieces in place for the most part.

I followed the printing settings that we found in the group assignment and printed my first draft:

It became immediately obvious that the sides of the press fit were way too skinny. Those legs on the press fit pieces had to take the brunt of holding the folding pieces computer and holding the folding flaps together. Additionally, when folding up the flaps the first time, I messed up the bend location and realized that the middle portion of the press fit piece was too wide and too square and would cause problems if the flaps were not perfectly lifted. I went back and changed these things:

and printed it:

This version worked a lot better and was way more sturdy. Also, since the pieces were all highly symmetrical, they could be assembled in multiple ways. For instance, you could flip the flaps in the oppsite direction and place the pressfit pieces at the bottom so the base holds up the laptop. There are other assemblies that include having the pressfit pieces fit into each other, but these configurations don't make a laptop stand.

The pressfit pieces fit well in their flat configuration and their press-fit configuration. And most importantly, it was able to hold up my laptop!