Week 7 - Molding and Casting
This weeks assignments covered molding and casting. The general process is to machine a wax block with the positive of the part, pour a rubber-like material called Oomoo into it (which is then the negative And the mold), then pour the desired final material into the mold. A couple constraints drive the parts we could make this week. First, the wax block dimensions were 1.5"x3"x7". This the stock dimensions, however the structural integrity of the wax falls off with wall thicknesses less than 0.25". Additionally, the shopbot 3-axis CNC machine in the EDS shop has a 0.25" and 0.125" end mill. Luckily, the length of the end mill is long enough to avoid collisions. Other constraints include limited machine time (which sets the surface finish) and the 3-axis machine nature means that there cannot be undercuts with a flat end mill. Luckily, the oomoo is flexible and easy to get out of the mold, even with a straight face.
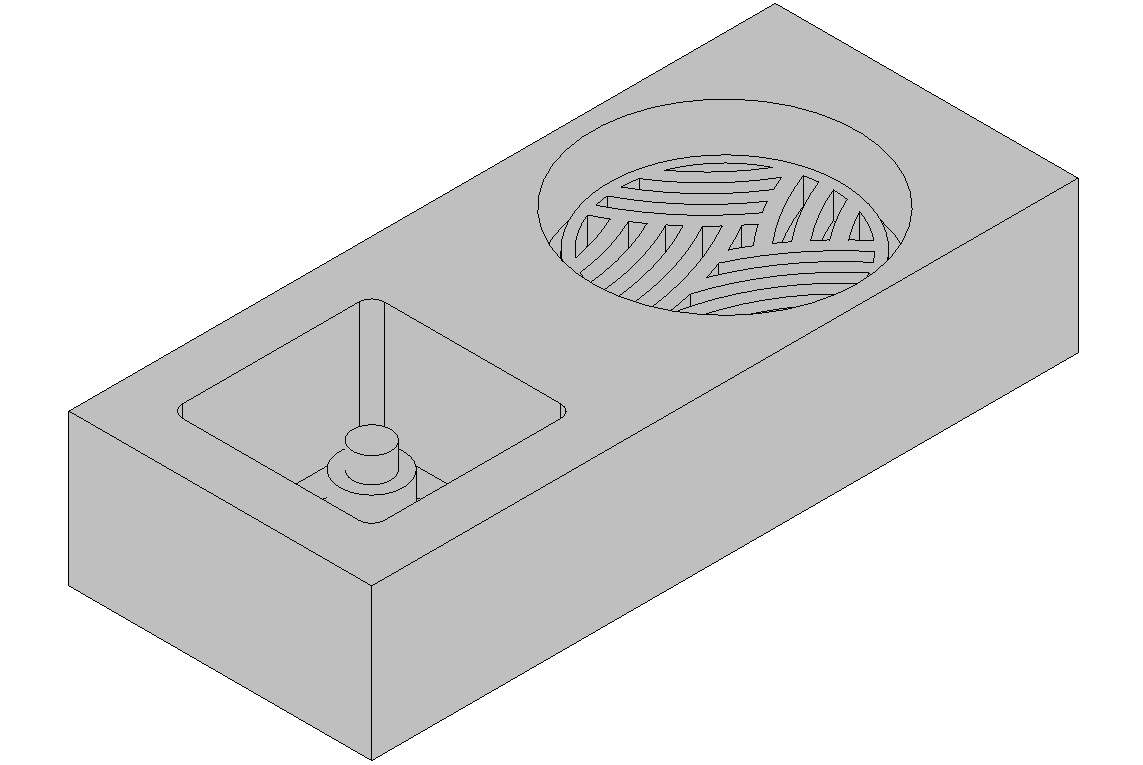
The two parts I decided to make were a interesting patterned coaster (that turned out to be too small to be a coaster) and a nut for a lead screw, to be used in part of my final project. Starting off with the coaster, I first paintstainkly made the pattern out of many many circles with exactu dimensions of 0.125" (which was a mistake I had to come back to).
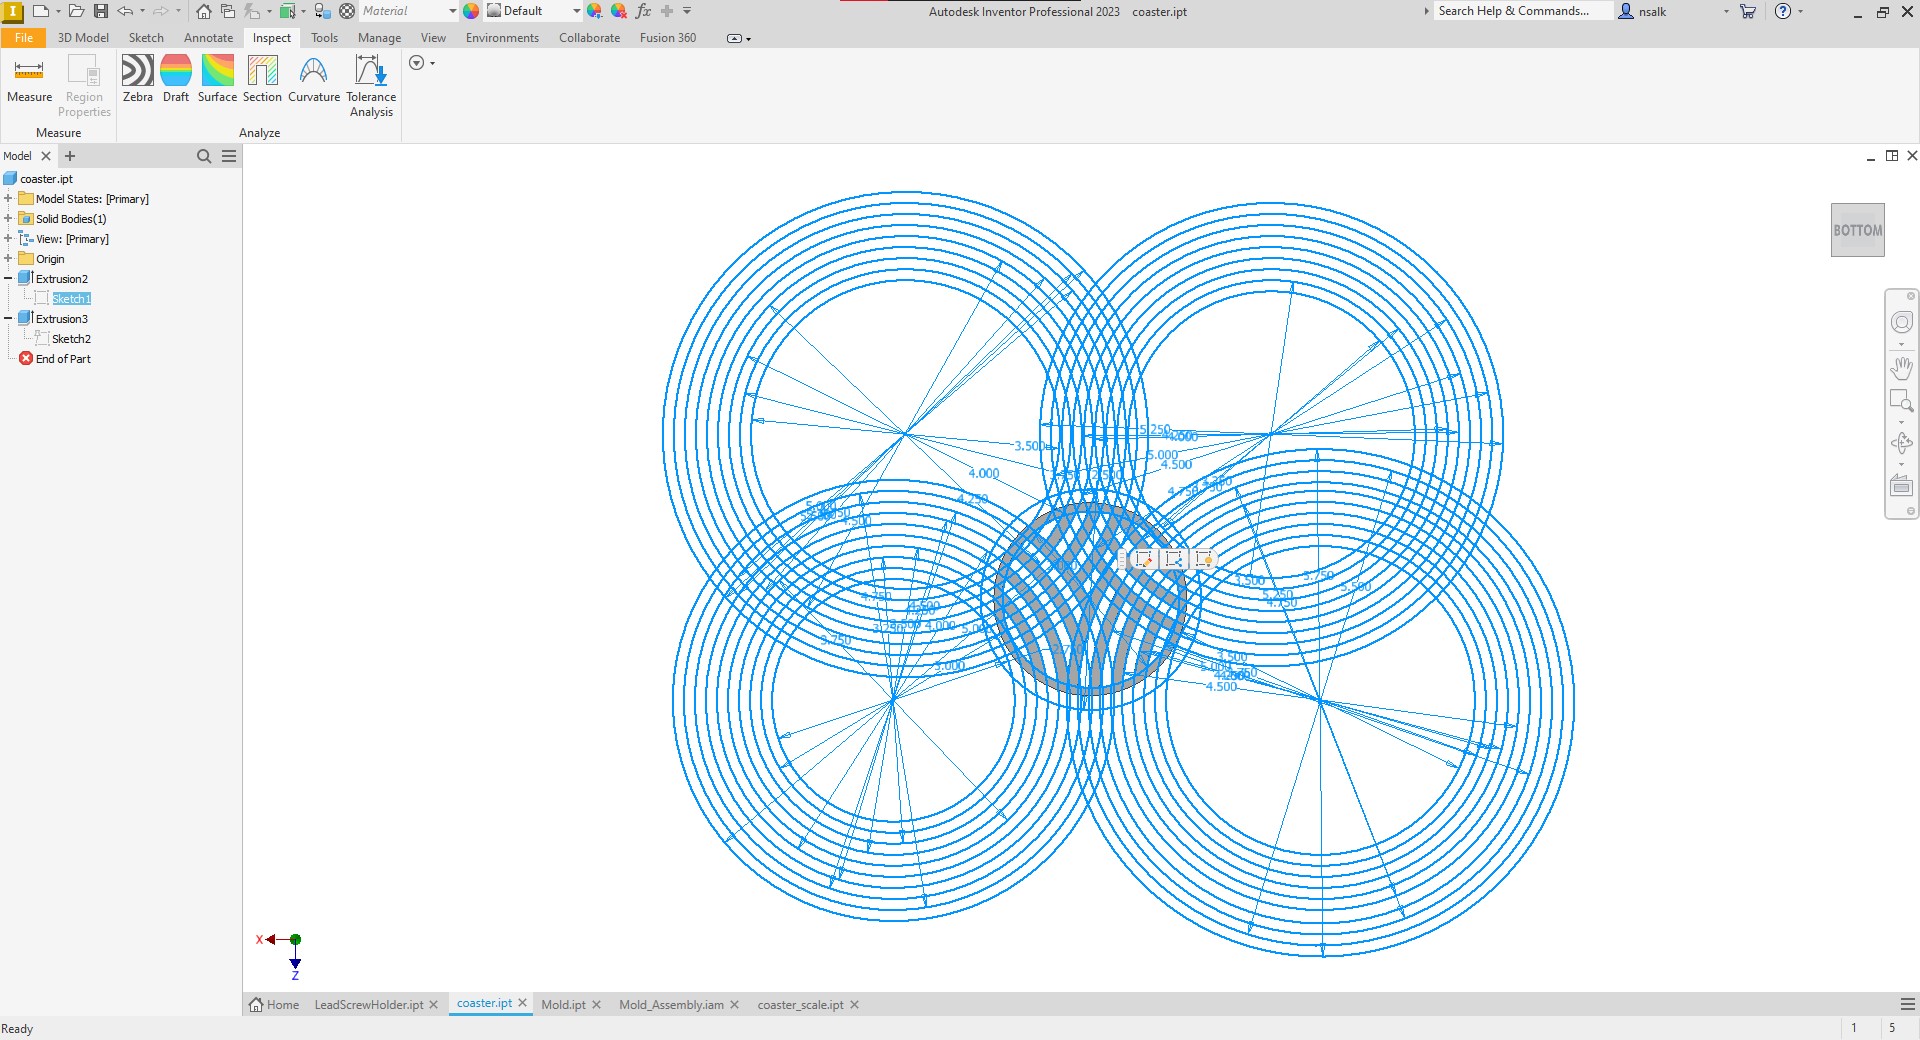
I then extreduded the intersecting parts that I wanted to keep. This was also a painstaking process that there's probably a better way to do. I later had to come back because the Fusion CAM wasn't happy with the grooves that were exactly 0.125" wide, the width of the tool, so I had to export as a STEP and then derive a new part from the STEP file and upon input I was given the option to scale it. I scaled it by 5% and it was happy.
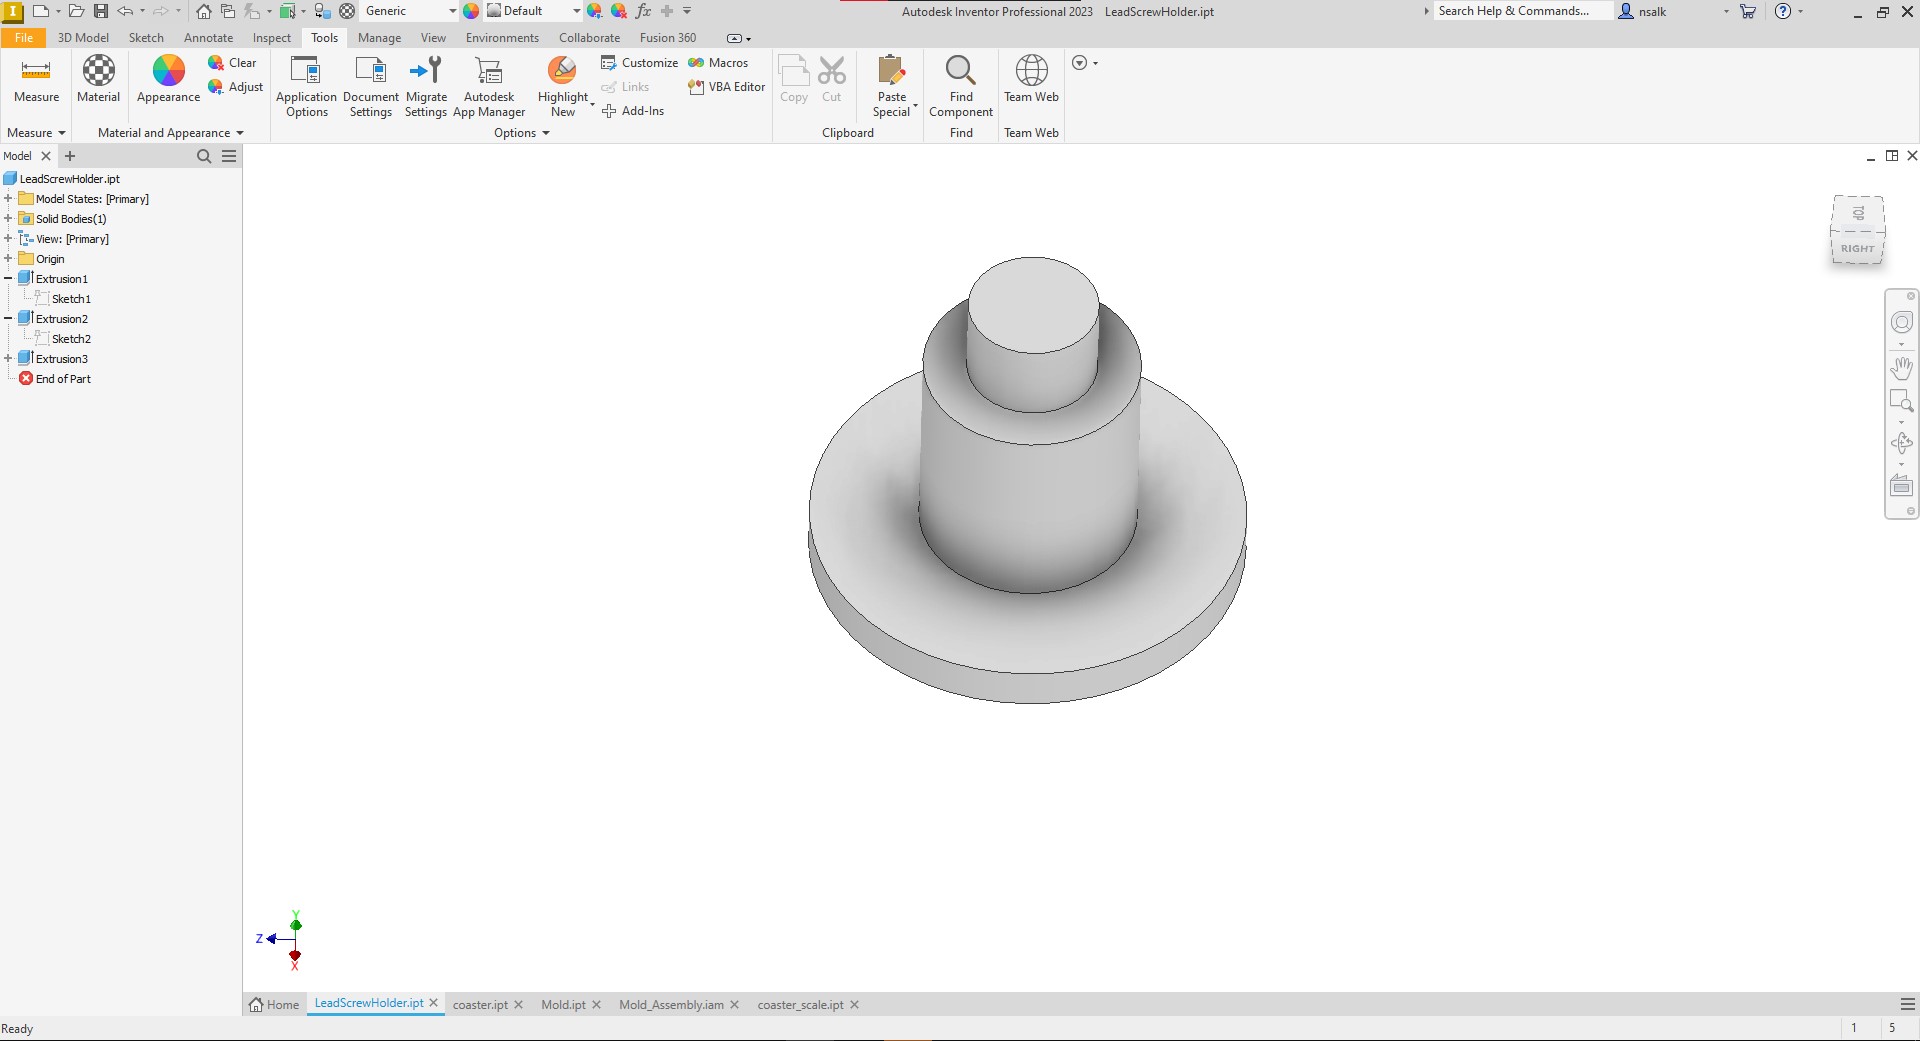
Then when I moved on to make the outline of the lead screw nut. This was a simplified geometry because the complexity happens when I put the actual lead screw inside the mold while the material is curing. I will have to use a lot of mold release or PVA layers to keep the right dimensions and I will also have to use the two part plastic in order for the integrity to be met (ceramic/plaster won't cut it). So there is a 3/8" notch in the positive of the part that will be used to hold the lead screw in place and up right while the material is curing.
<
The CAM software needs me to also model the stock wax material so it know what to cut away. Therefore, I need to make the wax block template with cutouts for where my parts will sit in. I made the stock block as a separate part and ensure the slot depths were deep enough to have a good amount of material at the top, which would be the bottom of the part when pouring.
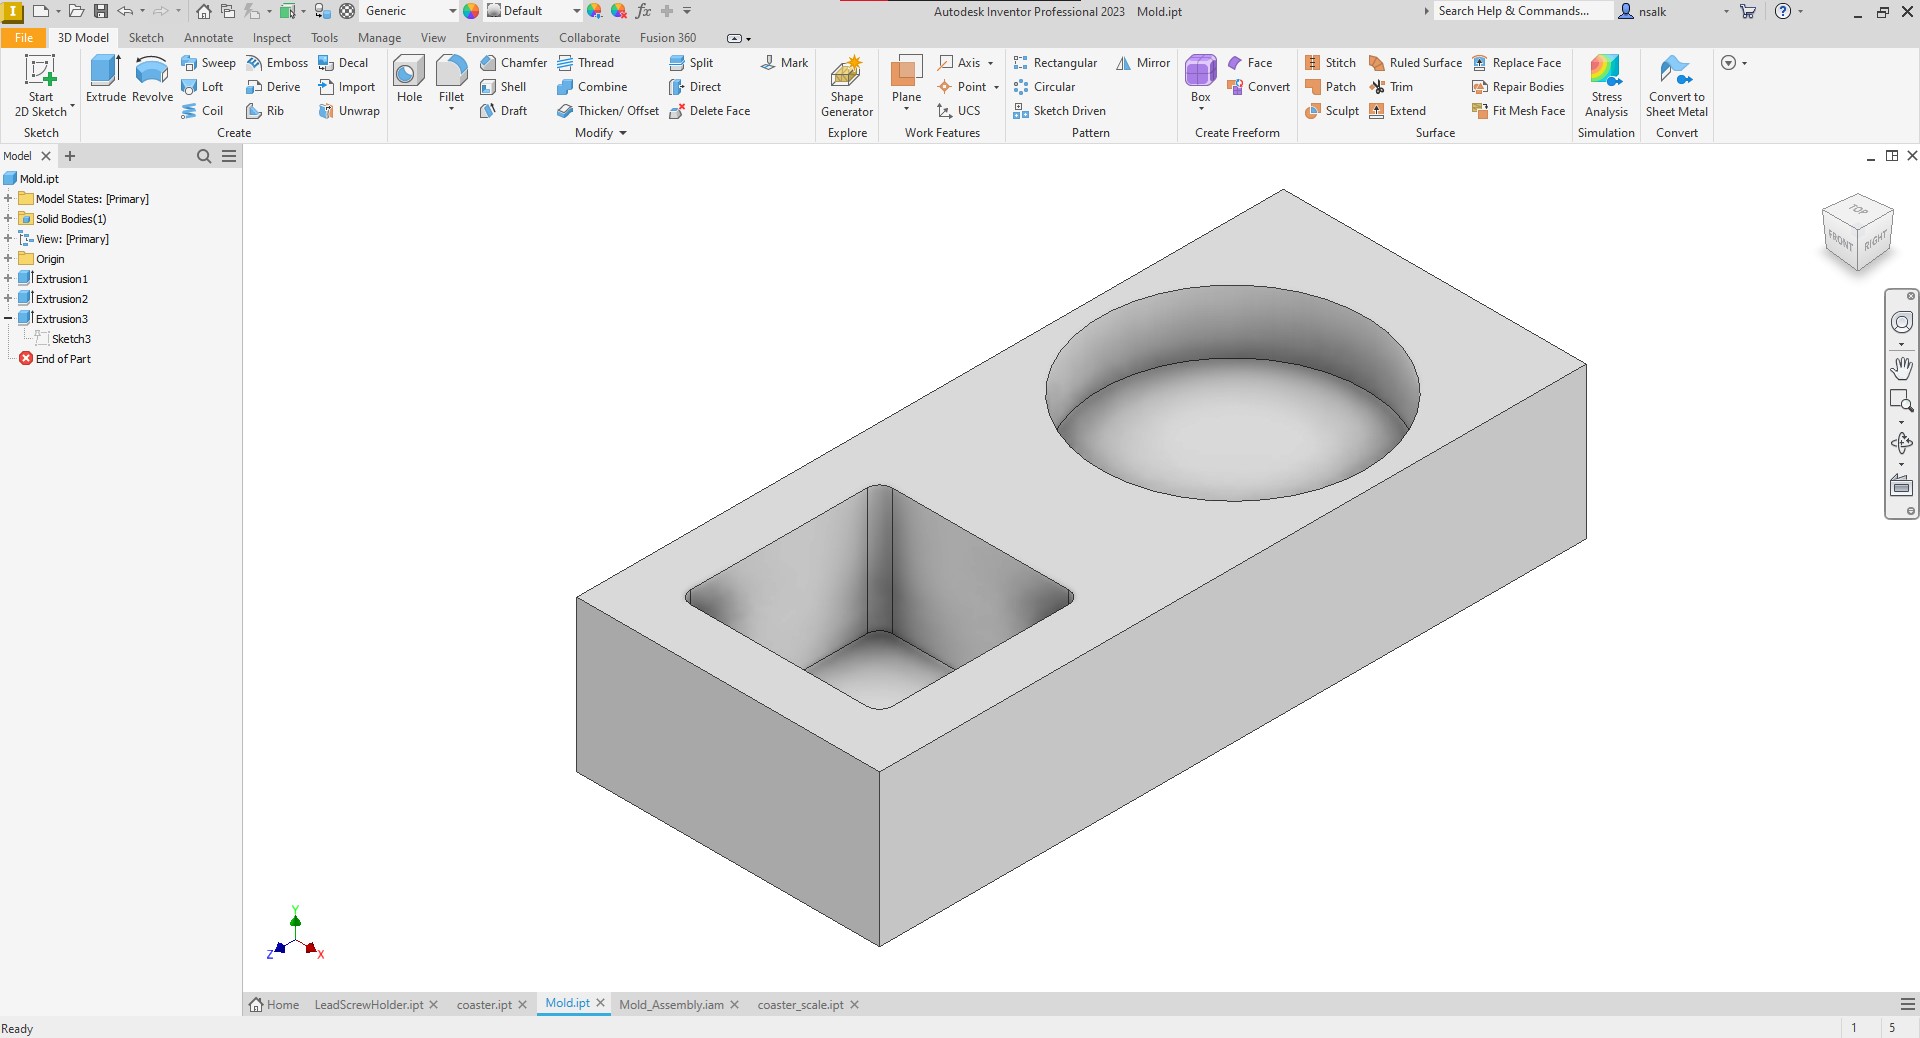
I then created an assembly in Inventor because I can't stand Fusion assemblies. I placed the wax stock as the base and inserted the two parts into their respective slots.
Now that was completed I exported the assembly as a STEP file and imported it into Fusion to implement CAM.
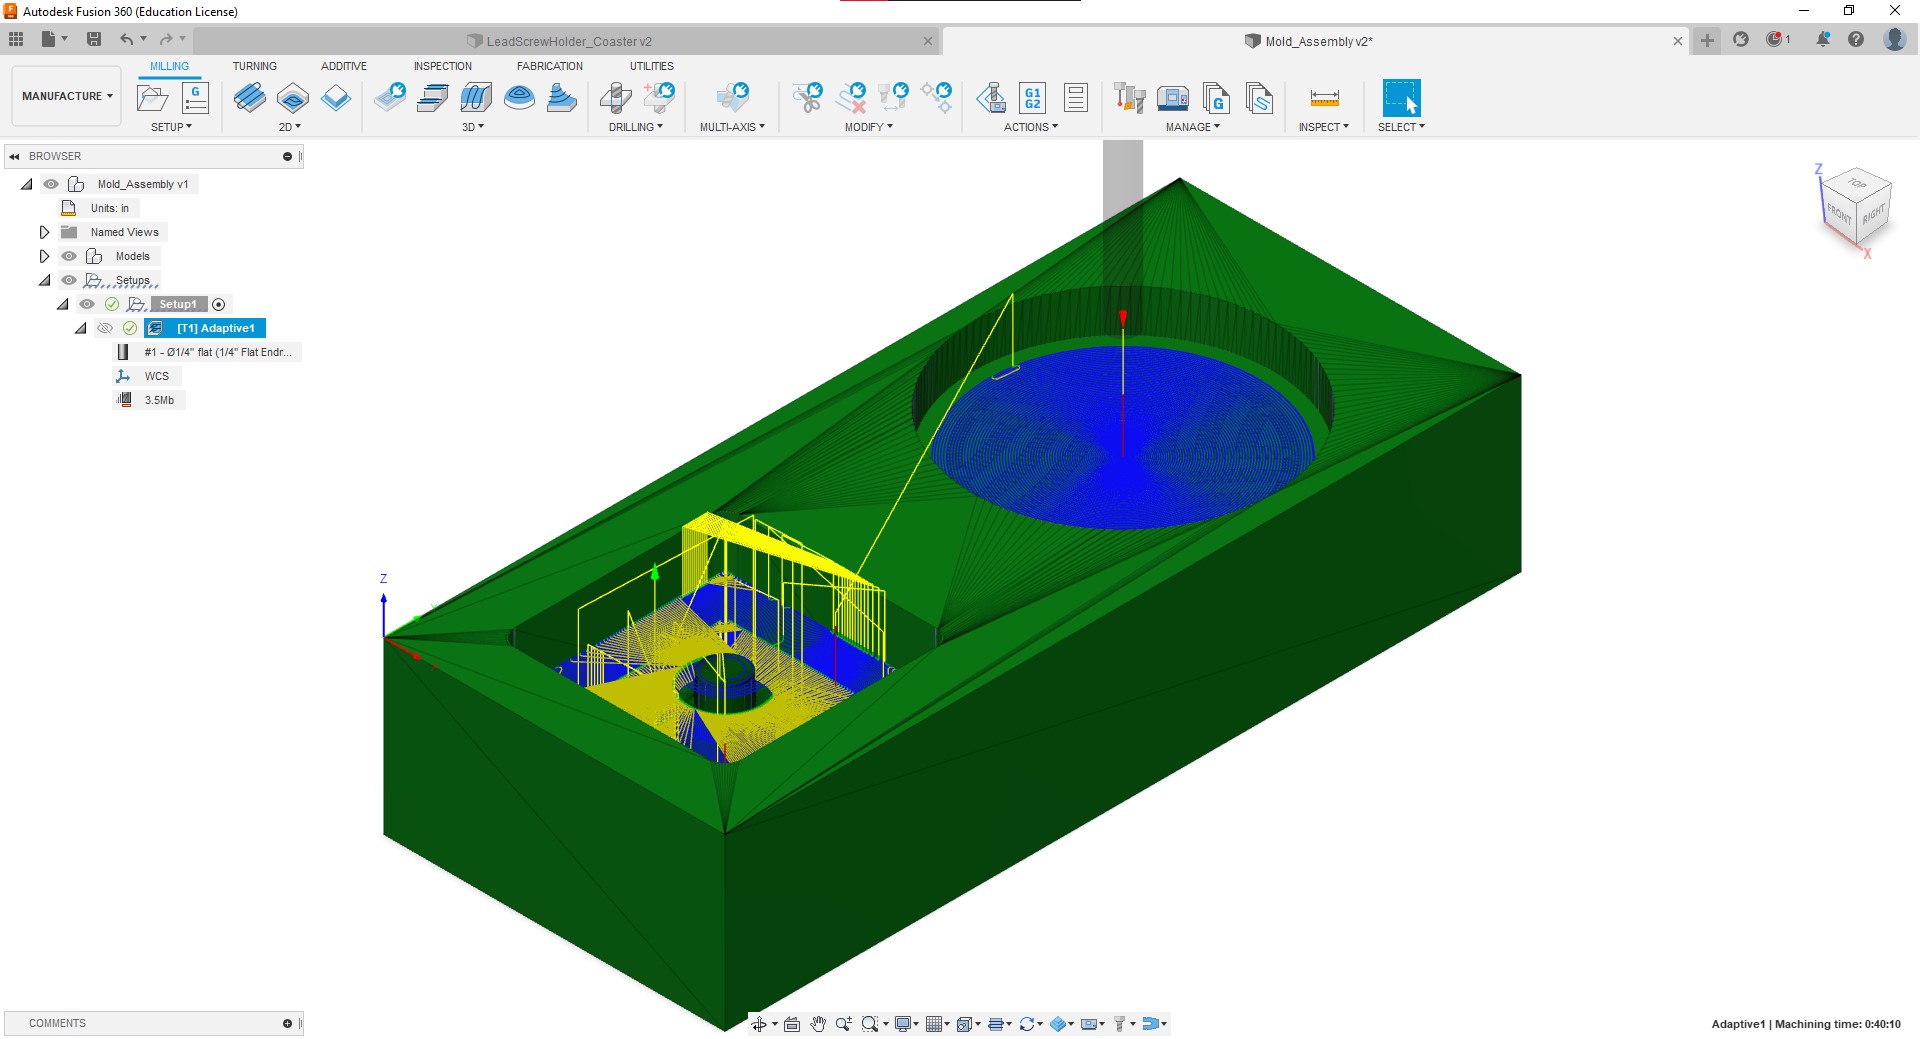
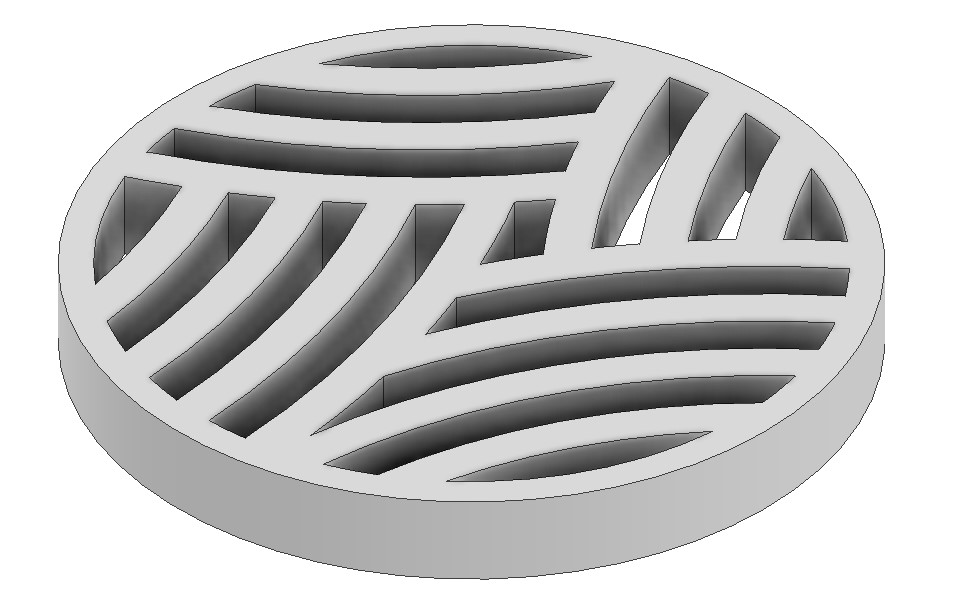
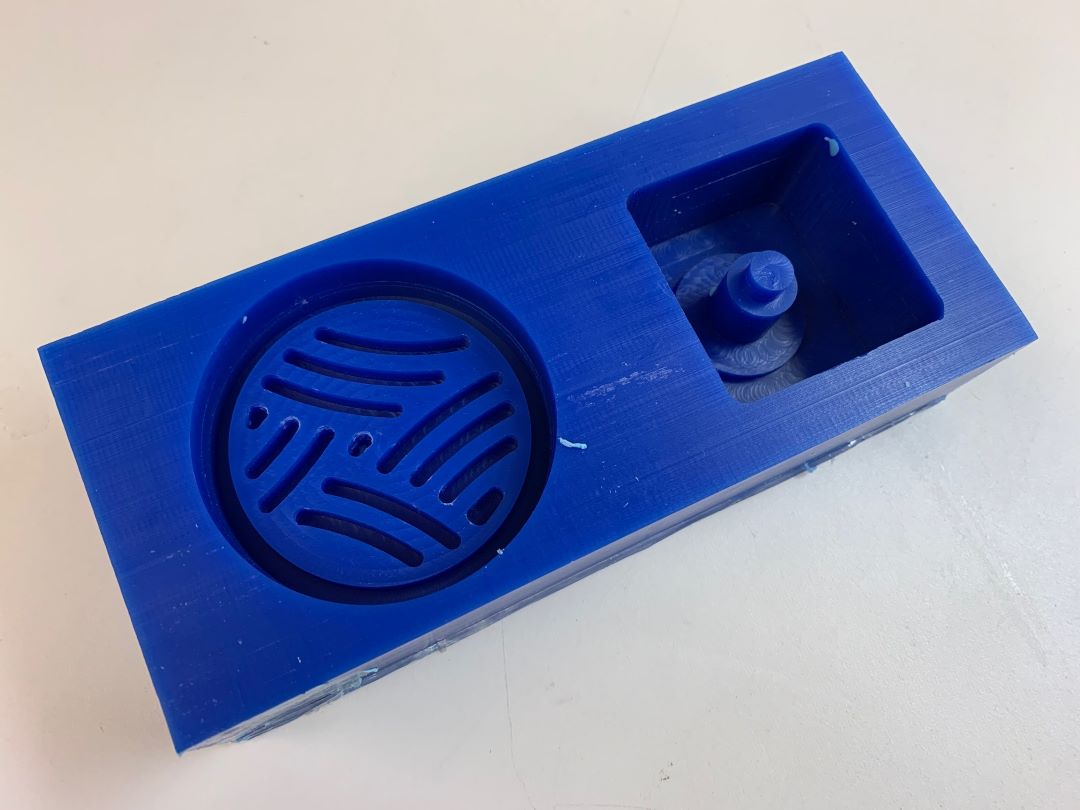
The first path was to do adaptive roughly clearing using the 1/4" endmill. This tool is capable of completely making the lead screw nut because there aren't any small details in the part, but the coaster required a change to the 1/8" end mill midway through the machining. The end result was success. As expected, the sharp points in the coaster geometry can't actually be made, so they appear filletted.
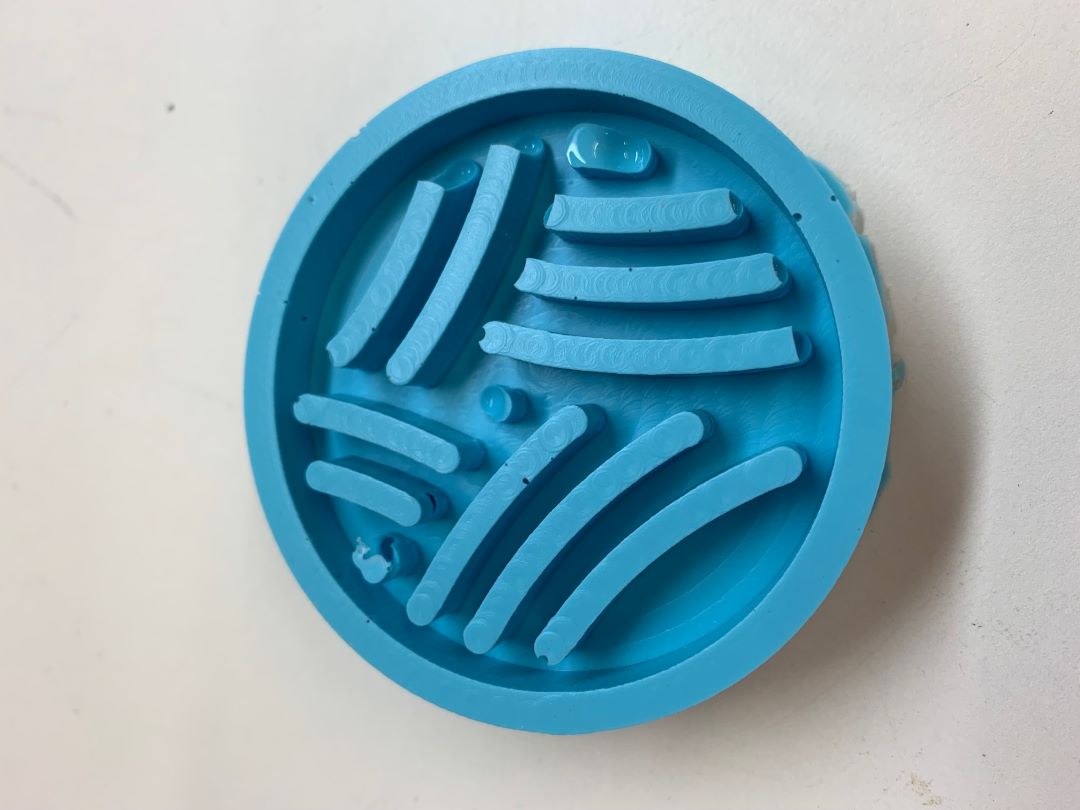
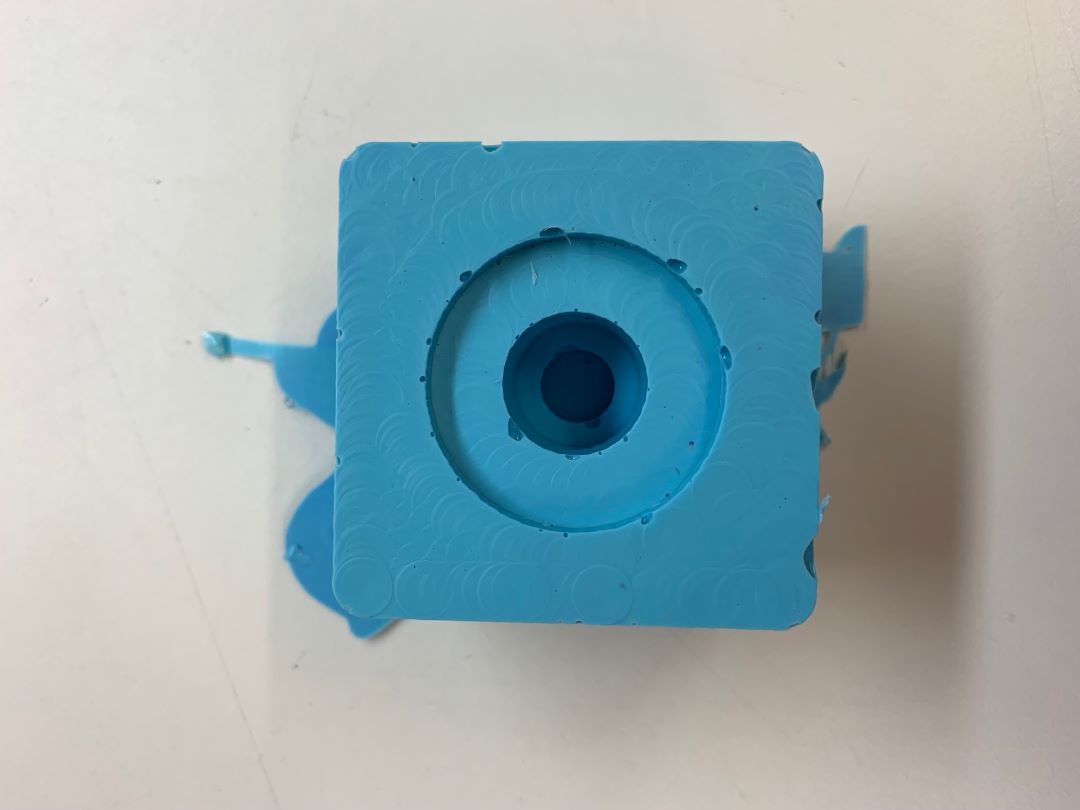
Now it was time to create the mold. Oomoo is a two part material. The mix ratio is one part A to one part B by volume and the stuff cures fast.To determine the final volume, I pour water into the mold and then pour the water into a graduated cup. This is the final volume. I pour the more viscous part first into a cup and then the less viscous part trying to be careful of bubbles forming by pouring a think stream. Unfortunately, I was trying to be two careful and I was too slow. I tried to mix carefully and throroughly without introducing air bubbles into the Oomoo. I took to long and by the time I started to pour the Oomoo into my wax template, the stuff was already thickening (It's pot life is 15 min). I started dumping it into the mold because it wasn't creating a nice thin stream anymore. The end result was a pretty shotty mess with lots of air bubbles.

But, I let it dry overnight and took the two molds out of the wax. They came clean out and definitely have significant air bubbles. However, I'm pretty happy with the results regardless. I can alway sand away the material that will fall into the holes.
I chose to use hydrostone because I like the finish and the mix ratio is clear and good. The mix ratio is 33 parts water to 100 parts powder by weight. I first pour roughly 50 g of water into a small cup that's sitting on a scale and already has been zeroed. I then pour the hydrostone powder into the cup until the scale reads 200 g. I thoroughly mix the combination, not paying to much care to the bubbles since it's loose and I don't care about small bubble inside the part itself, until it becomes a loose milk shake-like consistency. I then pour this in a thin stream into each mold (I decide to pour into the lead screw nut even though this will be eventually be plastic, just to see the shape and if I'm happy with the dimensions).
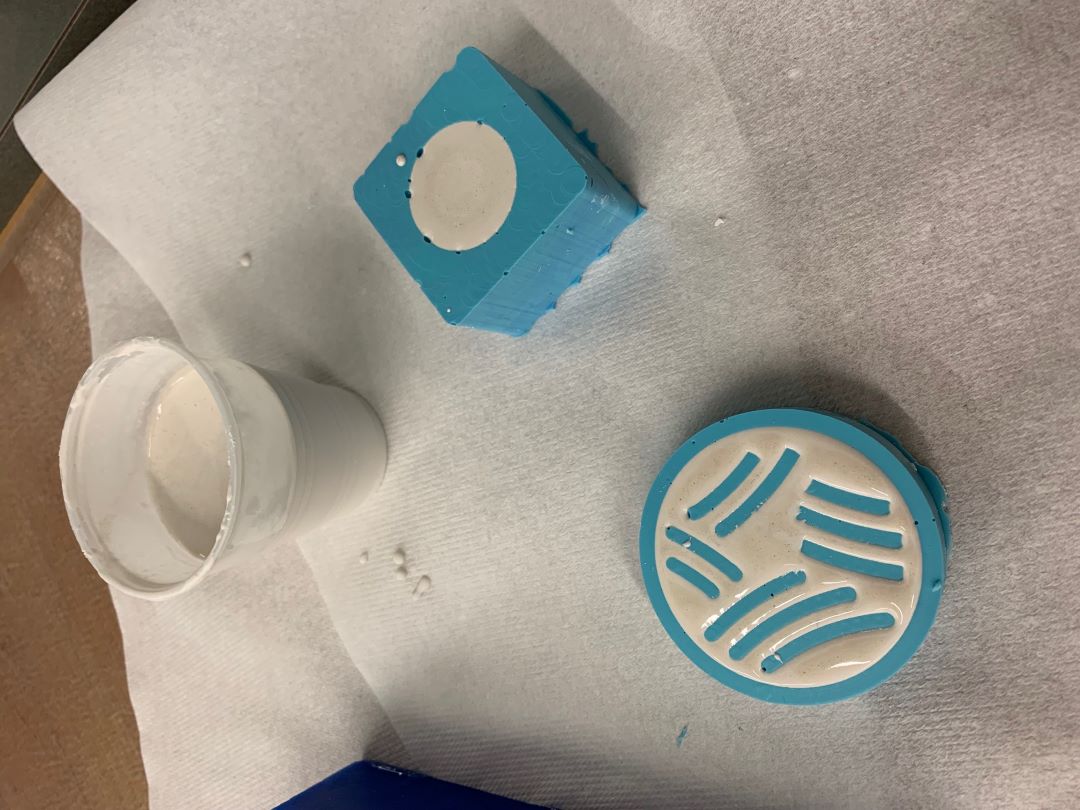
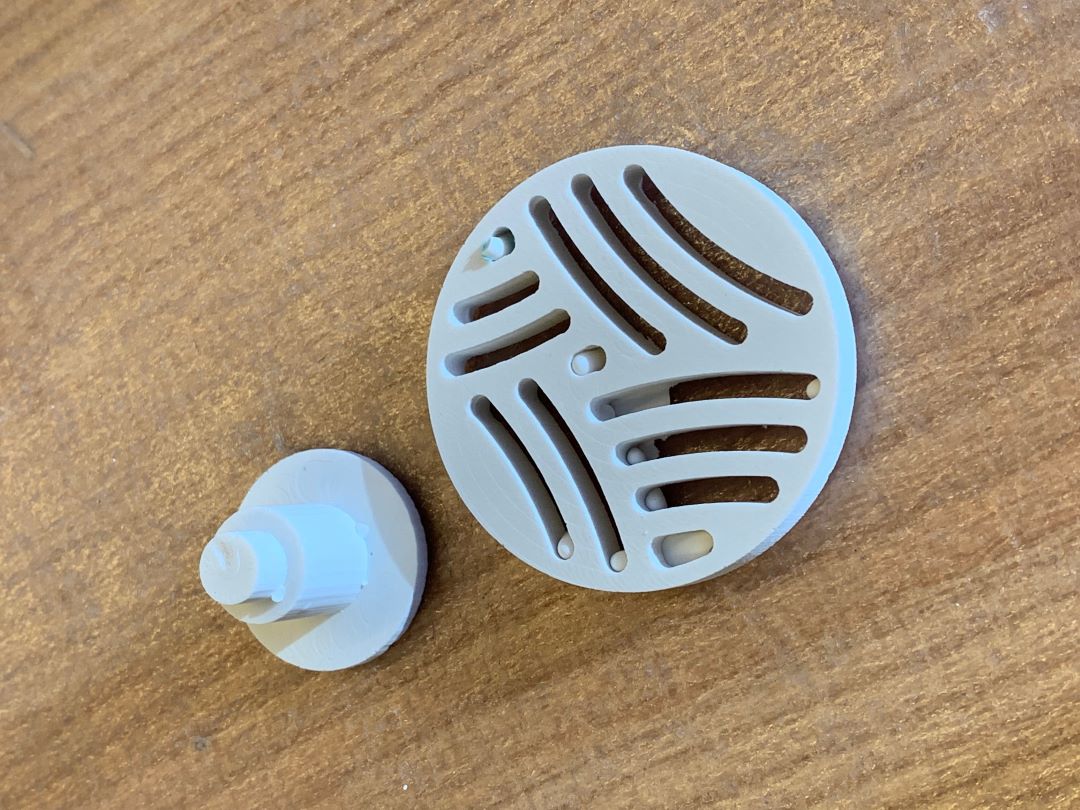
The next day I come back after the hydrostone dried and extracted the part from the mold. The end result is pretty good, especially when considering how bad the molds were.
Design files for this week can be found here.