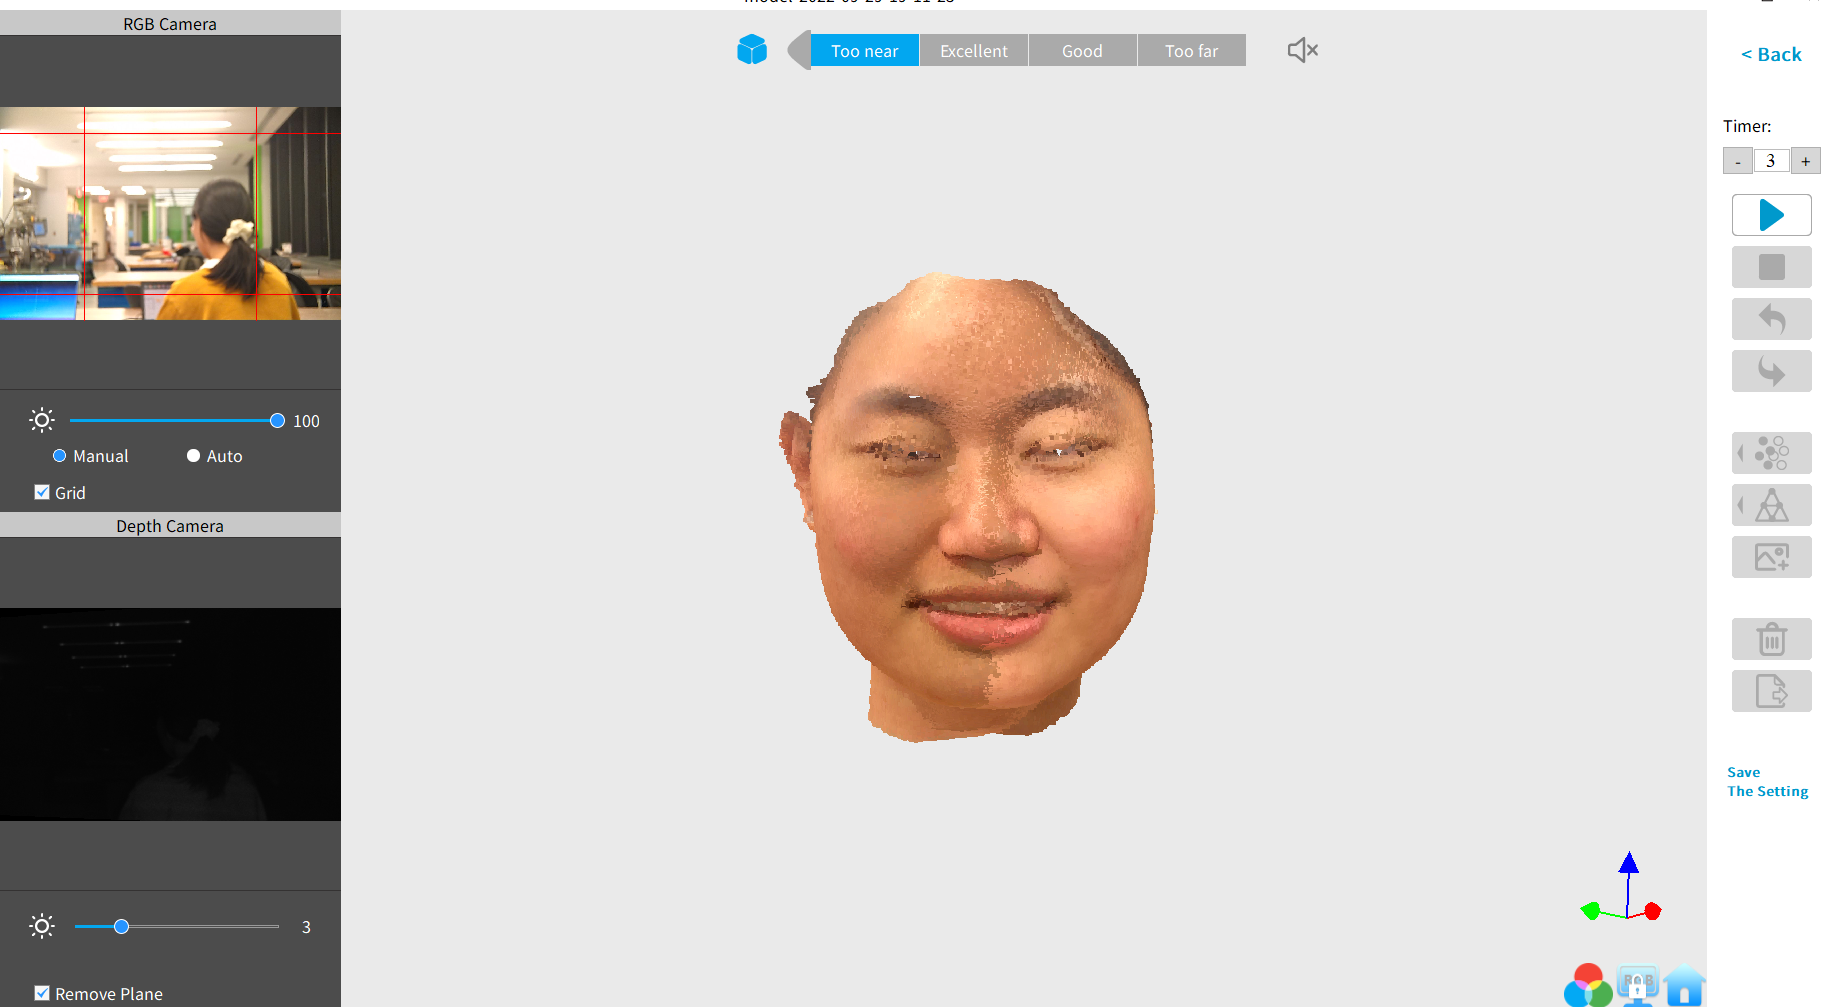
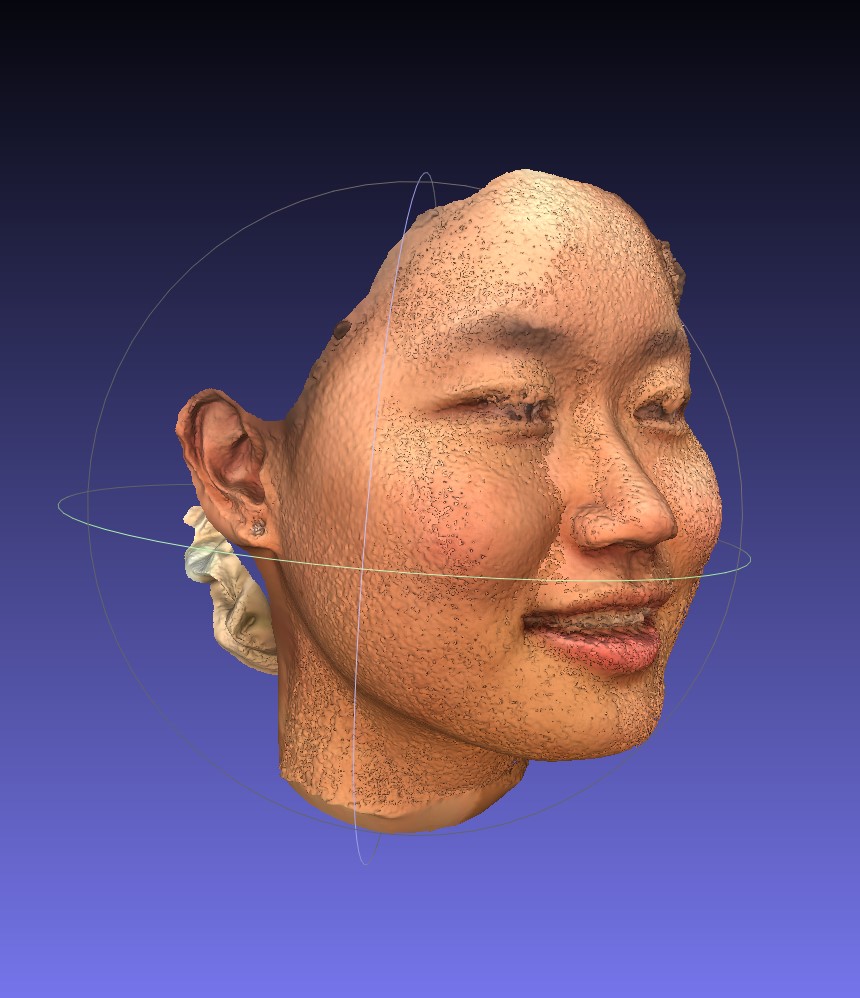
In my research lab, I use confocal microscopy to scan C. elegans. However, I never used Revopoint for scanning. After seeing Anthony's demonstration of scanning a sculpture, I was quite impressed by how detailed the scanned sculpture was. Therefore, my expectations were high and decided to scan my face, hoping to produce an equivalent quality of my scanned face. I placed the scanner at a height and using the rotatable chair in the lab, I spun myself. The scanning happened at night, so I avoided potential complications due to the sunlight. However, since my hair is dark and my glasses are transparent, the scanner couldn't recognize some of my features. Therefore, I only scanned my face: slowly rotating my head from right to the left, I moved so that the scanner could capture my face. Unfortunately, my eyes moved, resulting in an eyeless figure. Overall, I'm very satisfied with the scanner!
3D CAD design
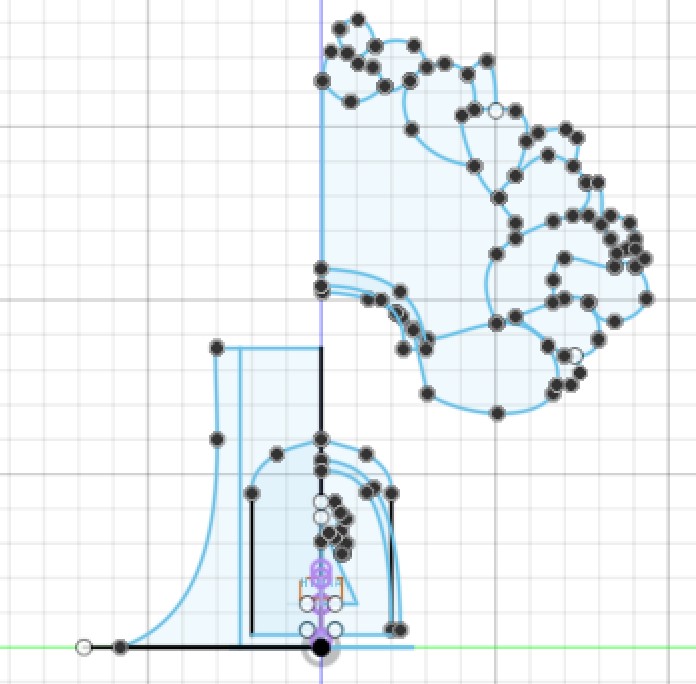
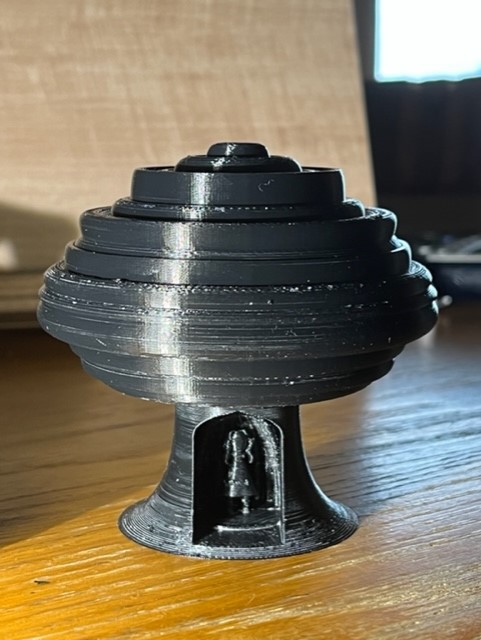
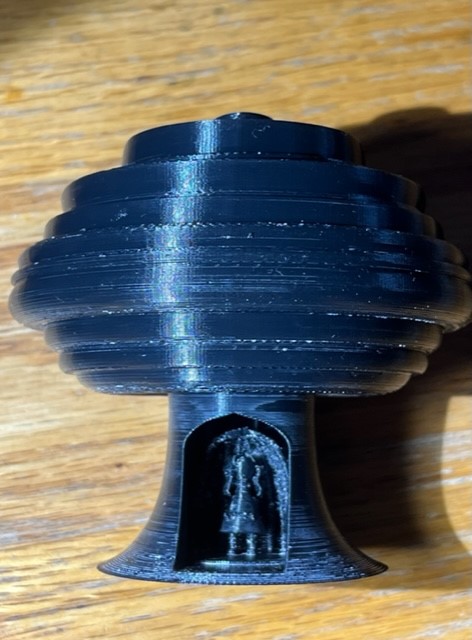
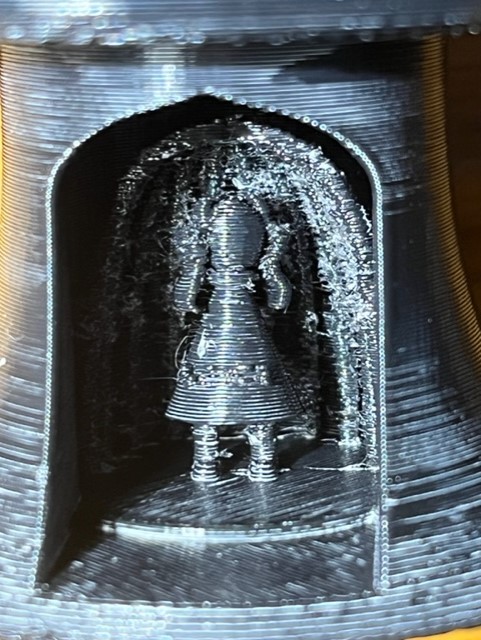
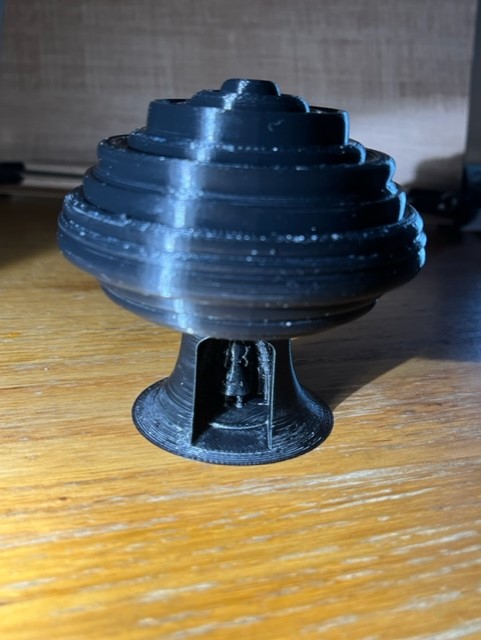
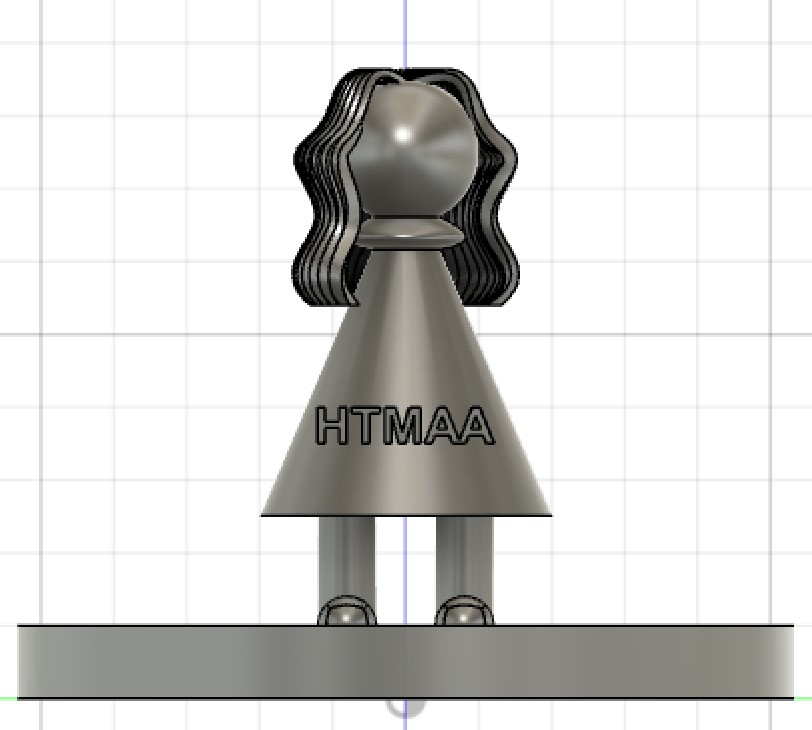
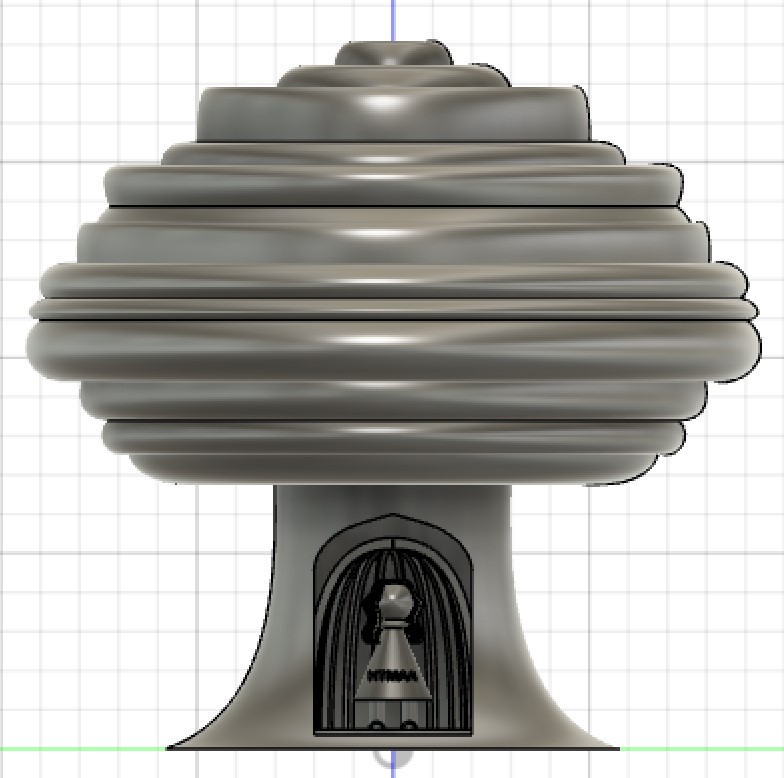
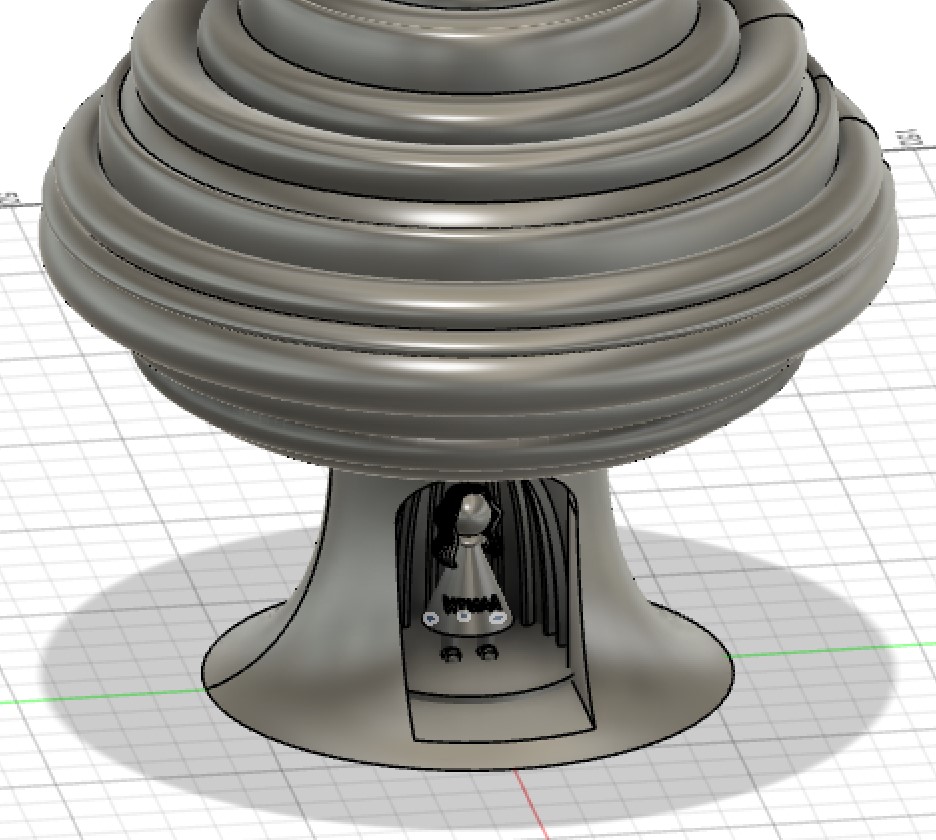
I used Fusion 360 to CAD a girl inside the tree. To meet the homework requirement ("cannot be made subtractively"), I tried to make the inner part of the tree as detailed as possible. During the design process, I used a new feature called "revolve," which made my life so much easier! Anthony also taught me how to use "sweep" and it was the perfect tool for the girl's hair. I then used a circular pattern to repeat the hairline. Moreover, I wanted to be explorative and give the girl cute shoes, which were created by the "create form" feature. The tree was another challenge since I didn't know how to make it look aesthetic on Fusion. I first thought about making branches using the "sweep" tool and then inserting leaves, but unfortunately, that demanded an excessive amount of time. After pondering for a moment, I decided to make tree-like protrusions and used the revolve feature again to finalize the model. This week's CADing expanded my 3D modeling skills, and I enjoyed deepening my knowledge in computer-aided design!
Printing
I first exported my STL file into a USB drive. Before initiating the print, I confirmed all printing works were finished and cleaned (if not, acetone should be used to clean the surface). The black PLA filaments (sadly, this was the only color available) were already installed into the Stratasys 3D printer (a special printer that enables dissolvable support material). When I opened my file on the printer system, I realized that my figure was excessively big, so I resized down by 50% to save both material and time. I reviewed and confirmed the automated print settings, which have already been set from the group assignment. The printing took approximately 7 hours and 30 minutes.
Tree post-printing
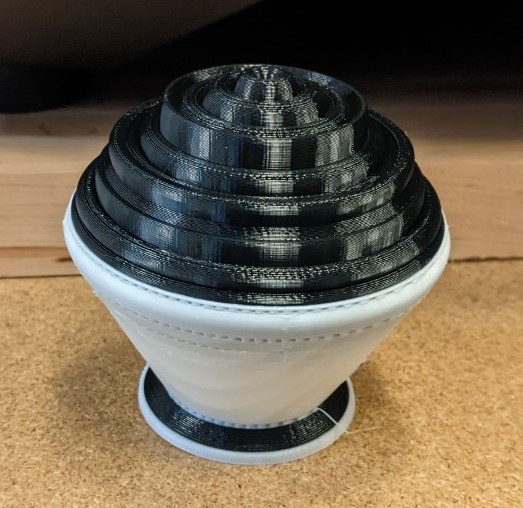
After printing, the tree was also covered in the white filament (aka. absorbable filament). The model was put into the bath for dissolving the support material and revealing my final product!