Idea
This week, I printed a functional Rubik's cube from scratch and in one piece using
a 3D printer. If you've ever been as intrigued by the inside of a Rubik's cube as I have,
this project is for you! The mechanics behind this simple puzzle are simpe but fascinating.
Usually, it's made of various parts that are injection molded, while a few screws and a
central cross hold everything together. Using a 3D printer and a sophisticated mechanism of
support structures on the inside that dissolve in a solution, I hope to create a cube that
can be created in a single print and is functional as it comes out!
Modeling the Rubik's Cube
As you know, I am a beginner in CAD modelling and have only started exploring it with this
class. This project was a perfect opportunity for me to level up my modeling skills. I started
by looking at the original patent by Erno Rubik from 1983 (US 4378116 A)
to understand the dimensions and the mechanism. A few YouTube videos of people disassemblying their cubes were
also greatly helpful (thanks to Mad Scientist, Jared Owen and of course What's Inside?).
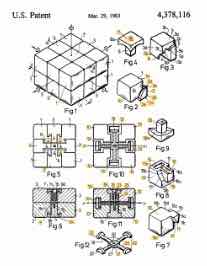
Illustrations of Erno Rubik's patent of his puzzle toy
I started by modeling the interior cross structure that supports the center pieces. The modeling was quite
easy, although I should mention that I later got rid of the fixed cross and instead replaced it with the 6 axes just "sticking out" of a
sphere in the middle of the cube, as this gave the cube more stability. I continued modeling the edge pieces (connecting 2 faces) and the
corner pieces (connecting 3 faces) of the cube according to the dimensions in the patent. The first challenge was to
give each cube their respective "shaft" (the piece that sticks out into the inside of the Rubik's cube and holds the piece in place).
I first tried to model it with a ton of projections from the other pieces, hoping to get to a profile that would just fit the inside of the
cube. After an hour of failed attempts of doing so, I realized there was a much simpler solution: an intersection between the sphere in the middle
(that forms the center of the cube) and a larger version of the piece I wanted to create a
shaft for that stuck into the center. In hindseigth, I think the combine tool is much more powerful than I initially thought and I'll likely use it more often.
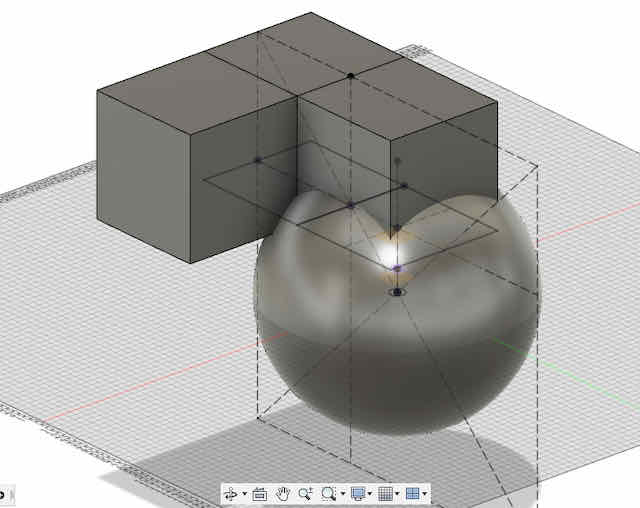
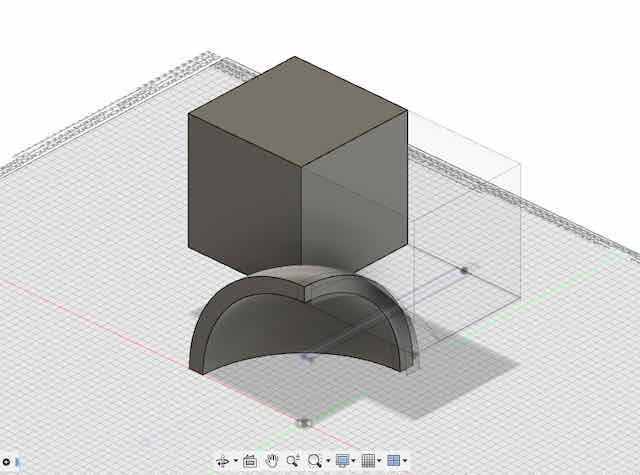
The basic idea for the center, edge, and corner pieces: cutting them with a sphere inside the cube, where their shafts will line up
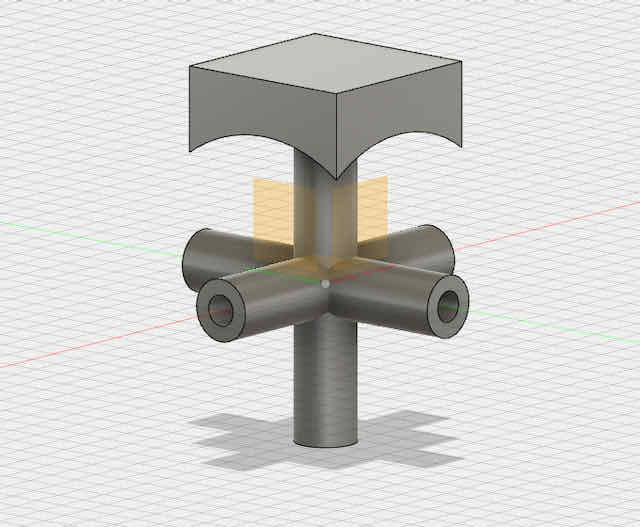
The initial central cross with the center piece on top. I later changed the structure of the cross to six individual bolts (one for each center piece) that connect to a core sphere
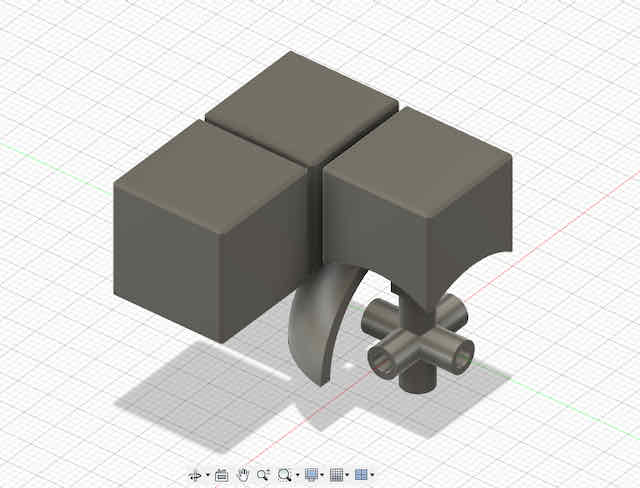
An edge piece with its respective shaft
A corner piece with its respective shaft
Another challenge were the tollerances, which I had not had taken into consideration when I modeled the first version of my cube. Obviously, having the faces
of the individual pieces be right next to each other (on each other) meant that the 3D printer would just print one big cube. I went back to the sketches
and added tollerances everywhere that were parameterized and could be adjusted based on the results I got from some test prints. Again, I think this
shows powerfully how important it is to get the basics of your model right. It's in the initial sketches where I tend to model something too quickly or overlook
an important feature, so that later I have to adjust it all the way from the start through the entire timeline.
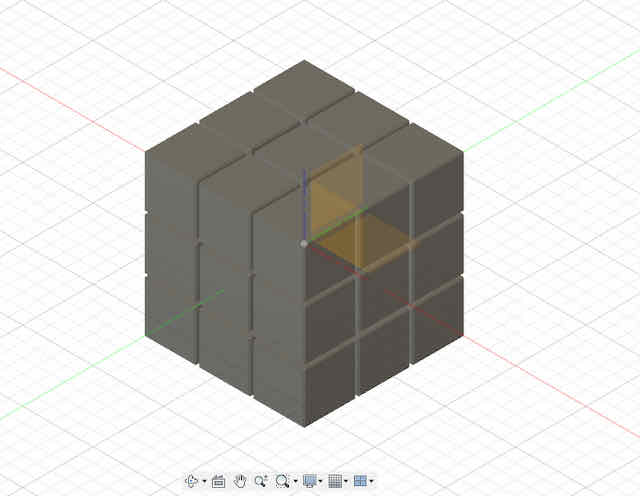
The revised basic pieces with gaps between them

From below
So far, I had only modeled the cube's spherical center (cross), one center, one edge, and one corner piece. Since all other pieces have the same geometry as these three pieces,
I used the mirror function to complete the entire cube with ease. Also, this still allows me to edit all other features previously used to model the
pieces of the cube in the timeline and propagate the changes throughout the entire cube.
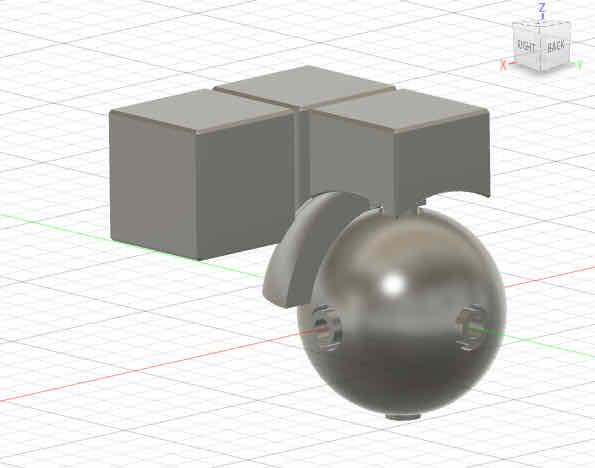
The revised core sphere with six individual bolts (one for each center piece)

Cross section of the finished cube
The finished cube from outside
Experimenting with Screw Mechanisms & Tollerances
I printed a part of the center sphere with one center, one edge, and one corner piece as a test print to see
if the pieces were able to move along the center sphere as intended. While experimenting with different tollerances, I
noticed that the cube's maximum stability is achieved then all parts are "pressed" against the center sphere. In the original
Rubik's cube, screws with springs press the center pieces to the core sphere, which also exerts pressure onto the shafts of the
edge and corner pieces and holds them in place. In my cube, I needed a similar mechanism without the use of any screws (since I want)
the cube to come out fully assembled.
My initial idea was to add small hook-like structures around the circular shafts that connected the core with the center pieces, such
that each center piece can be pressed into the cube's core and it is fixed that way. I printed and experimented with multiple
shapes and diameters on PLA printers with PLA support structures. Unfortunately, I could not get the system to work reliably enough with PLA, the material I wanted to use
for my cube. The hooks would either not fit through the opening in the core sphere at all, or if they fit through, they would come out just
as easily. Moreover, keeping the size of the Rubik's cube in mind, most of these hooks needed to be much smaller than the 3D printer's
accuracy of around 0.1 mm, so they could not be printed effectively and reliably to fit through.
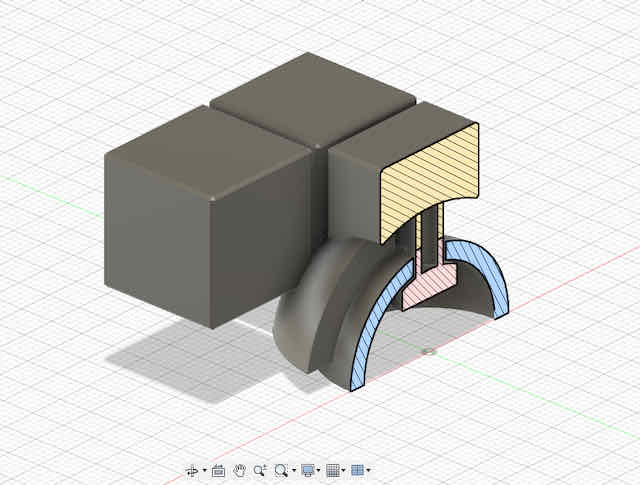
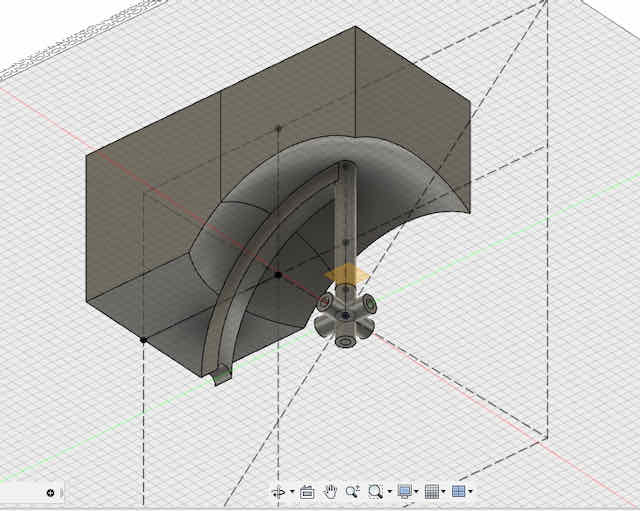
The screw mechanism should be at the interface between the core sphere and the connecting bolts to the center pieces
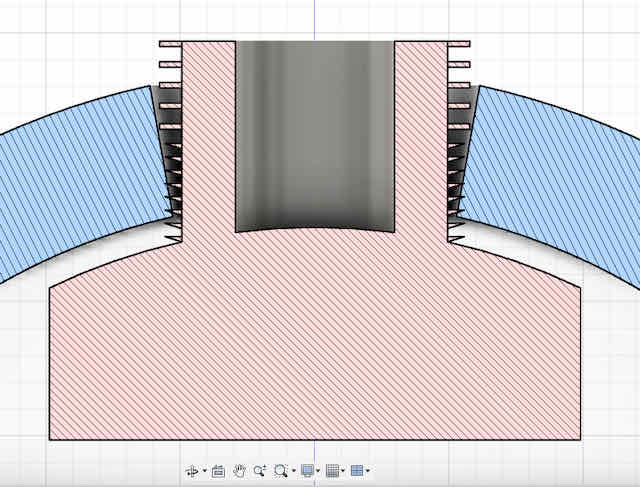
A detailed view on one possible arrangement of the "hooks"
Printing one experimental arrangement to test the tollerances and the hooks

The printed result of an experimental arrangement in PLA, with support material in PLA
Although it would have been possible to print the cube on a more expensive printer with higher accuracy and smaller
tollerances, I wanted my print to work even on low-budget printers. Therefore, I decided to abandon the implementation of
a screw mechanism and instead experimented with the tollerances until I found one that the printer could just print but that
also kept the parts nicely locked. This certainly is a trade-off and I would love to solve it in a future iteration
while preserving the idea of a cube that's ready to use in one print.
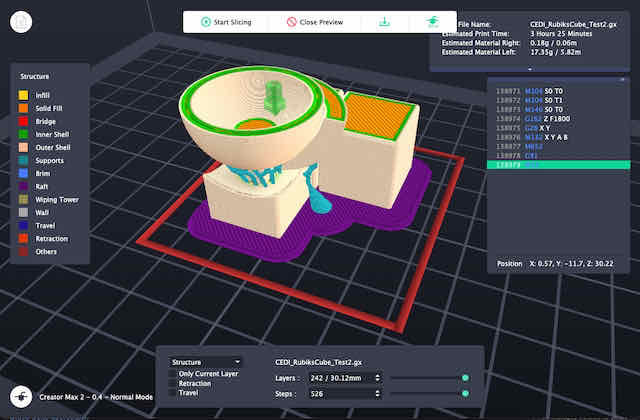
Printing with PLA & PVA on a Multi-Material 3D Printer
So far, the test prints of just a few pieces all came out great, but they also barely needed
support structures. Unfortunately, to produce the entire cube functional and in one print, I needed
a lot of support structures within the cube that are inaccessible once it is assembled. To solve this
problem, I chose to go from a single to a multi-material 3D printer and use PLA as the material for the cube
and PVA as the material for the support structures. PVA has a similar extrusion temperature as PLA and slowly dissolves in water at
room temperature, so it is an ideal candidate for support structures in inaccessible places on our final print. I chose
our Flashforge Max Pro 2 printer that has two extrusion nozzles for this print and loaded one with black PLA and the other with transparent PVA.
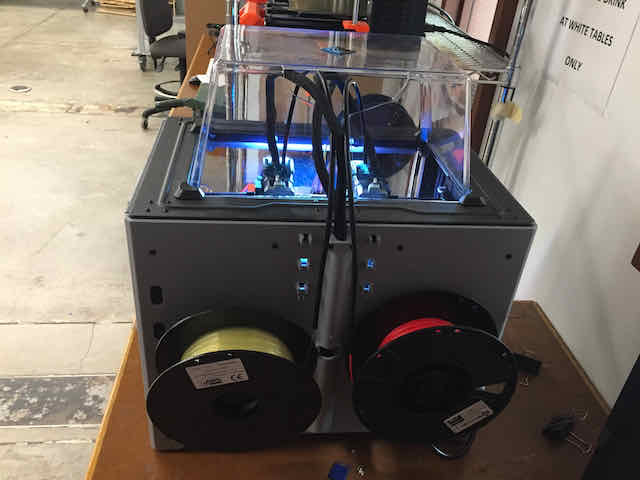
Loading PLA and PVA to extrude with a two-nozzle 3D printer from Flashforge
Testing the first layer of PLA with PVA support structures in water at room temperature
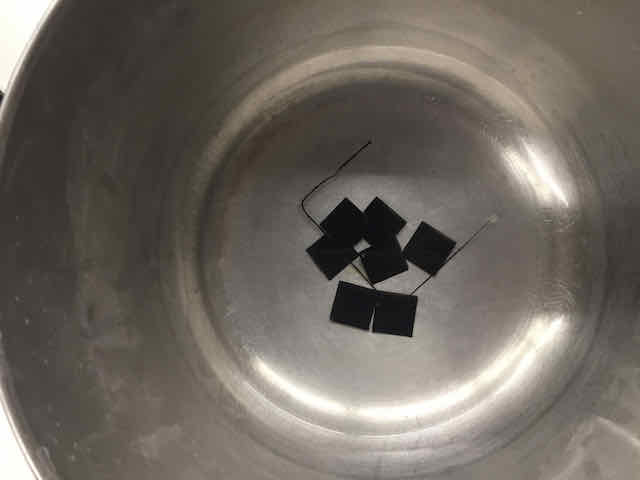
As expected, the PVA support structure dissolves within a few hours, leaving the rectangles unentangled
Unfortunately, printing with the printer, needed some heavy
bug fixing until I could get the fine structures as I needed them. The PLA was easy to work with – it printed perfectly at 215°C with a bed temperature of 60°C, although the nozzle
often oozed material while it was idle. I fixed this by decreasing the extrusion temperature to 205°C and increasing the retraction to 3.5mm inside the nozzle.
The PVA, on the other hand, needed much more care. When I first ran it at a temperature of 215°C, it burnt inside the extrusion chambr and completely clogged up the nozzle.
It was also oozing without end while idle. I decreased the temperature over multiple experiments down to just 165°C – much below the temperature range given by the vendor – and
increased the retraction to 3.5mm inside the nozzle. Next, the PVA would not stick to the print bed, so I increased the bed temperature to 65°C and used masking tape on the
print bed to get it to stick, both of which did not help. I also tried using a PVA glue stick to create a PVA surface on top of the masking tape, which did not help either. Last, I
decreased the extrusion speed of the PVA down to a mere 25mm/s and set the cooling fan to be always on. In combination, these adjustments finally gave me a working result – the nozzle
still oozed a bit every time it was idle, but at least so little that the wiping tower could absorb the oozed filament. Overall, using and adjusting the printer to use PLA and PVA in harmony
was tedious, but it resembles the experience of many on the internet. At least I learned about every setting in the slicer at this point. Luckily, the final print of the Rubik's cube itself came out
flawless in my case. I immersed the cube in water at room temperature over night to dissolve the PVA support structures and had a fully functional Rubik's cube by the next morning!

PVA oozing from the nozzle and not adhering to the print bed became a frequent issue

At last, I found settings that at least produced a working result. The left nozzle prints the Rubik's cube in black PLA, while the right nozzle prints the support structures in transparent PVA. You can clearly see the oozed fillament on the wiping tower of the PVA tower – a problem I could not fully fix
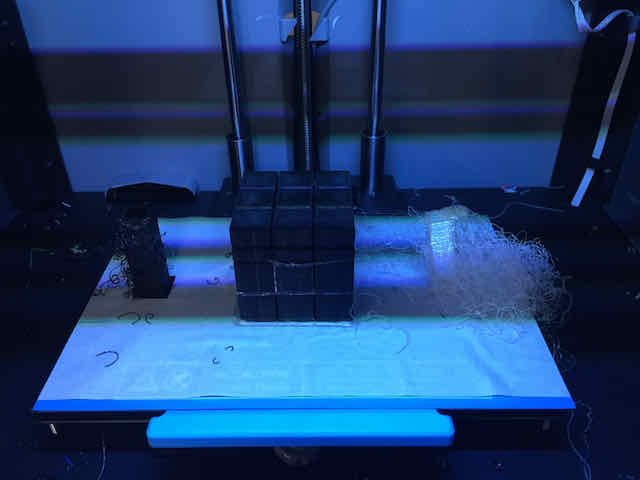
The final print. The black PLA fillament got stock in the extrusion channel about 75% through the job (see top layer). I decided to use it nonetheless to reduce waste. I put the cube into water overnight to dissolve the PVA support structures
After an overnight wash in water at room temperature, the PVA support structures had fully dissolved. Most importantly, the cube actually twisted and worked as expected!
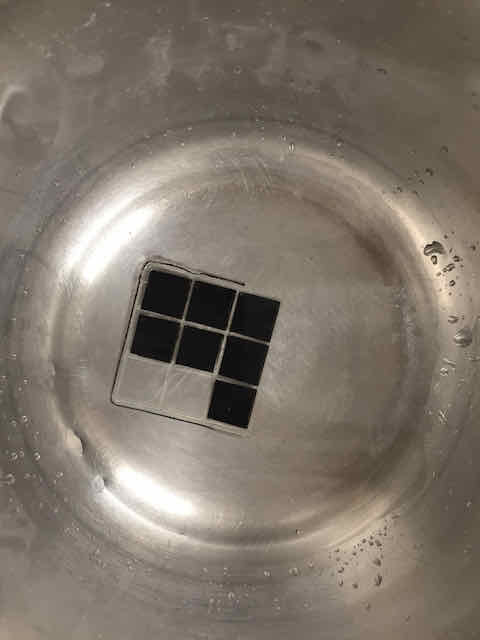
To give the cube its iconic color palette (and make it a puzzle), I cut out some color tiles using some leftover vinyl on my beloved vinyl cutter. I simply
took one of the faces of the cube, exported it to Illustrator, and added round edges and a small edge around the stickers, before cutting them. The feeling of
sticking them onto the cube to finally finish my first single-print Rubik's cube was amazing. Obviously, there are still plenty of ways to take this project from here –
I have put a print job in the queue with a much better printer at SEC that also prints with a soluable support material. Moreover, I want to further tweak the mechanism
for the cube center pieces to exert pressure on the other pieces, making it more sturdy. Last, I think the ideal colored tiles should not be vinyl color tiles, but
maybe 3D printed textures in differntly colored filament, such that the cube is more accessible and can also be solved blind-folded for an extra challenge!
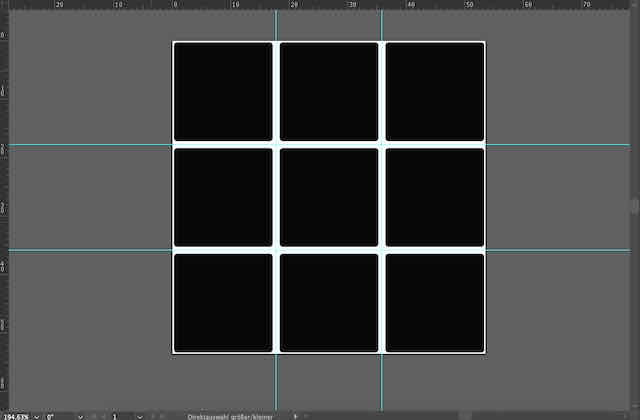
Modeling the colored stickers for each side of the cube
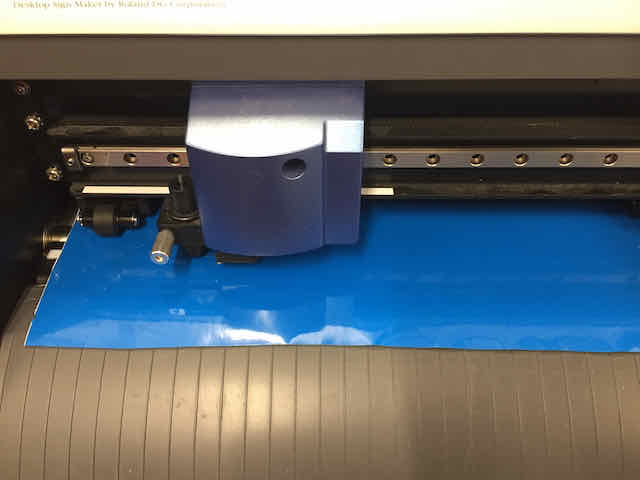
Cutting the colored stickers on the vinyl cutter
After dissolving all support structures, I can finally stick the colors on and finish my first single-print Rubik's cube