Week 03 - 3D Printing & Scanning
1.1 Group Assignment
1.2 Individual Assignment
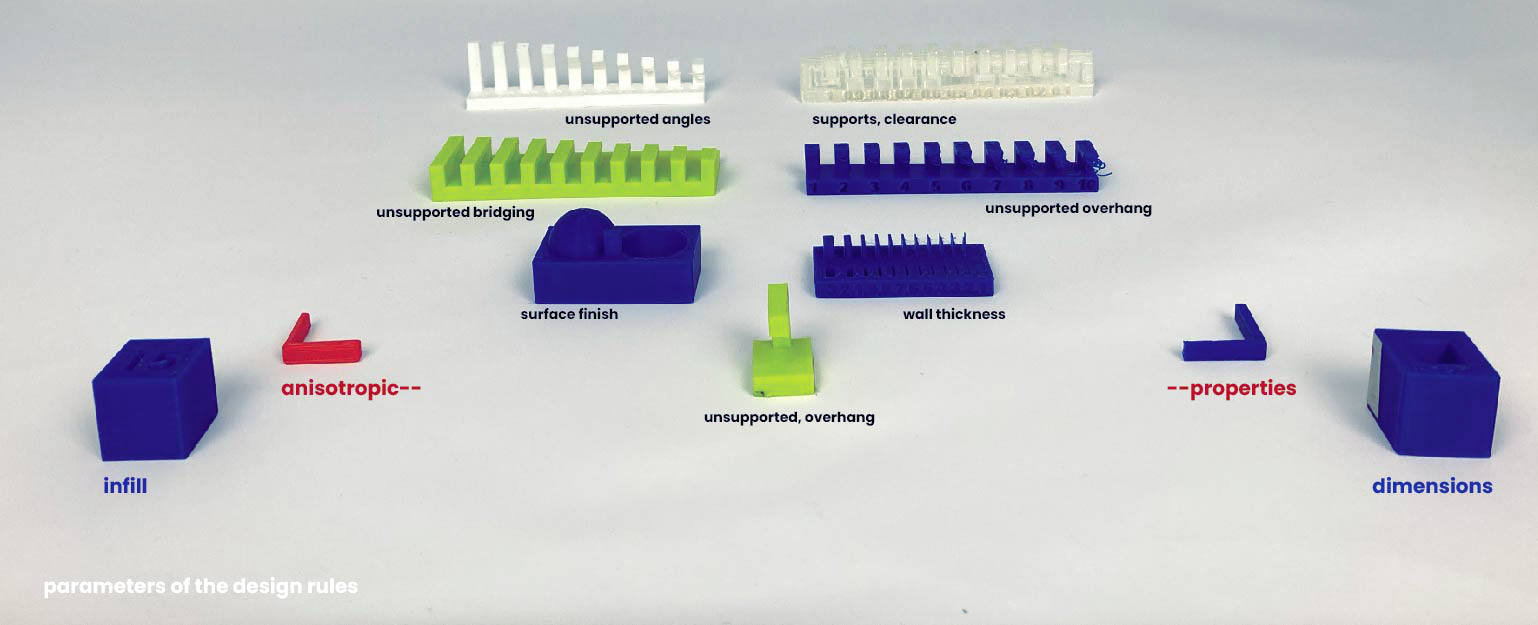
This week's group assignment was to characterize the design rules of the 3d printer to use; in our case: Prusa Printer. This step was crucial in understanding the boundaries/ limitations of the machine, thus, allowing the user to have a better understanding of the work-time efficiency of the printing process.
 Supports, overhang: The bottom of the overhang was not noodle-y, which was our desired outcome.
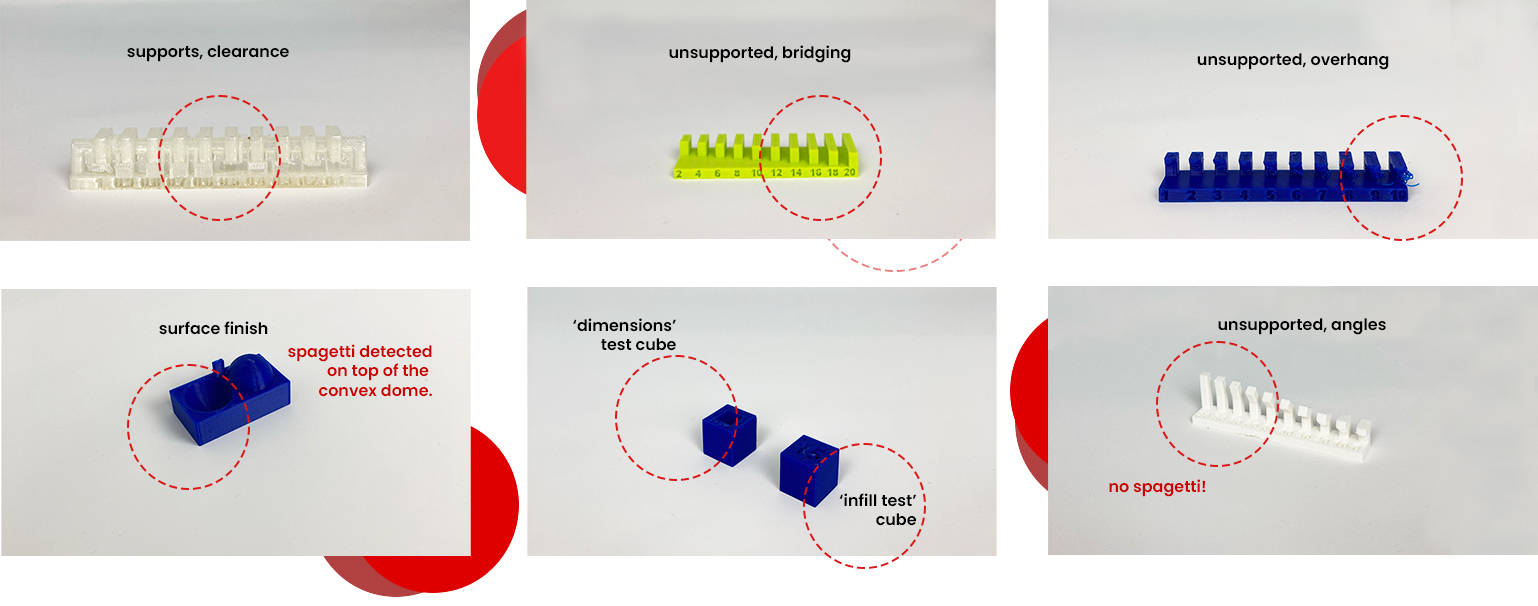
Supports, clearance: 0.1 mm and 0.2 mm rings stayed attached to the beam. 0.3 and 0.4 were able to free themselves from the beam when force was applied. However, we decided that using gaps in the 0.5 - 0.7 mm range would be ideal.
Unsupported angles: 40-90 degree span was quite issue-less. However, we found that support was needed for the printings with less than 20-degree components.
Unsupported overhang: All of the rings had spaghetti, starting from the 1 mm. Support is definitely needed for 0-degree printings.
Unsupported Bridging: This printing turned out quite successful, not noodle-y at all!
Wall thickness: This printing resulted in a bit messier than the others. Walls thinner than 0.5 mm failed, and gaps thinner than 0.2 mm did not work reasonably well.
Anisotropy: Anisotropic properties of the printing were quite well. However, there might be a higher risk of failure in taller designs, and it would be less risky to print the long side laterally.
Dimensions: Interior dimensions were 0.2 mm tighter than expected. Also, the cubes had outside dimensions 0.1 mm shorter. Taking tolerances into account was also significant to note.
Surface finish: The overall result was very successful, except the convex part was slightly less smooth than the concave.
1.1 Group Assignment
1.2 Individual Assignment
The individual assignment of the week was to design and 3D print an object that could not be made ‘subtractively,’ thus, made additively.
My initial plan was to gift a small-scaled matter to my housemates, a sweetly-designed object like a door key holder. I also wanted it to be organic and corner-less—sturdy but tender.
This idea invited a reference to my mind, a plug-in of Grasshopper named ‘Jellyfish’.
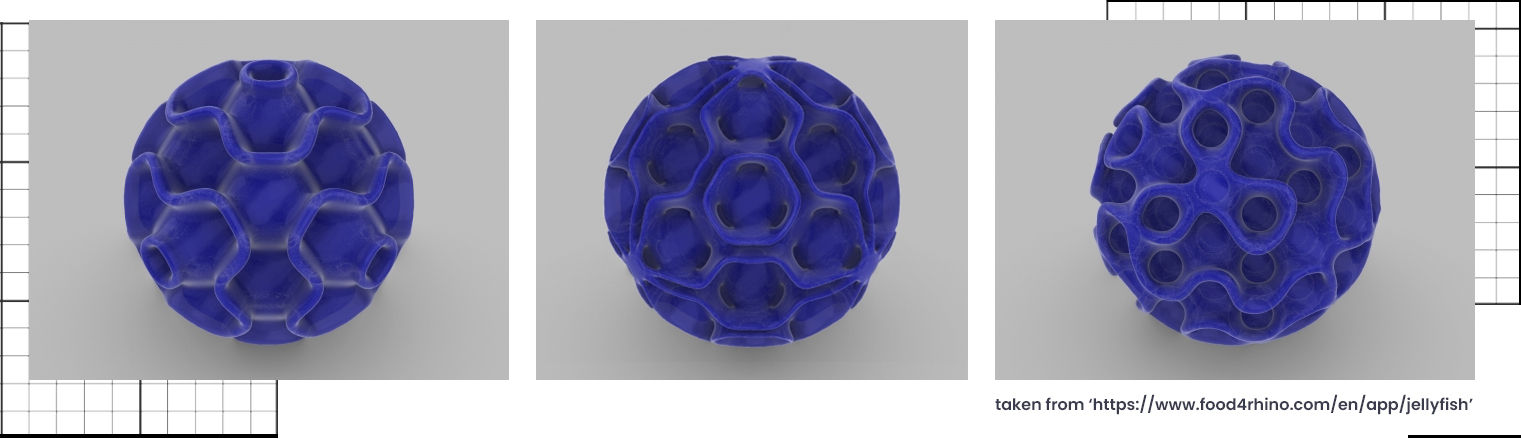 As suggested, I decided to use Fusion 360 for this task. After watching a couple of tutorials on circular patterns, I decided on the final shape and kept the radius very small at the beginning (2 cm). The form is basically five hexagons around one pentagon, circular patterned until the half sphere, then mirrored and joined together.
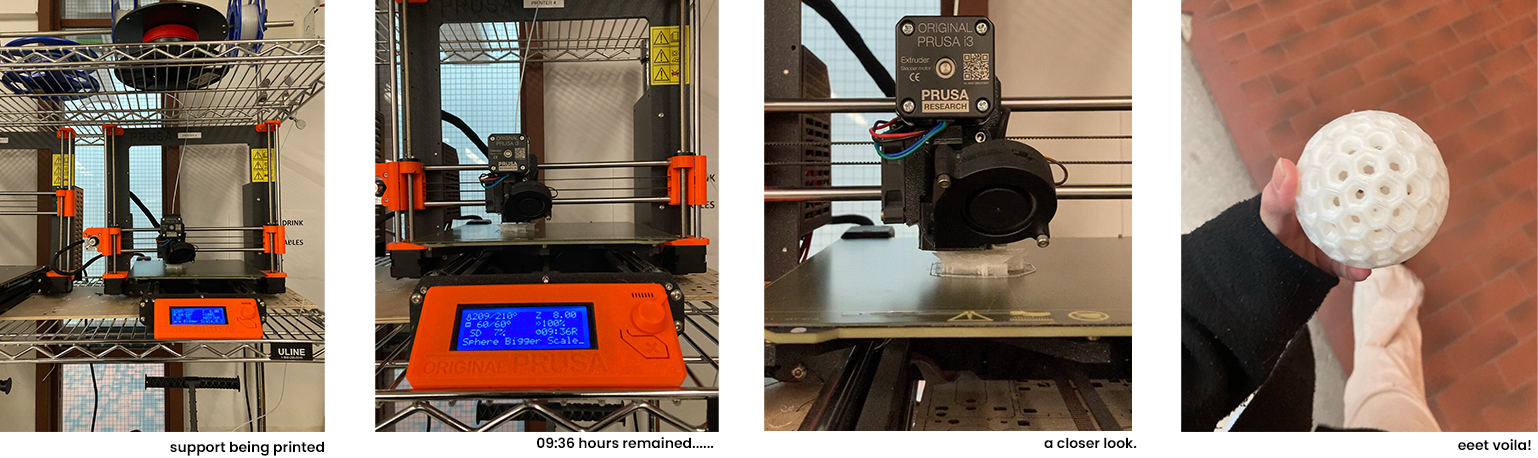
After finishing the modeling, I sent the .3mf formatted file to Prusa Slicer. The first bump on the road appeared: How to choose the proper type/ amount of support? Since the designed shape was hollow, and I did not want any support to pass through the form, so we decided to customize the support (Suvin showed how we could use the brushes in Prusa Slicer to make customized supports-blocks happen).
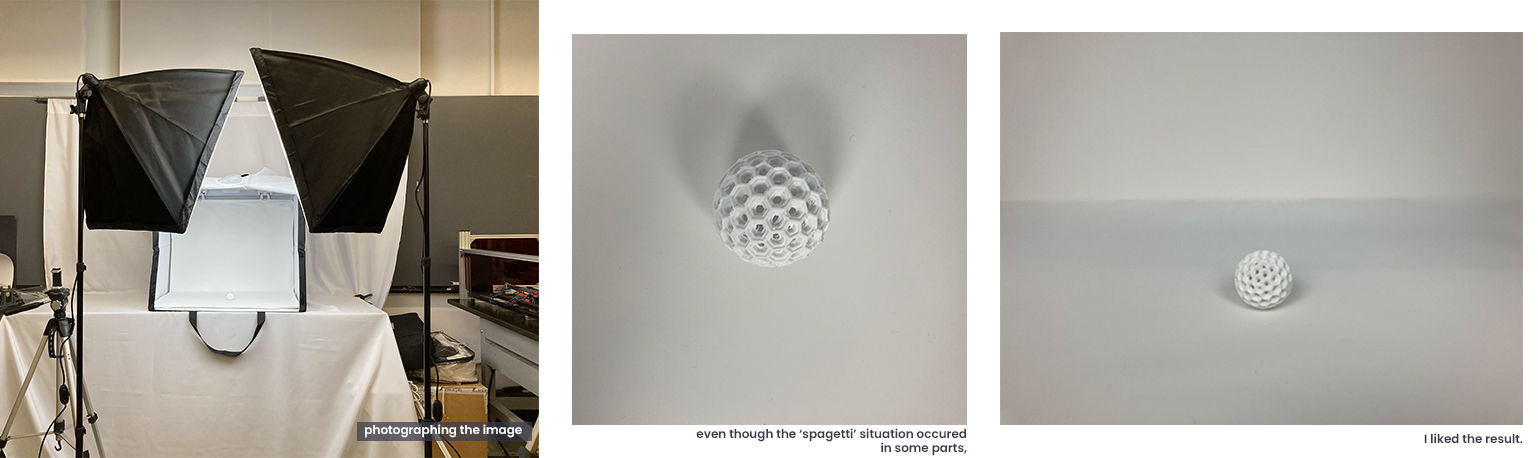 Second Chance
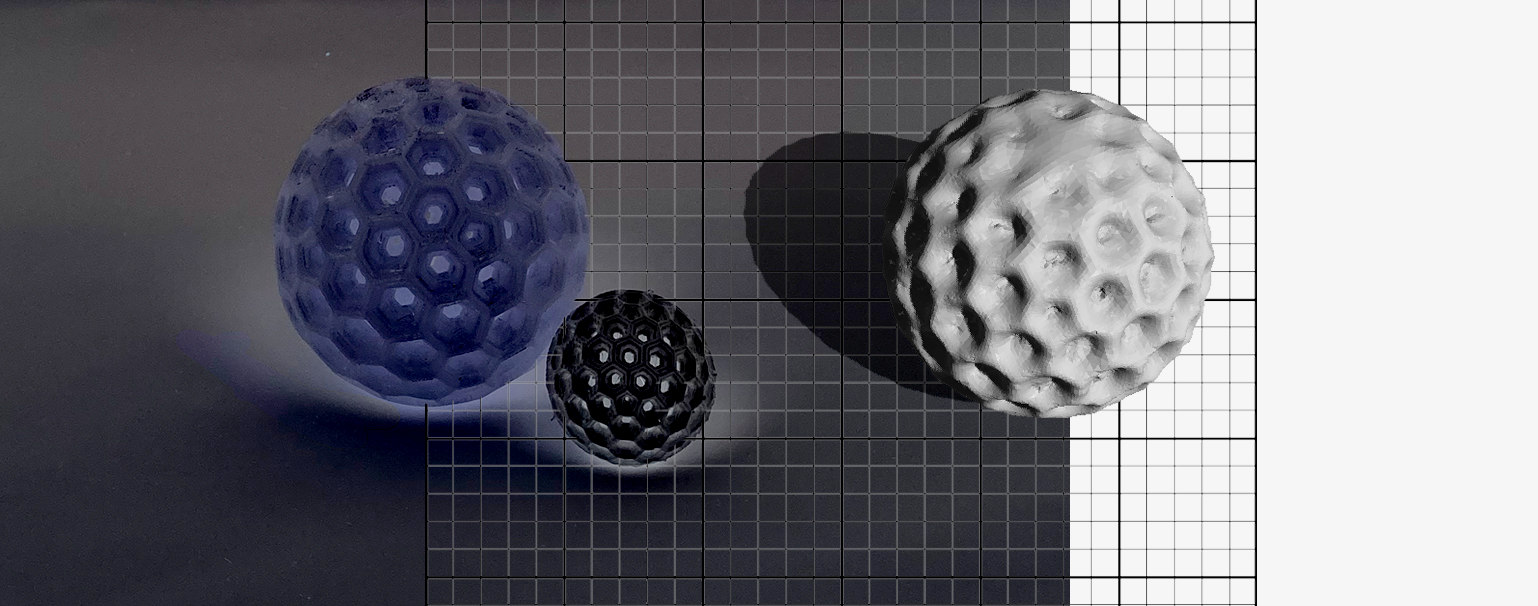
 Printing my first object took around half an hour, and even though some parts of it were noodle-y, I felt content with the result, except for the scale. After seeing what scale and white PLA material caused the design (a golf-ball effect), I decided to scale it up two times.
Scaling it up and changing the PLA color choice into a more transparent one made the work more satisfying.
This printing process took 9 hours, though. I started working on the scanning with my first 3d print and left the new design to bake overnight in the lab.
Overall, I feel pretty content with the result. I think I would really like to stop the machine right at half of the sphere, change the material into a material that can hold compacted soil, and allow plants to grow; so that it can become a hanging/suspended plantation module as a future suggestion!
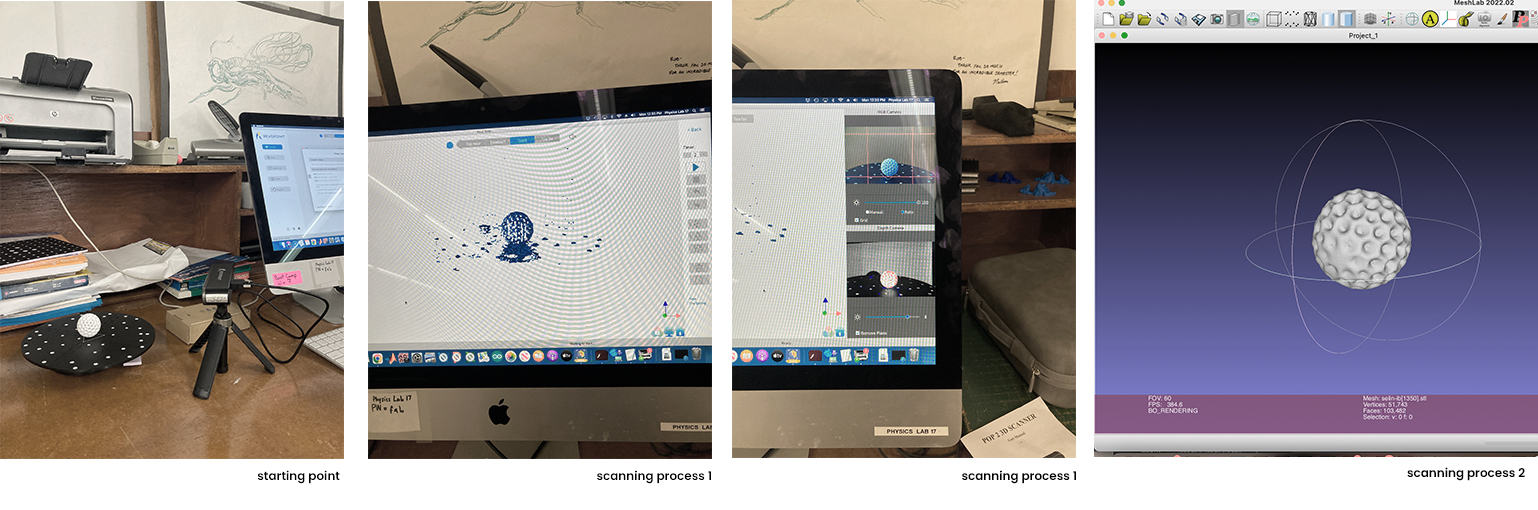
 Scanning
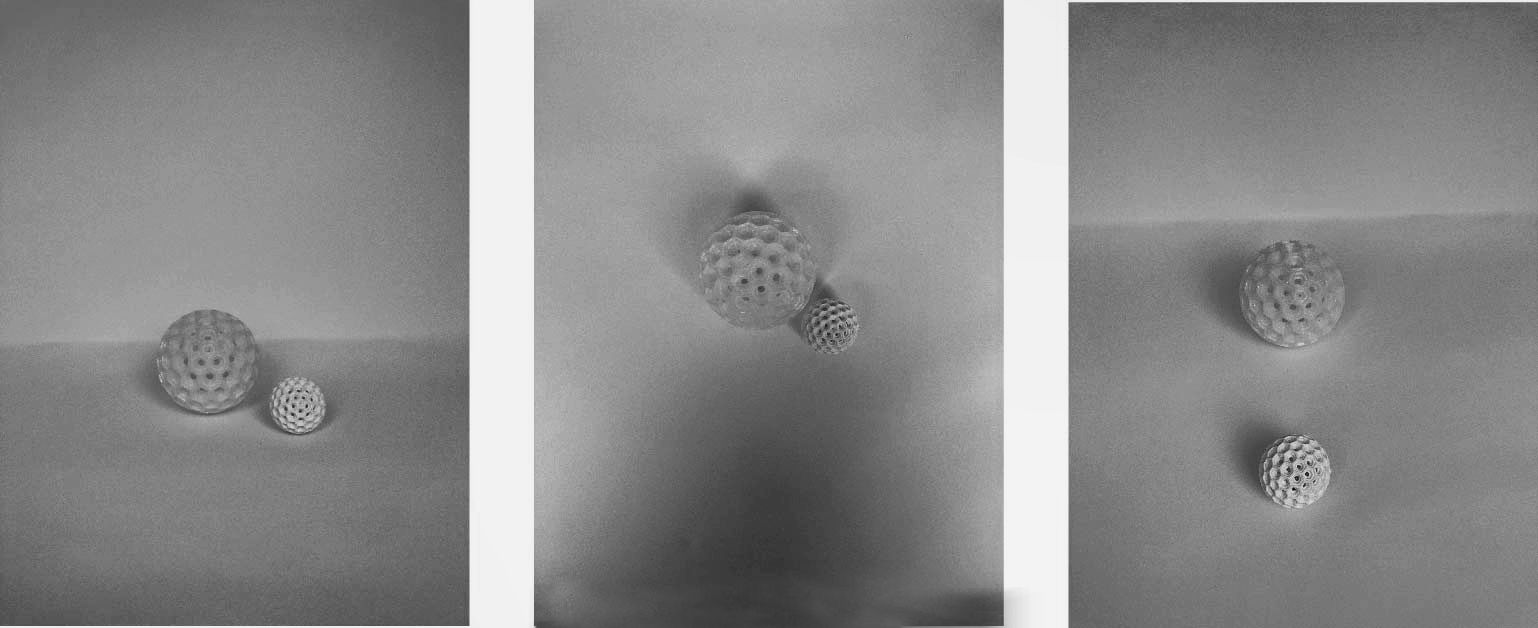
(Almost) everybody mentions this, but -it was hard. I wanted to scan my 3d printed object, the object that had a lot of repetition and hollows. The machine could not read it correctly (Also, centering the object took a lot of time and effort). Using Revopoint 3D Scanner, I have come up with an unfinished -not fully patched version of my sphere. Ibrahim suggested me to use an application called ‘MeshLab’ to finish the surfacing. With his help, the final version of the scan looks like this!
I am half-closing this week's chapter with some of the scan process pictures. Bisous.