Week 06 - Make Your PCB Mean Something (More)
1. Blinking the LED of My Good Old Board (ATSAMDC11)
2. Experimenting with Touch-Sensitive Tools (SAMD21E18)
This week, I fell into Quentin’s electronics orbit. Instead of me explaning it, we might as well just count how many times I will be mentioning his name.
Let’s start where we left off.
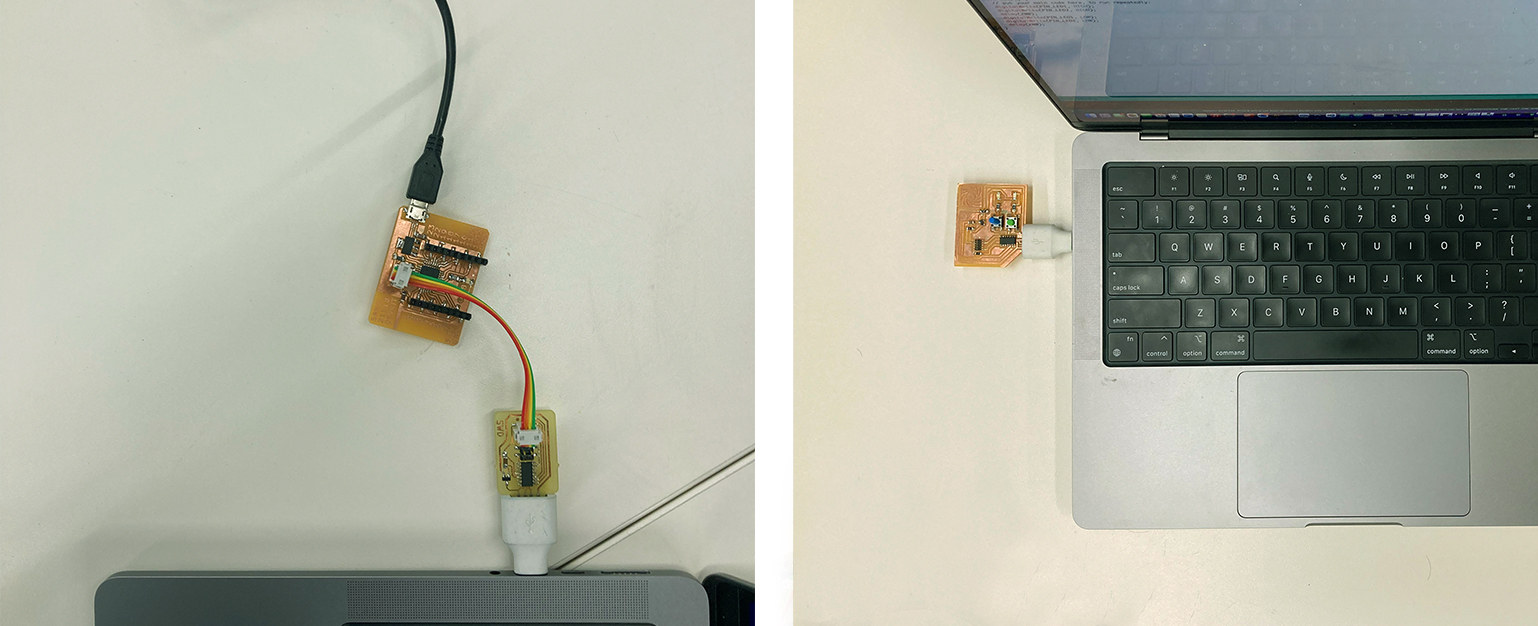
In Week 4, I met all the schematic requirements and programmed my board with another programmer, loading the bootloader binary on my board using OpenOCD.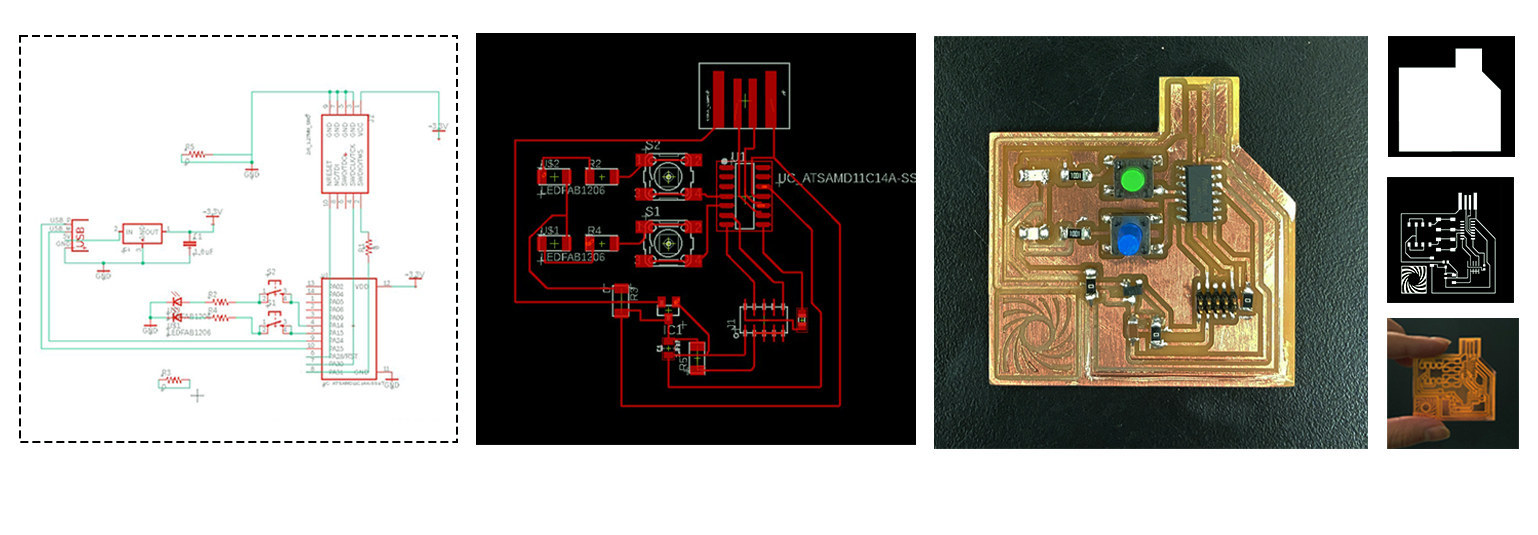 Now, it was time for my ATSAM DC11 Echo Board to do something: Blink! -a secure and sweet start.
To make my LED blink or use any code, I needed to download the highly recommended Arduino IDE software. Even though I had little experience with C++ language and was a bit intimidated as the program was installed, Quentin (2) helped me introduce the program and how I could benefit from it.
 A note: Newest version (2.0.1) of the program was problematic in downloading the libraries, so we ended up also downloading the 1.18.19 Version.
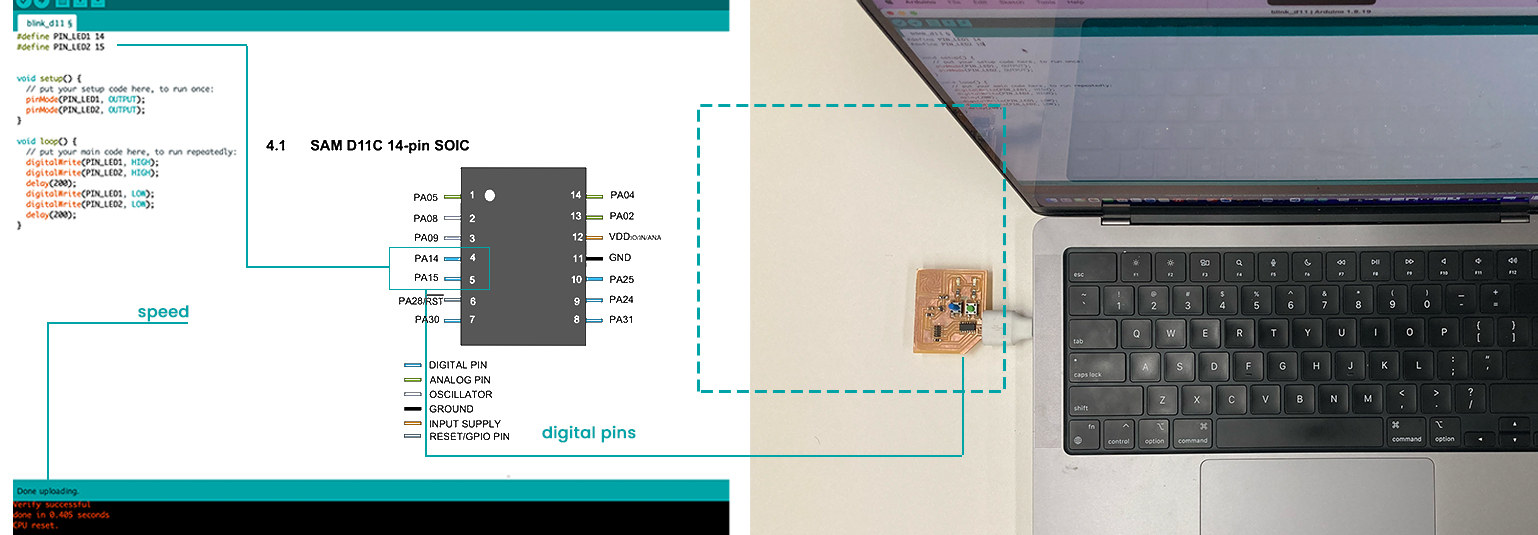
Making the LED Blink: This process took a very short time. I knew that my LEDs were attached to the P14 and P15, which are both digital pins. After writing the code and adding a delay amount so that it could blink, I had two blinking diodes!
1. Blinking the LED of My Good Old Board (ATSAMDC11)
2. Experimenting with Touch-Sensitive Tools (SAMD21E18)
While designing my board in Week 4, I had two of my buttons connected to different pins instead of diodes, but I changed it before milling, and all of my buttons ended up being limited to LED activation. For this week, I had a couple of different ideas:
1. Re-designing my PCB with other button-pin connections
2. Re-milling a PCB that I like and can implement in my final project and experimenting with it as a learning tool
I chose the 2nd option, and this is where I mention Quentin’s immense help and his name for the third time.
Adjusting the Schematic Design & Milling:
Since I wanted to create a touch-sensitive modular system for my final project, I consulted with Quentin (4). I asked which board would be the most ideal for experimenting and concluded our decision to use the SAMD21-E18 microcontroller. My milling process of the SAMD21 devkit board started right after adjusting some components we did not have at the Harvard Shop. We did not have the USB, so we changed the footprint into a mini-USB.
 Soldering:
Under the storm of 18 teeny-tiny pins, a lot of flux, and warnings of ‘don’t use too much solder!’, a nicely-soldered board was ready to be programmed and used!
Programming & Code:
We used one of Quentin’s (5) boards to program the new board, and the new board was programmable, meaning there were no soldering issues! (Also, it was around midnight, and any error after 12 am has the potential to exhaust you more than it should). Like the last time, we started by sending a signal to the pin linked to our LED. HIGH for lighting up, LOW for lighting off, once delay() in milliseconds is added; there we have a blinking LED!
Uploading the Sketch to Microcontroller:
This step consisted of multiple steps that I have taken screenshots to remember it. Here I share the archived wisdom to define the `Tools`:
The last step was compiling the code by clicking on Verify and then, Upload. Blinking LED and a message greeted us: Verify successful / done in 0.044 seconds / CPU reset.
PS: I copied and pasted Neil’s hello-world coding, which also worked perfectly!
The Touch-Sensitive Programming:
For this, I visited Quentin (I lost count) with a roll of an aluminum foil sheet. We first downloaded the Adafruit Freetouch library. Then, we tested it by connecting the aluminum sheet to PIN 02. This is important because PIN 02 is one of the two Digital to Analog Pins, allowing the Adafruit library system to function (see Atmel Datasheet).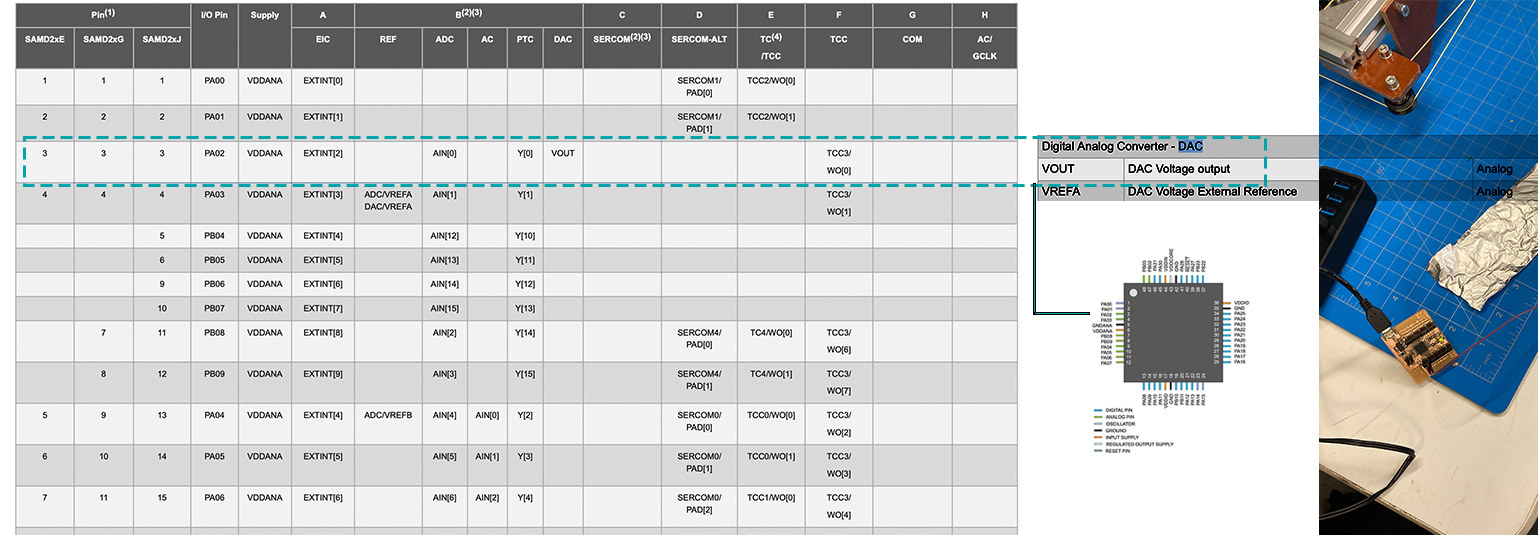
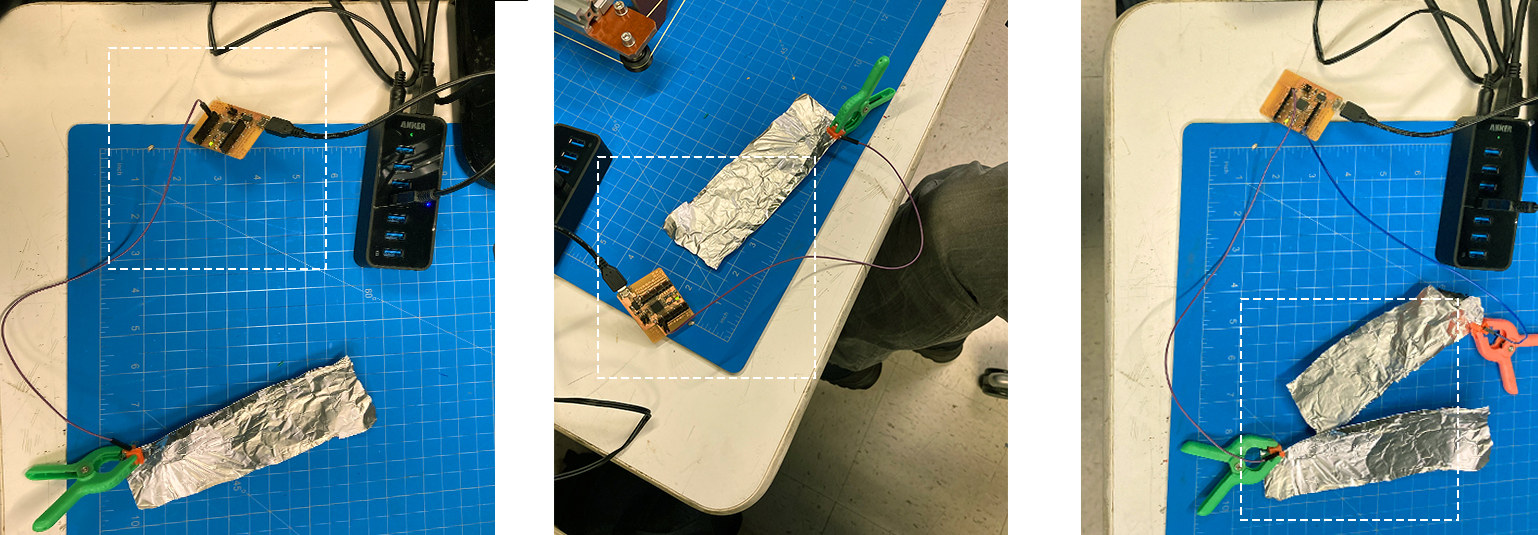 After activating the Serial Plotter, we could see how the capacitance was read. As our hands moved closer to/ touched the sheet, the graph peaked.
 We also tried connecting one aluminum sheet to the ground and the other to P02, imagining a foam in between than can become a modular interactive surface with a thickness. This comforted me and provided me with a starting point for my final project.
Tiny Comparison
SAMD21E18:Verify 10240 bytes of flash with checksum. Done in 0.025 seconds.
Adafruit only works only with the SAMD21.
ATSAMDC11:
Done In 0.405 seconds.
Finalment, un petit coin français: J’sais pas si j’ai deja dit ça mais (ouaiiis. je. l’ai. dit).. Quentin, je suis très reconnaissant à toi!