Week 8
Computer-Controlled Machining.
Engineering Files
OSB Bookshelf
For this week, we were assigned to "make something big" using OSB particle board. With the quality of the material we were given, I wanted to try making something somewhat out of view, but still functional. Originally, I wanted to make an organizer for our lab's kitchen area, but I realized how unappealing OSB looked naturally, and didn't want to deal with spending too much time finishing the wood after the cut for it to be presentable.
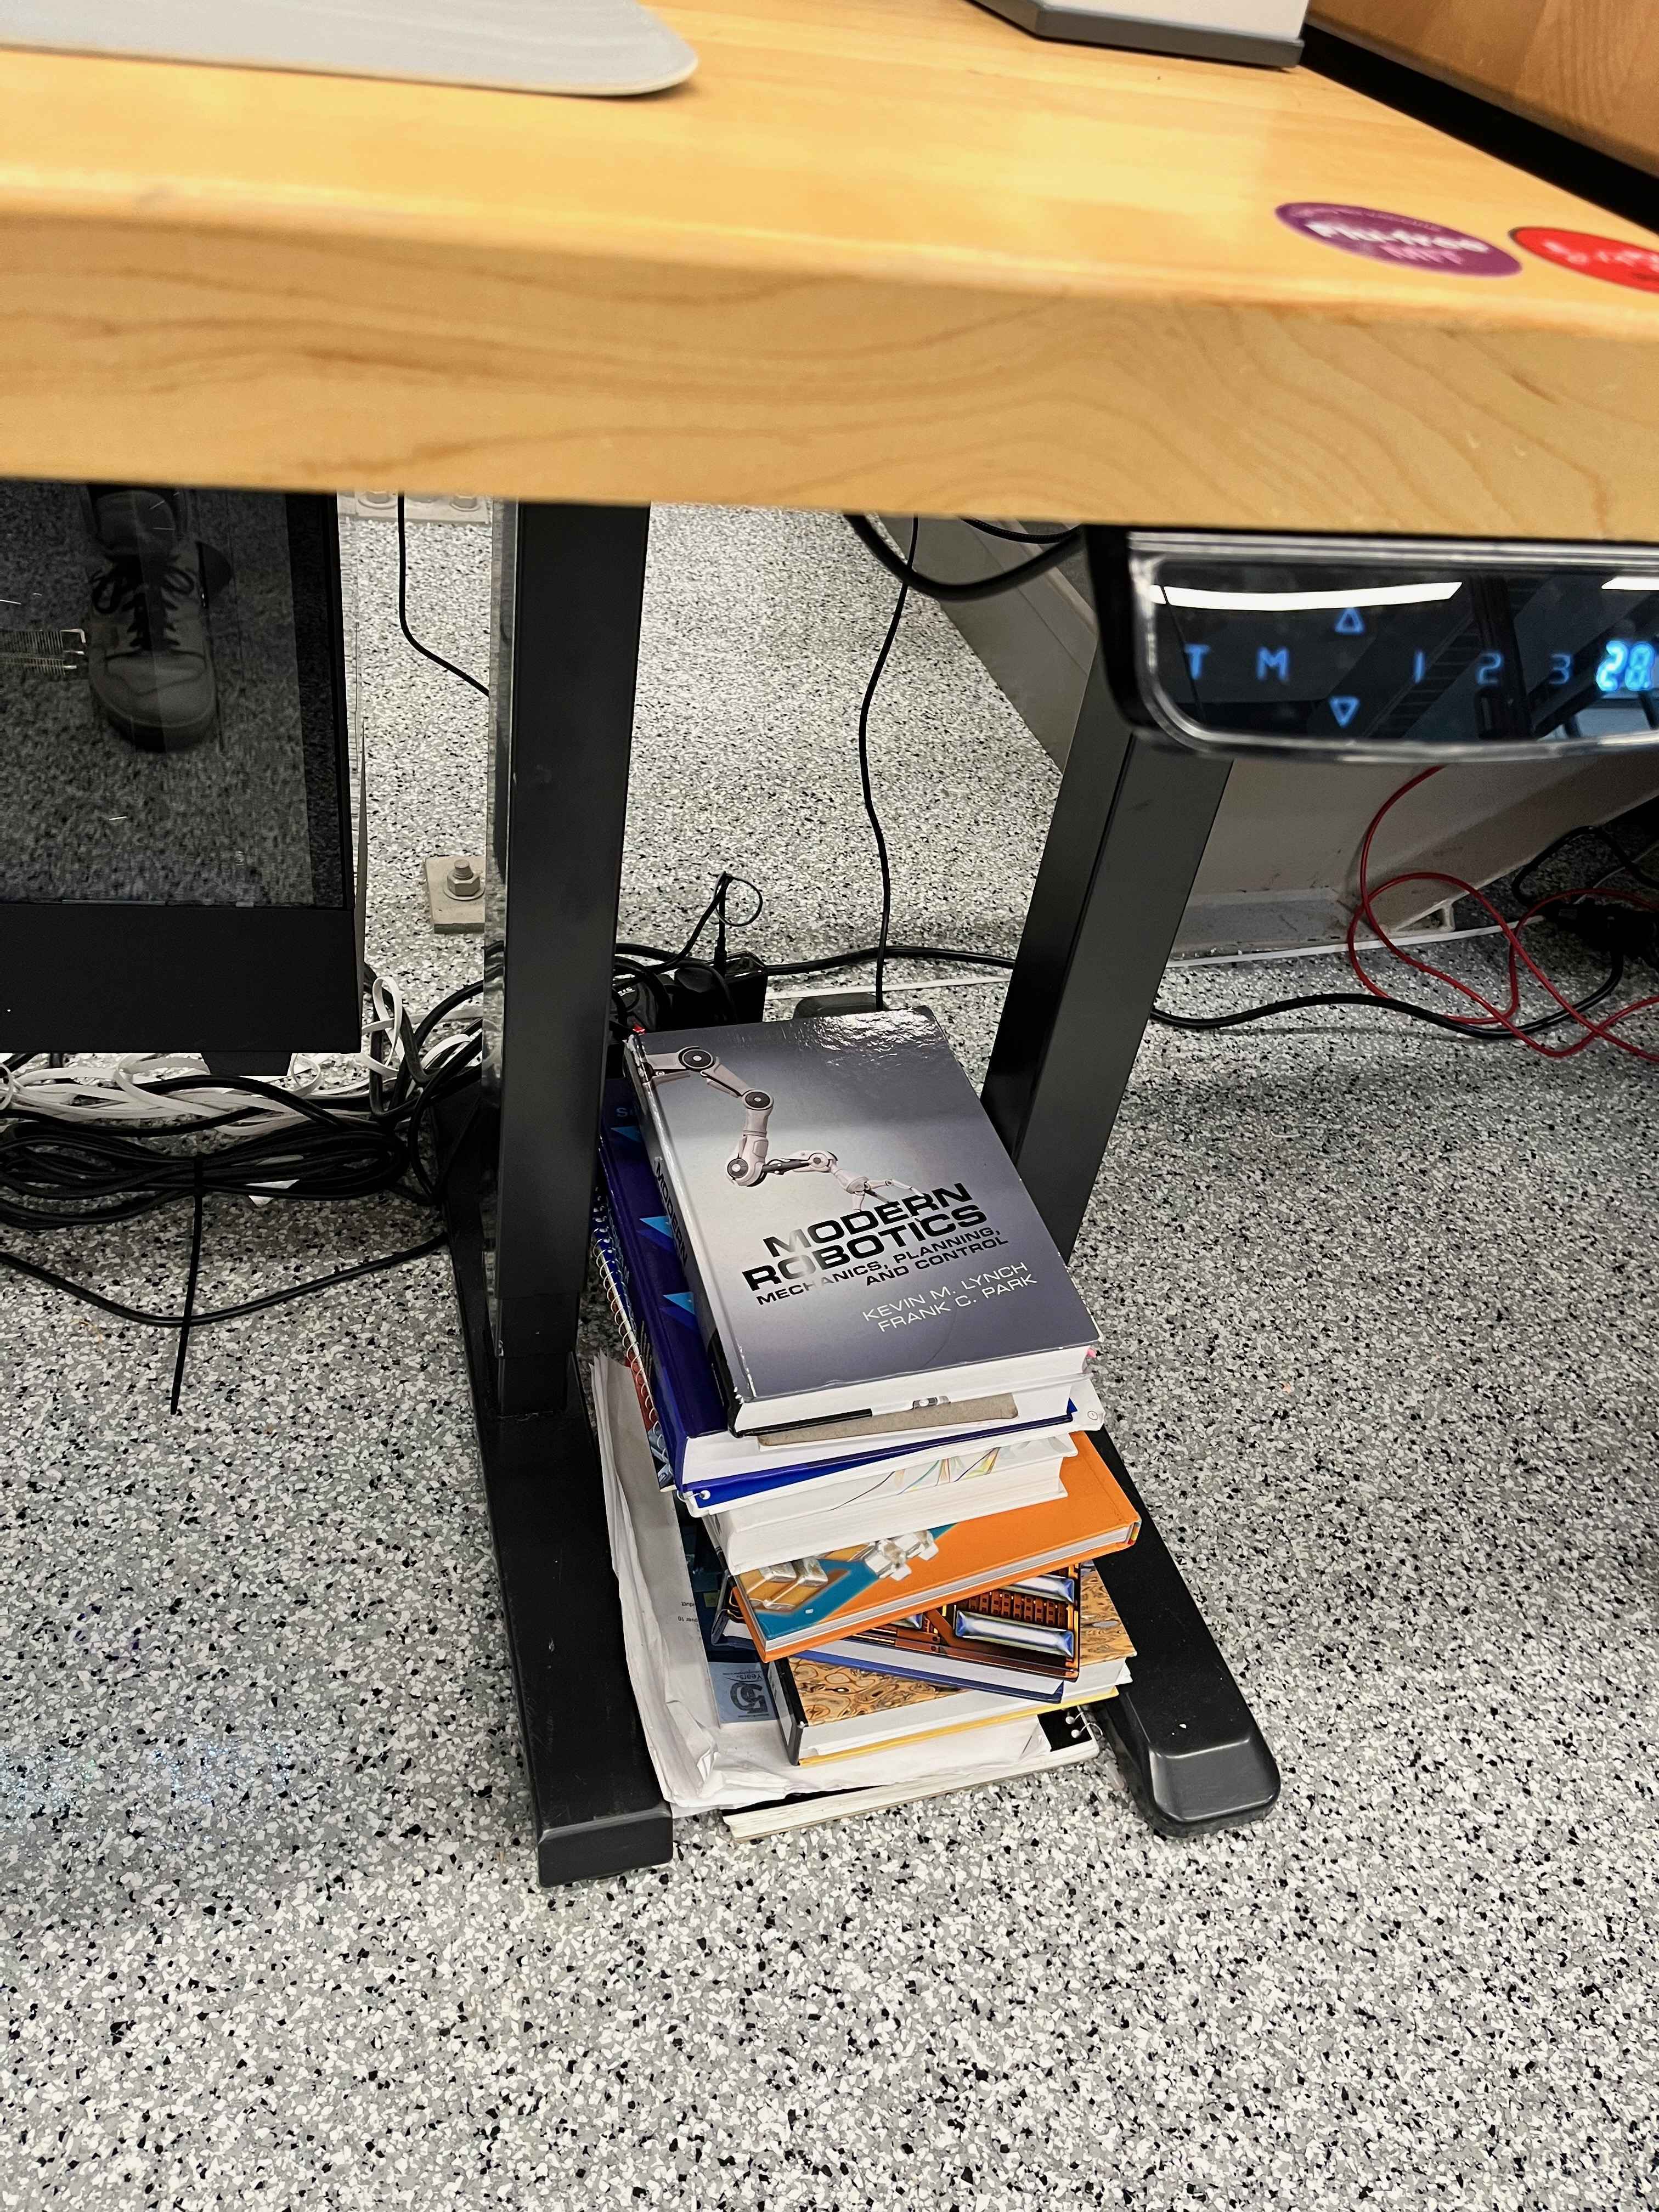
Instead, I decided to make a small bookshelf for the piles of books stacked beneath my desk.
The CAD was fairly straightforward to design, but the only unknown was the effective thickness of the OSB. After measuring the particle board, I had measurements ranging from 0.45" to 0.49". I used the lower bound as my effective thickness for CAD, and planned to hammer in the joints as needed.
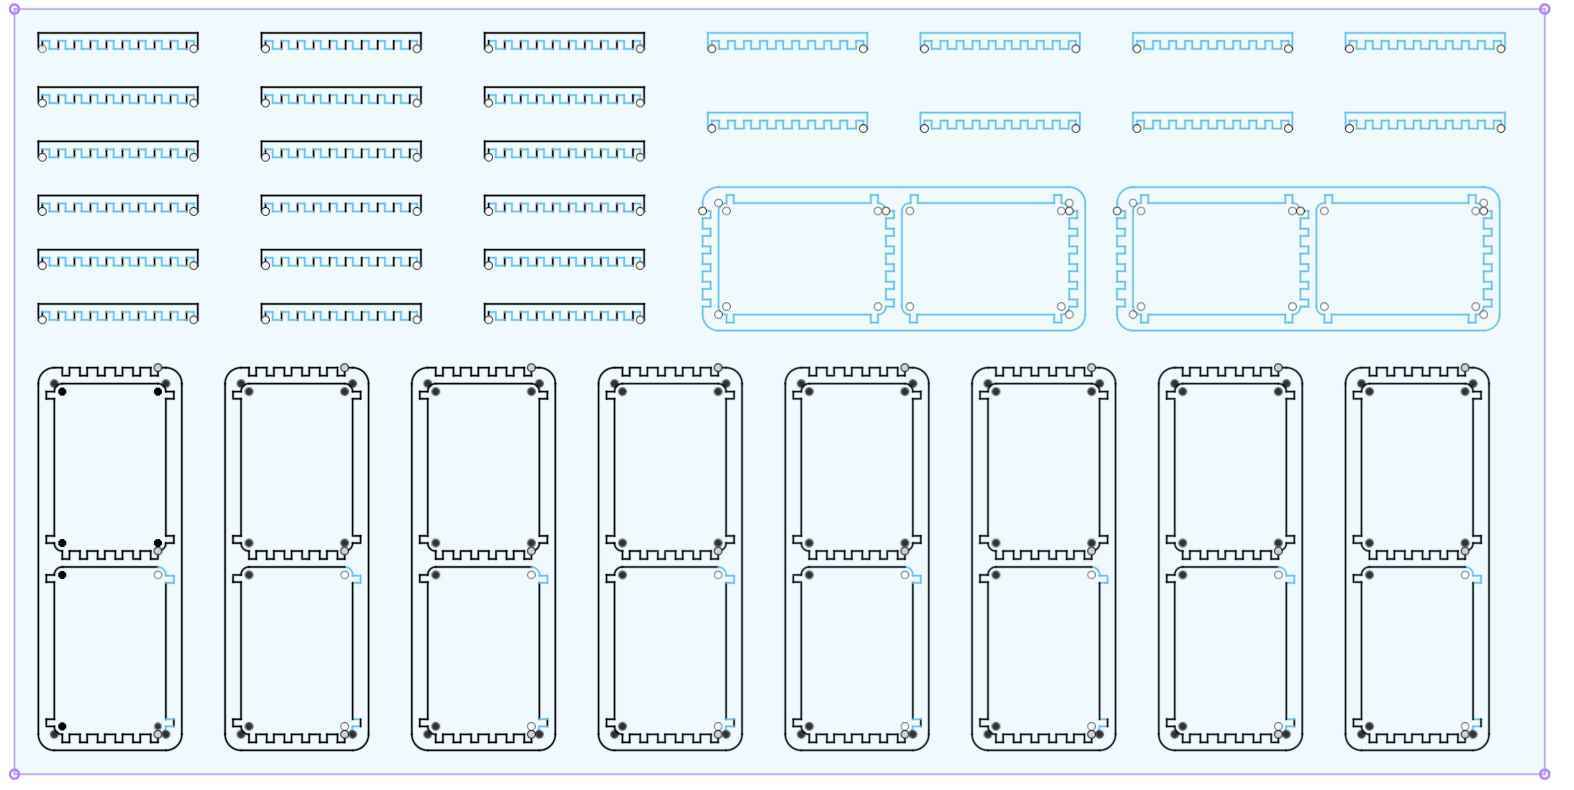
Measuring the available space and kinds of books underneath my desk, the dimensions of the bookshelf were constrained to be 9" x 10" x 24", and I designed simple pressfit joints for each of the bookshelf frames.
With the CAD completed, I met with Chris in N51 to try and set up the CAM necessary for cutting the OSB on the Onsrud machine. Unfortunately, my sketch with the drill holes (all the interior angles in CAD) didn't seem to export properly as a DXF from Fusion. Chris was able to quickly setup what was needed though, and we soon had a prepped file.
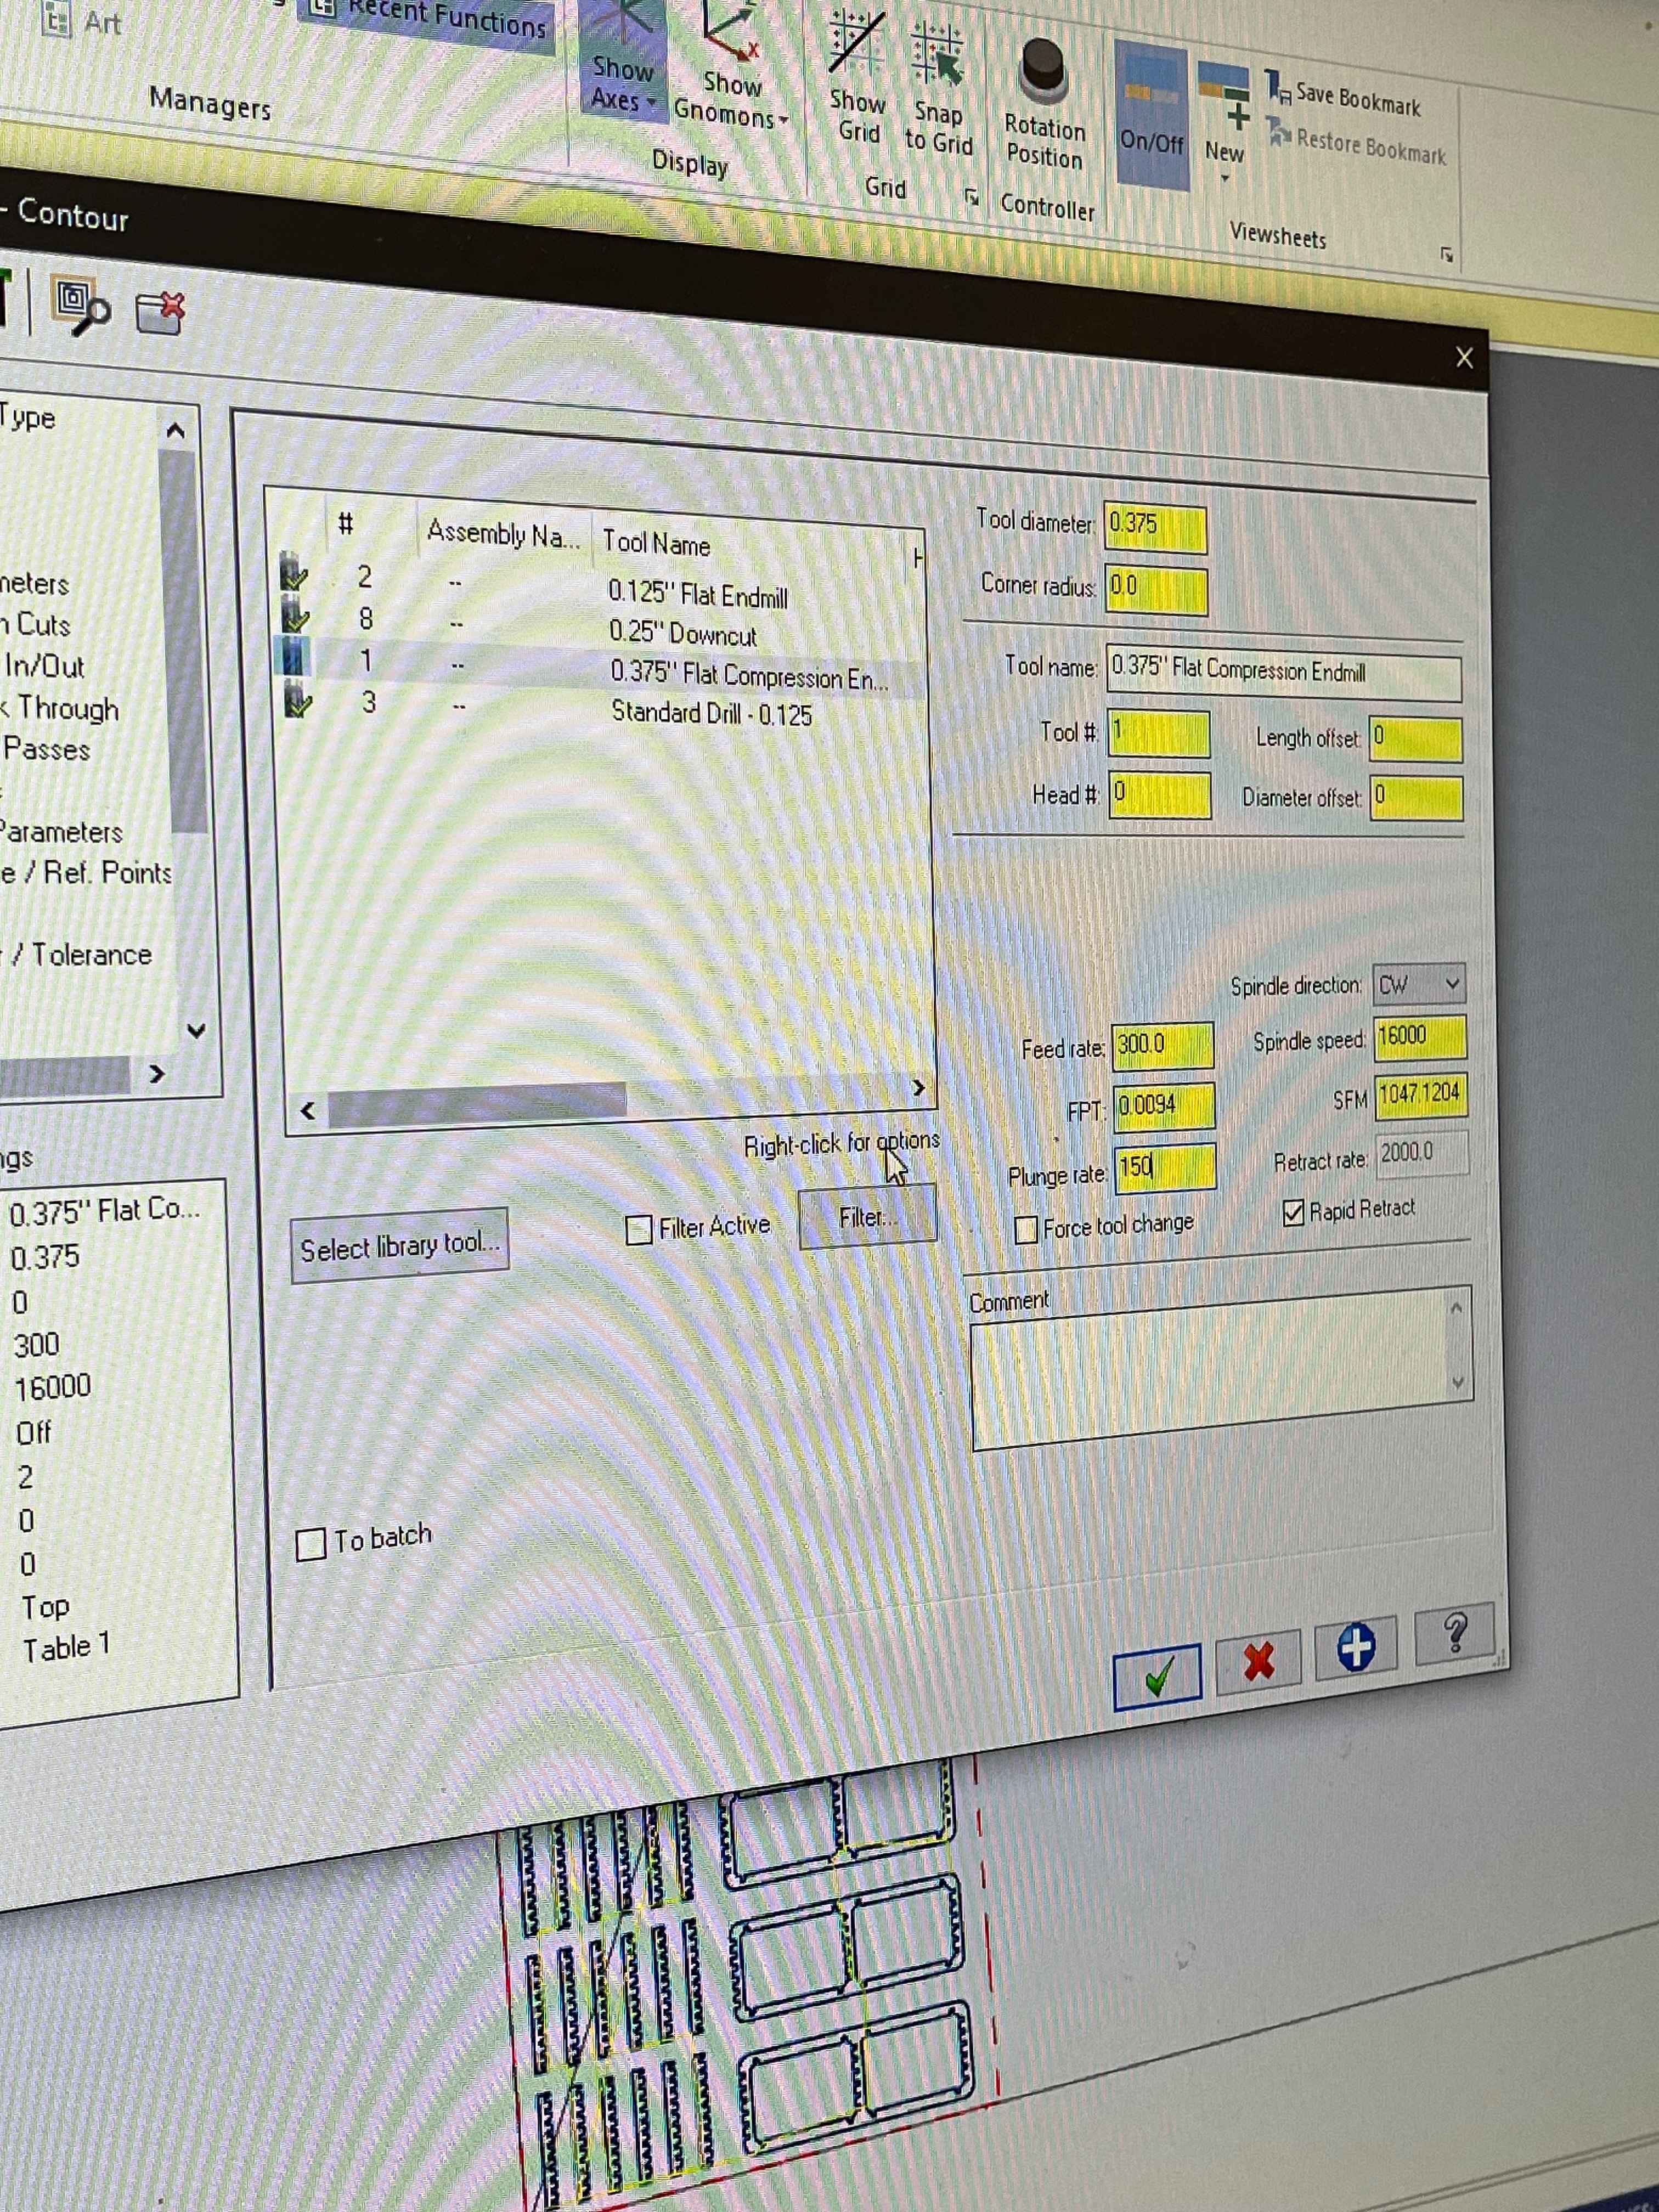
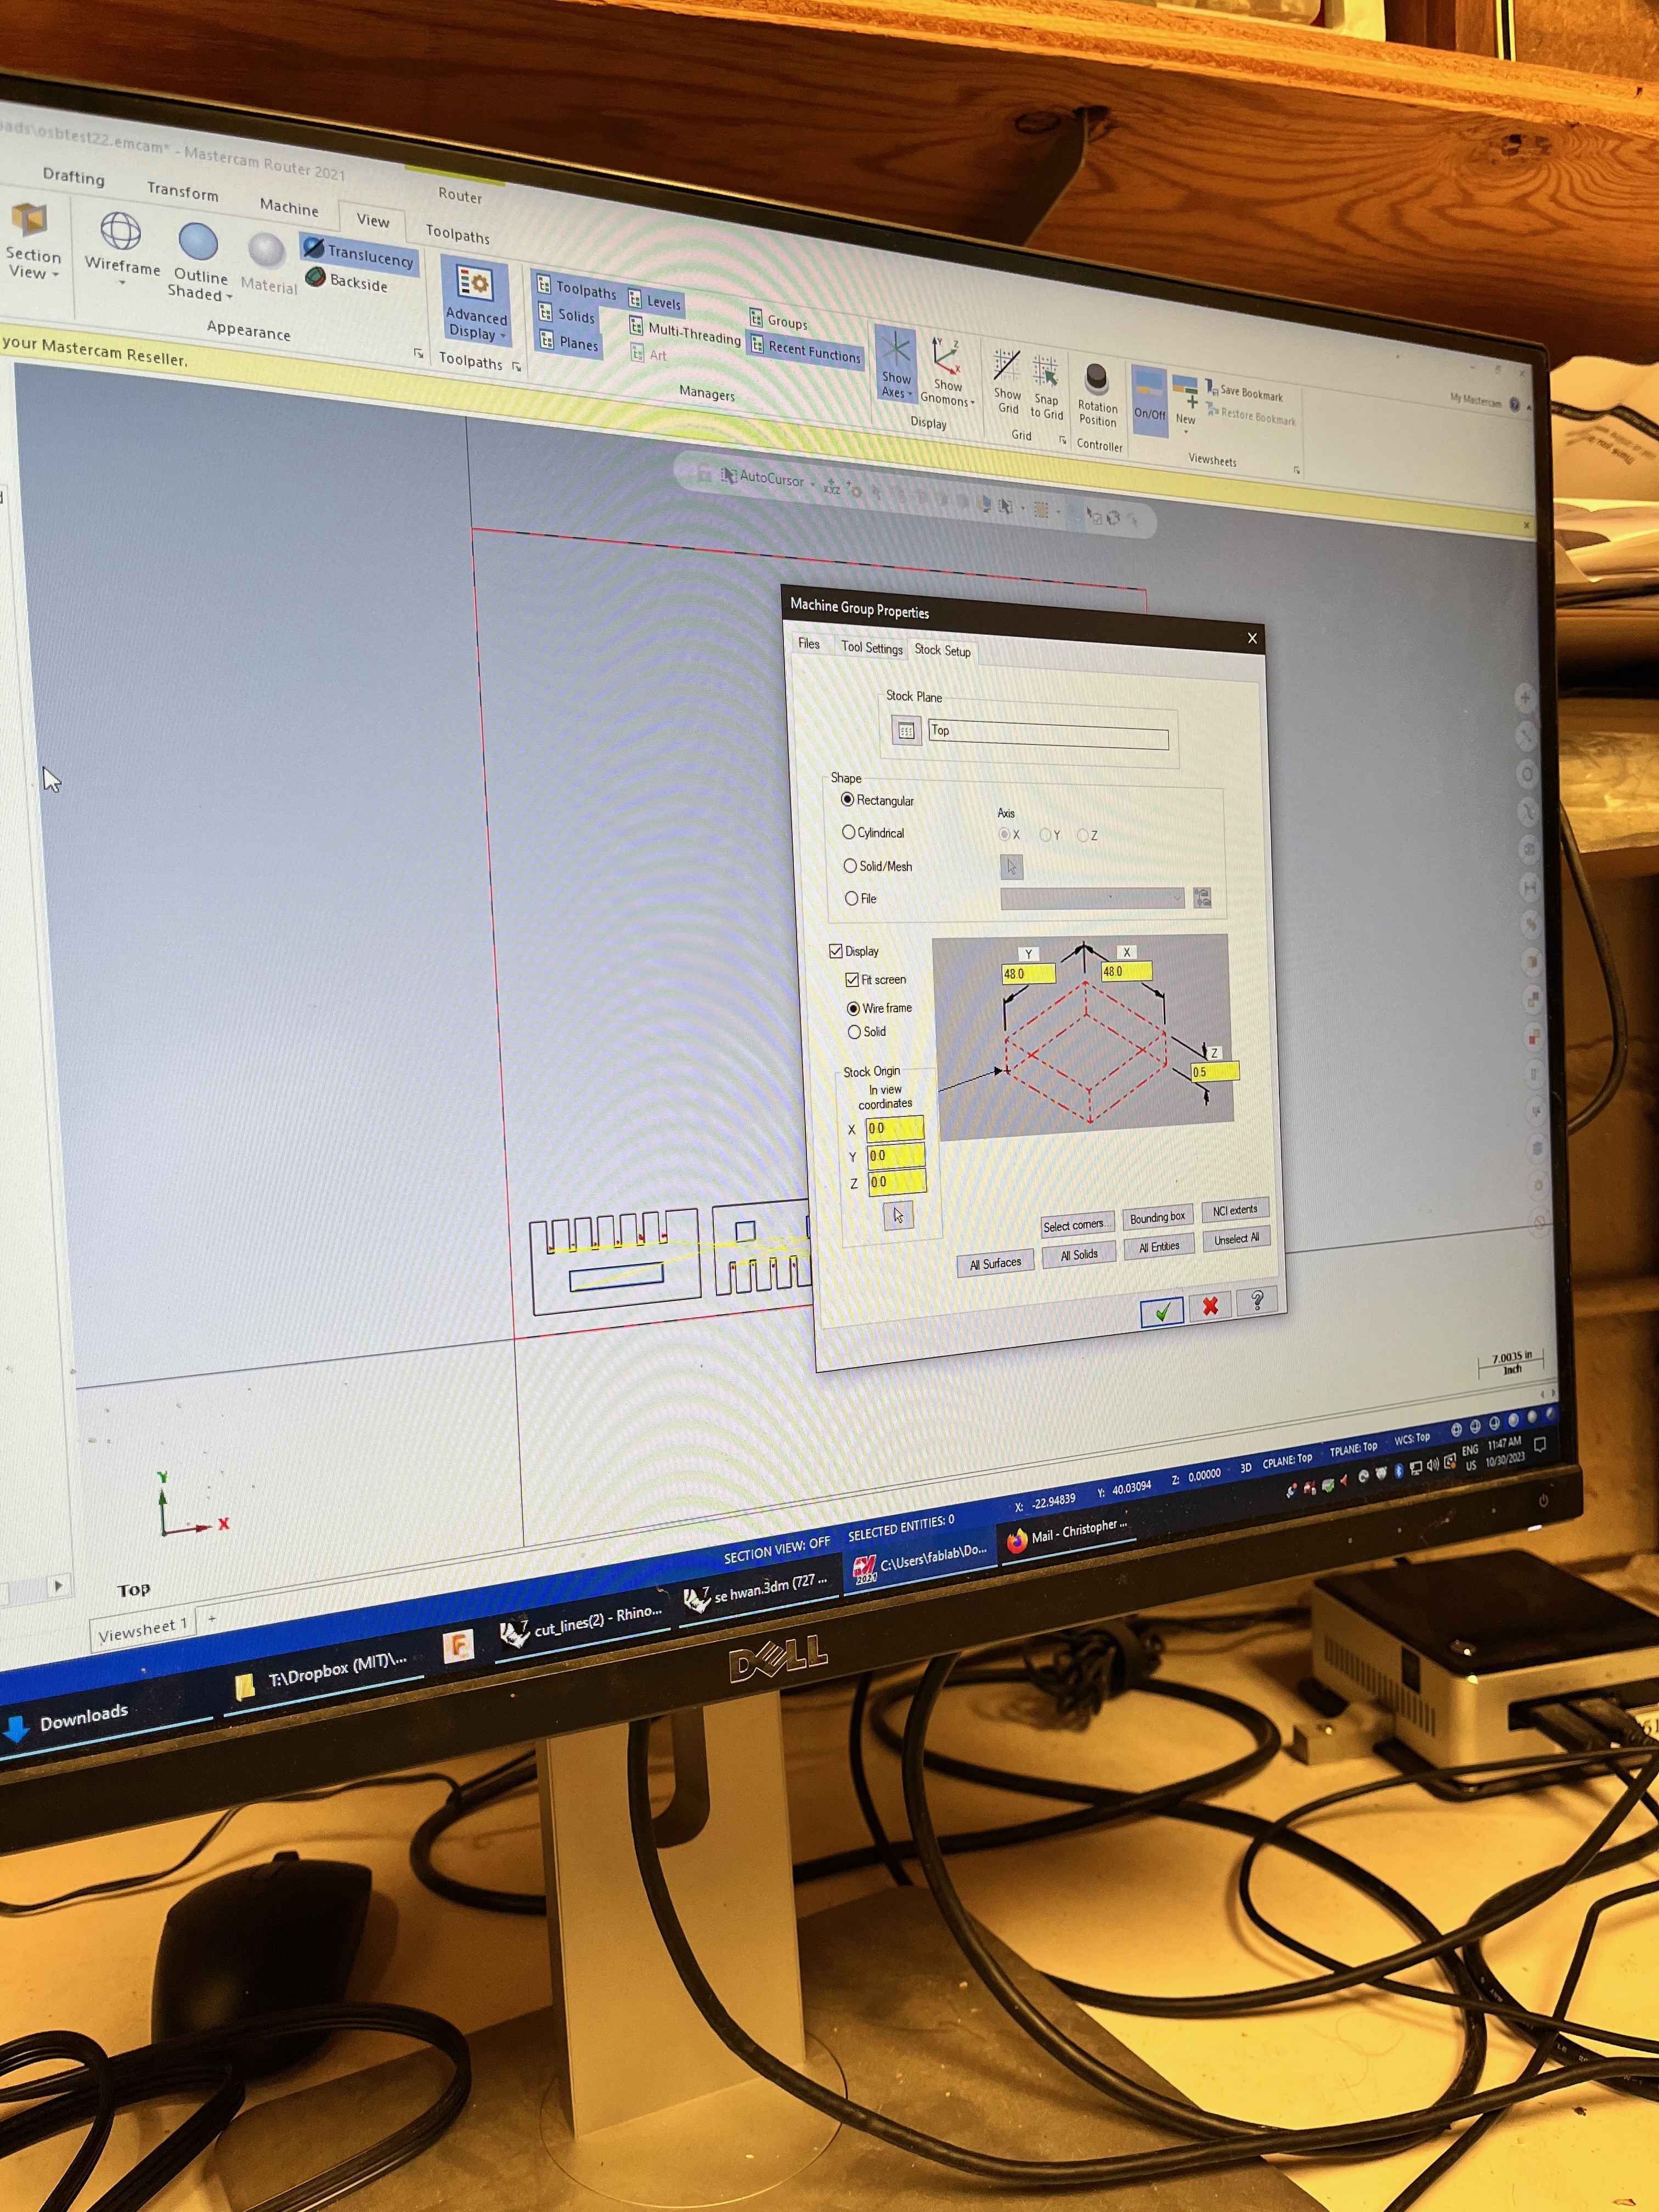
After all the setup was done, we were able to inspect the total operations and toolpaths required for the full cuts. It came out to over a thousand drill holes and several hundred contour cuts, implying almost an hour of cut time in total. Chris explained to me how he was setting up the onion skin offsets and tool feeds and speeds to expedite the cut a little bit.
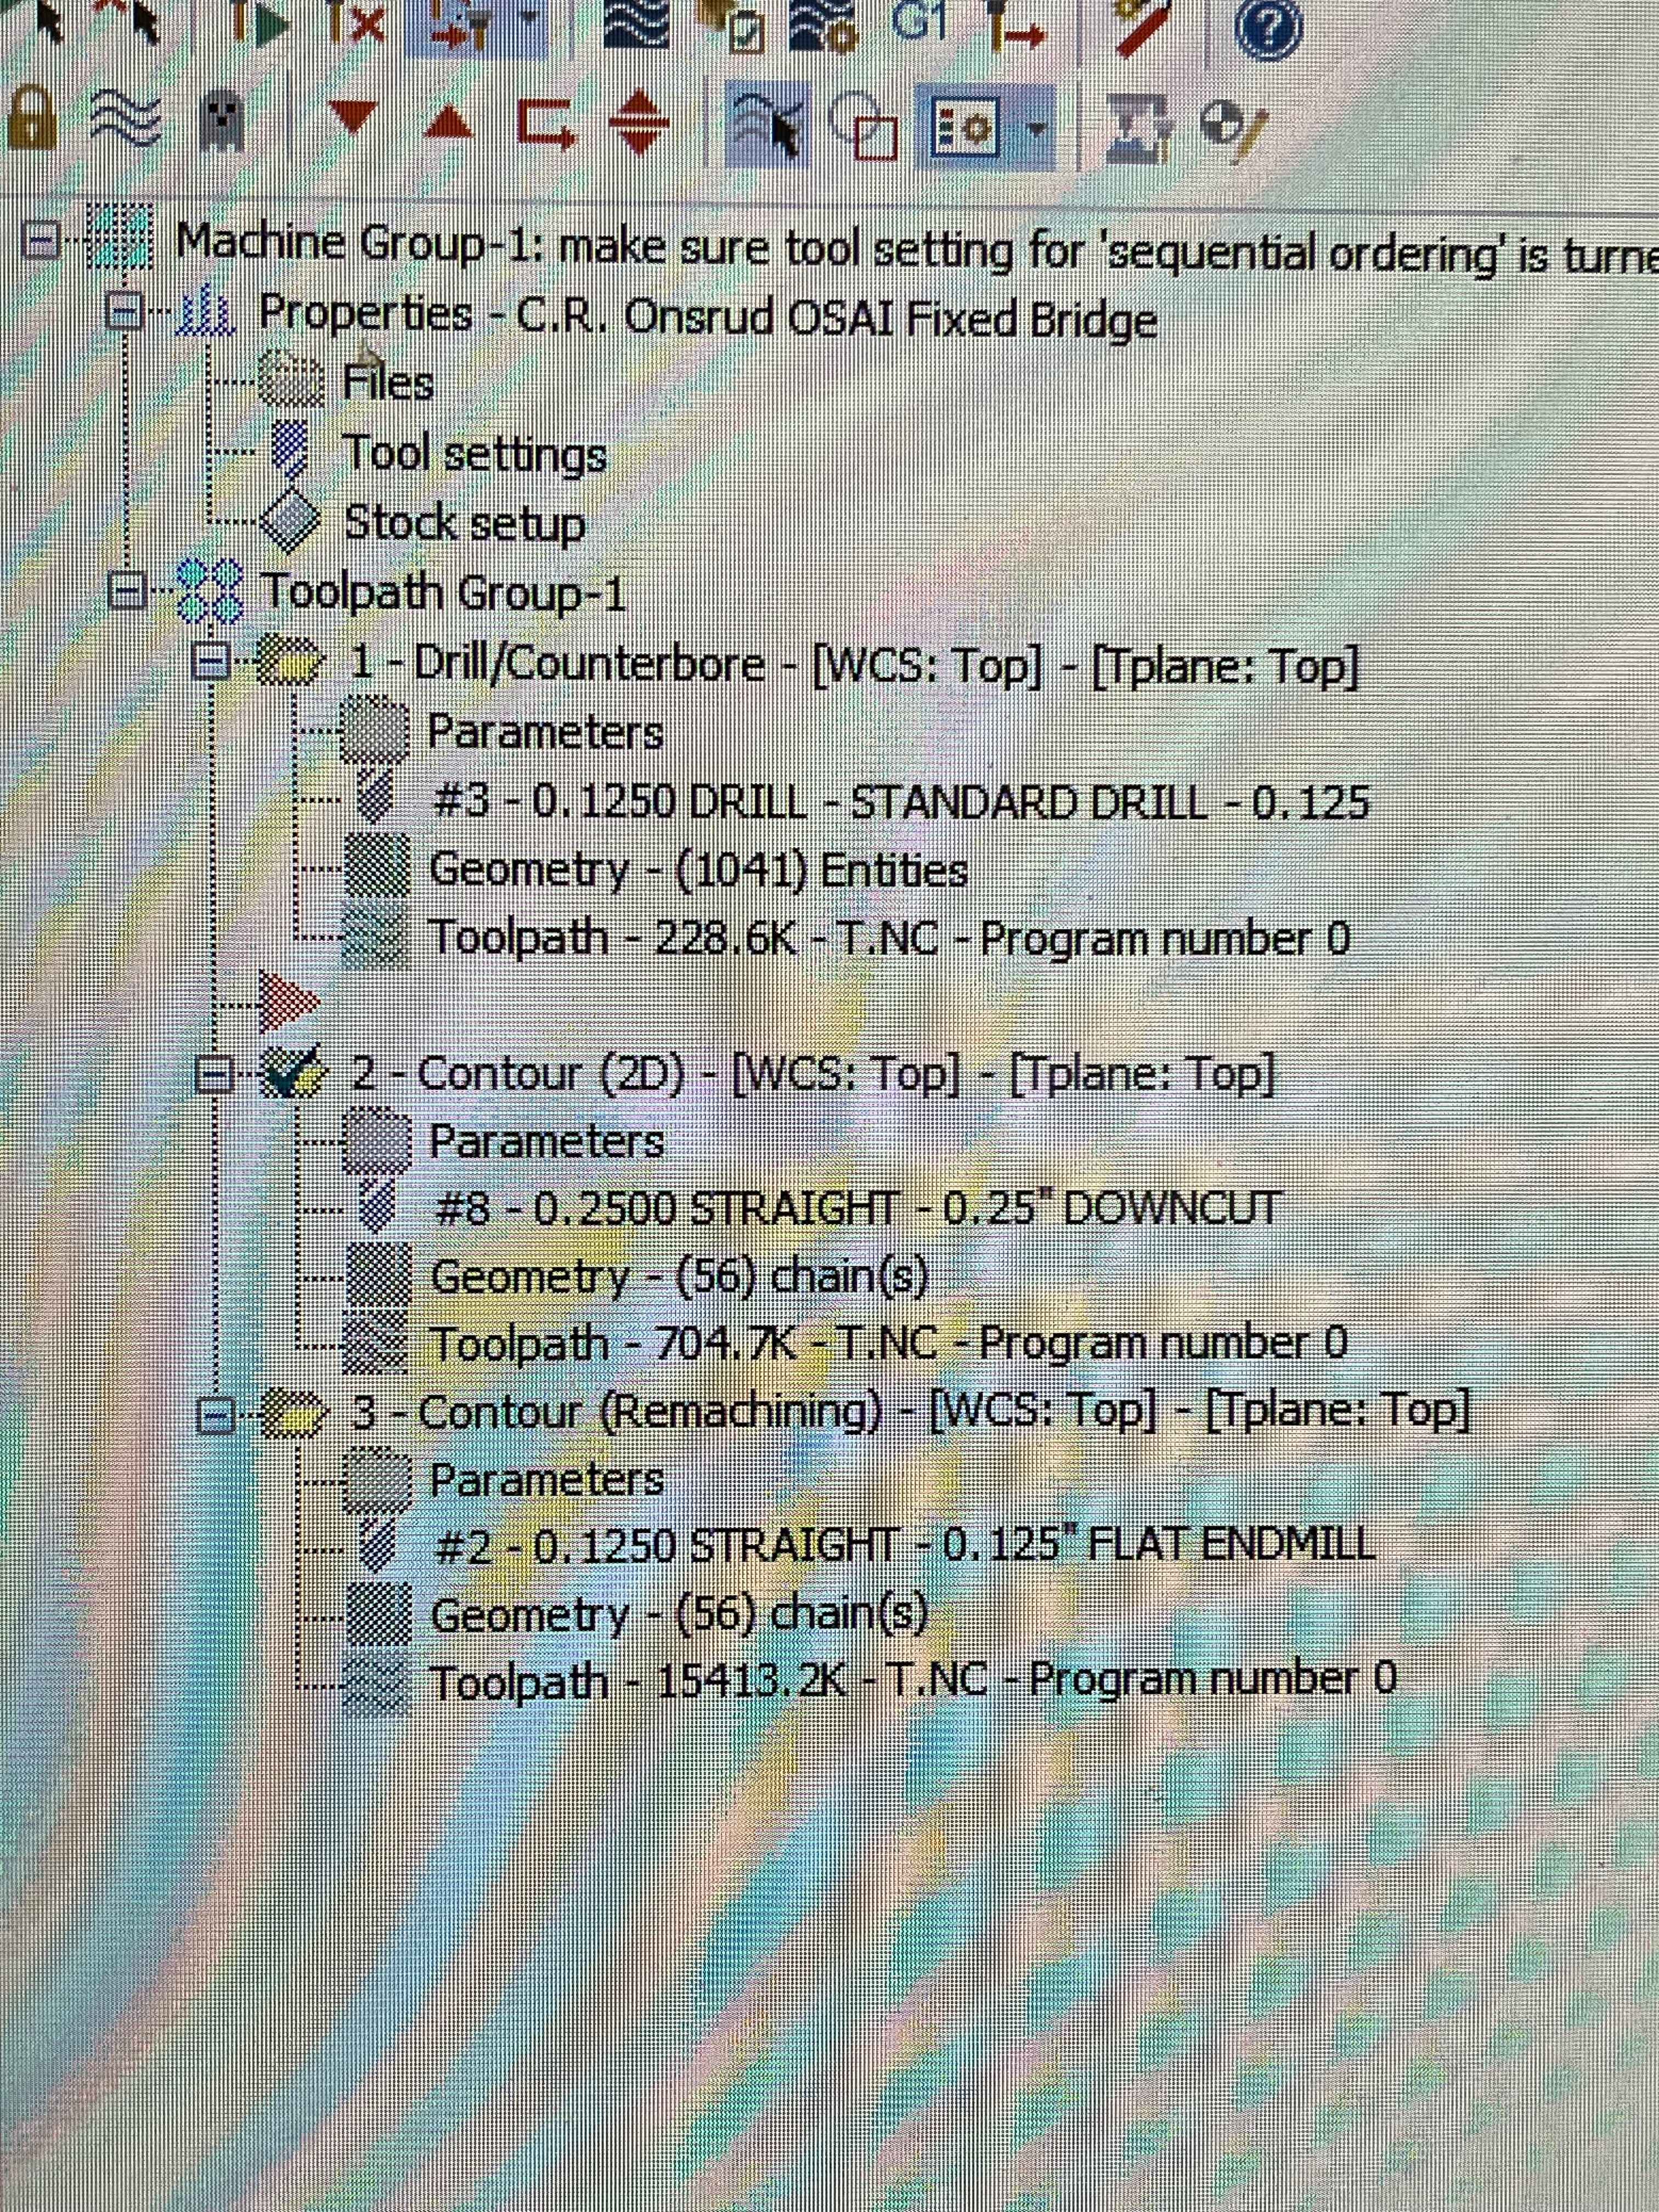
After the CAM was setup, I was able to begin cutting the OSB. Things quickly went wrong, but I didn't realize it until it was too late. While the Onsrud was cutting the contours, I didn't realize the tool offset for the onion skin was actually too deep, and the mill was cutting clean through the board on the first pass. The CAM setup involved a first pass with a larger diameter tool, and a second pass with a smaller diameter tool for the finer details and cleanup.
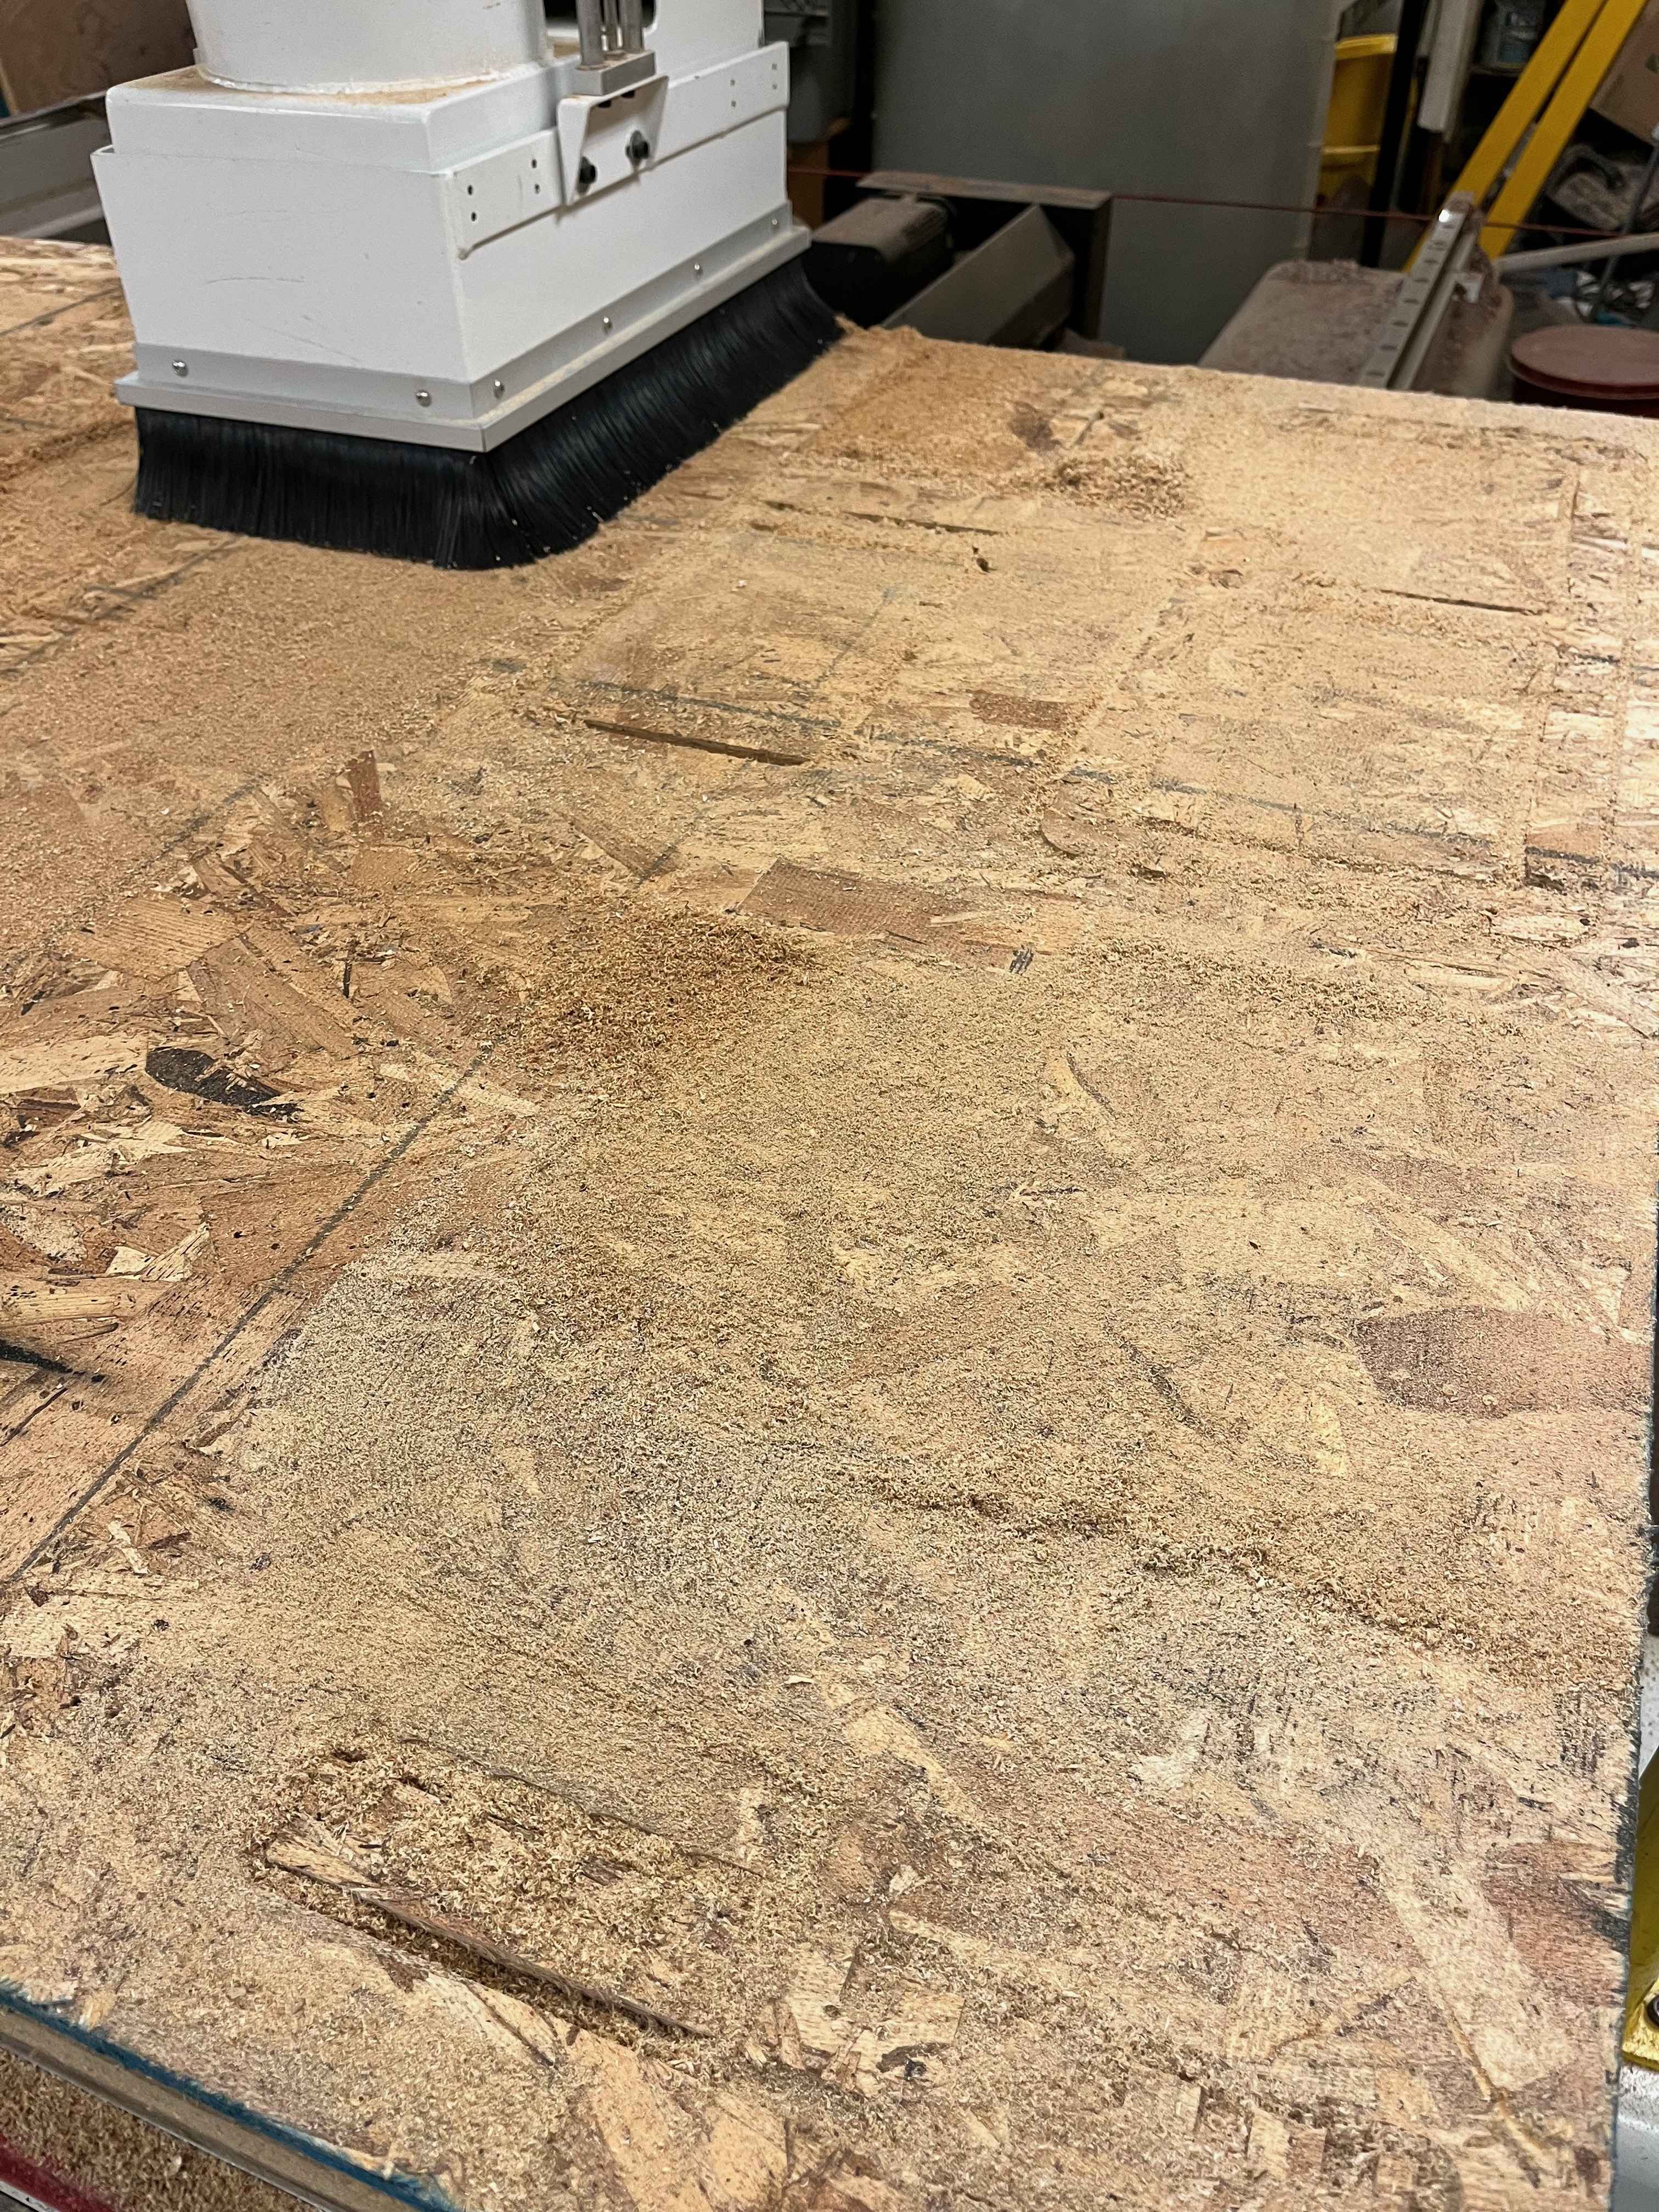
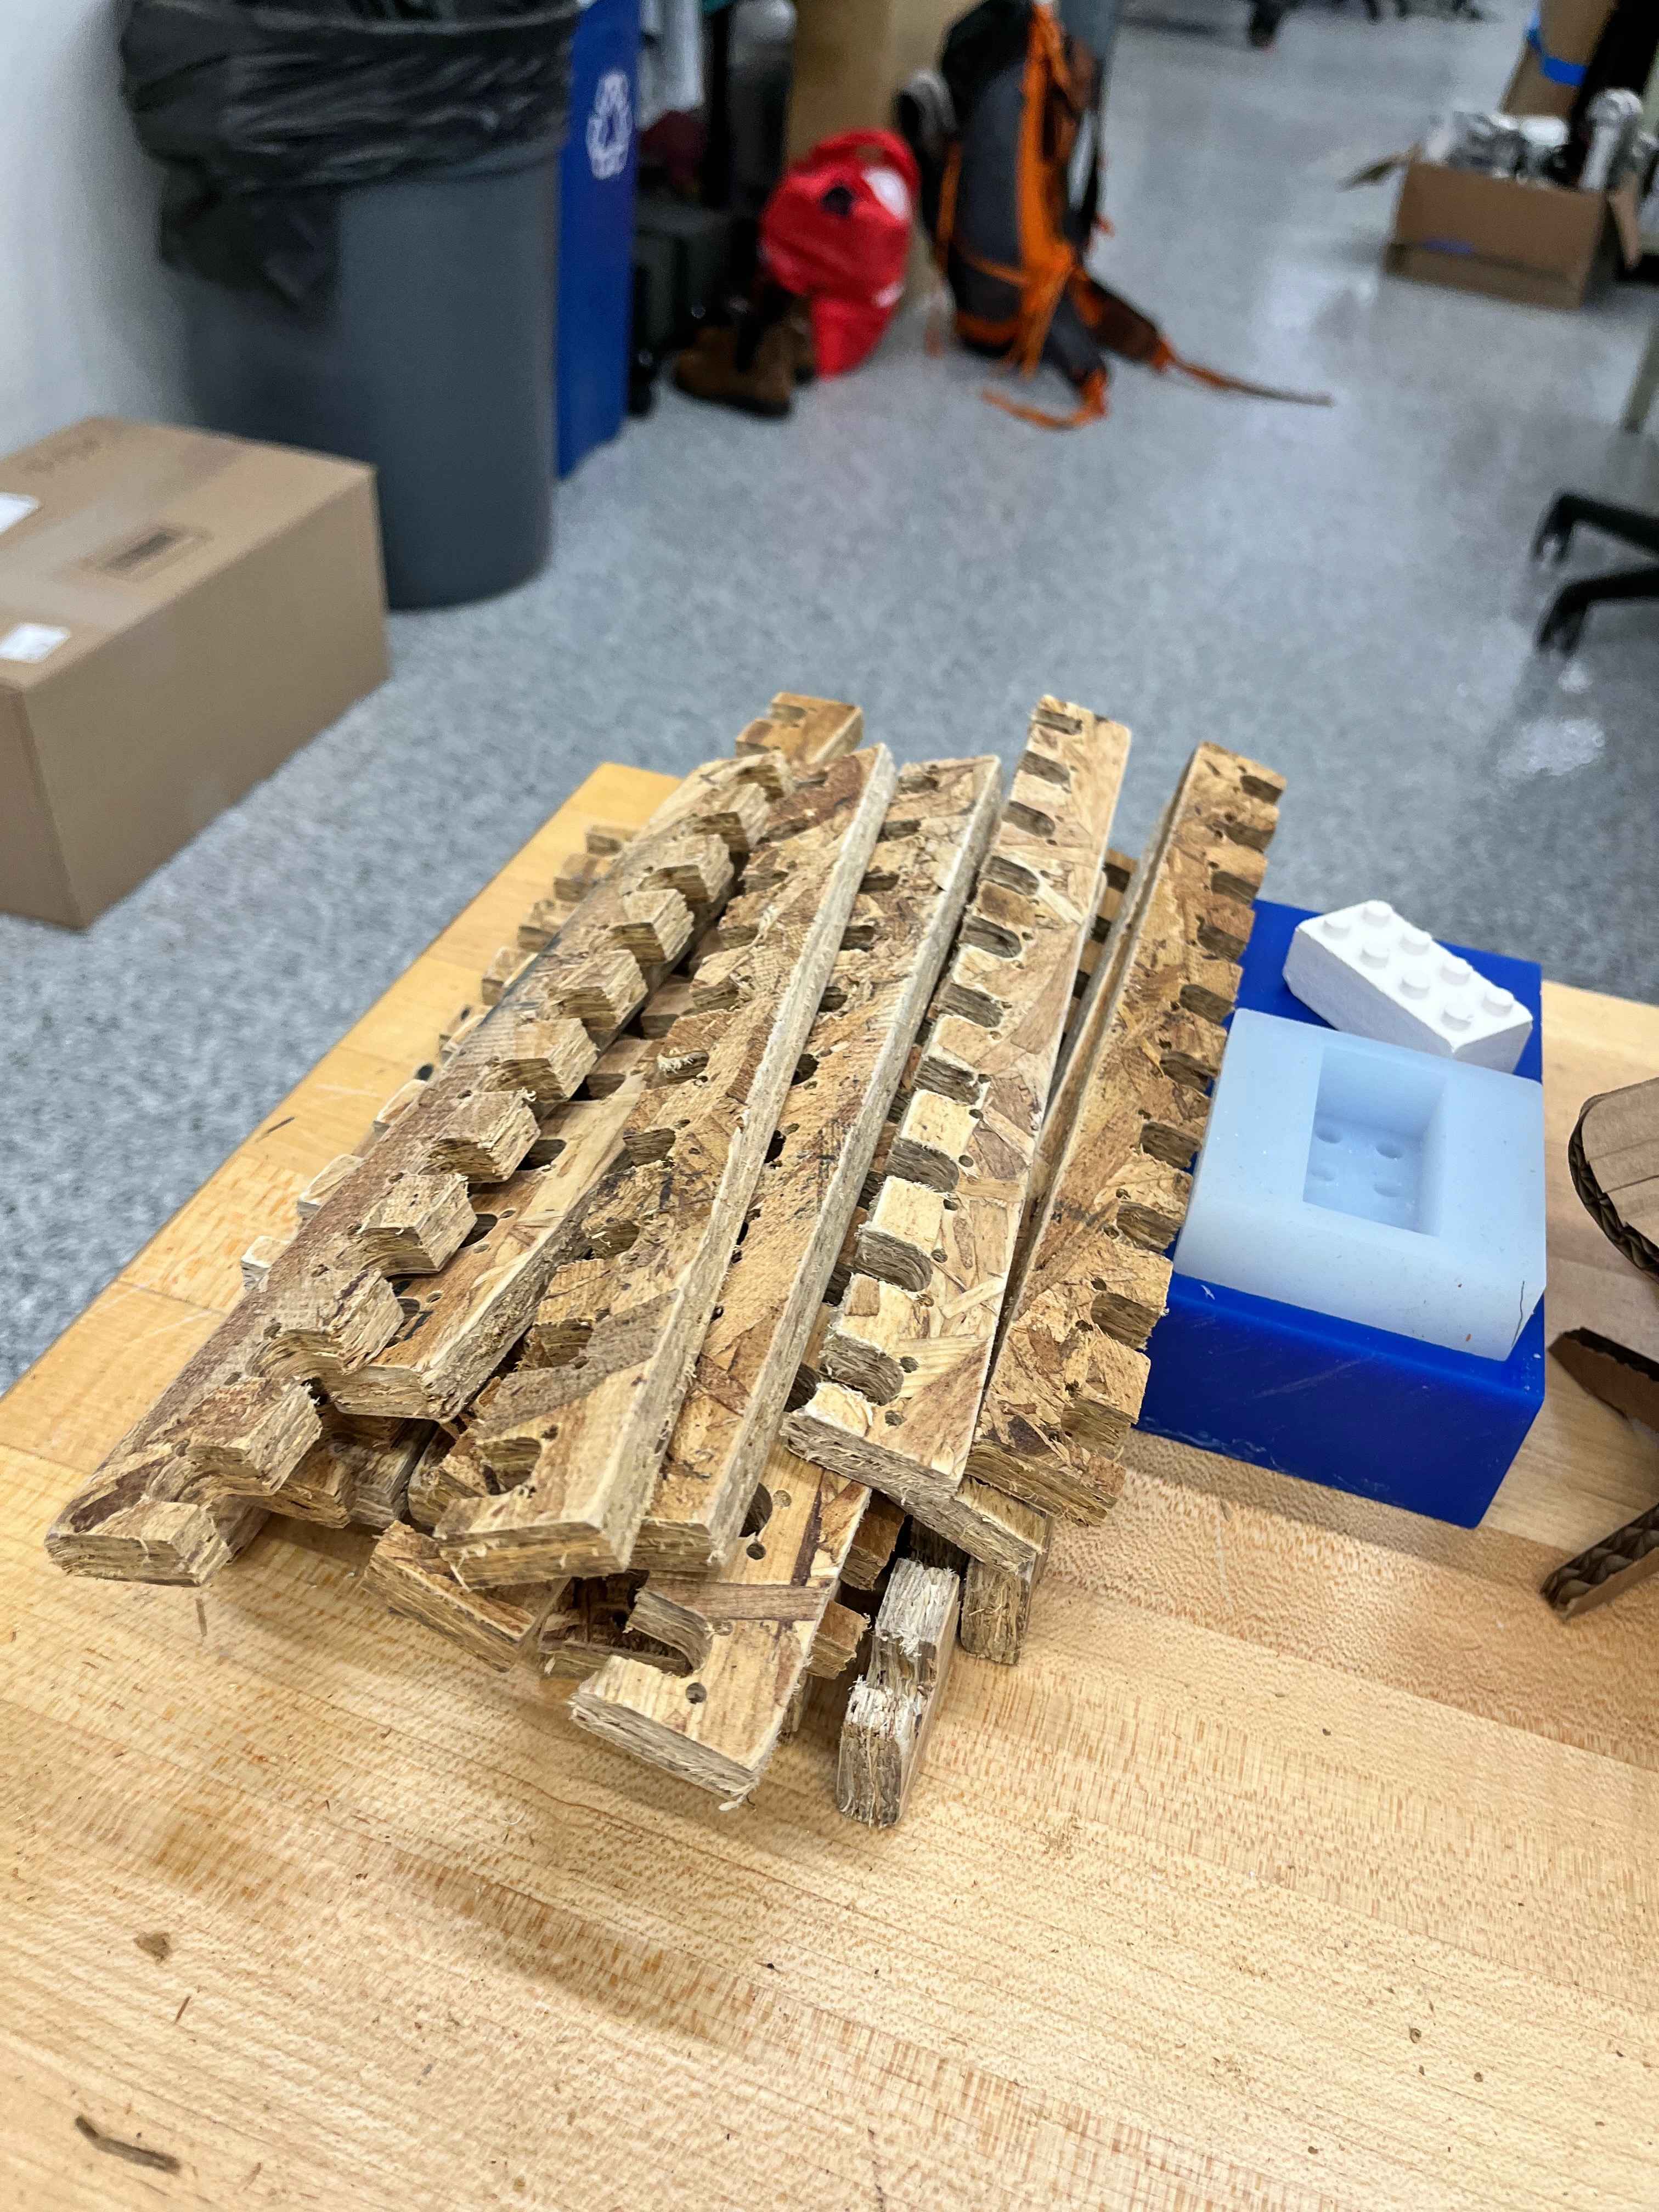
Halfway through, we noticed that the tool had actually entirely dislodged one of the pieces from the board, and we had to stop the mill after the first pass. The aftermath of this can be seen here:

This meant that on the first pass, all my pieces were already cut all the way through, and on the second pass, they weren't secure. Consequently, some of the detail cuts (before the job was stopped) were all over the place.
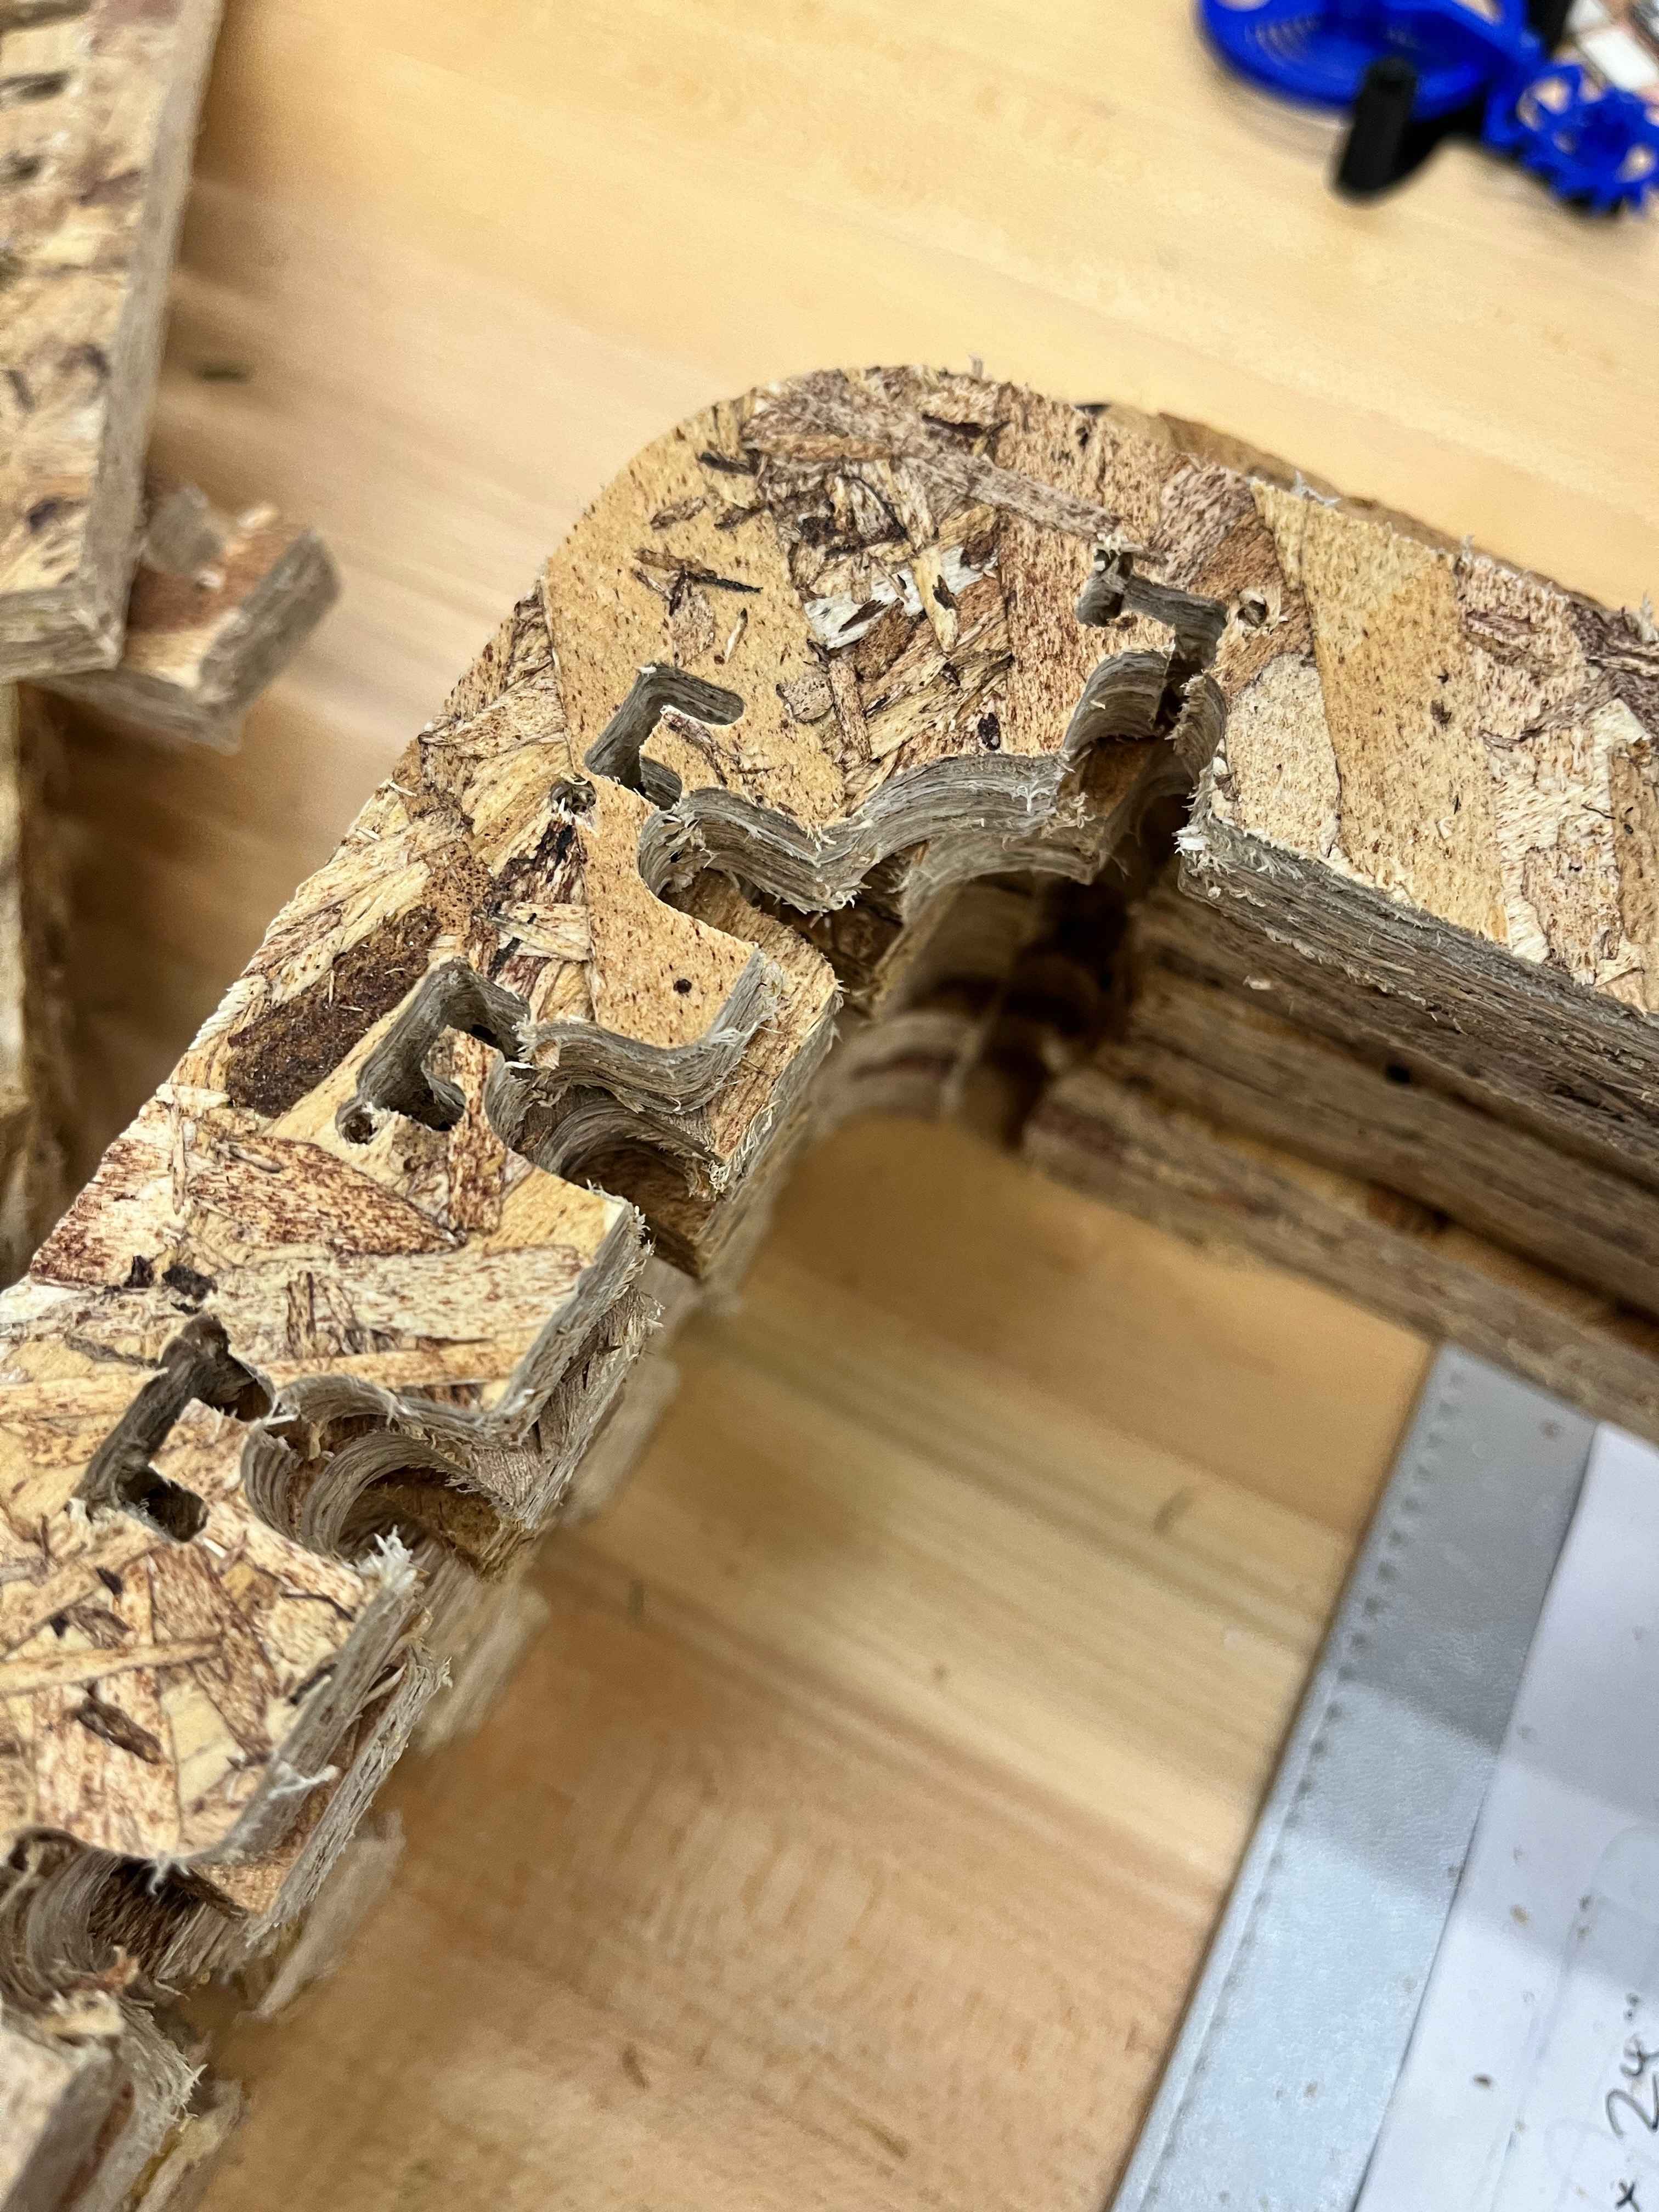
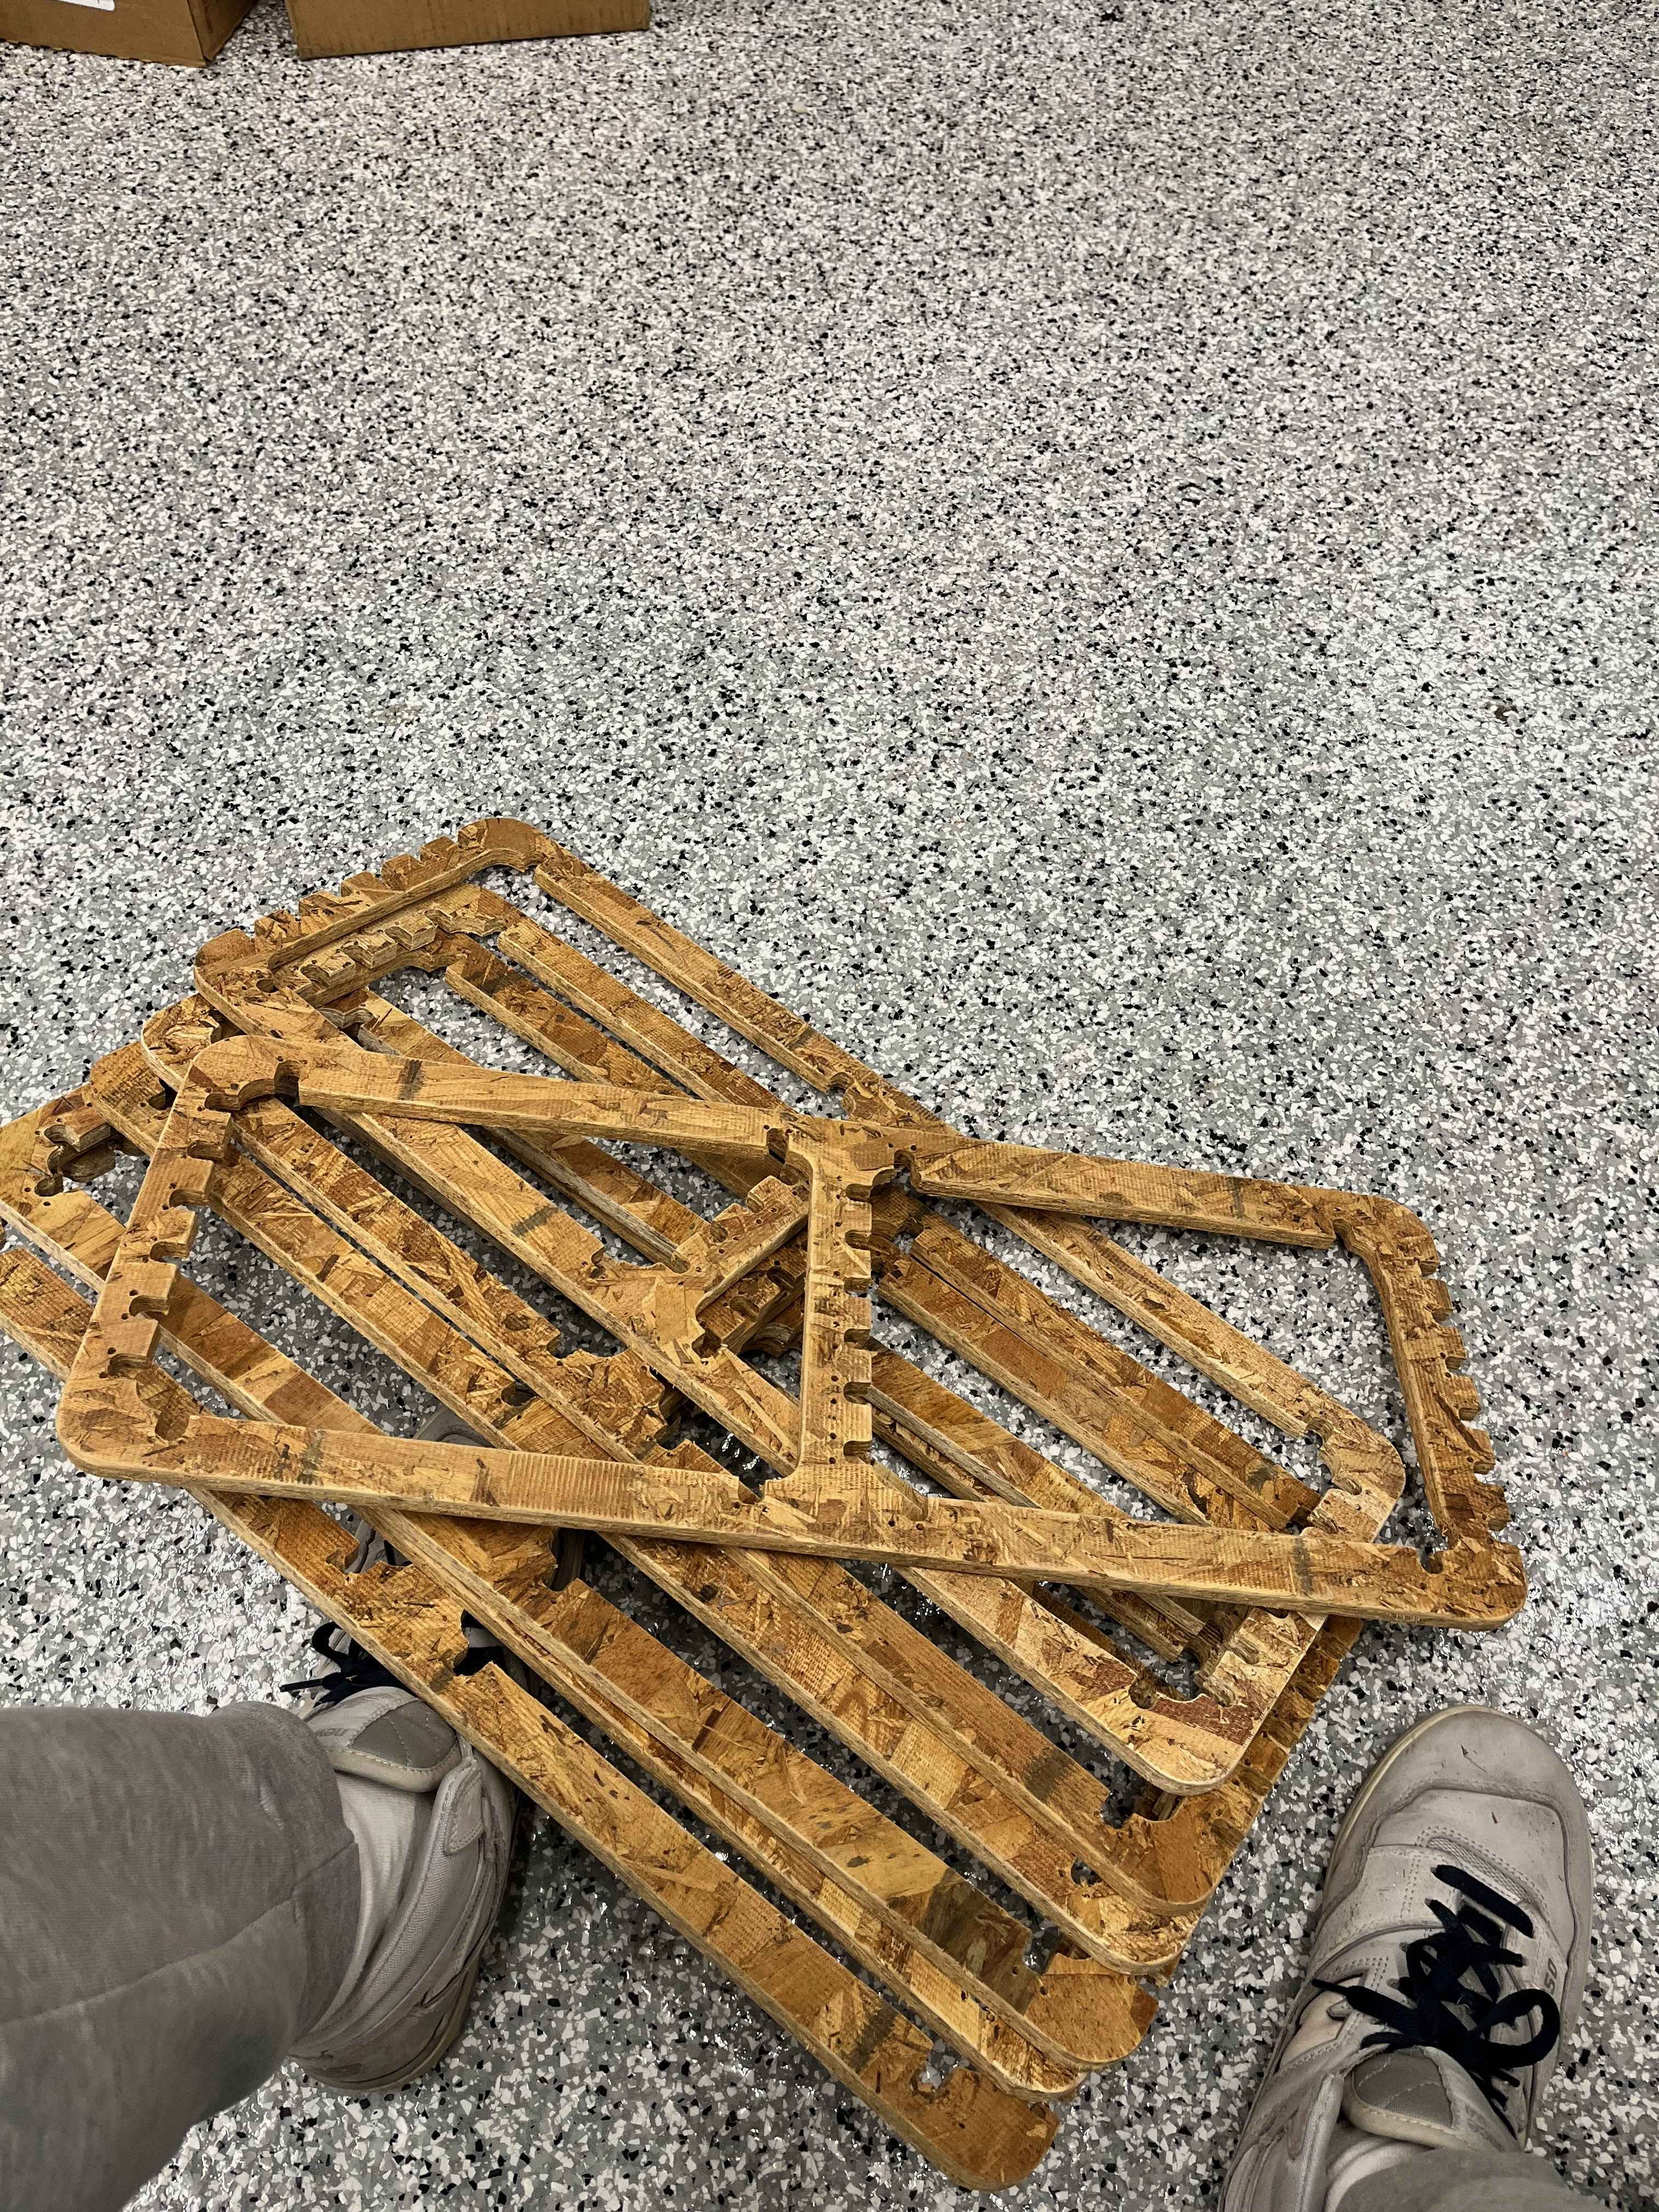
Regardless, I was able to get all my connector pieces and 9 out of 10 of my frame pieces (one was destroyed by the mill) for assembly.
I spent several hours sanding down the sharp and jagged edges of the pieces. I'm still unsure if these were due to the nature of the OSB board, or the dislodged cutting from the mill, but the pieces were very rough and splintered easily. It's not ideal to pick splintered pieces off any bookshelf, so I ensured that at least the edges were less sharp and smoothed the surfaces down a little.
I then began assembling the bookshelf. I used a rubber mallet to hammer in the connectors, and I was able to get the bookshelf together in around 30 minutes.
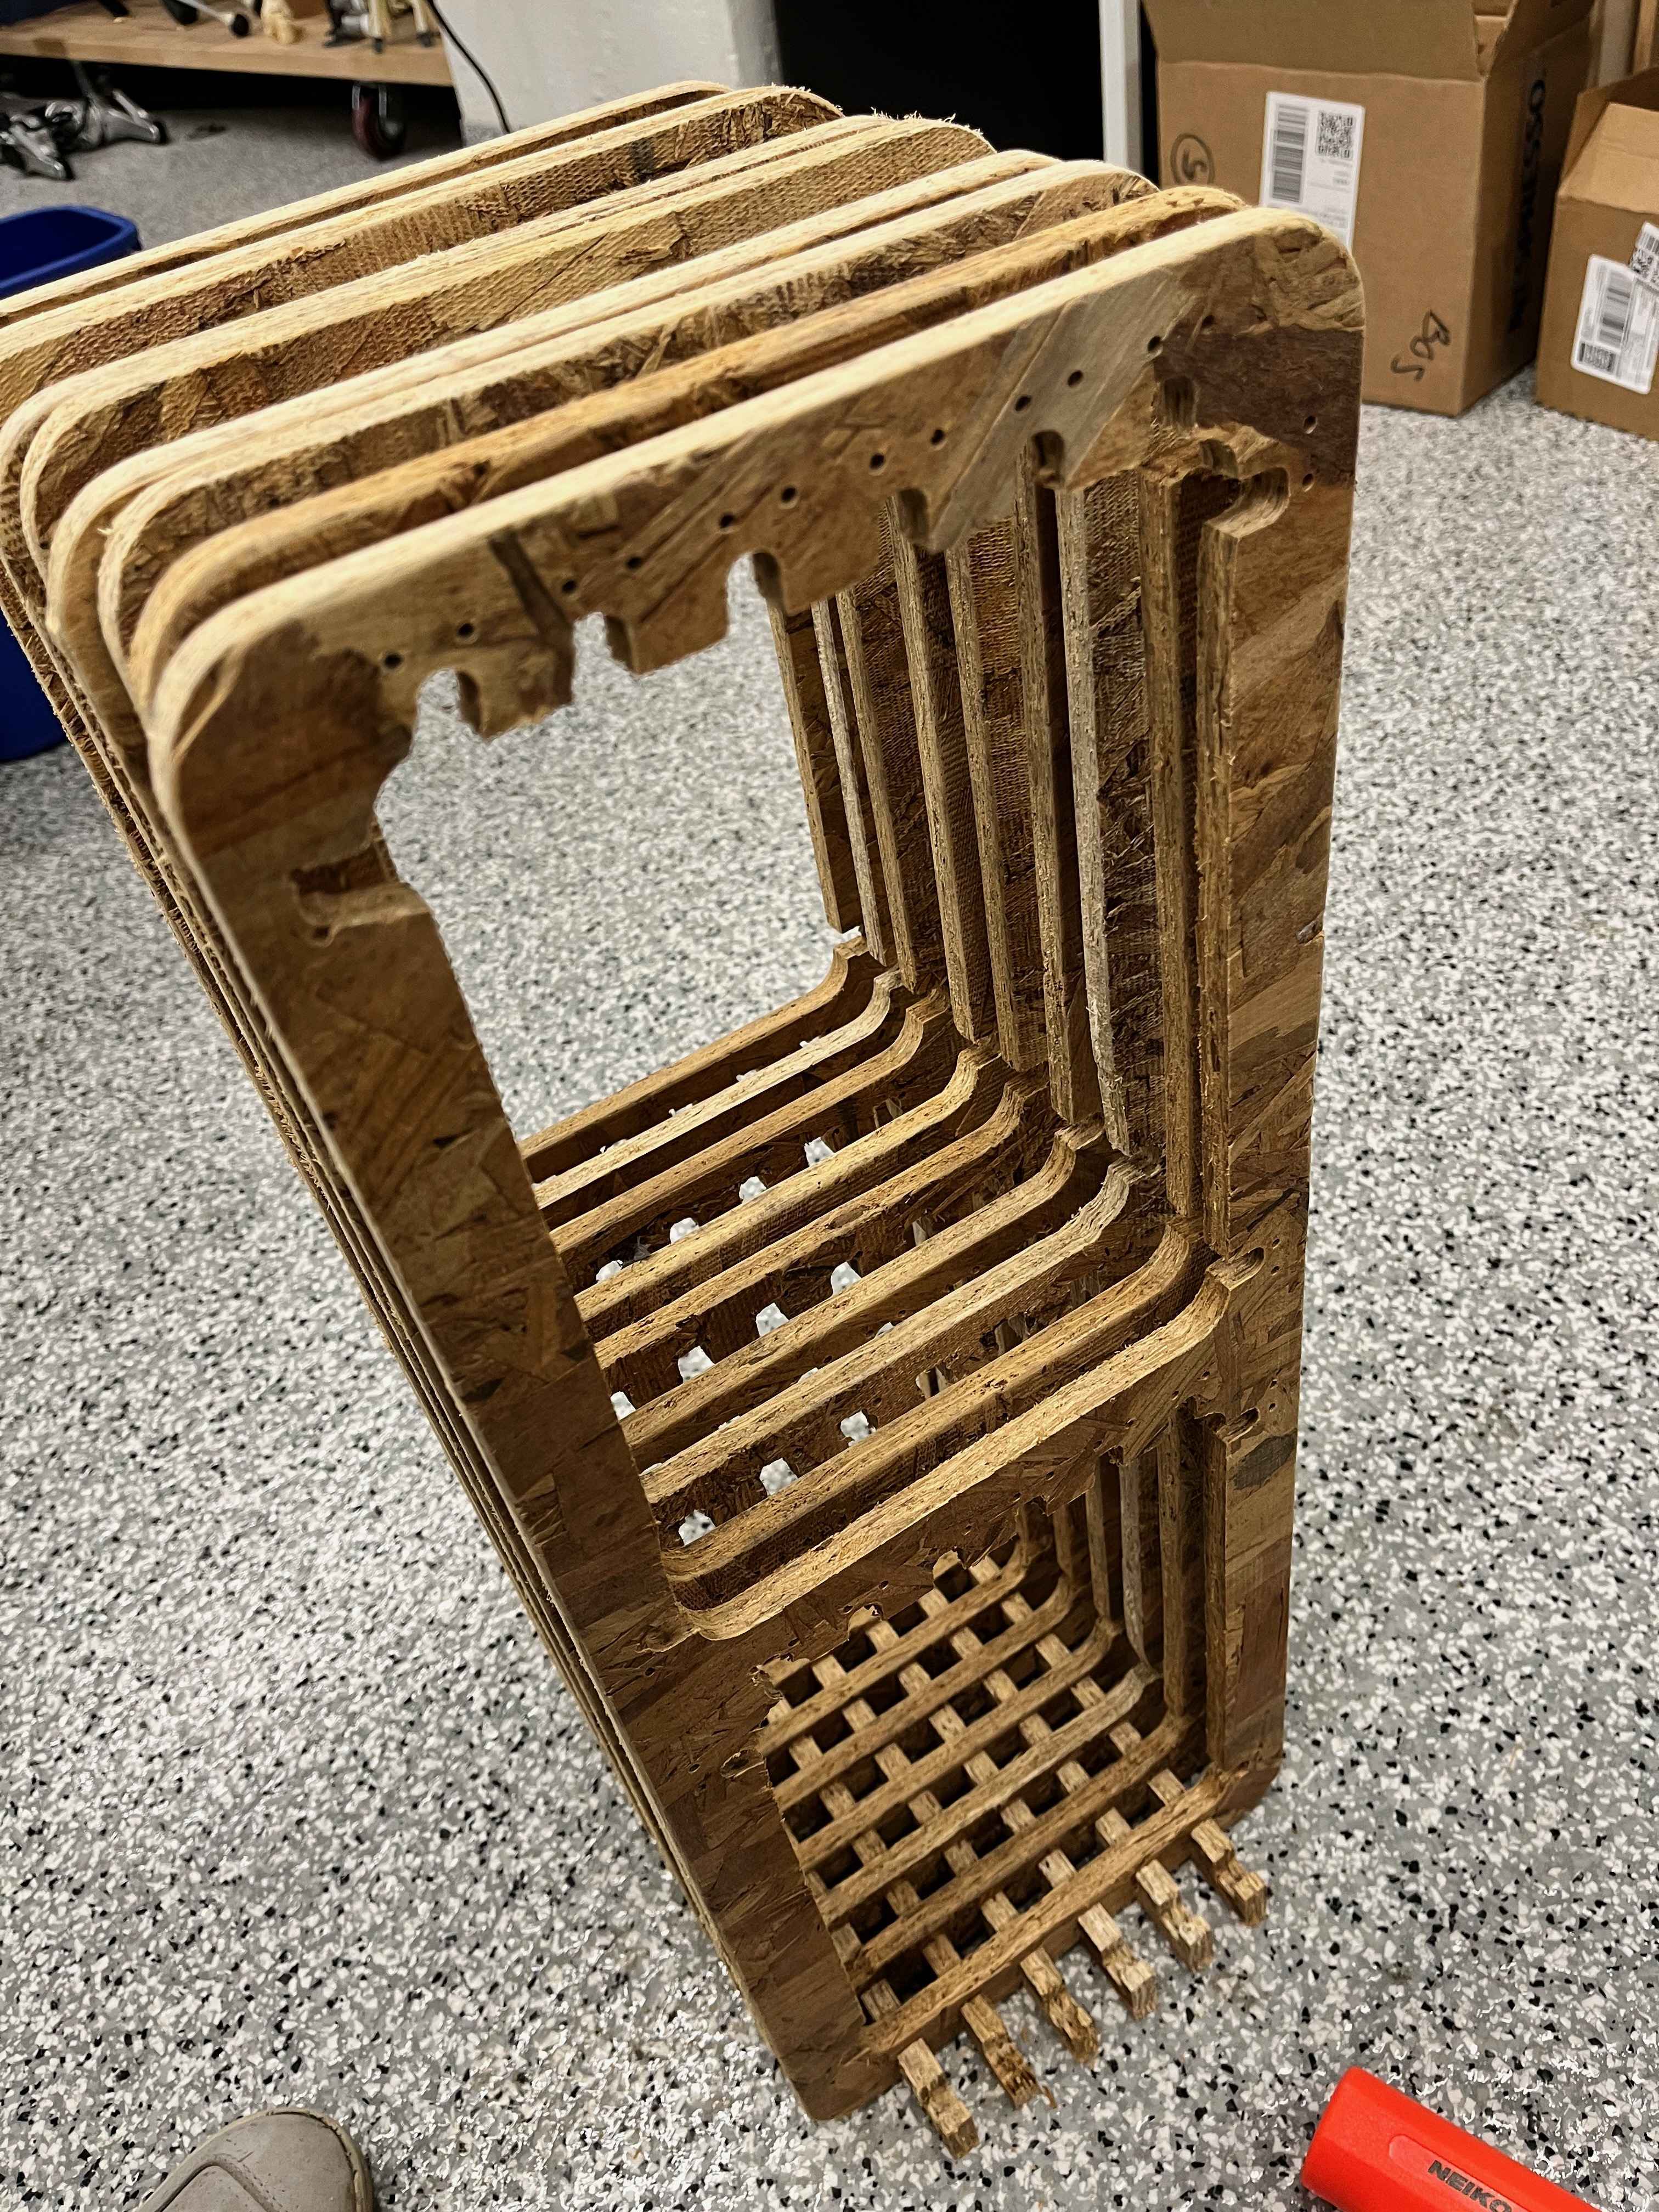
A lot of the connection pieces did NOT go together well. With the sloppy cut tolerances, I didn't expect them to, but it was a significant challenge trying to make all the pieces fit together, and I had to make liberal use of the hammer. But eventually, I was able to more or less force all the connection pieces together, and I had a complete, ugly bookshelf.
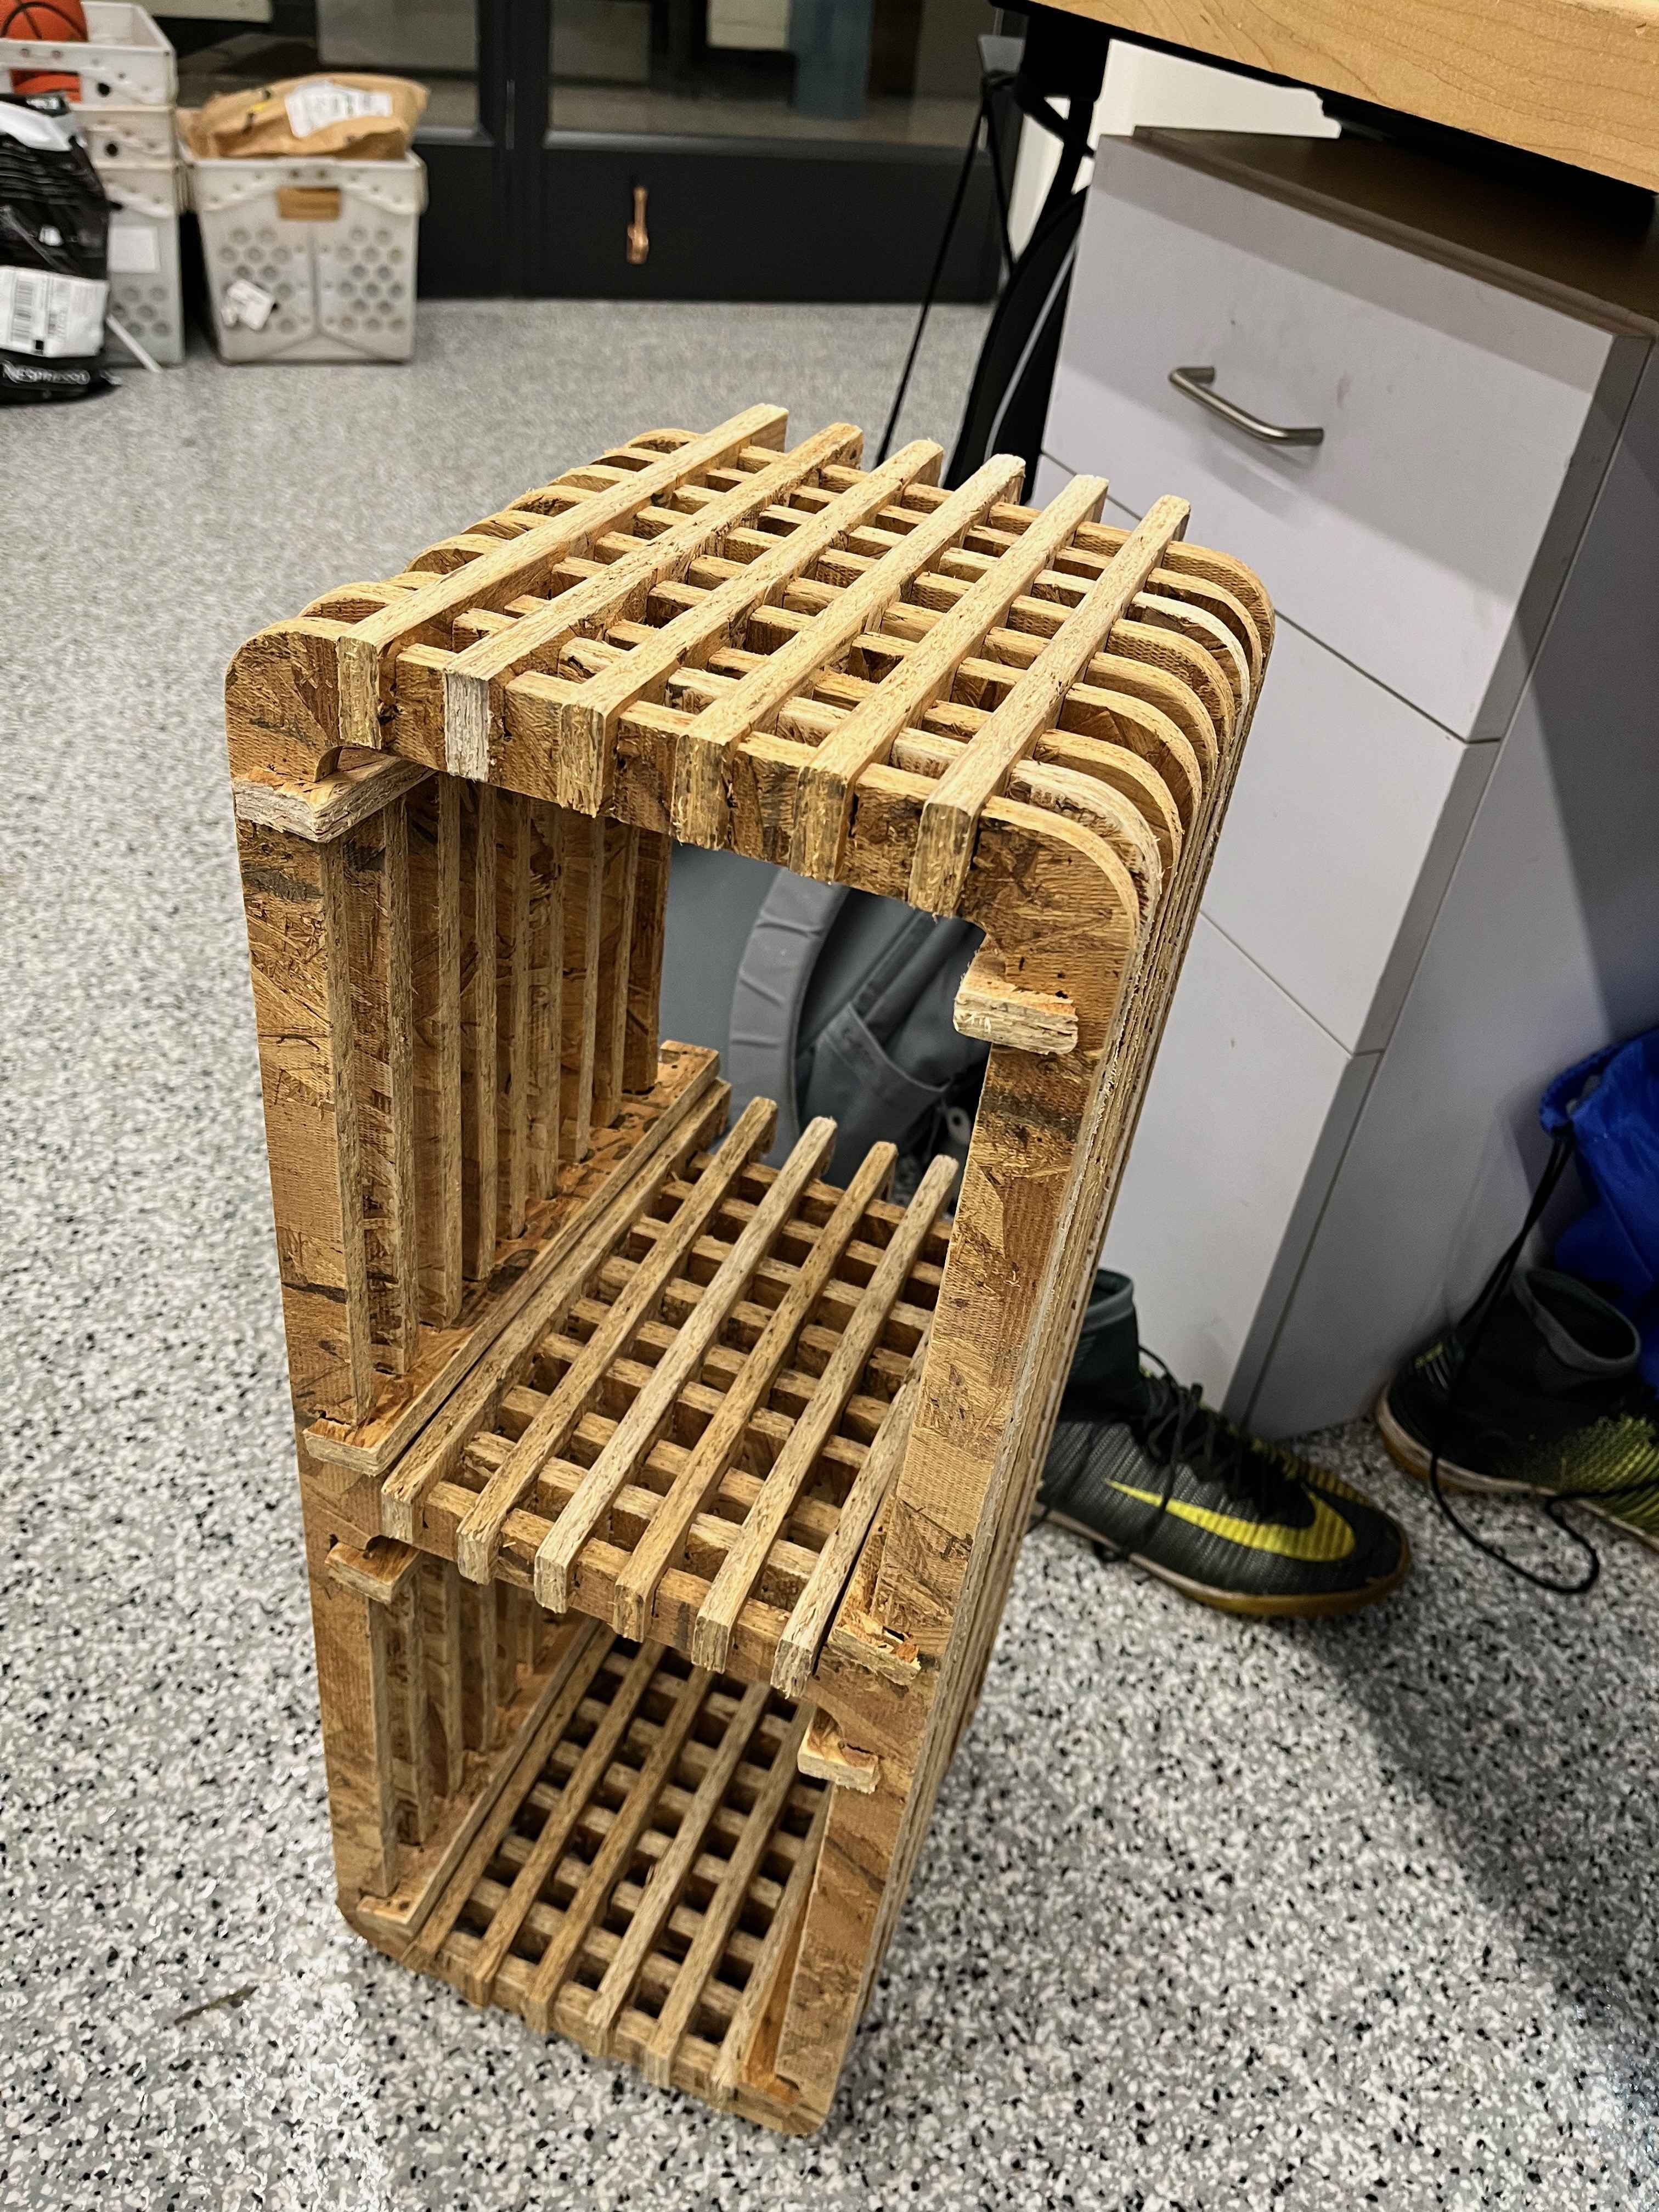
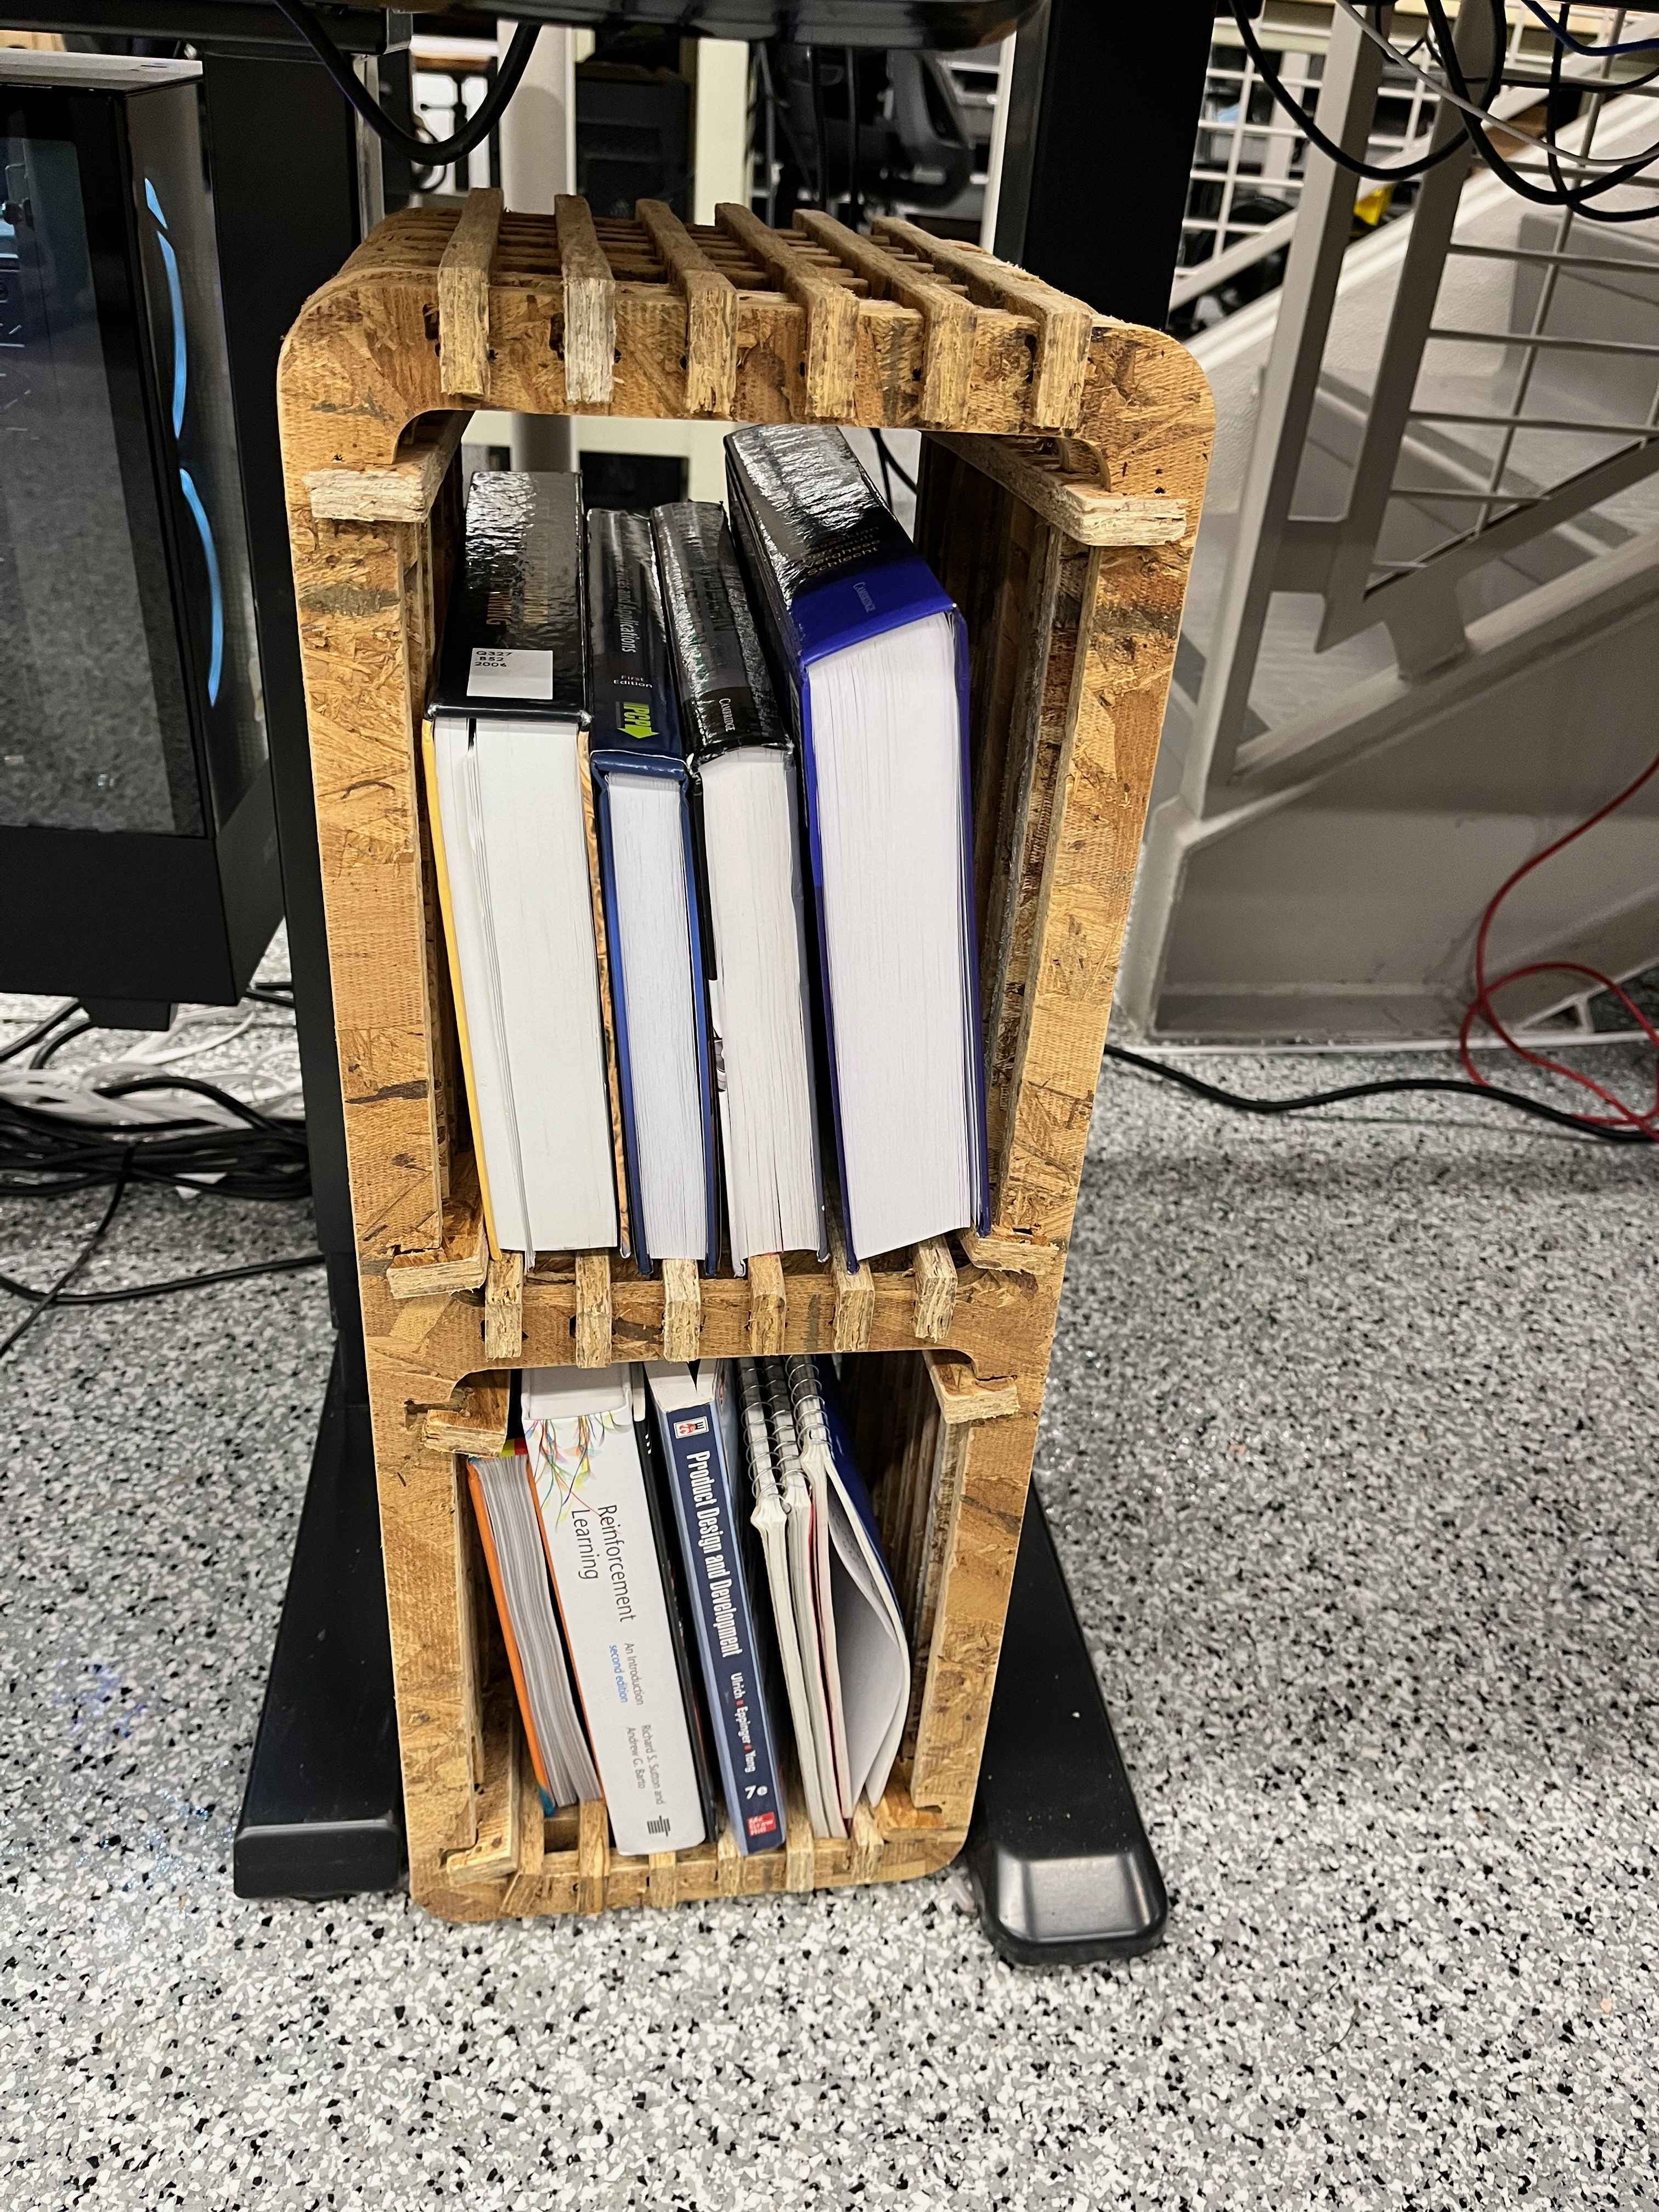
Because the finer detailed cuts weren't completed, my connections weren't flush with the row heights of the frames, and I had to lay some books sideways for them to fit. Still, it's marginally better than having them strewn around on the floor.

How to Make Almost Anything 2023