Week 13: Interface and Application Programming
This week's individual assignment is to create an application that interfaces a user with an input and/or output device made in previous weeks. The group assignment is to compare as many tool options as possible.
Project 1: Three.js + Eyemechanism + Serial communication + UI
I wasn’t sure what to work on this week. After seeing some animations on websites that could be made using Three.js, I realized I’ve always wanted to include it in my own site. So, I decided to do something with Three.js this week. I started by experimenting with integrating it into the main website. Initially, I wanted to host all my CAD models using Three.js, but after trying it out for a while, I realized the file sizes would be way too large. It doesn’t seem practical to render tons of 3D models natively on the site.
I spent a lot of time watching tutorials online and honestly wasted hours experimenting with unnecessary things while trying to animate objects on the site. Eventually, I came across this animated bee 3D model on Sketchfab. I thought it would be a fun way to visualize sensor data. One idea is to use the VL53L5CX module to capture an 8x8 grid of distances, detect motion within its field of view, and send that data to a microcontroller. The bee could then move in the corresponding direction or the data could be visualized on the computer. For now, I'll start by rendering something simple on the website using Three.js.
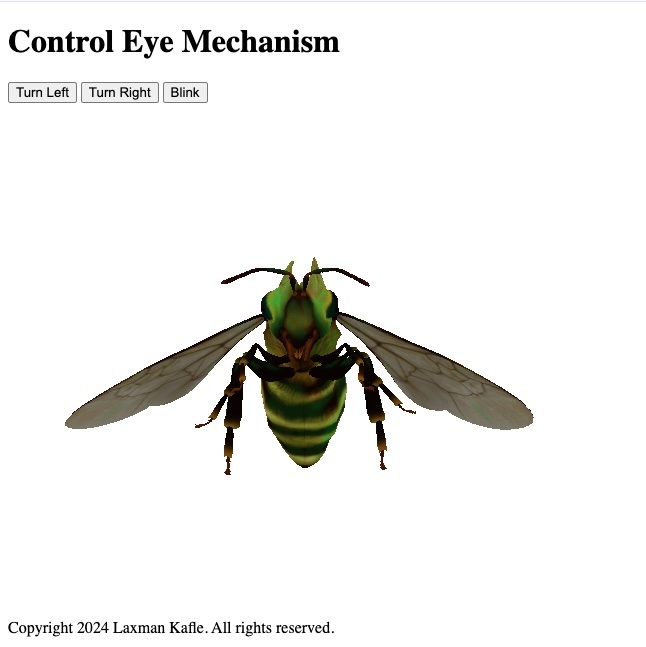
Below, a 3D model is rendered using Three.js:
Last week, I created a UI to control the eye mechanism I’ve been working on. This week, I tweaked it slightly to visualize the eye mechanism's movements on the computer. After setting up the Three.js rendering on my system, I decided to incorporate it into this week’s assignment. I updated the HTML code so that clicking "Left" makes the bee turn left, clicking "Right" makes it turn right, and clicking "Blink" causes the bee to rotate once. While this doesn’t add any functional advantage over the existing code, it’s fun, and it works well.

You can downalod the full code to reproduce this here
Project 2: New Board + VL53L5CX time of flight sensor output visualization (still in the work...)
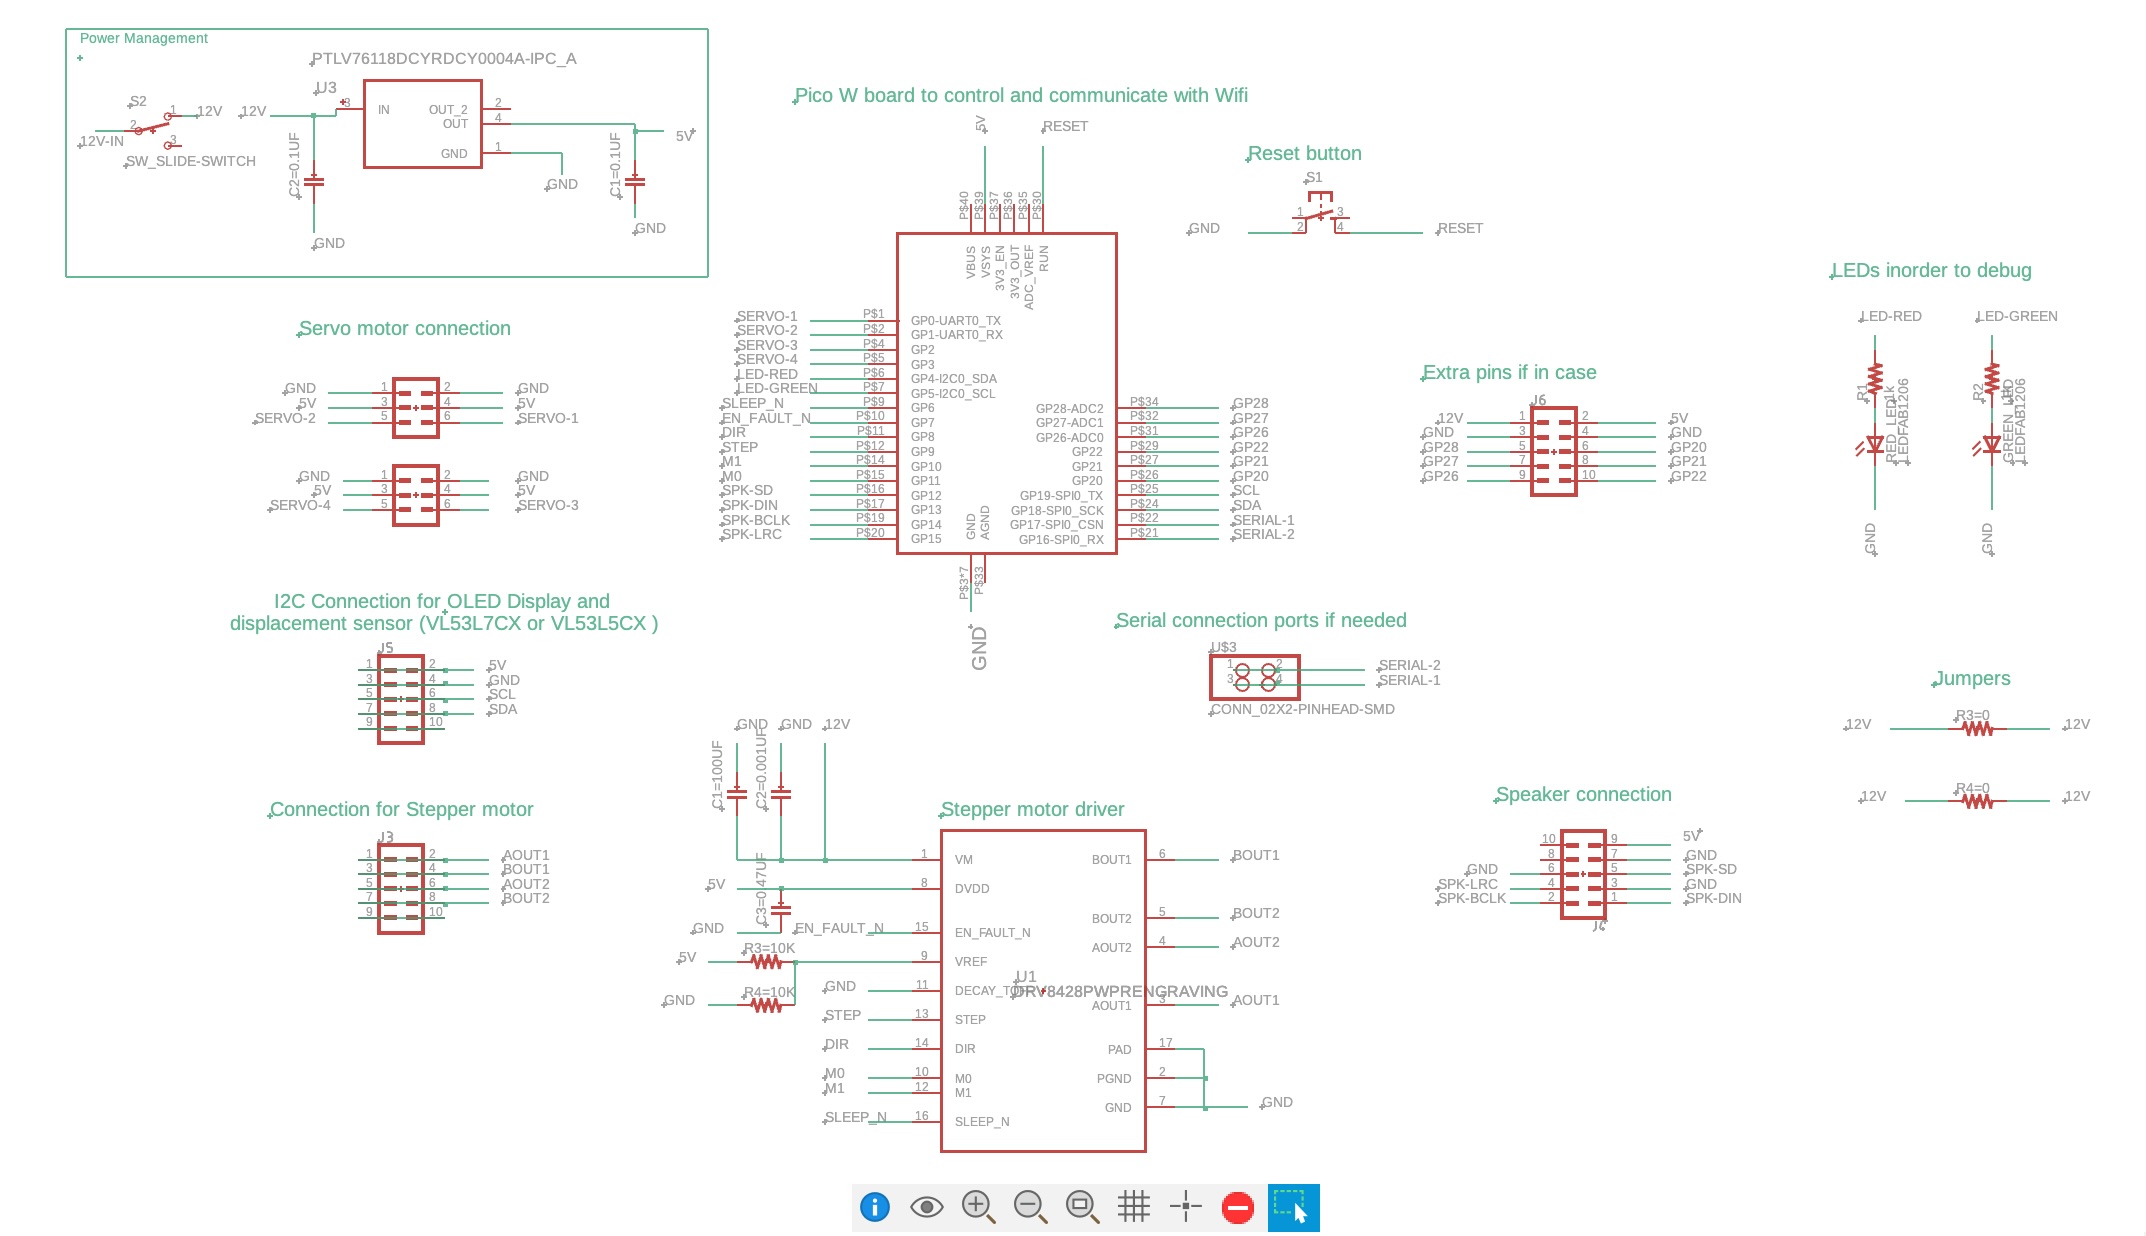
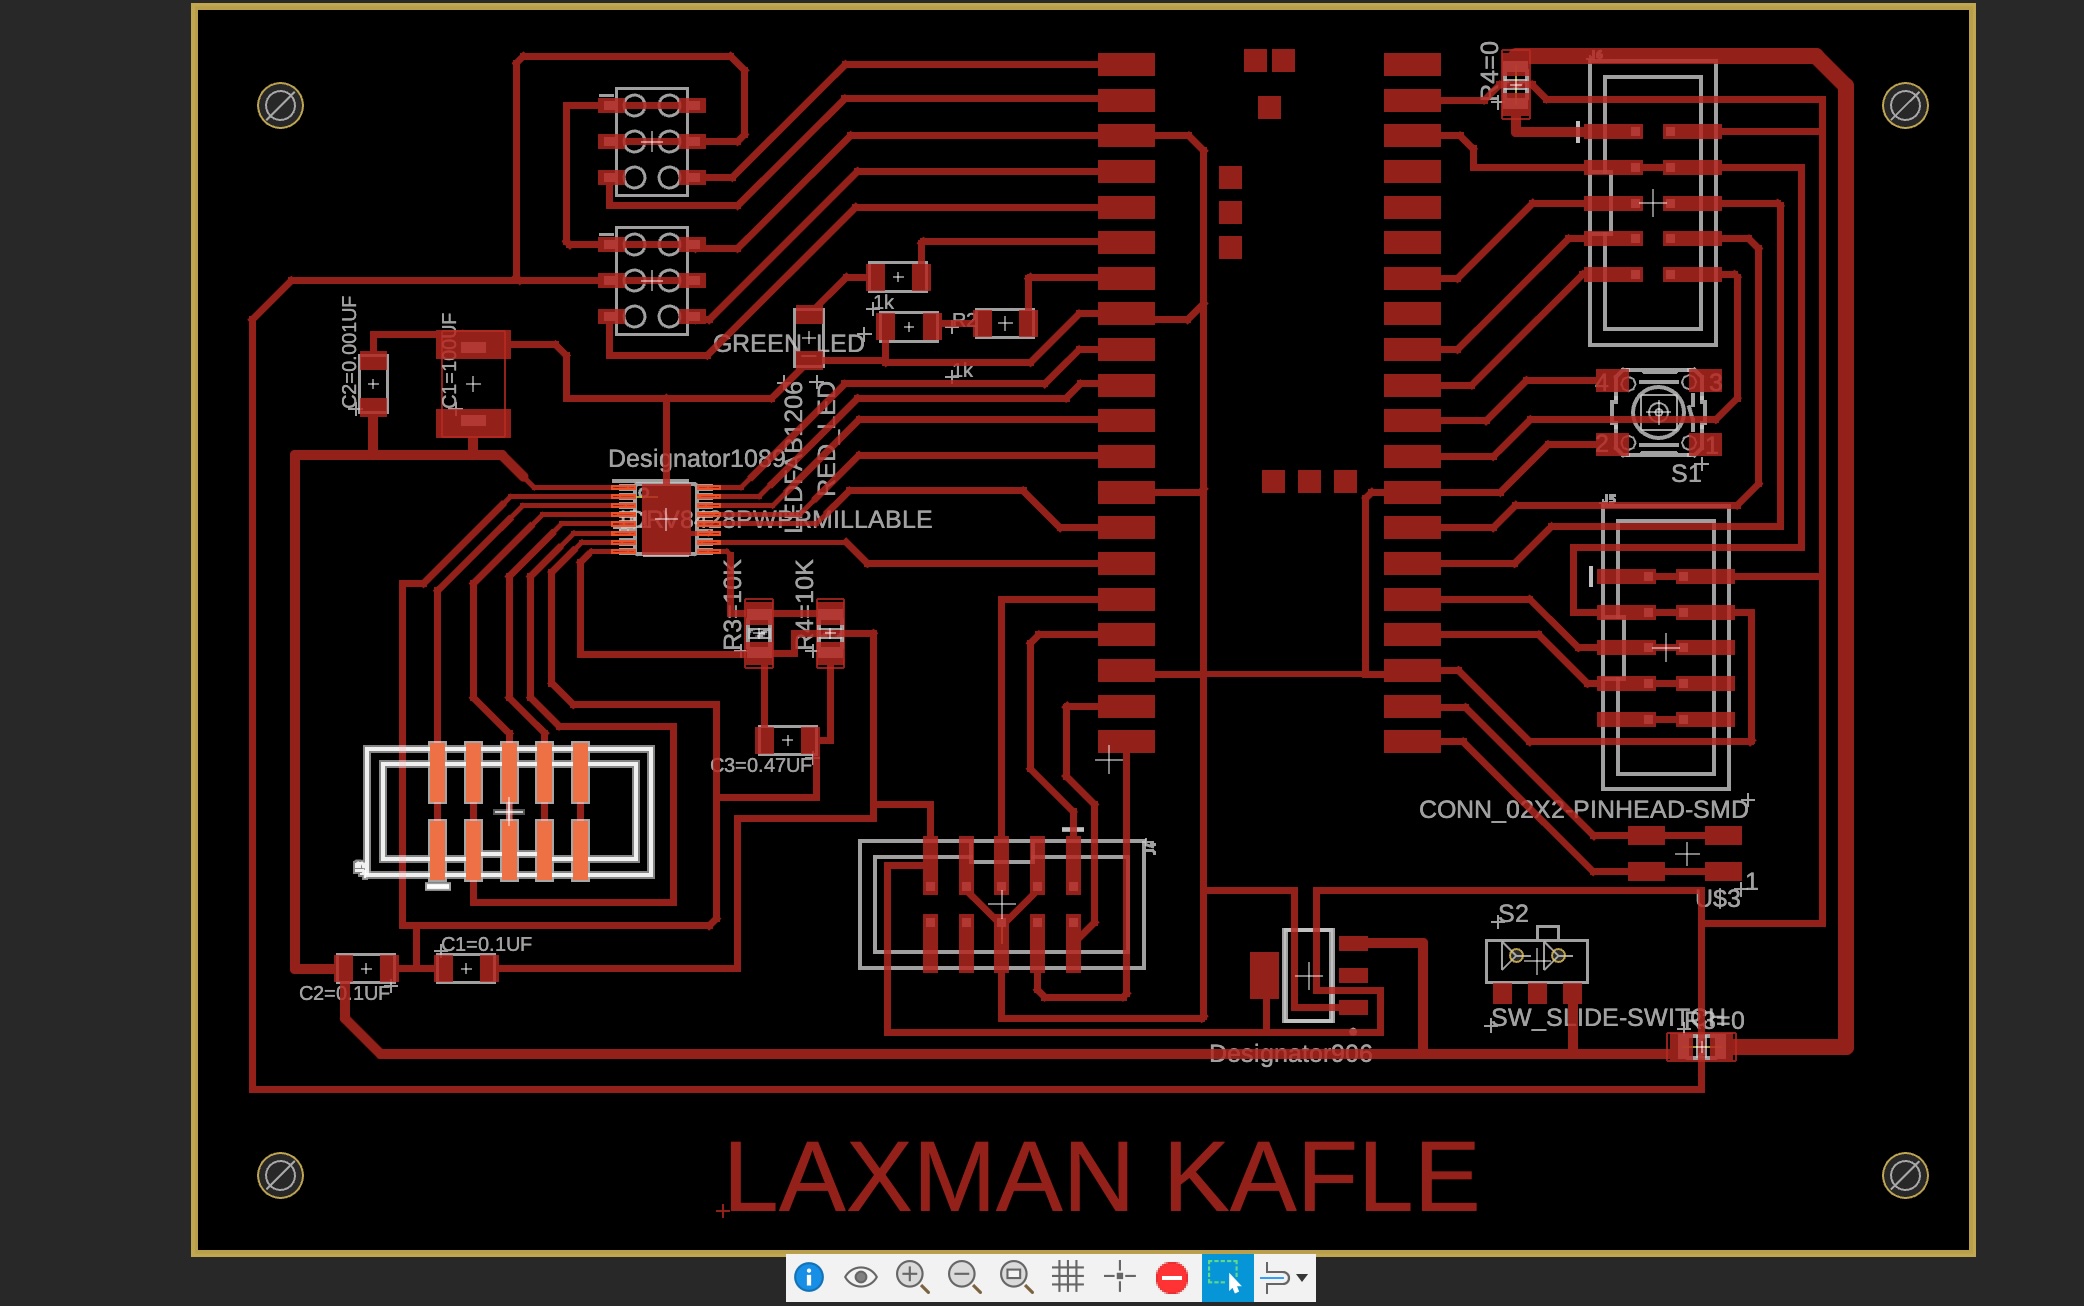
Meanwhile, I’ve been revising the PCB board design for my final project. Along the way, I made several updates to the design, implemented new ideas, and became more proficient in designing boards and efficiently using every available pin. In my previous design, I used the Raspberry Pi Pico but didn’t fully utilize all the pins or include extra ones for potential future needs. This updated design will be the final version, using the Pico W instead of the Raspberry Pi Pico, as the Pico W includes Wi-Fi capability. The board will have sufficient pinouts for servo motors, a stepper motor driver, a few LED lights, a speaker and microphone, power management, I2C devices, and extra pinouts for future needs. I hope this is the last revision I’ll need for my final project. I also plan to use this board for this week’s assignment, allowing me to test the board while completing the task.
Schematic

PCB

Project 3: Testing LabView Software (Not Complete, Will Try Later)
LabView is a popular software among my lab peers, but I’ve never used it before. Since it was introduced in class this week, I decided to try a simple task with it. Fortunately, MIT provides a license for LabView, but the latest macOS version is not tested and seems incompatible. For reference, I’m using macOS Sequoia version 15.1.1 (24B91). During installation, LabView gave me a warning, but I ignored it and installed the software anyway. Unfortunately, it didn’t work properly on my computer. I plan to try LabView on my PC later.
Next, I decided to install LabView on my office PC. I hadn’t used that computer in months, and after installing LabView, the PC started restarting every 30–40 minutes. This issue seemed odd. It might be due to a power issue, memory problem, or overheating caused by dust accumulation on the cooling fans. I cleaned the PC with compressed air, but the problem persisted. Since the computer is very old, I don’t want to waste much time fixing it right now. For this week, I’ll work on LabView in short sessions before the PC shuts down. I’ll troubleshoot the PC next week or whenever I have free time.
I’ve watched several online tutorials on getting started with LabView, and it seems exciting for someone like me working in experimental research. LabView offers a convenient way to handle data acquisition and visualization, and it’s a fun way to build user interfaces for programming tasks.
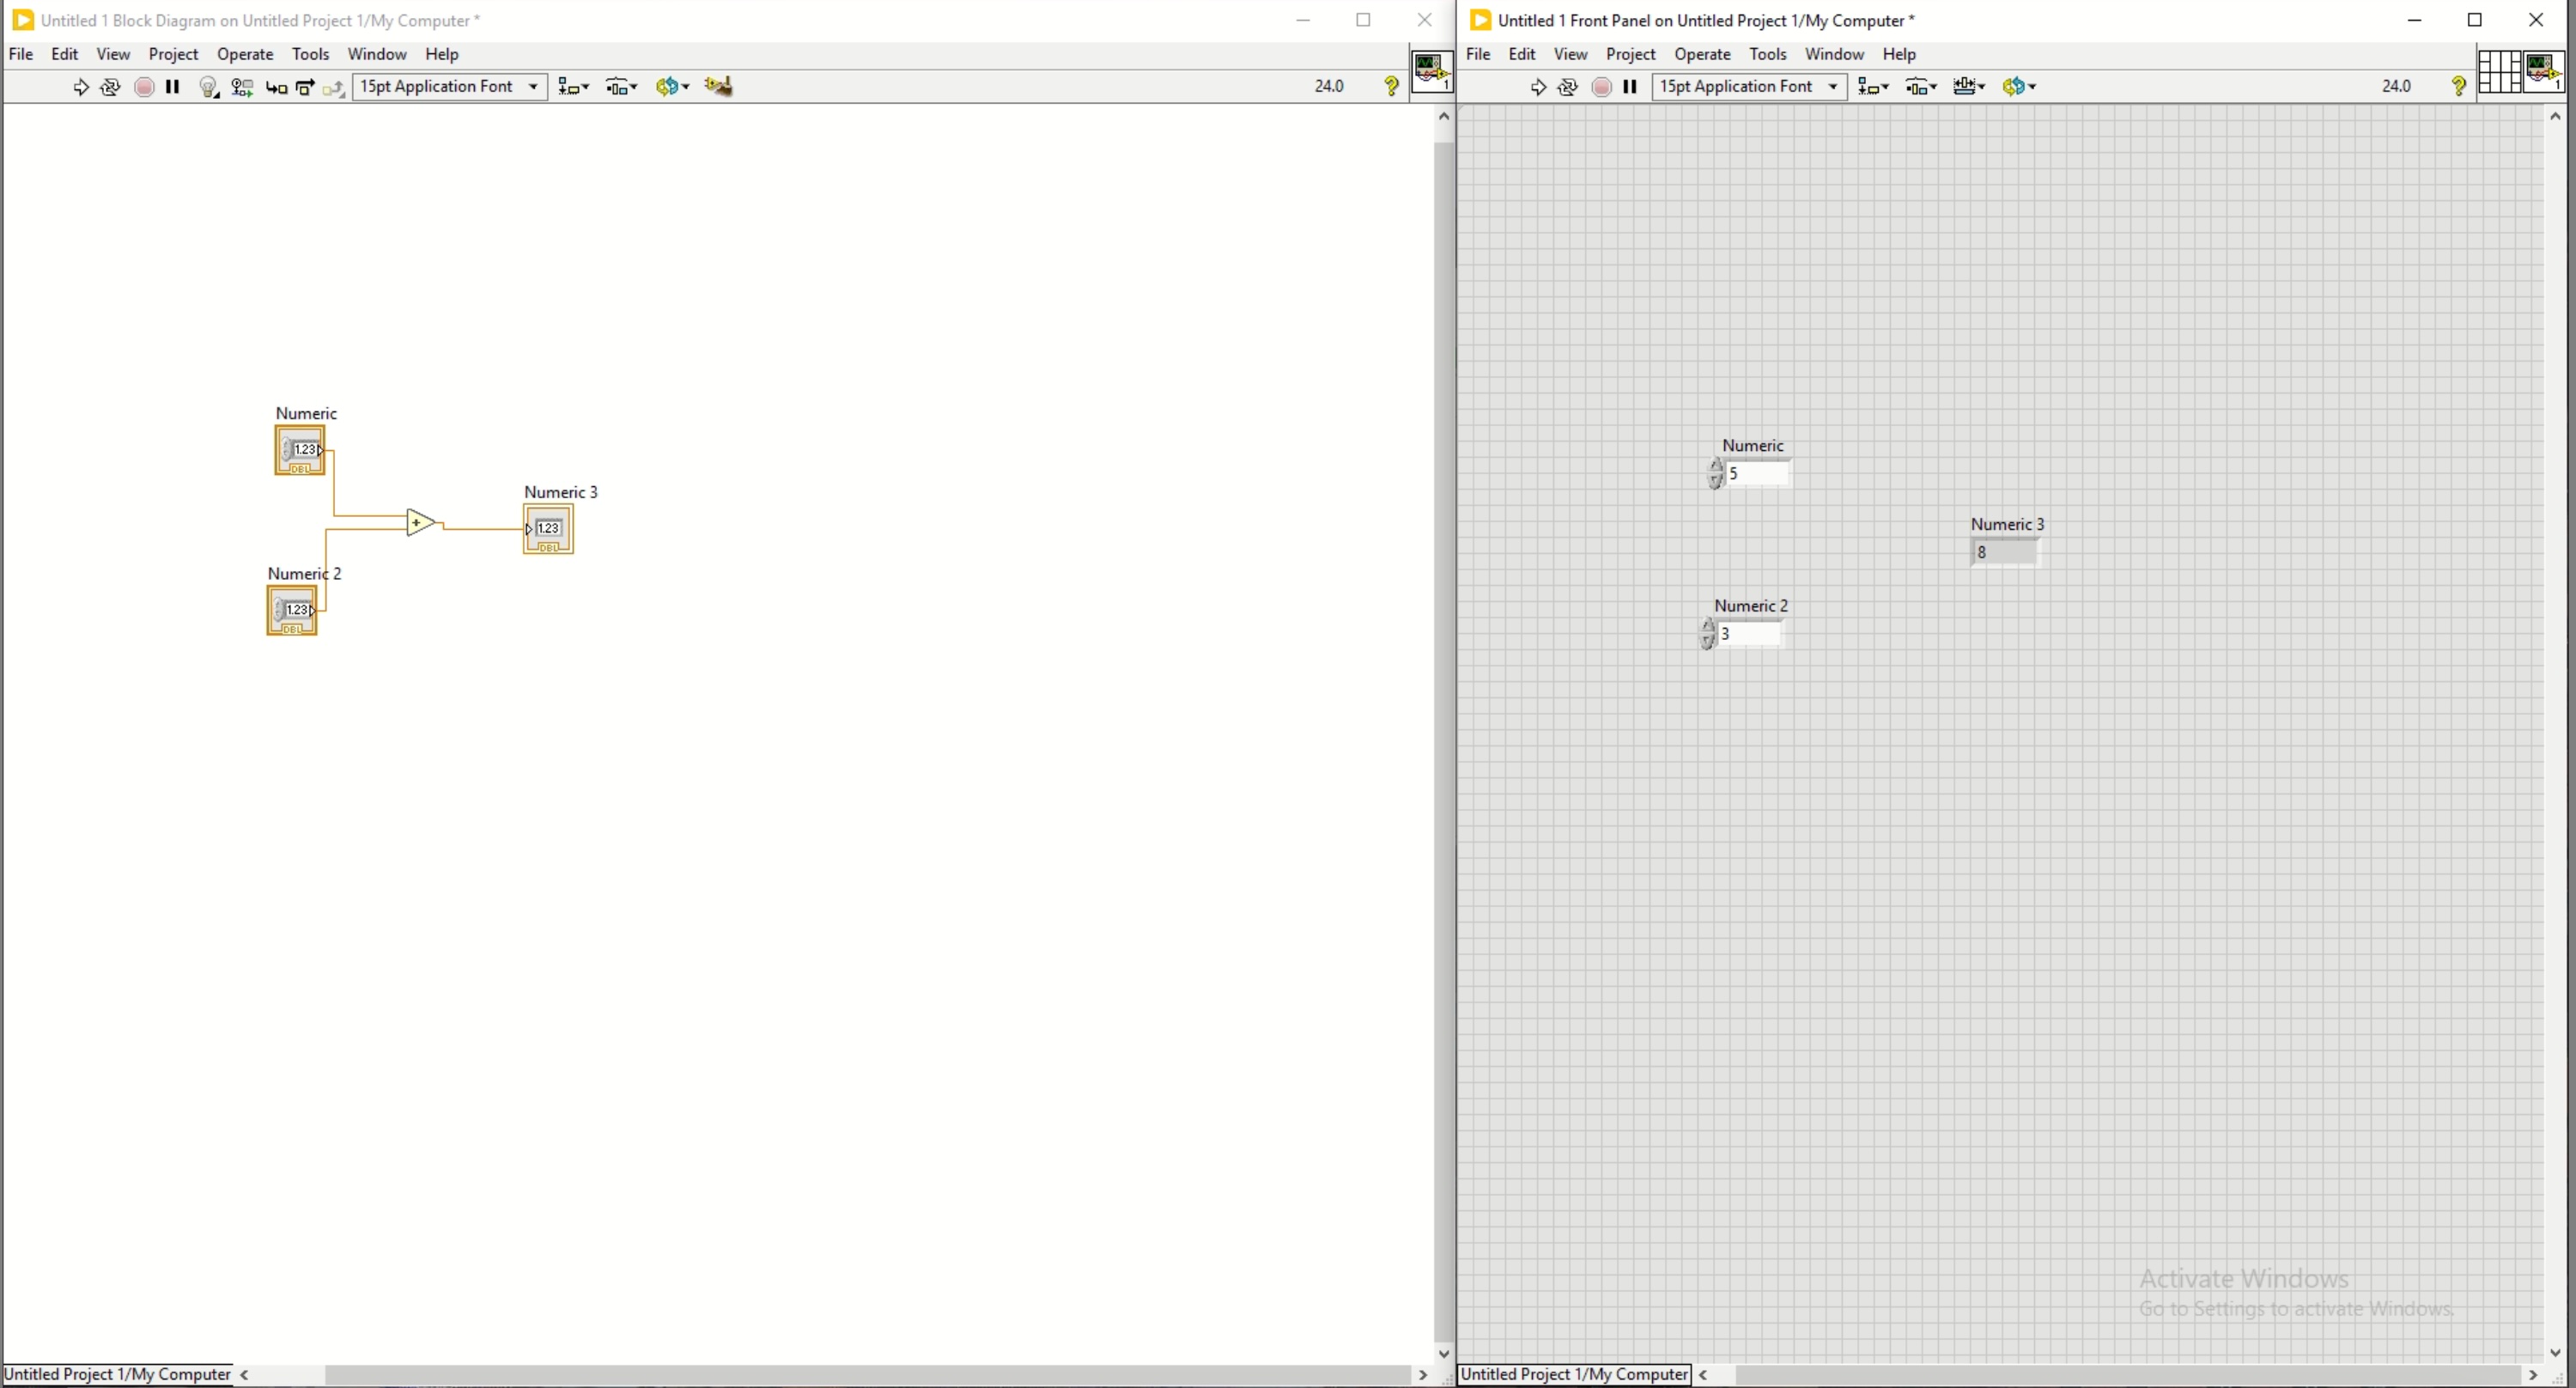
I started with a simple setup where I input two values, and the program calculates their sum.
