

This week, I expanded on my work from last week to build out a synthesizer with controller mapping and sensor visualization in Max/MSP. During the actual assignment week, I made a lot of
progress on my mapping, but I wasn't totally happy with it so I decided I'd come back and fill out the documentation of the thing once I finished it for my project.
I've used Max/MSP for a variety of things over the years, and I can do a lot, but my sound design akills and knowledge are limited, so every time I make something I try to explore something new, and this is no exception.
It took a lot of messing around to make something I was happy with, but I learned a lot in the process. One of the best things about Max is the documentation- there are so many resources and help files for everything, so once you know the basics it
is easy to learn more!
I started with the visualization because it was really helpful when mapping to have a sense of what the sensor data from different movements looked like. Just like last week, I used UDP recieve objects and routing to break my OSC bundles out into the respective data.
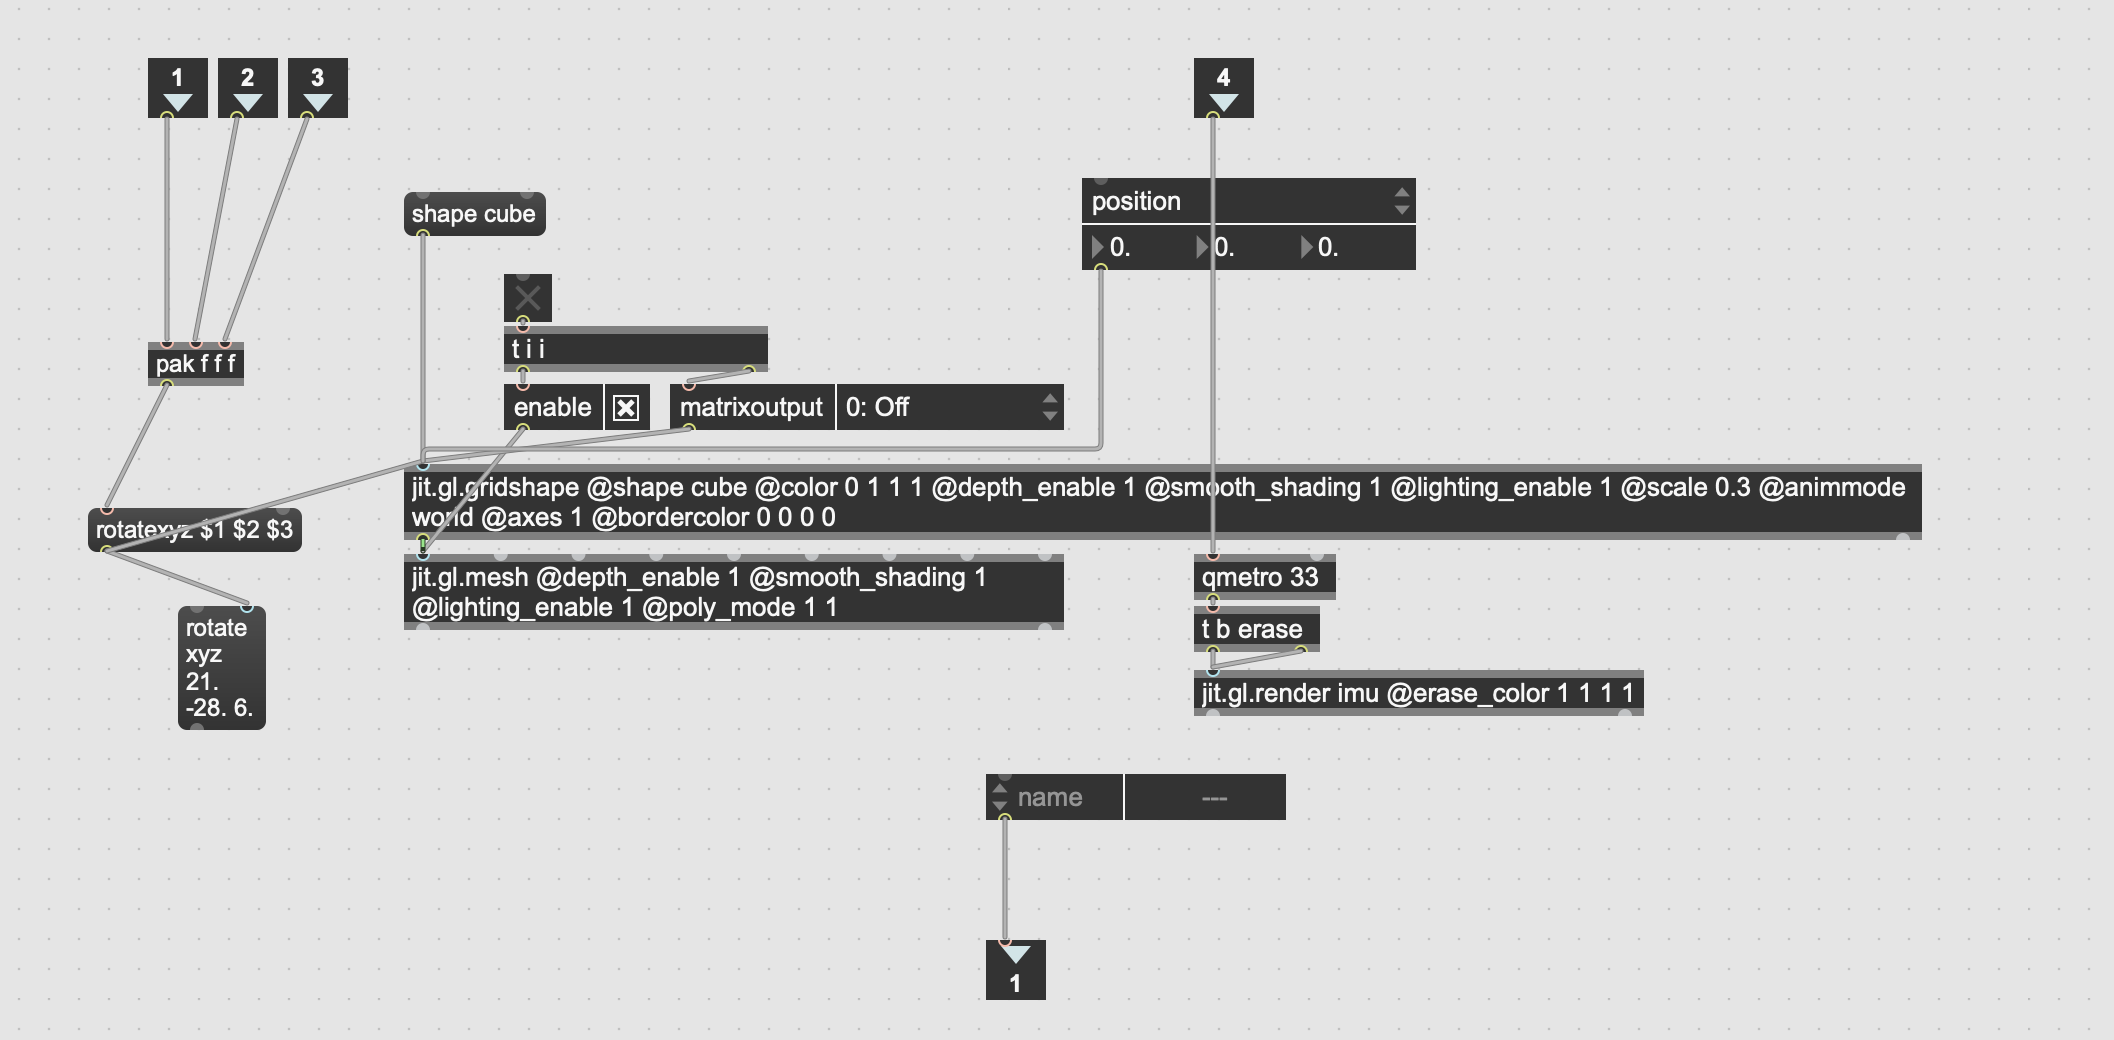
I used simple sliders and knobs to visualize the data for the most part, but wanted to see if I could use jitter (a family of max objects for video and graphics) because I'm not too familiar with it and thought it would be fun to learn. Simply by digging through Max 8 Jitter documentation, I was able to make a visualizer for the IMU which is just a cube whose 3-axis orientation is determined by the roll/pitch/yaw of my sensor. It's not a perfect 1:1 and I couldn't figure out how to fix that, but it works pretty well to show a good idea of what's going on.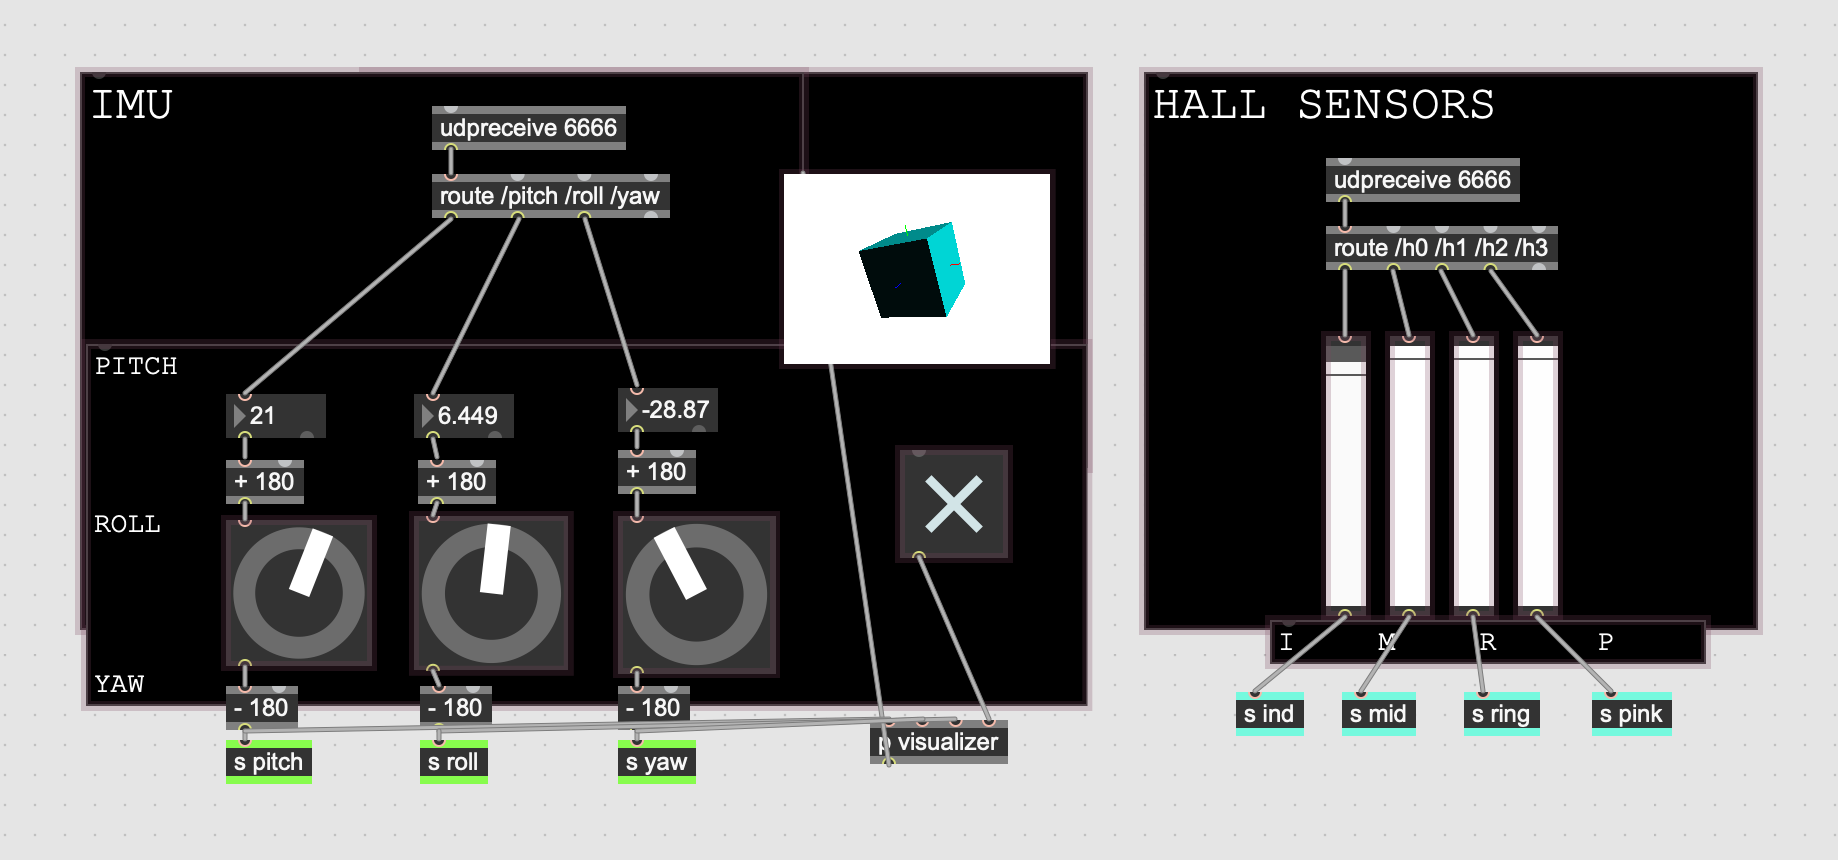
Sonically, I drew inspiration from the sounds of the red line. My commutes to and from the lab have been a really influential thing to this project as it's often a time in my day where I think through problems I may be stuck on. So I guess this is a bit of a tribute to that.
If you pay attention to the sound of the T, you'll quickly notice the frequency distribution of the sound world is heavily bimodal, mostly low rumble and high screeches, so I wanted to capture that in my design.
The sound sources for my patch are some FM synths (using the simpleFM~ object, color coded pink in the image below) and some audio (played back via the purple ~groove objects). I started out with just the FM synths but it was sounding a bit too electronic for my taste and I wanted to mix things up a bit.
So, I went into my basement and recorded myself screaming for 2 minutes on my phone. I'm not sure if it was worth it because the neighbors called the cops and I was in a lot of pain afterwards and hoarse for a day. But I was able to take that audio and cut it up and mess with it
in Logic to create a "low" sample and a "high" one. Implementing the low one was easier than the high one but I like what I did with it in the end.
The other central portion of my sound design is the 3 "effect" pedals. The chorus and distortion are modified versions of some patches I have made over the years to emulate guitar pedals, and while they aren't the best, they're fun to play with, especially for projects like this where I'm particularly interested in messing with textures. I made the delay pedal specifically for this project and will definitely be using it in the future.
Here is the sound mapping side of the patch. I used color coding and lots of labeled encapsulations (any object that starts with a p is an abstraction holding more code!) to make it easier to take in what's happening here for someone not proficient in Max.
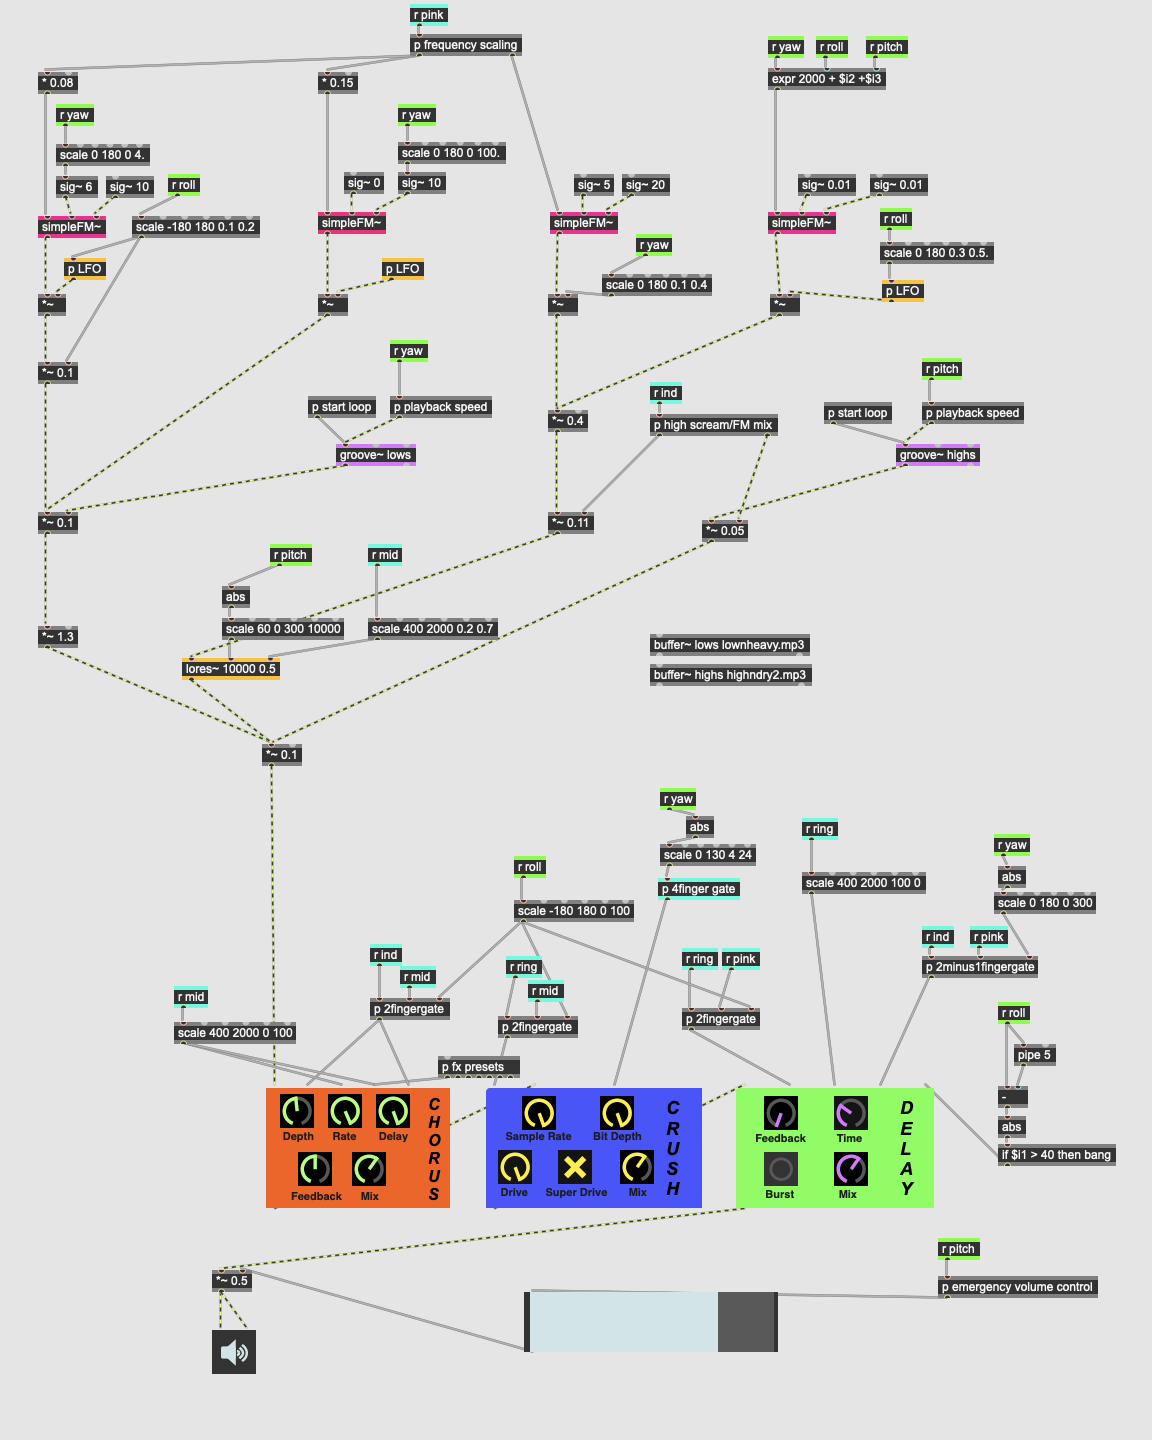
My approach to mapping was a bit chaotic so I am going to give a very rough explanation and highlight some main points.
I relied on send and recieve objects (blue and green for hall sensors/imu respecitvely) to be able to easily plug sensor inputs into all sorts of parameters. The way I conceptualize it, some of these are more "active" while others are more "passive."
"Active" parameters are ones that I am intentionally controlling, ie. I am thinking about bending x finger to achieve y output. "Passive" parameters are ones that modulate the sound based on what my sensors are doing, but they're not the primary focus of my gestures. They're more of a byproduct of
my movement that adds depth to the sound. Most of the IMU parameters in the upper half of the patch are "passive" in this way.
With a system like this, 1:1 mapping is pretty boring, because there aren't that many sensors. To make it more interesting, it works well to map sensors to multiple things at once (I did this heavily with roll/pitch/yaw). Having "passive" parameters is a great way to add
variety to the sound without needing to think too hard on the performance side of things.
Another thing I experimented with here is sensor combinations. My main example of this is the mix knobs for the effect pedals.
Each pedal has a 2-finger combo which, when both fingers are bent, engages control of the mix knob via roll. I thought this was a fun little way to incorporate a gesture that mimicked turning real knobs in the air. When all 4 fingers are bent, yaw controls bit depth on the distortion pedal, creating a really crunchy sound.
When my index and pinkie are bent but not my middle finger, yaw controls delay time. That one is a bit of a physical metaphor as well, as it behaves like a DJ record scratch motion.
As an instrument designer, I think my biggest schtick is leaning really far in the direction of continuous rather than discrete control. Ie, rather than triggering notes and/or articulating rhythms, I like controlling movement through timbral space. That's part of why I was so interested in using analog hall sensors as opposed to something with a discrete on/off switch. Even so, using finger bend as an on/off at times turned out to be a really helpful tool, so I'm glad I tried mixing it in eventually.
The UI for this patch (presentation mode) looks like this:
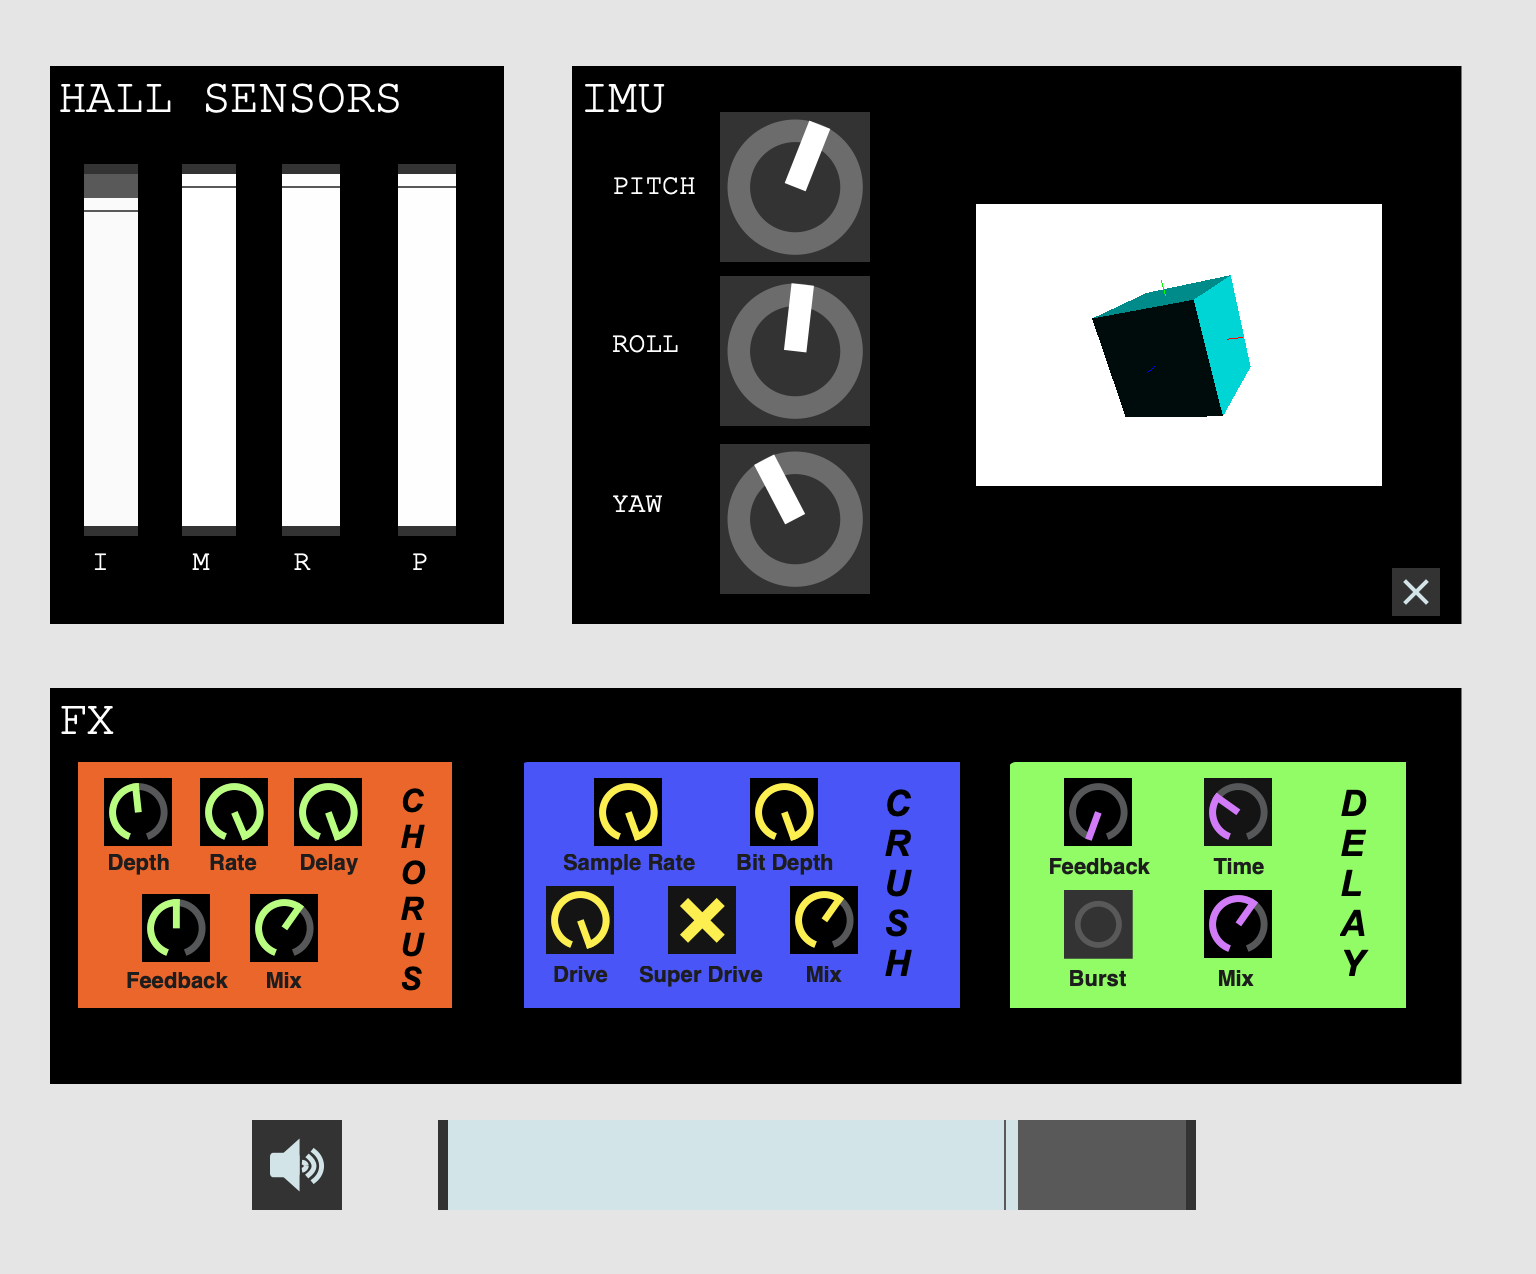
The function of this is to help me clearly see the parameters I'm controlling as I play. As you can see from comparing the mapping photos to this, not everything is included, but the FX pedal parameters are the only ones I really benefit from seeing, and more information would've been more
distracting than helpful.