Week of Nov 27, 2024
Write an application that interfaces a user with a self-made input/output device
For this week I wanted to find a way to remotely control the moving of a servo motor. Potential applications include being able to remotely trigger release of my convertible helmet based on sensor or user input from a different geographical location. Putting on my city planning hat, I wonder if the networking and interface application programming aspects taught in HTMAA could be applied to physical interventions at a city scale - perhaps have sensors installed throughout a large geographic area, that is connected to mechanisms serving a civic function during times of emergency?
This week's assignment thus required selecting a frontend interface to connect to my output device. As part of the "group assignment" this week of comparing tool options, I explored a few different user interface possibilies - React since it was mentioned in class and frequently pops up on UI forums; Render since my classmate Adi used it; and Shiny since I am learning how to use it this week for a data science in planning class.
Group Assignment: Compare Tool Options
React |
Render |
Shiny |
|
|---|---|---|---|
| Features | Frontend JS library for web interfaces | Full-stack platform for deploying apps; not a UI-builder | Integrated backend (server logic) and frontend (UI) for web apps |
| Use Cases | Highly interactive UIs | Hosting of fully developed apps | Integration with data visualization; quick prototyping |
| Limitations | Need JS expertise and more complex configuration setups | Low bandwidth limits and expensive tiered pricing | Need R expertise; limited to small-scale deployment |
Individual Assignment: Write an application that interfaces a user with a self-designed input/output device
Since I am learning to use RStudio for another class, I decided to try to connect RStudio's ShinyApp to my servo motor. This requires me to write a program in R for the ShinyApp (front-end web user interface), and code for uploading to my microcontroller.
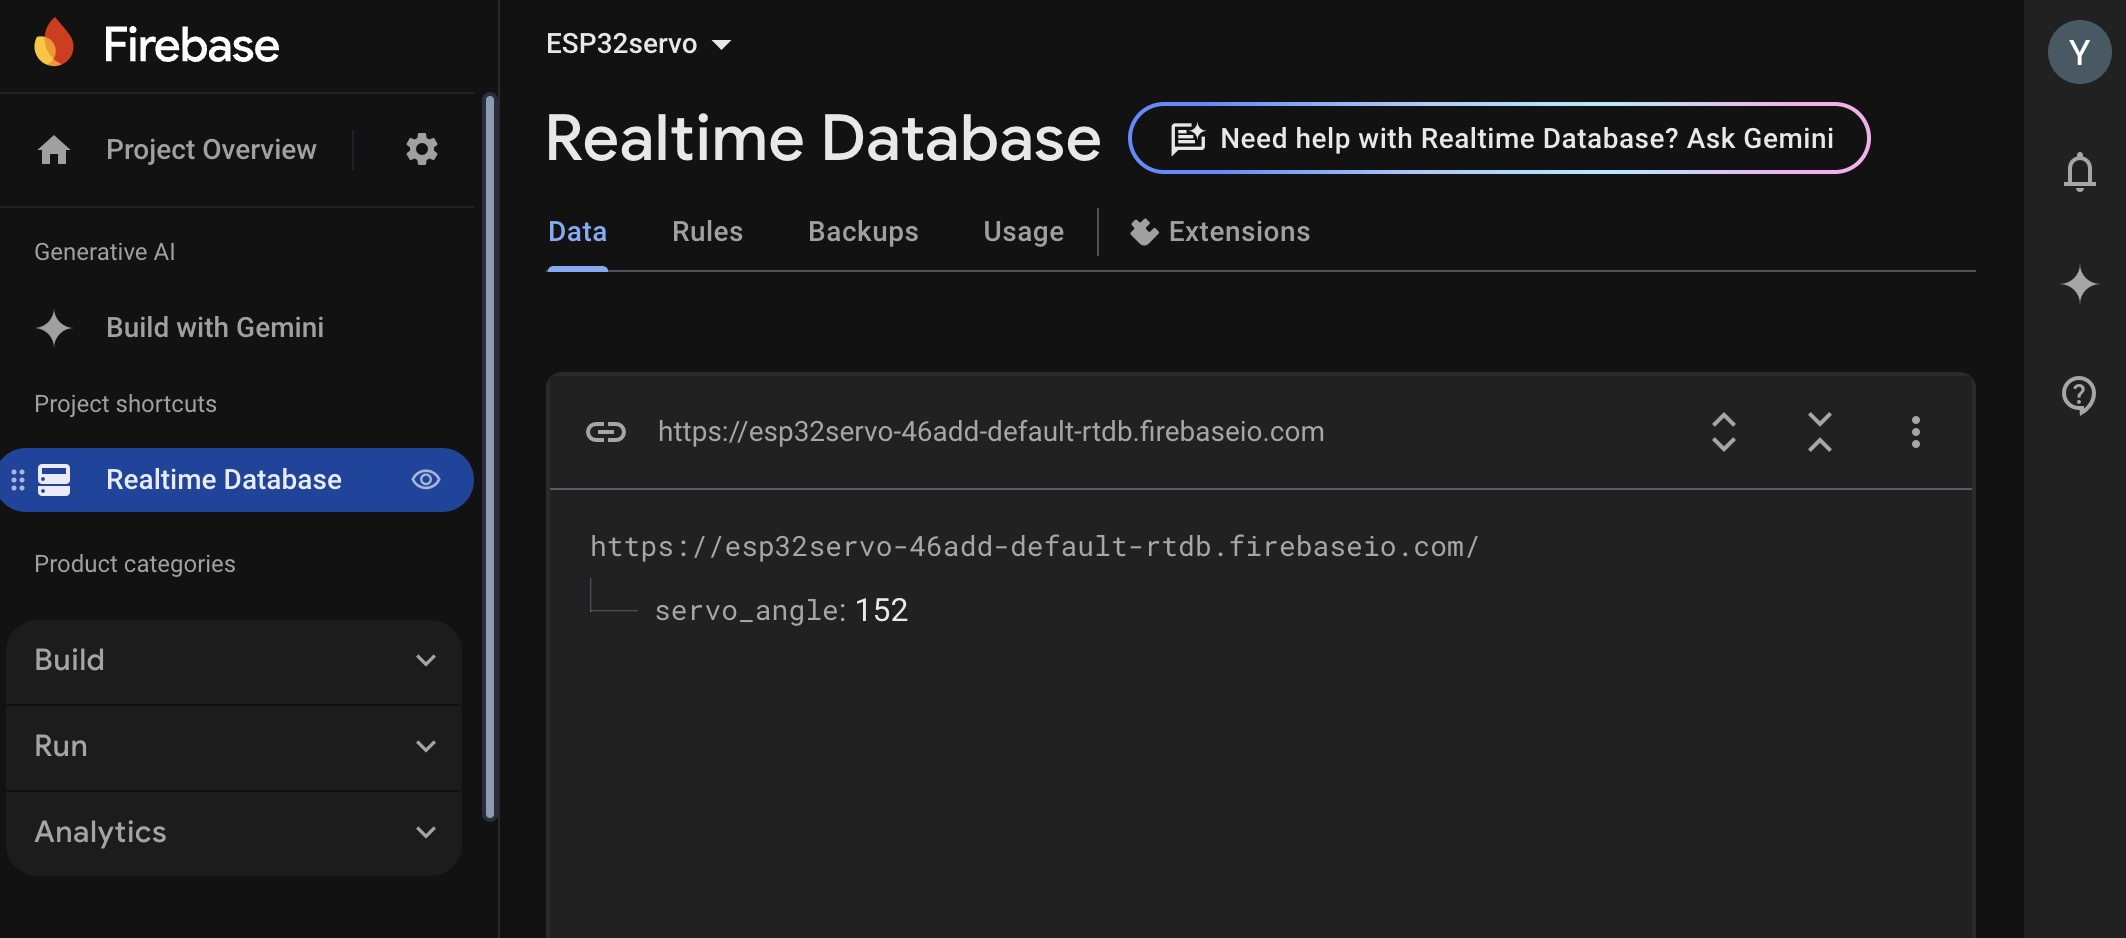
Building upon last week's ESP32-S3 code and past week's servo movement code, trawling online forums for collective wisdom on ESP32-C3, and with the help of Mx ChatGPT, I wrote an Arduino sketch, but could not get the IP address to print. At this point I also decided that I do not want my application to have to constantly have to update the IP address in ShinyApp based on the wifi network my microcontroller was connecter to, and so searched online for solutions to streamline and automate this. I learnt about Firebase this way, and proceeded to set up a Firebase account.
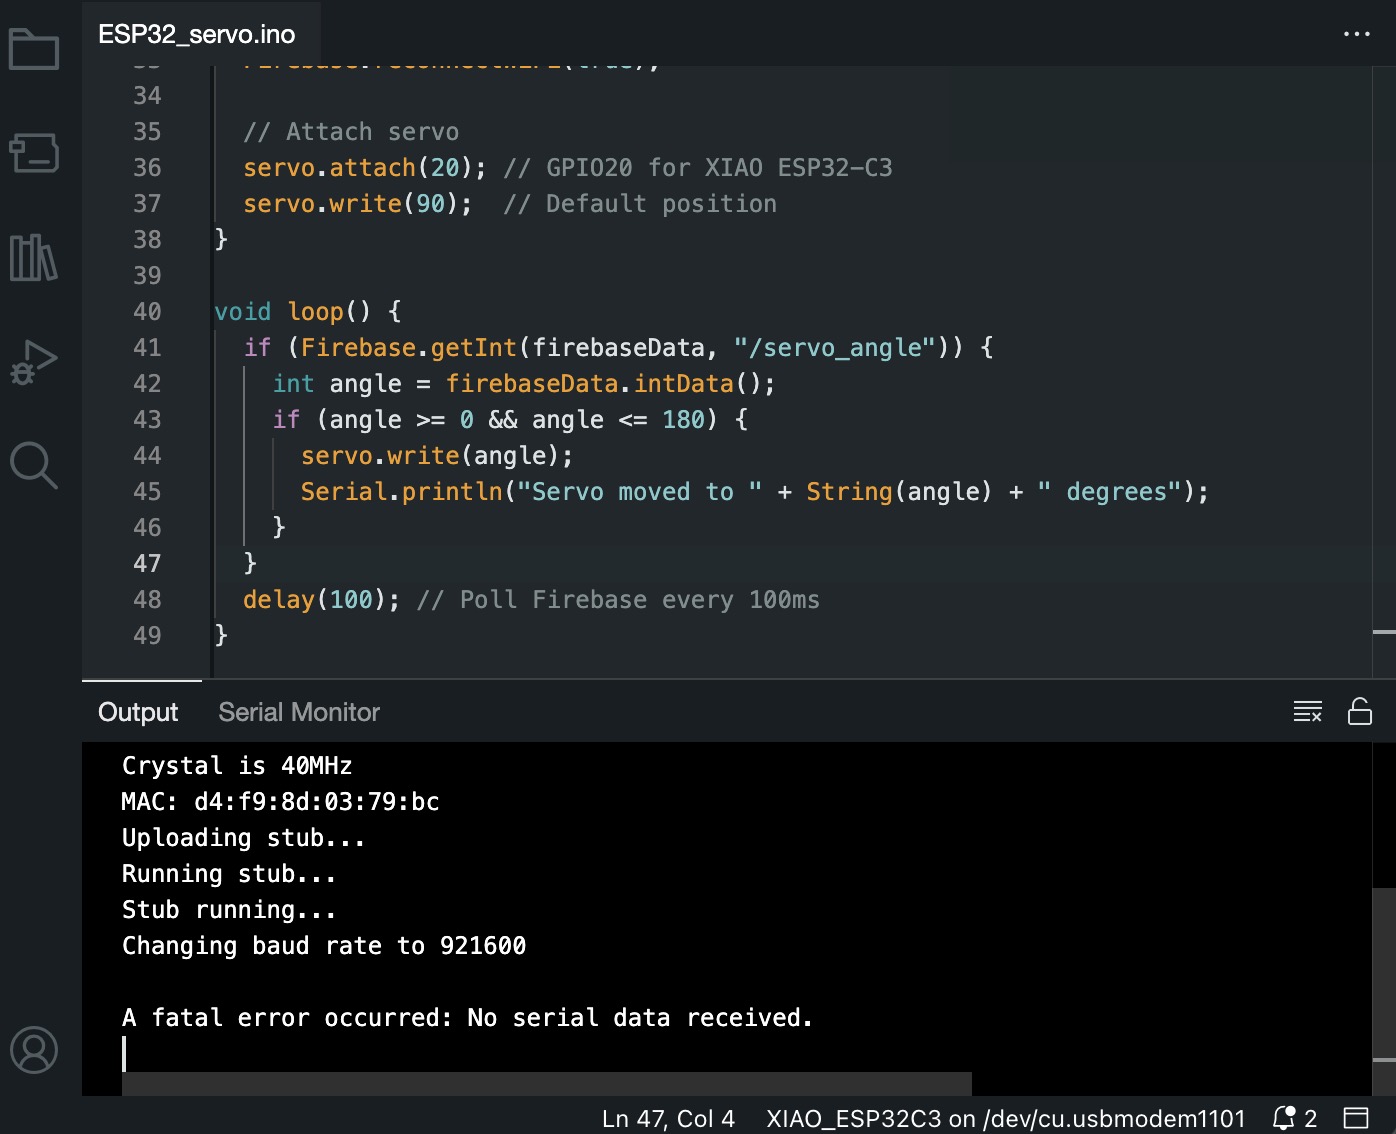
Learning from last week's debugging, I tried troubleshooting steps that worked previously, and what worked time round was erasing the microcontroller's memory before each upload using Terminal. As it was a different microcontroller, the python code had to be adjusted to "esptool.py --port (insert port address e.g. "/dev/cu.usbmodem123") erase_flash" instead of last week's "esptool.py --chip ESP32S3 --port /dev/cu.usbmodem123".
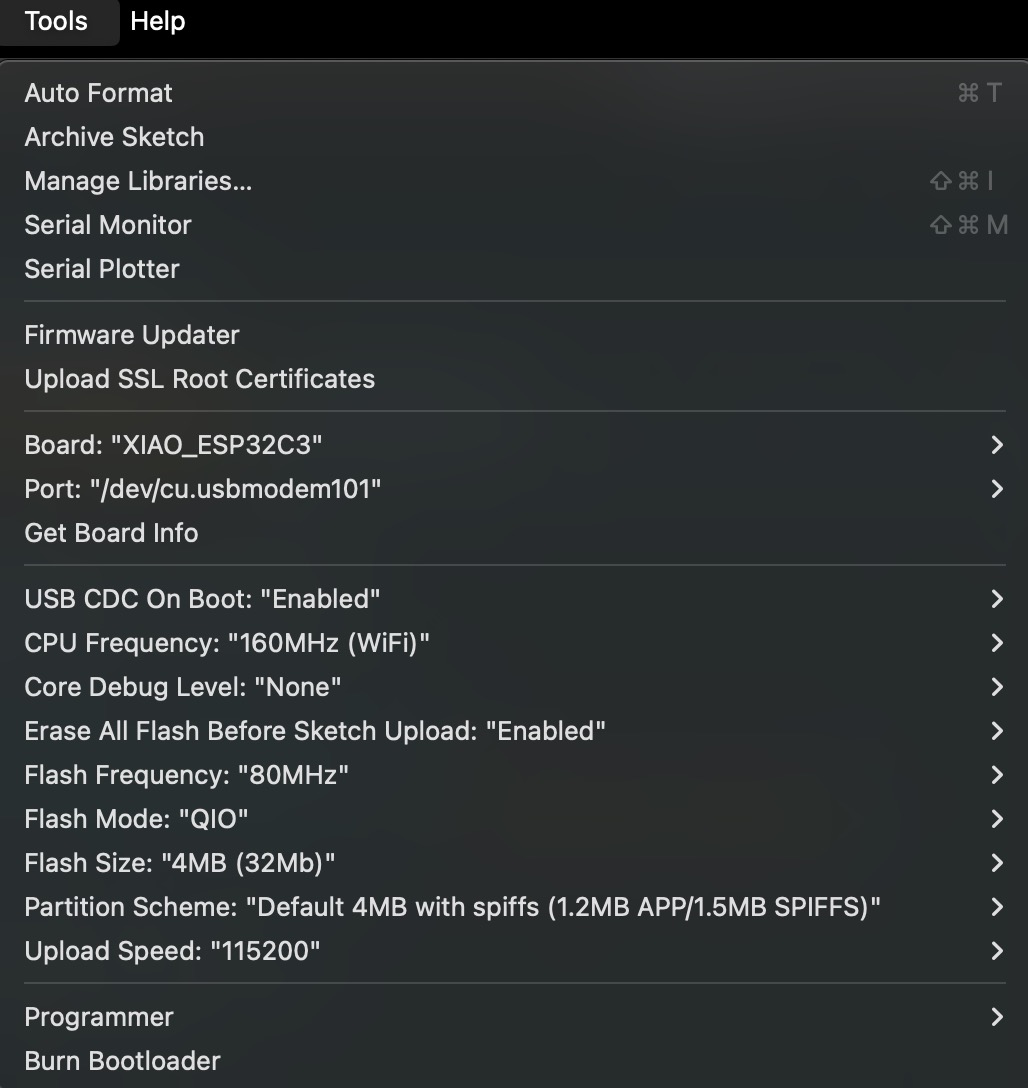
I also adjusted other settings under Tools within the Arduino IDE, but these were done before erasing the flash via Terminal, so it's inconclusive whether they helped. Either way, shown here are the modified settings in place at the point of my eventually successful code uploads (notably enabling the erasing of flash memory before upload). The full code/ Arduino sketch uploaded to the ESP32-C3 microcontroller is at the end of this page.
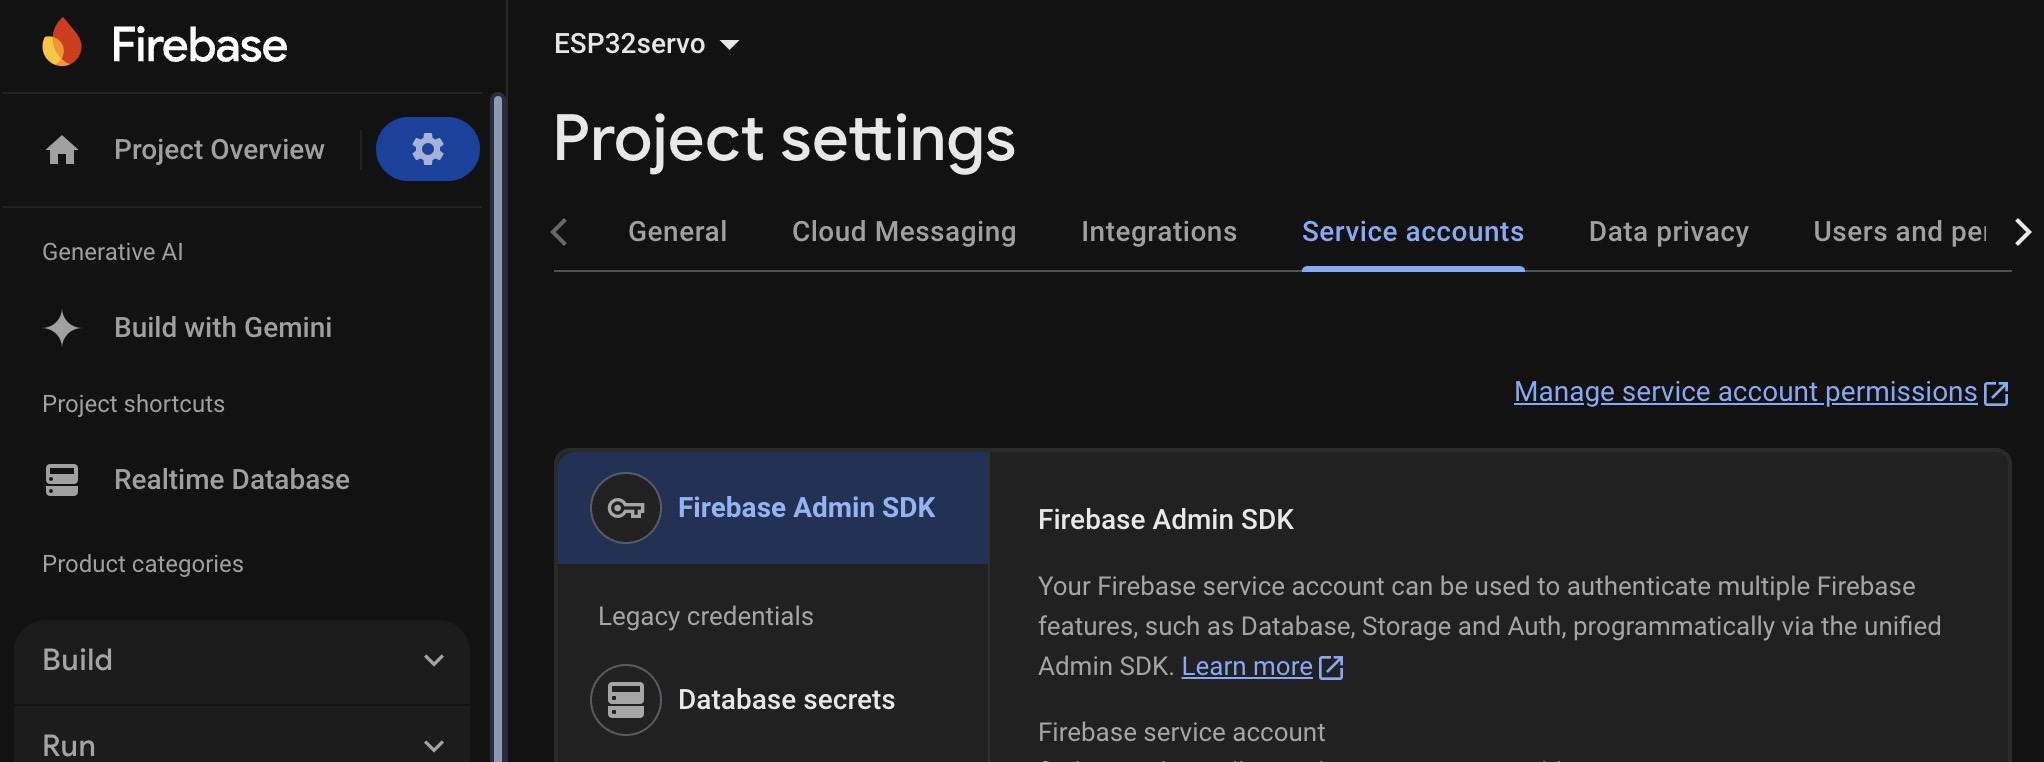
Another issue I faced with the ESP32 code was whether to include "FIREBASE_AUTH" or not. Since I had set "Realtime Database > Rules" to be "true" to allow reading and writing, I initially thought that I could drop the "AUTH" lines in the ESP32 code since the Firebase console was not password protected. It turns out that there is a "secret key" function within Firebase that I could generate though (Firebase - Project Overview - Project Settings - Service Accounts), so I incorporated that back into my ESP32 code, and it worked.
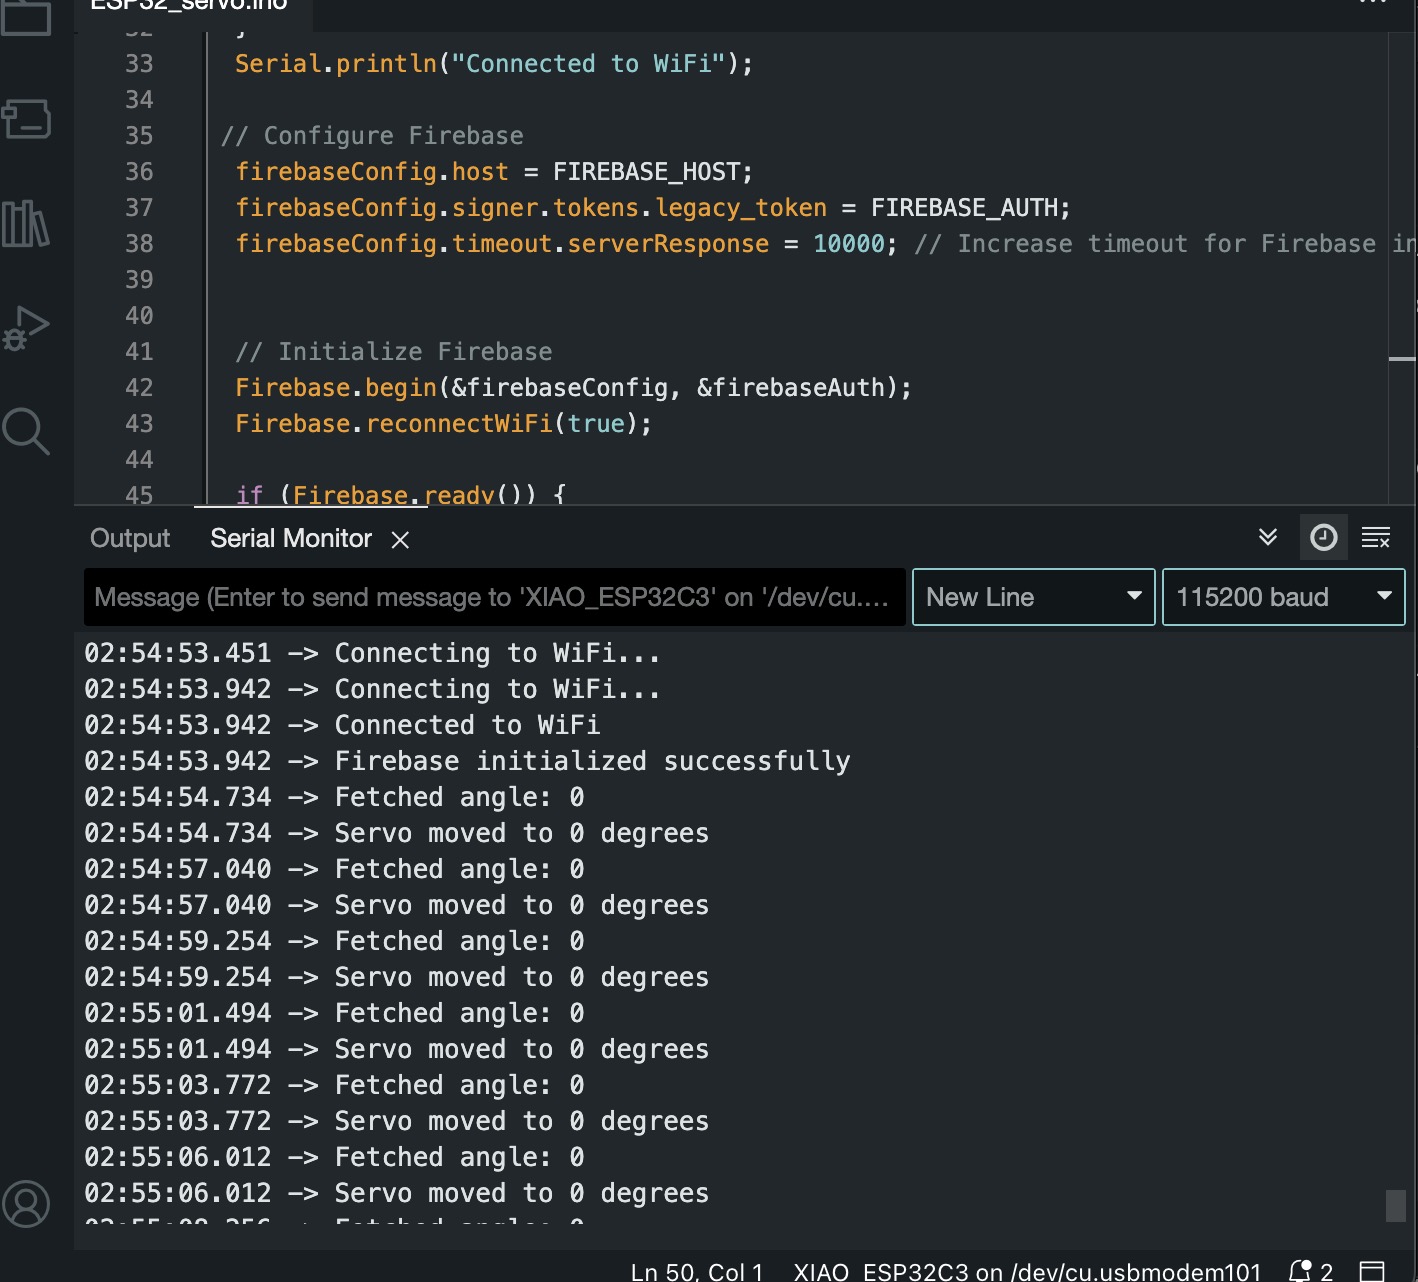
The last salient issue (out of numerous issues that I will not mention here, else I could write a novel) was with delay time - I found that by increasing the time specified in "delay()" functions in the ESP32 code, the resultant code was more forgiving of communication lag times between the microcontroller and the Firebase database, and allowed the application to actually work.
Next was to program in R to design a ShinyApp web interface. The main issues I ran into were with using functions within the Firebase library. After some trial and error and consultation with Mx ChatGPT and online forums, it became apparent that using httr and jsonlite libraries were a more foolproof way to communicate with Firebase. Another issue was the syntax of "firebase_url" - in the ESP32 Arduino IDE code I had to drop "https://" at the start in order for the code to run, while within RStudio I had to include it and also add ".json" at the end of the url in order for the ShinyApp to run. I also found that restarting R sessions before running the ShinyApp, and sometimes flat out closing and reopening the app, and restarting the laptop, worked when RStudio failed at compiling.
Another crucial troubleshooting step is to add in debugging lines within both the ESP32 and ShinyApp codes (serialprint and print respectively), so that Arduino IDE's serial monitor and RStudio's console + ShinyApp interface can produce text explanations identifying when something goes wrong. These debugging lines are annotated in my code for both programs below. The full code for my ShinyApp can also be found at the end of the page.
My first successful Shinyapp interface generated in RStudio after lots of debugging:
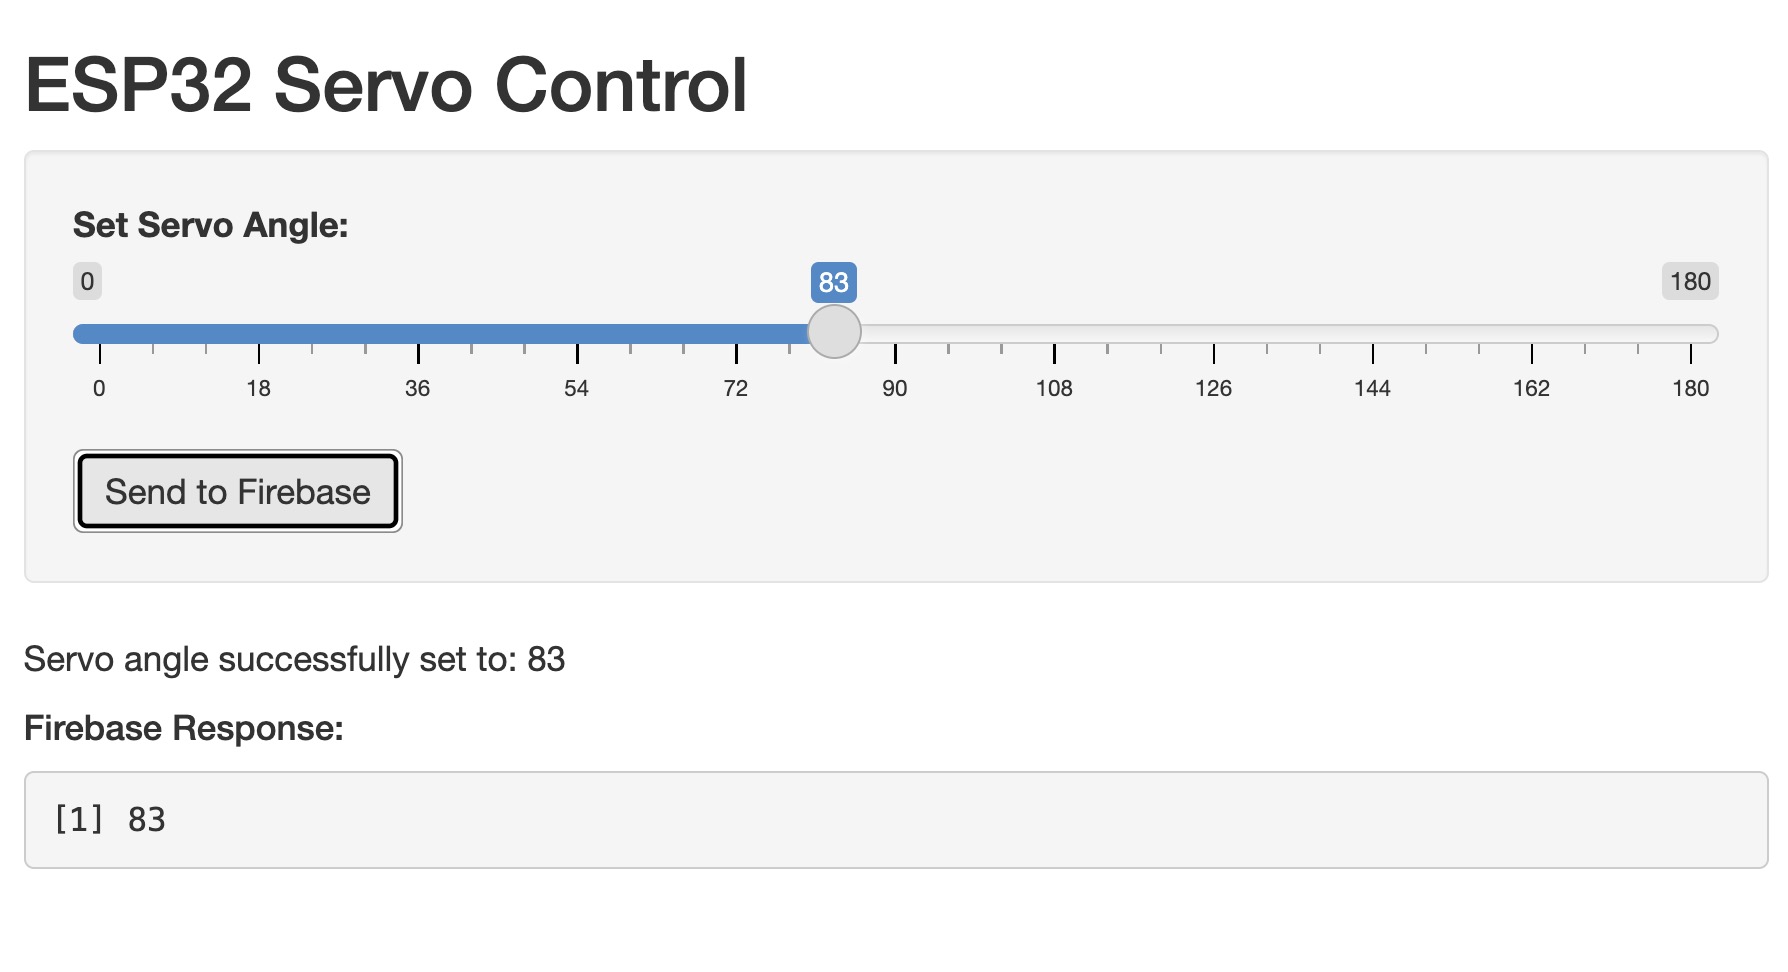
Made further tweaks to the UI, and uploaded it onto my ShinyApps page so that anyone could access this interface and remotely control my servo: Shinyapp link for remote control of the servo
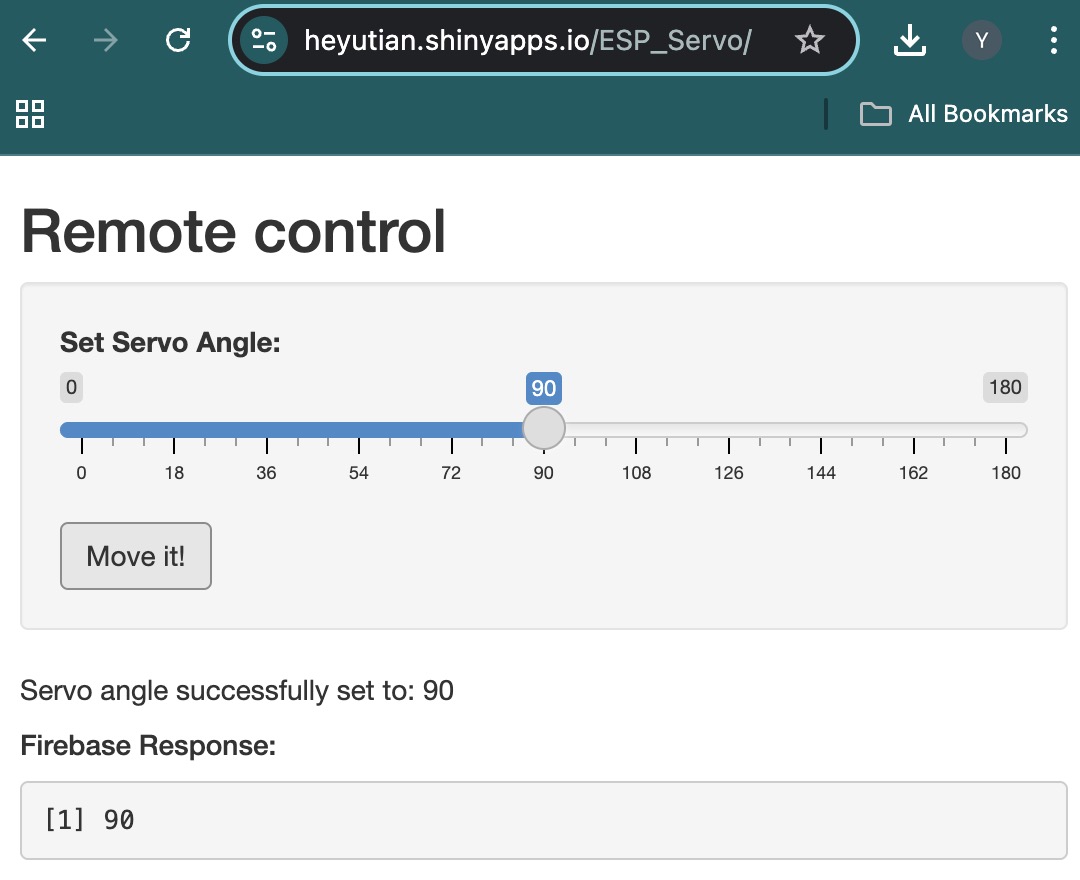
And finally, after hours of debugging, I managed to make the servo move through a user interface designed with R! Some future explorations to consider: calibrating servo movement to more precise angles (currently the movements are jerky and do not seem to correlate with the angles selected); minimizing response time without causing the ESP32 program to crash.
Update as of Dec 4, 2024
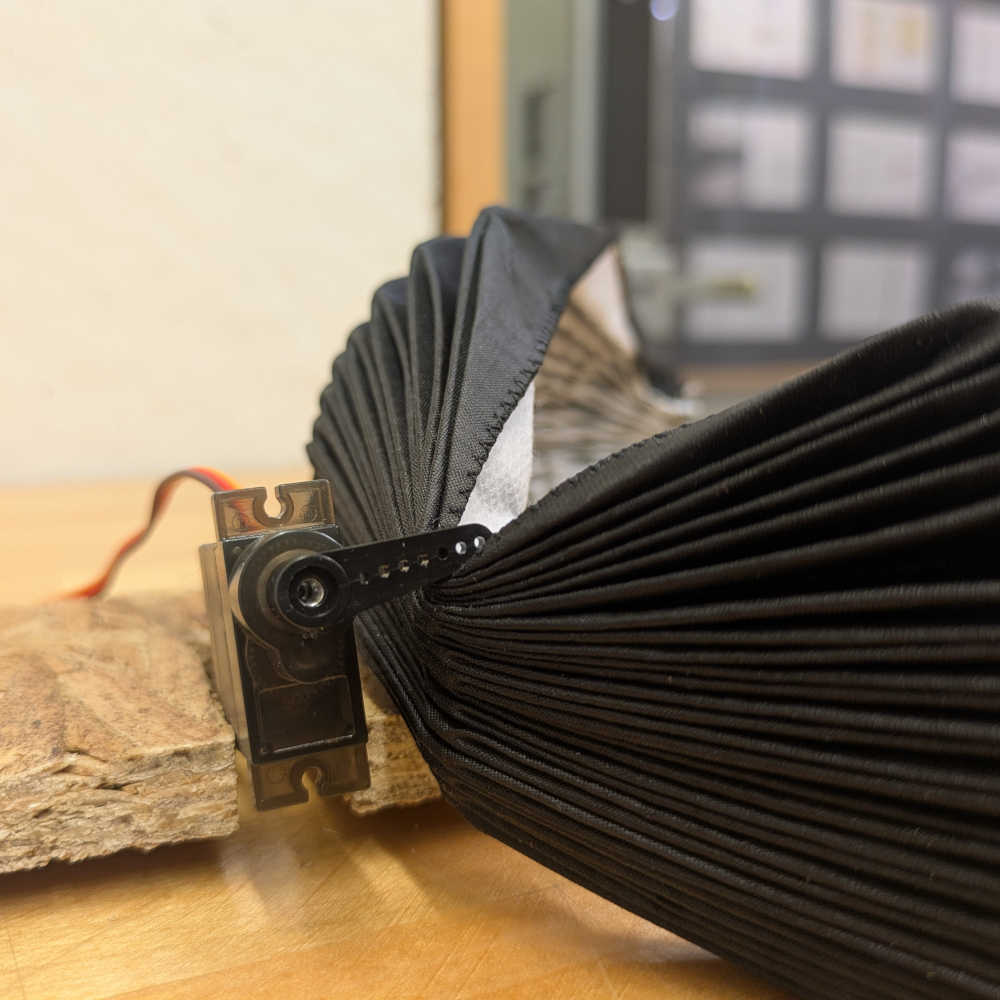
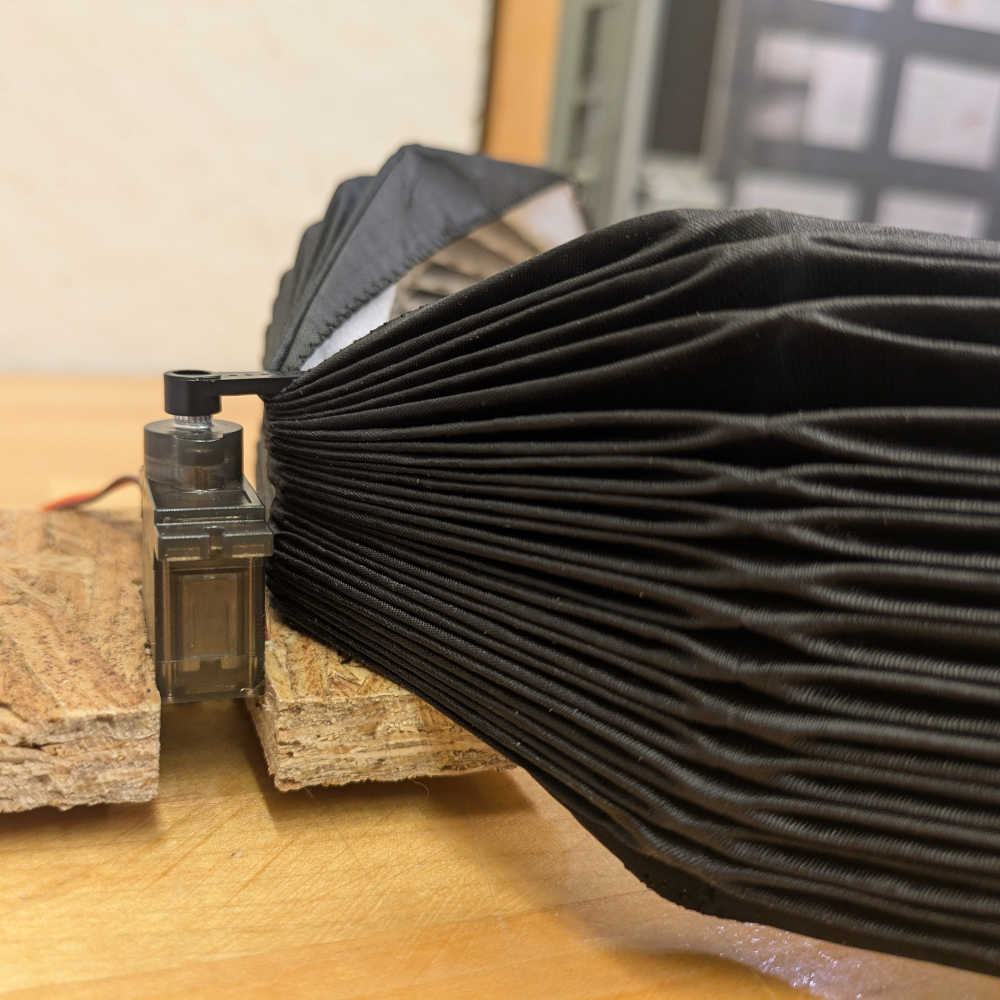
I realized that the easiest way to 'calibrate' the servo was to take the servo attachment off and reattach it to the angle specified. 0, 90, 180 degrees now correspond to servo attachment movements! I then tested it on my final project's prototype, to check if the microservo was strong enough to hold things now and if it could act as a release. Tried 2 different orientations of the servo attachment, like so. Both work!
Code for ESP32-C3 that was uploaded via Arduino IDE:
#include <WiFi.h>
#include <FirebaseESP32.h>
#include <ESP32Servo.h>

    const char* ssid = "********"; #replace with Wifi username
    const char* password = "********"; #replace with Wifi password

    // Firebase configuration
    #define FIREBASE_HOST "esp32servo-46add-default-rtdb.firebaseio.com"
    #define FIREBASE_AUTH "**********" #replace with secret key generated via Firebase - Project Overview - Project Settings - Service Accounts


    FirebaseConfig firebaseConfig;
    FirebaseAuth firebaseAuth; // Add FirebaseAuth object
    FirebaseData firebaseData;
    Servo servo;

    void setup() {
      Serial.begin(115200);

    // Connect to Wi-Fi
      WiFi.begin(ssid, password);
      unsigned long startAttemptTime = millis();
      while (WiFi.status() != WL_CONNECTED && millis() - startAttemptTime < 30000) {
        delay(1000);
        Serial.println("Connecting to WiFi...");
      }
      if (WiFi.status() != WL_CONNECTED) {
        Serial.println("Failed to connect to WiFi");
        while (true); // Halt execution
      }
      Serial.println("Connected to WiFi");

     // Configure Firebase
      firebaseConfig.host = FIREBASE_HOST;
      firebaseConfig.signer.tokens.legacy_token = FIREBASE_AUTH;
      firebaseConfig.timeout.serverResponse = 10000; // Increase timeout for Firebase initialization


      // Initialize Firebase
      Firebase.begin(&firebaseConfig, &firebaseAuth);
      Firebase.reconnectWiFi(true);

      if (Firebase.ready()) {
        Serial.println("Firebase initialized successfully");
      } else {
        Serial.println("Firebase initialization failed: " + firebaseData.errorReason());
      }

      // Attach servo
      servo.attach(20); // GPIO20 for XIAO ESP32-C3
      servo.write(90);  // Default position
    }

    void loop() {
      if (Firebase.getInt(firebaseData, "servo_angle")) {
        int angle = firebaseData.intData();
        Serial.println("Fetched angle: " + String(angle));
        if (angle >= 0 && angle <= 180) {
          servo.write(angle);
          Serial.println("Servo moved to " + String(angle) + " degrees");
        } else {
          Serial.println("Invalid angle: " + String(angle));
        }
      } else {
        Serial.println("Failed to fetch data: " + firebaseData.errorReason());
      }
      delay(1000); // Poll Firebase every 1 s
    }
Code for Shinyapp within RStudio:
library(shiny)
library(httr)
library(jsonlite)

# Define UI
ui <- fluidPage(
  titlePanel("Remote control"),
  sidebarLayout(
    sidebarPanel(
      sliderInput("angle", "Set Servo Angle:", min = 0, max = 180, value = 90),
      actionButton("set_servo", "Move it!")
    ),
    mainPanel(
      textOutput("status"),
      h5("Firebase Response:"),
      verbatimTextOutput("response")
    )
  )
)

# Define Server
server <- function(input, output, session) {
  # Replace with your Firebase database URL
  firebase_url <- "https://esp32servo-46add-default-rtdb.firebaseio.com/servo_angle.json"

  observeEvent(input$set_servo, {
    # Get the angle from the slider
    angle <- input$angle
    print(paste("Move it!", angle))  # Debugging line

    # Send the angle to Firebase
    response <- tryCatch({
      PUT(
        url = firebase_url,
        body = toJSON(angle, auto_unbox = TRUE),
        encode = "json"
      )
    }, error = function(e) {
      return(NULL)
    })

    # Update UI based on response
    output$status <- renderText({
      if (is.null(response)) {
        "Failed to communicate with Firebase. Please check your internet connection or database URL."
      } else if (status_code(response) == 200) {
        paste("Servo angle successfully set to:", angle)
      } else {
        paste("Failed to set servo angle. HTTP status code:", status_code(response))
      }
    })

    output$response <- renderPrint({
      if (!is.null(response)) {
        content(response, "parsed", simplifyVector = TRUE)
      } else {
        "No response received."
      }
    })
  })
}

# Run the Shiny app
shinyApp(ui, server)