
Aijia Yao
✦ Final Project: Prof. Slughorn's Hourglass

|

|

|
|
|
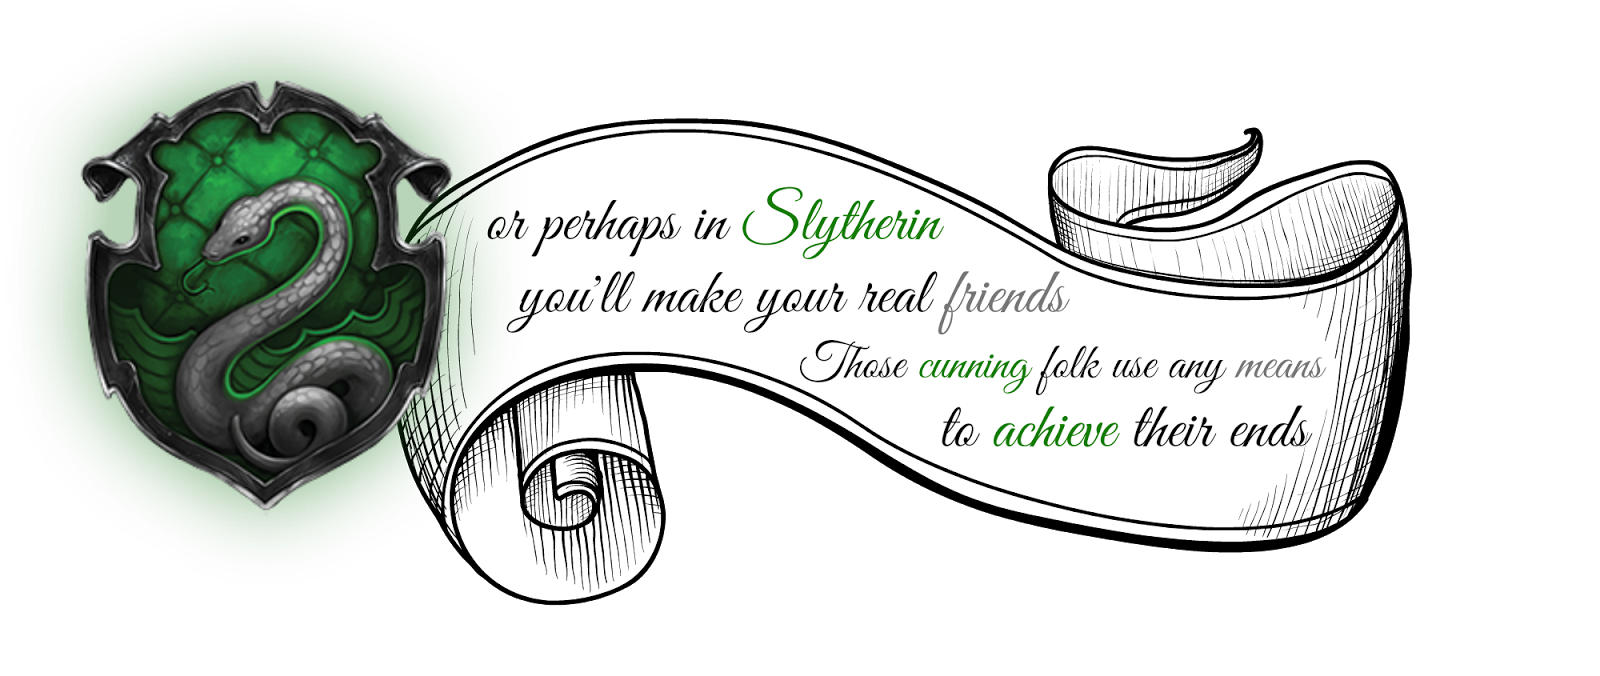
Through this project, I think it is important to address the common misunderstandings people may have about the Slytherin house.
We are not evil; we are loyal to the core, and we guard what we cherish.
From Professor Snape’s enduring love, to Professor Slughorn’s appreciation of talent, and to Salazar Slytherin’s emphasis on lineage, these ideals define Slytherin far more than the stereotypes.💚
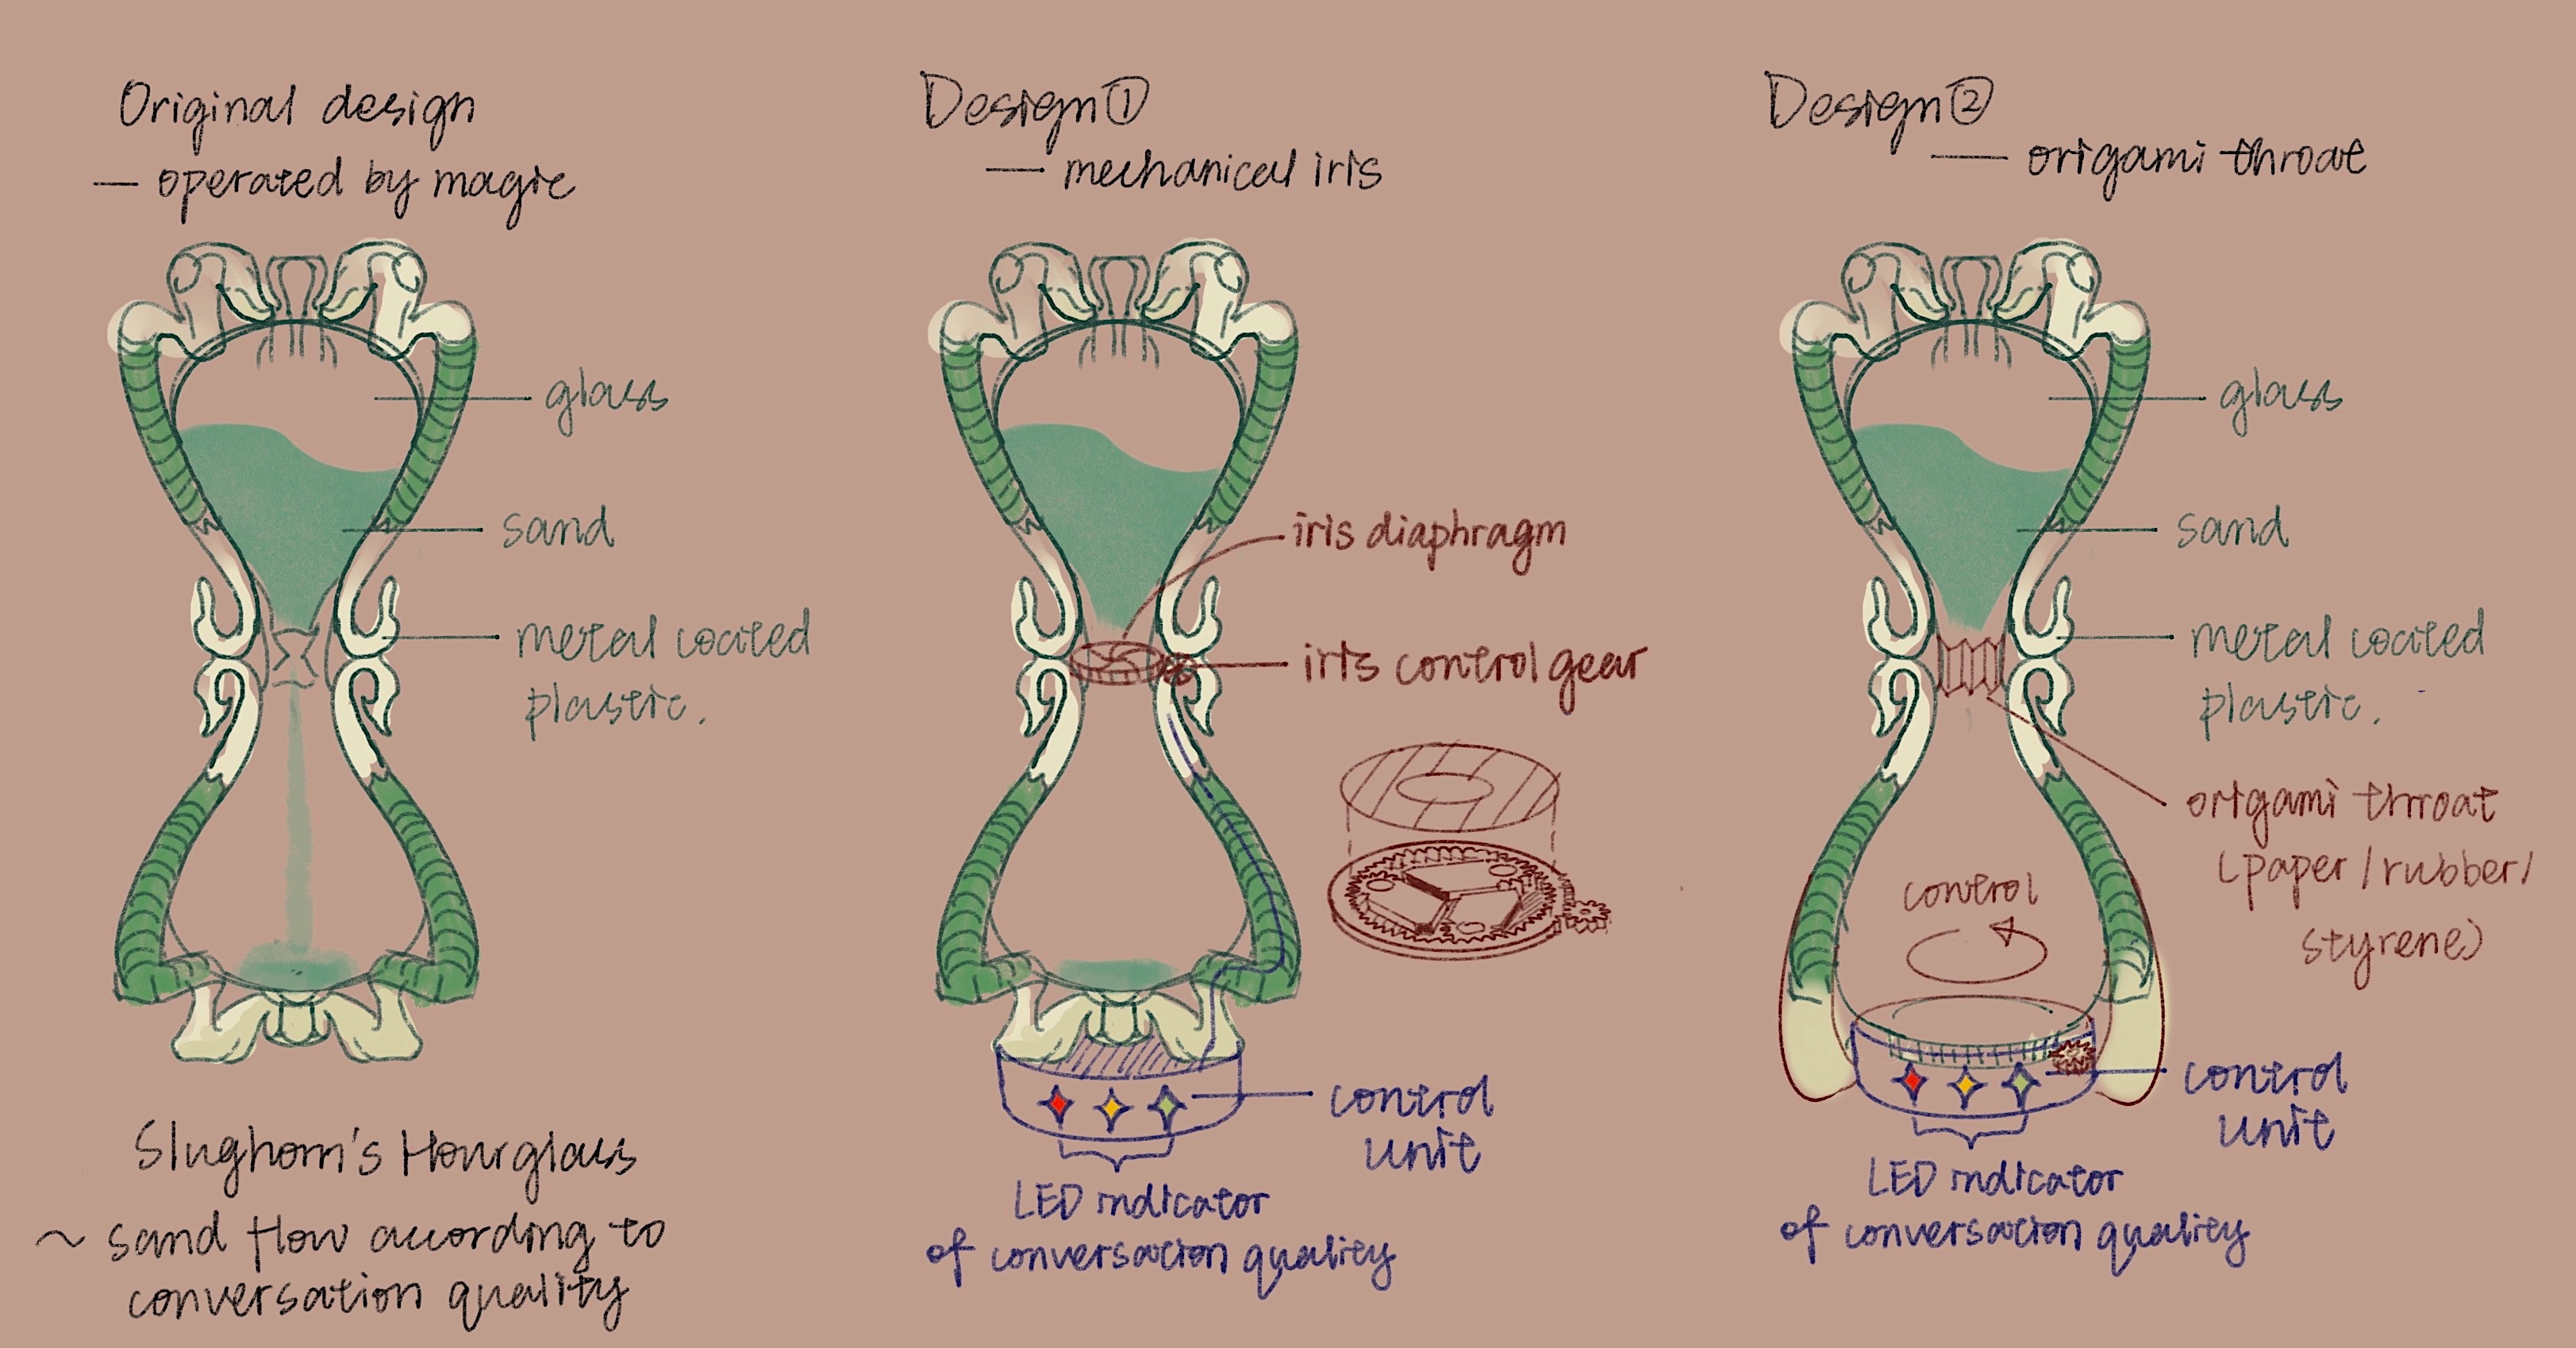
As for this hourglass, that devotion is reflected in our reverence for time.
I believe true progress requires the courage and cleverness to push boundaries ahead of understanding;
what others label as “dark magic” is often brilliant innovation or evolution in its infancy.
✧ ✧ ✧ ✧ Jump to final demo video ✧ ✧ ✧ ✧
(The following content documents my progress toward the final project)
✧ Early Thoughts- September 2025
Check out the movie scene that inspired this project:- The hourglass design can be modified to have a controllable flow rate, possibly through adjustable openings or mechanisms.
- Since this class won't include glass design, maybe the hourglass vessel can be substitue for other materials.
- Some initial ideas are here in the draft:
✧ October Updates
I'm excited about the potential of this project and the challenges it presents. I want to explore various design options and functionalities for the hourglass, including:
- Integrating a touch pad for speed control.
- Using audio sensing to automate the flow control.
- Experimenting with different materials for the hourglass vessel.
I also came across an interesting kind of origami structure called Kresling Pattern
On Week 8, I tested and refined the audio input device, and I have been following this tutorial to try ensuring it accurately captures voice commands for controlling the hourglass.
On Week 9, I did some research on origami structures and magnetic field control, which could potentially be integrated into the hourglass design. After discussion with Anthony, we explored the idea of using the electromagnetic properties of iron filament as sand flowing in the hourglass structure.
|
✧ November Updates
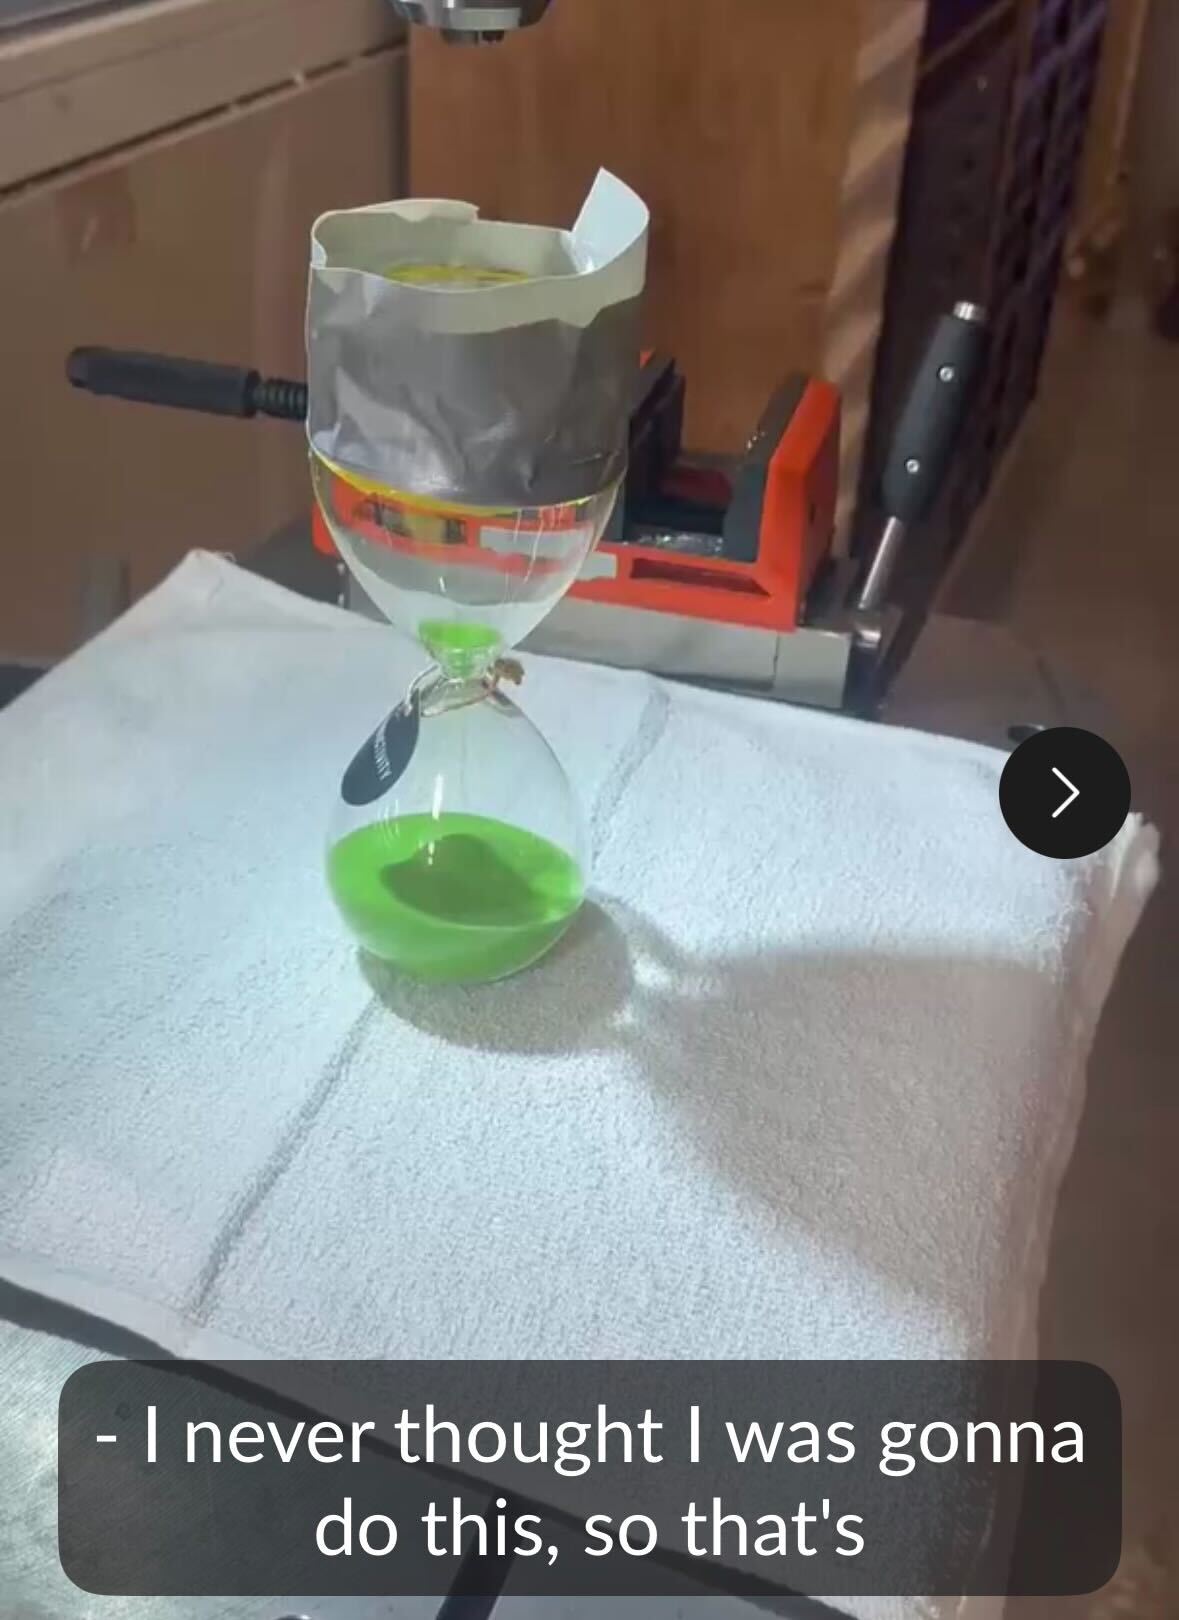
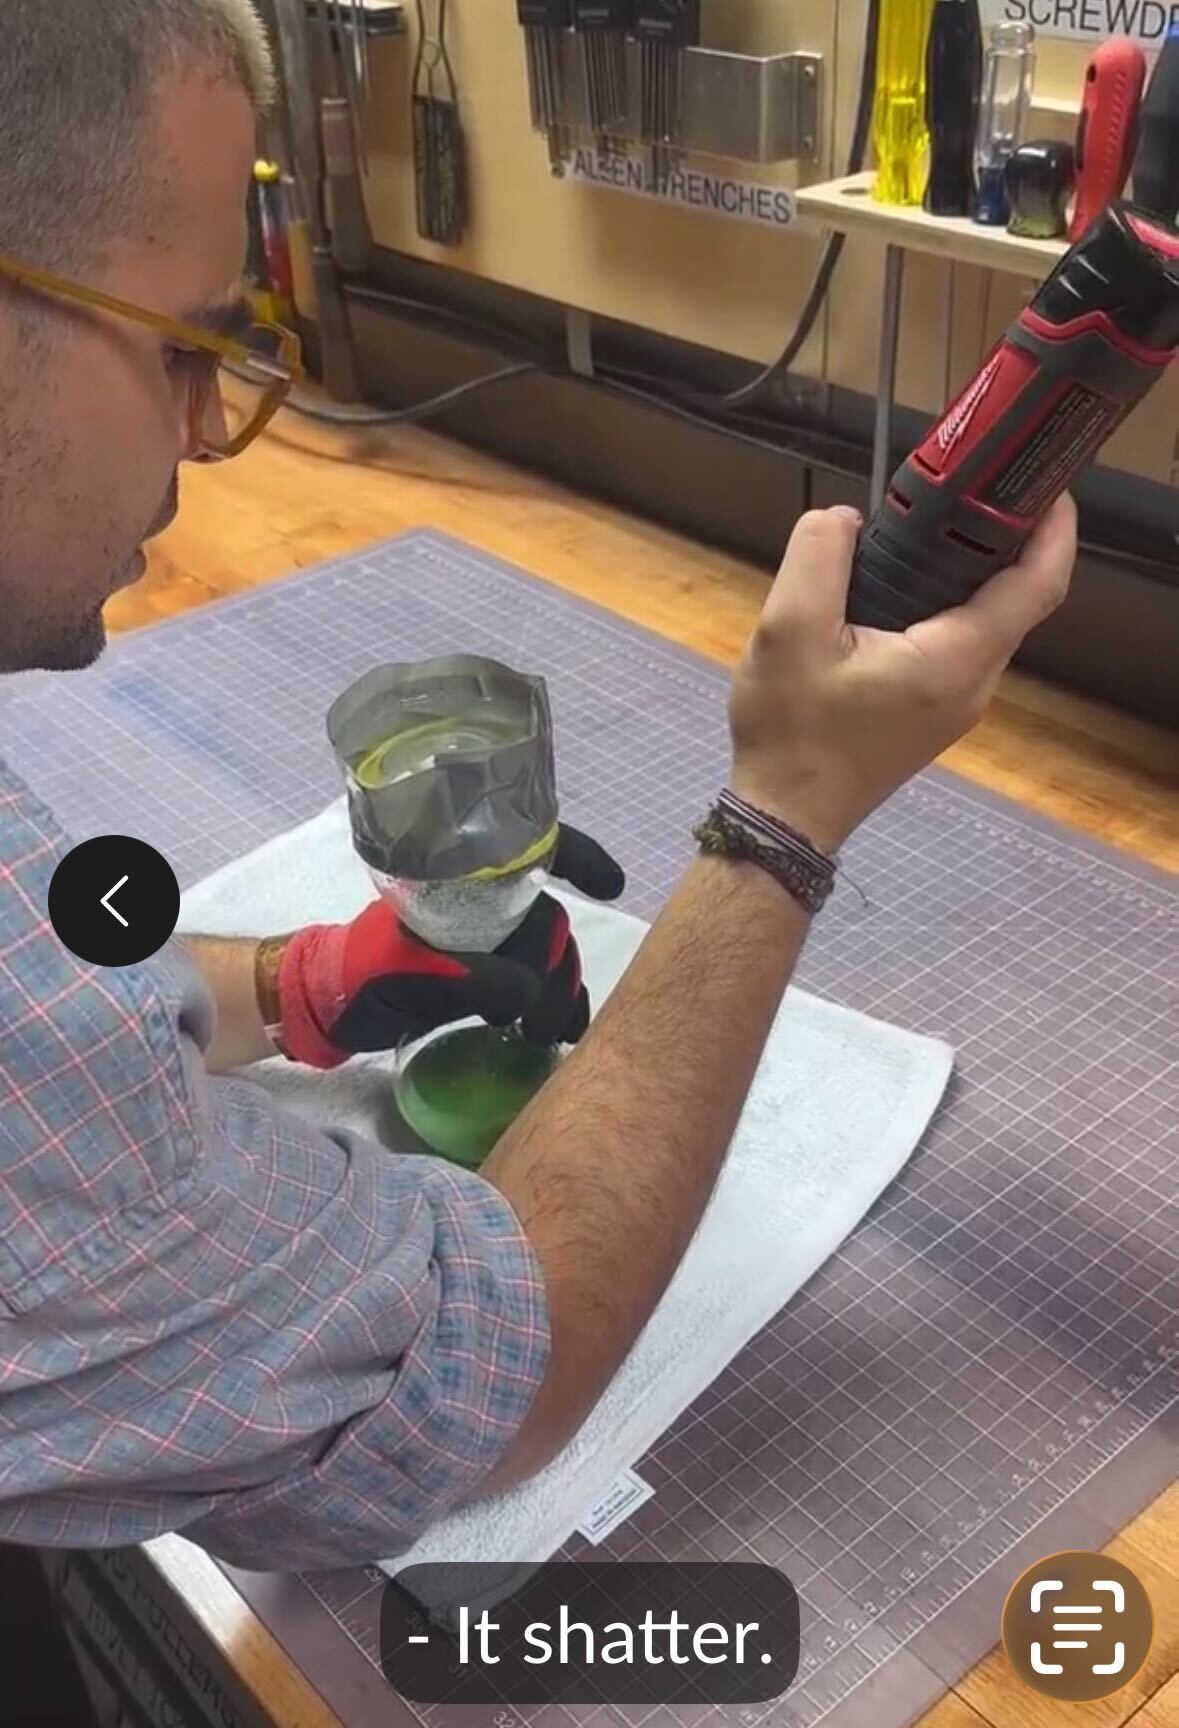
Since the glassware design is not covered in this class, I just bought one off the shelf and bring it to the master of glass, Alfonso, with the challenge of drilling a hole to open it for iron powder filling. See his words of wisdom in cc of the process below:
|
|
Alfonso successfully drilled a hole in the glass, and I was able to fill it with iron powder but just needs to make sure it's really dry after I cleaned out the sand with IPA. The hourglass is now ready for the next phase of testing and development.
For Week 11, I created a system diagram to illustrate the overall design and functionality of the hourglass project: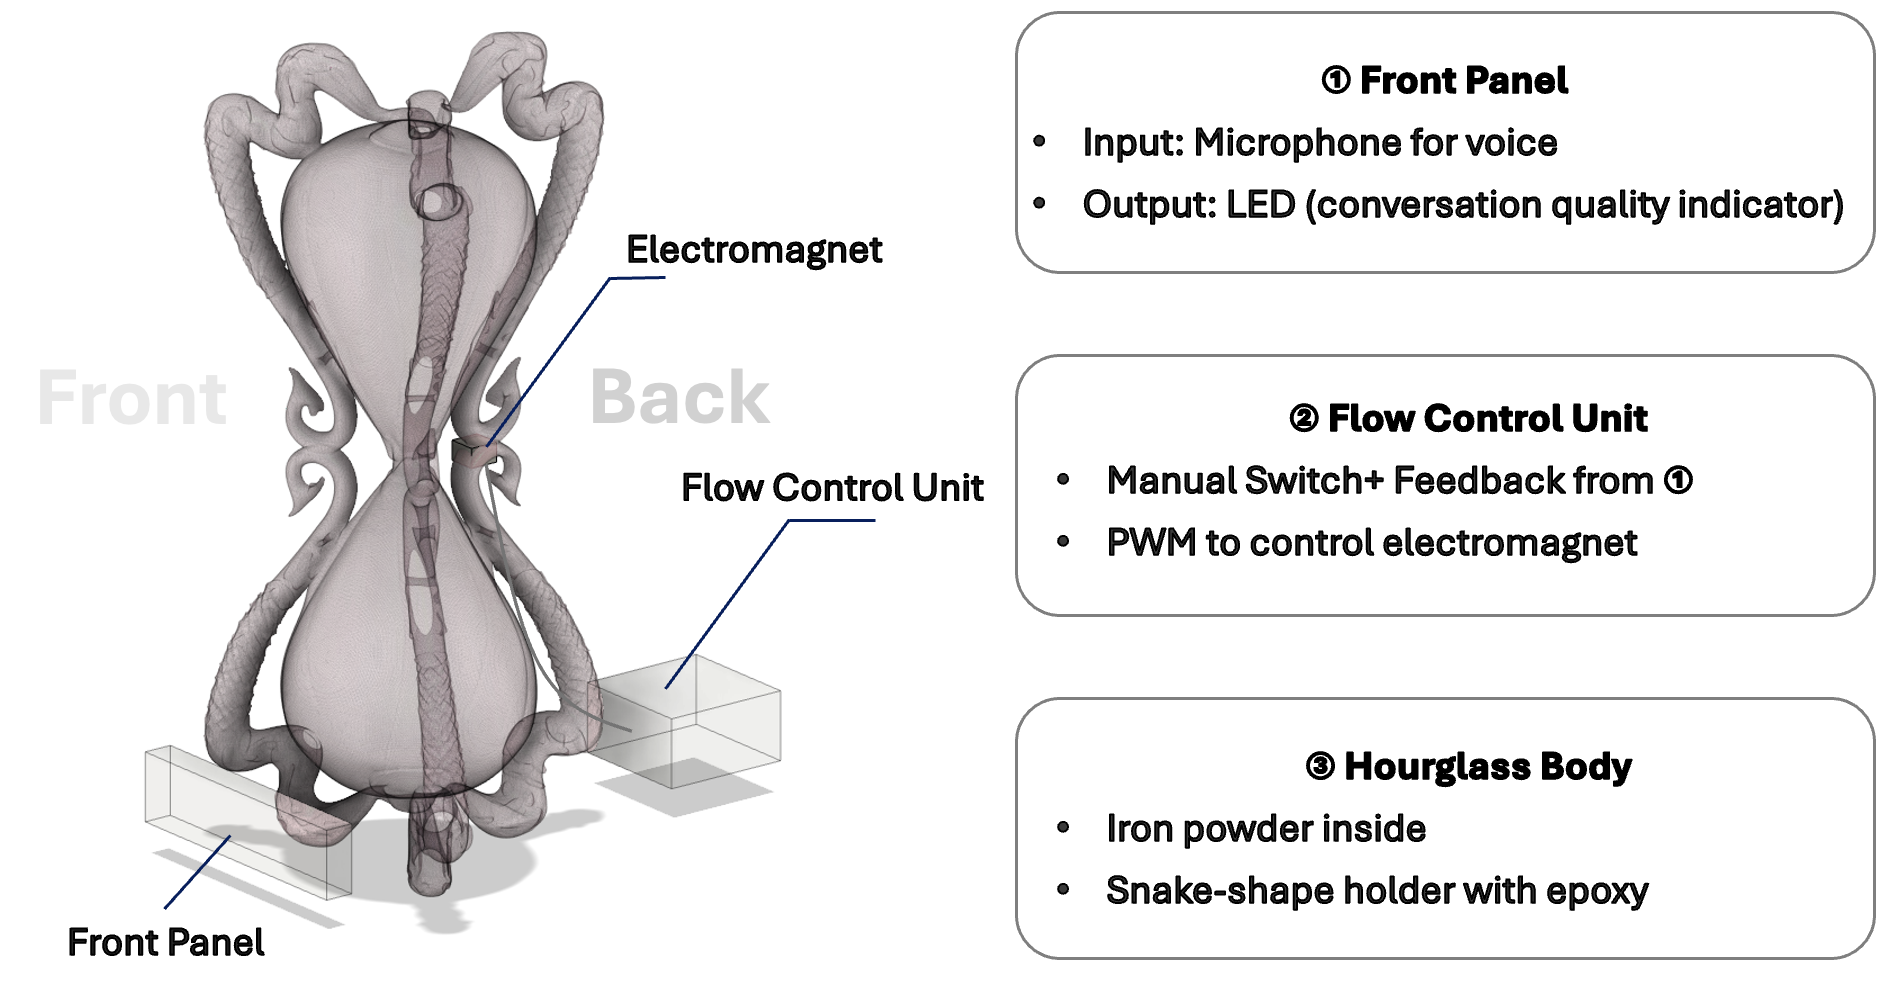
Moving forward, my next steps include:
- Continuing to refine the audio sensing system to ensure reliable voice recognition for controlling the hourglass flow rate.
- Prototyping the electromagnetic control system using 3D printed snakes and electromagnet.
- Dropcasting epoxy snakes to have coils wrapped around, as suggested by Anthony.
- Integrating the touch pad interface for manual speed control, allowing users to adjust the flow rate of the hourglass directly.
- Conducting system integration testing between the audio sensing, electromagnetic control, and touch pad interface.
- Documenting the development process and preparing a comprehensive presentation for the final project showcase.
- Weeks 12-13: Integrate touch pad interface and finalize audio sensing with electromagnetic control system prototype.
- Weeks 14-15: Conduct system testing and refine the hourglass design.
- Week 16: Prepare final documentation and presentation materials.
✧ December Updates
In the final weeks leading up to the project deadline, I focused on integrating all components and conducting thorough testing to ensure everything functioned as intended. Here are the key updates:
Audio processing with EdgeImpulse ML models has been implemented to enhance the voice recognition capabilities of the hourglass. This allows for more accurate control over the flow rate based on 'conversation quality'. A note here is that the reason I decided to use keyword spotting instead of streaming audio is because I always have a mixed feeling about the cyber surveillance, so I hope to avoid any potential issues.
|
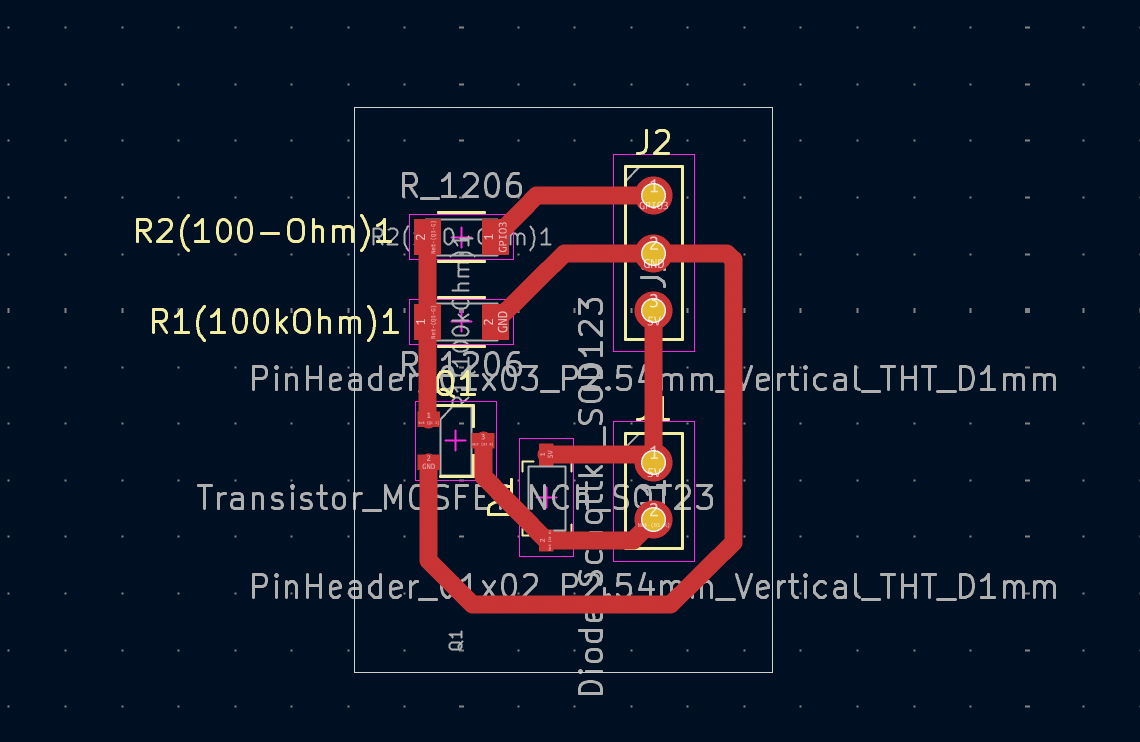
For better performance and wireless connection, I then switched to XIAO ESP32S3 instead of RP2040 in Week 12. I also milled a separate PCB for the electromagnet control using MOSFET.
|
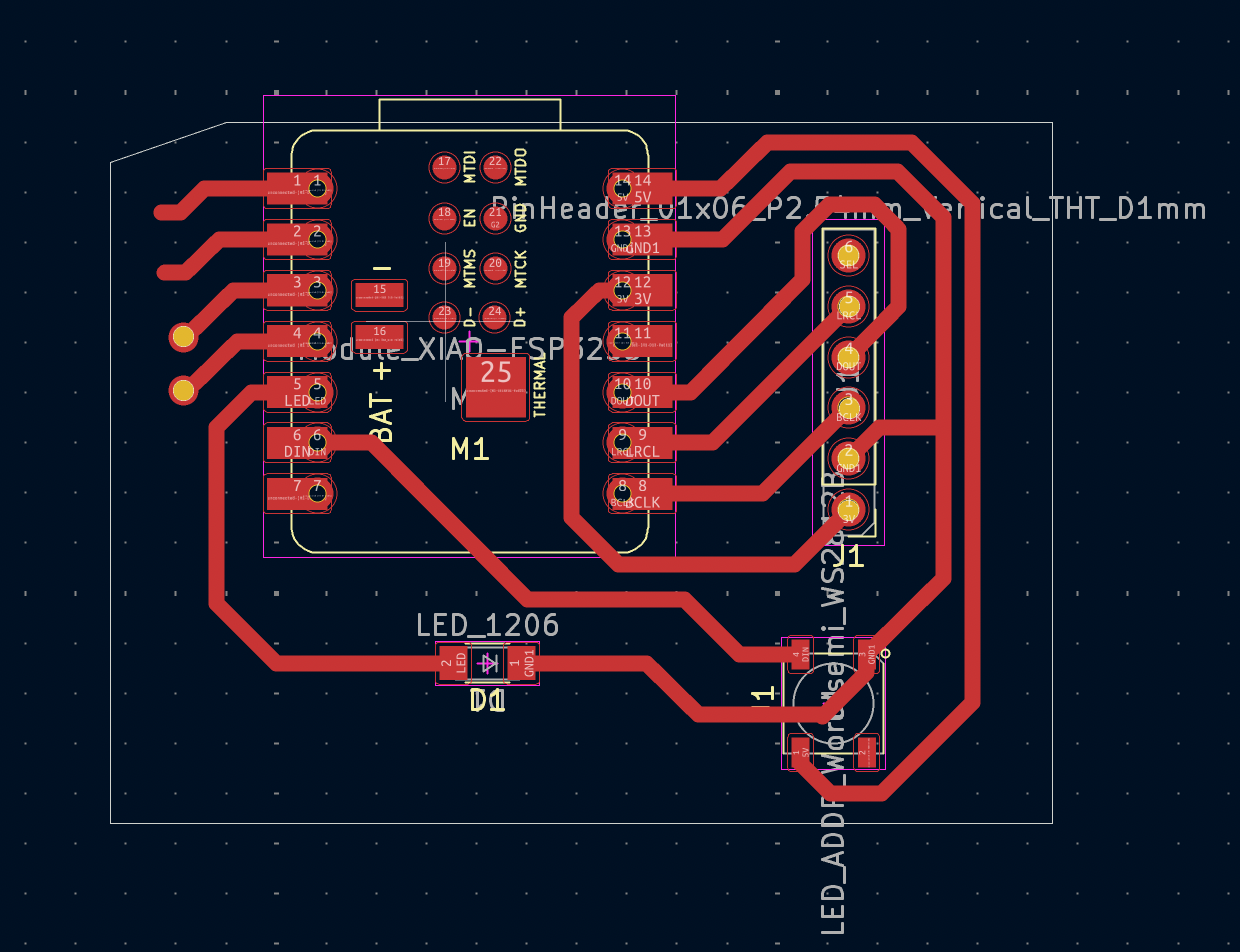
|
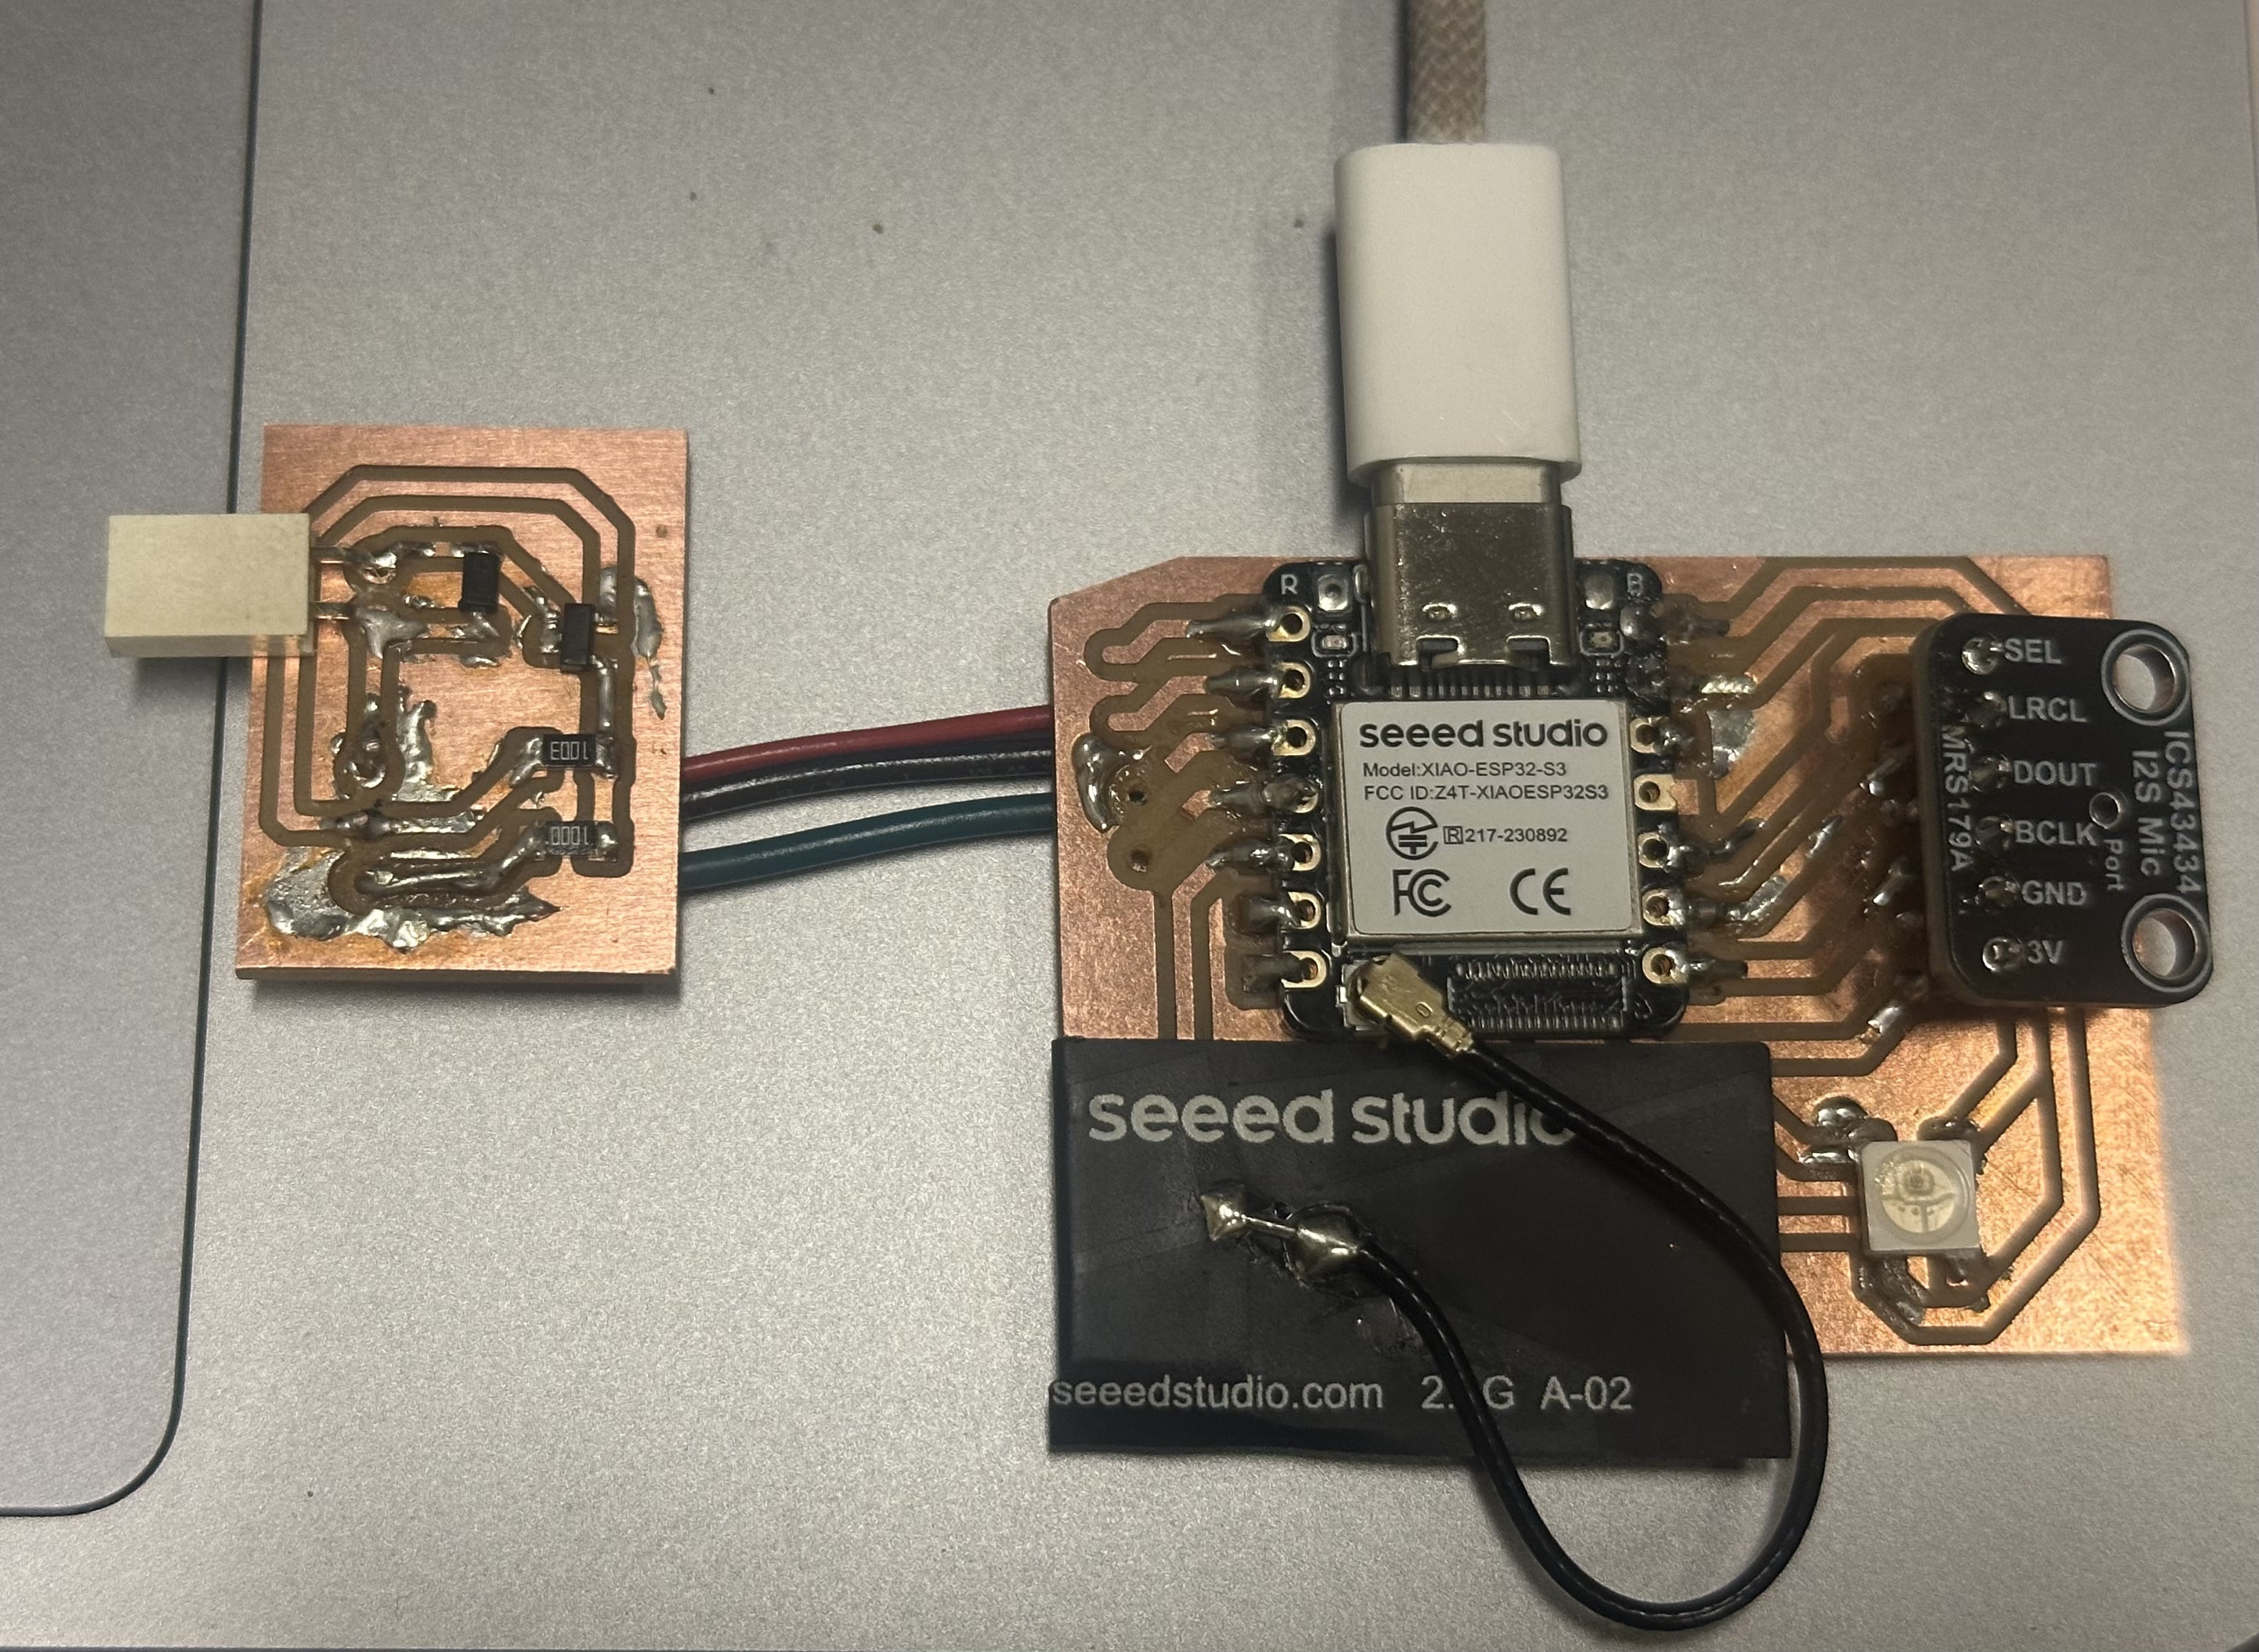
|
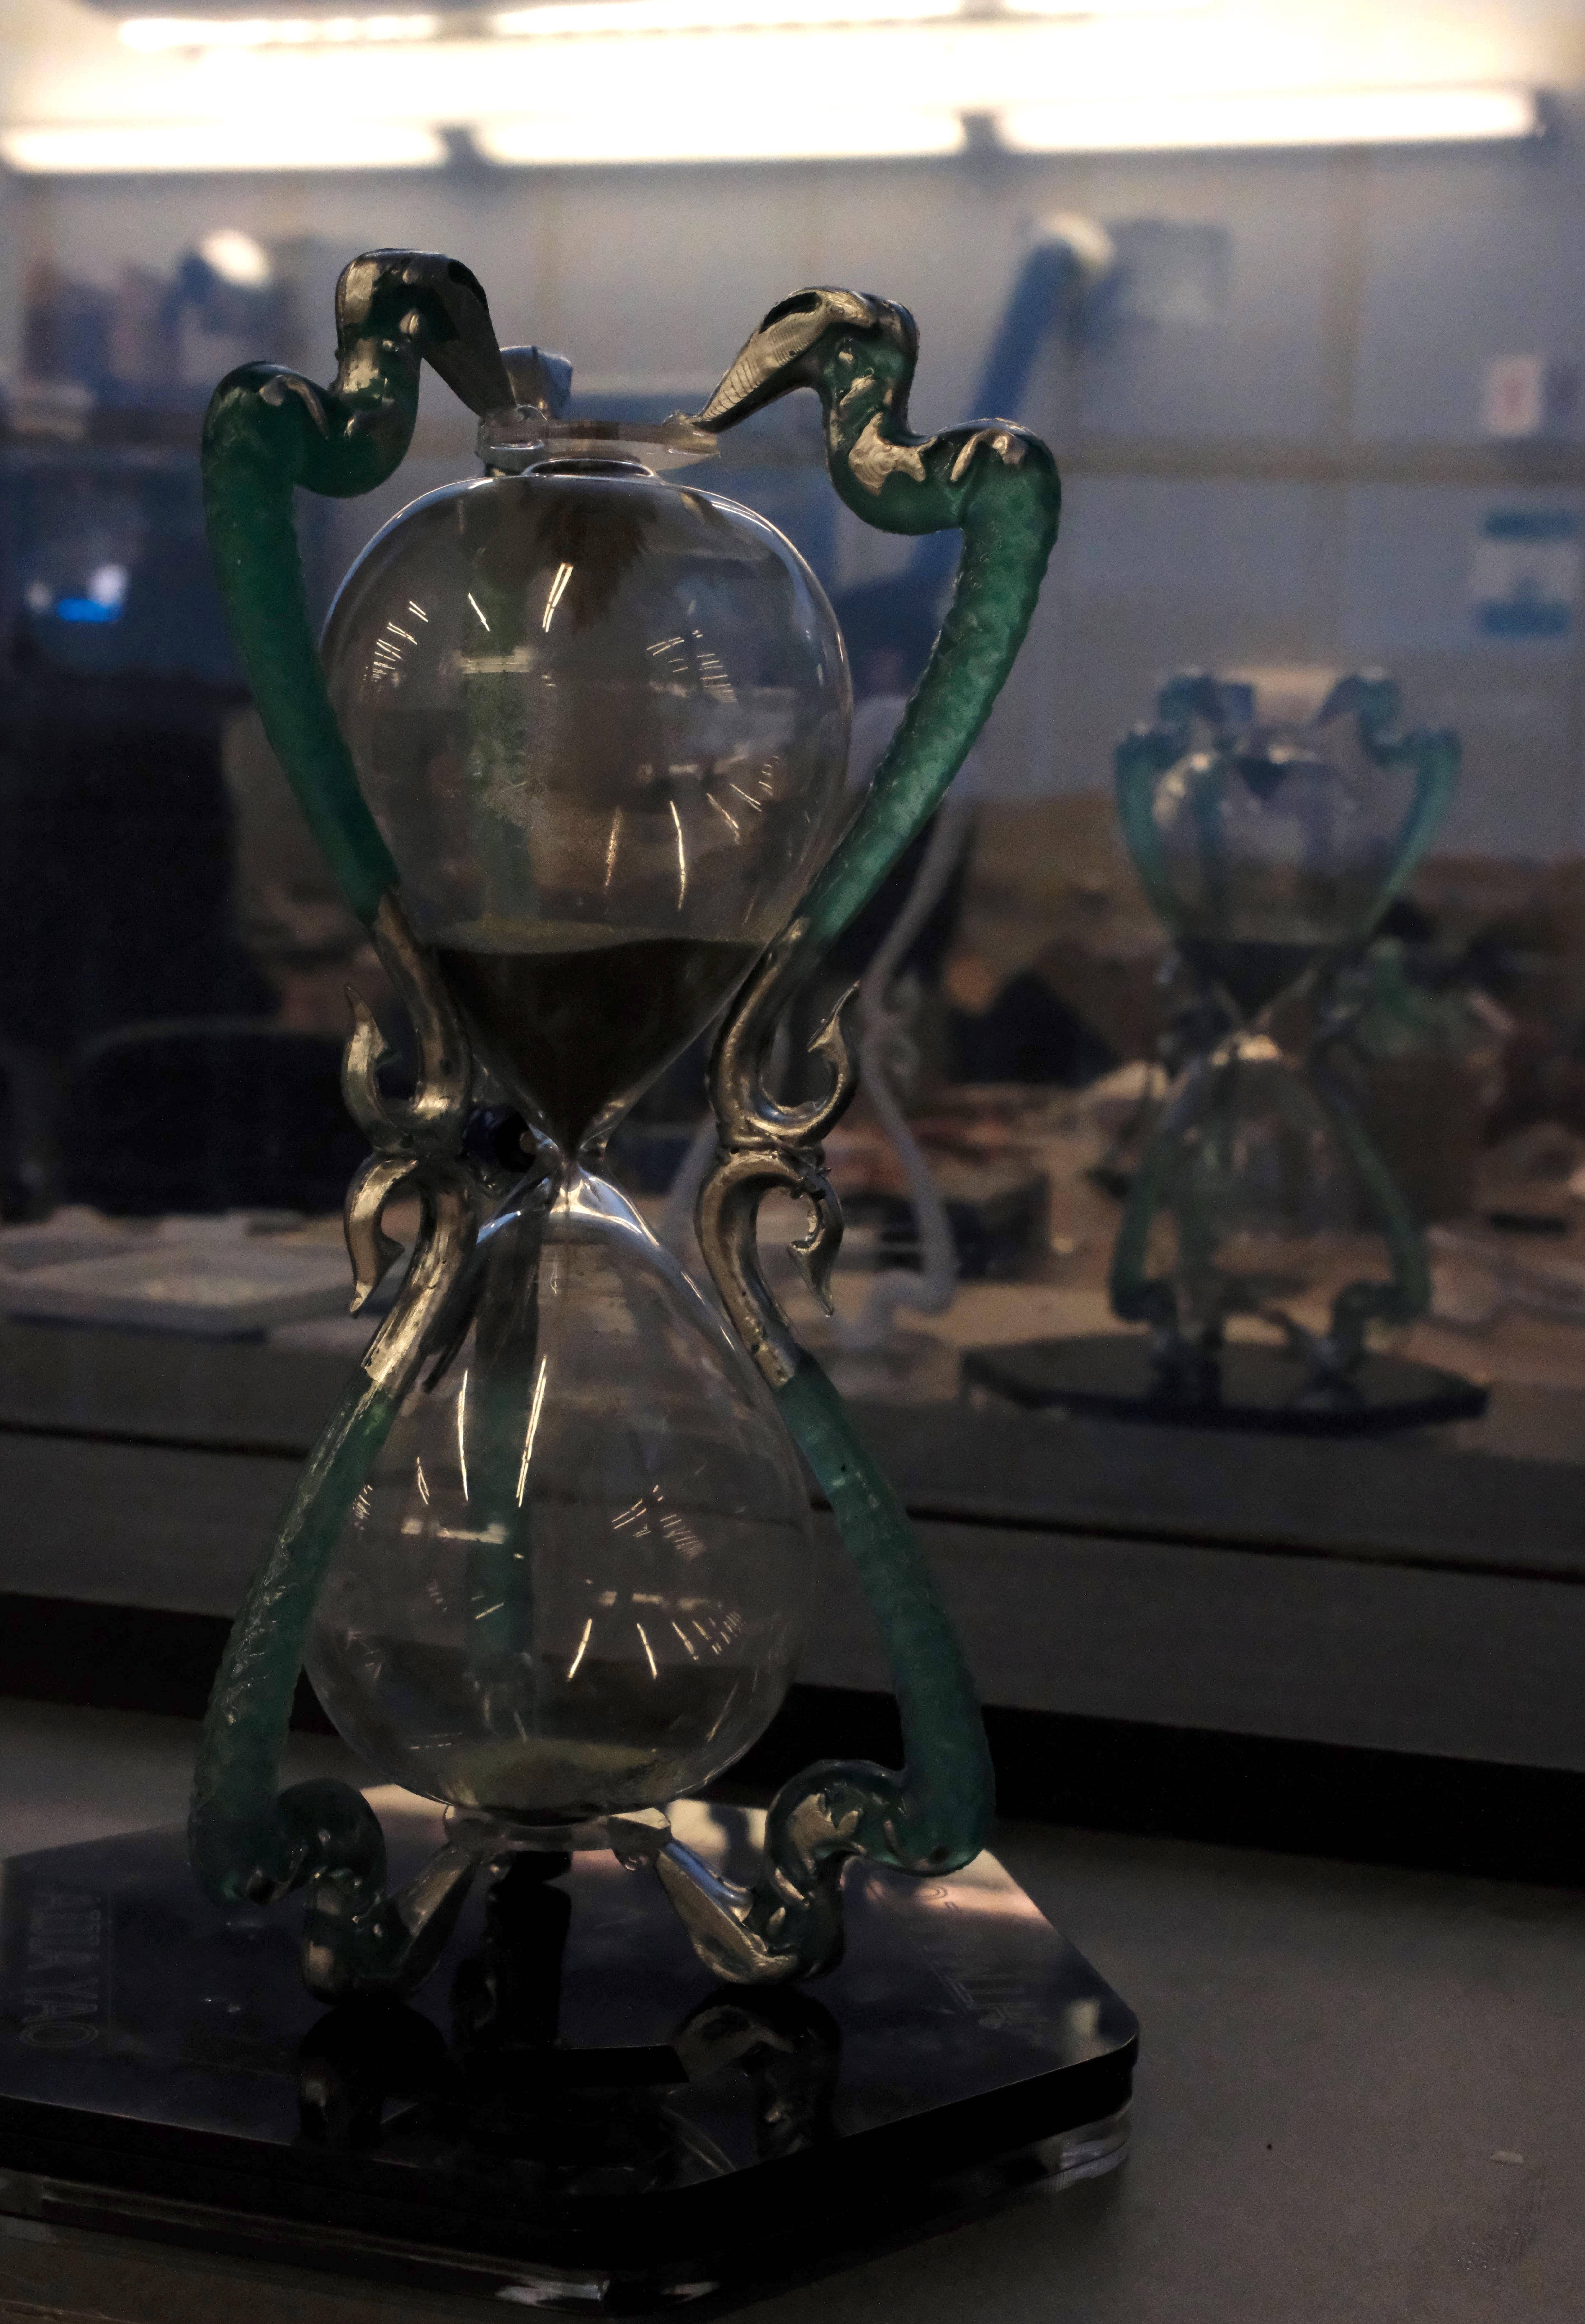
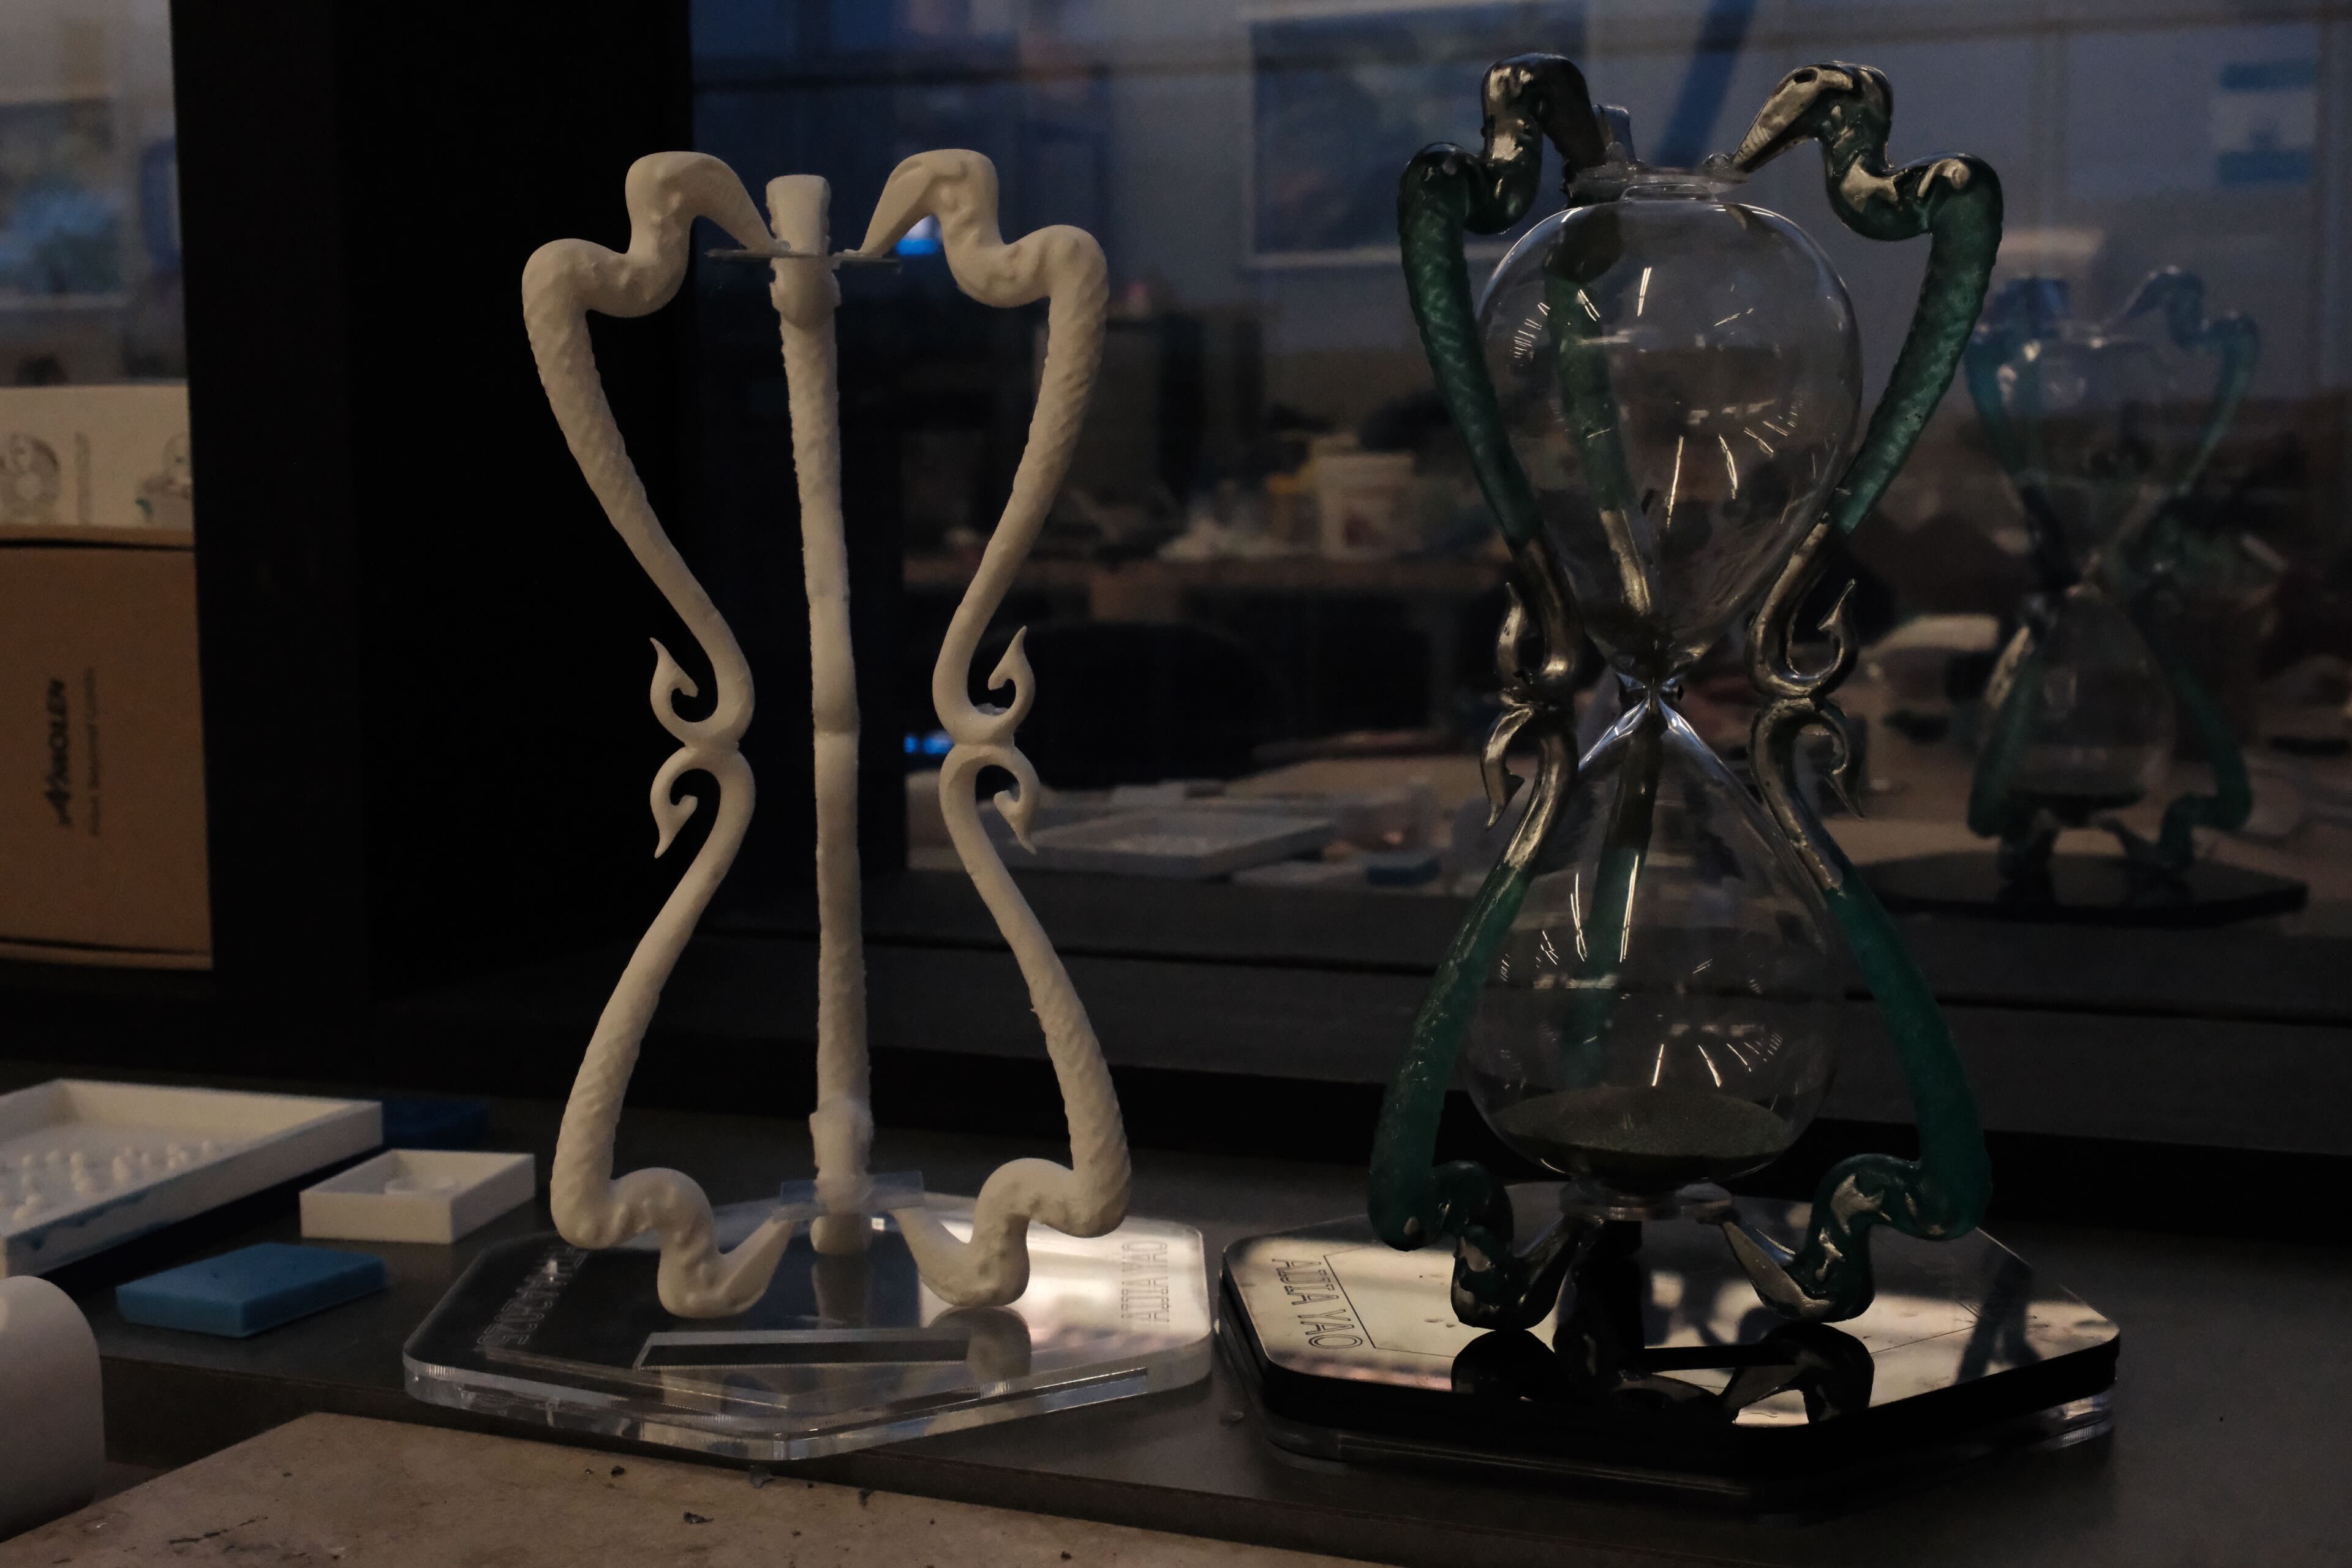
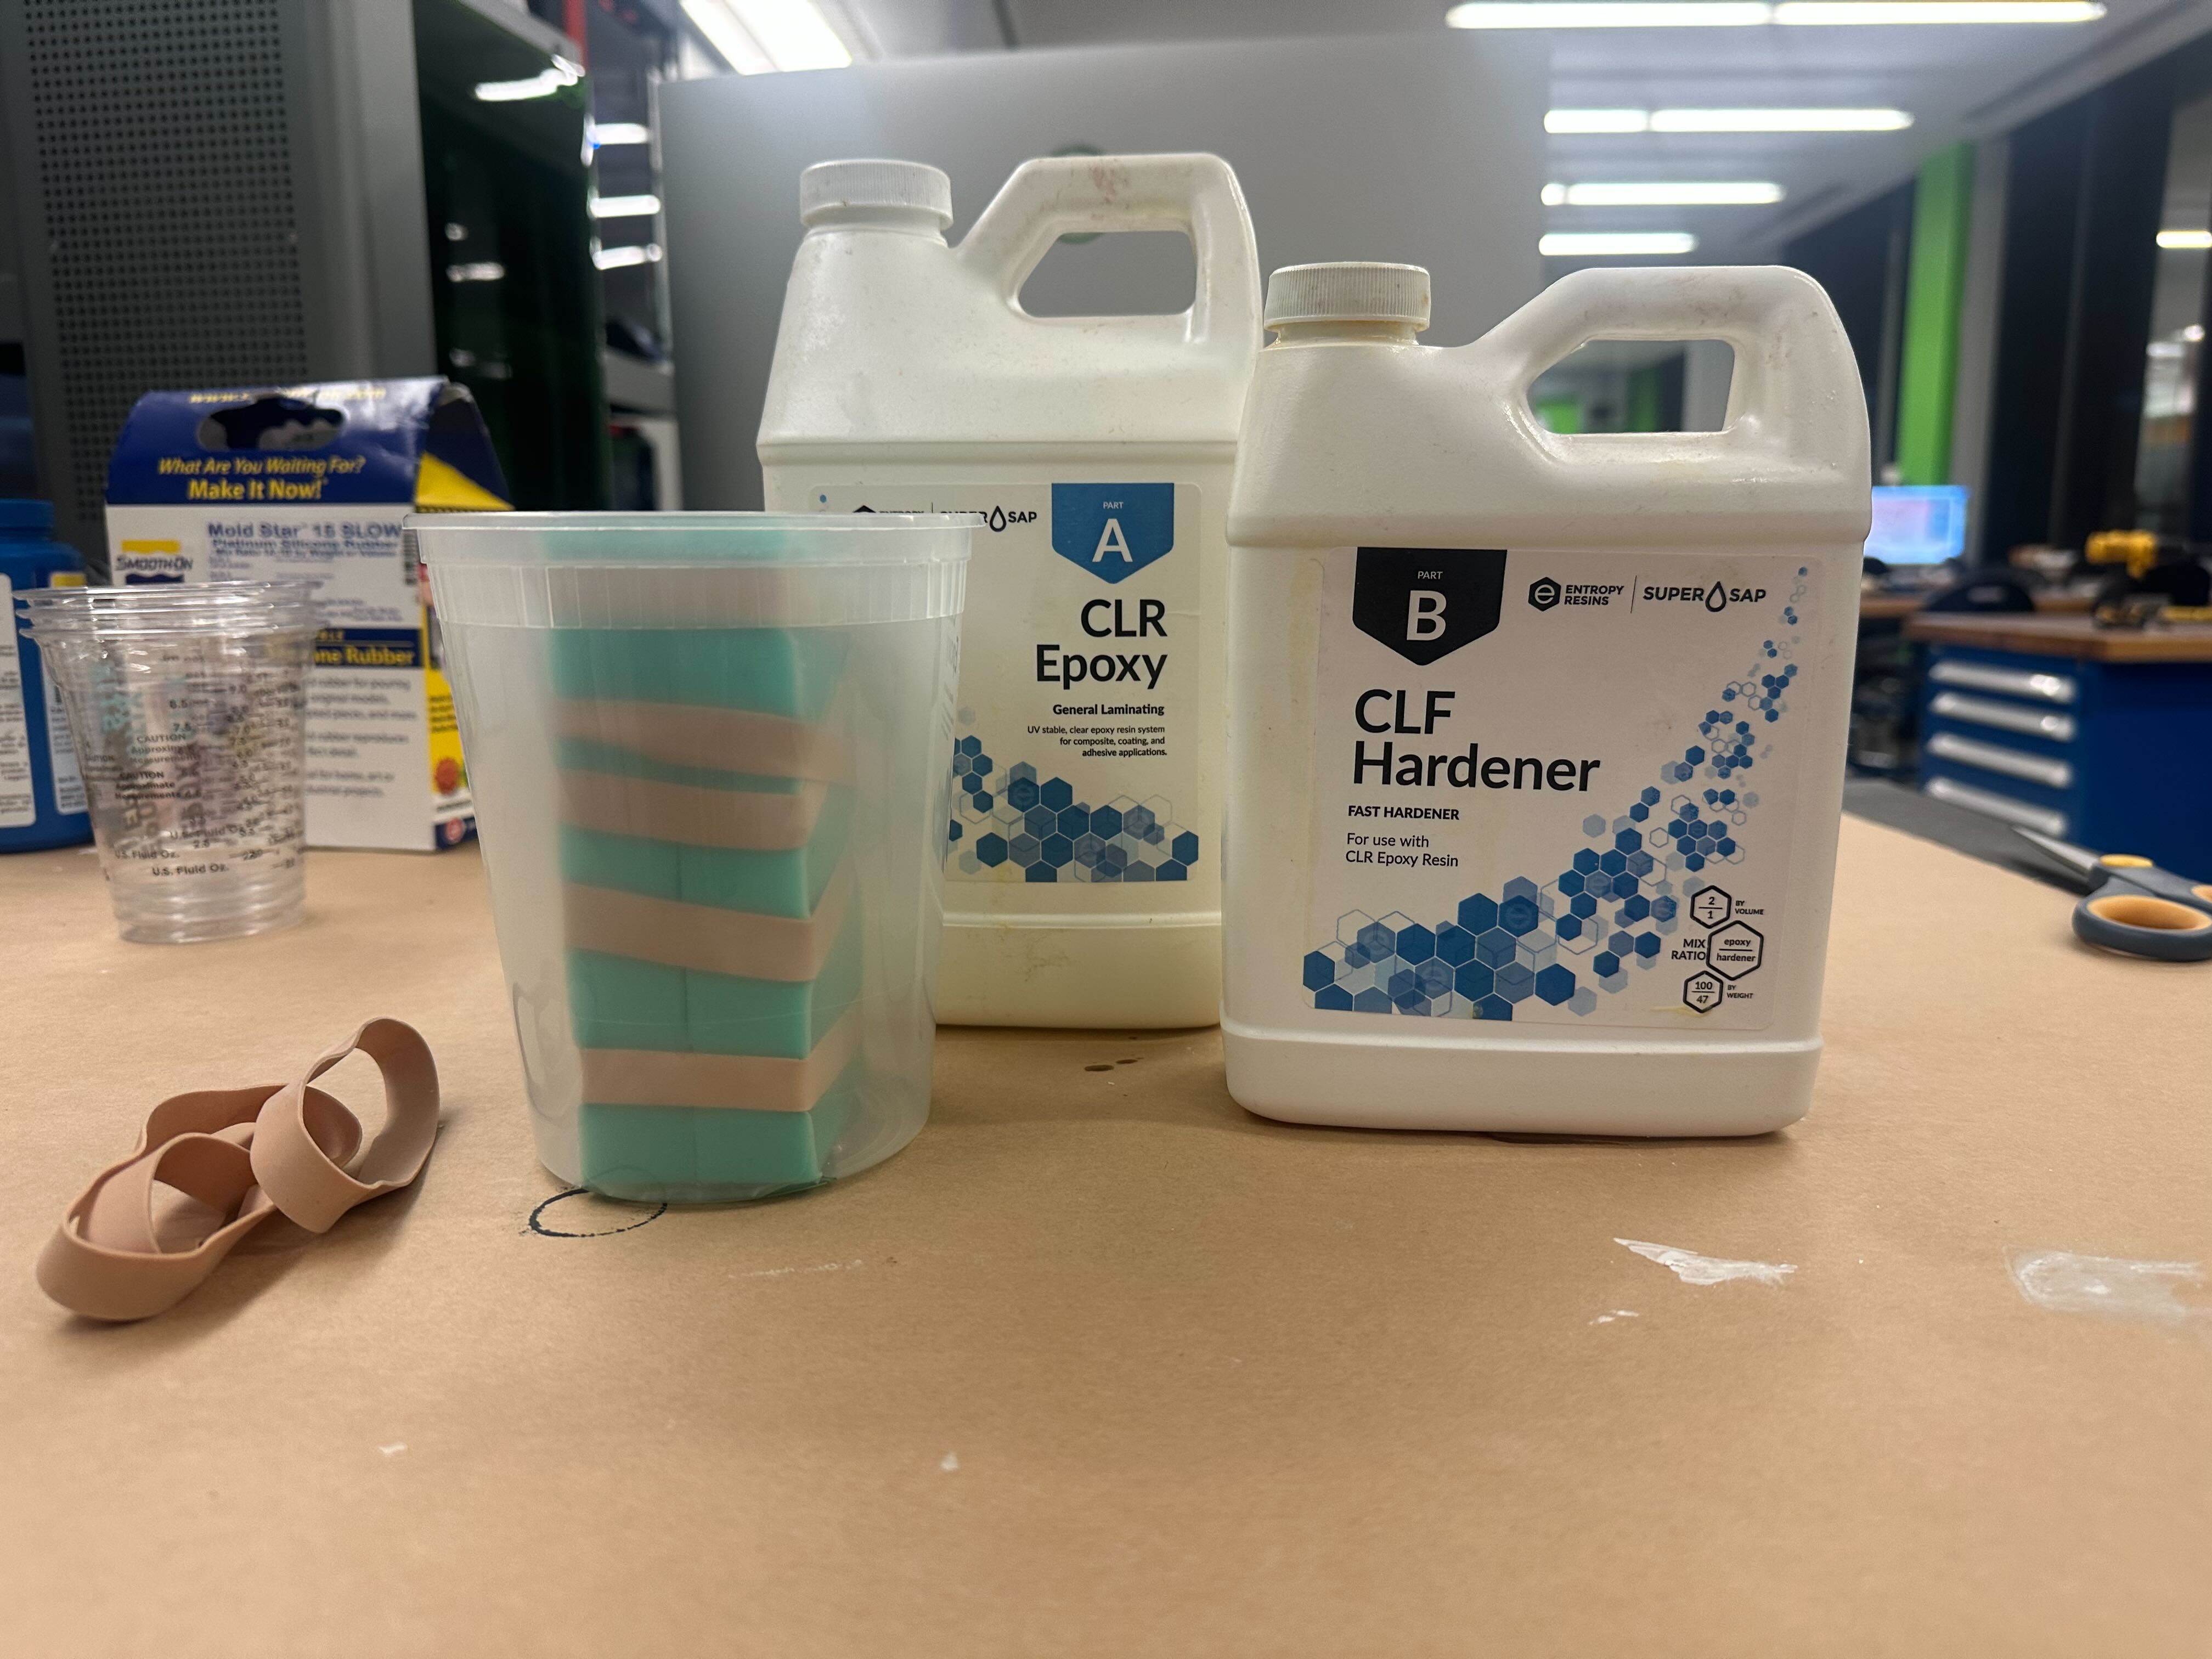
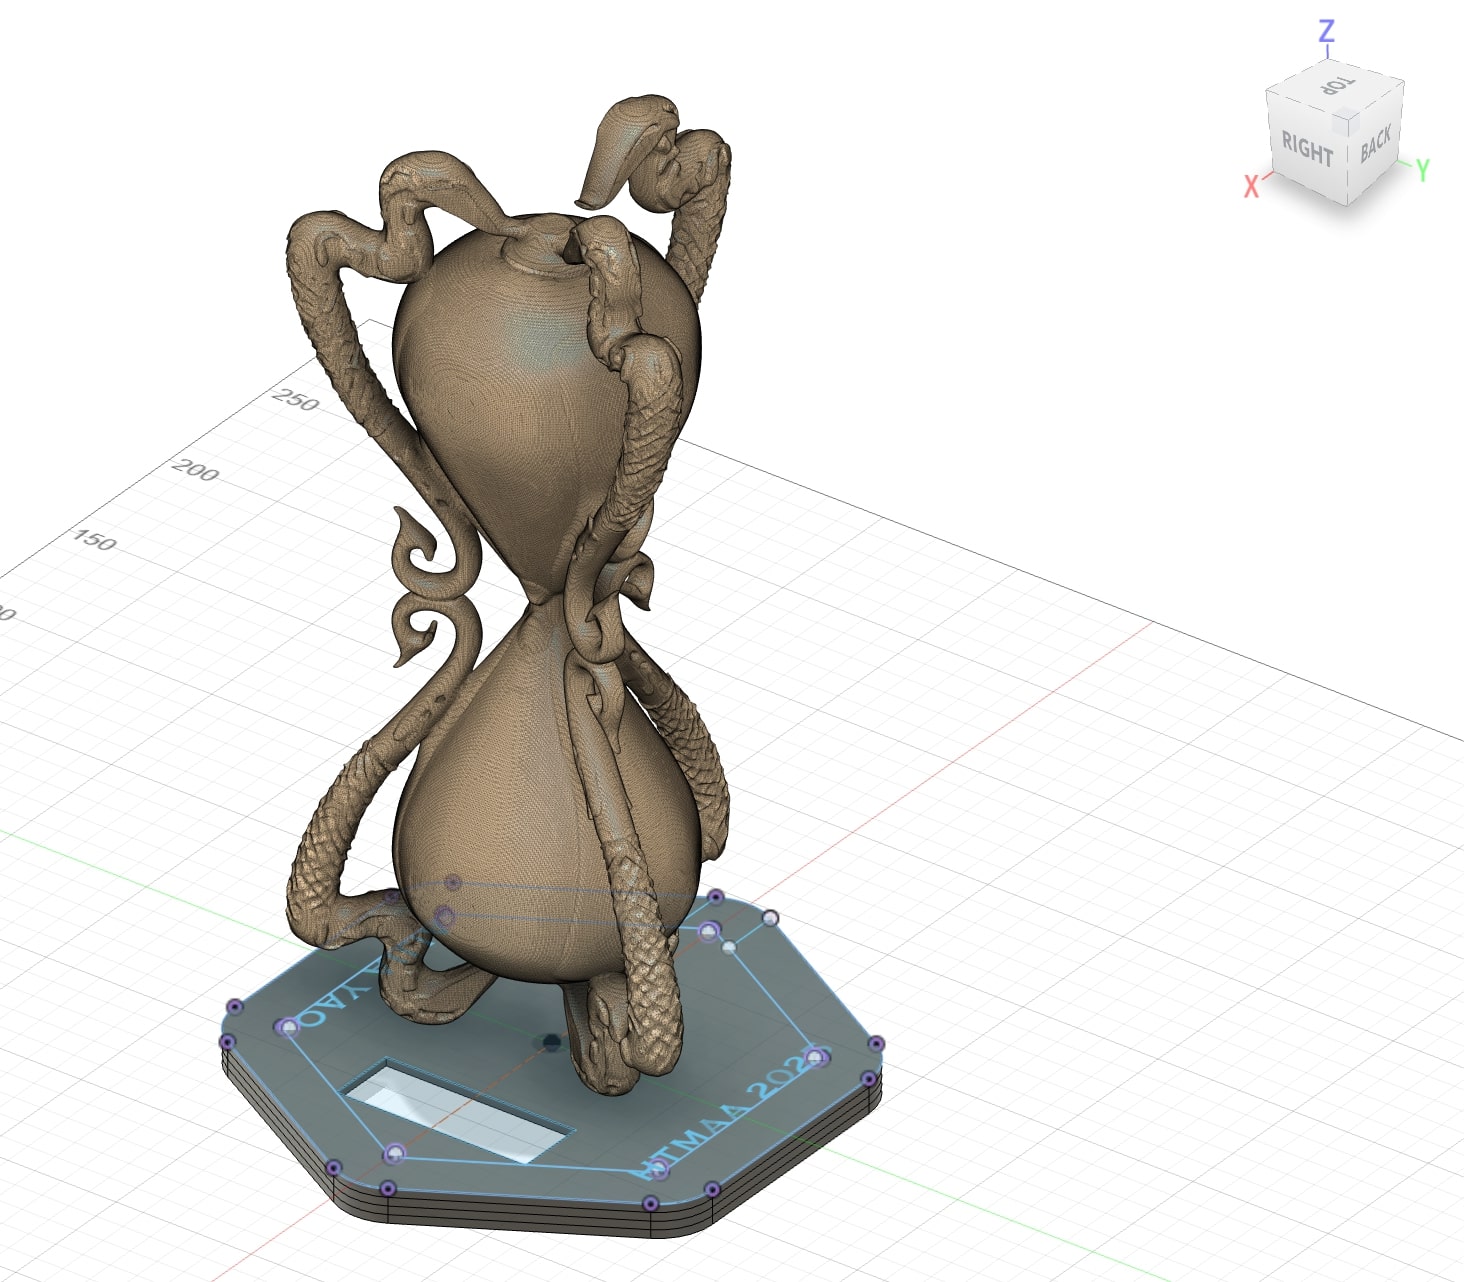
Then for the hourglass itself, I first prototyped the design using a 3D printed components and then I used that to calibrate the dimensions for the final design, which is first a PLA 3D printed mold and then using sillicone to create the final mold before casting epoxy.
|
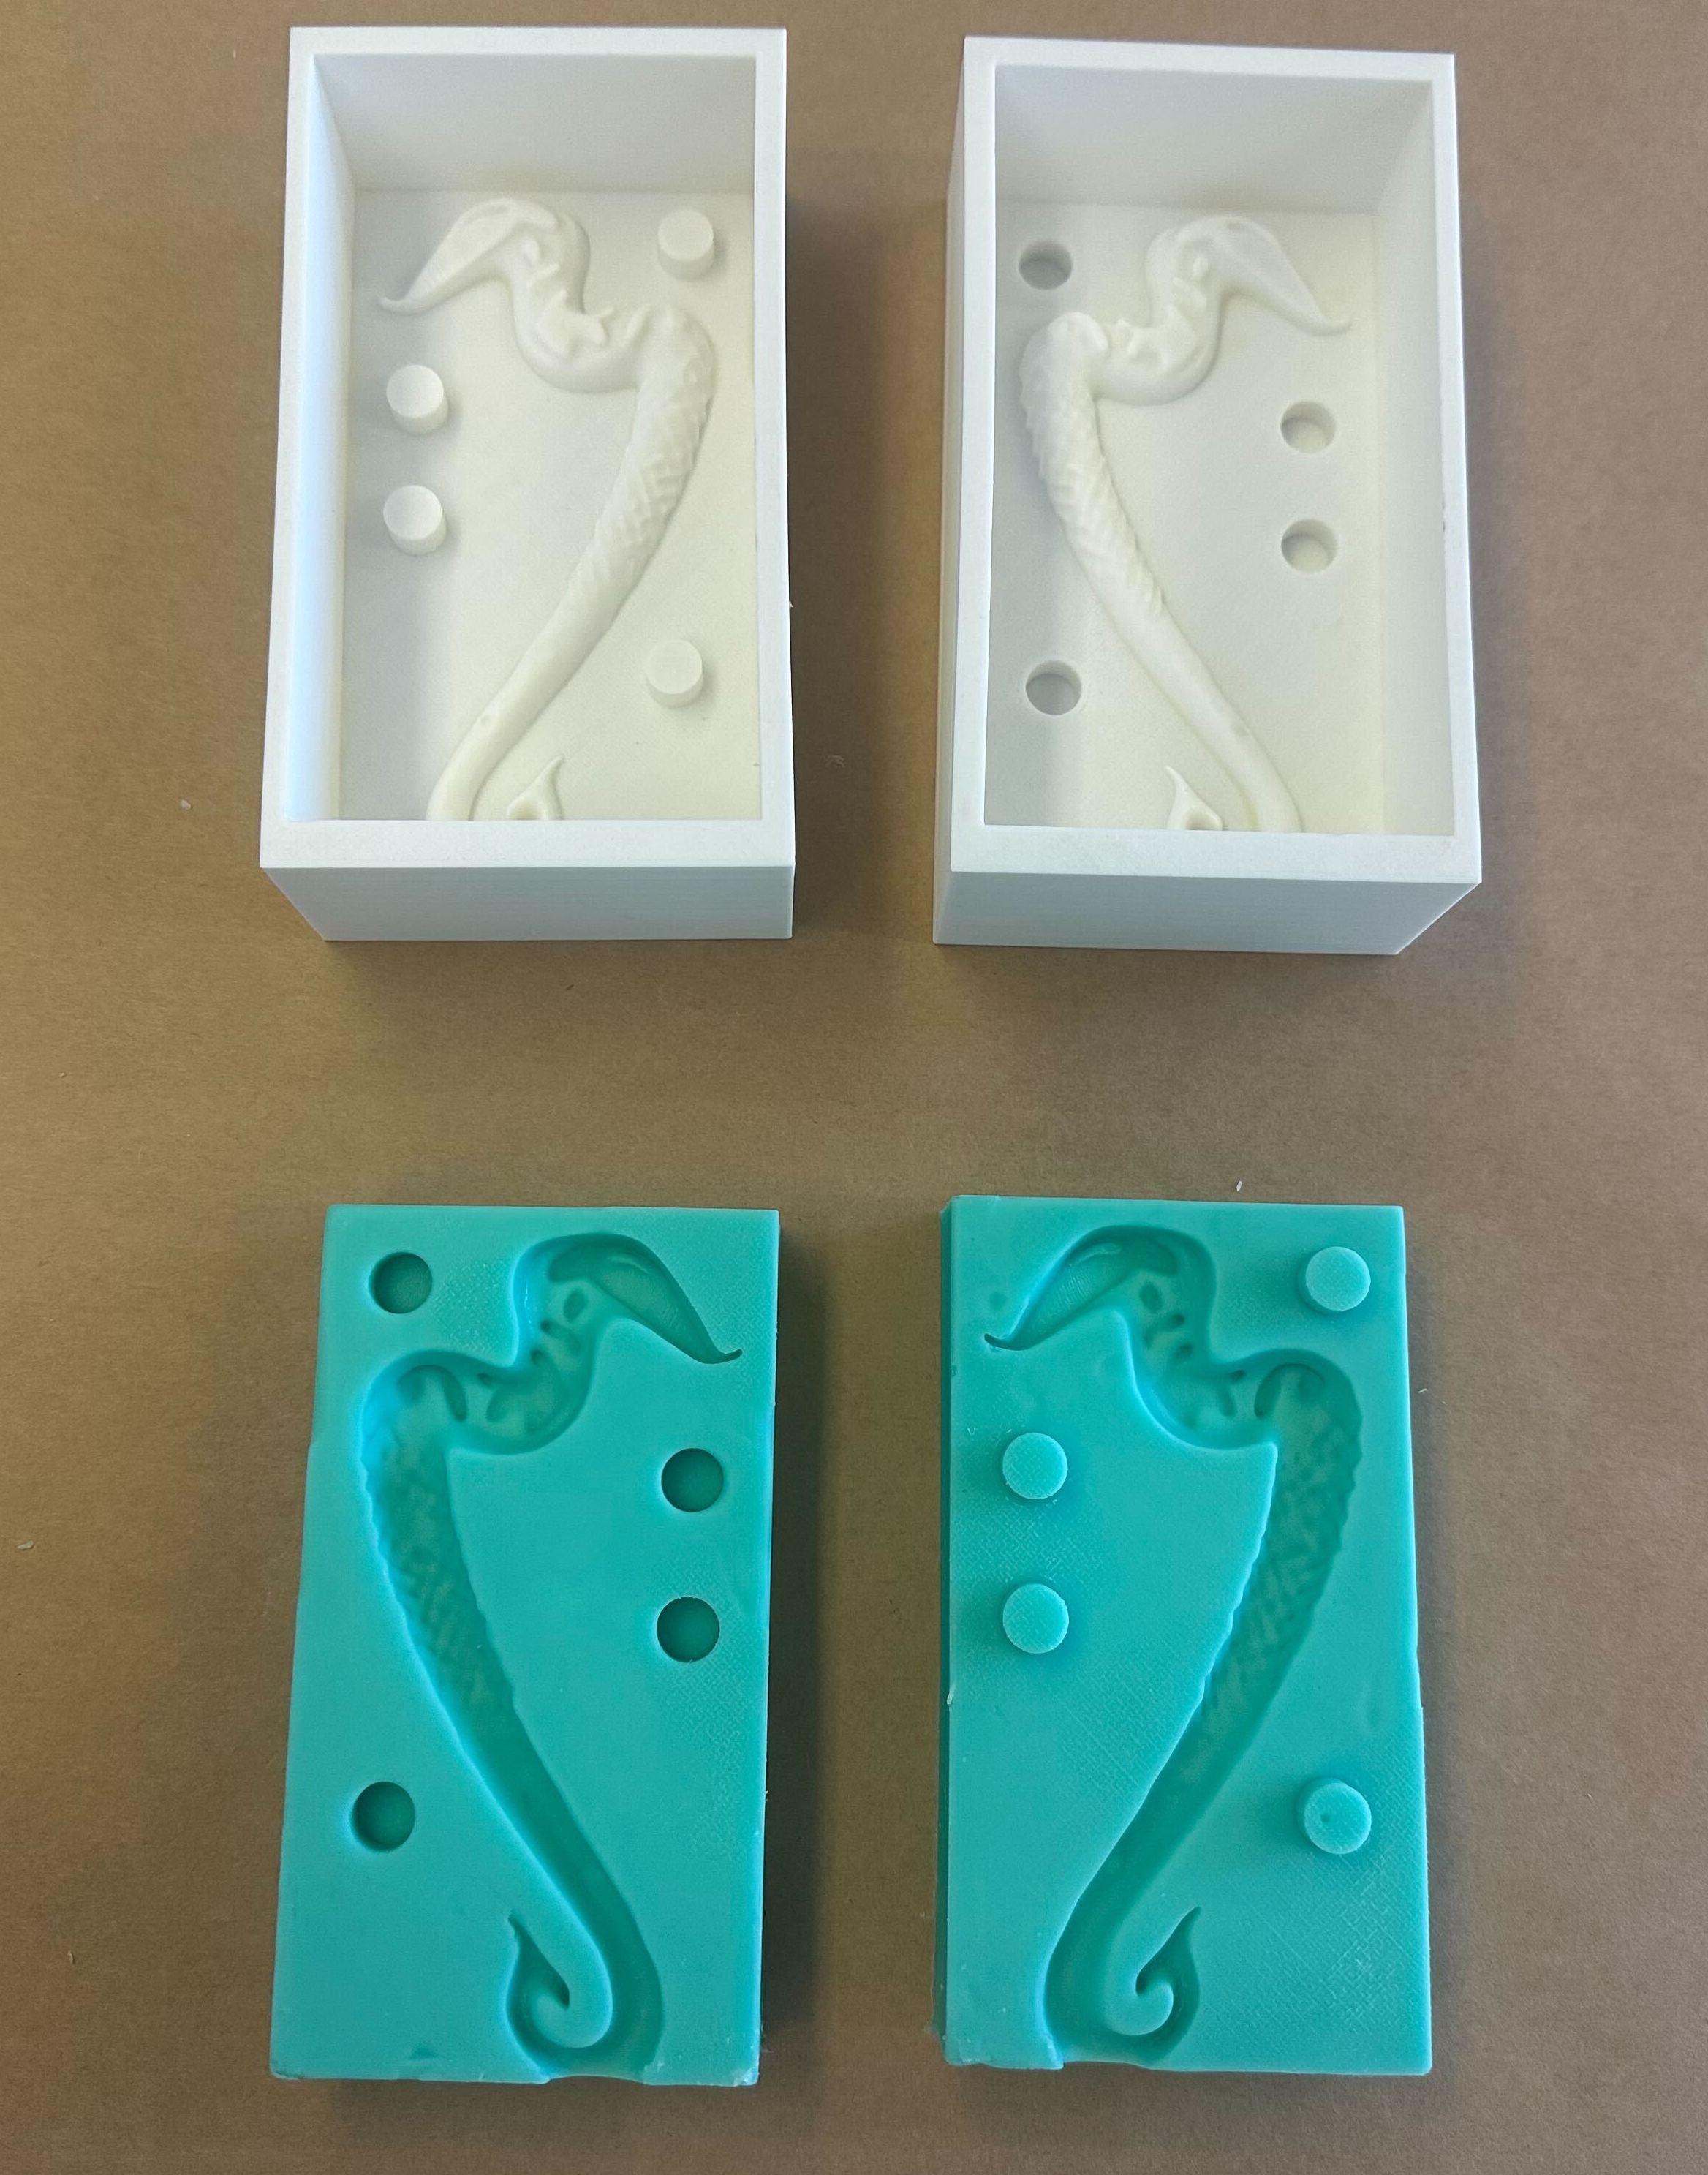
|
|
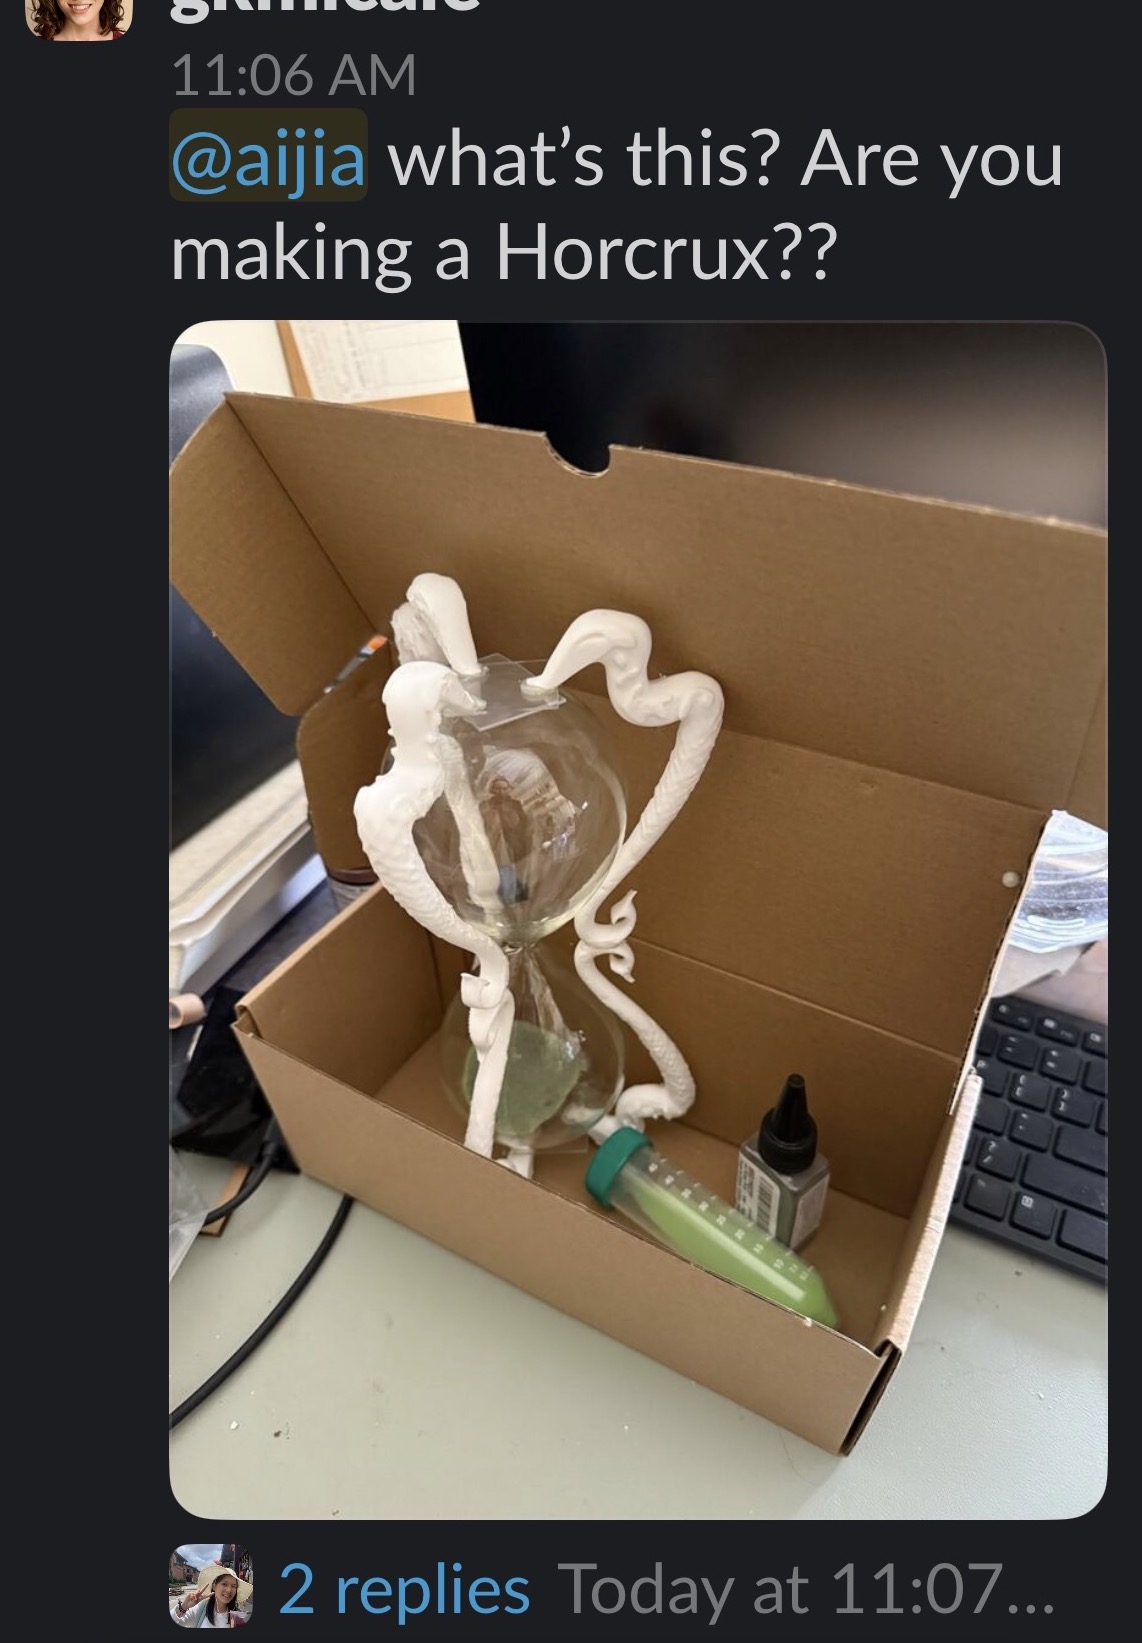
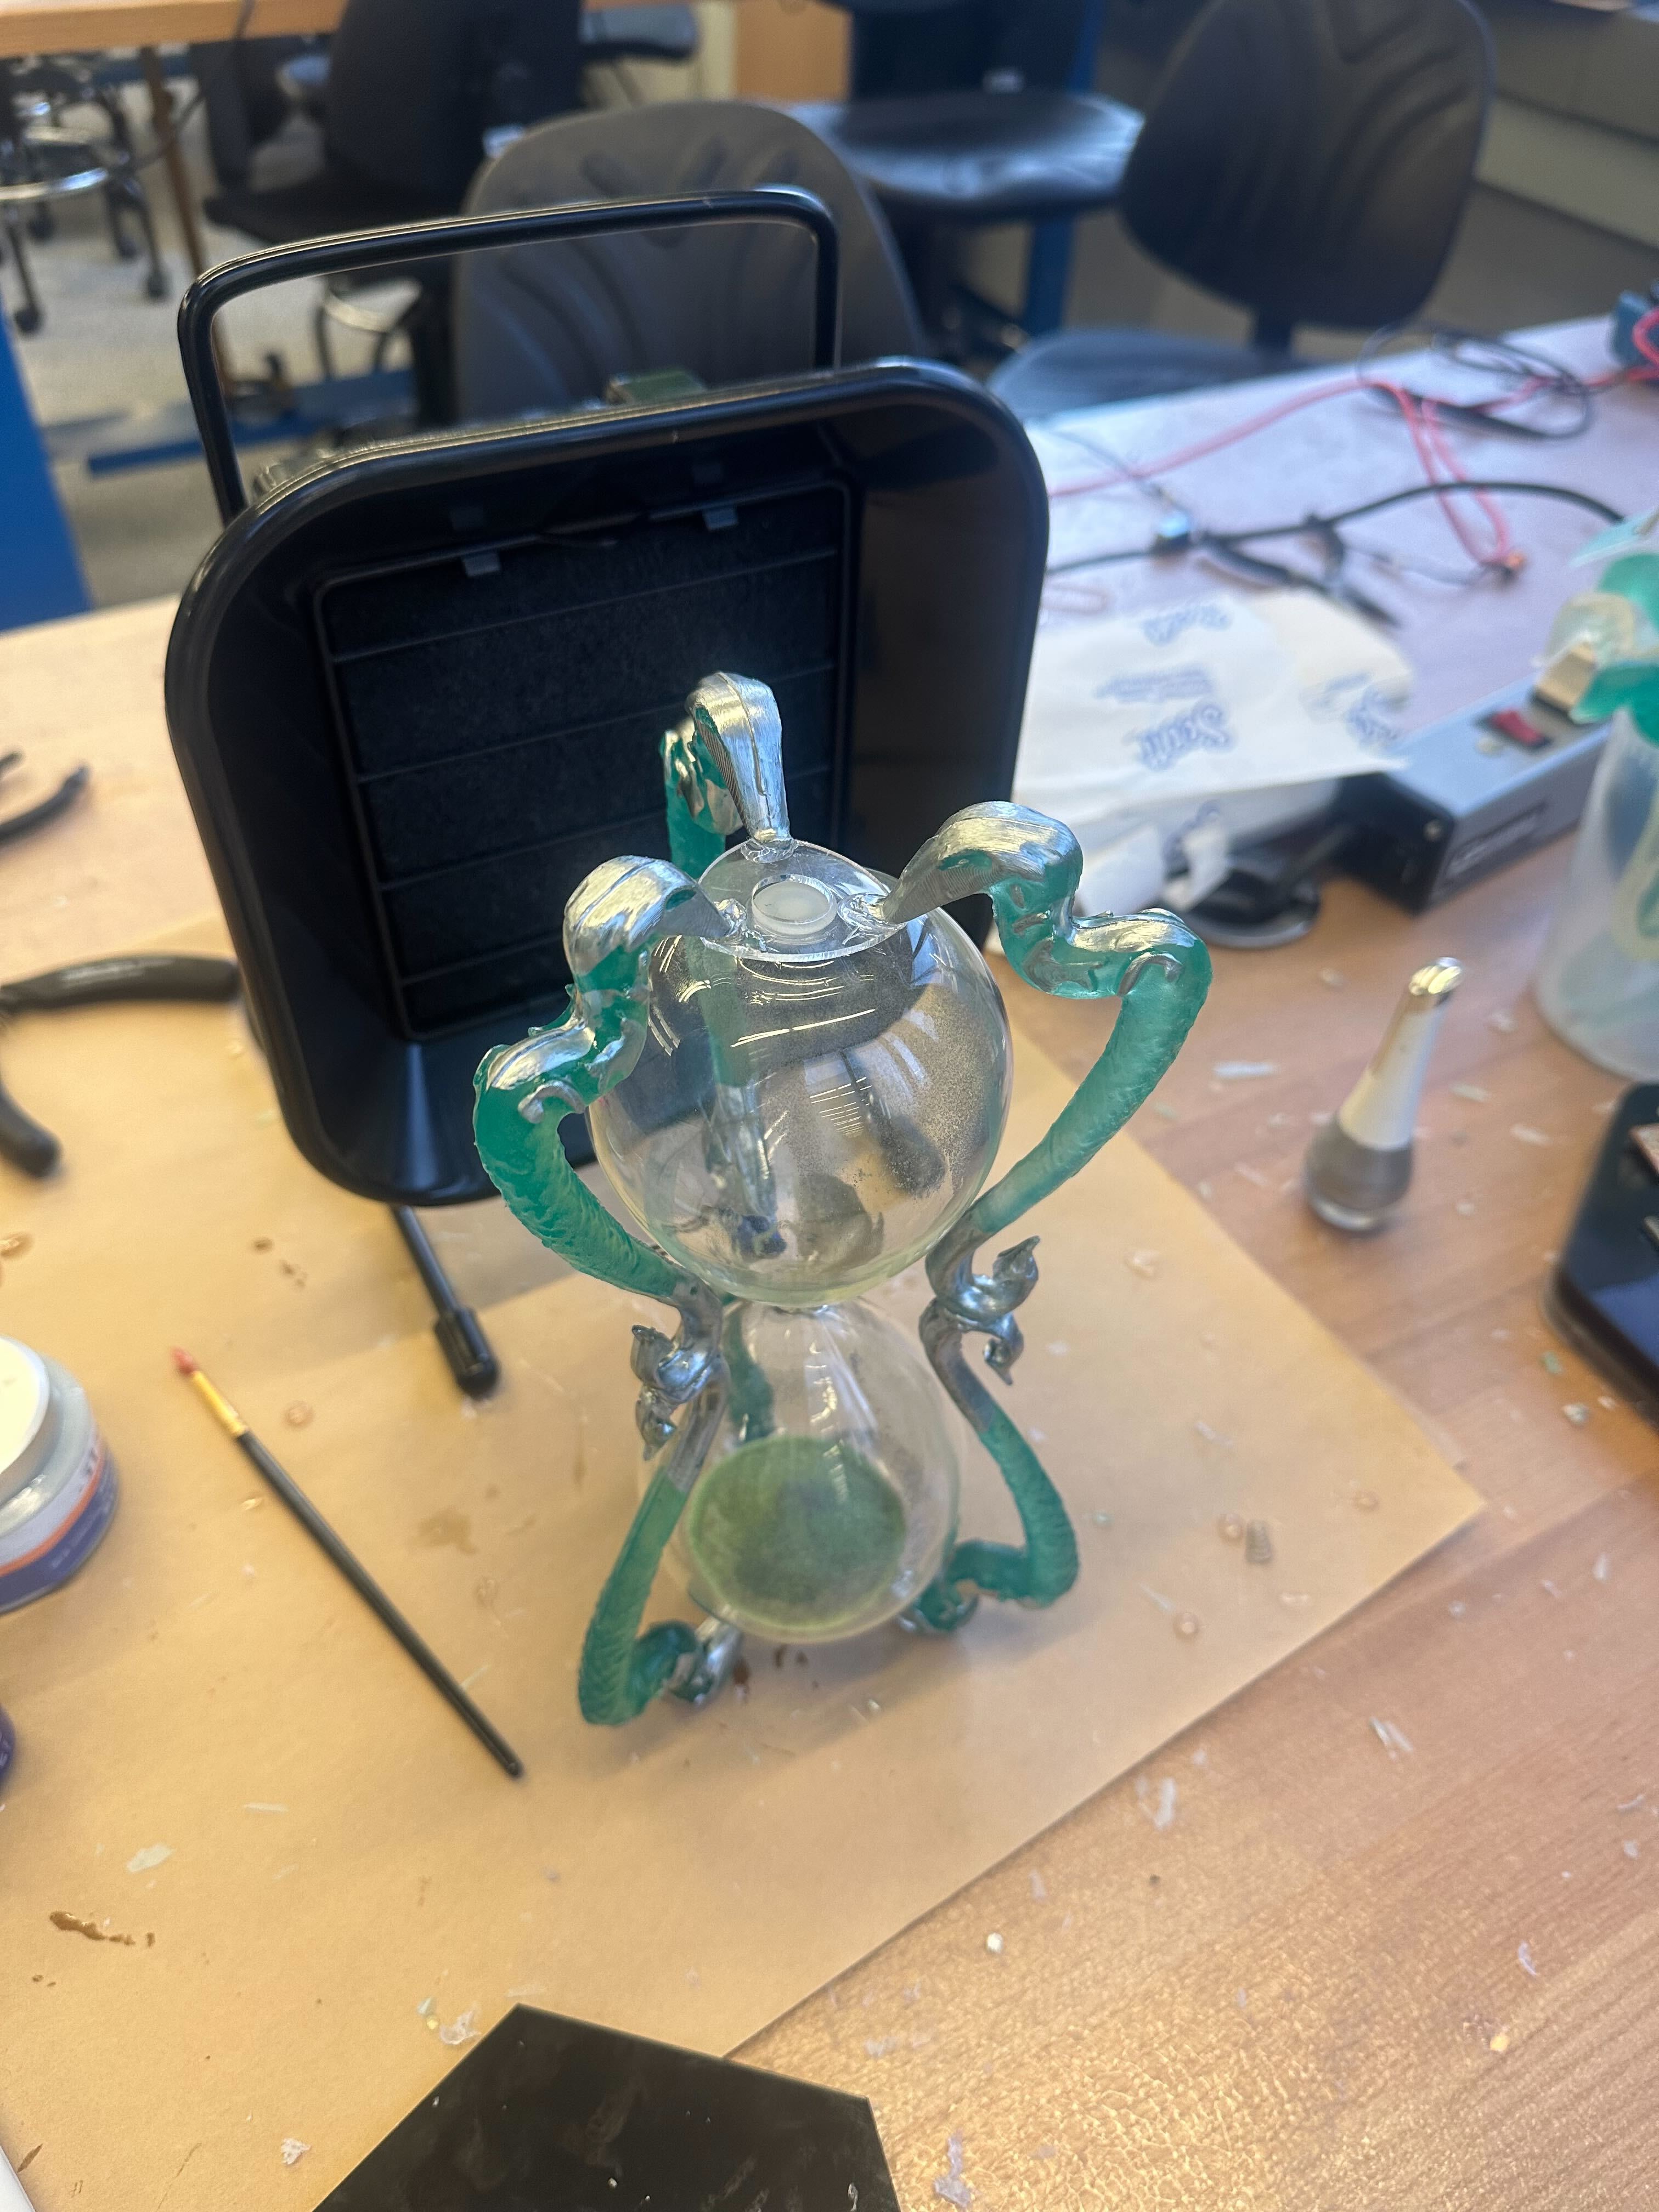
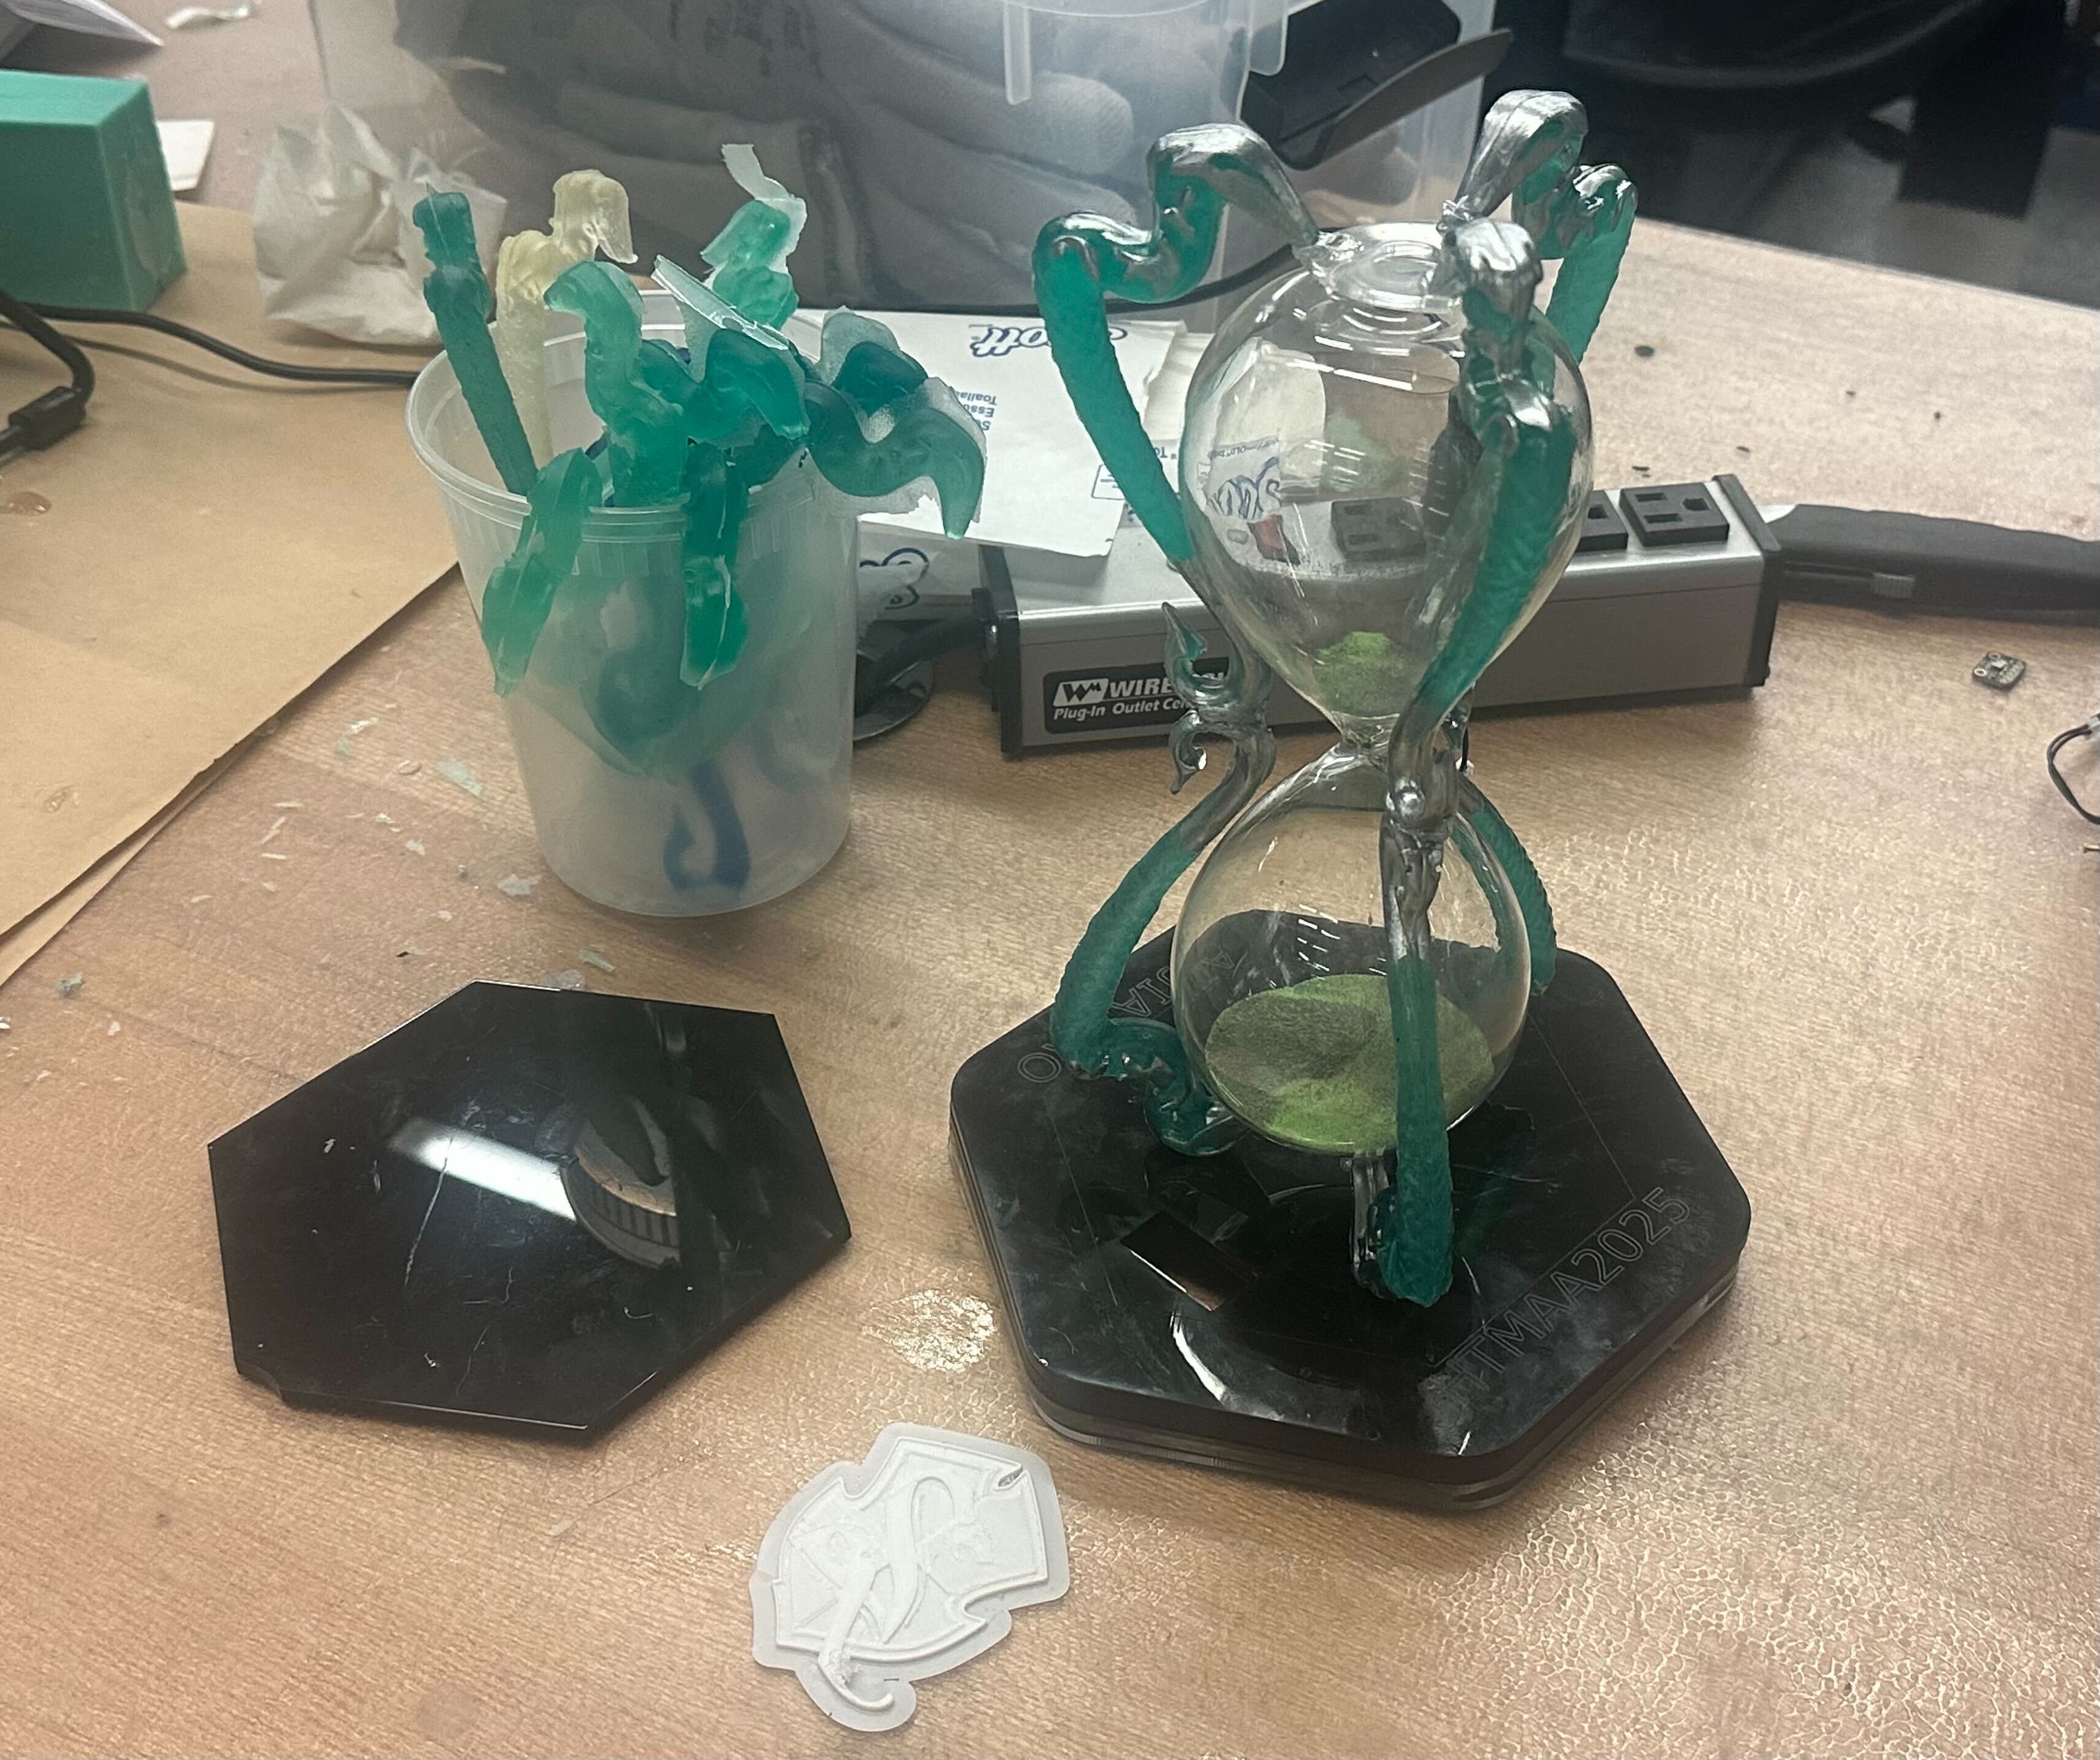
And when I left the prototype in the office, one most unexpected message was sent from my office mate. But indeed, Prof.Slughorn is actually an expert for horcrux, so this prototype was a success:) And for the casting of epoxy, a vacuum chamber was used to remove air bubbles.
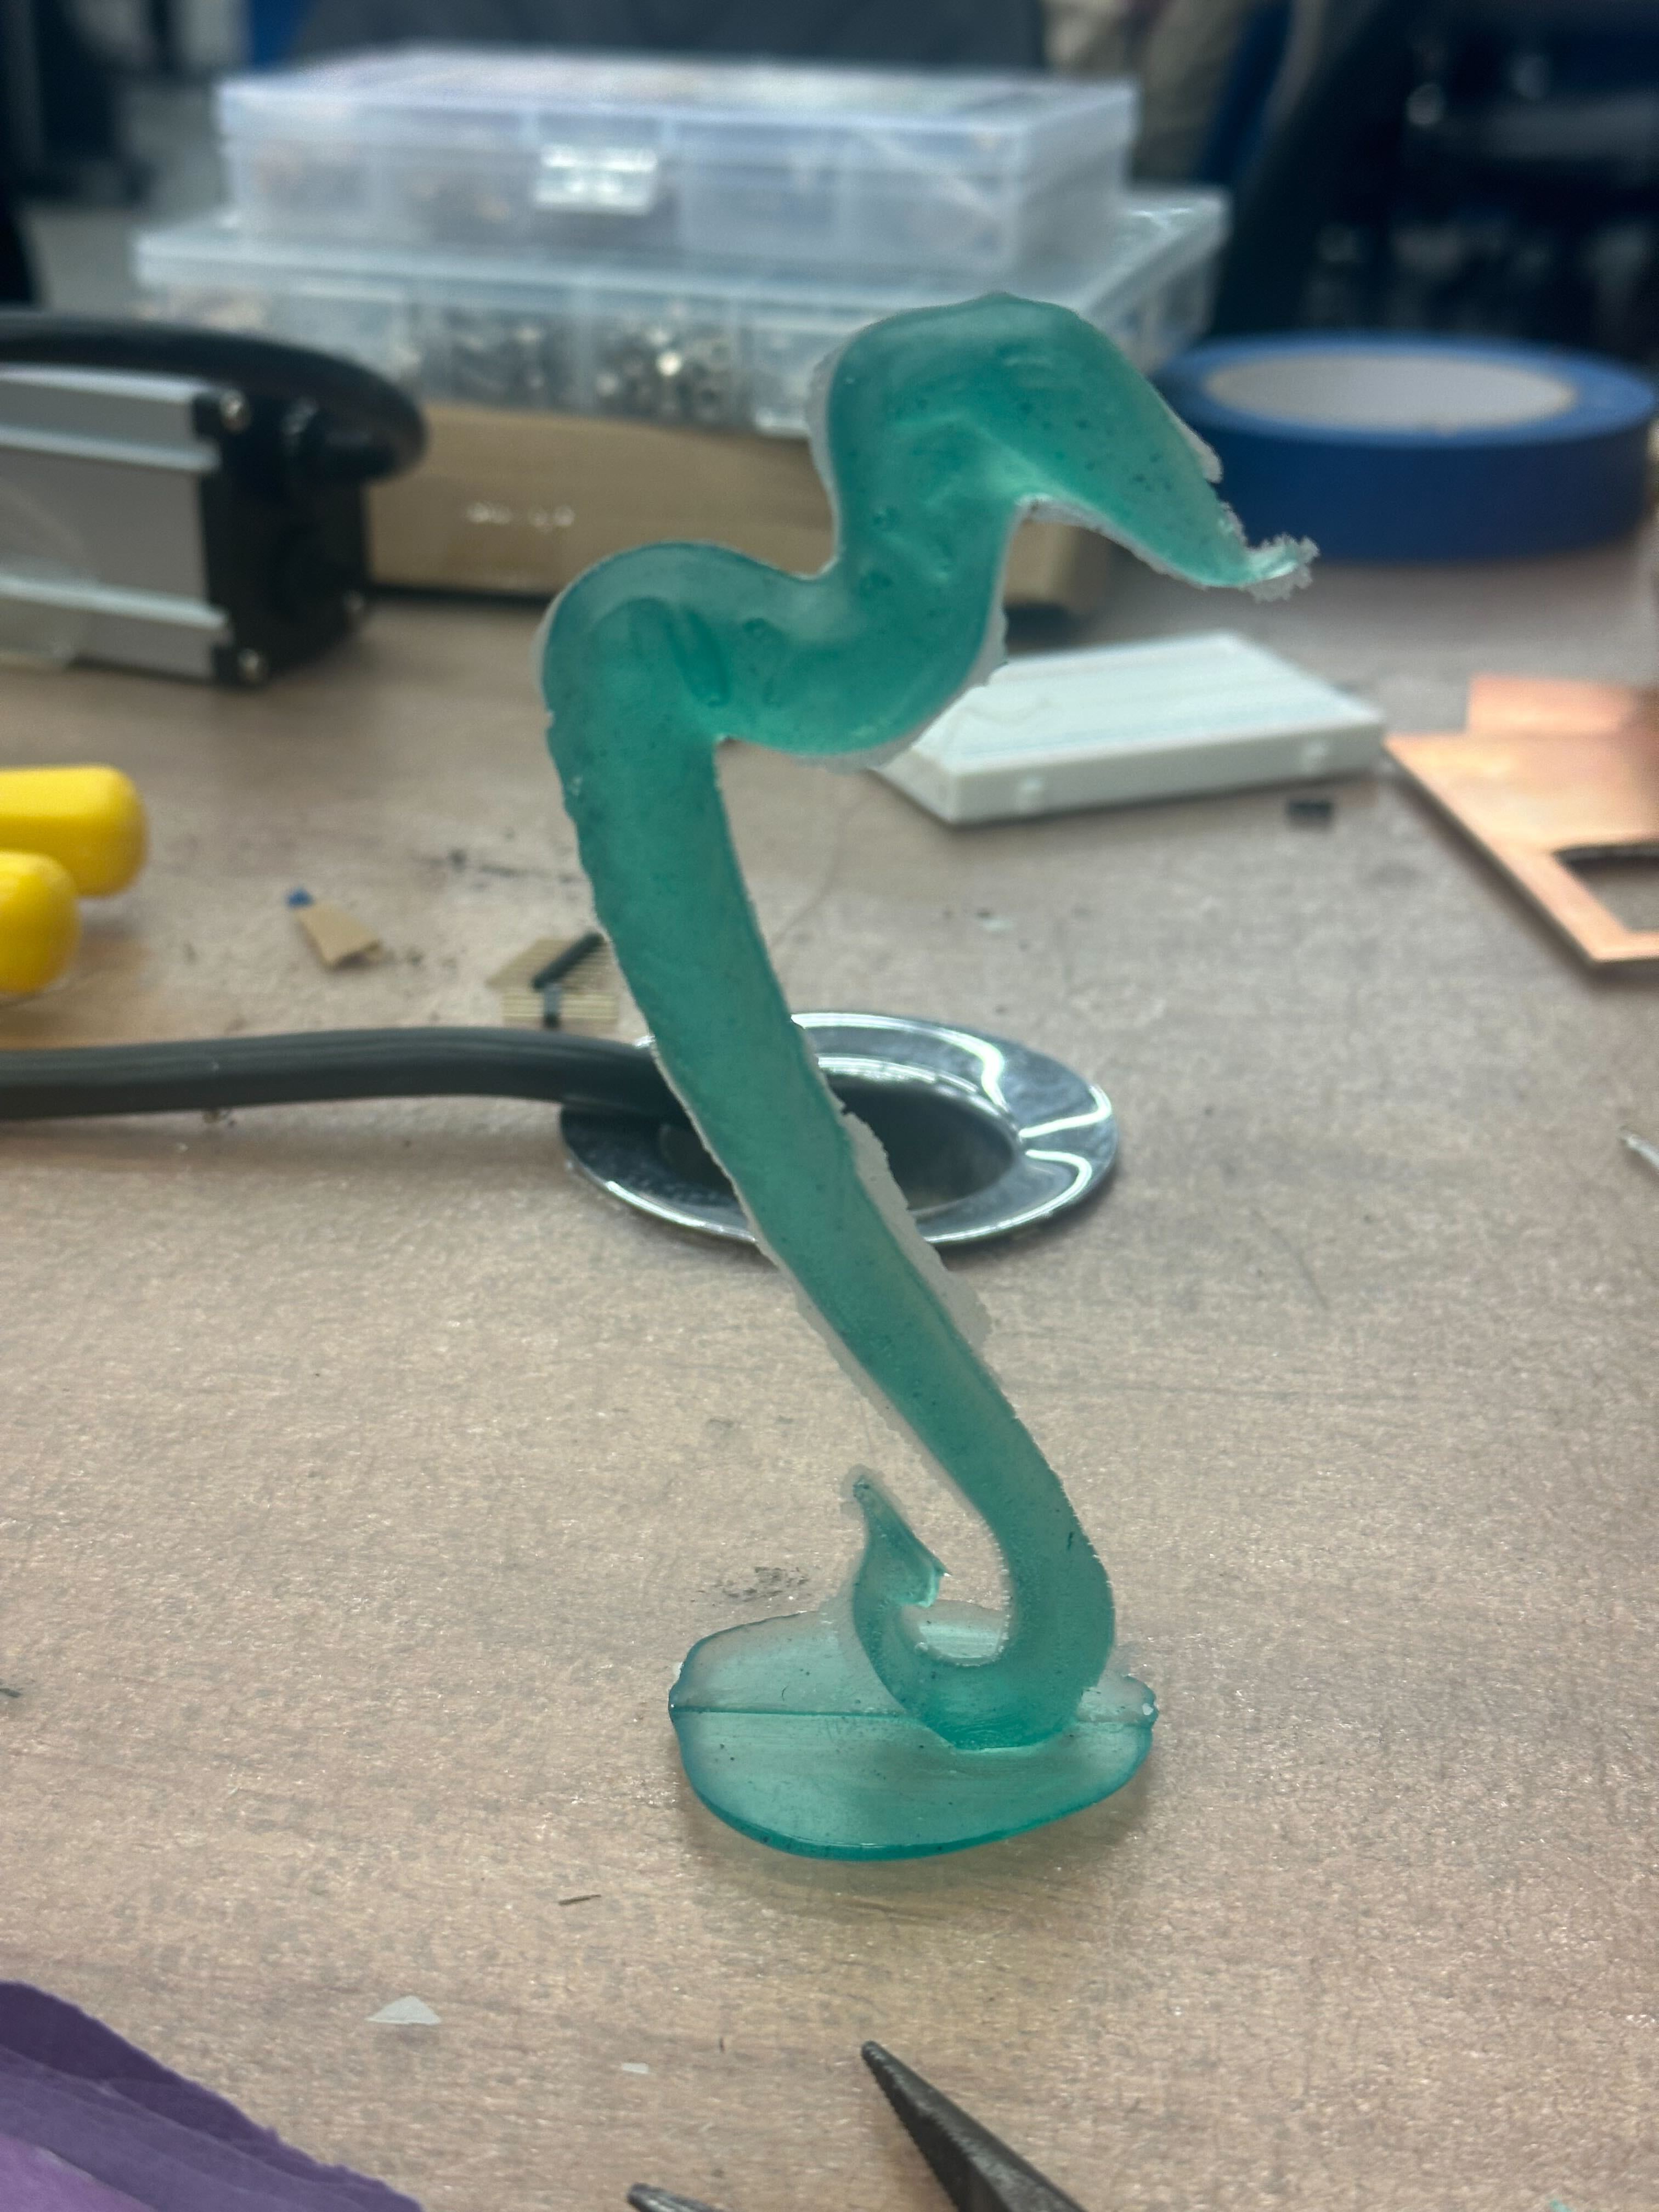
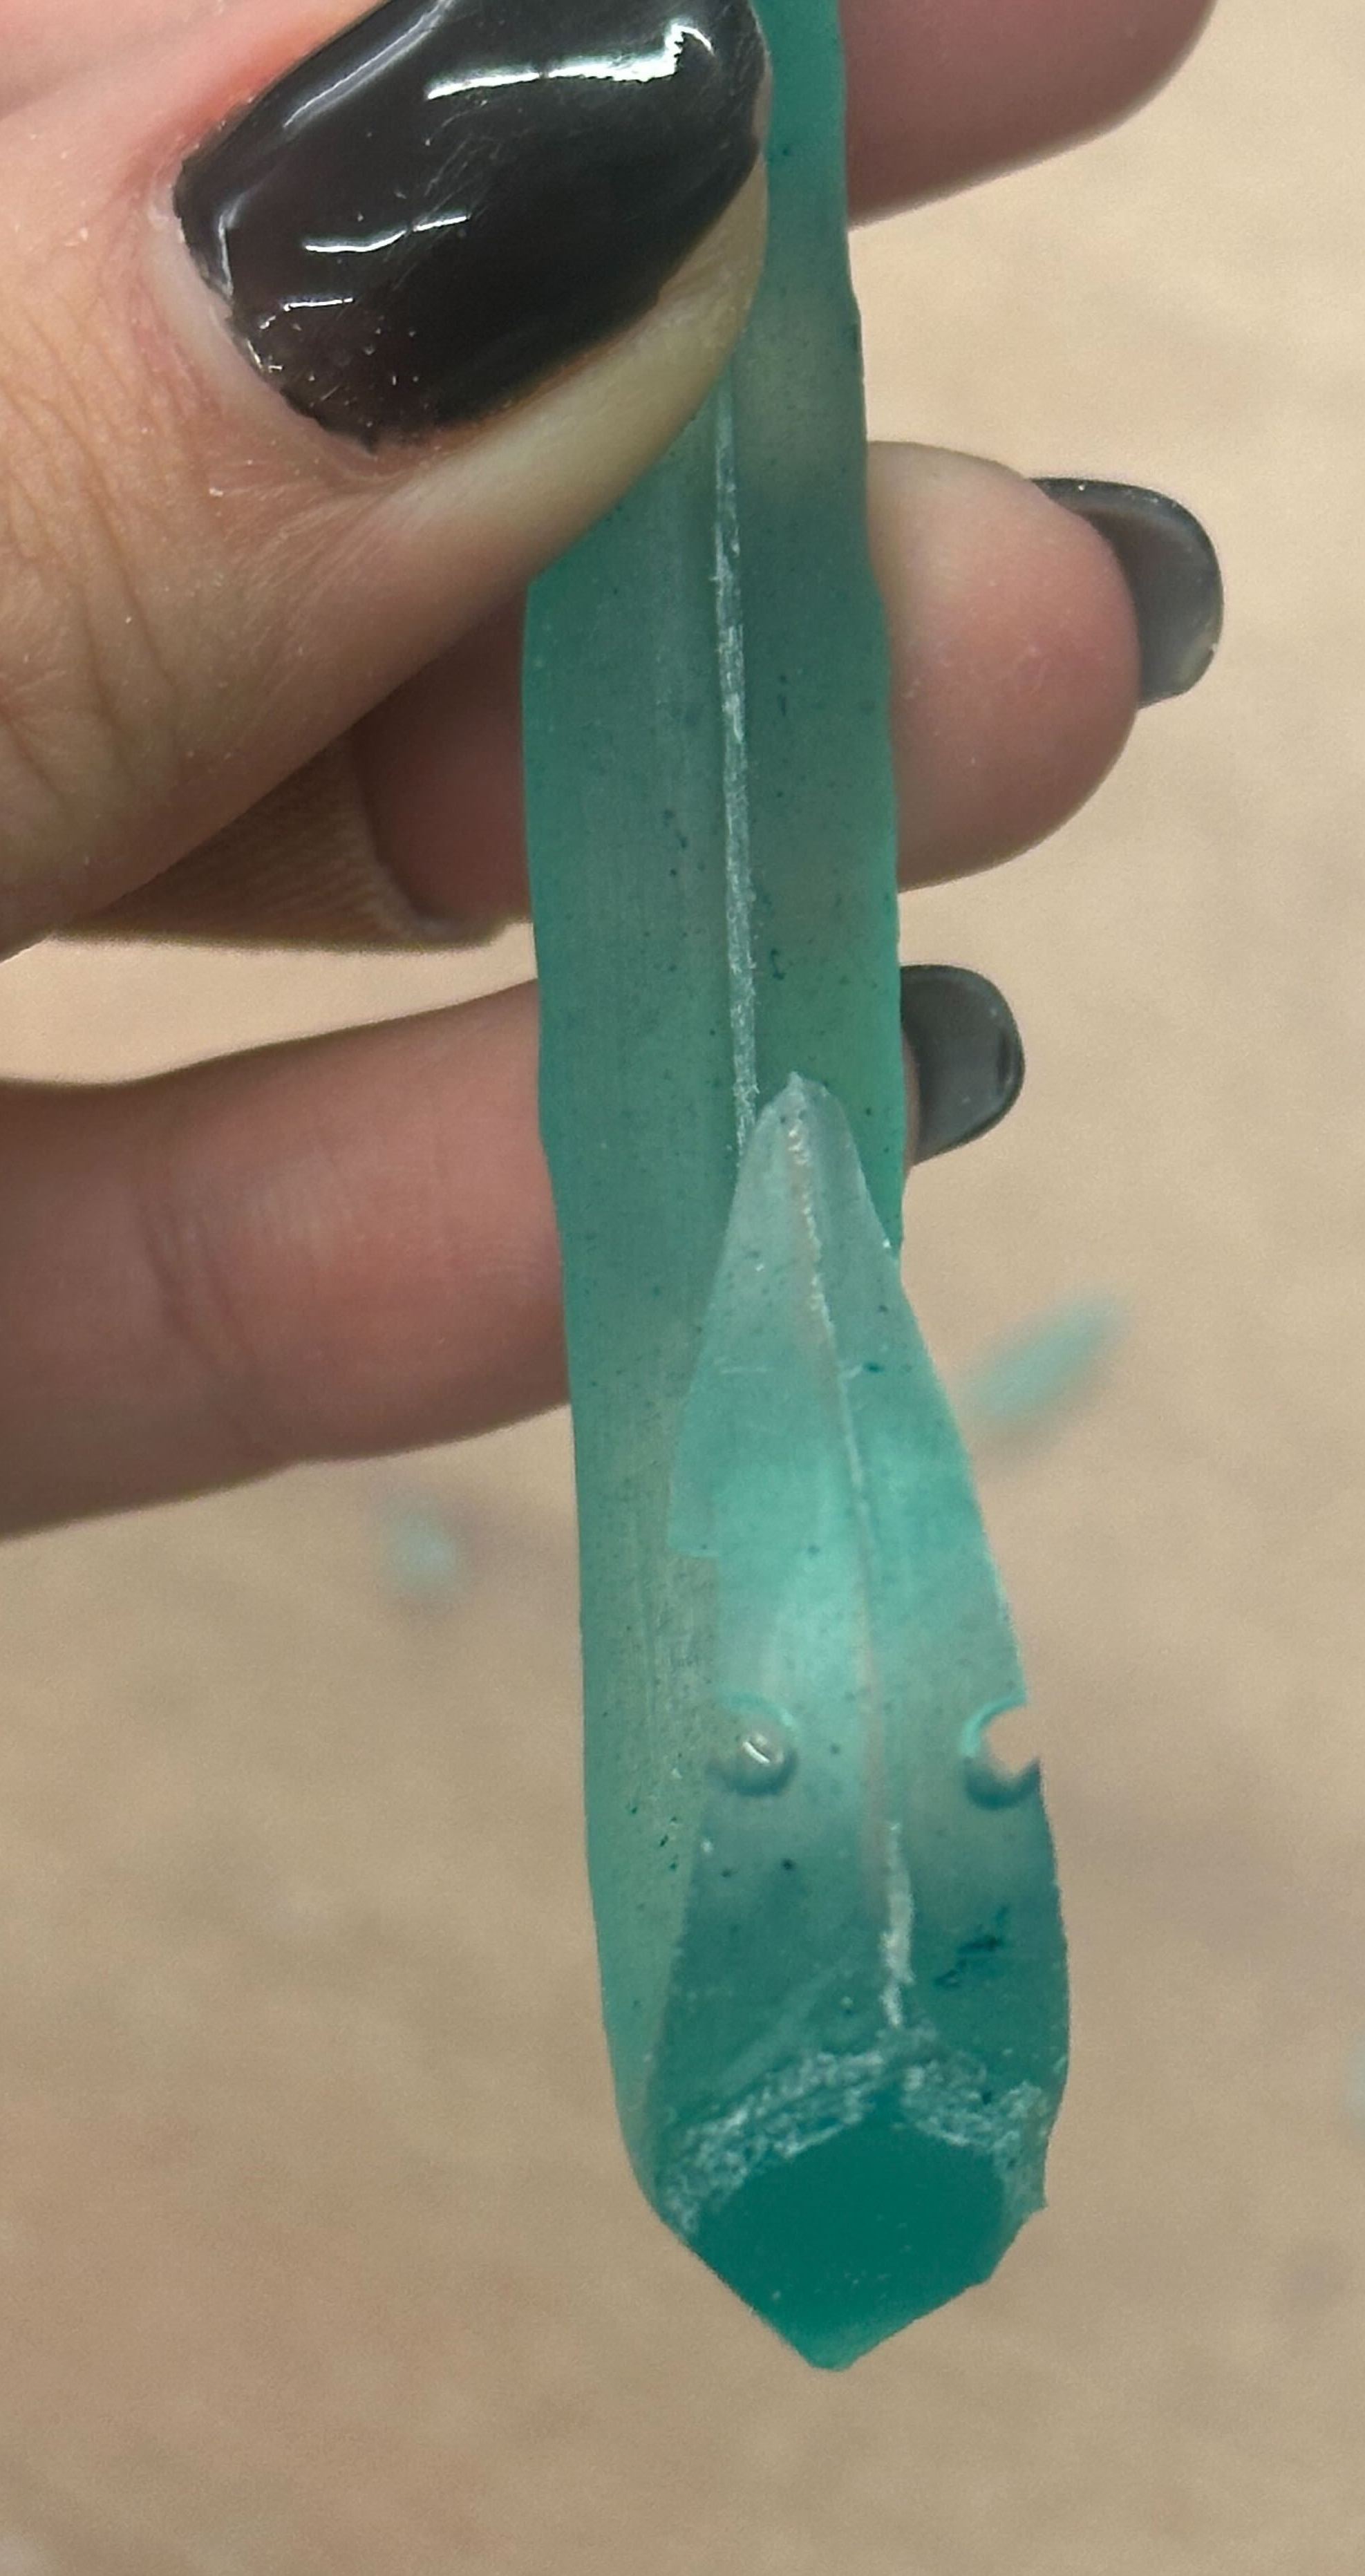
After some tuning of the pigment(thanks Hayley for giving me a clean green pigment💚), I painted the snake after demolding and sanding with nail polish. Then the final exterior of the hourglass was completed and ready for display.
|
|

|
|
The electromagnet for the hourglass was actually a solenoid and the control operation is fairly easy: using MOSFET to switch the current and the magnetic field triggered will hold the sand and stop the flow.
To have a decent look for the entire system, I just designed and laser cut acrylic to act as the base and cover the PCB.
|
|
Finally, everything was integrated and tested, just check out the video below from the day-of final demo, recorded by classmate Tushar. The hourglass can be controlled in two different modes: in manual mode and in automatic mode(keyword-spotting). The interface to control and demonstrate the keyword spotting is an html webpage, which was documented in Week 13.
|
⚠️TMI WARNING⚠️
First, see below the Q&A's for some general information about this project.
Base: black acrylic board.
Snakes: dyed proxy material shaped by molding and casting, painted with fast-dry nail polish.
The rest were made using resources from EDS inventory.
Though I learned a lot from the tutorial of keyword spotting, the key lesson learned was that voice signals are difficult to manipulate, as they are sensitive to both temporal and spatial variations.It could even be affected by some stereotypical components:
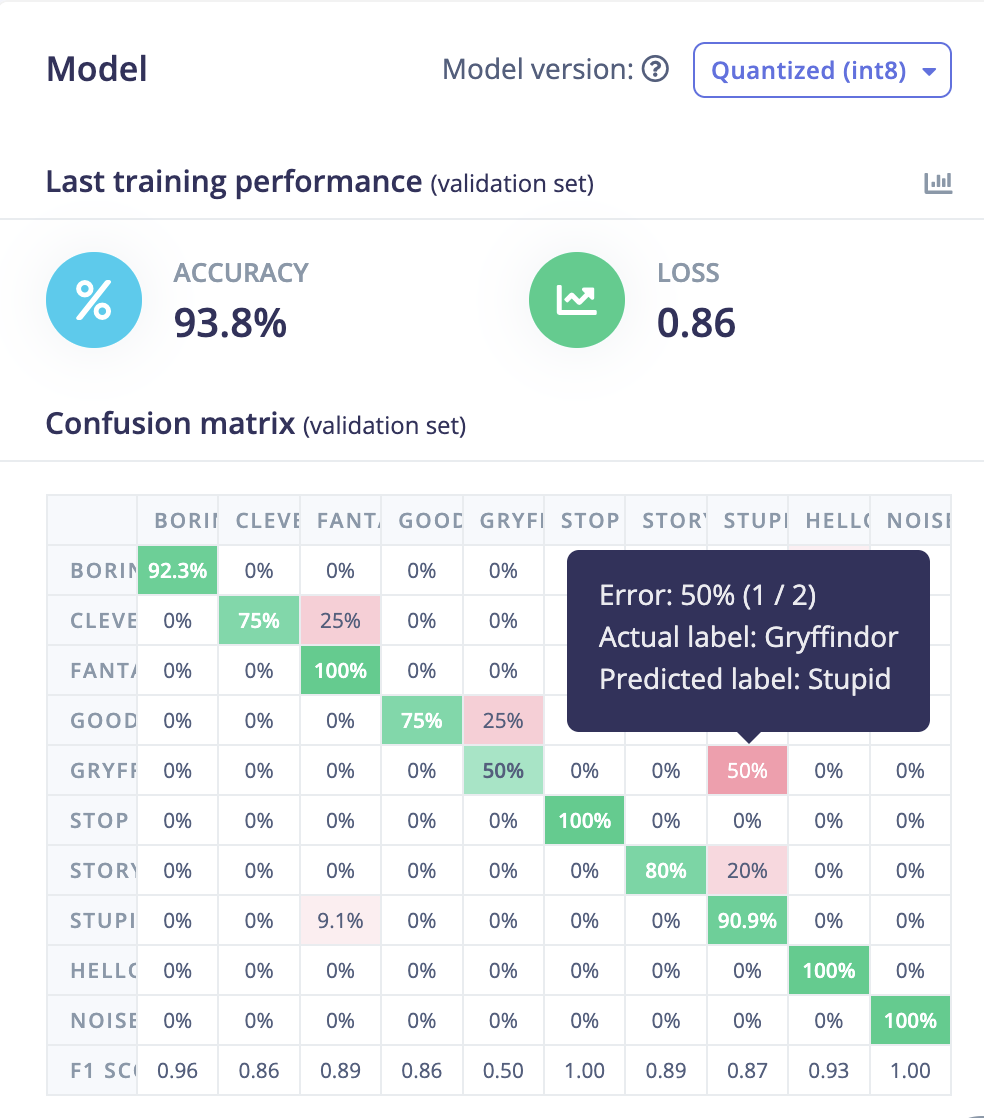
Someohow, a lot of the model I trained just kept confusing "Gryffindor" with "Stupid", and one of the cases the error is shockingly 50%.
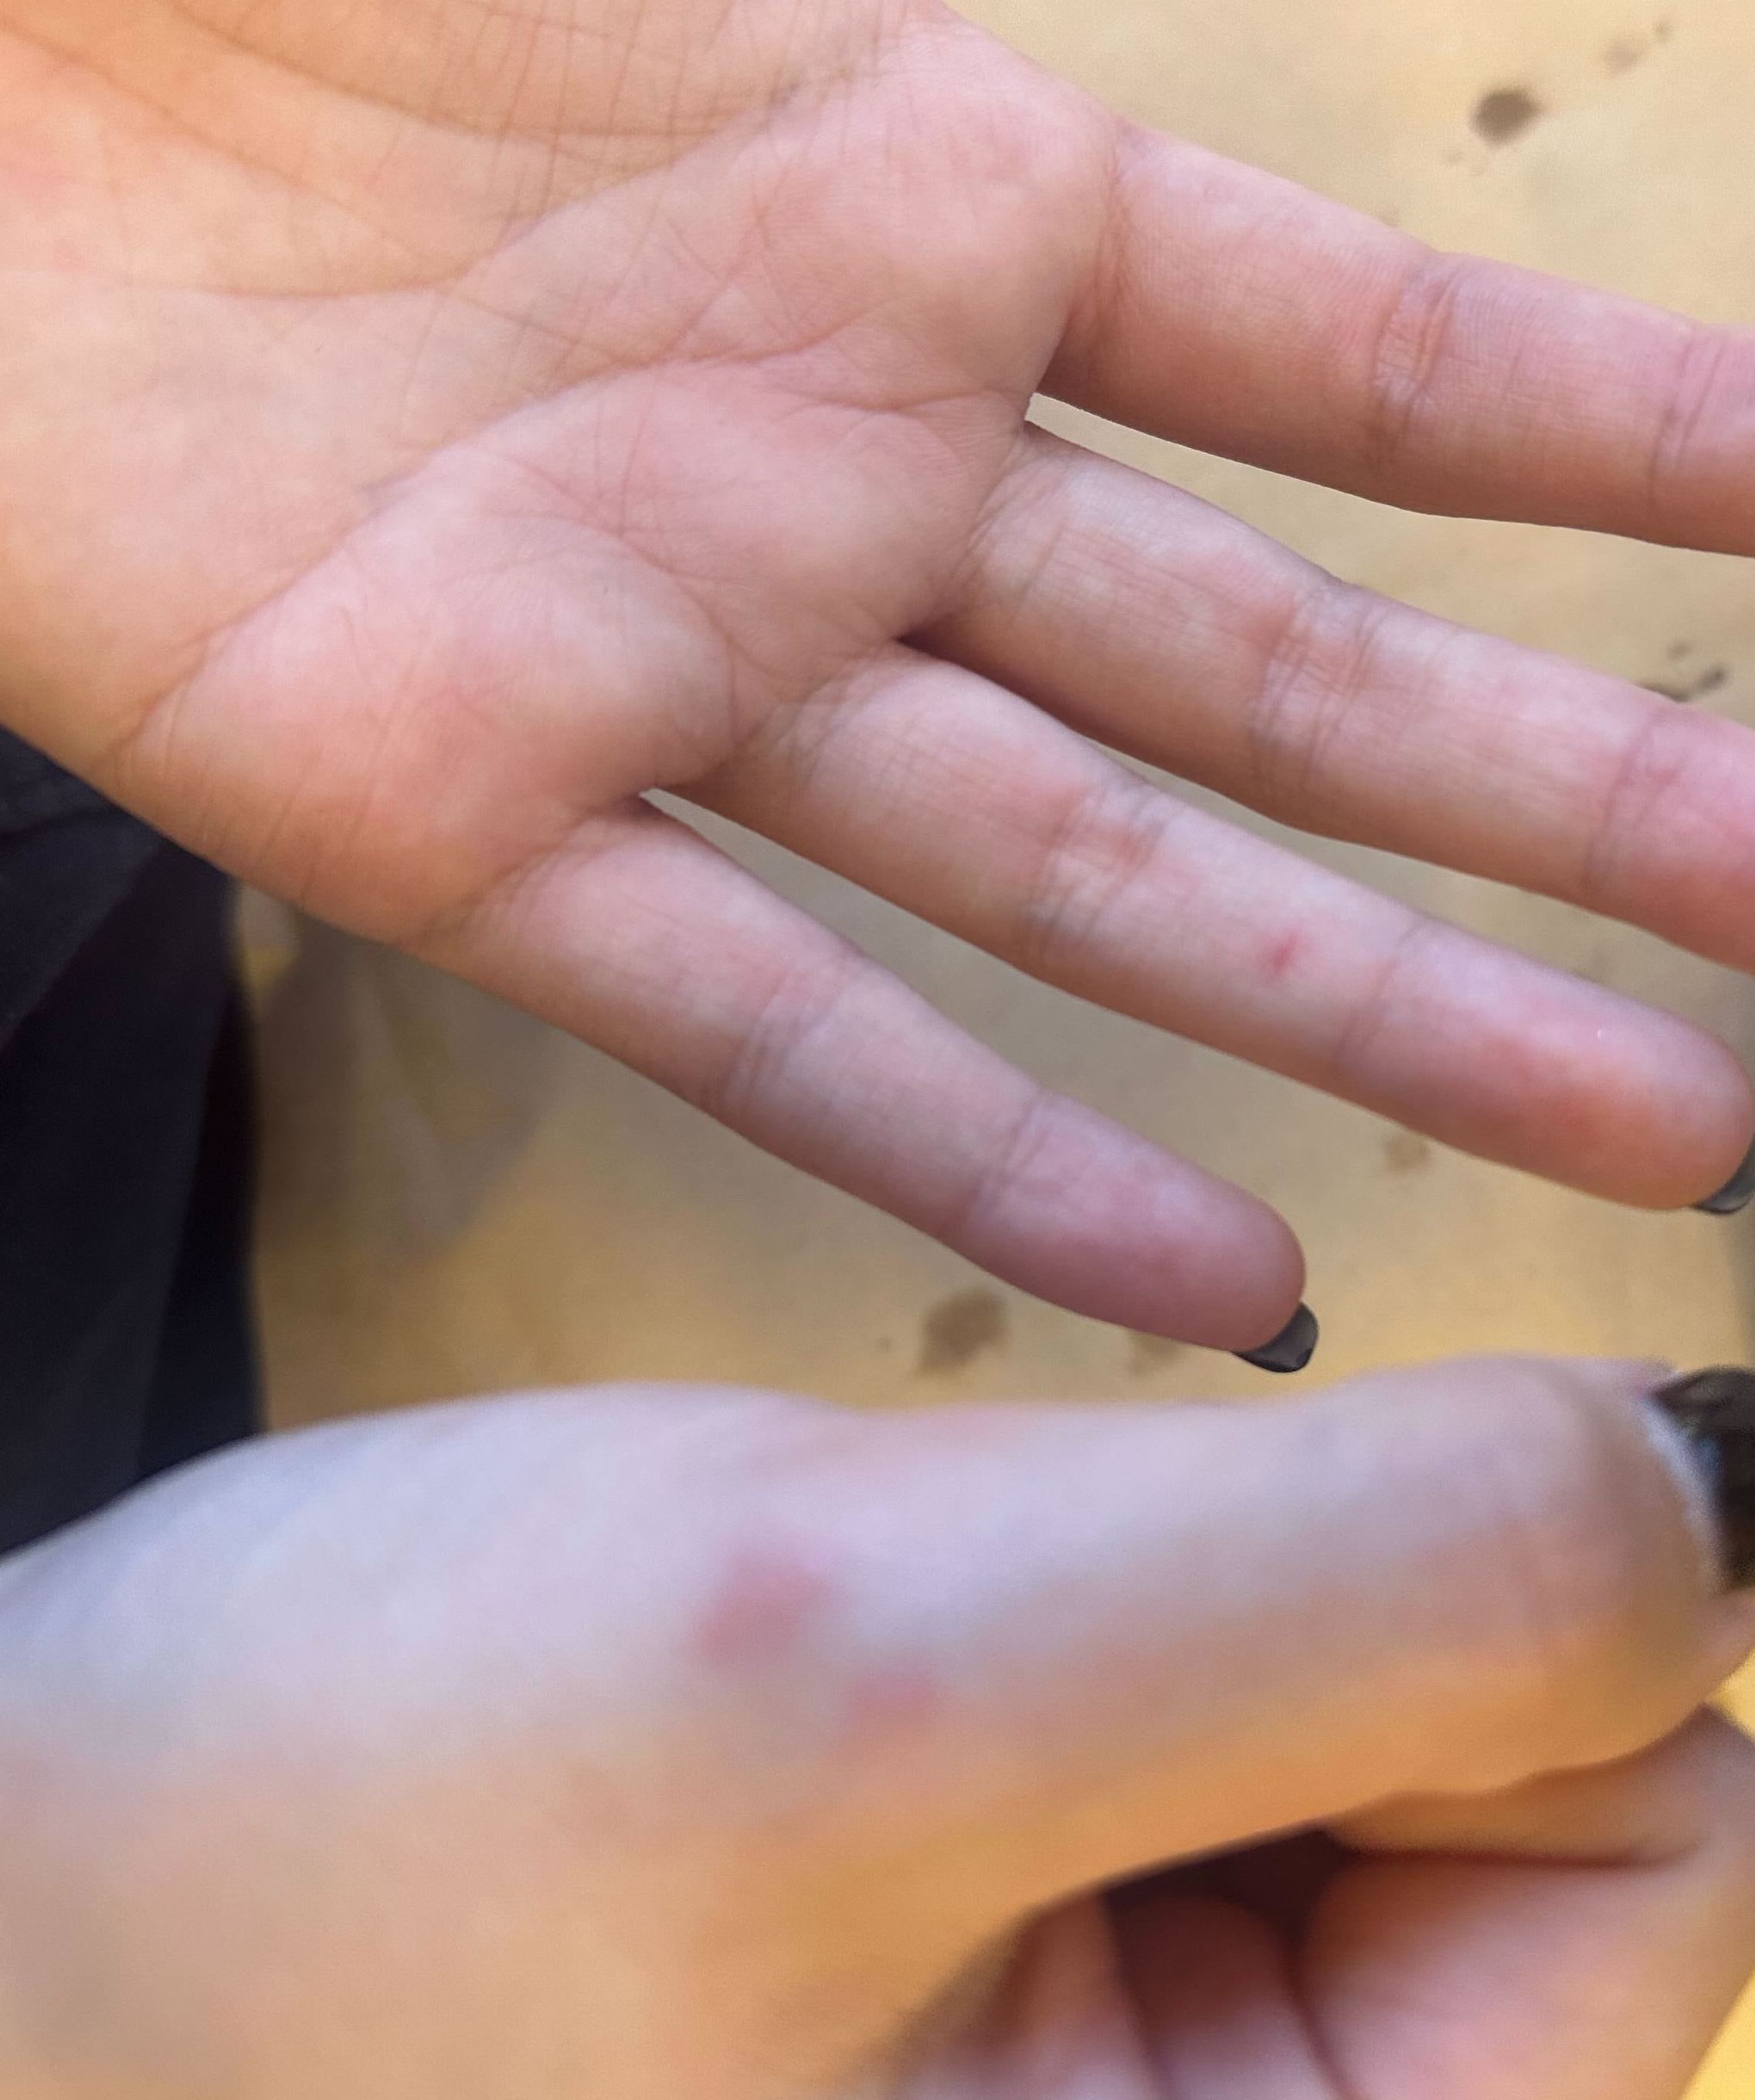
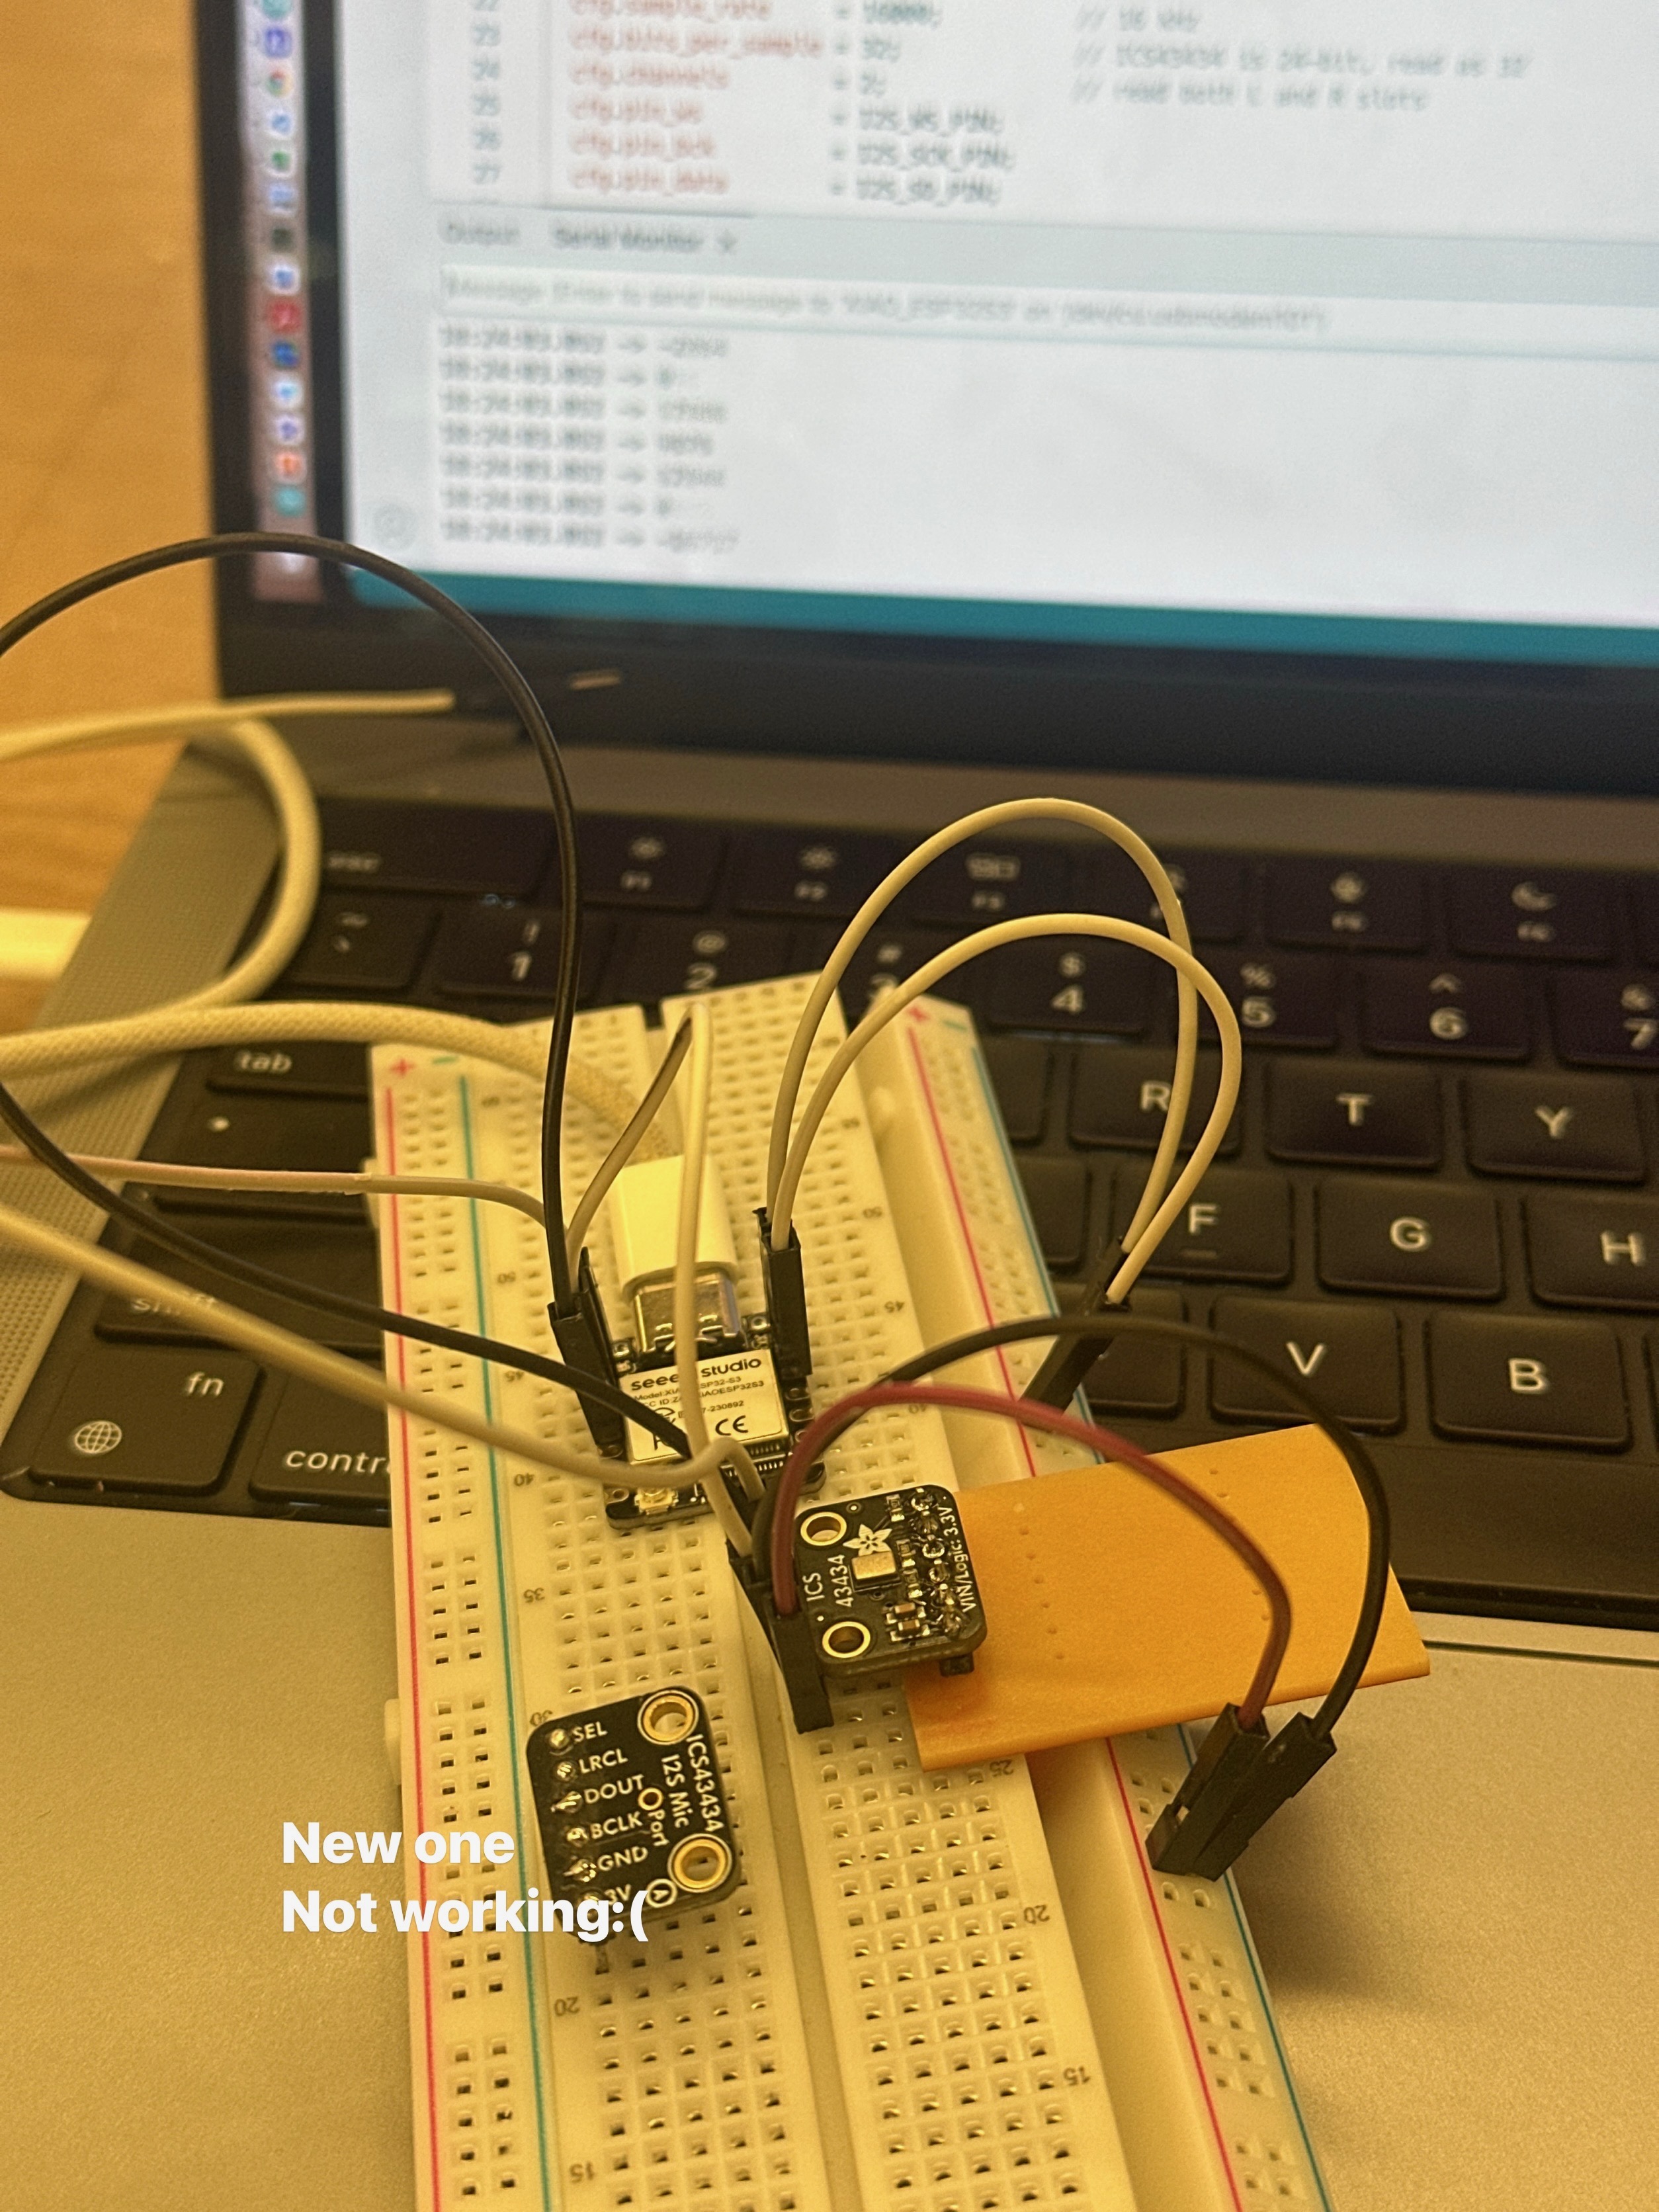
And there are always something unexpected in the process. Fortunately, I didn't get burnt by the soldering iron (๑•̀ㅂ•́)و✧ throughout the class (I definitely learnt from the burnt scar when grabbing the hot soldering iron when i was in elementary school) Still, I got burnt by hot glue(but fortunately I was just a step away from the sink in EDS and was able to rinse it with cold water immediately), cut by epoxy and mentally damaged by the broken ics-43434 which cost me hours to debugging my sketch till I found out it was the component itself that was broken. Still, none of these were complaints, I deeply admire the engineering spirit that keeps pushing forward despite the pain, the pressure and sleep deprivation.
|
|
|
Finally, I want to thank everyone who supported me throughout this journey. In September, I started a slack channel for the class to stack my own random pieces and logs, see below how it progressed till the very end of the class: