Please see this link for my group's assignment.
Before I dive into this week’s assignment, I wanted to figure out a better workflow for my web development process. Last week, while I was just trying to get started,I was doing my word processing in Google Docs, exporting to HTML, and then using ChatGPT to reformat the HTML file into something more digestible and visually appealing.
I didn’t like how circuitous this process felt, and knew there had to be a better way! During class, Huanyu presented his website and workflow, which seemed much more straightforward. See his website for exact details (Link). Essentially, to create his web pages, he developed Markdown documents in Typora and then converted them to HTML using Pandoc.
I took a look at both, and decided I wanted to try and find a free alternative to Typora. It seems great because you can just format a document in a simple editor without having to use markdown syntax. If I get tired of using the markdown formatting, I may go back to it. In the meantime, I am writing my markdown and using the live preview function in VSCode. I am also using this markdown formatting document for reference (Link). After making an initial draft of my HW3 site in this markdown format, I will try converting it using Pandoc (read on).
I downloaded the Pandoc installer for windows from this repo (Link). Note: (1) be sure to download the msi and not the zip! (2) Do not run the pandoc executable. This program is designed to be run from your windows shell (or git bash, which is what I’m doing).
Success! After a bit of playing around, I got this working. A couple of key points figured out from my conversations with chatGPT: (1) Pandoc needs a template file in order to make the html look like the rest of your website. It basically duplicated my index.html and then got rid of most of the content. (2) It’s important to ensure that you the href in your template pointing to css assets is correct so that it can access all the relevant info (3) Now that I have everything standardized (e.g. sub-folders for each page within the /pages directory containing a .md version of the webpage) I should be able to write a bash script that updates all of them at the same time. This would be super useful! I’ll come back to this if I have time. Note that if I reformat my landing page to also be Markdown based (which I think I should) then I’ll need to reference a slightly different template (multiverse-pandoc-root.html). Whereas the template to use for my sub-pages is multiverse-pandoc-subpages.html. Both are in the root directory of the Repo.
Shout out to ChatGPT for helping me figure out this workflow. You can see our transcript here.
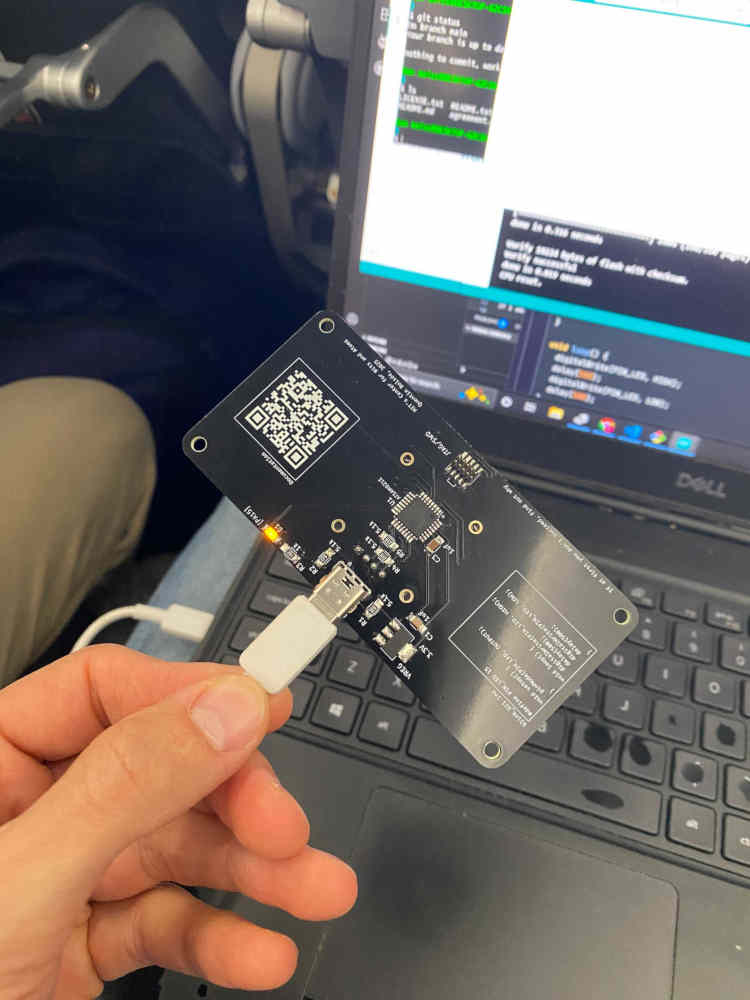
This week, students attended a session in order to fabricate a nifty device, designed by Quentin (one of the TA’s). The QPads, as they are called, are based around one of three microprocessors, include a screen and a few capacitative pads. Given that: (1) I would be out of town for these sessions (at my brother’s wedding!) and (2) I have experience with soldering and microcontroller programming, Quentin Bolsee excused me from this part of the assignment, and provided me with a pre-soldered board, with the bootloader already installed.
Following the instructions here (Link), I added the Fab SAM Core Library to my Arduino IDE installation and selected the “Generic X21E” board. I was then able to successfully run the blink.ino example file stored here(Link).
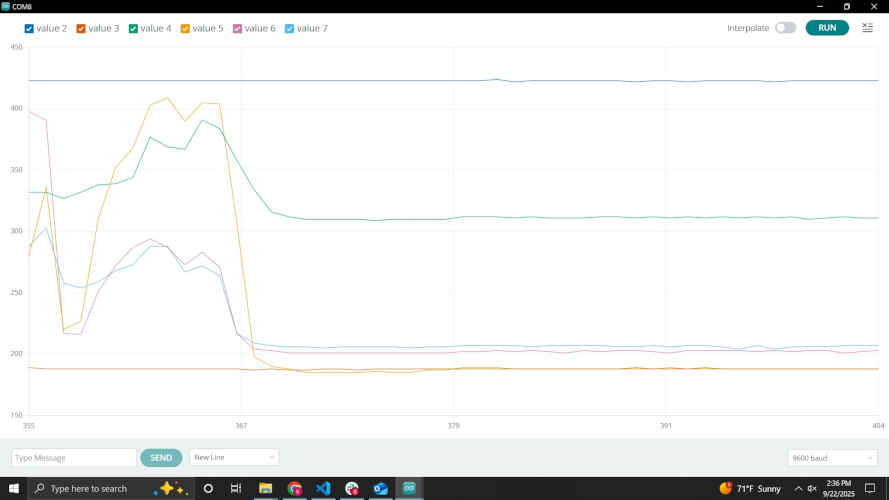
My first goal is to control the LED with one of the touch pads using test_touch_D21.ino as a starting point (Link). When I tried to compile this sketch I got an error saying “Compilation error: Adafruit_FreeTouch.h: No such file or directory” which means I am likely missing a library. Installing the Adafruit FreeTouch Library resolved this issue and allowed the code to compile. Using arduino’s plotter tool, I was able to visualize the button presses.
I was just looking through the code to figure out how to connect a touch event with a call to digitalWrite to turn on an LED when I saw that this is actually already in the example code! Touching and releasing Q0 turns on and off (respectively) the on-board LED.
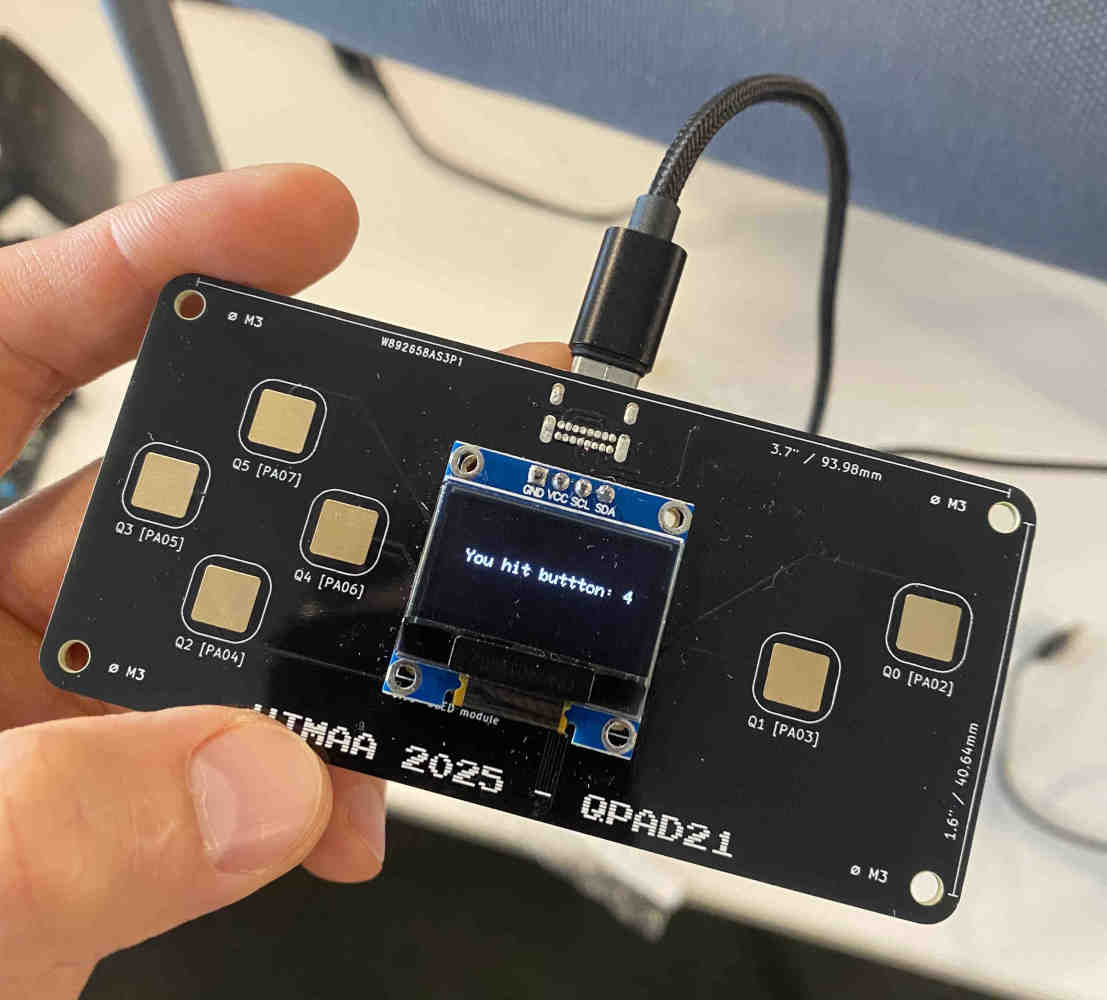
I decided to write a simple program which shows the index of the button pressed on the screen. Here are the steps I took to write my code:
You can find my code here.
NOTE: Check out my HW4 for a much cooler example of microcontroller fun! See below for the result!
Another piece of the assignment is to browse through the data sheet of a microcontroller. I am going to take a look at the SAMD21, since that’s what’s on my board. The data sheet can be found here (Link).
The main sections of the data sheet are as follows: Description Config Summary Ordering info Block Diagram Pinout Signal Descriptions I/O Multiplexing and Considerations Power supply and startup considerations Product mapping Memories Processor and Architecture Peripherals Configuration Summary Clock System Lots of info on Peripherals Electrical Characteristics. Some sections of interest below: