Assignment: Make Something Big
For week 7's assignment, we needed to make something big (~meter-scale) using computer-controlled machining. I decided to design and build a midcentury modern-inspired shelf using the ShopBot CNC router.
Inspiration: The $1000 Shelf
I recently found this really cute midcentury modern shelf on Wayfair that I absolutely loved. The problem? It was over $1,000! The design featured these beautiful curved sides that kind of look like candy canes, and I thought—why not just make it myself with the ShopBot?
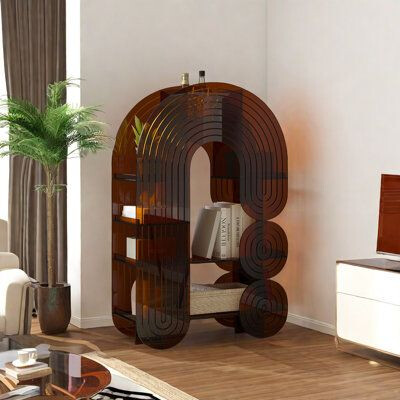
Not only would I save a ton of money, but I'd also get to practice CAM toolpath generation and learn about large-scale CNC machining. Plus, I needed a shoe rack anyway! 👟
CAD Design in Fusion 360
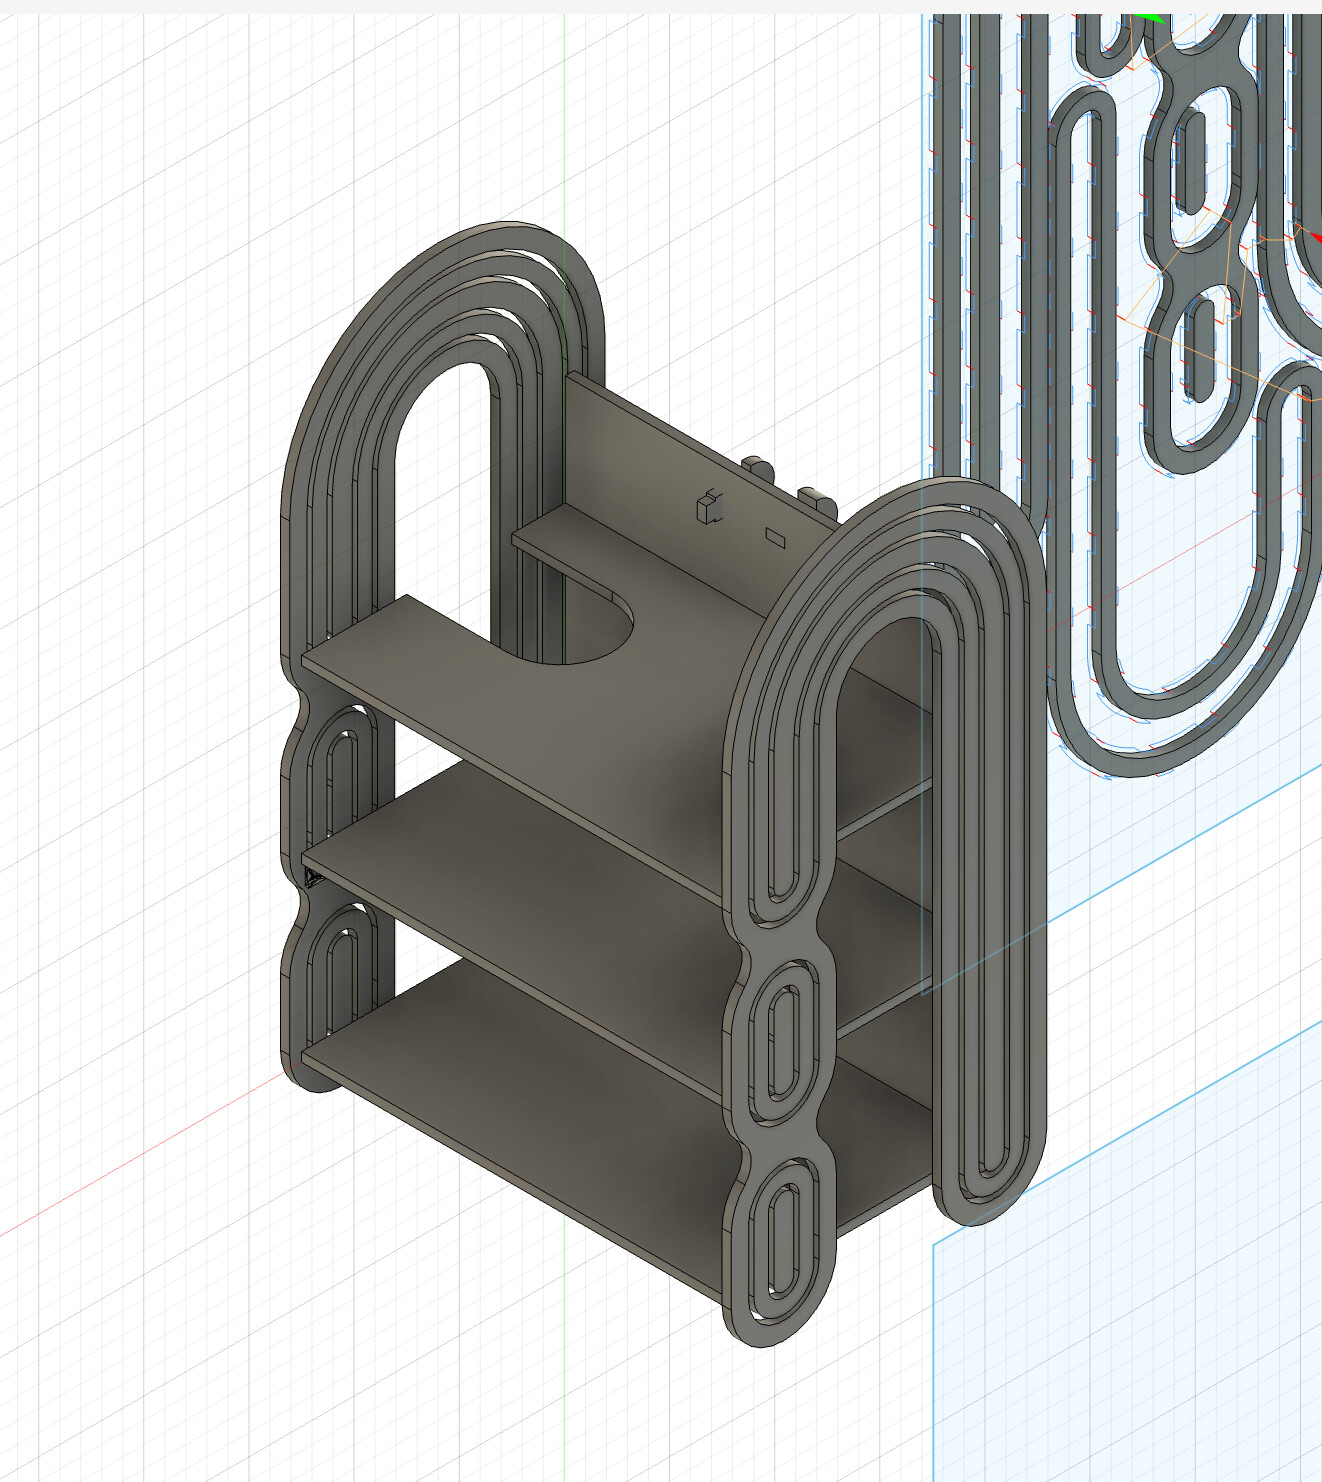
Modeling the Candy Cane Sides
I started by recreating the shelf design in Fusion 360. The key feature was the curved "candy cane" shaped sides. I used spline curves to match the organic, flowing shape of the original design, then extruded them to the appropriate thickness.
Design Considerations
- Material thickness: Designed for 3/4" (19mm) OSB sheet stock
- Shelf dimensions: ~36" tall × 24" wide (meter-scale requirement)
- Number of shelves: 3 horizontal shelves for shoe storage
- Joinery: Glue and screws for assembly
- Curved features: Organic curves on side panels for aesthetic appeal
💡 Design for Manufacturing
- Nesting: Arranged all parts efficiently on a 4'×8' sheet to minimize waste
- Tabs: Planned holding tabs to prevent parts from moving during cut
- Pilot holes: Added pilot holes for screws to prevent splitting
- Tool clearance: All features sized appropriately for 1/4" end mill
CAM Toolpath Generation
Setup in Fusion 360 CAM
After completing the 3D model, I switched to the Manufacturing workspace in Fusion 360 to generate toolpaths for the ShopBot.

Stock Setup
- Material: OSB (Oriented Strand Board) - 3/4" thick
- Stock size: 48" × 96" (standard 4×8 sheet)
- Origin: Lower left corner, top of stock
Toolpath Strategy
I created multiple toolpath operations to cut out all the parts:
1. 2D Pocket (for pilot holes and features)
- Tool: 1/4" flat end mill
- Operation: Create pilot holes and any recessed features
- Depth: Through-thickness where needed
- Stepdown: 0.125" per pass
- Stepover: 50% of tool diameter (0.125")
2. 2D Contour (for outlines)
- Tool: 1/4" flat end mill
- Operation: Cut part outlines including curves
- Depth: Full thickness (0.75") plus 0.05" into spoilboard
- Tabs: 0.25" thick × 1" wide, 4 tabs per part
- Lead-in/out: Smooth entry to prevent tool marks

Speeds and Feeds
I calculated appropriate cutting parameters for OSB:
- Spindle speed: 18,000 RPM
- Feed rate: 100 inches/min
- Plunge rate: 30 inches/min
- Chip load: ~0.014" (calculated: 100 IPM / (18000 RPM × 2 flutes) ≈ 0.003")
⚙️ Chip Load Formula
Chip load = Feed rate (IPM) / (RPM × Number of flutes)
For wood with a 1/4" 2-flute end mill, target chip load is typically 0.003-0.010 inches.
Layout and Nesting
I arranged all parts efficiently on the sheet to minimize material waste:
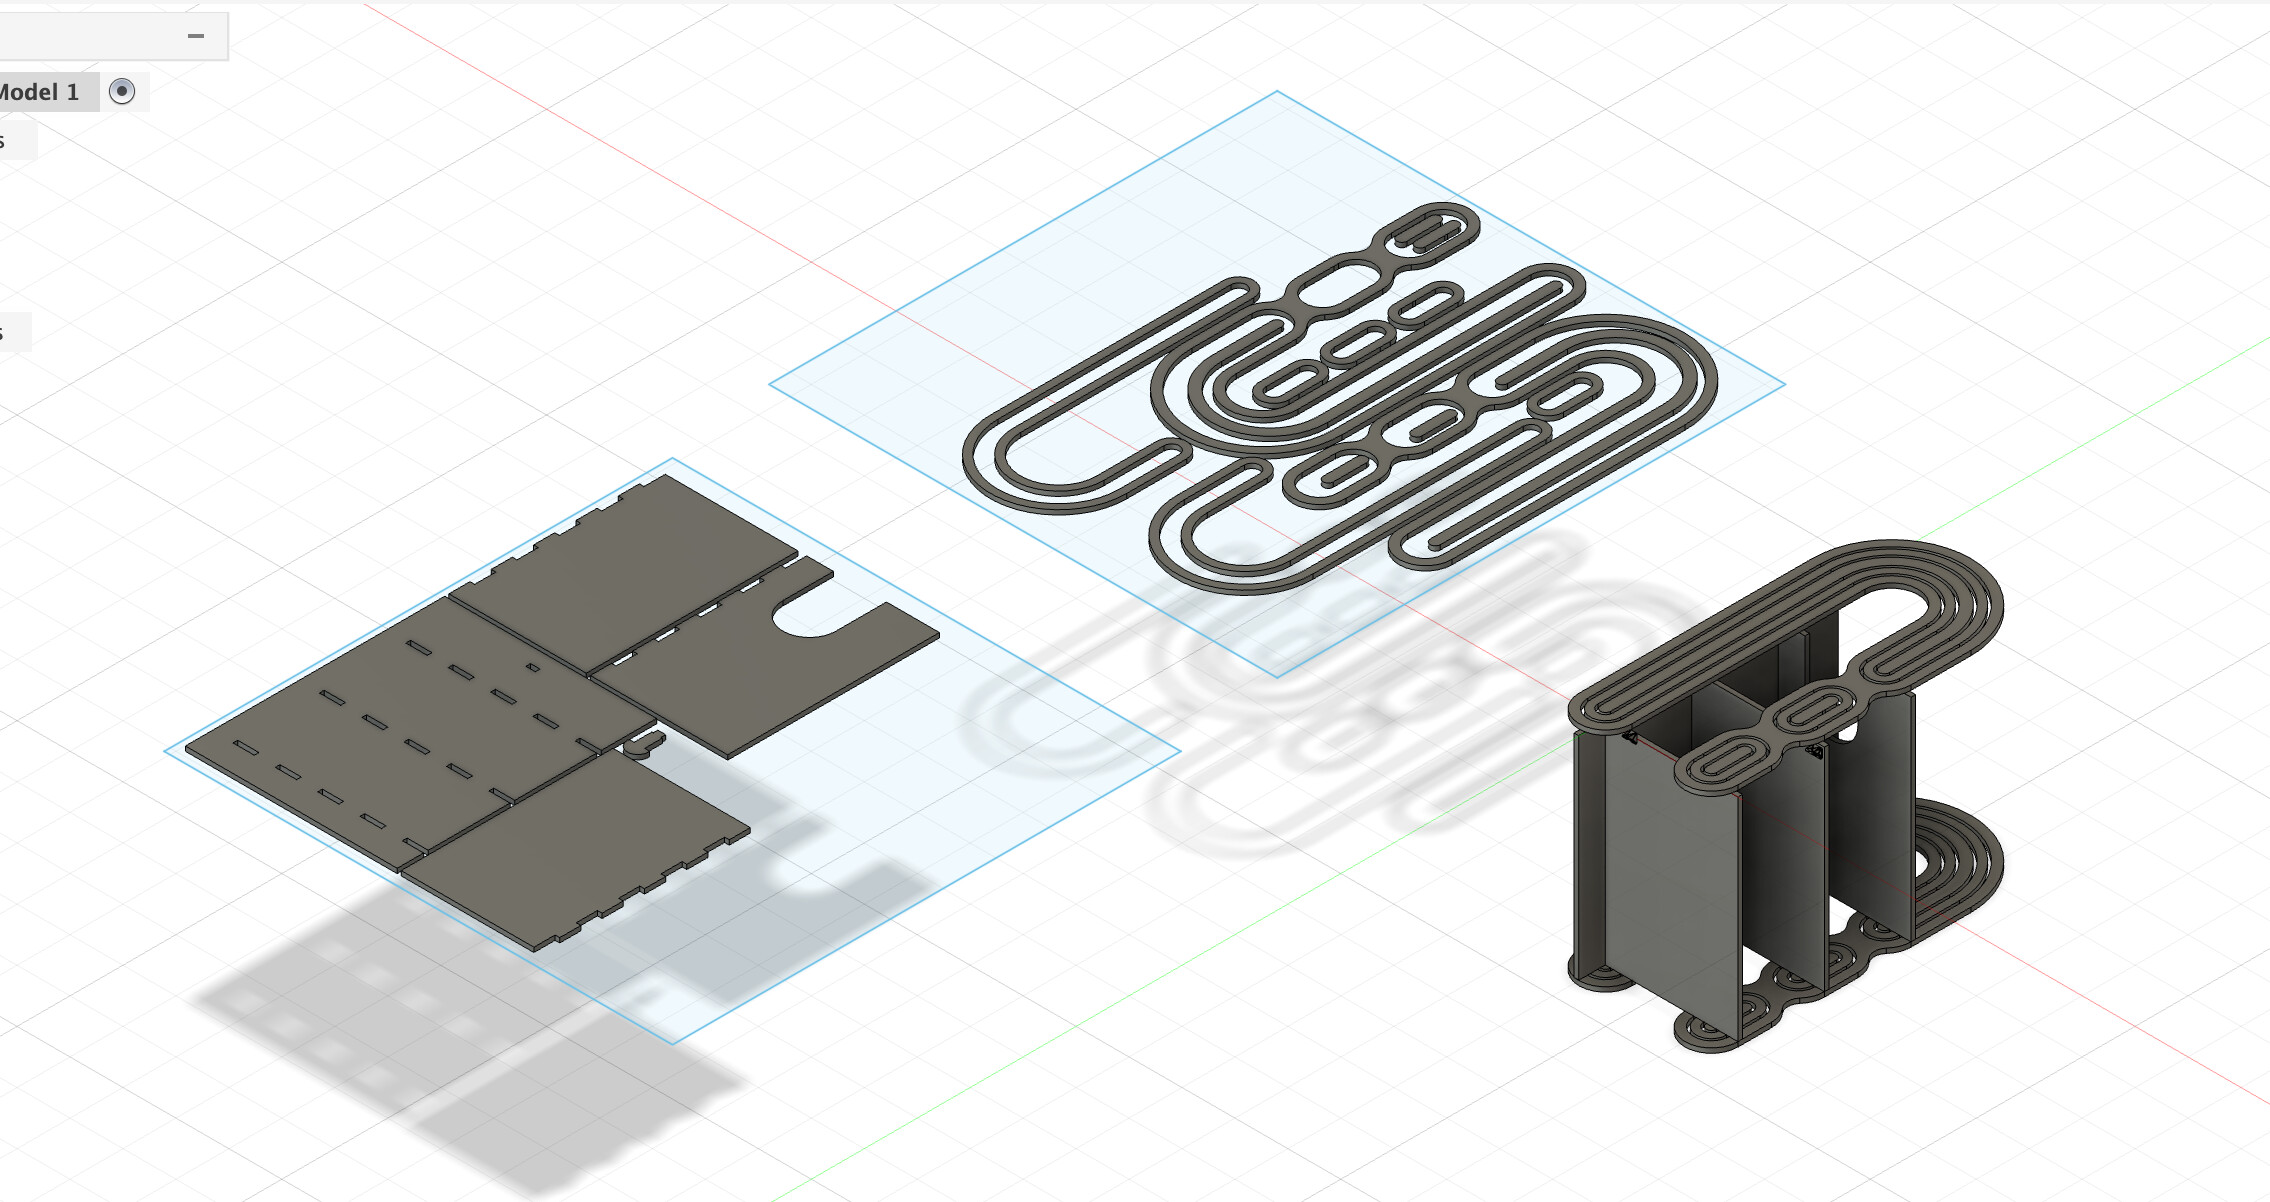
- 2 curved side panels (candy cane shape)
- 3 horizontal shelf boards
- 1 top piece
- Total material usage: ~70% of the 4×8 sheet
CNC Machining on the ShopBot
Machine Setup
Before cutting, I prepared the ShopBot:
- Placed OSB sheet on the spoilboard and squared it to machine axes
- Screwed down the sheet at corners and edges (avoiding toolpaths)
- Zeroed X and Y at lower-left corner of stock
- Zeroed Z on top surface of material using touch-off plate
- Loaded 1/4" 2-flute straight end mill
- Turned on dust collection system
Cutting Process
The cutting process took about 45 minutes total:
- Pocket operations: ~15 minutes for all slots
- Contour cuts: ~30 minutes for all outlines
- Manual tab cutting: Used oscillating saw to cut holding tabs after machining
✅ What Went Well
- Toolpaths ran smoothly with no errors
- Curved cuts came out beautifully smooth
- Dog-bone corners worked perfectly for square tabs
- All parts fit together on first try!
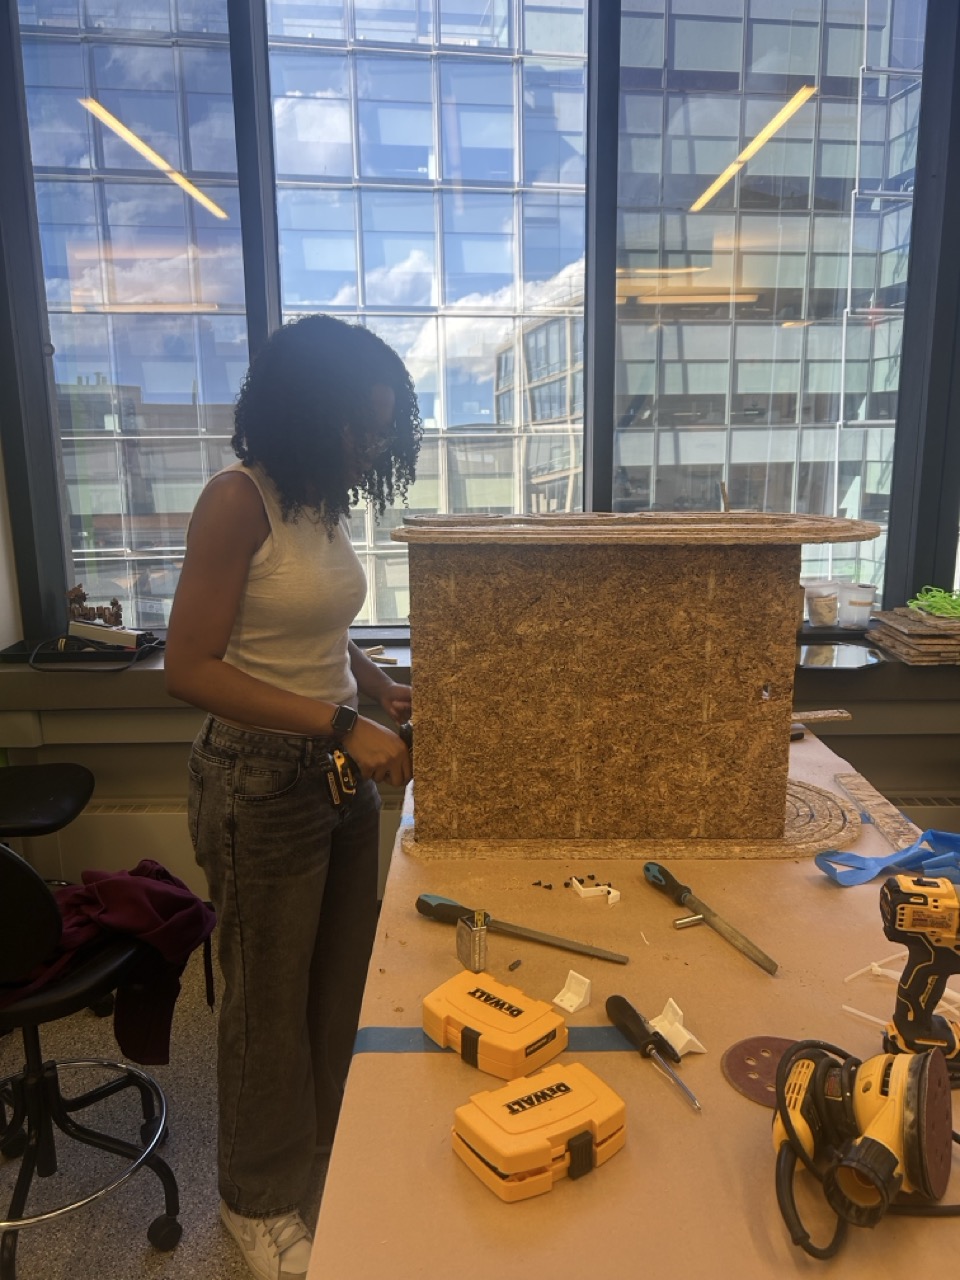
Assembly
Putting It Together
After cutting all the parts and removing the holding tabs, assembly was straightforward:
- Sanded all edges lightly to remove splinters (OSB is really splintery!)
- Pre-drilled pilot holes using the CNC-milled guide holes
- Applied wood glue to all joining surfaces
- Assembled shelf boards between the side panels
- Secured everything with screws driven through the pilot holes
- Clamped the assembly while glue dried
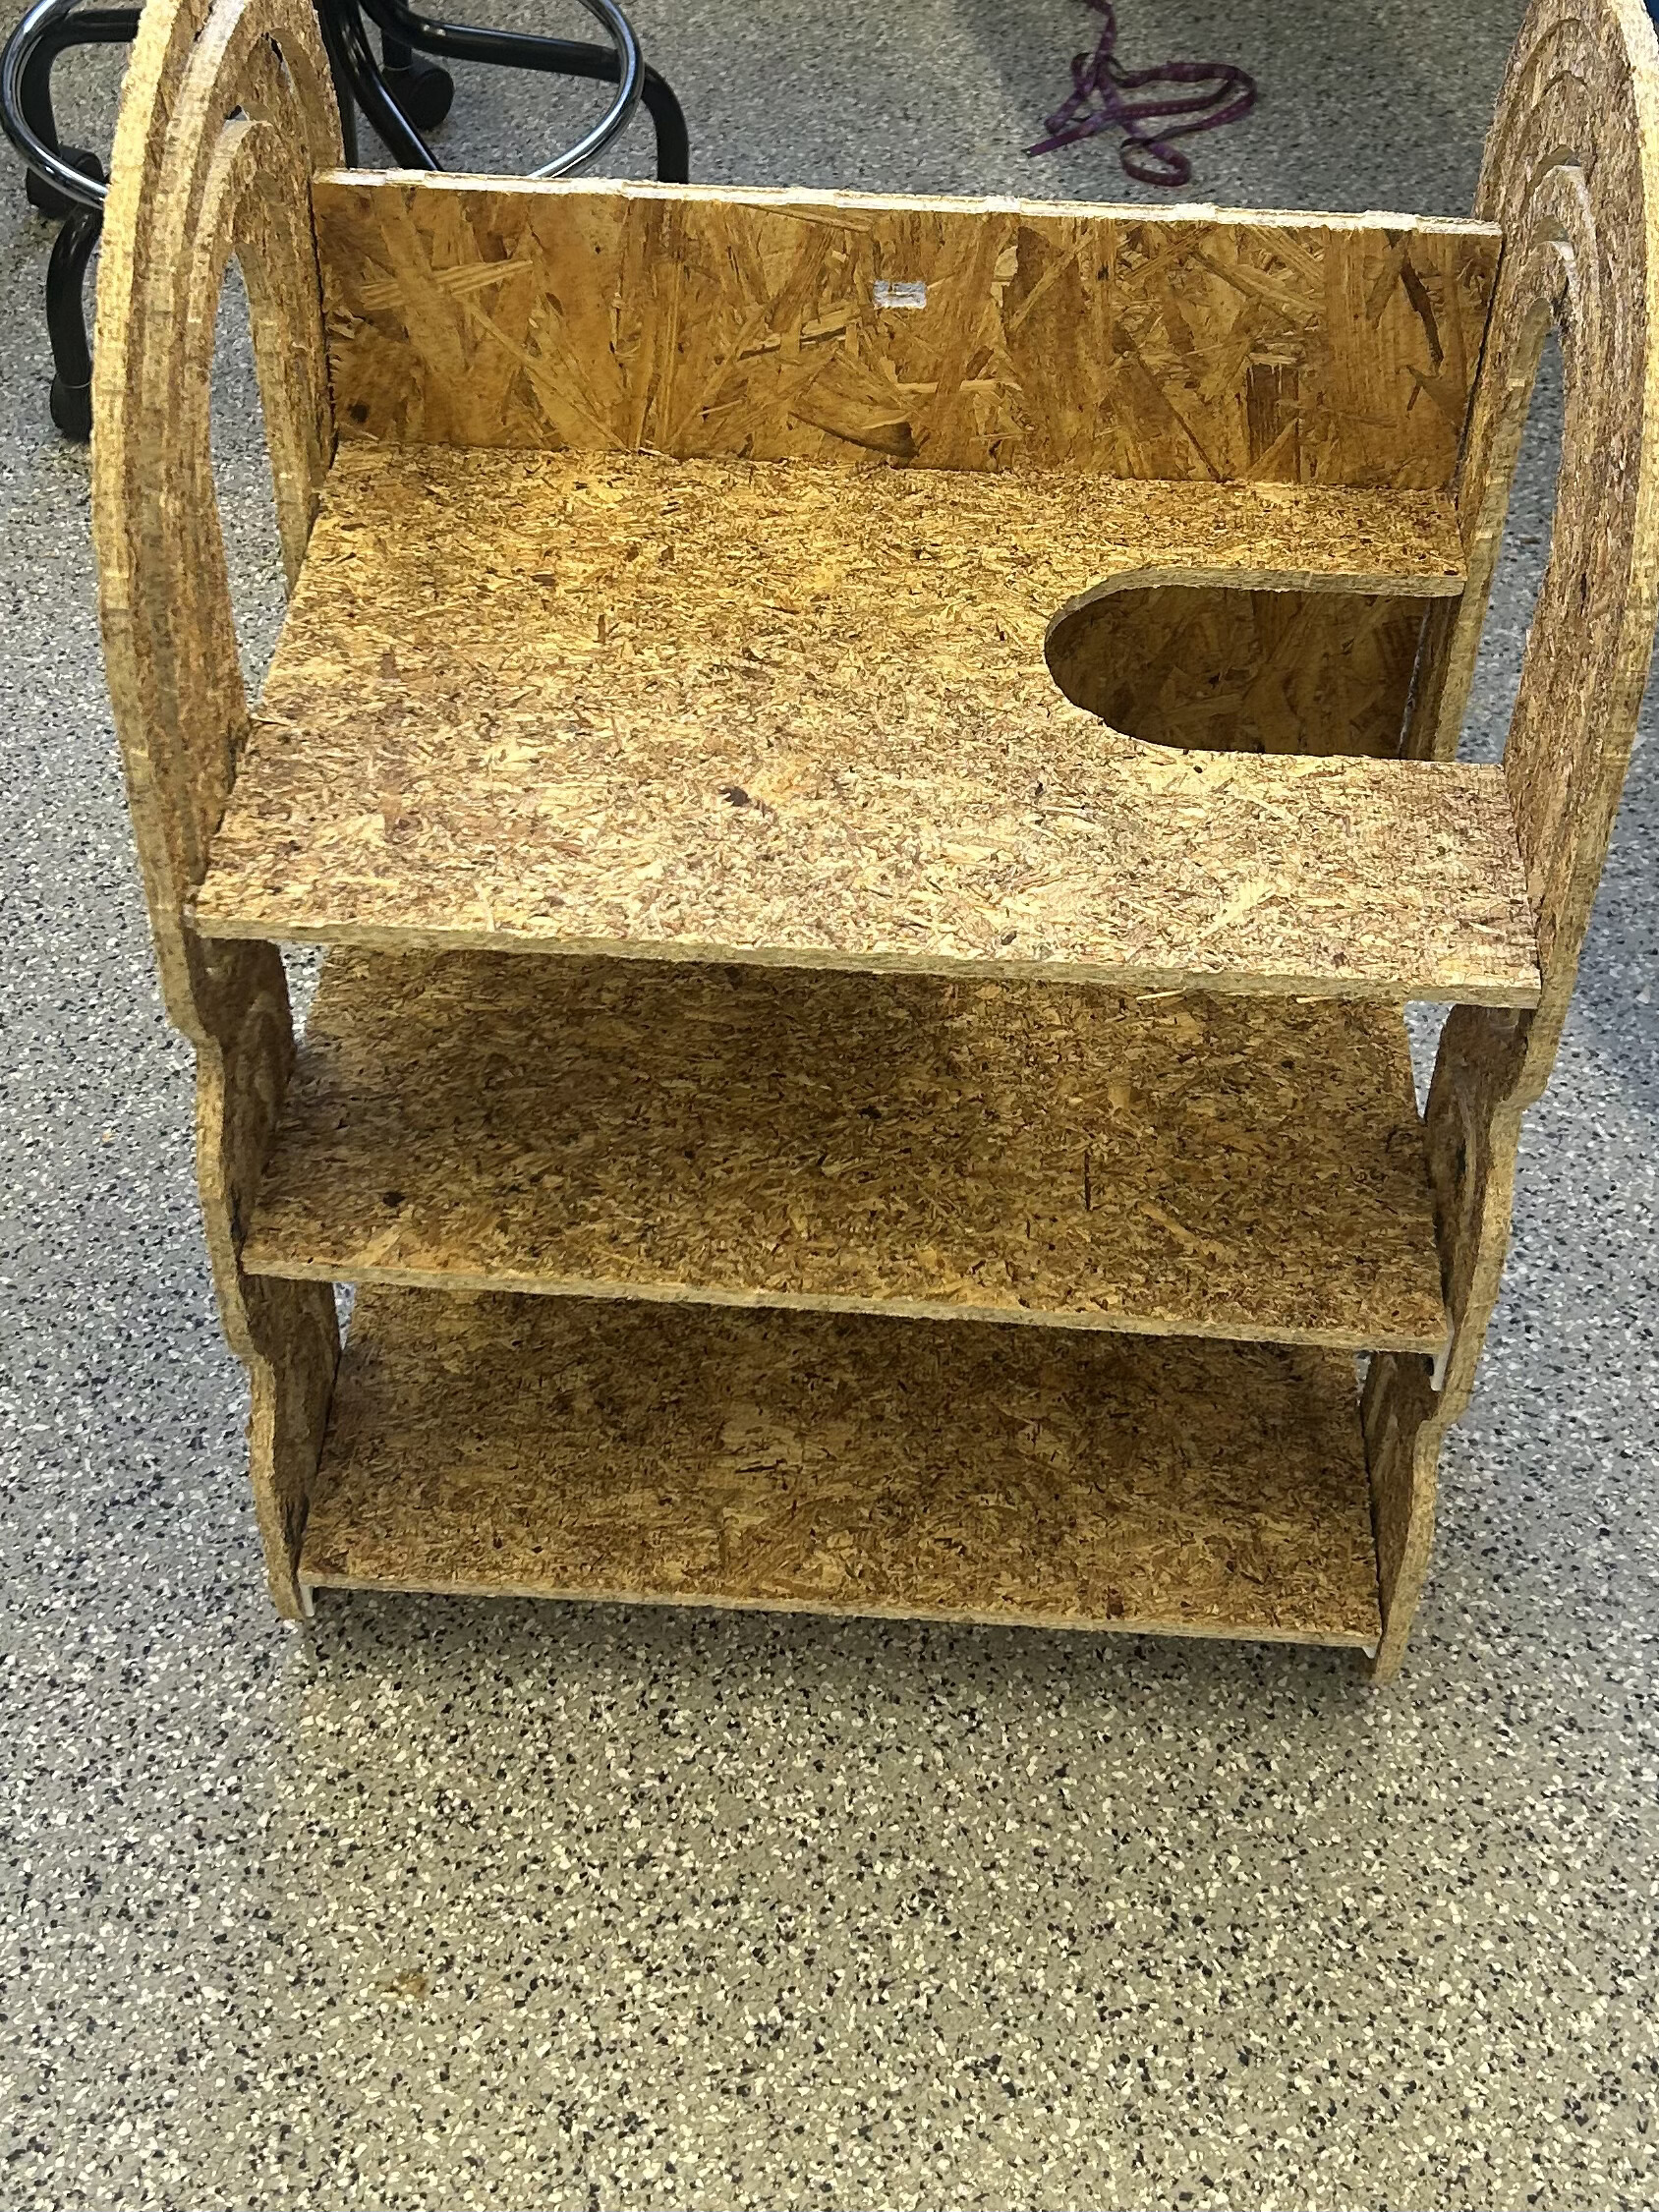
Finished Shelf
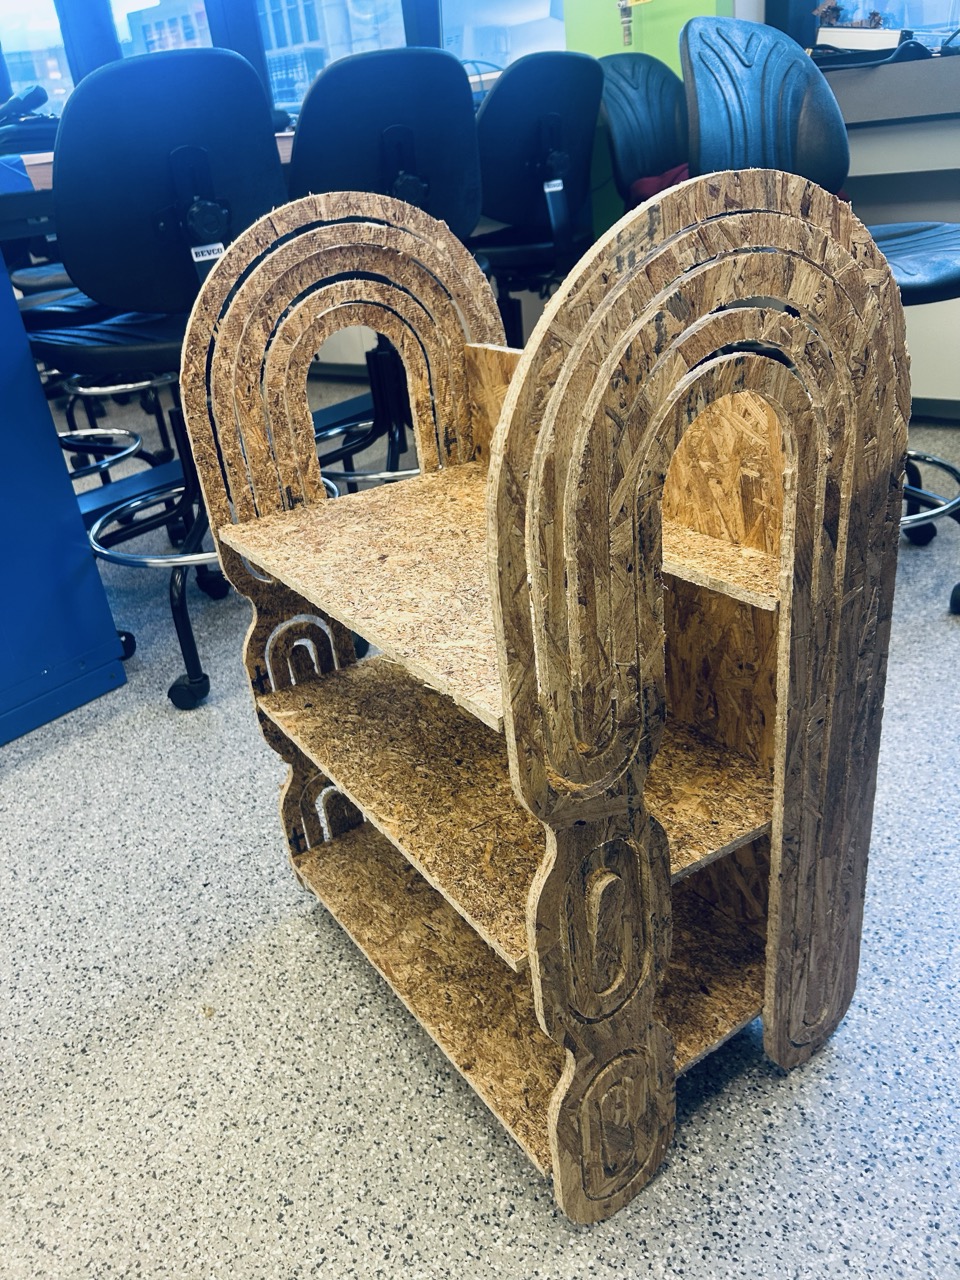
I'm now using the shelf as a shoe rack, and it works perfectly! The curved "candy cane" sides give it that midcentury modern aesthetic I wanted, and the glued and screwed joints make it rock-solid.
Reflections & Lessons Learned
What I'd Do Differently
⚠️ Material Choice: OSB Issues
The biggest lesson: I really wish I had used better wood than OSB. While it was cheap and readily available, OSB is incredibly splintery. Even after sanding, the surface remains rough, and I have to be careful when handling it.
Better alternatives for next time:
- Baltic birch plywood: Smooth surface, beautiful edge grain, minimal splintering
- MDF: Very smooth, great for painting, easy to machine
- Valchromat: Colored MDF, water-resistant, premium finish
What Worked Well
- CAM toolpaths: Fusion 360's CAM workspace made it easy to generate efficient toolpaths
- Pilot holes: CNC-milled pilot holes made screw placement precise and prevented splitting
- Glue and screws: Strong, permanent assembly that can support weight
- Curved features: CNC made the complex "candy cane" curves effortless
- Cost savings: Total material cost ~$30 vs. $1000+ for the original!
Design Improvements
If I were to make this again, I would:
- Use Baltic birch instead of OSB for a better surface finish
- Add a back panel for additional stability
- Include adjustable shelf heights using a series of slots
- Round over the edges with a roundover bit for safety and aesthetics
- Apply a finish (polyurethane or wax) to protect the wood
Extra Credit
🏆 Assignment Requirements Met
- ✅ Make something big: Shelf is ~36" × 24" (meter-scale)
- ✅ Extra credit - Curved surfaces: Organic candy cane curves on side panels
- ✅ Extra credit - Three-axis toolpaths: Used 2D pocket and contour operations
Conclusion
This project taught me the complete workflow of large-scale CNC machining—from CAD design and CAM toolpath generation to machine setup and assembly. While I learned that material choice matters a lot (seriously, OSB splinters are no joke), I'm really happy with how the shelf turned out. It serves its purpose as a shoe rack, looks great with those midcentury modern curves, and I saved nearly $1000 in the process!
Most importantly, this assignment showed me the power of computer-controlled machining for creating furniture and large-scale objects with complex geometries that would be extremely difficult or impossible to make by hand.