Overview
This week was wildcard week. The assignment was:
"Design and produce something with a digital process (incorporating computer-aided design and manufacturing) not covered in another assignment, documenting the requirements that your assignment meets, and including everything necessary to reproduce it.
Out of all of the options, I was most drawn to laser engraving (it looked so cool, and used a new machine) and ultrasonic welding (Alfonso is a legend and I've been curious about soft robotics). I decided to try to use the laser engraving session to make something for my final project, and the ultrasonic welding session to try to understand how to design something that inflates itself into shape. You can see my final results above, and find my project files here below.
Project Files
Group Assignment
Laser Engraving
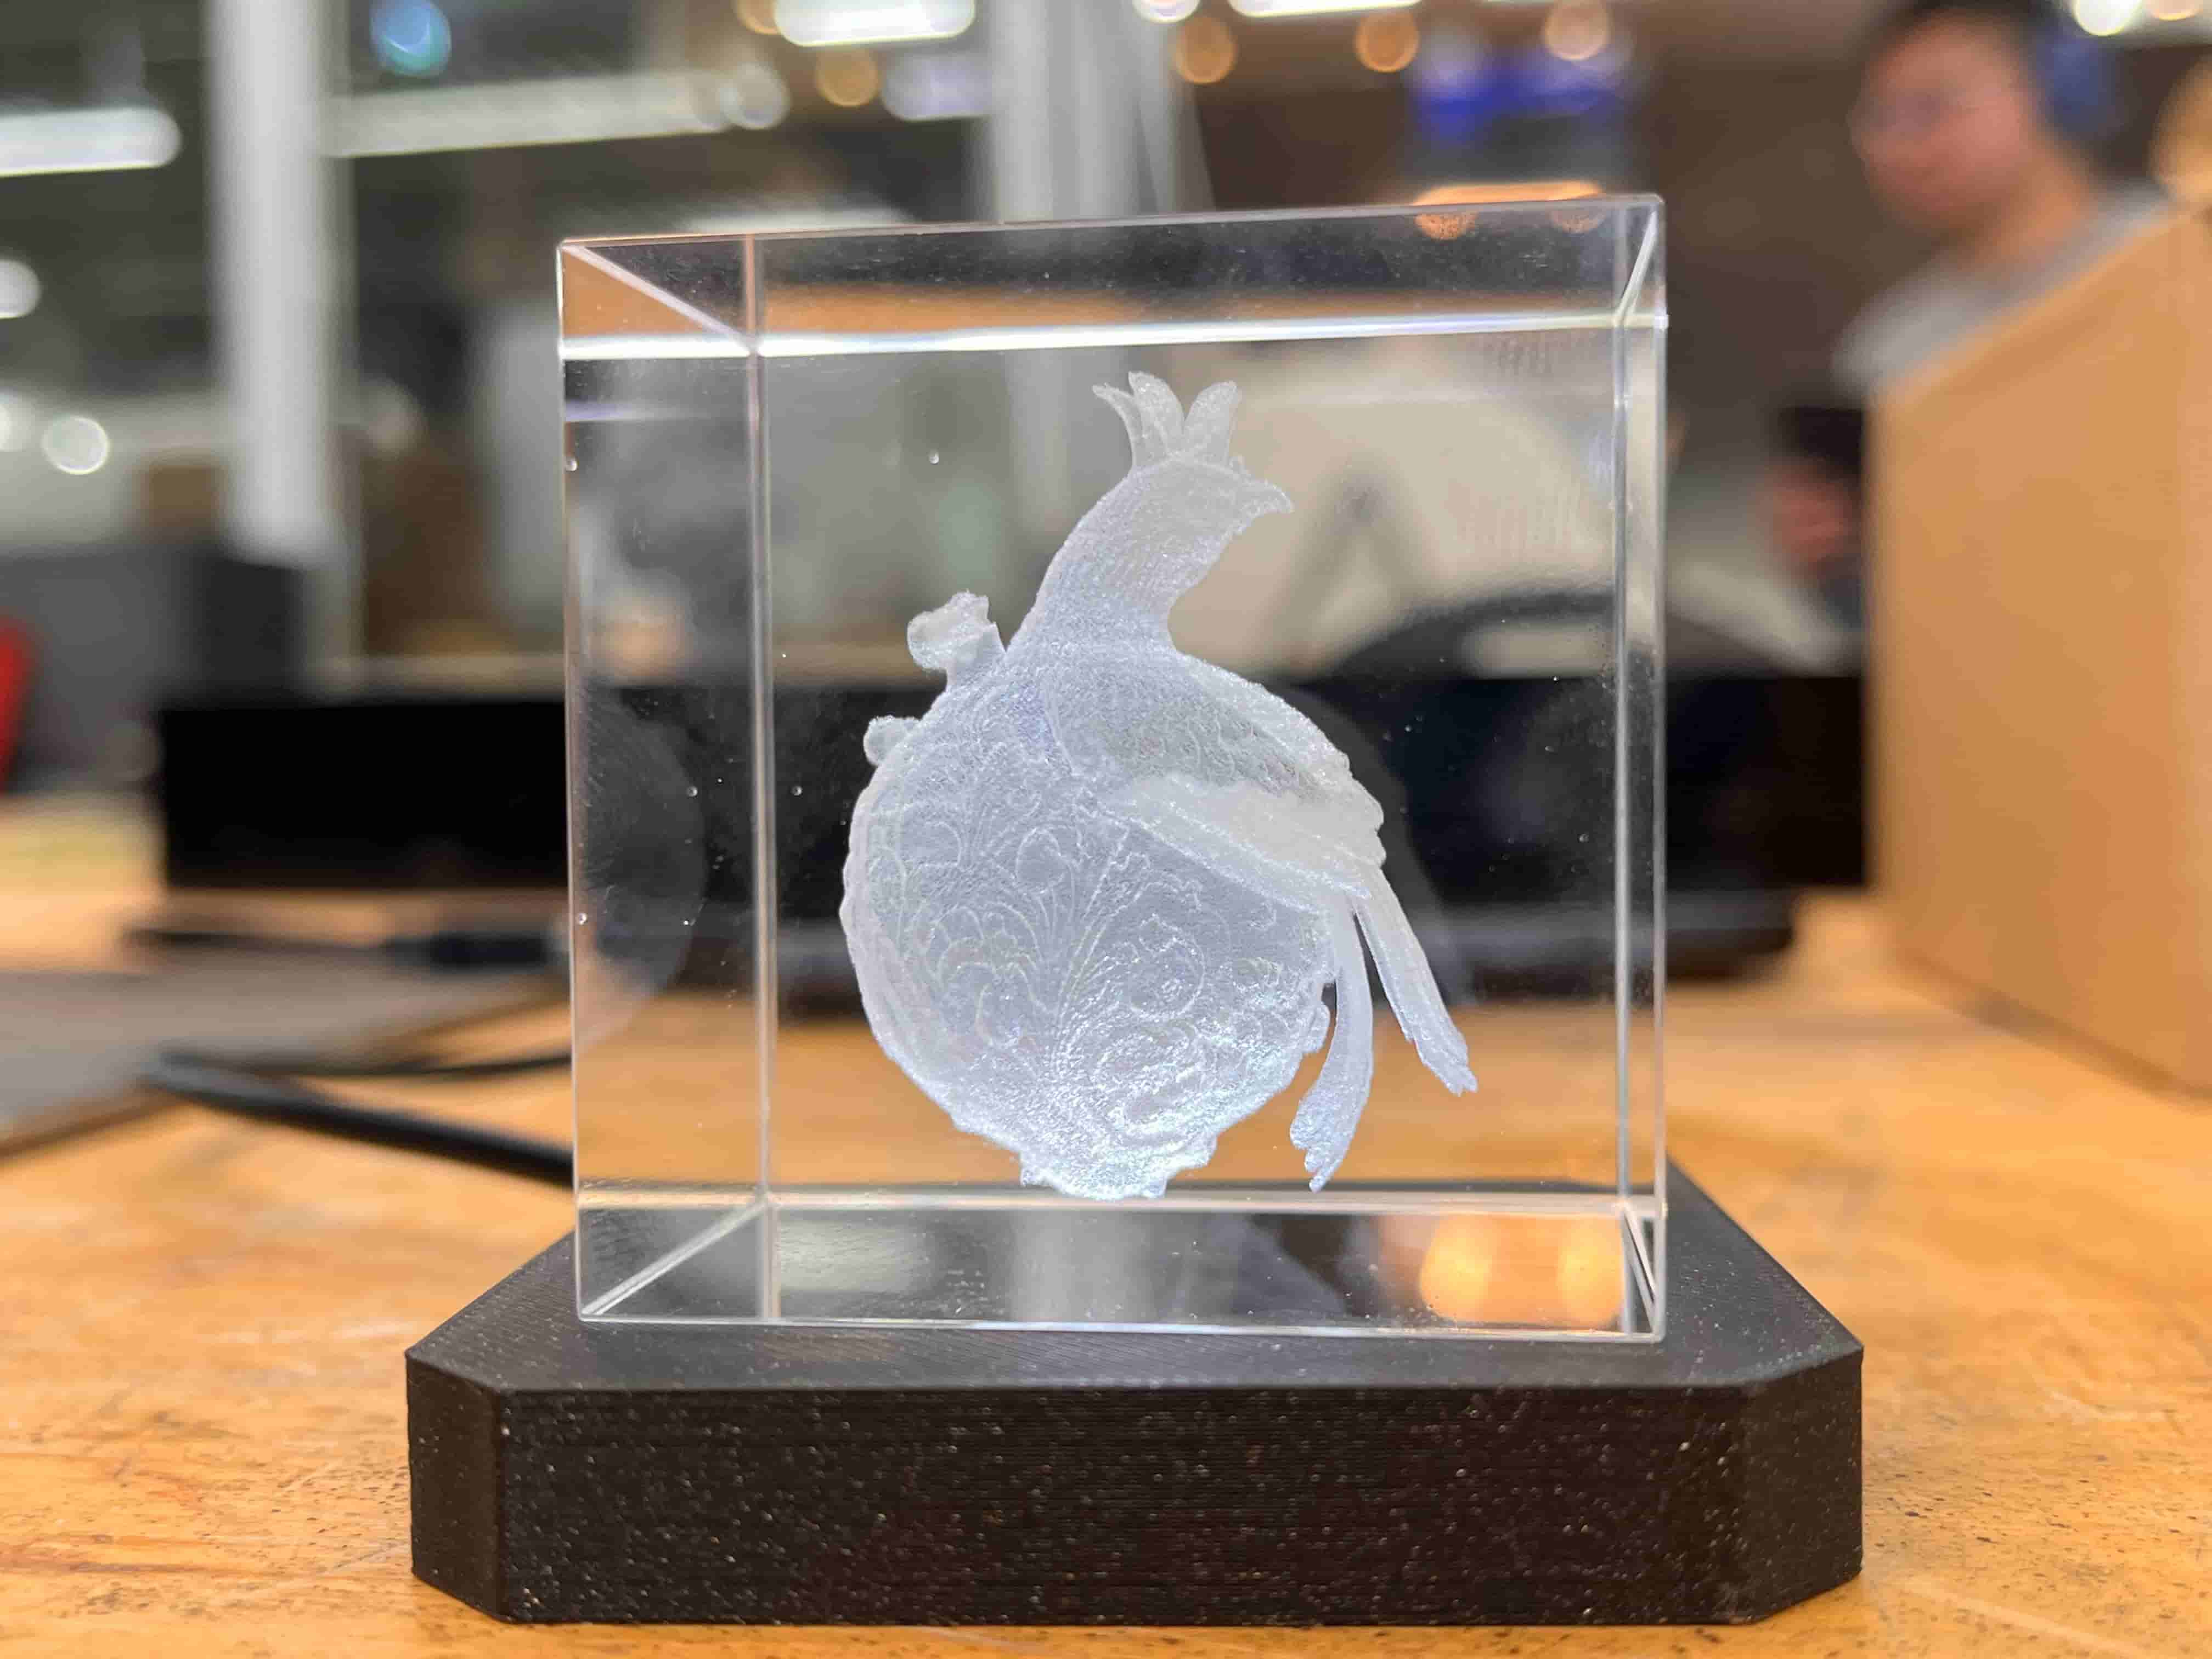
Quentin led this session, and taught us about the newly-arrived xTool F2 Ultra UV machine. We used K9 crystal cubes to engrave with, and were able to just drag in any 3D model (in .stl or .obj format) and process it with the xTool software. The group's documentation can be found here.
I'd originally wanted to make a 3D model of my partner and I, and had heard that xTool had a great 2D image to 3D model intergrated into their software. However, let me give you the before and after and let you make the comparison yourself:
Before:
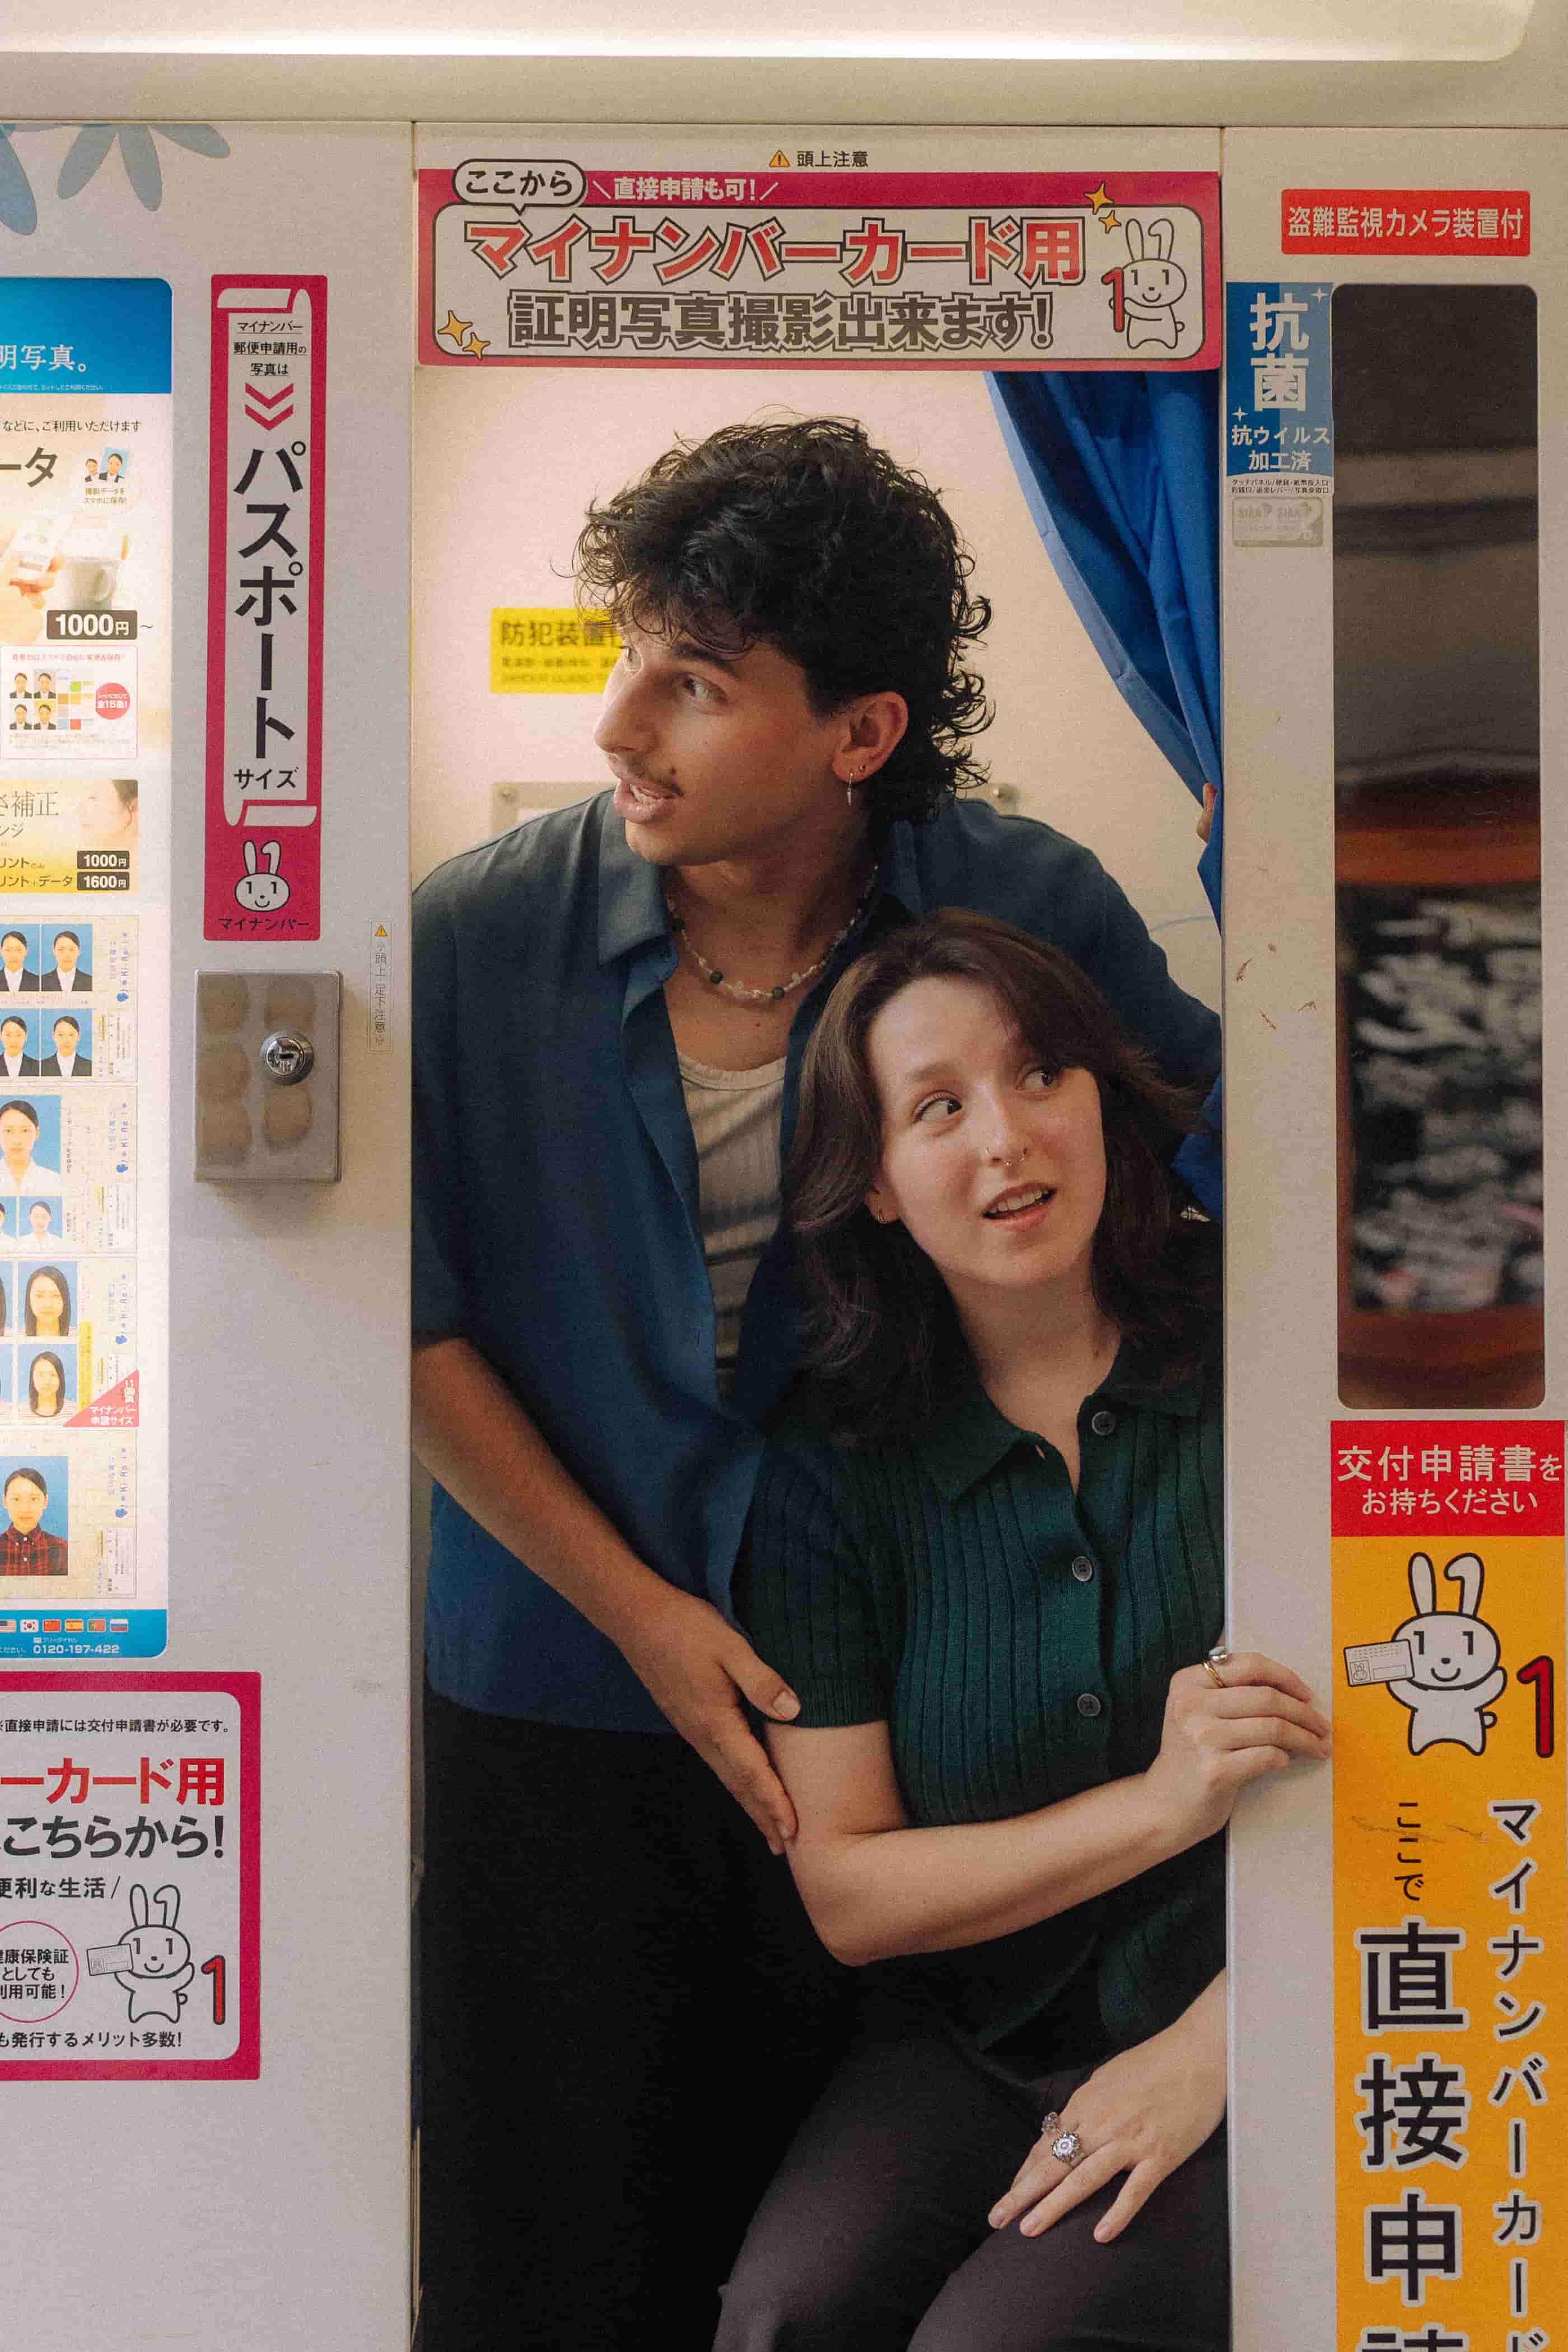
After:
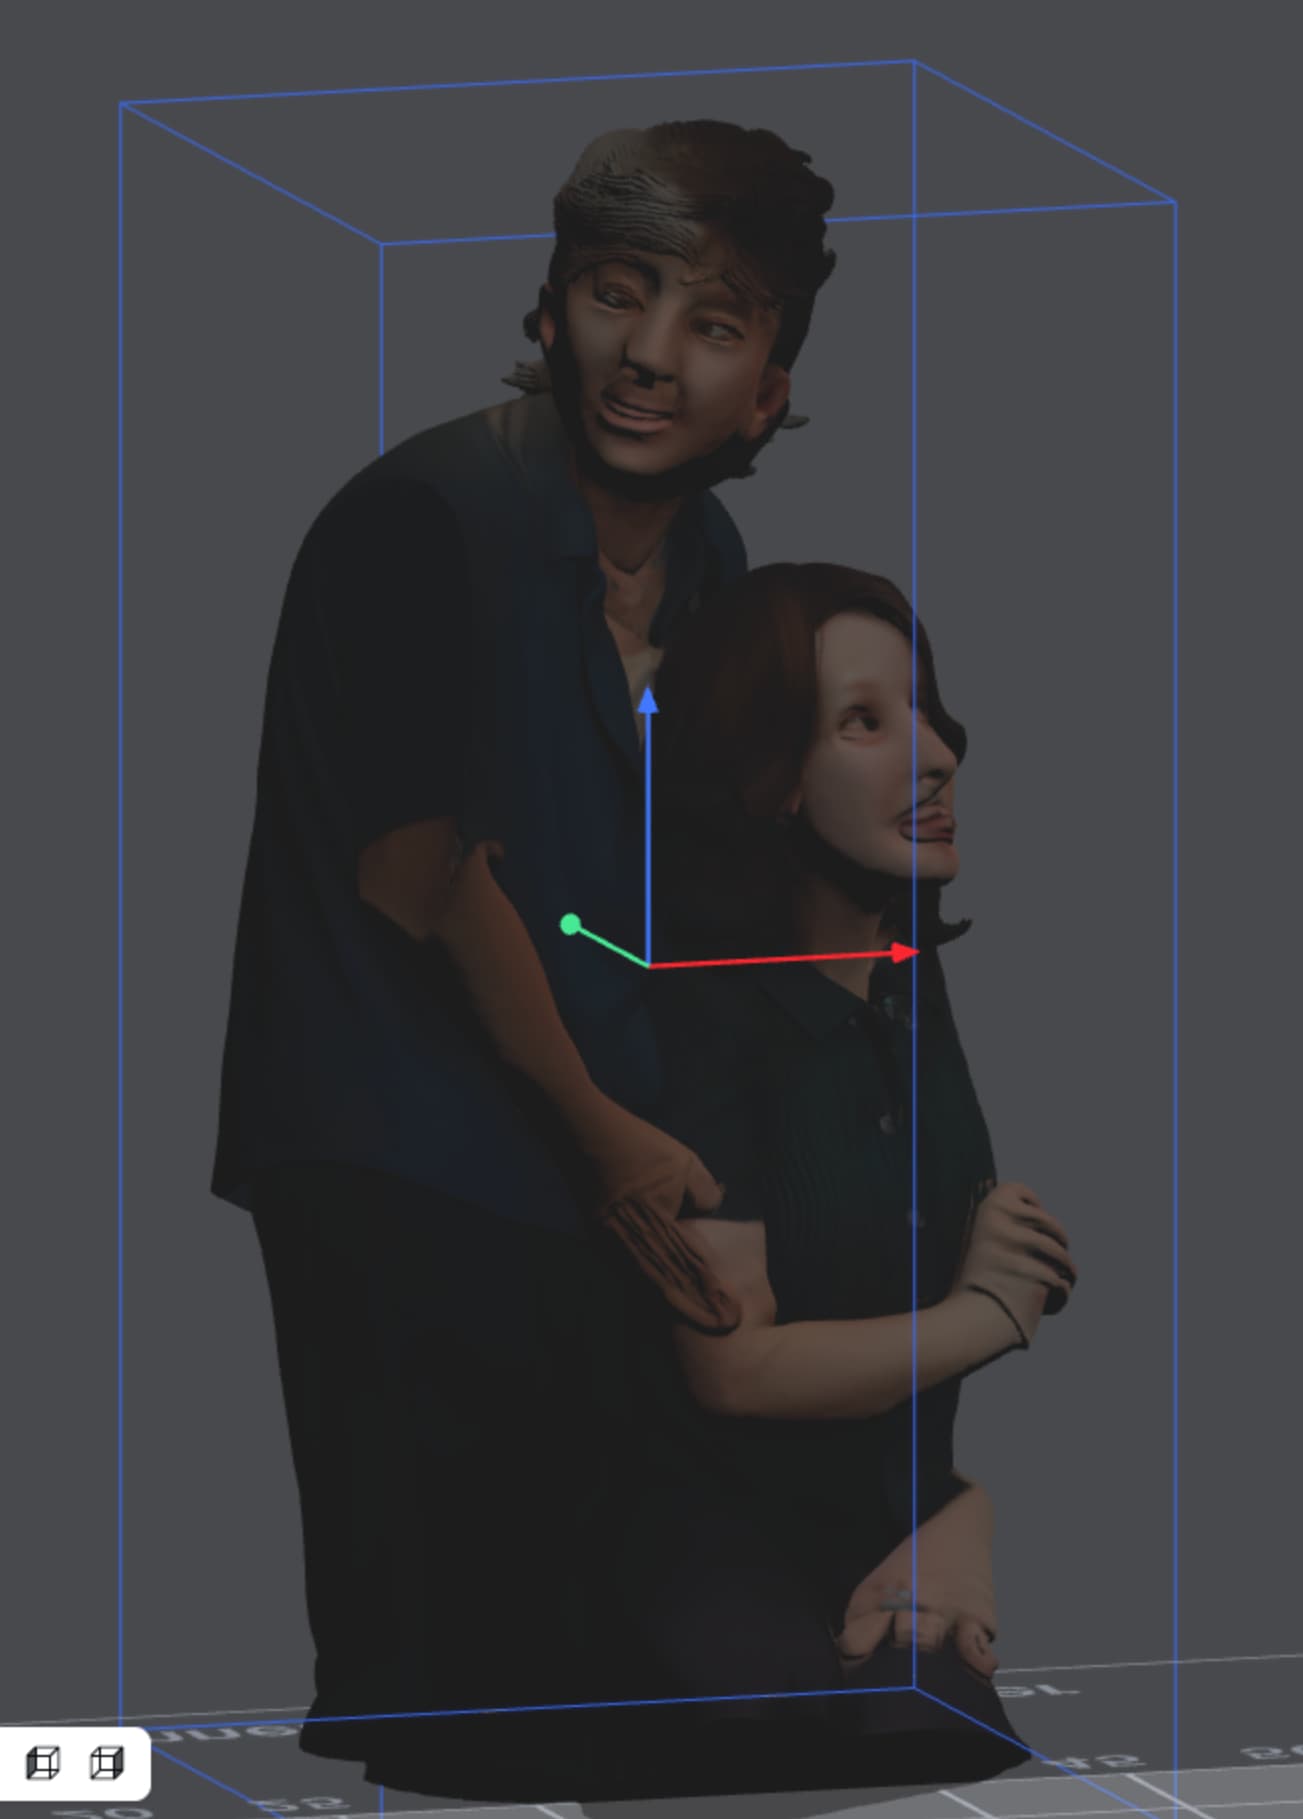
Terrifying. That was the result of using their "best" model, which it said was best for faces and people. Their generations cost about 50 coins depending on which model you use, but you get 200 just for making an account, so this ended up being free.
So instead of pursuing more people, I thought I'd keep expanding on my AI-to-fabrication testing, and see if it would have a better shot at a highly detailed image from Midjourney that was more of an object. This time I tried their more "mid-tier" generative model, which I'd seen in a tutorial get some decent results.
Here are my prompts, initial generations, and final image:
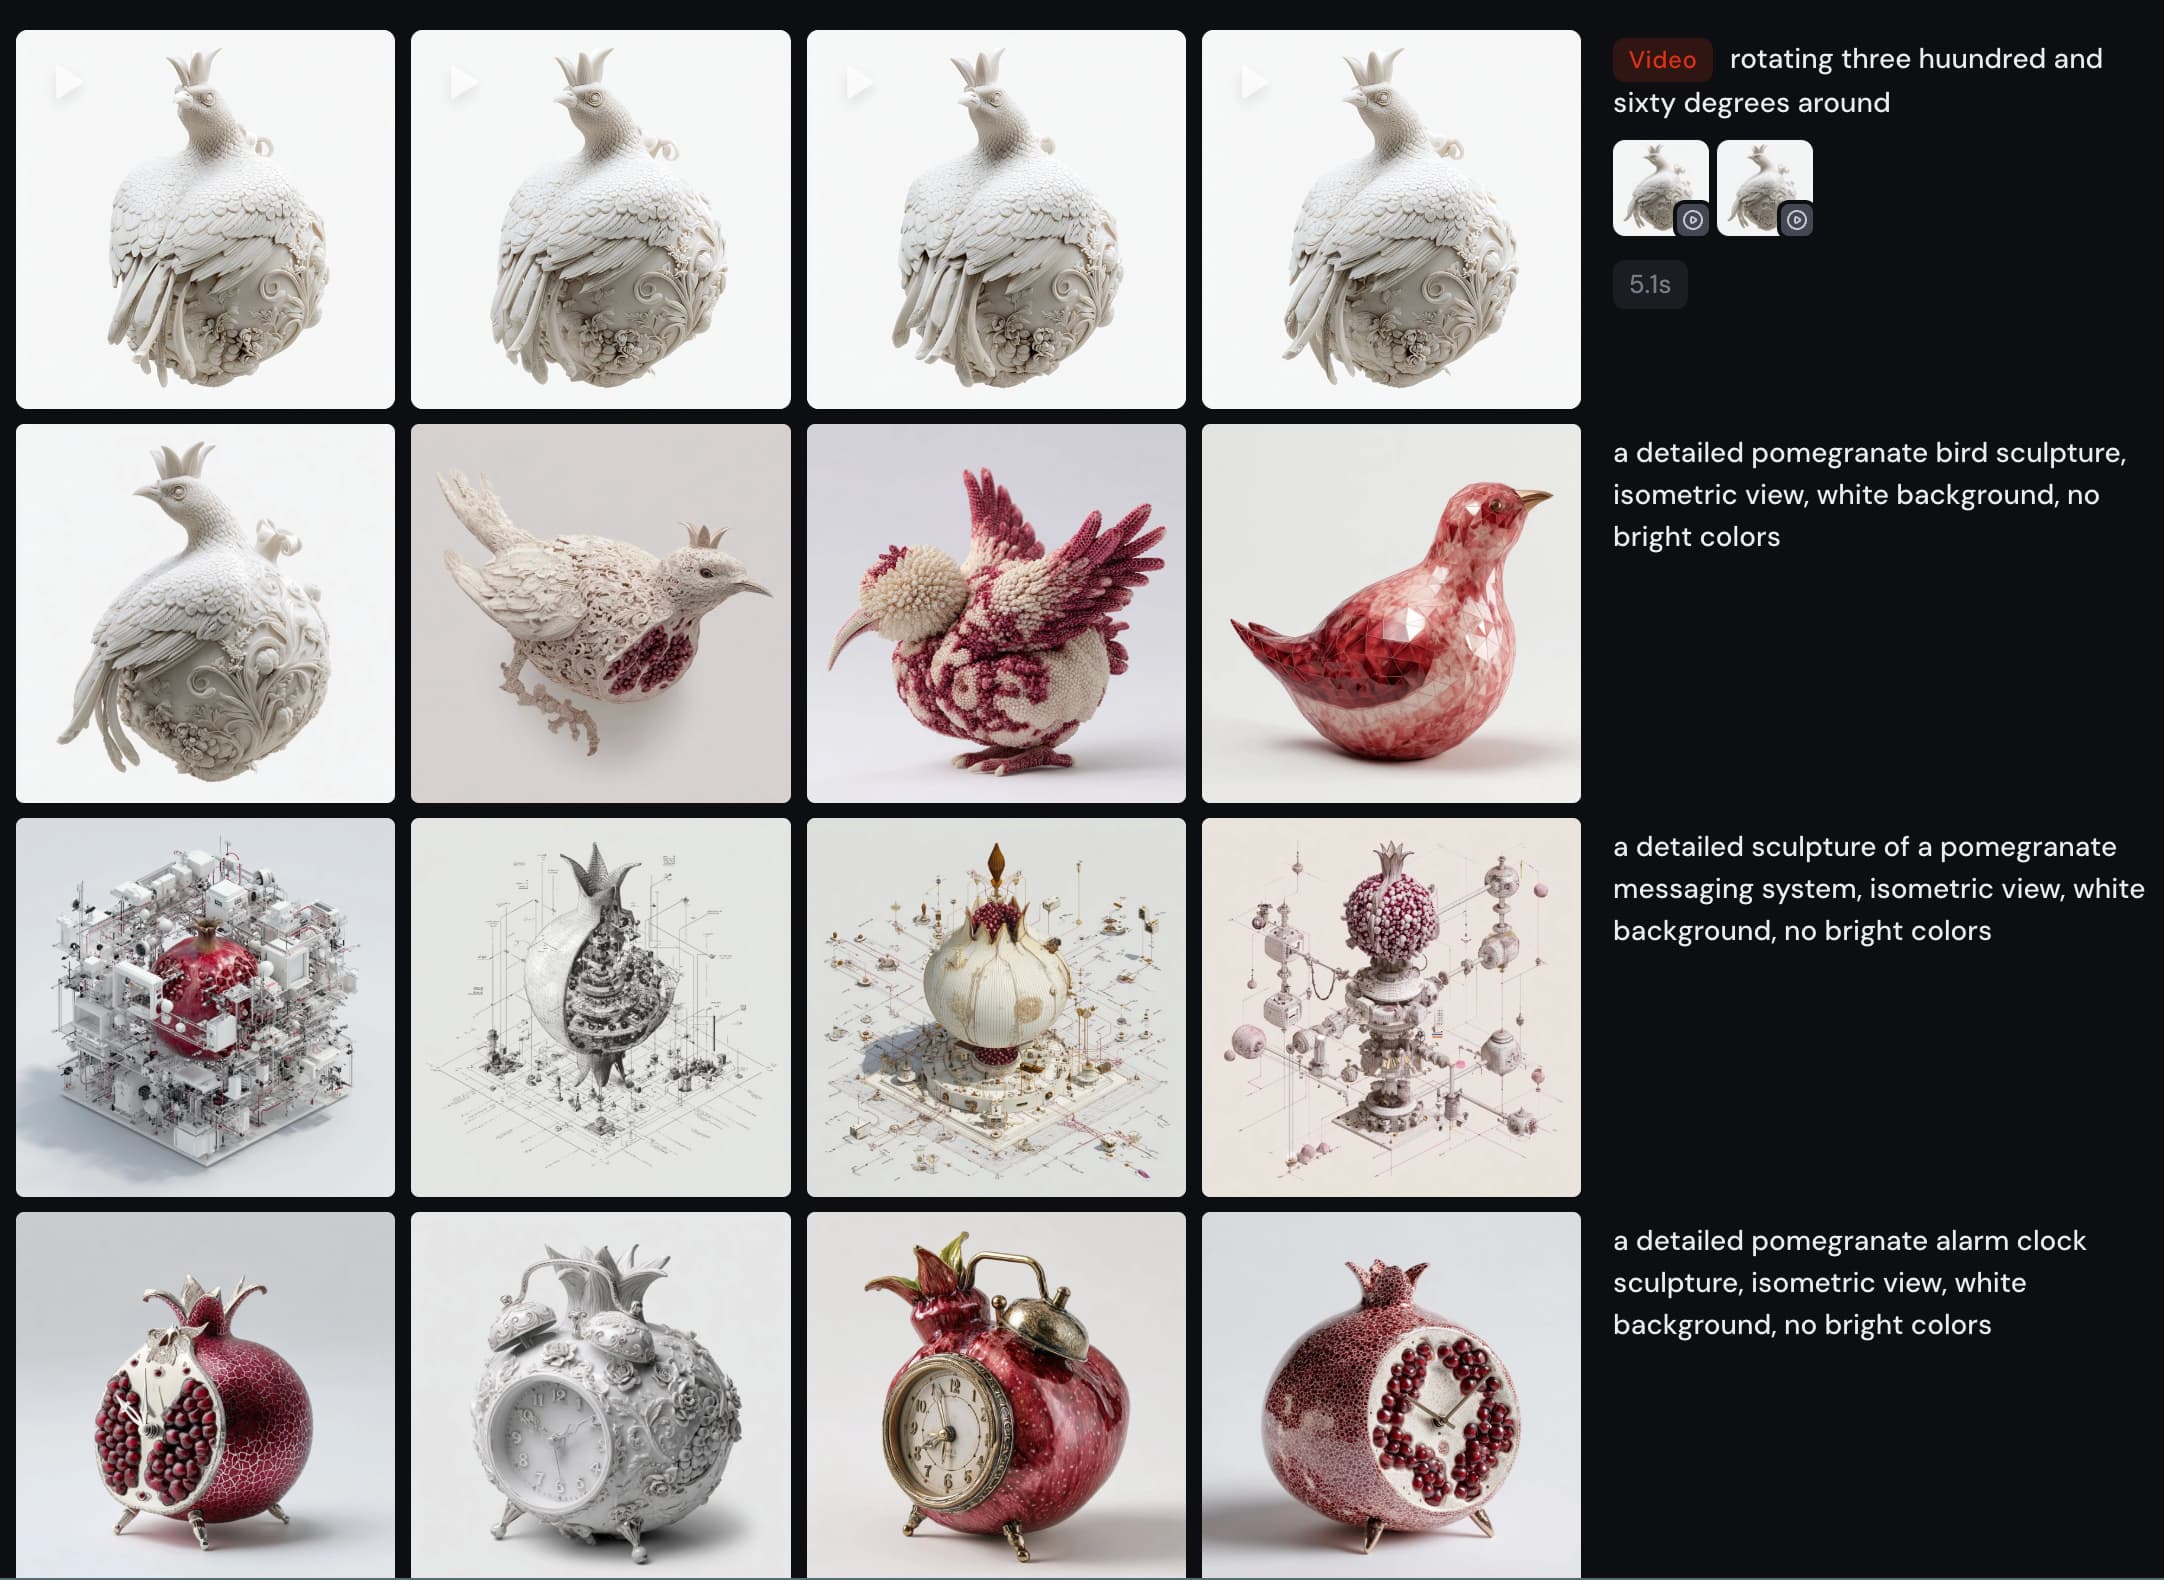
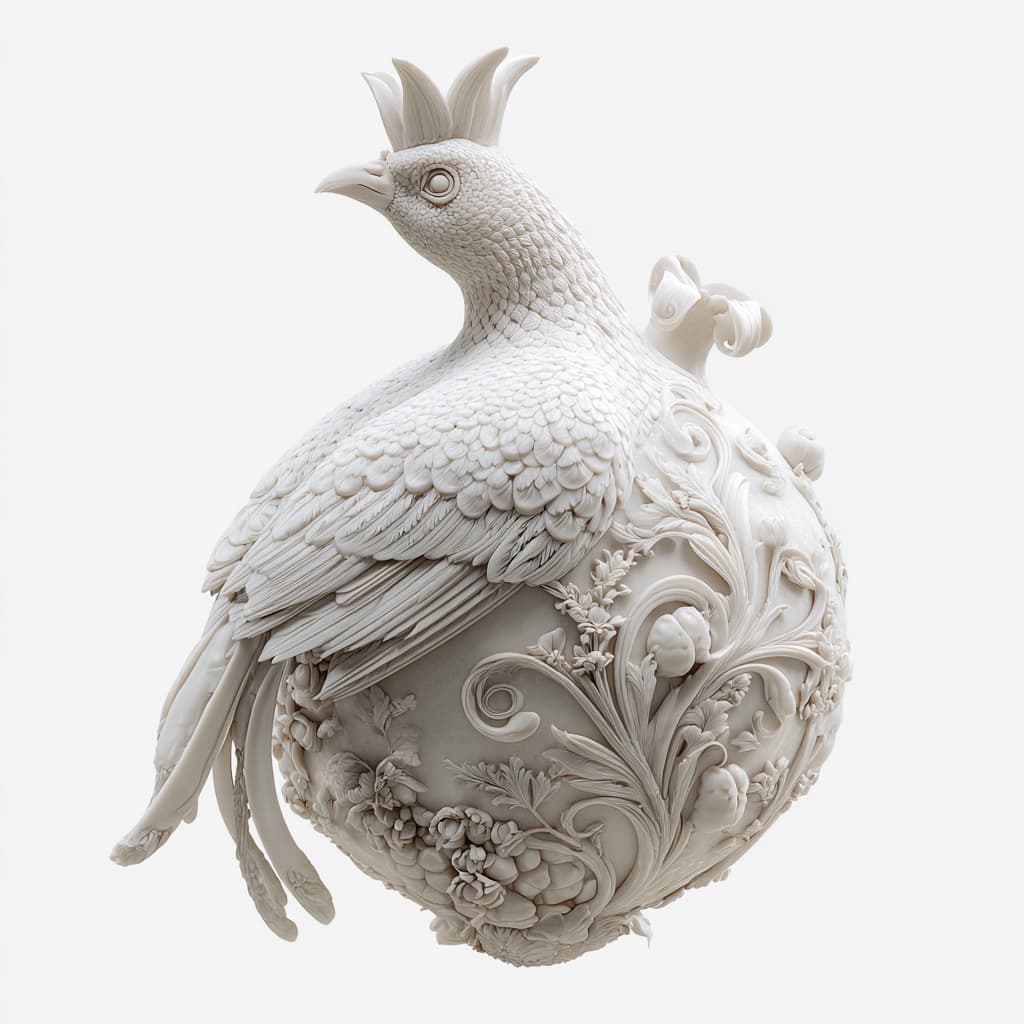
As it turn out, xTool was better BY FAR at this - generating a nearly perfect, symmetrical, closed 3D model at high resolution.

For comparison's sake, here's the same 2D image brought to 3D with Meshy:

You can also export the 3D model from xTool as a .glb file, and use a converter like this one
to turn it into an STL/STEP/OBJ/3MF etc. for whatever use you need.
But since I was already in the tool, we just checked the settings (50% power, 180 dot duration, 0.05 layer height, 0.03 point spacing, and 40khz frequency)
and hit start.
Here's the timelapse!
And the final result:

I plan to use this as part of my final project, so check for an update here.
Ultrasonic Welding
Notes from Process Info Session:
- Yue's site (with great examples of inflatables): https://yueyang.design/kiriinflate/
- It's a fast process, with no smell, and is fairly safe (localized heat) but does have an annoying high pitched sound
- Use cheap nylon as sketch material - any bags that are meant to seal food are great;
- Can alsy use pure PA6 (nylon 66?), great plastic, impossible to tear, strong and welds nicely
- Can also use a strange material (polyinide?) with one layer shiny deposit (directional, need to find the right way and find right power and speeds - shiny to shiny seemed best?)
- Can also use that colorful camping material stuff, potentially with layer of tpu - this is stretchy but welds best
- Lowest layer is silicone; then the material; then teflon, which conducts the heat and helps the vacuum - will have kerf of 2mm (ie 4mm seams)
- Will send Alfonso a dxf, need to be here to manufacture; select tpu, draw, maybe 20mm per second
- Design for a 2-6mm width if you want crumple, otherwise won't;
- A round corner is much better than sharp because with the latter the machine needs to lift up, which will add heat and potentially holes
- You can 3D print on the vacuum bags to seal it as well if you clip it to the tray (kyung, from tangible maybe, did this?) and use normal pla
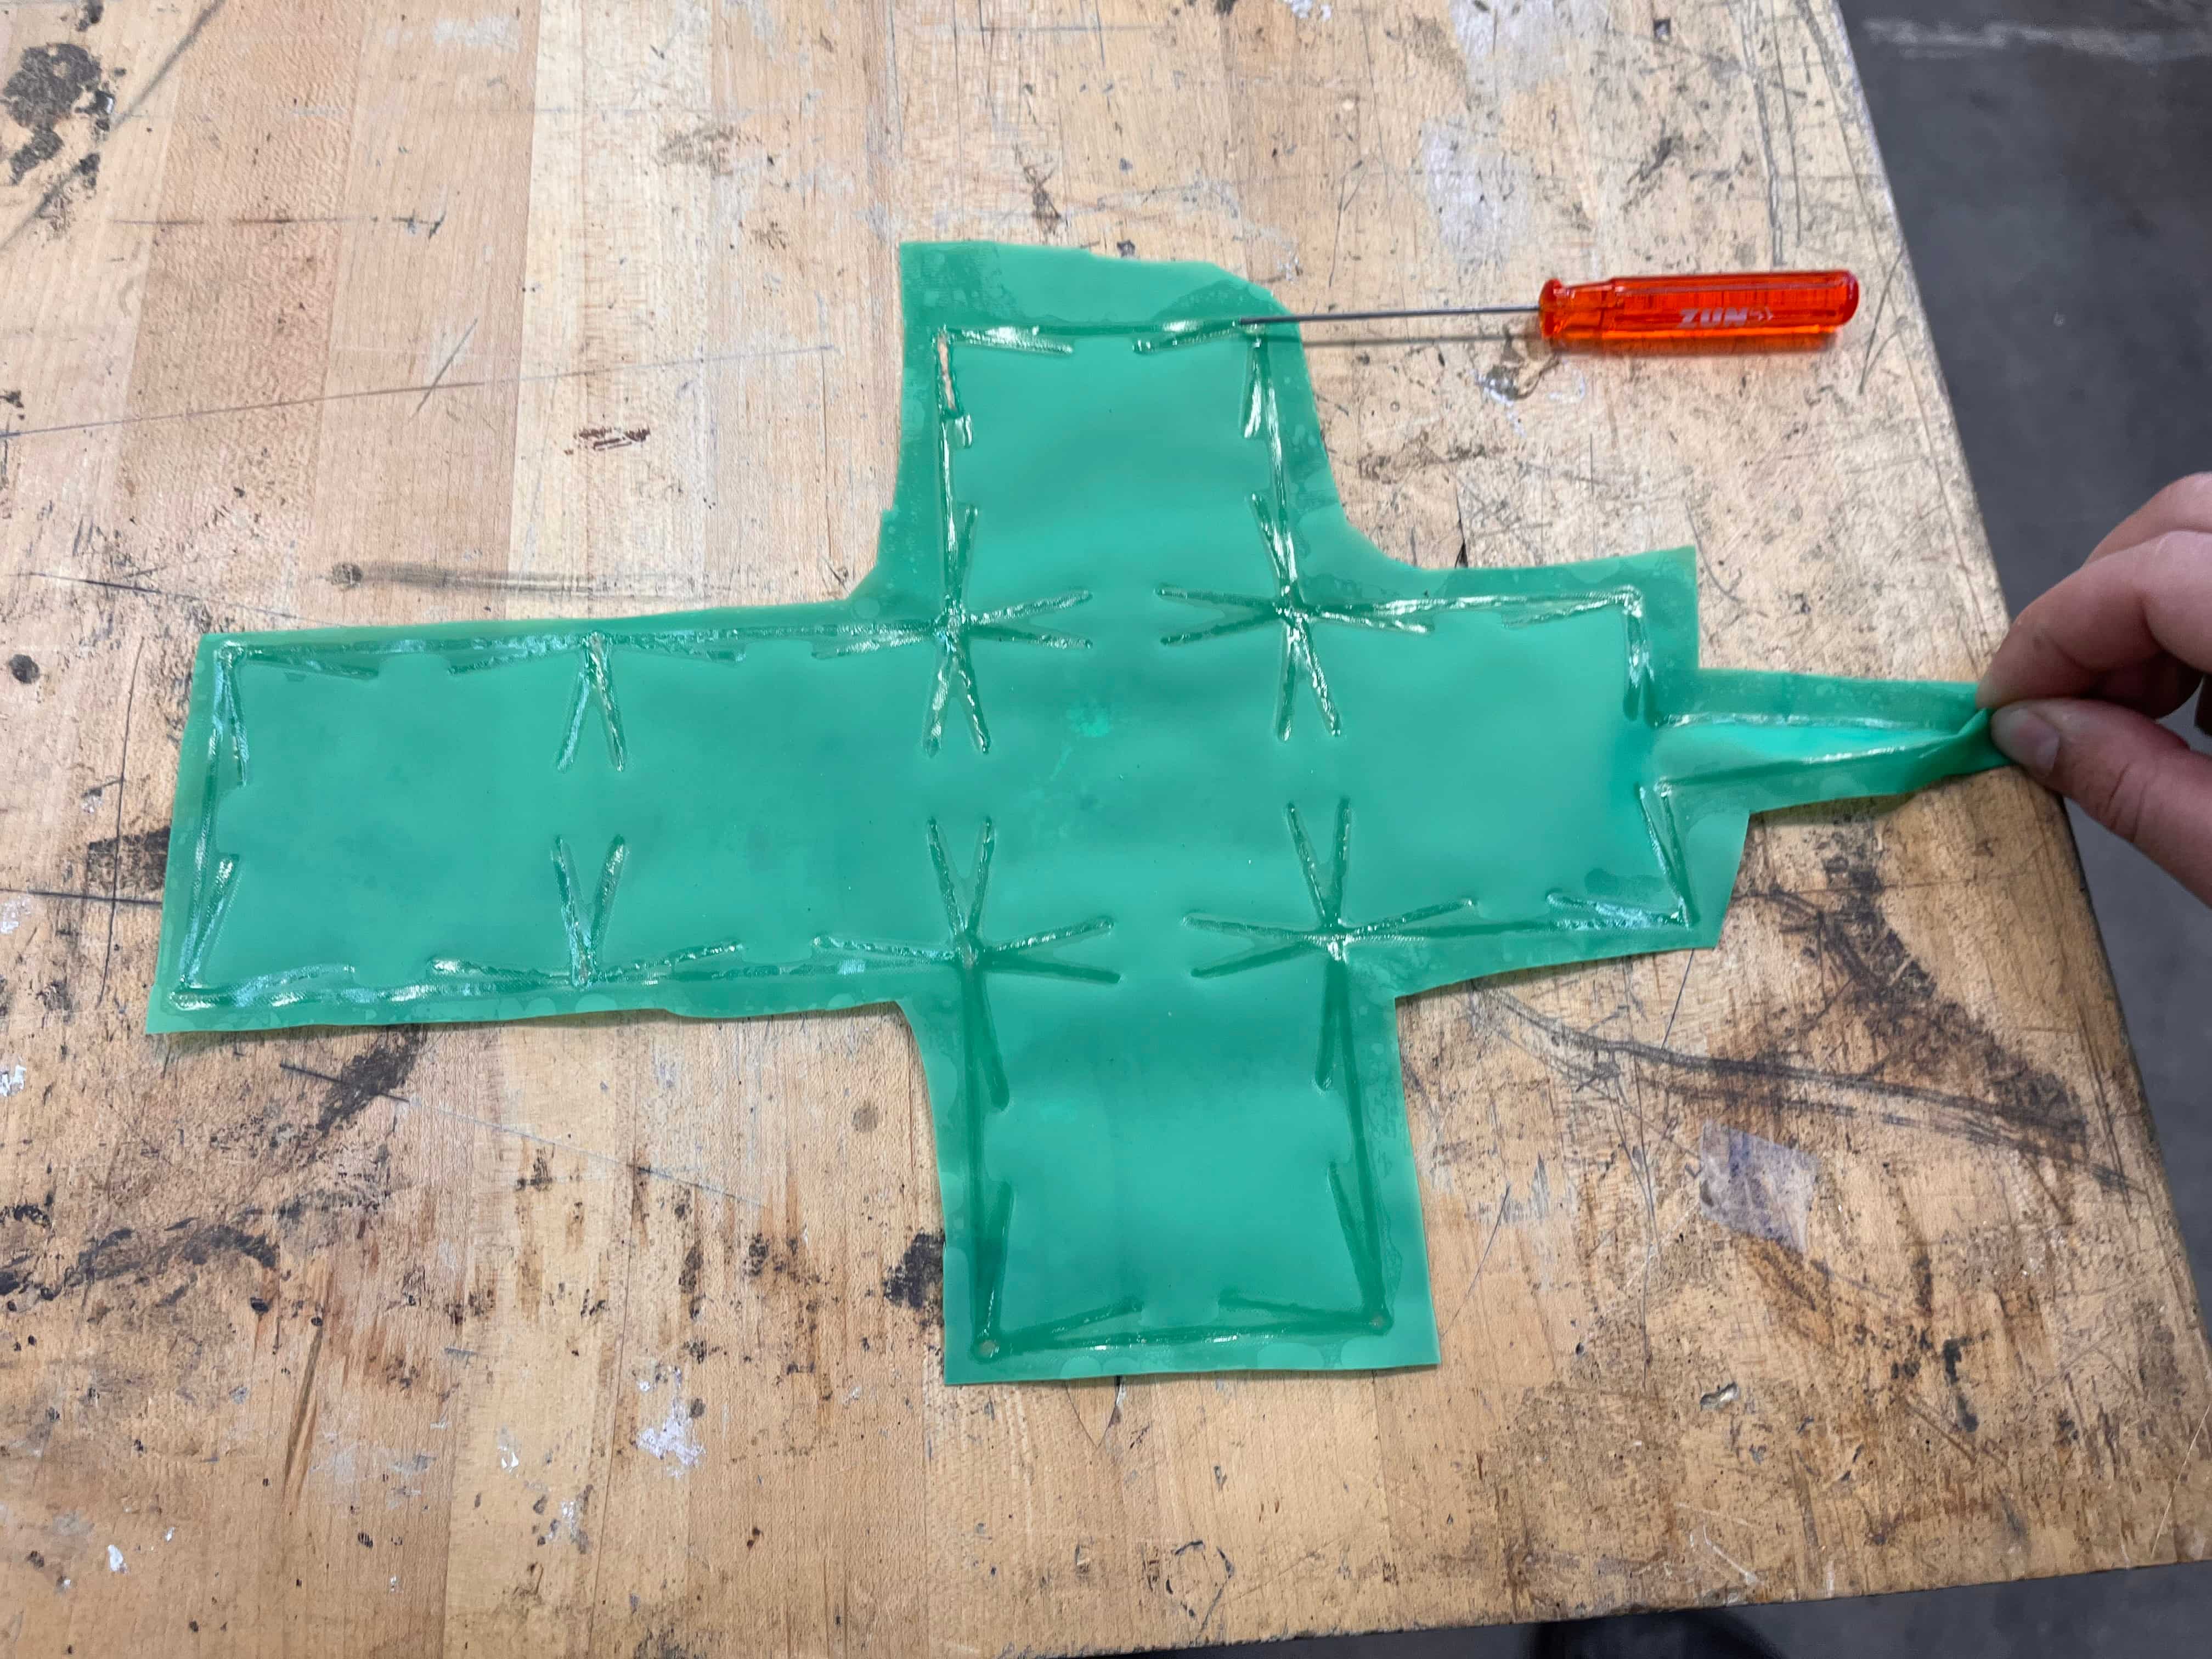
Process
I wanted to try making a self-inflating cube, inspired by Jifei et al's aeroMorph project from 2017 in Tangible Media. I eyeballed what
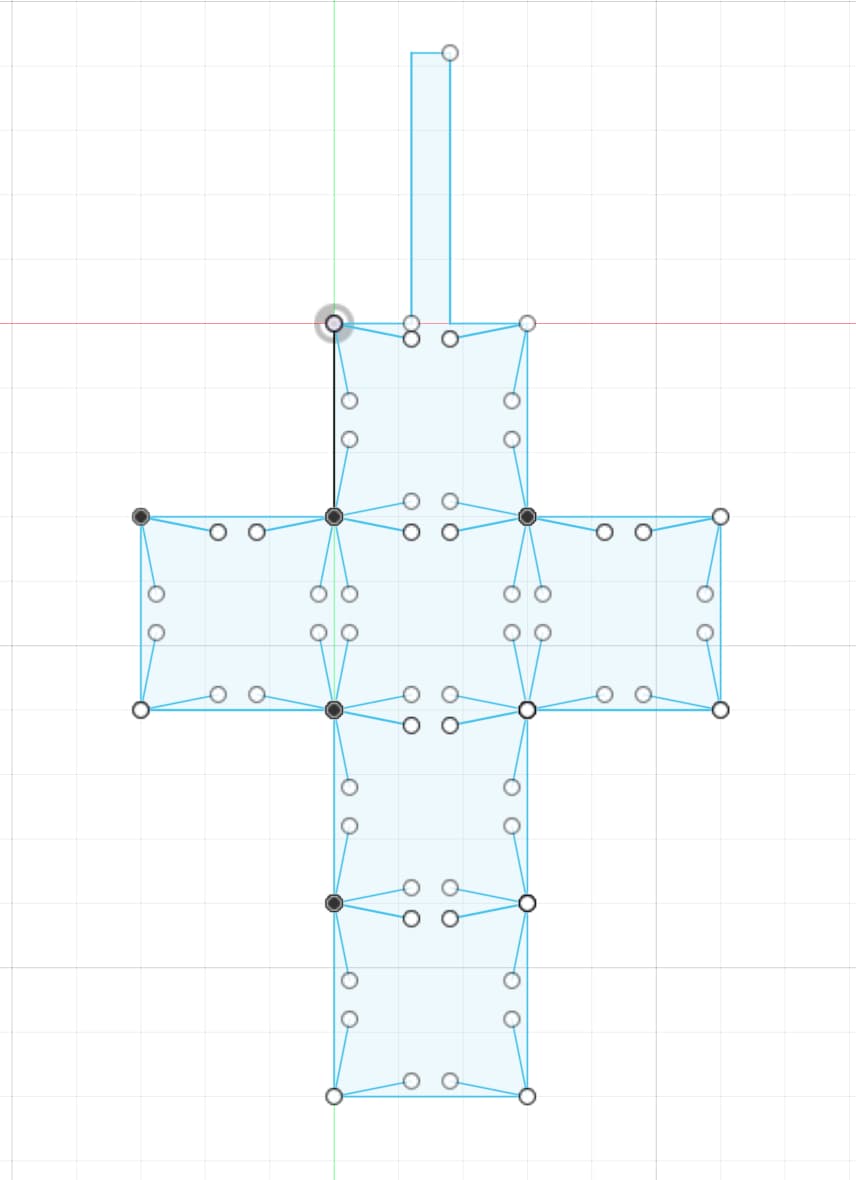
I thought might work and laid it out in Fusion (I actually originally tried Illustrator, but Alfonso reminded me that made no sense.
no sense at all. and he was right.)
Here's a screenshot of the project from Tangible Media:
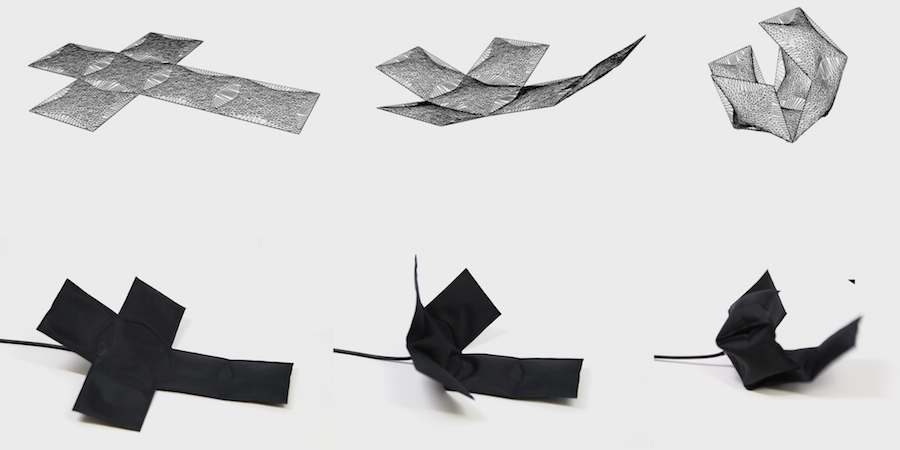
And here's my eyeballed design to emulate it:
Here's a little behind-the-scenes process video and what it looked like upon completion:
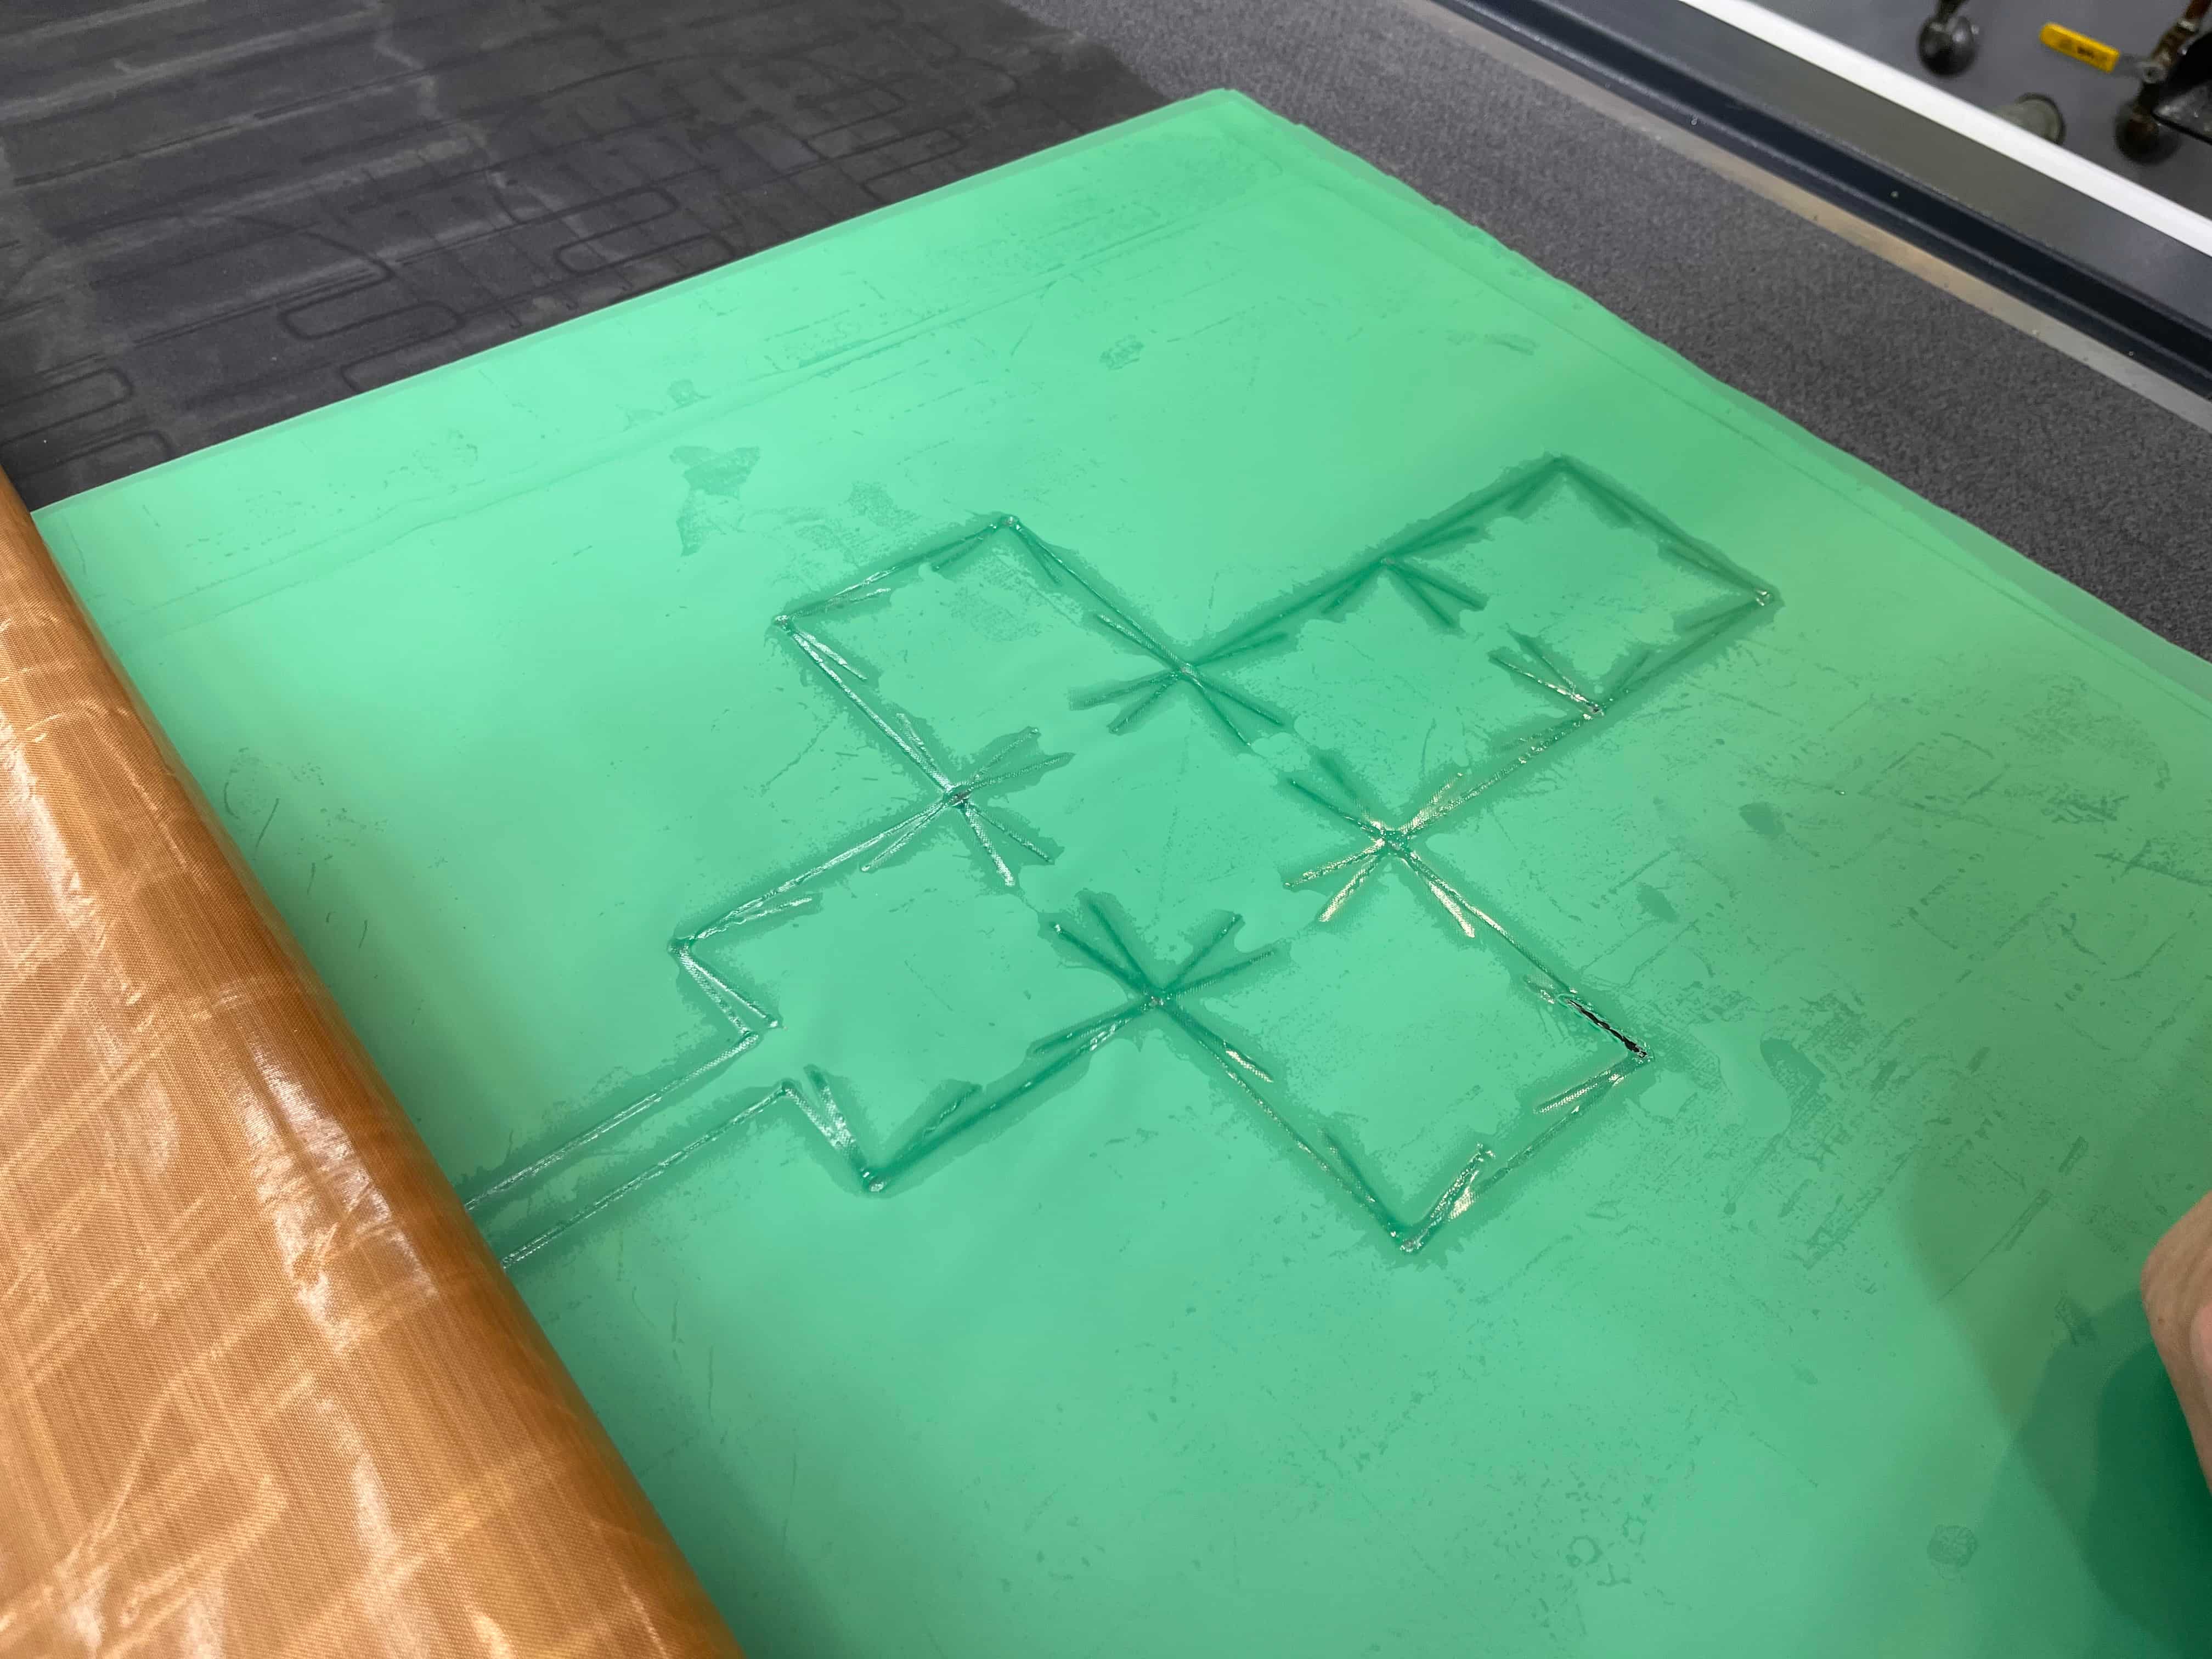
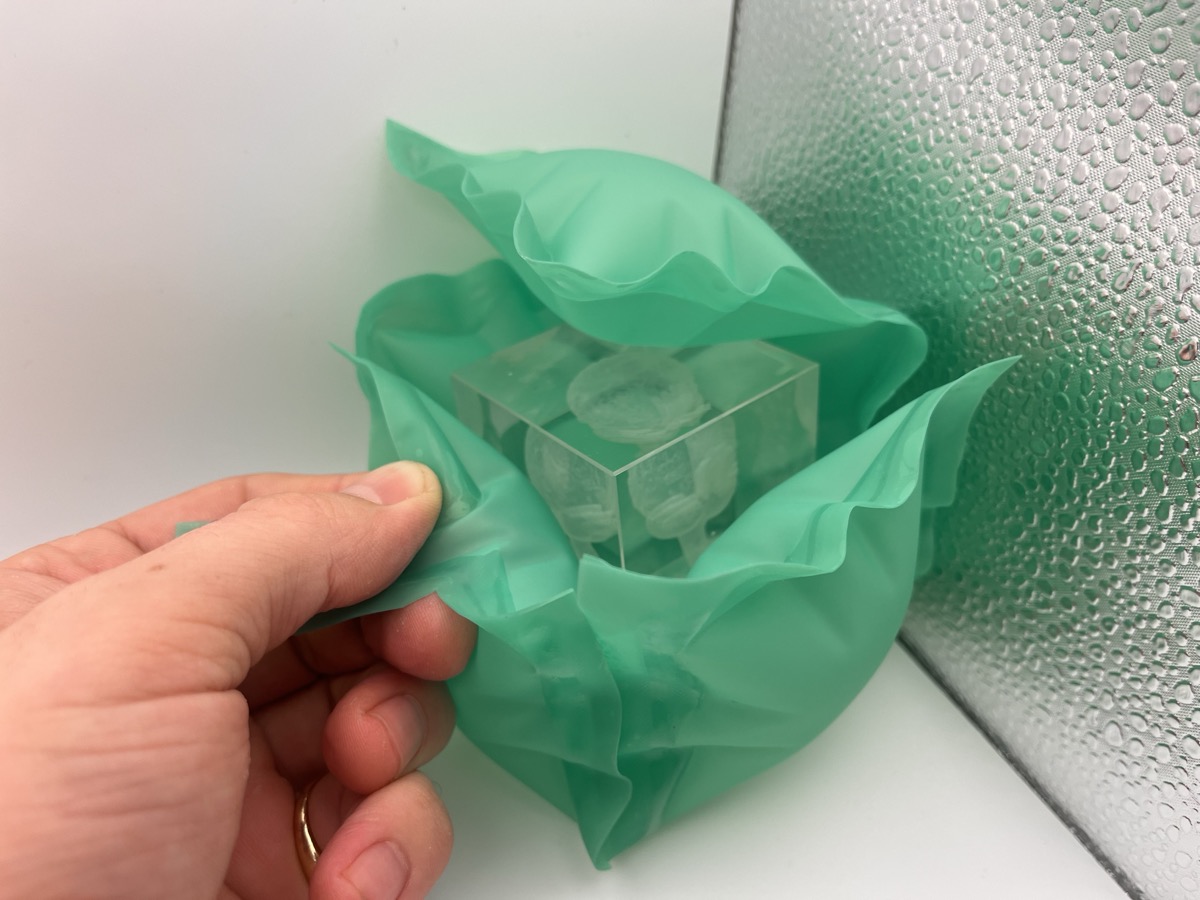
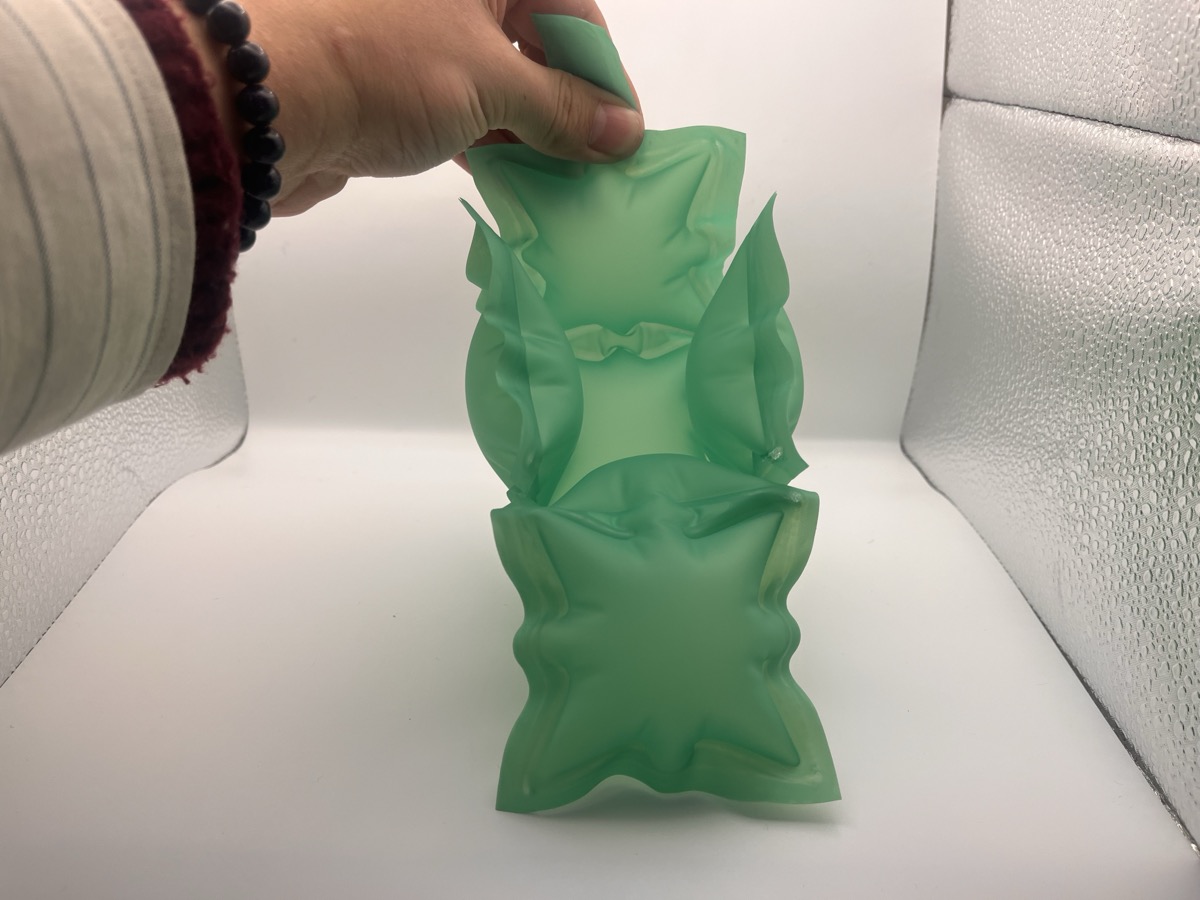
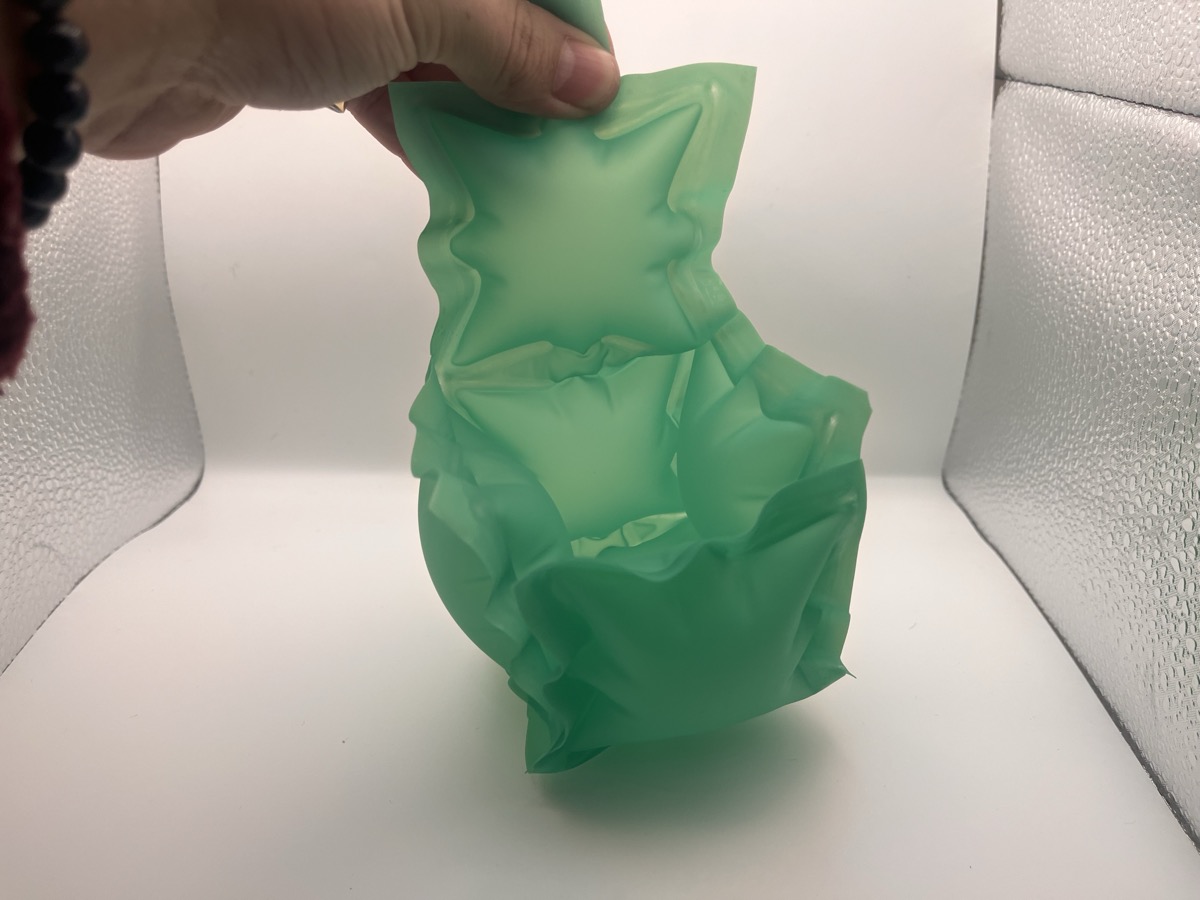
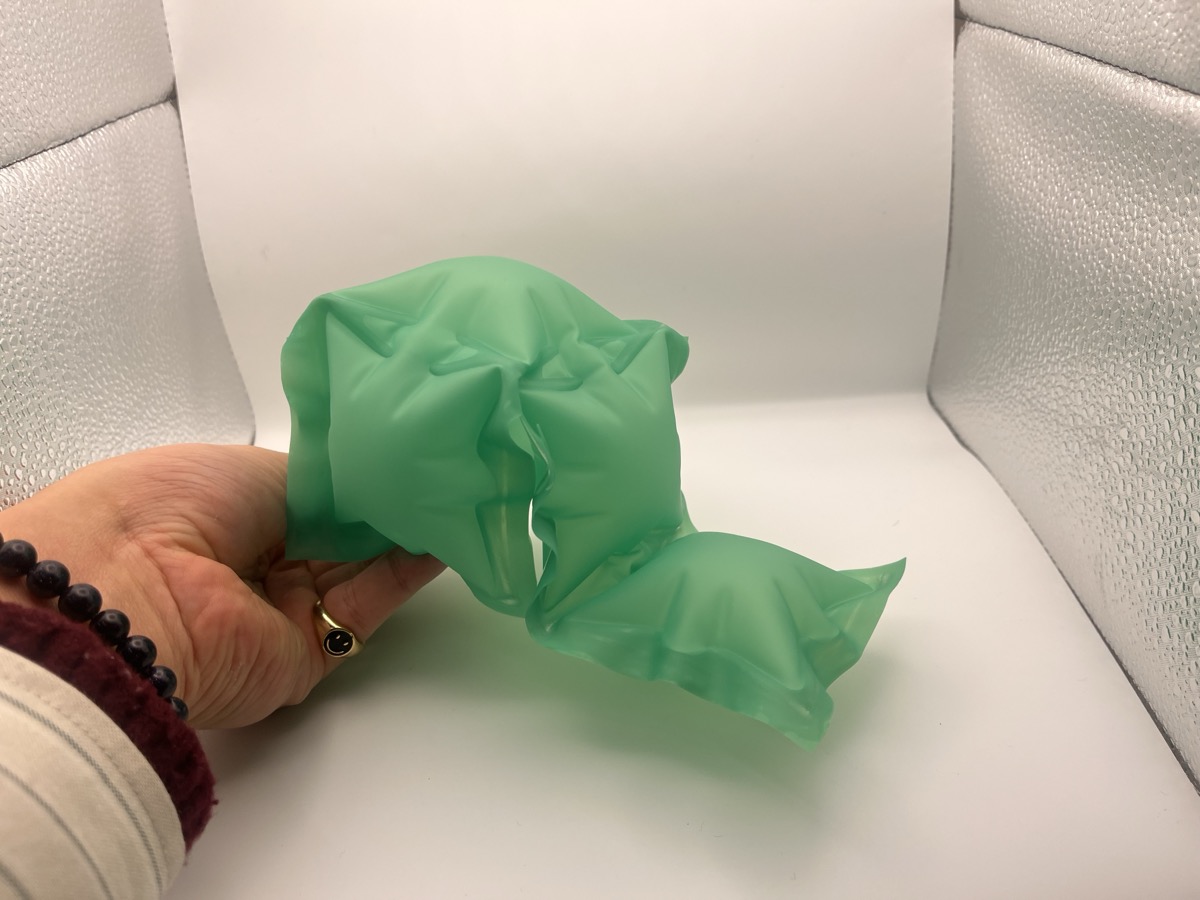
I cut it out, and tried to inflate it...
And Voila! It actually worked! Not only that, it's actually the perfect size to fit my glass engraved cube! What a lovely coincidence. 😌
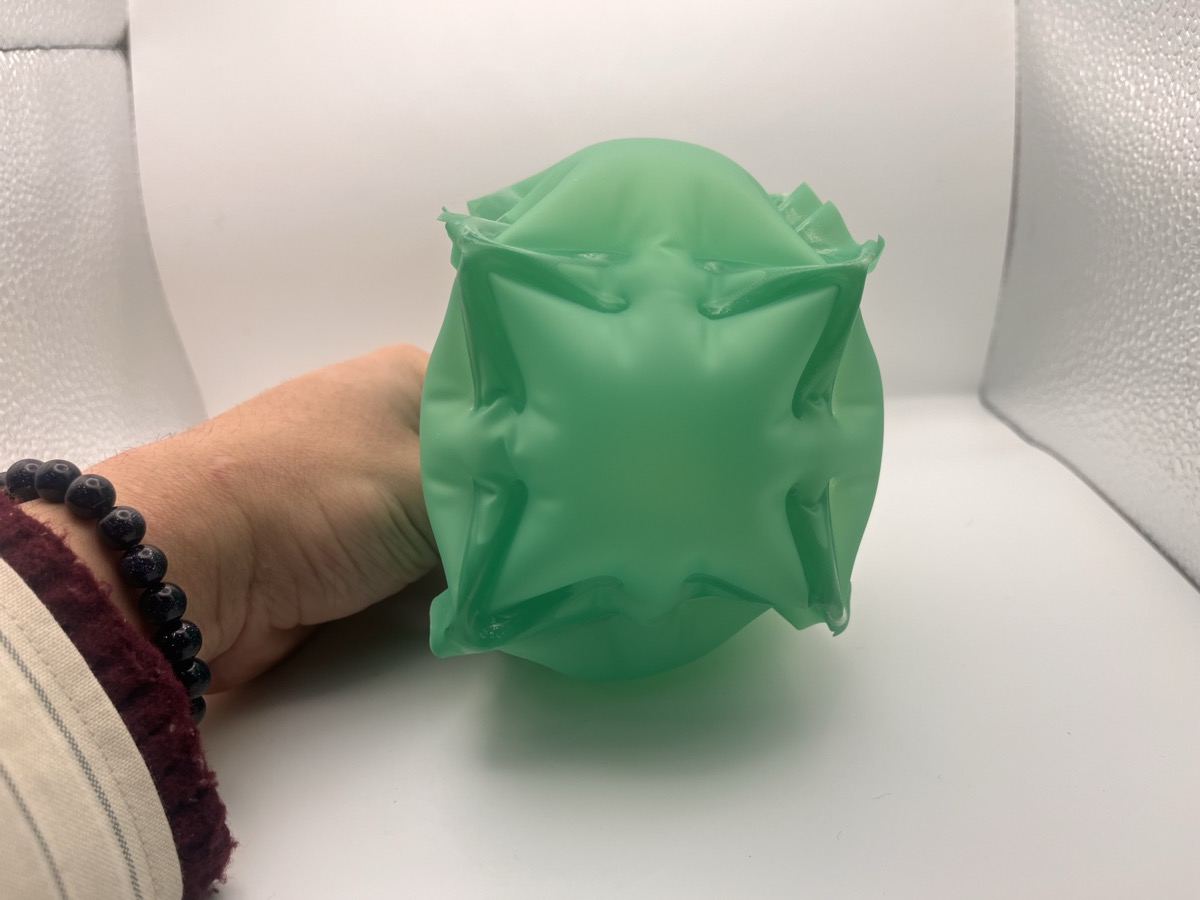
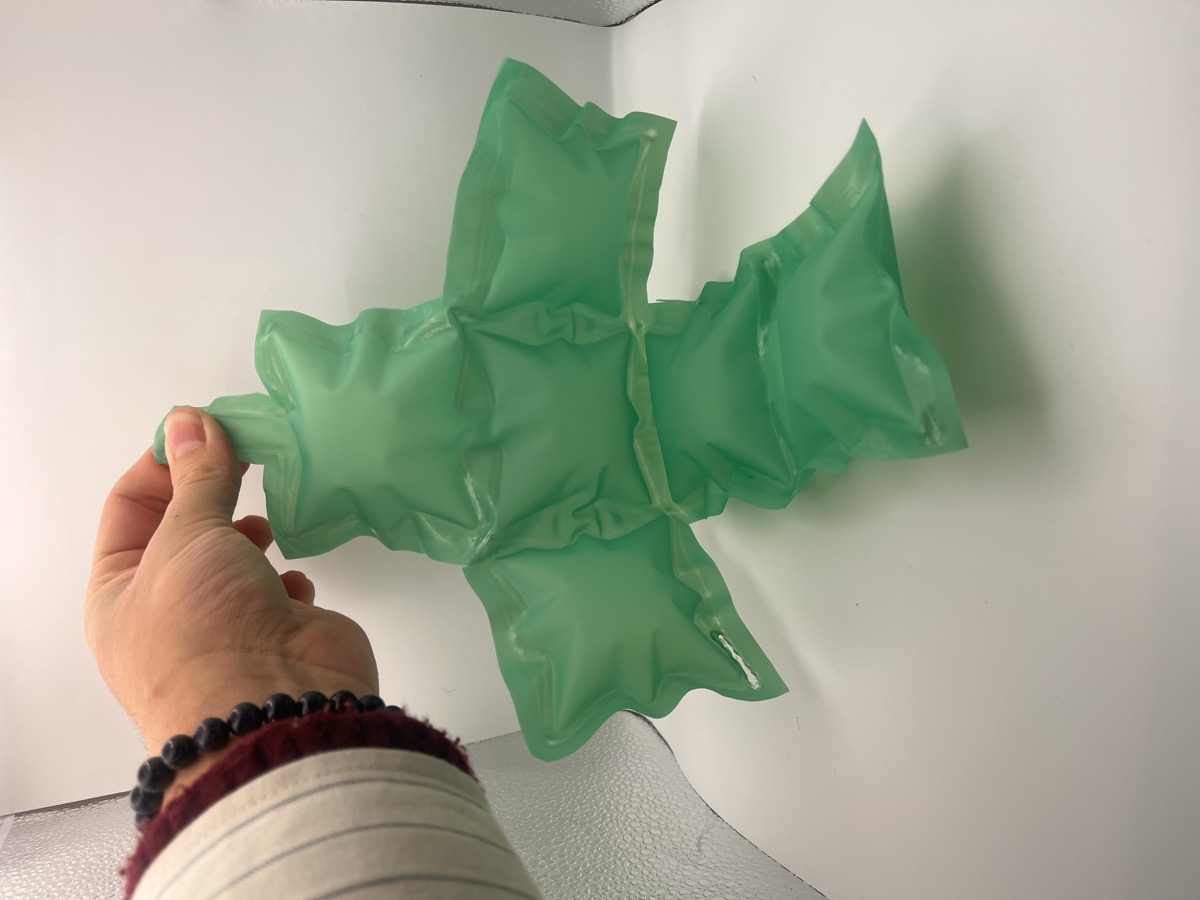
Each face and hinge is strong enough to hold its position, so it can actually quite comfortably morph into a number of different shapes. Frankly, it looks like a wonderful reclining chair to me...
All in all I had a great experience, and this definitely sparked a million different follow-up ideas that I can't wait to dive into. Thank you for teaching us, Alfonso! 🫶