Final Project Showcase
Timelapse of Assembly:
Final Project Files:
- Final PCB KiCad Files (Cuckoo v3)
- Final 3D Printed STLs (Internal Mounting Structures)
- DXF Files for Housing [unfortunately these are v1, v2 got corrupted :( ]
- Final Arduino Sketch for Demoing (however, I'm censoring my AIO key in this one)
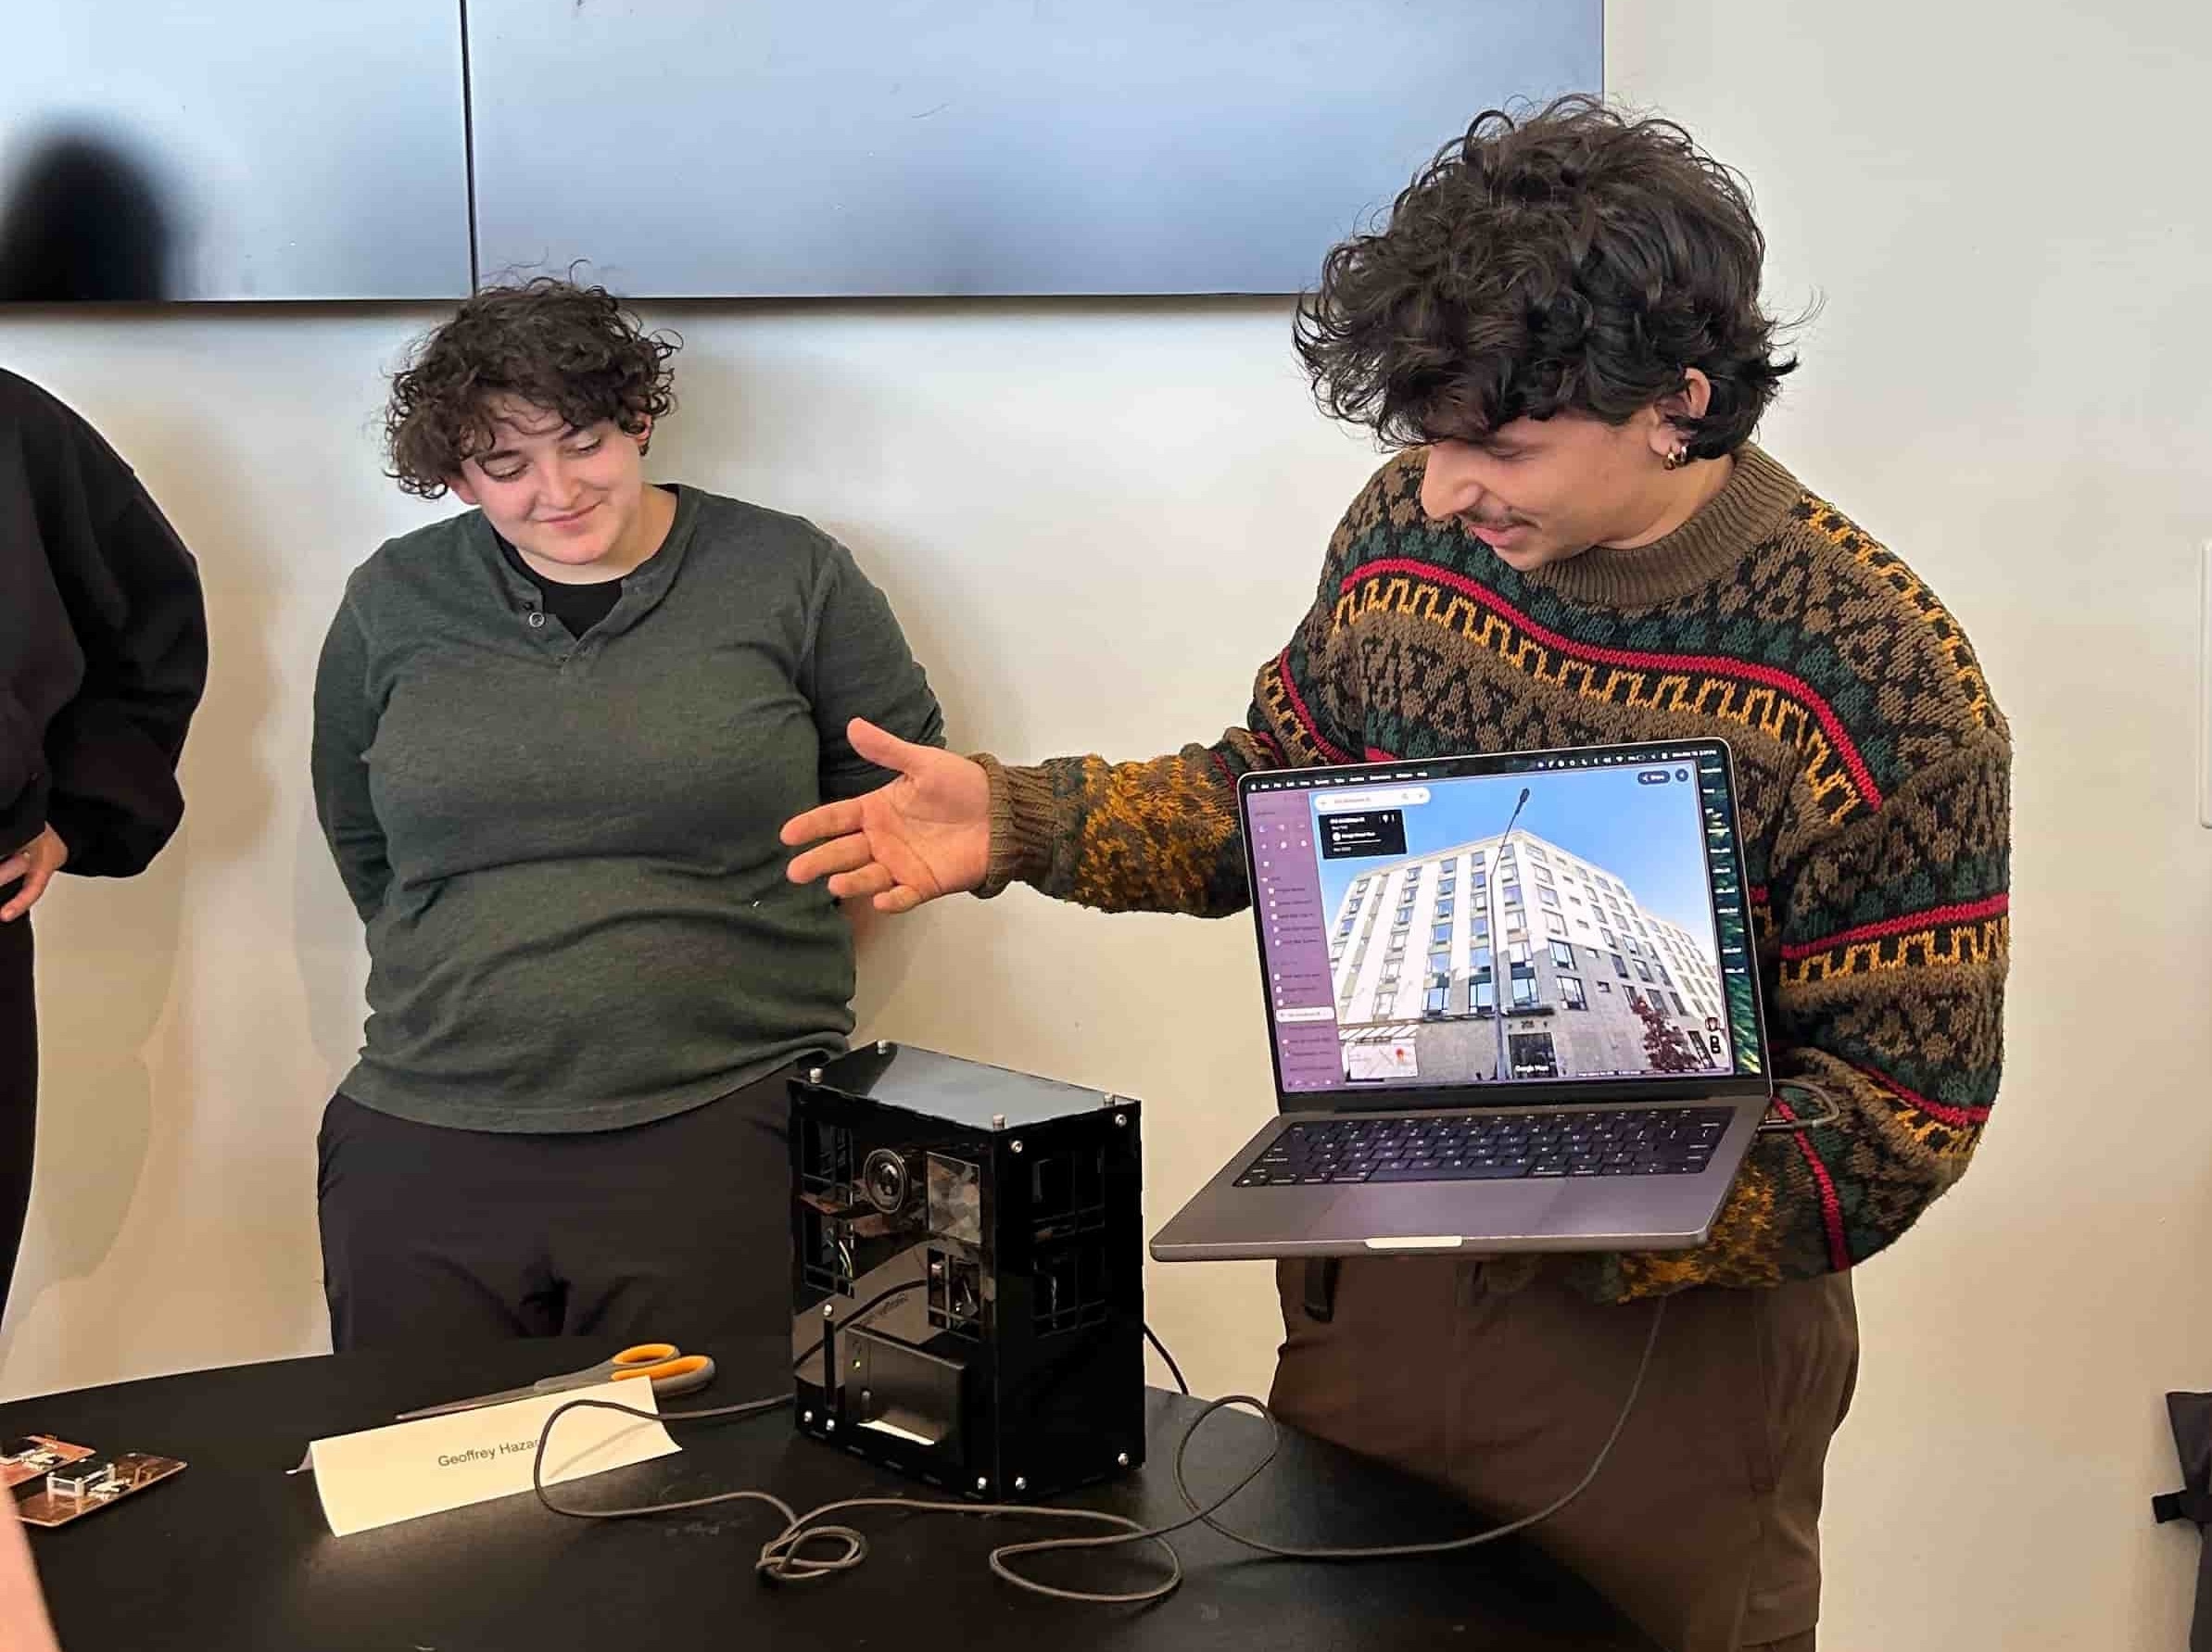
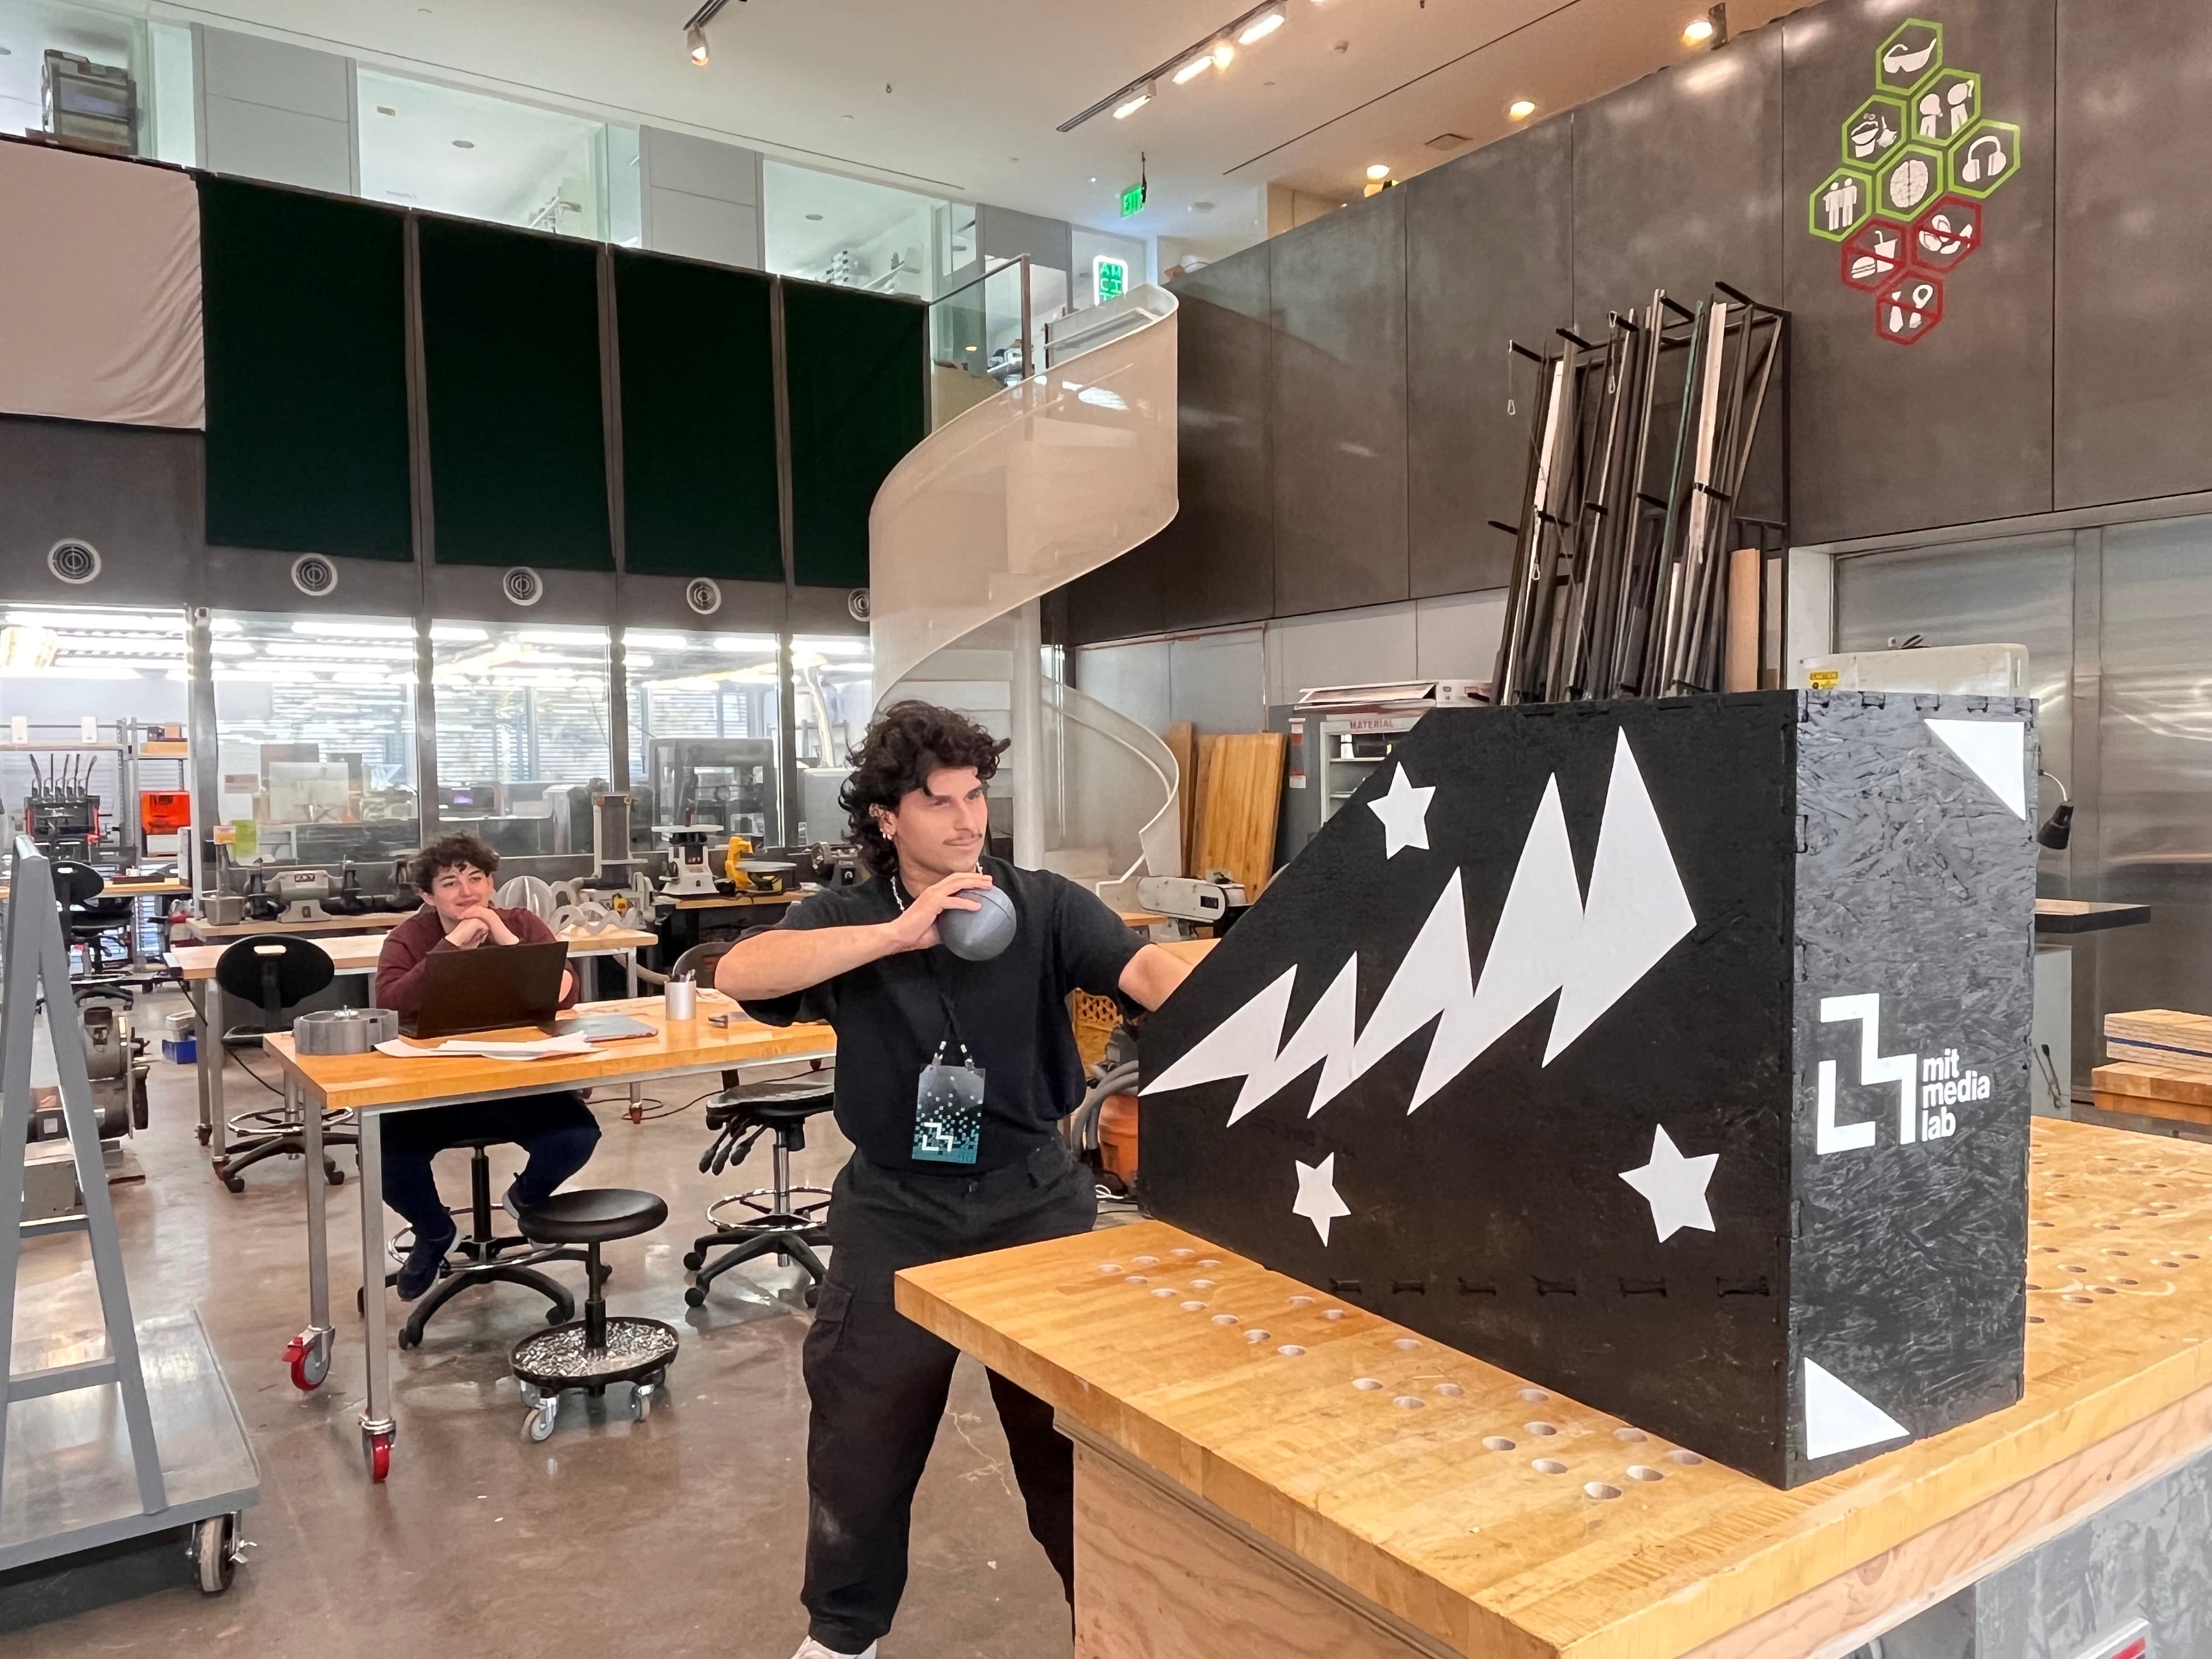
Highlights from Demo Day:
Final Project Notes
Here we are! The final frontier. Let's put it all together. The final project assignment is:
- Document a final project masterpiece that integrates the range of units covered, answering:
- What does it do?
- Who's done what beforehand?
- What sources did you use?
- What did you design?
- What materials and components were used?
- Where did they come from?
- How much did they cost?
- What parts and systems were made?
- What tools and processes were used?
- What questions were answered?
- What worked? What didn't?
- How was it evaluated?
- What are the implications?
- Prepare a summary slide and a one minute video showing its conception, construction, and operation.
- Your project should incorporate 2D and 3D design, multiple additive and subtractive fabrication processes, electronics design and production, embedded microcontroller design, interfacing, and programming, system integration and packaging.
- Where possible, you should make rather than buy the parts of your project.
- Projects can be separate or joint, but need to show individual mastery of the skills, and be independently operable.
- Present your final project, weekly and group assignments, and documentation.
So let's go through it!
Project Details
What Does It Do?
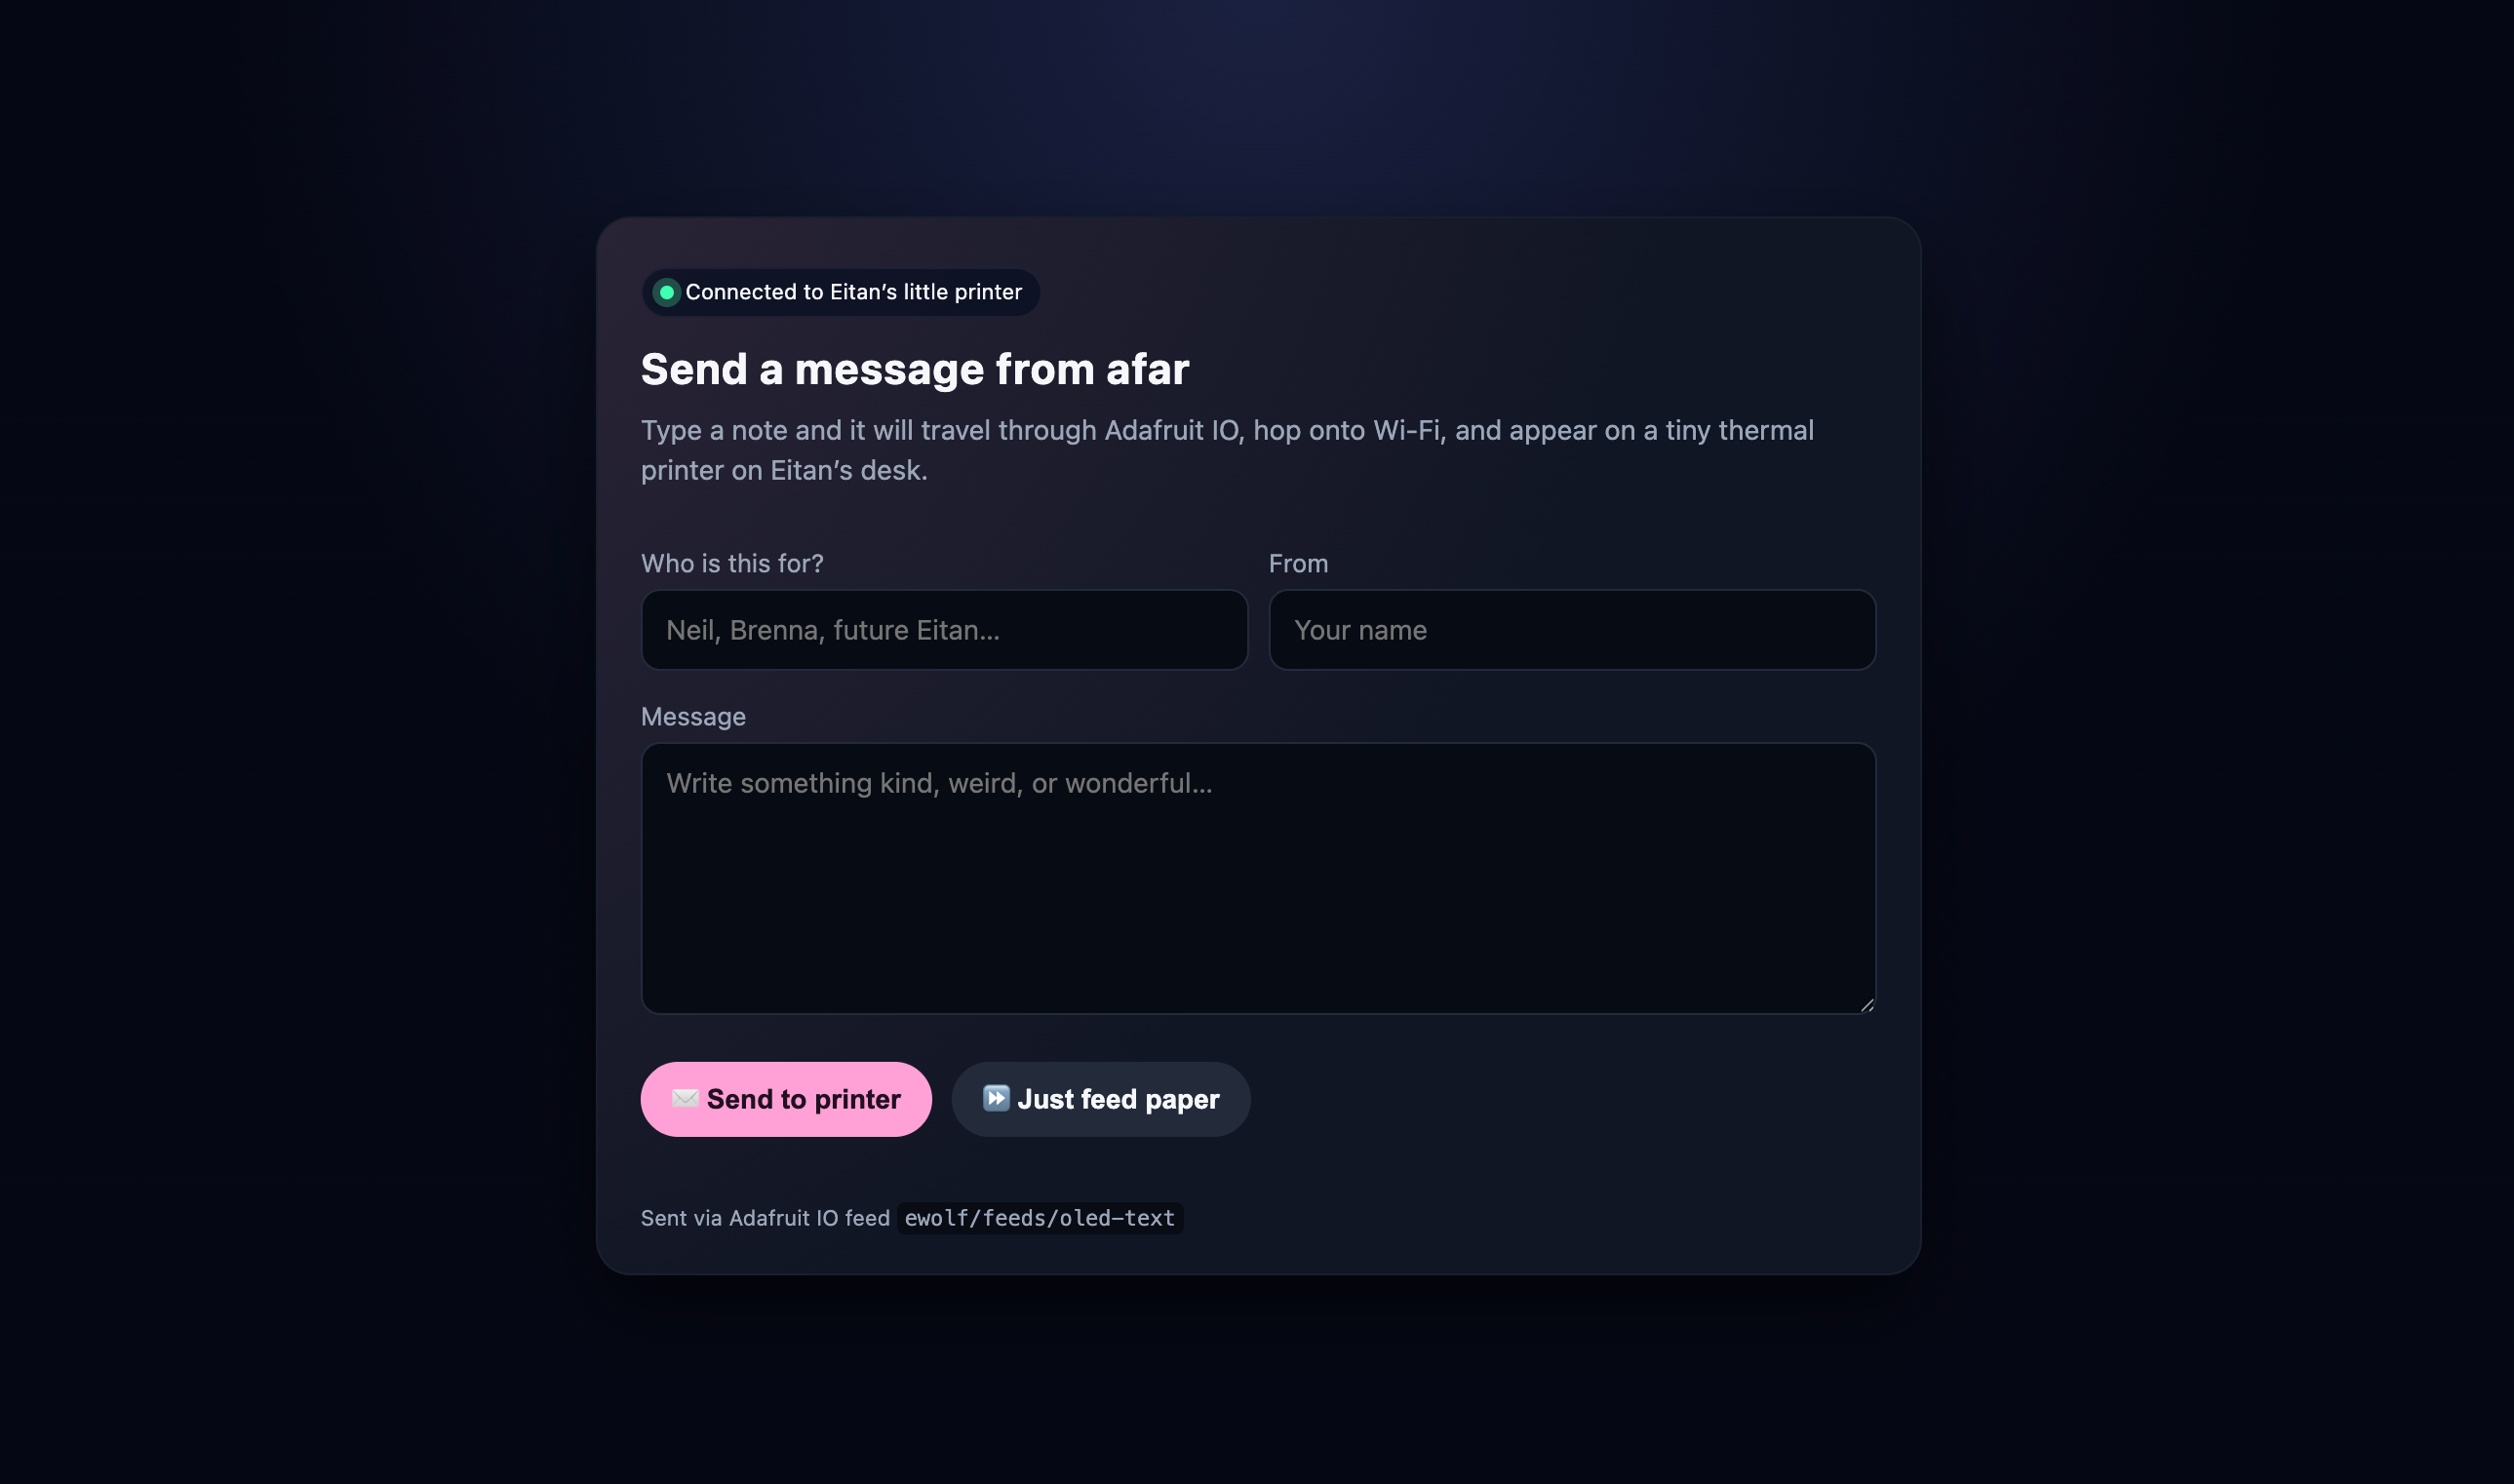
The NoteBox Printer is for anyone who is long distance from their partner, and wants to send them a tangible message from afar. You can type a note from a browser-based interface, and the NoteBox will recieve it, light up, play a sound, and print out that note on receipt paper for the person on the other end – no matter the distance between you.
Who's done what beforehand?
From what I could tell in the HTMAA world, only JD Hagood
had well-documented experimentation with a receipt printer (although his was a full-sized one, rather than the mini Adafruit/Seed versions).
The real inspiration behind me wanting to use a receipt printer is the Poetry Camera, which I'd seen a few years
back – I really like the idea behind this, and wanted to create a final project that would allow me to understand how to work with these little printers
so that I could build on it during the rest of my time at MIT and start to use AI in unique ways in tandem with a physical printout.
Plus, they're fun!
What sources did you use?
The vast majority of my references for this came from class materials (like Neil or the TA's documentation) which should be linked in each week's page. For example, when working on PCBs, I relied mostly on Neil & Quentin's mods & carvera software and examples. I also heavily relied on my classmates (CBA best section ever), who worked with me for hours to teach me most of these concepts or help with debugging; as well as all the TA's, whom I cannot thank enough – particularly Alfonso, Quentin, and Alan, who each went above and beyond to teach me how to get better at every facet of fabrication. I also used a lot of ChatGPT/Cursor for writing software, as that's a skill I'm not well-versed in (though I always did my best to understand anything it was writing on my behalf).
What did you design?
Everything except the components themselves – the board design and component dlayout, the milled PCB design, the 3D-printed PCB/LED/laser-engraved cube mounts, the internal structure and joints, and the outer frame. I don't think I can necessarily claim designing the software since so much of it is AI-generated; but I will claim designing my website, since I spent a lot of time finding different parts I wanted to add to what eventually became my final site and have a top-to-bottom understanding of how it's structured.
What materials and components were used?
I think this encompasses nearly everything:
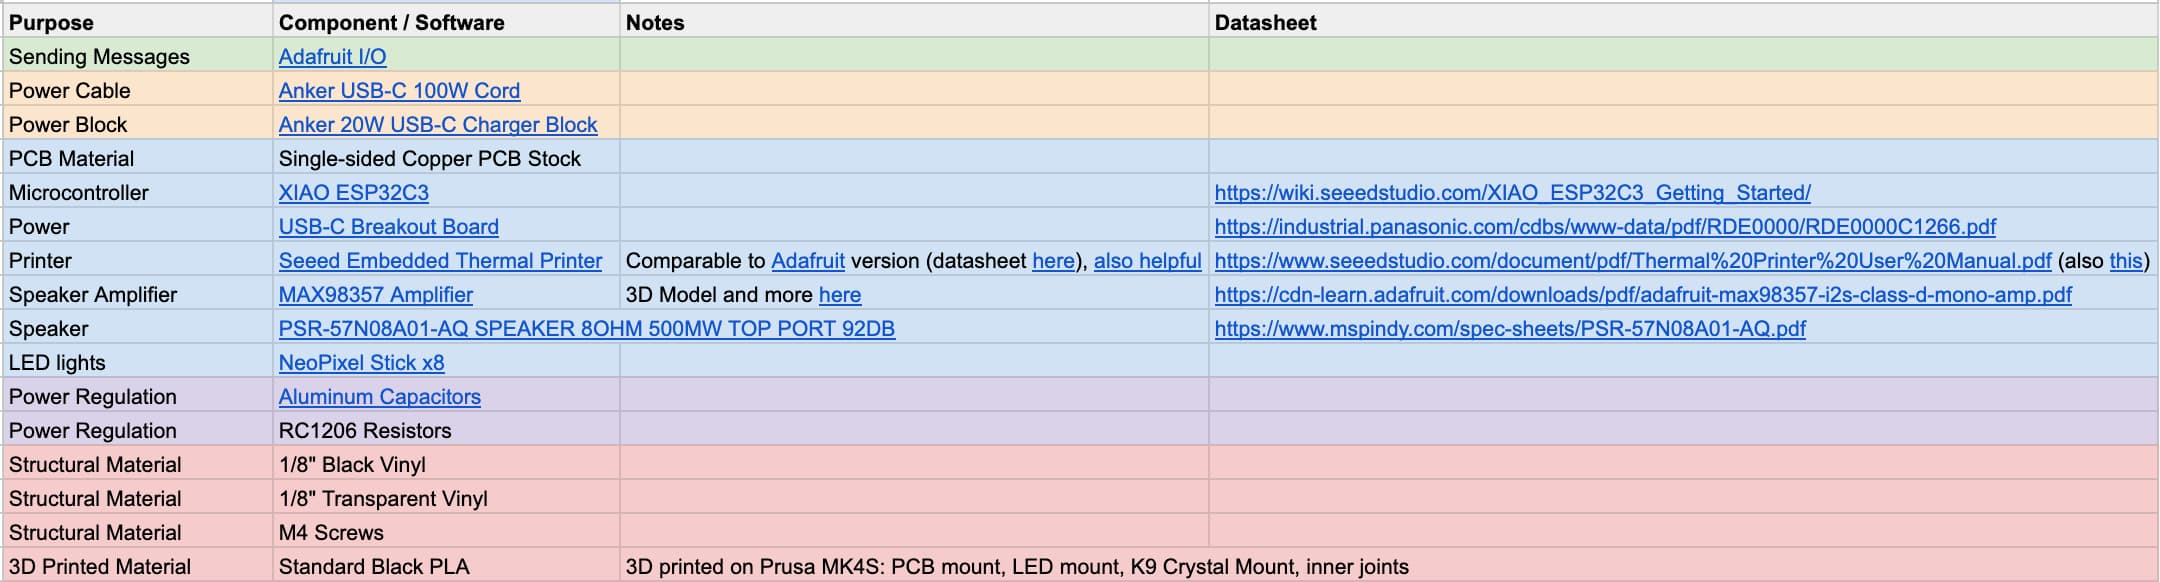
However, I was given a last-minute speaker replacement, so I'm not entirely sure what model it is or where it came from.
This also doesn't include JST connectors or receipt paper rolls, and doesn't capture 1 470uf capacitor I needed to order.
Where did they come from?
The power block and cable, JST connectors, capacitors, receipt printer rolls, and the speaker amplifier were bought on Amazon; the Seeed thermal printer was bought from Seeed Studio; I'm not sure where the speaker replacement I was given came from; Matti (another HTMAA classmate) gave me the NeoPixel stick; the structural materials were from spare stock down in Mars Lab; and the rest came from the HTMAA CBA Electronics Lab inventory.
How much did they cost?
- 1x Seeed Embedded Thermal Printer = $51.59
- 1x Box of SMD Electrolytic Capacitors = $10.99
- 1x Set of 5x Max98357 Amplifiers = $12.99
- 1x Anker 20W USB-C Charger = $11.99
- 1x Anker 100W USB-C Cable = $8.99
- 1x Box of JST Connectors = $7.99
- 1x Set of 58mm Thermal Paper Rolls = $5.94
- Everything from the CBA / Mars Lab inventory = ~$5-10
So in summary, somewhere around ~$120 by my estimate.
What parts and systems were made? What tools and processes were used?
As a reminder, my project was meant to incorporate 2D and 3D design, multiple additive and subtractive fabrication processes, electronics design and production, embedded microcontroller design, interfacing, and programming, system integration and packaging. So let's break it down:
- 2D Design: Pen & paper (the best fabrication tool in the world!), as well as Illustrator and Figma for sketching out ideas
- 3D Design: Fusion360 for all 3D modeling (all of the housing and casings, joints, mounts, etc)
- Additive Fabrication: Prusa MK4S and XL 3D printers for all 3D printing (PCB & LED mounts, inner joints)
- Subtractive Fabrication: xTool P3 laser cutter for cardboard/acrylic cutting (outer frame and cube mount) and the xTool F2 Ultra for laser engraving the crystal cube; also the Carvera for milling out my PCB
- Electronics Design & Production: KiCad for designing all my boards; the Carvera for milling them; and the soldering tools in the CBA electronics lab to solder everything on
- Embedded Microcontroller Design, Interfacing, and Programming: Cursor, ChatGPT, and Arduino for designing and writing the embedded programming system on the XIAO ESP32C3, as well as the HTML interface to communicate with the device
- System Integration & Packaging: Fusion360 to design all of the packaging based on the internal components and mounts I'd designed earlier, including through-holes; various pliers and screwdrivers to get everything into place; hot glue, super glue, and acrylic cement to seal everything together.
What worked? What didn't?
What Worked: I actually think a surprising amount. I know printers are famously tricky to get working, but after a lot of trial and error (and help from AI assistants) I was actually able to get it working decently – this is despite Adafruit discontinuing this printer component and me needing to use the Seeed version, whose documentation was mostly in Chinese and whose diagrams didn't quite match the Adafruit ones. I think I'll easily be able to build on this printing system to generate much more complex layouts and formatting options. The housing and packaging also came out looking really nice, in my opinion – I wasn't able to complete the windows (I would ideally like people to not be able to see into my sprawl of wires, teehee), but for how small each of the tabs are and how long I spent designing it, it all fits together really seamlessly and nicely and feels professional to me. Each of the component holes were perfectly measured and spaced, the mountings I designed and printed and attached work really well, and if you couldn't see in the windows, I think it'd look really really wonderful – I plan to add those soon and update my pictures to show that. It's sturdy, it's clean, everything inside is mounted and screwed in, and it's worked very consistently – all of which exceeded where I thought I'd be at this point.
What Didn't Work: Well, the speaker only buzzes rather than playing recognizable sounds, so something is definitely wrong there; either it's miswired or something is wrong in the software. I aim to debug that ASAP as well. As mentioned, I also wasn't able to get the windows in in time (though the ones I designed did fit in - lots of dialing in the press fits there). There were also a number of features I wanted to add (picking colors and sounds in the interface) or had to drop for scoping (the cuckoo bird, small LEDs behind some of the windows to look like a cozy apartment) that I wish I could have been able to include. I also realized that, while it is glued in, there technically is nothing from stopping the crystal cube from falling out if it ever came loose from the glue, which I would adjust in a future version (it just looked sooo nice with the clear view of it). But all in all, for the most part I understand exactly what went wrong and what I'd need to do to fix it in v2, so I actually feel very proud – at the end of the day, i just wanted a way to send my long-partner a message and light up her day, and this definitely accomplishes that. I'm looking forward to surprising her with it soon.
What questions were answered?
Can I successfully build something?--- yes!
Will whatever I build work in the class demo?--- for the most part!
Can I learn how to use a receipt printer like I want to be able to for future projects? --- absolutely!
Will I be able to include everything I thought I would at the beginning? --- no! but that's ok; de-scoping is part of any great project!
Will I be able to integrate at least three distinct things (audio, visuals, interaction) into a nice system? --- yes!
Is HTMAA the best class you've ever taken, and hands-down the best crash course in the exact hands-on skills you hoped to learn when applying to MIT? --- undoubtedly, unshakingly YES!
What are the implications?
First and foremost, the biggest implication is that I've shown myself that I can learn and integrate entirely new skills very quickly; that I can build things I imagine in my mind; and that I have enough knowledge and experience to understand exactly where I went wrong with this particular project, and feel empowered enough to go out and continue building upon this work. Now that I've learned how to use the receipt printer, I'm also really looking forward to continuing to use it for future projects and experimenting with audio interaction – I'd really like to build a musical version of the poetry camera I was inspired by. I think overall I look at the world in a different way, and am grateful to have been shown that there's a surprisingly large community of people that are just excited to build things and fix things and design things with a very pure intention. What a beautiful gift, truly.
How was/should it be evaluated?
I think this should be evaluated based on collaboration, effort, skill delta, and result. What do I mean by that?
Collaboration:
This is maybe the least related area (I'd argue worth maybe ~15% of a grade), but to me one of the most important ones. One of my largest takeaways from this course is that none of us are ever building anything
in a vacuum; from sourcing components to understanding concepts to building machines, we rely on each other to learn, understand, and grow. I've never been in an environment quite like this, where
every one of my classmates, TAs, and instructors were not only generous with their time, but excited to help – so it was important to me to show up with that mindset and return that energy. For me, that manifested
as organizing group learning sessions, making class groupchats, answering questions, debugging machines in my spare time, cleaning up around the shop, and so on. We've been brought into the larger worldwide fabrication network;
but I played a large role in bringing our classmates to an inclusive, supportive space where we could learn together.
So I can't speak for anyone else, but I know my project would not have been the same without the support of others, and I think it's fair to consider that area as one aspect of the grade people recieve.
Effort:
I know this is variable given everyone has different time constraints (and maybe less fair to consider), but for me, I poured truly hundreds of hours into this class, spending nearly every free moment in the shop, electronics lab,
with a learning group, or experimenting on my own. I sought out so many additional opportunities to learn more almost every week, spending hours with TAs and my classmates trying to deepen my understanding of each topic to the best
of my abilities – all in service to trying to make this final project exceptional. There wasn't a single time where something failed in the midst of this process where I just gave up; I would source from other people's sites, wikis,
forums, TA office hours, classmate advice, and really anywhere I could to make sure I was getting enough of an understanding to synthesize into what I needed for this project.
The final project itself is the result of at least 100+ hours of work, which I think should be factored into the grade. But it's not just about time spent, but amount learned, which brings me to my next area...
Skill Delta:
I understand everyone comes into this class with very different backgrounds and level of ability. However, I was a little anxious at first because I think I fell on the "next to zero" end of the spectrum across many of these skills.
But if I look at everything that went into making this –– 3D modeling, laser cutting, 3D printing, electronic component selection/PCB design, milling, soldering, embedded programming, laser engraving, debugging,
system integration and packaging, and so much more –– I'm extremely, EXTREMELY proud of myself for this final result, because NONE of those I knew how to do before. And now, not only can I do it, I have enough foundational knowledge to continue
to build upon this and make a v2, a v3, and so on.
So to me, factoring in how much of these skills are new to people and how many of them they could integrate is fair.
Result:
Honestly, maybe surprisingly, this is the least important to me. I set out to make a cuckoo clock that would light up, play a sound, move a bird out of a housing, and print out a message that I'd send to my partner from afar;
the final result can do all of that, minus the bird. I saw how many people's projects didn't work on demo day, for so many possible reasons, but I don't consider those projects failures; I knew how much had gone into them
and that they (for the most part) did work at various points in the process. So it feels less important to me to count my machine mostly working as less of a failure, because I know I could have easily been among them – maybe if I
tripped and dropped it, or accidentally pressed something I shouldn't have, my project would have completely fallen apart.
So I'm glad mine did almost entirely work, and yes I'm secretly really happy I managed to avoid doing anything that would have led to it failing completely, but please feel free to count or discount that as much as you wish.
I think I wrote way more than I meant to, and it probably wasn't exactly what you meant by this question. I think in summary I just ask that you forgive my late documentation and my other personal drawbacks, and see how much I was dedicated to this class with every fiber of my being.
Thank you for allowing me to be a part of the journey this year!
Updates
Week 15 Update (Final Project Week, 12/15)
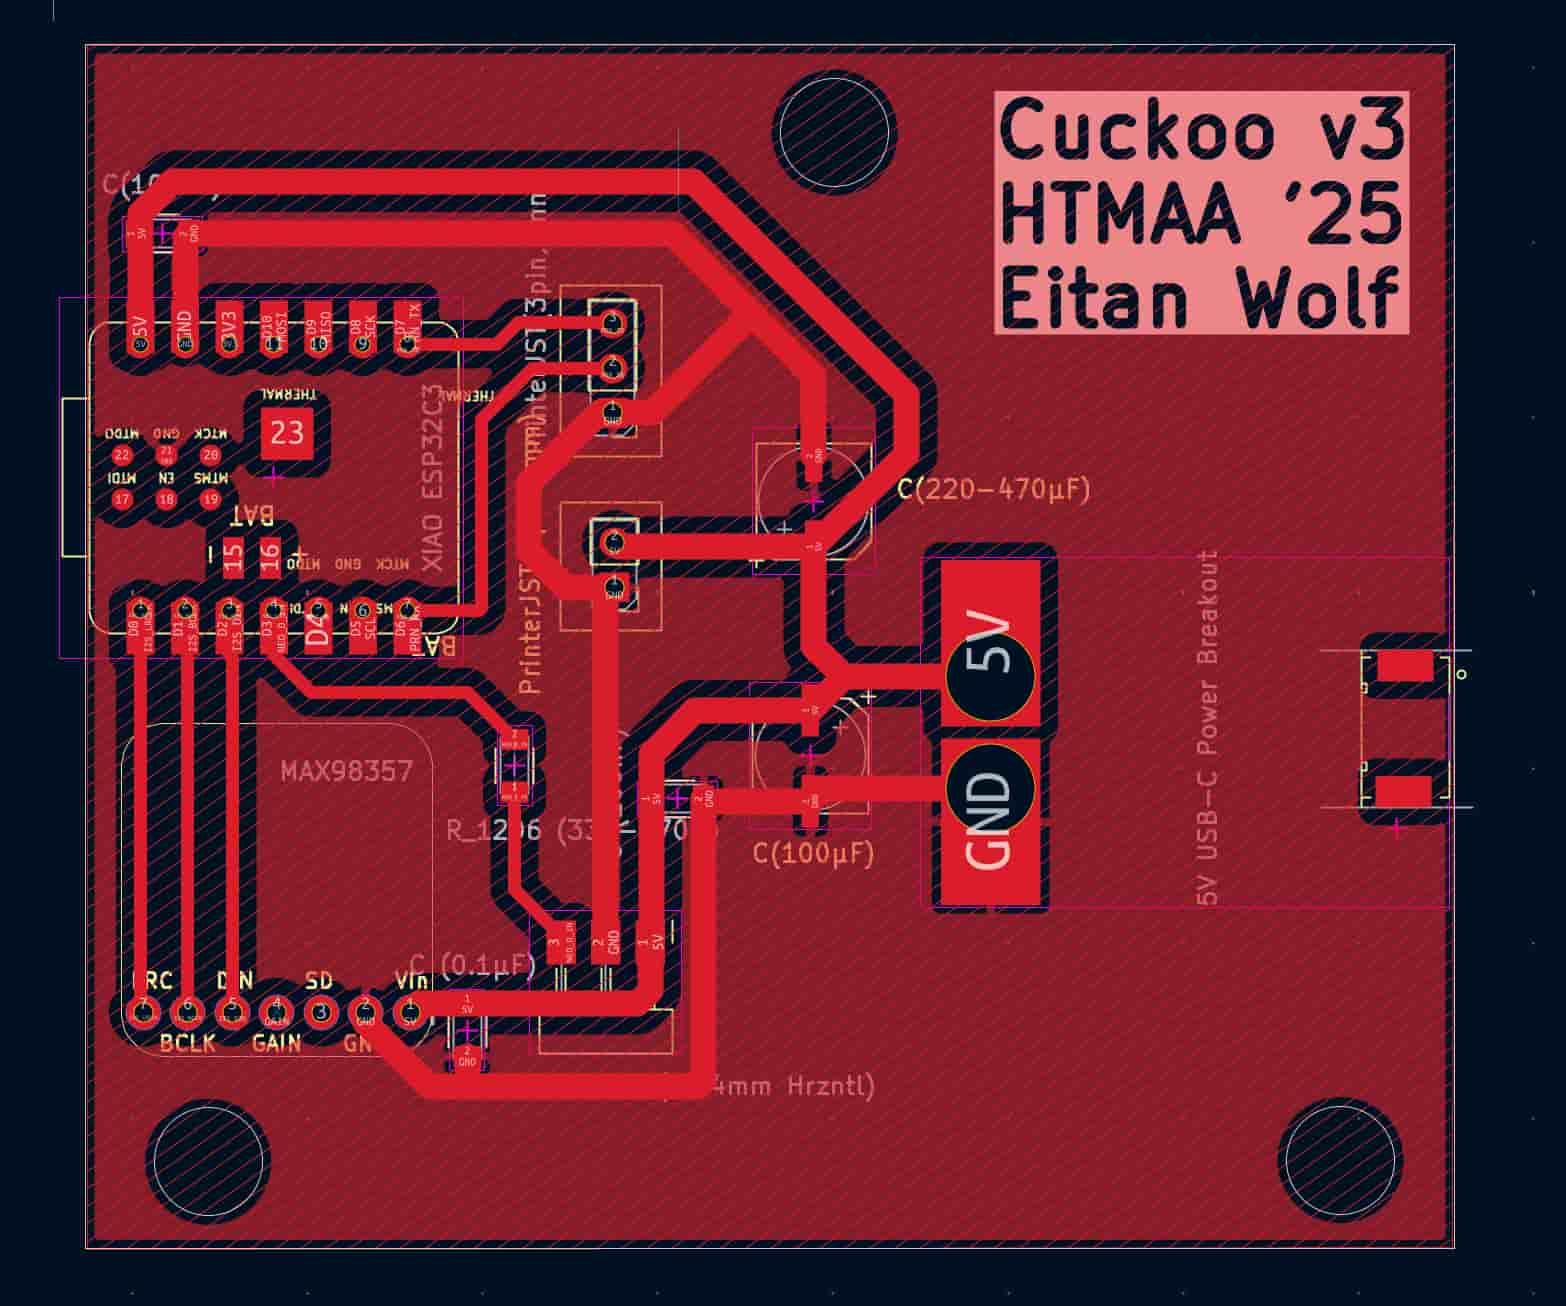
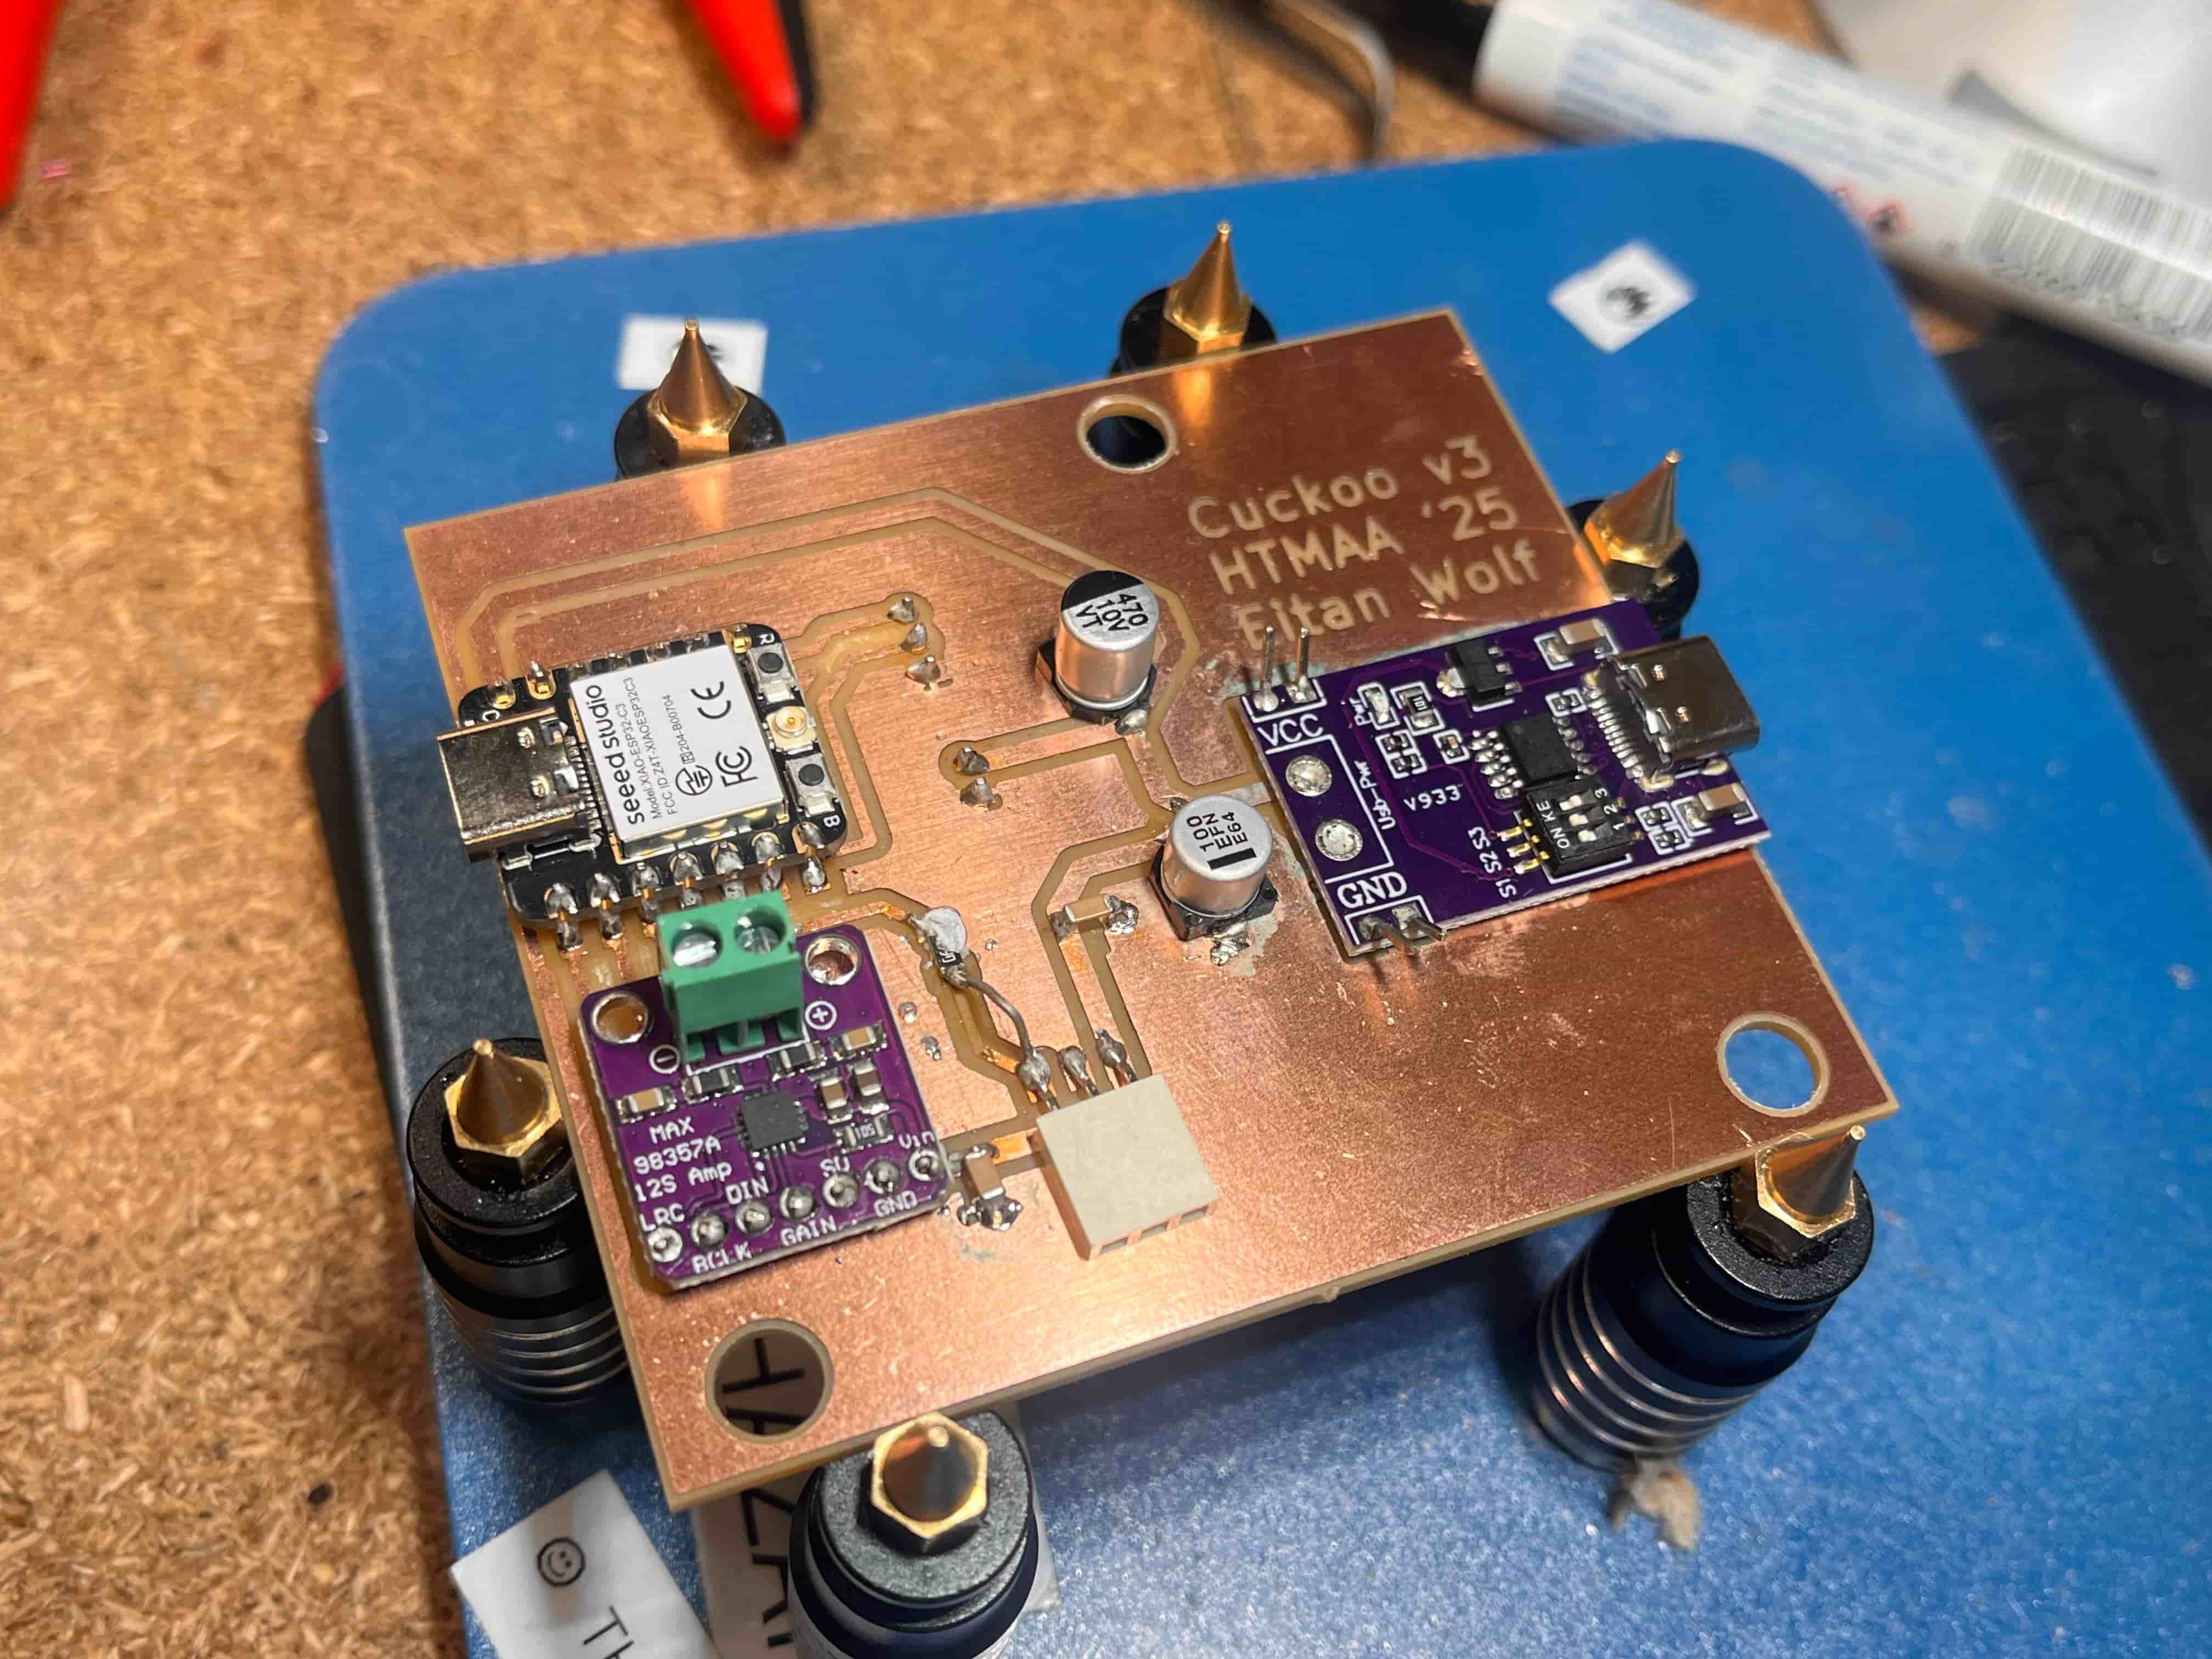
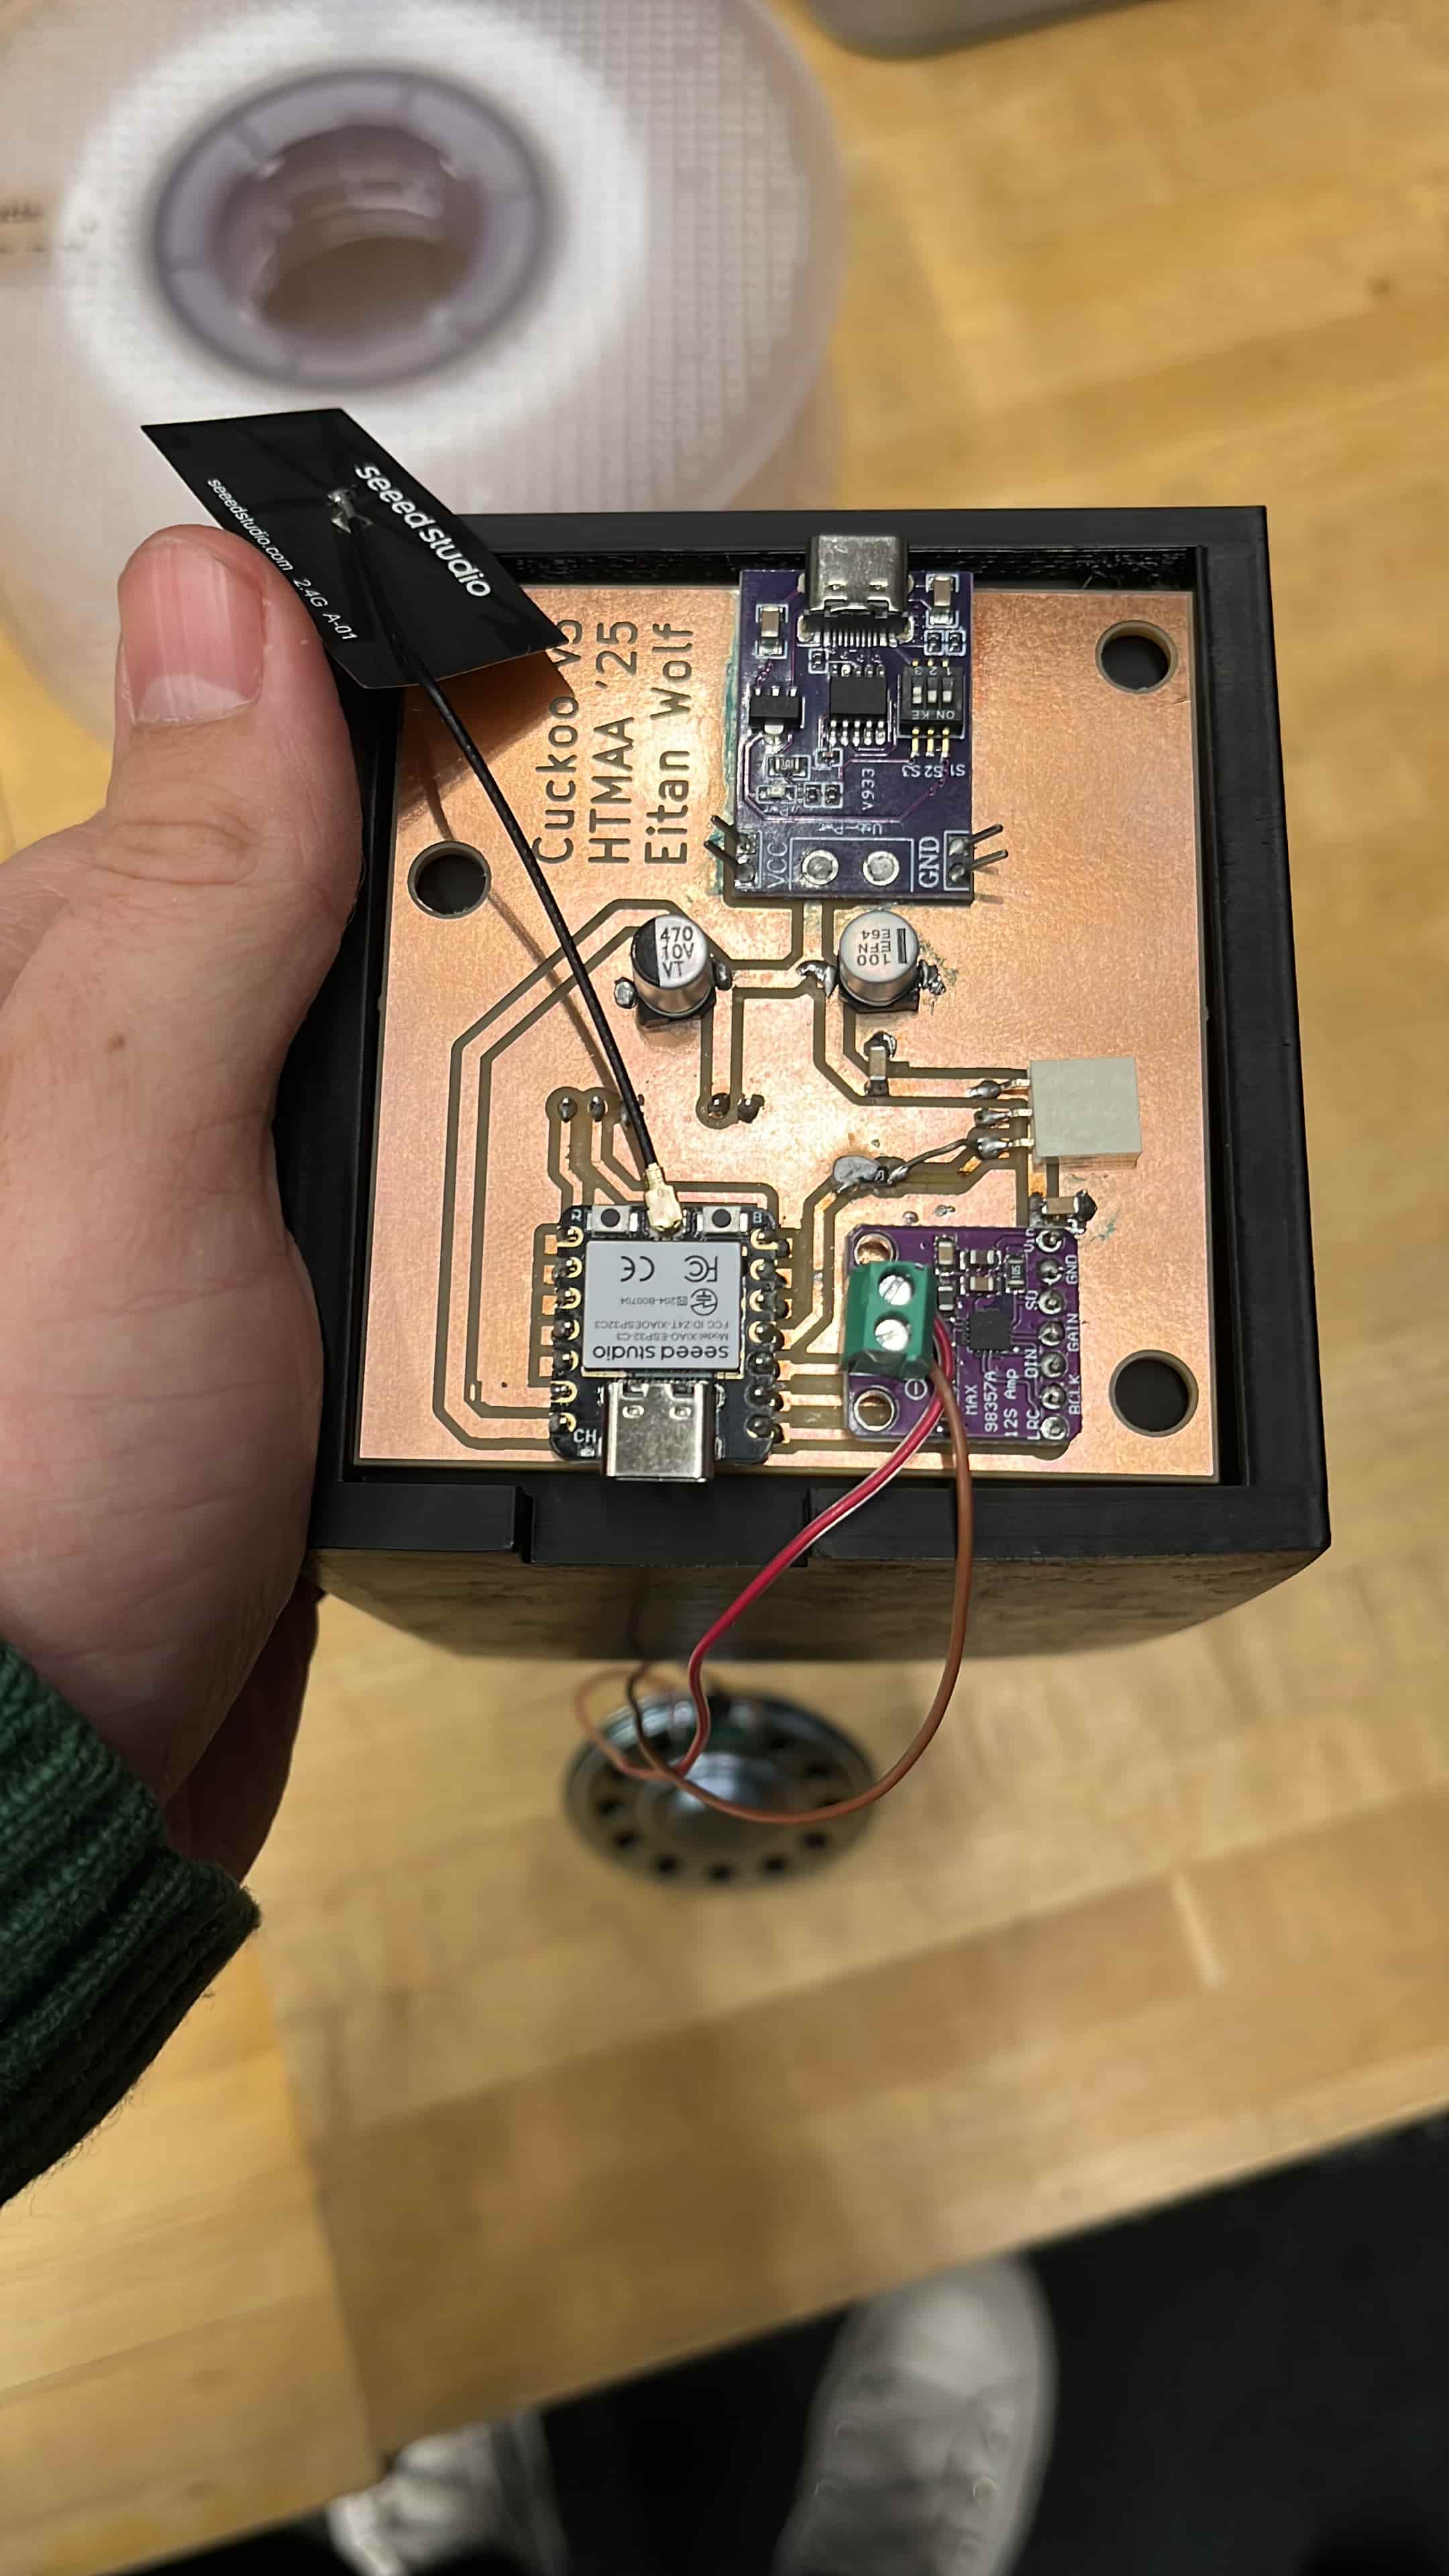
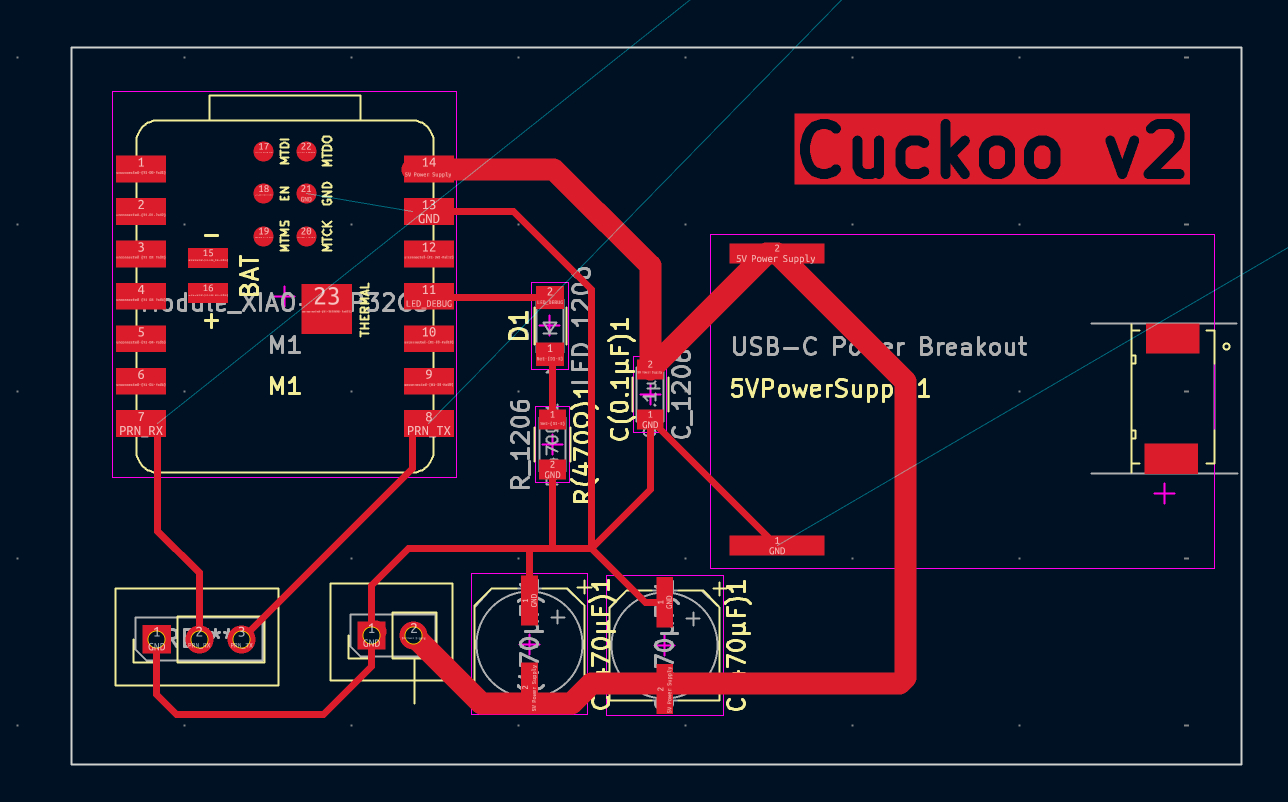
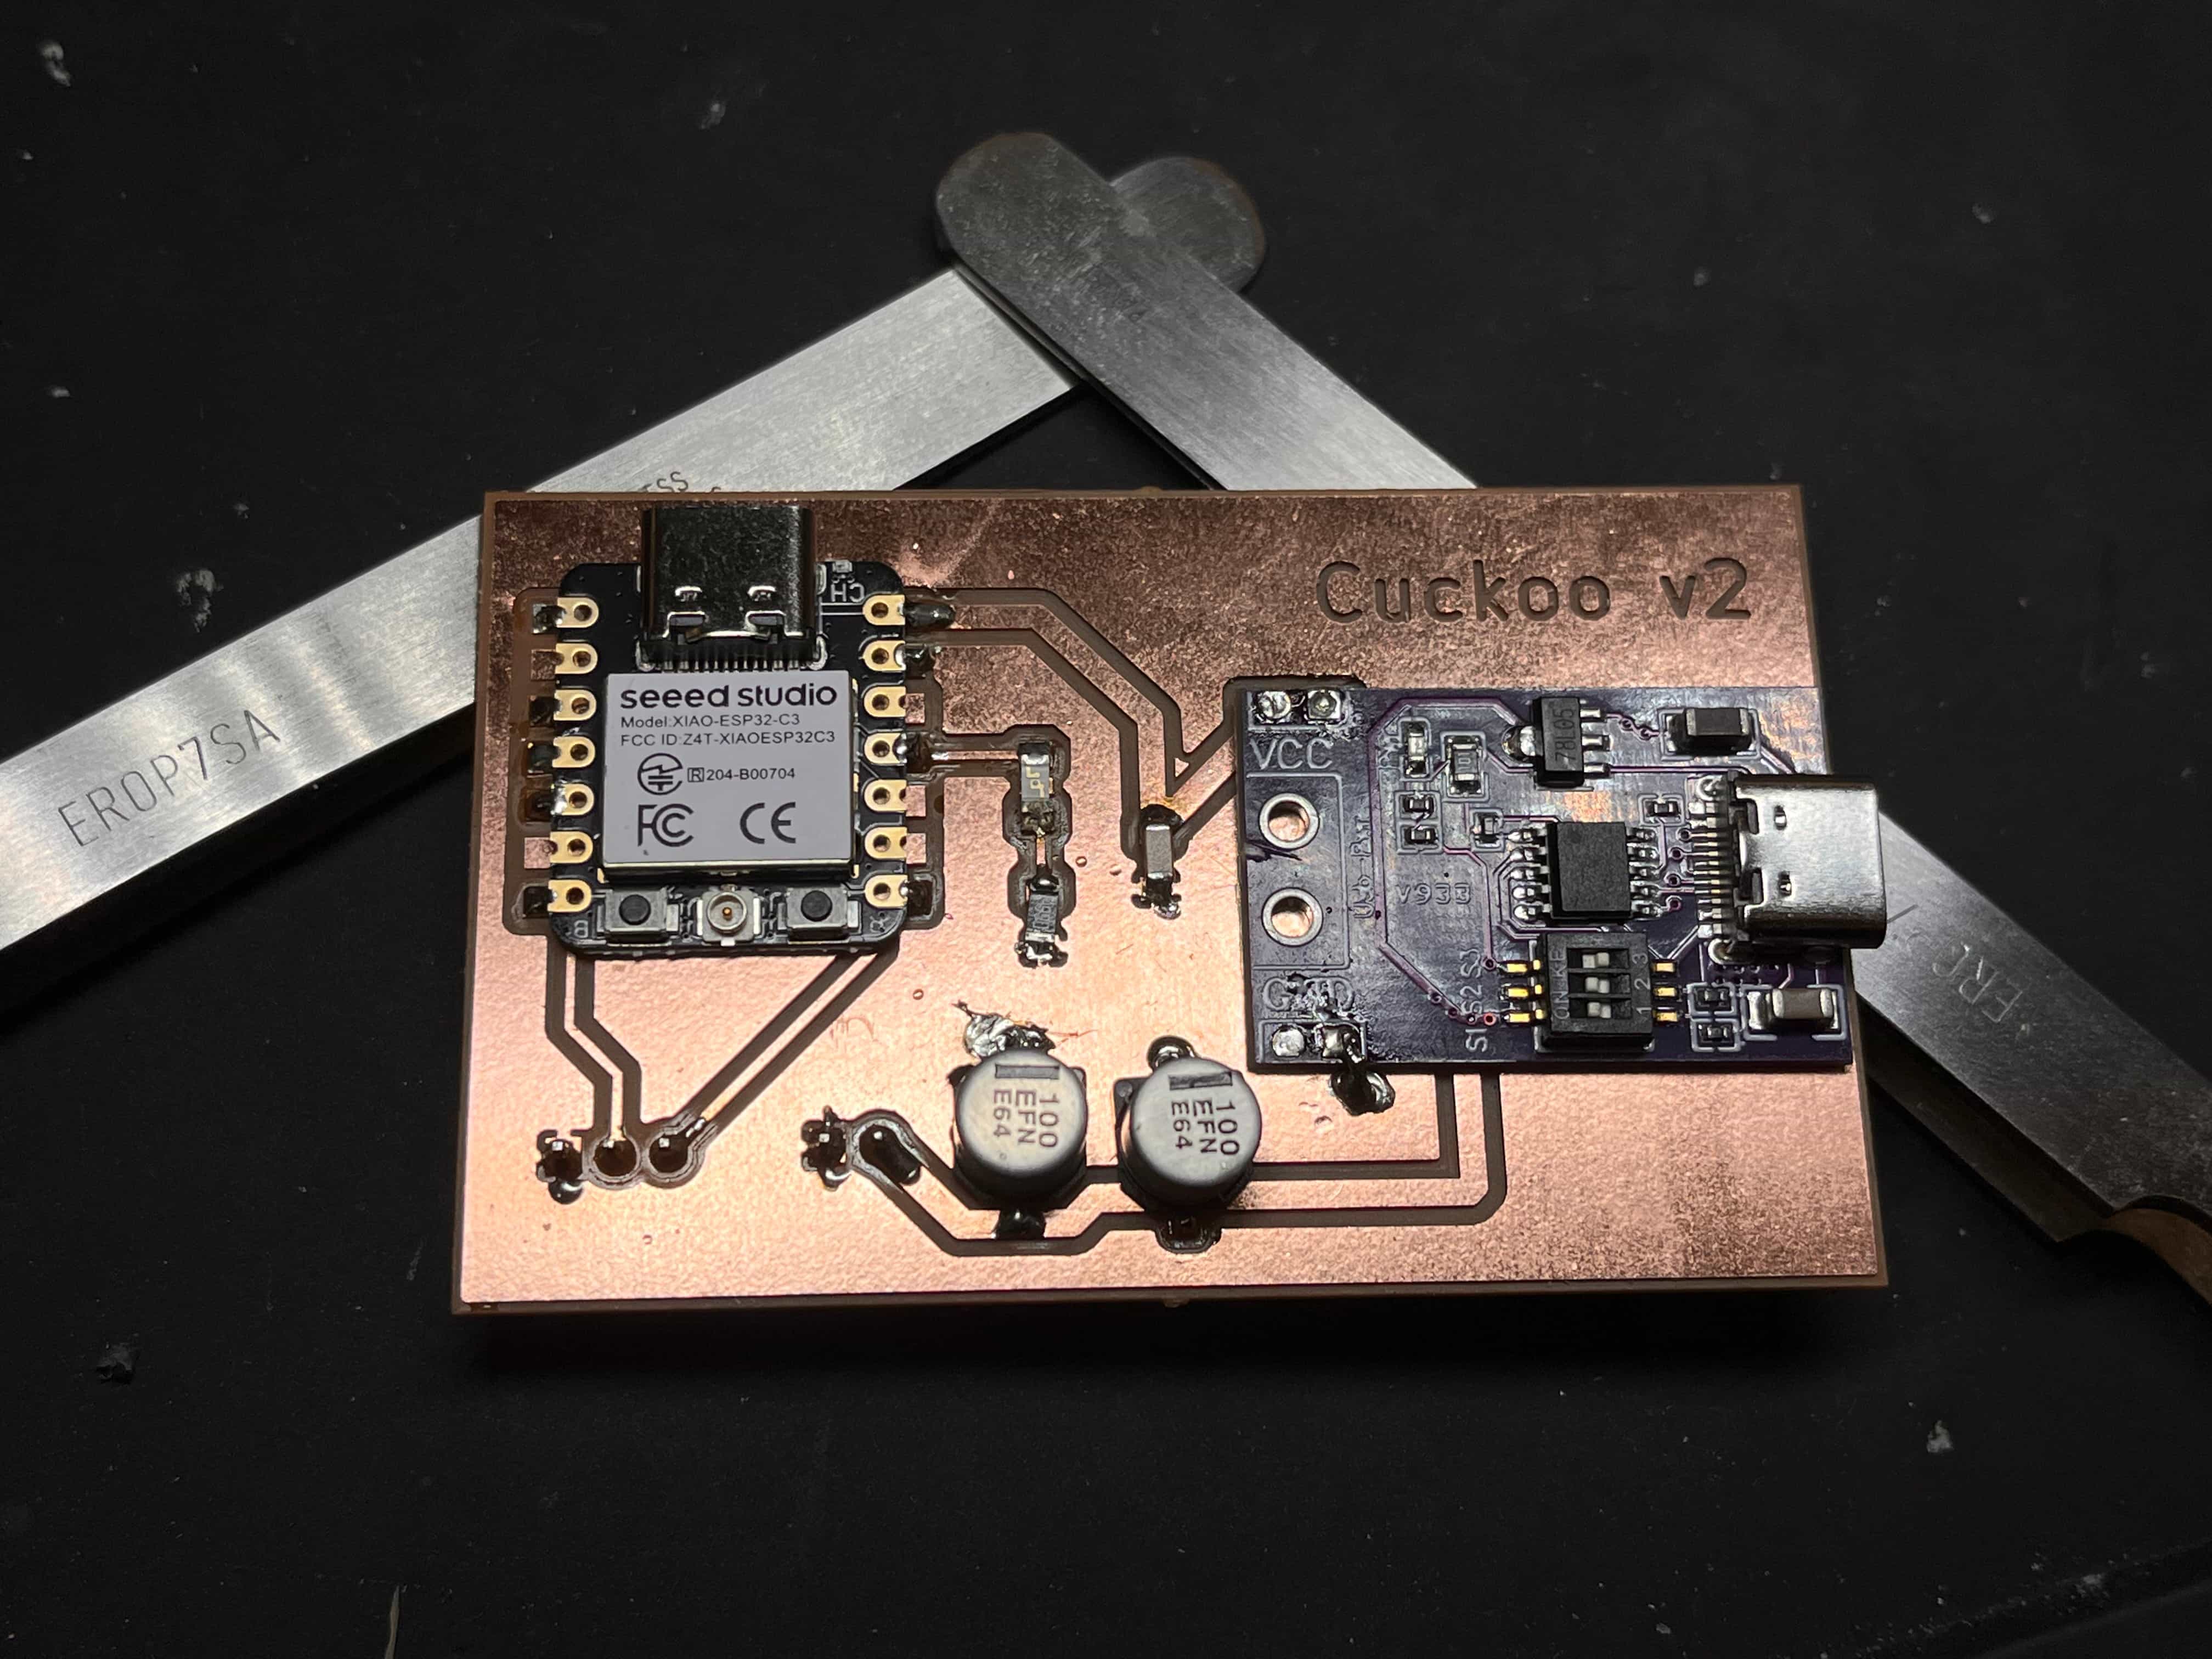
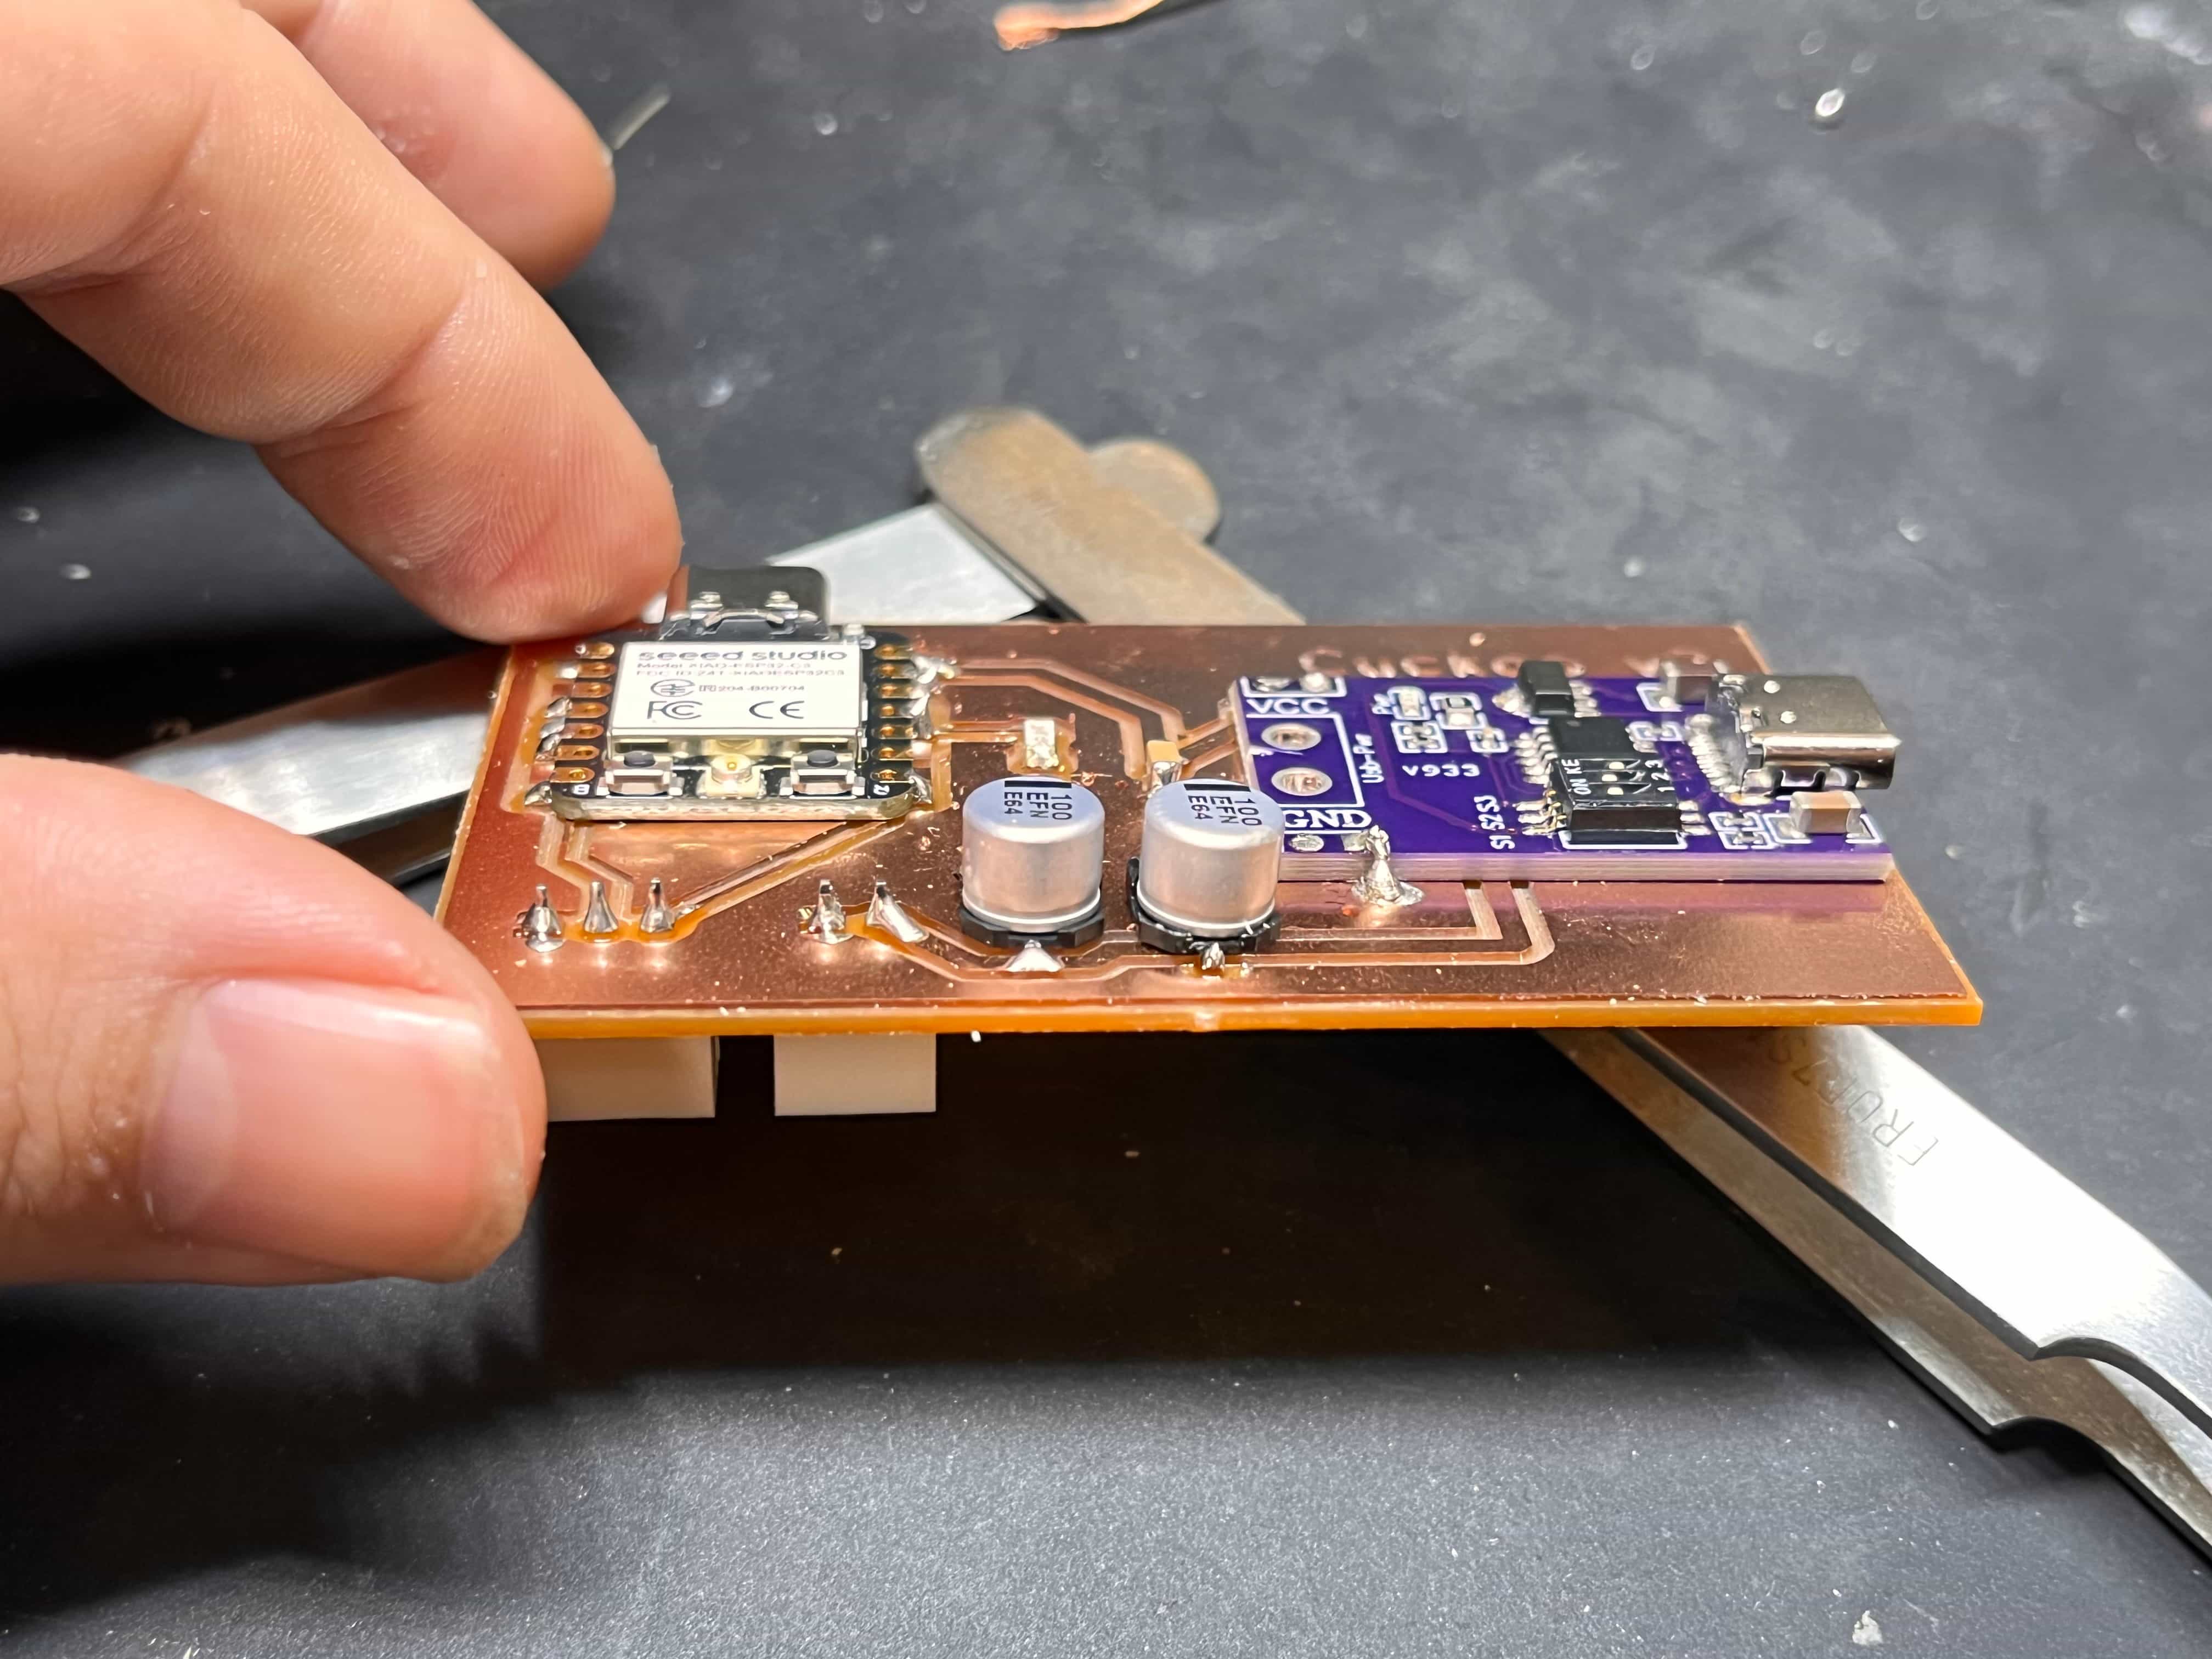
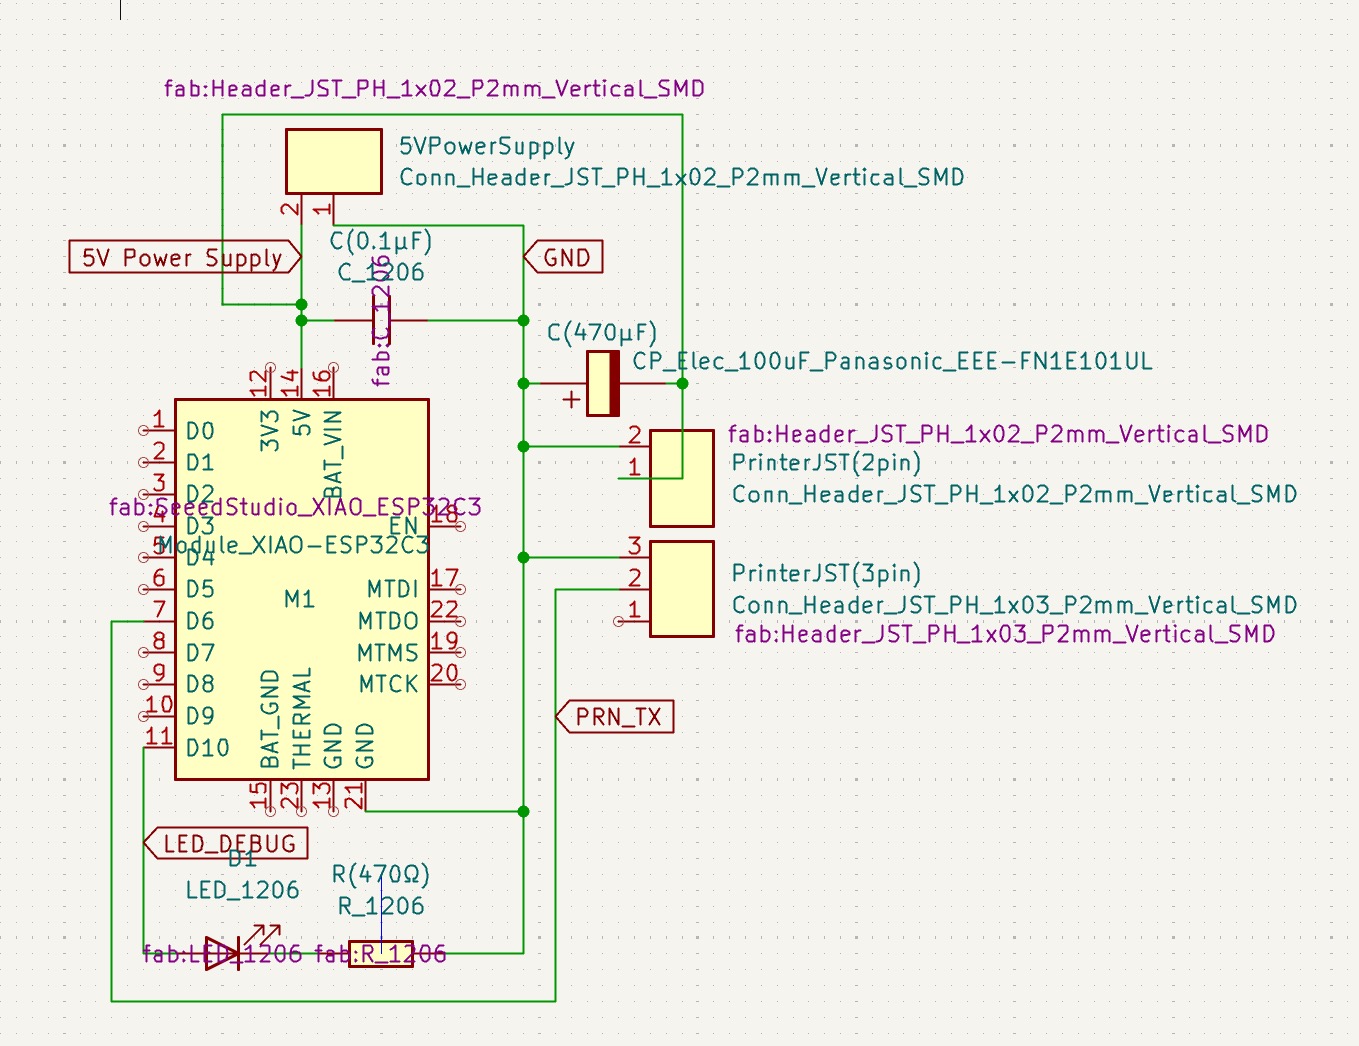
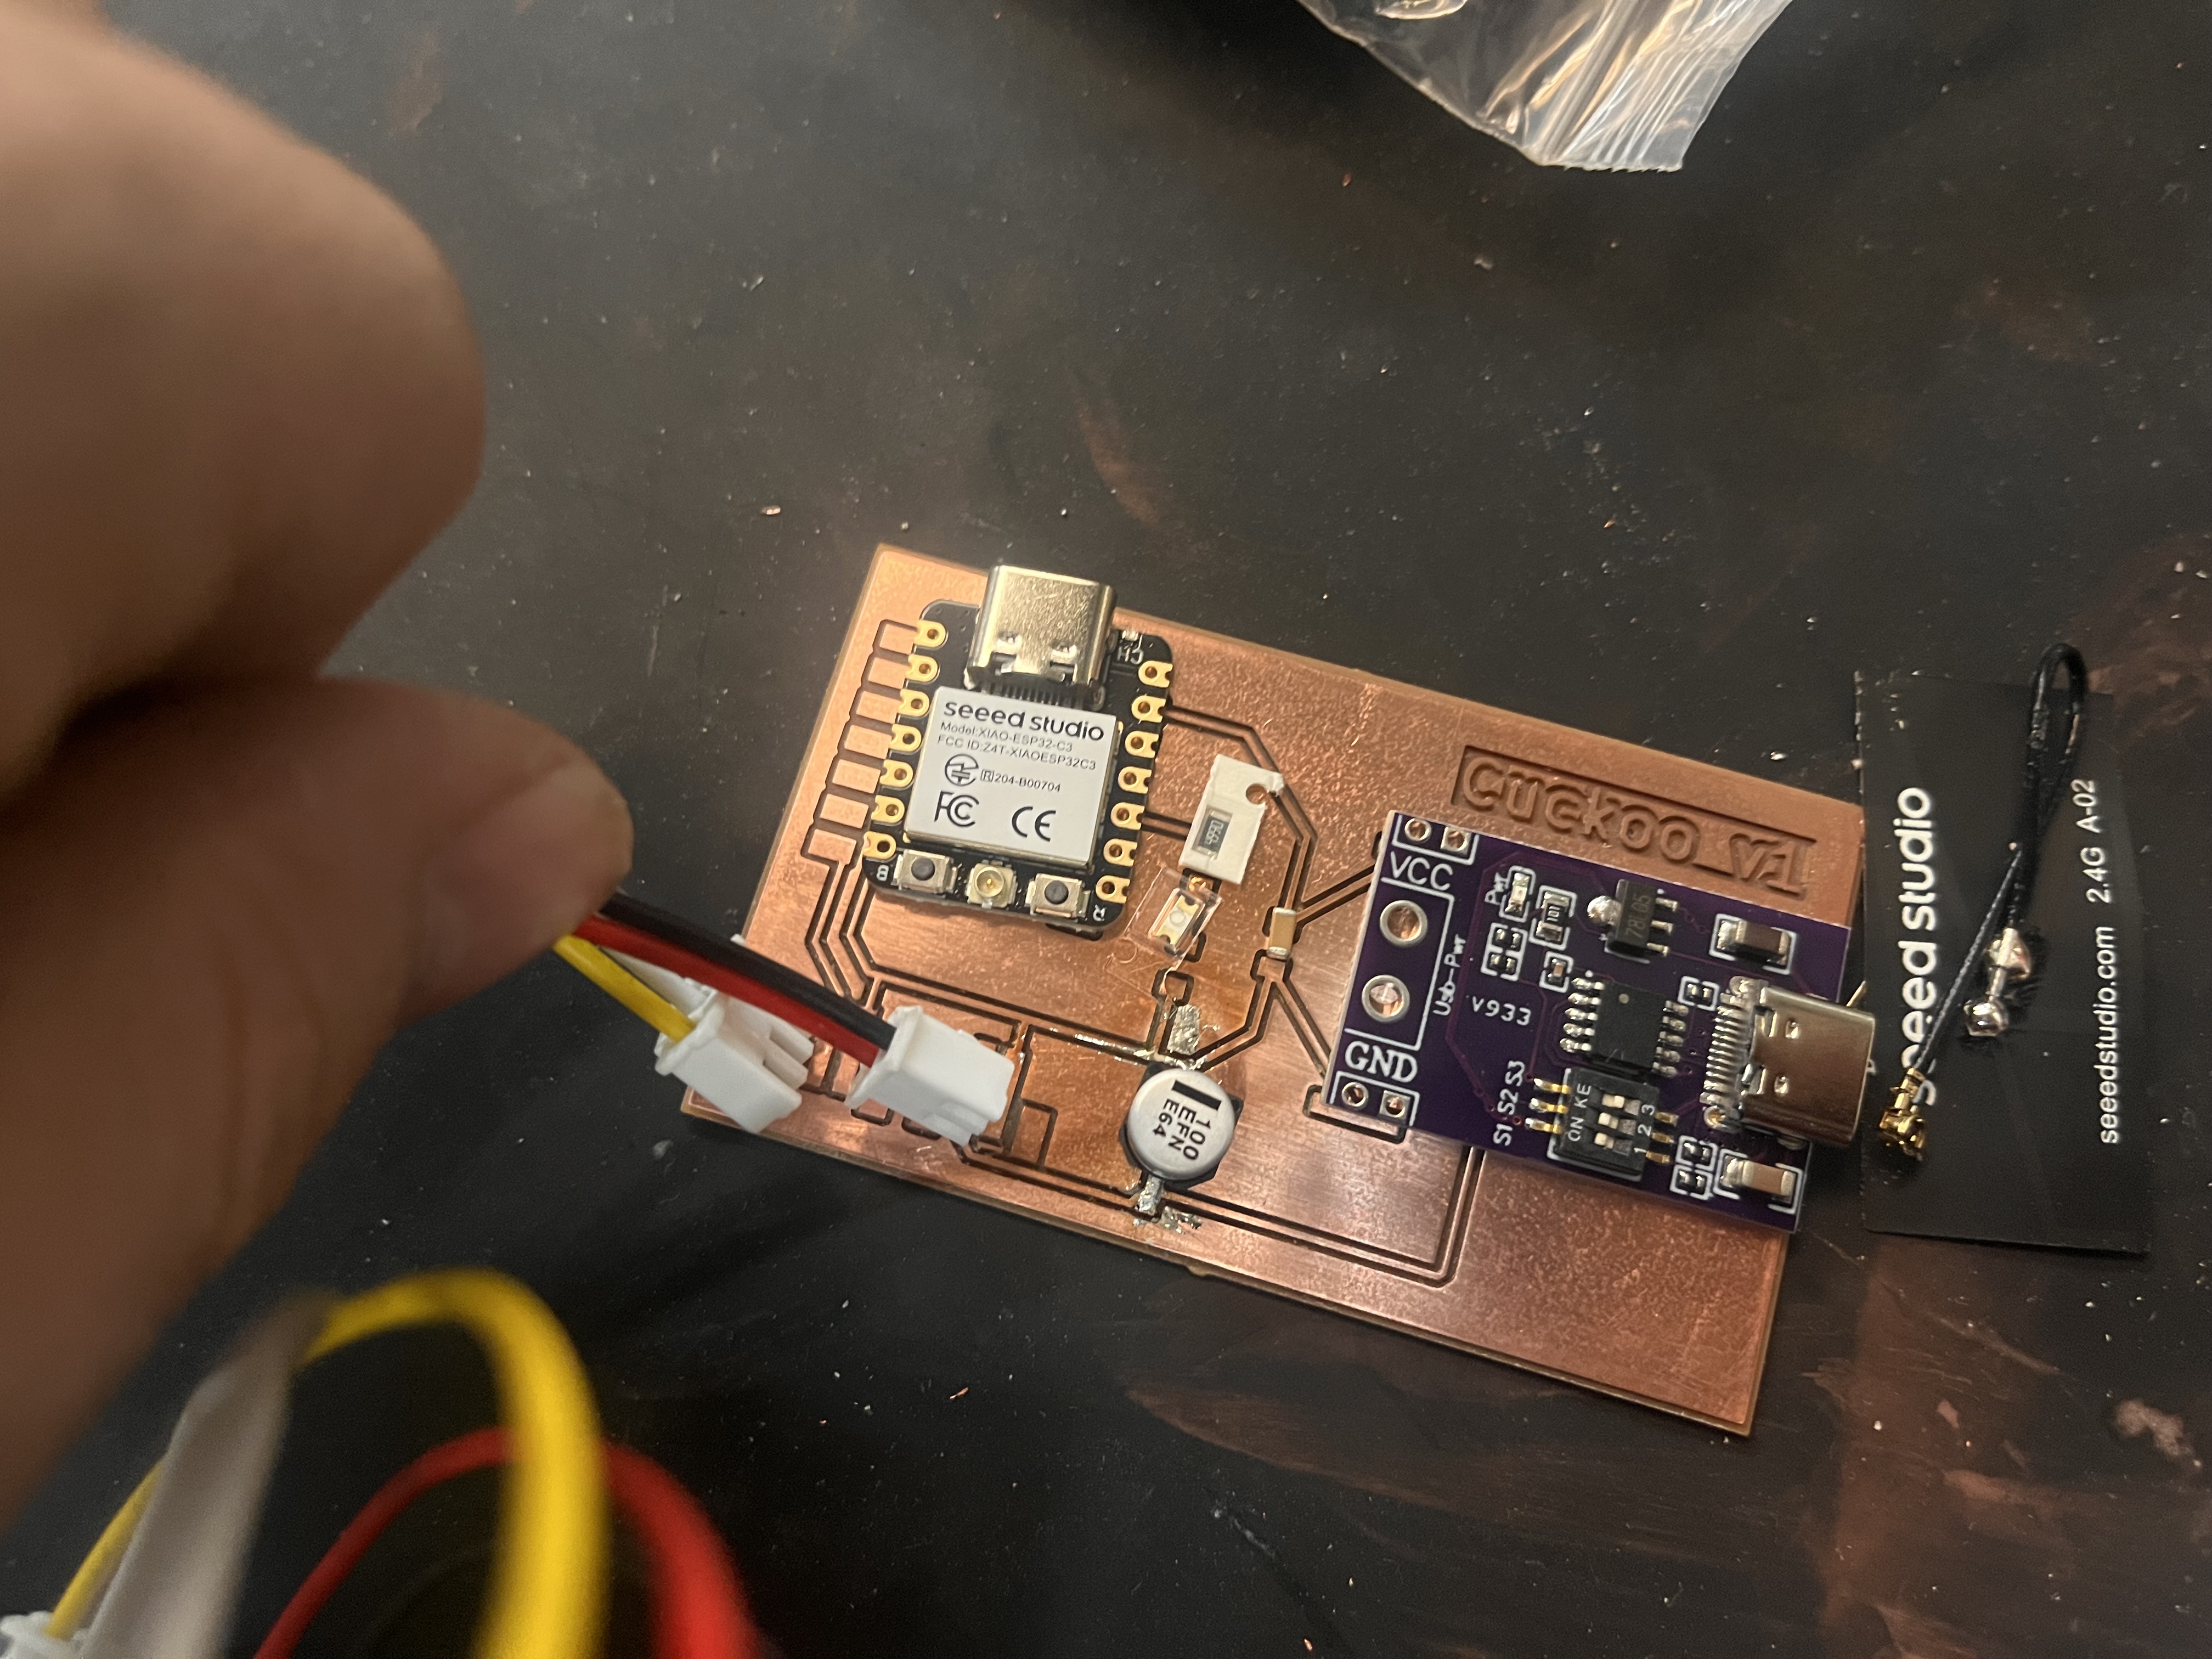
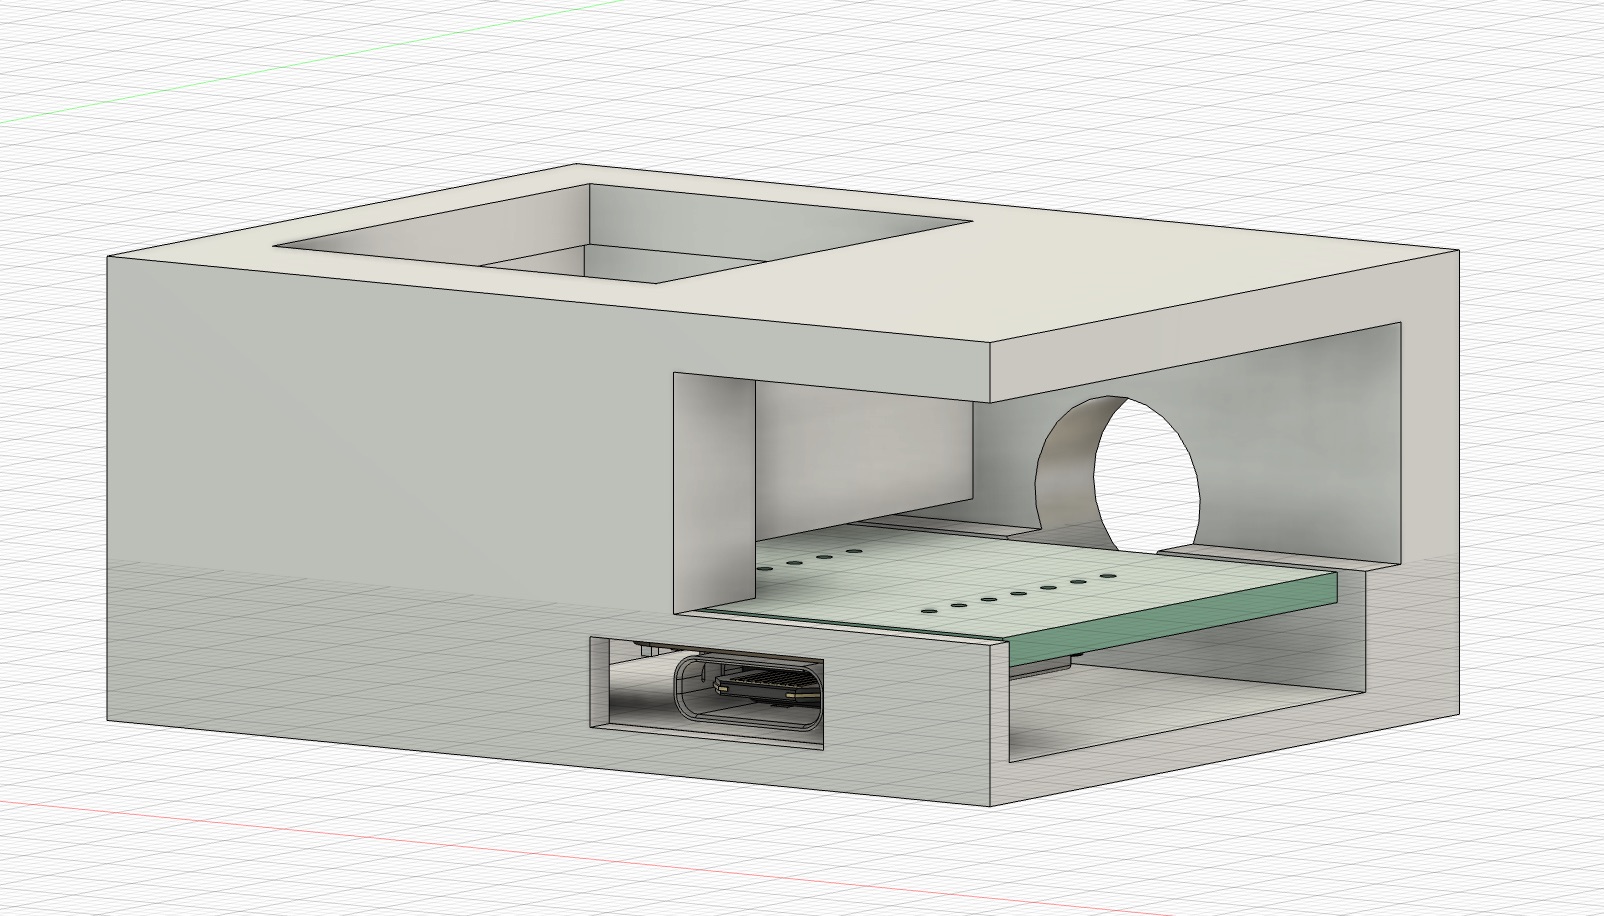
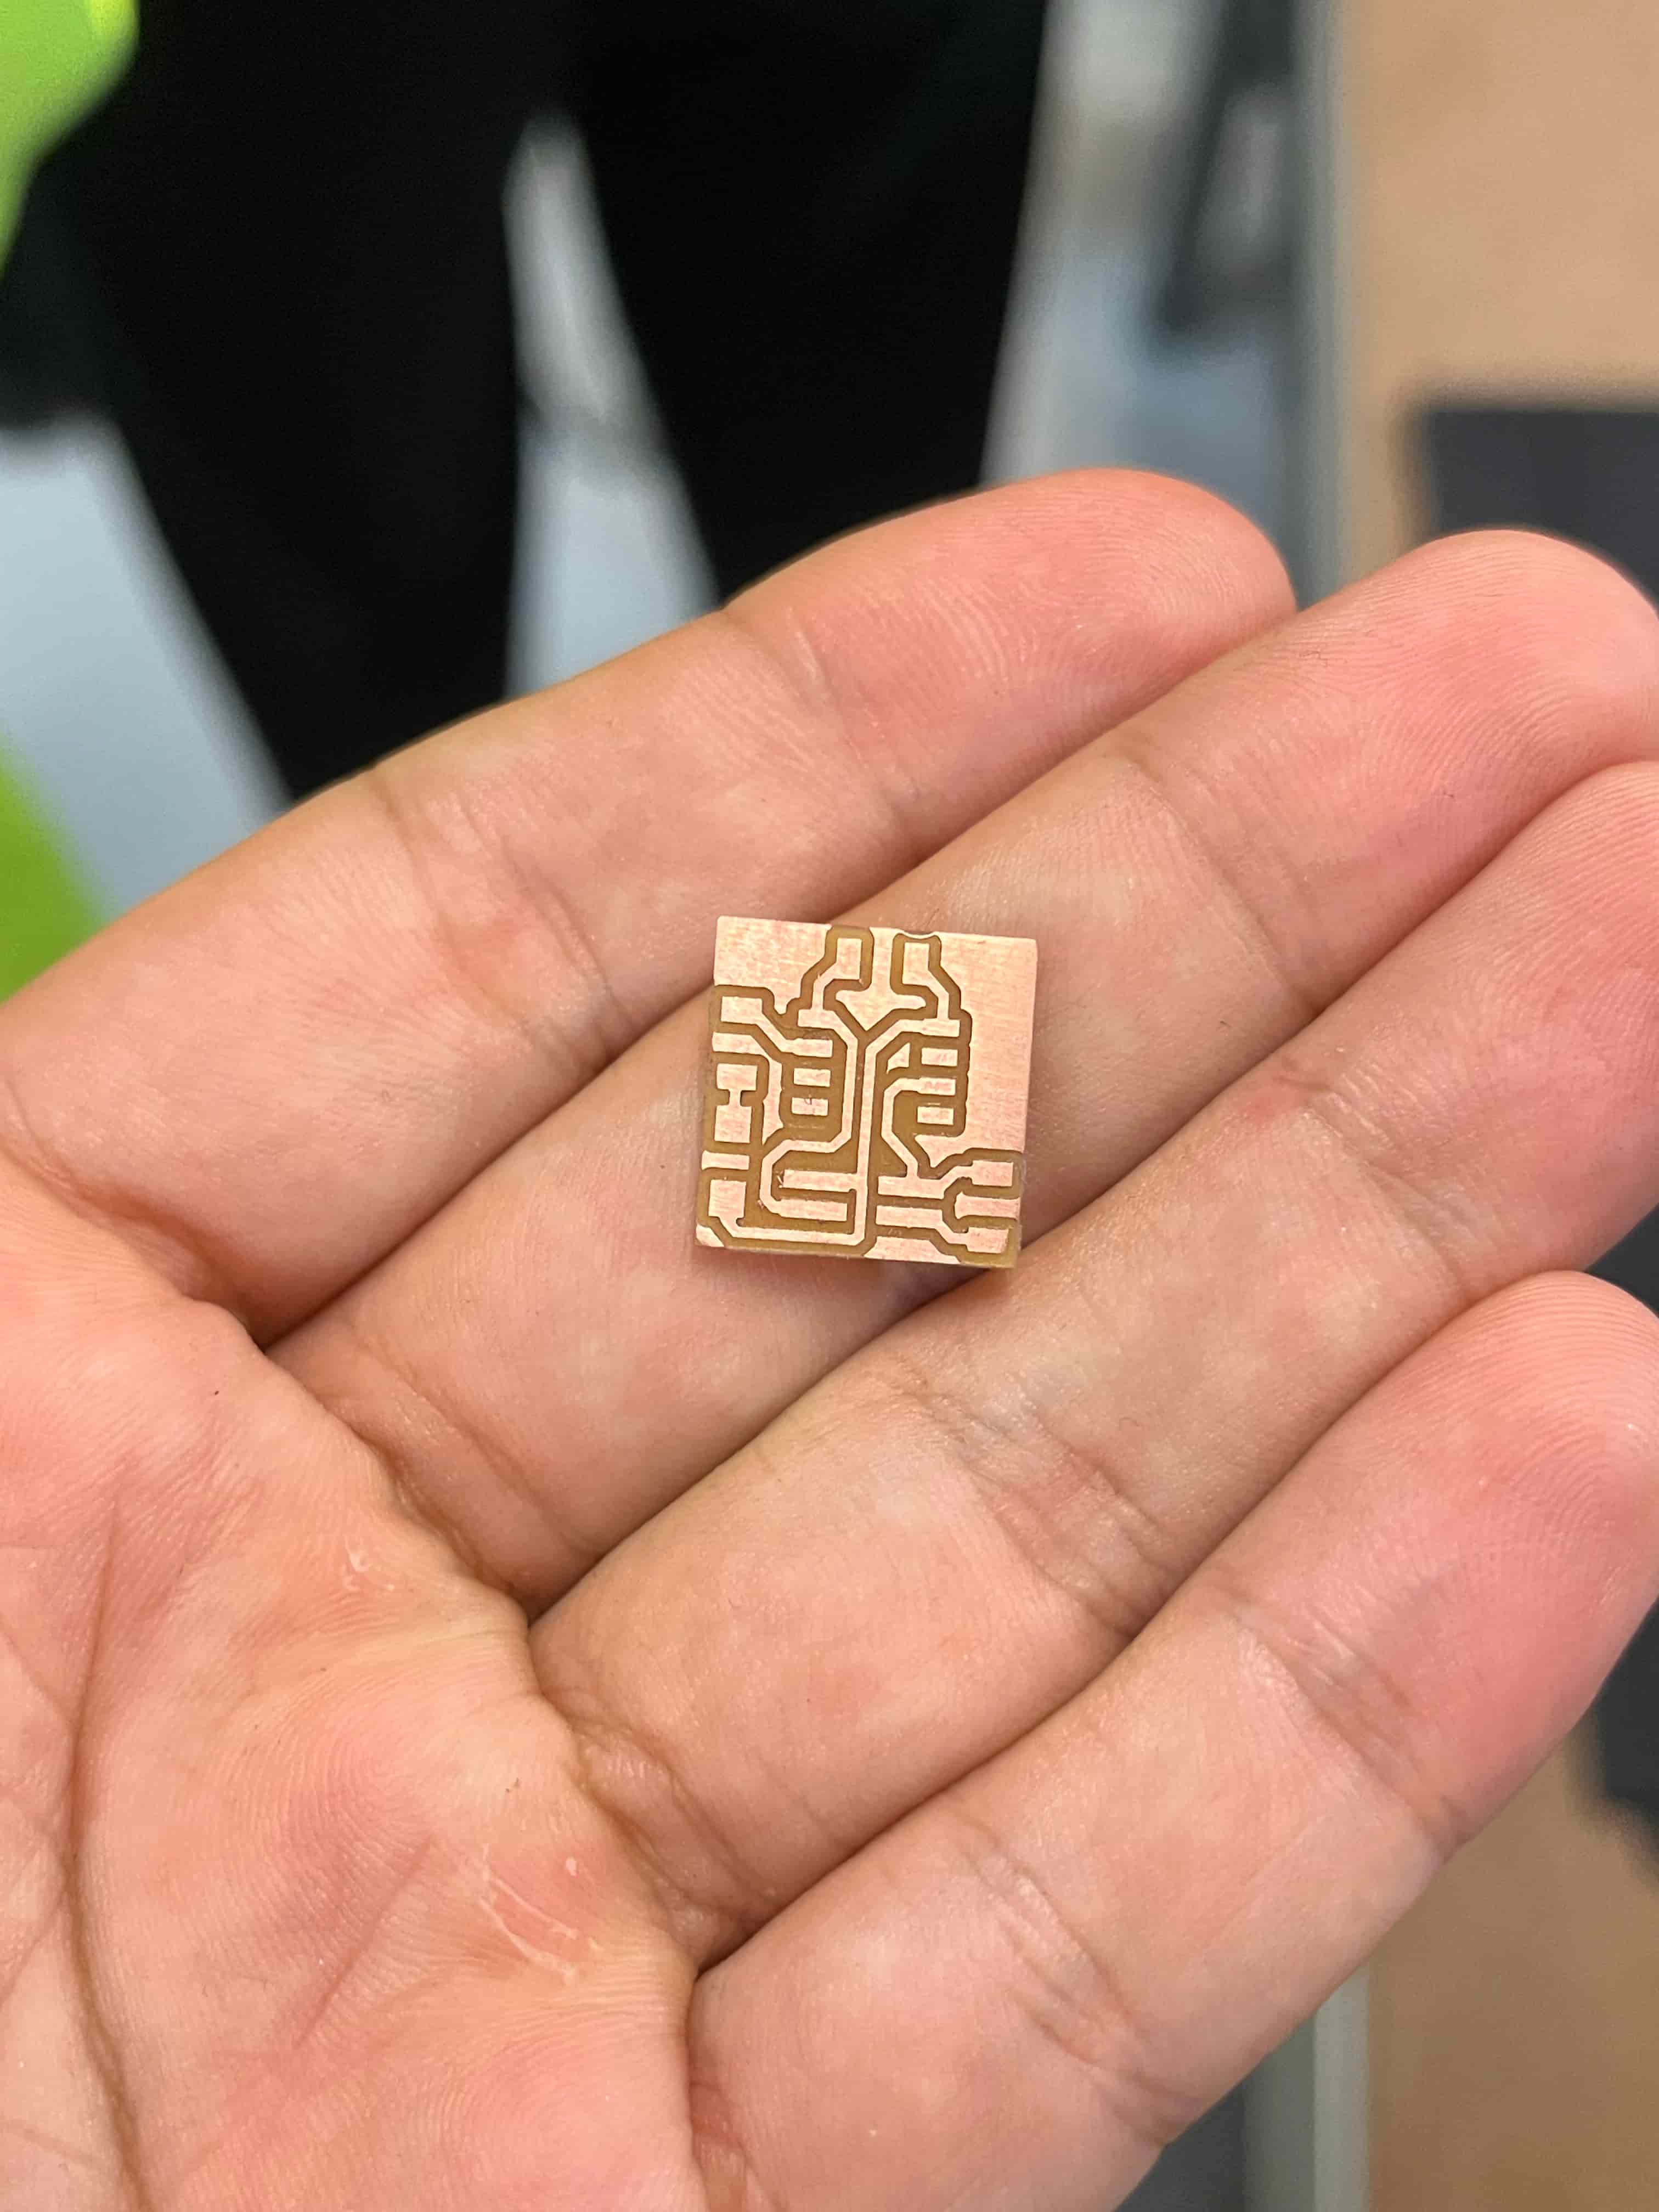
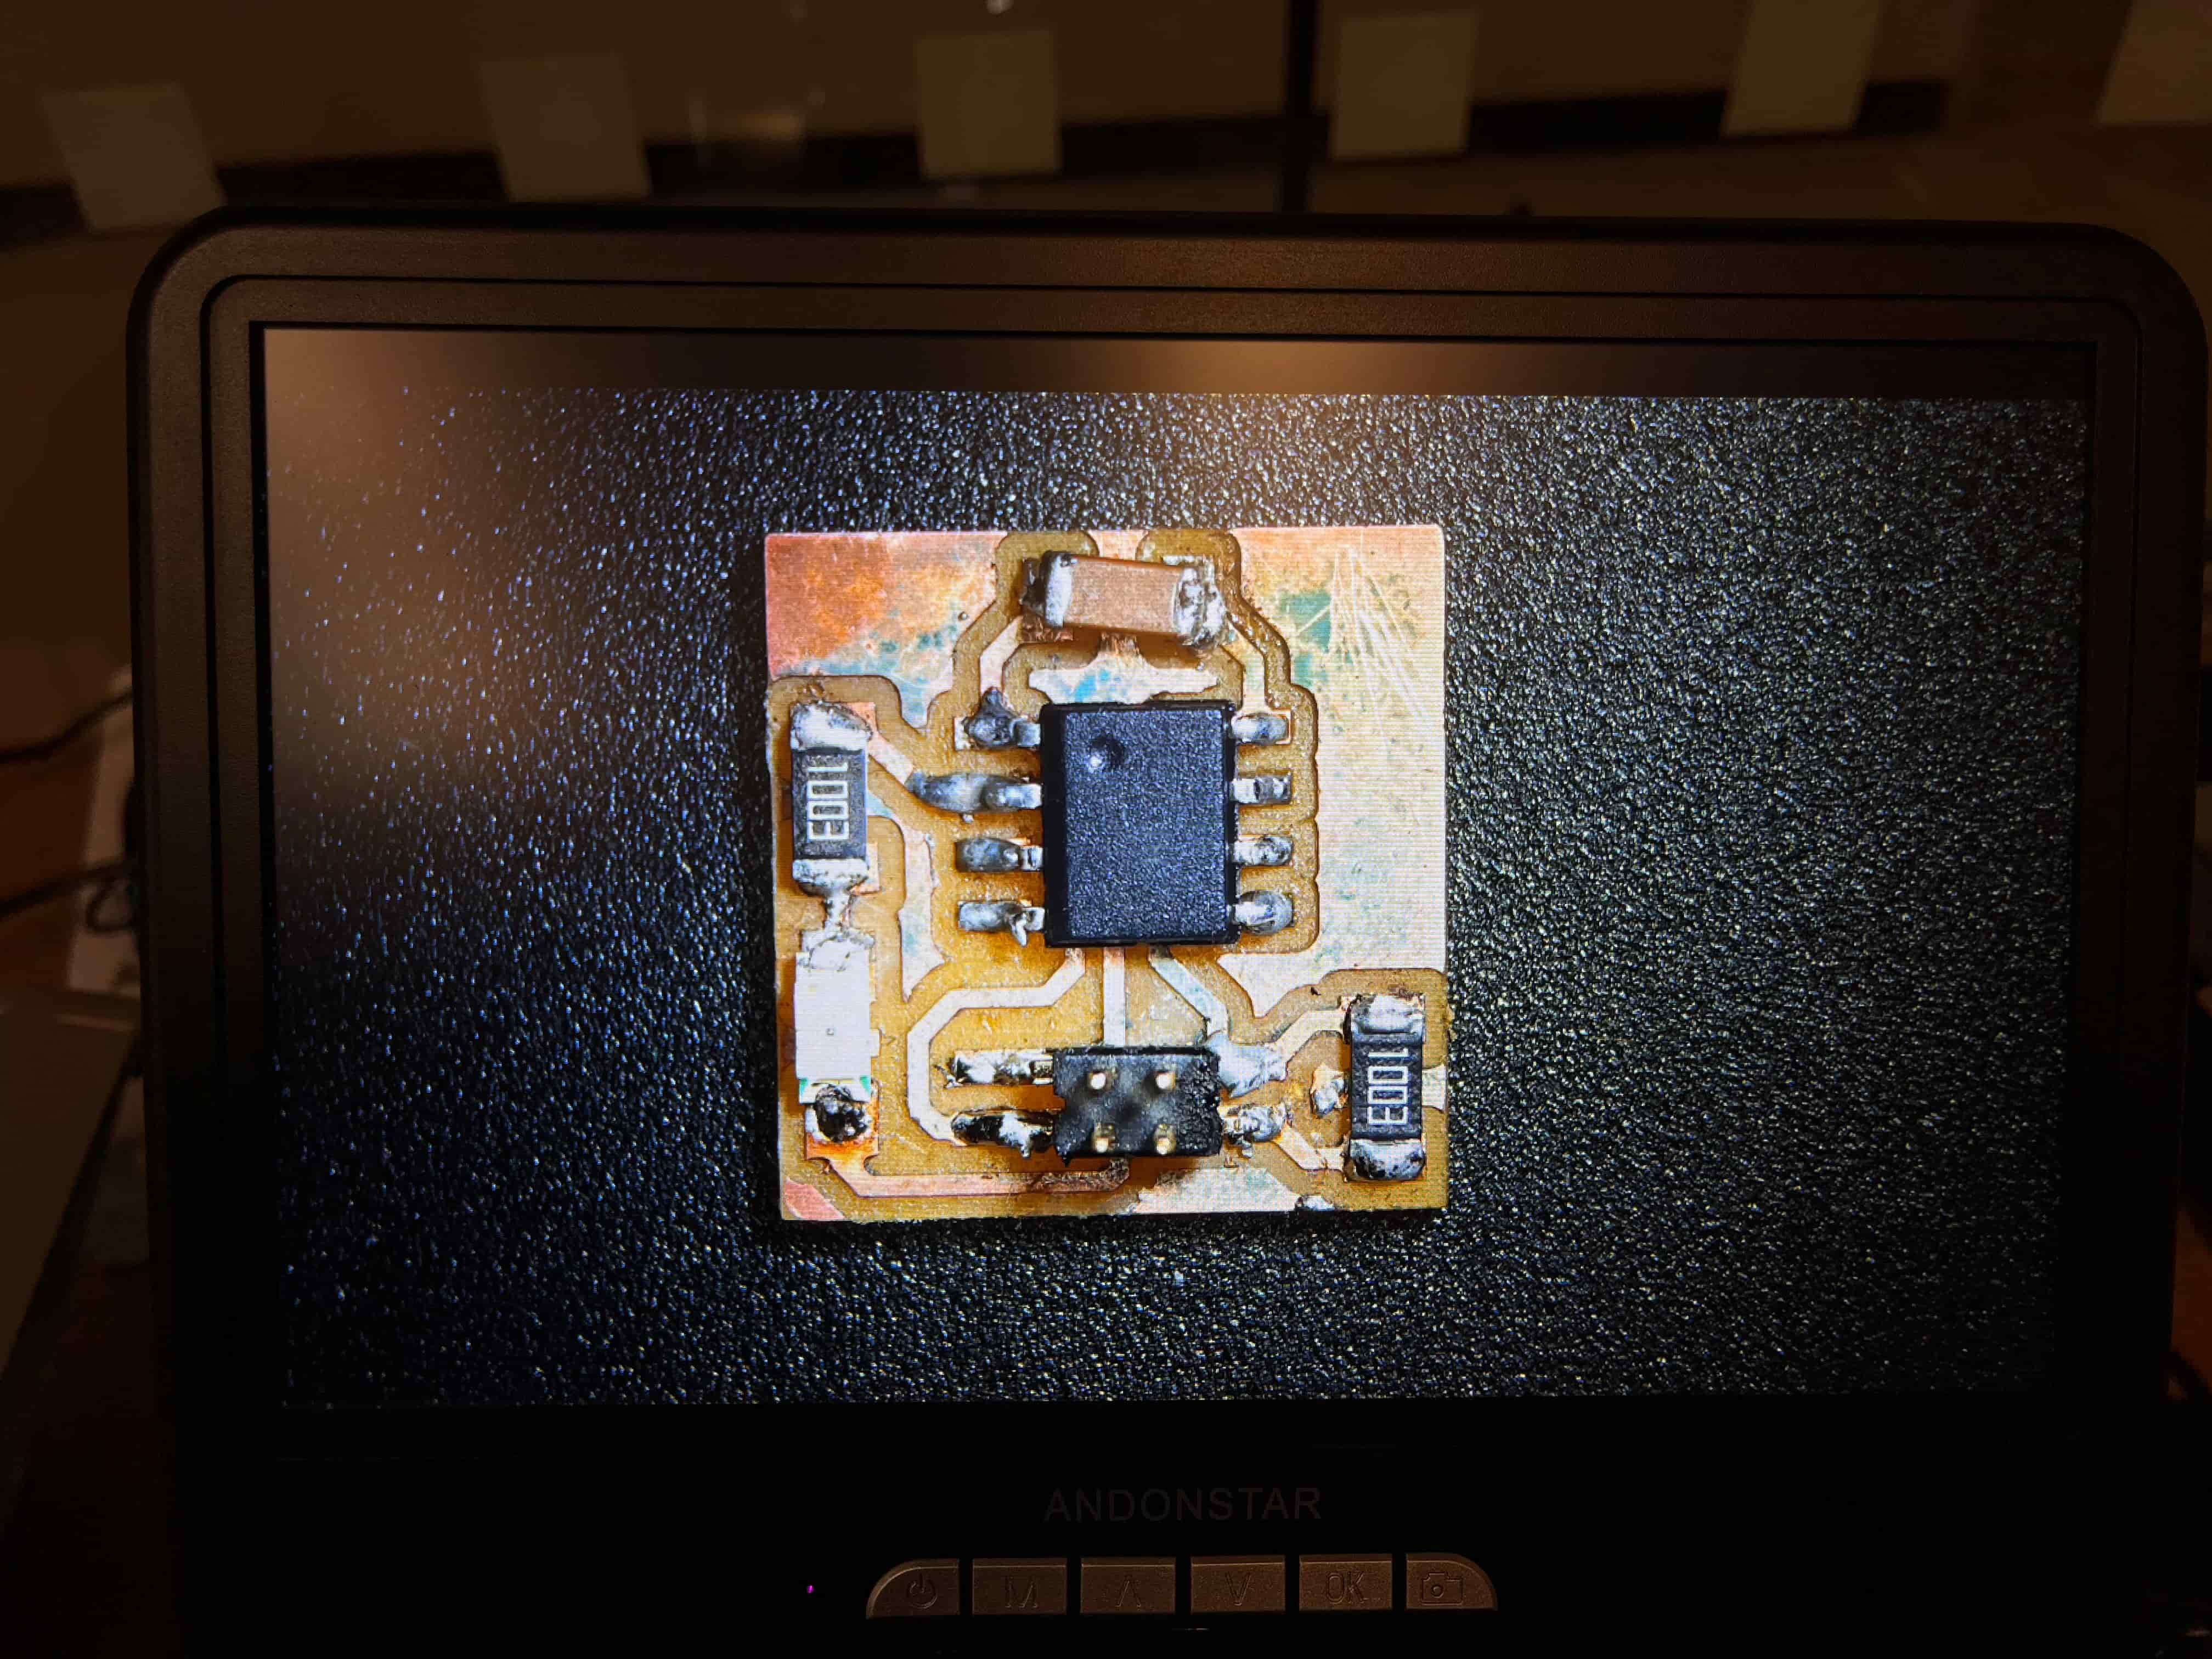
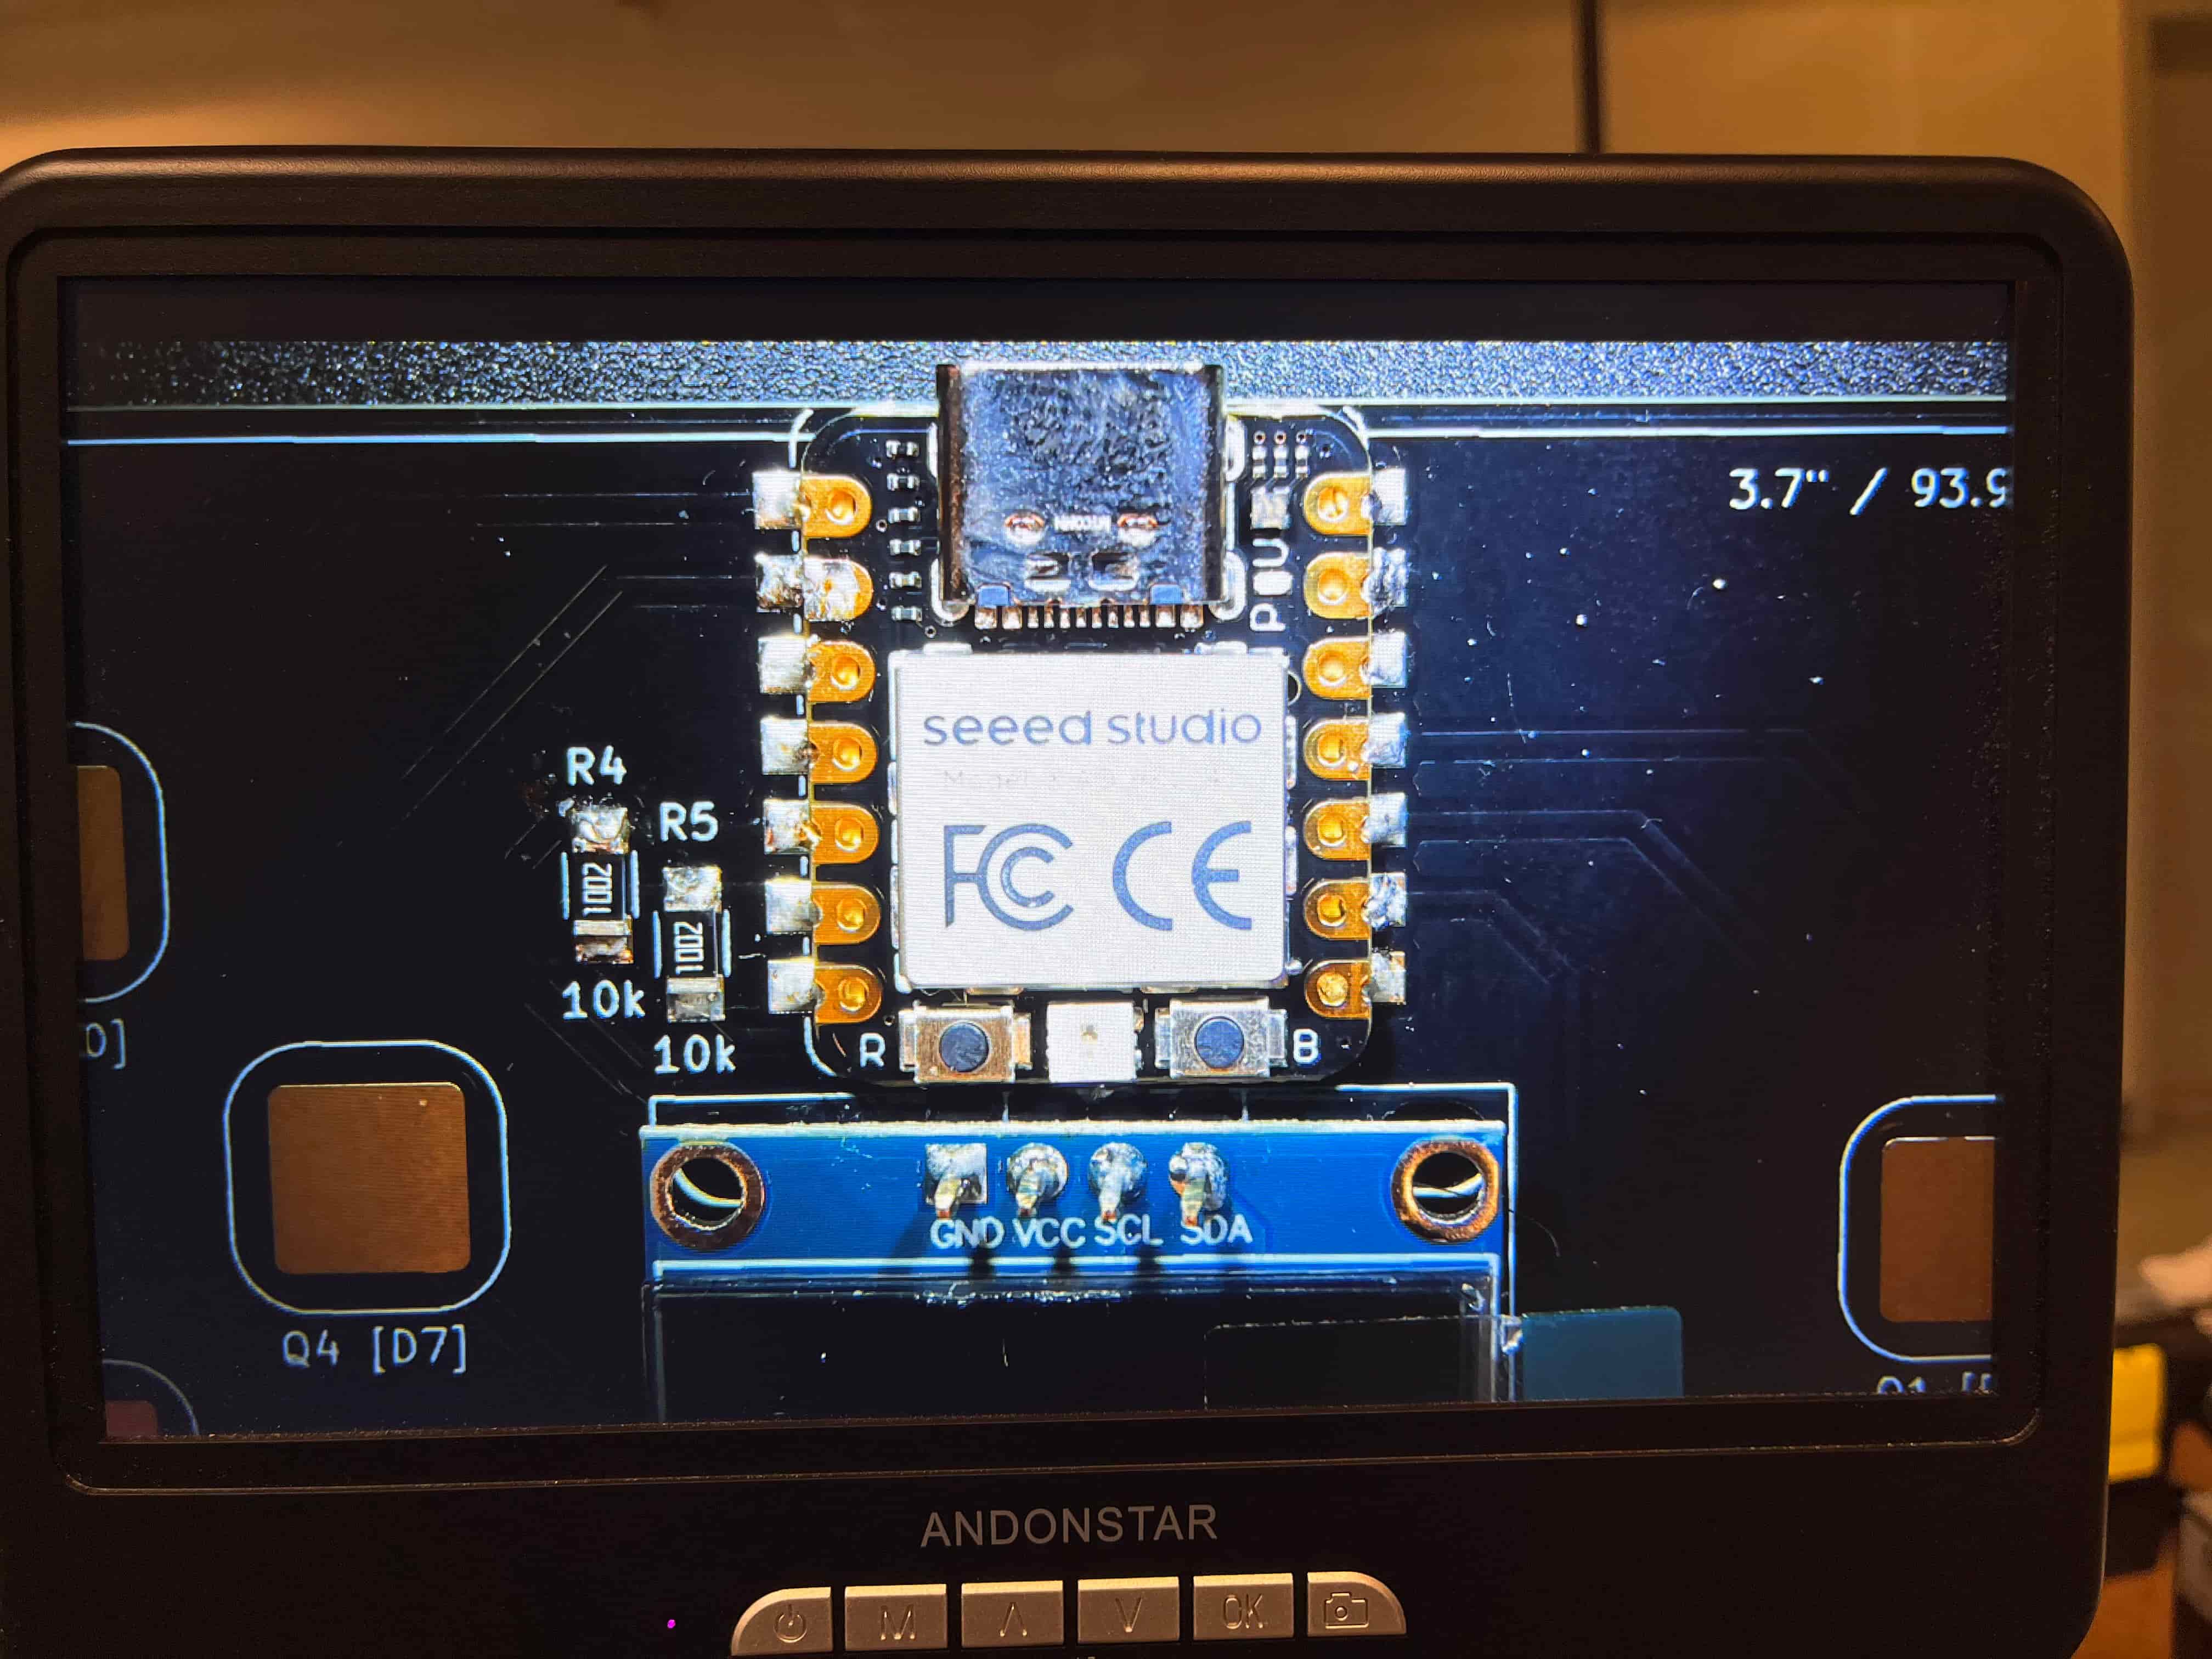
The week has arrived to put it all together. First things first; get the final PCB completed, and test everything together to see if it works. We've added more
through-holes for easier soldering and for an eventual mounting, added our final components (a few extra capacitors), and pushed the USB-C components out a bit
so the cable can connect to it easier.
Take a look:
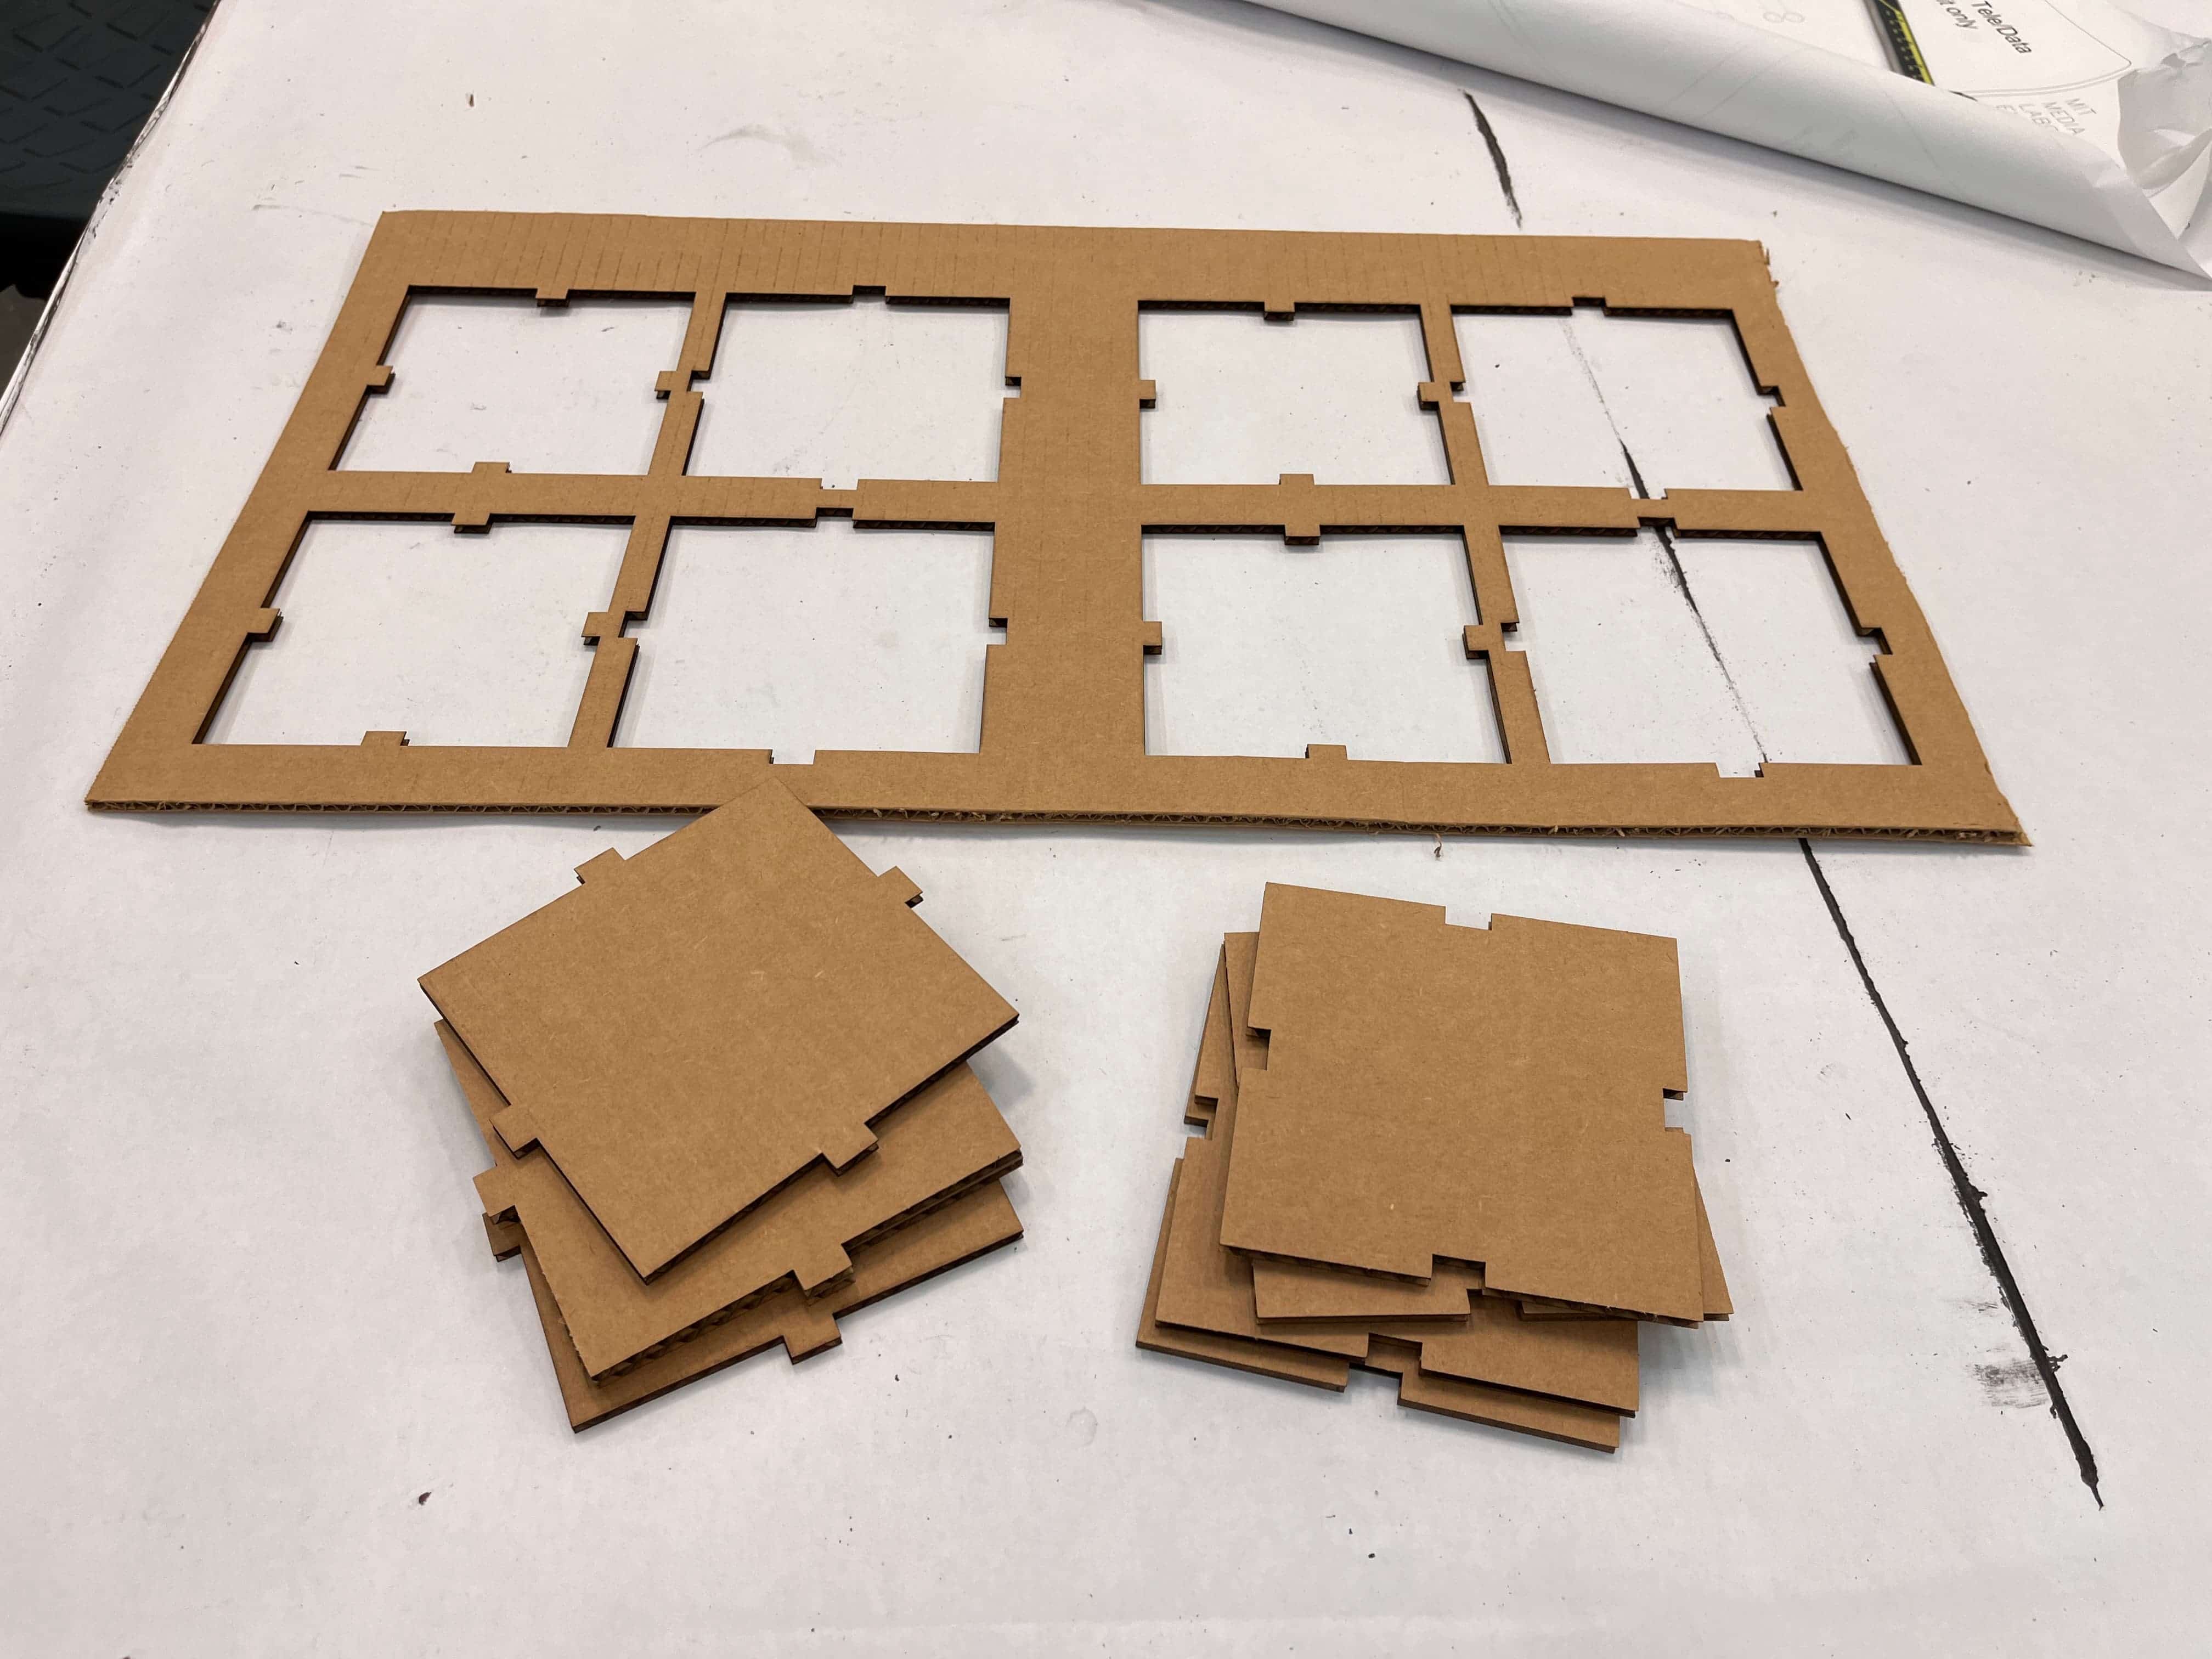
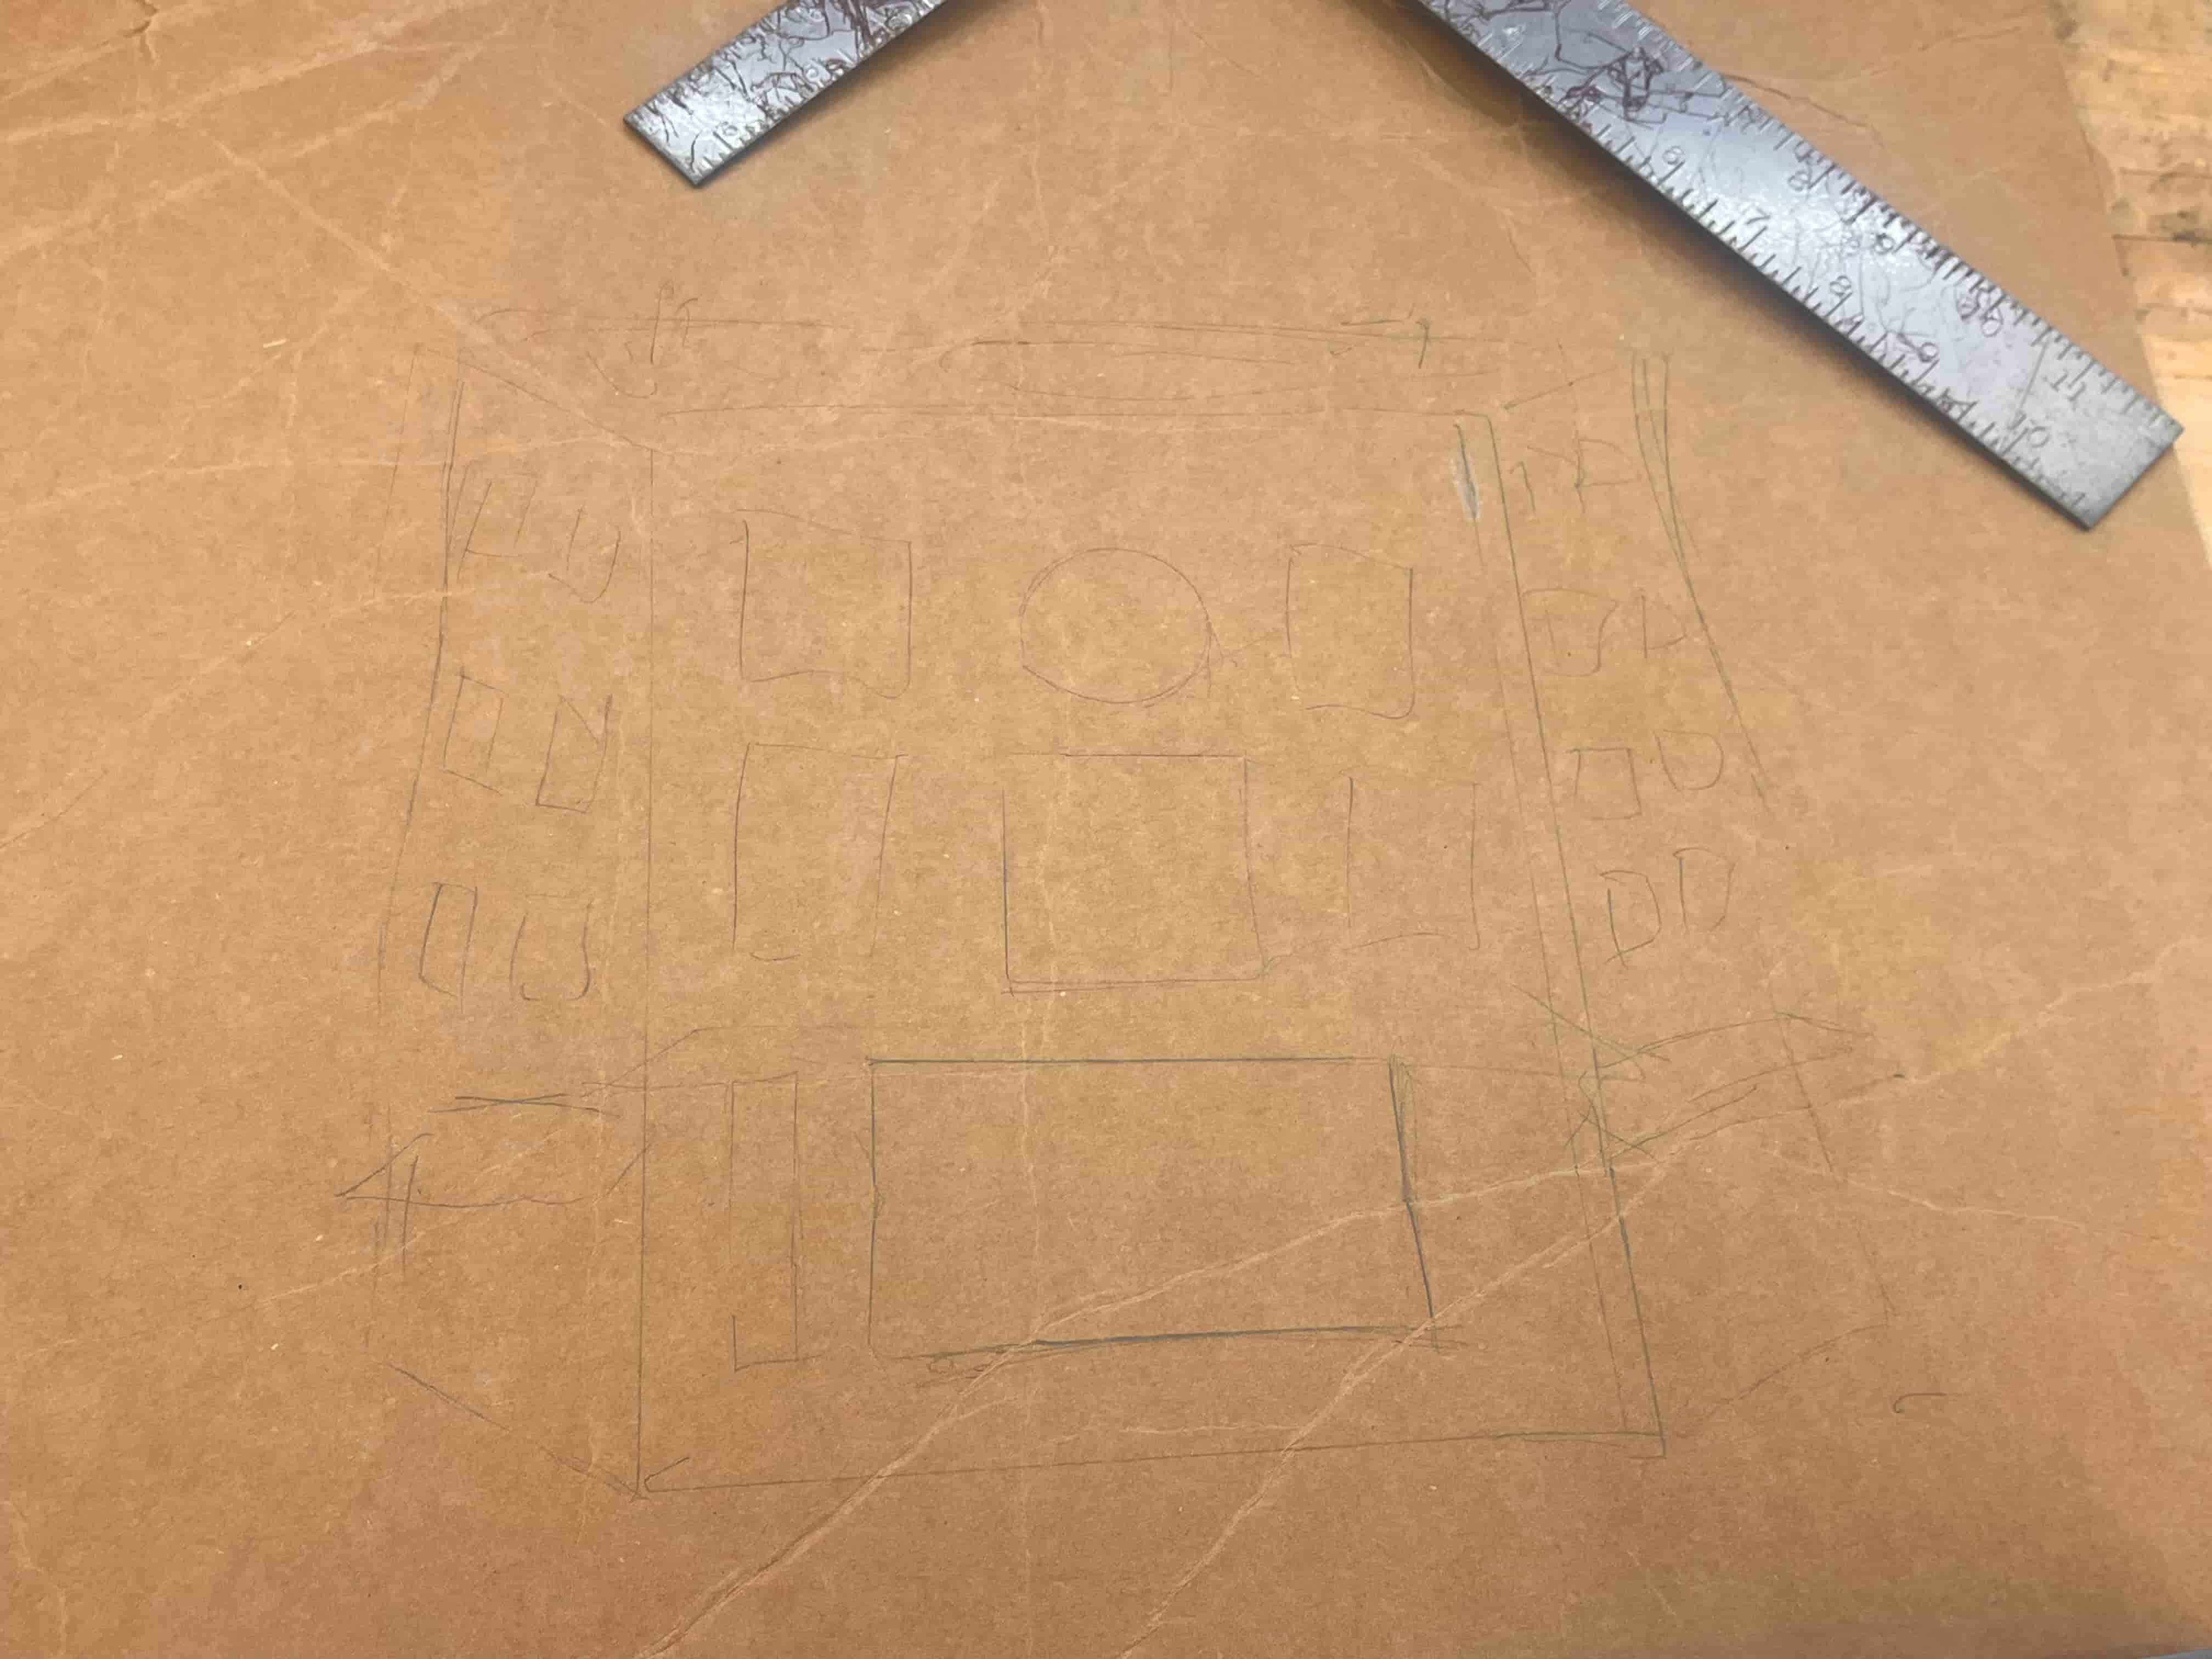
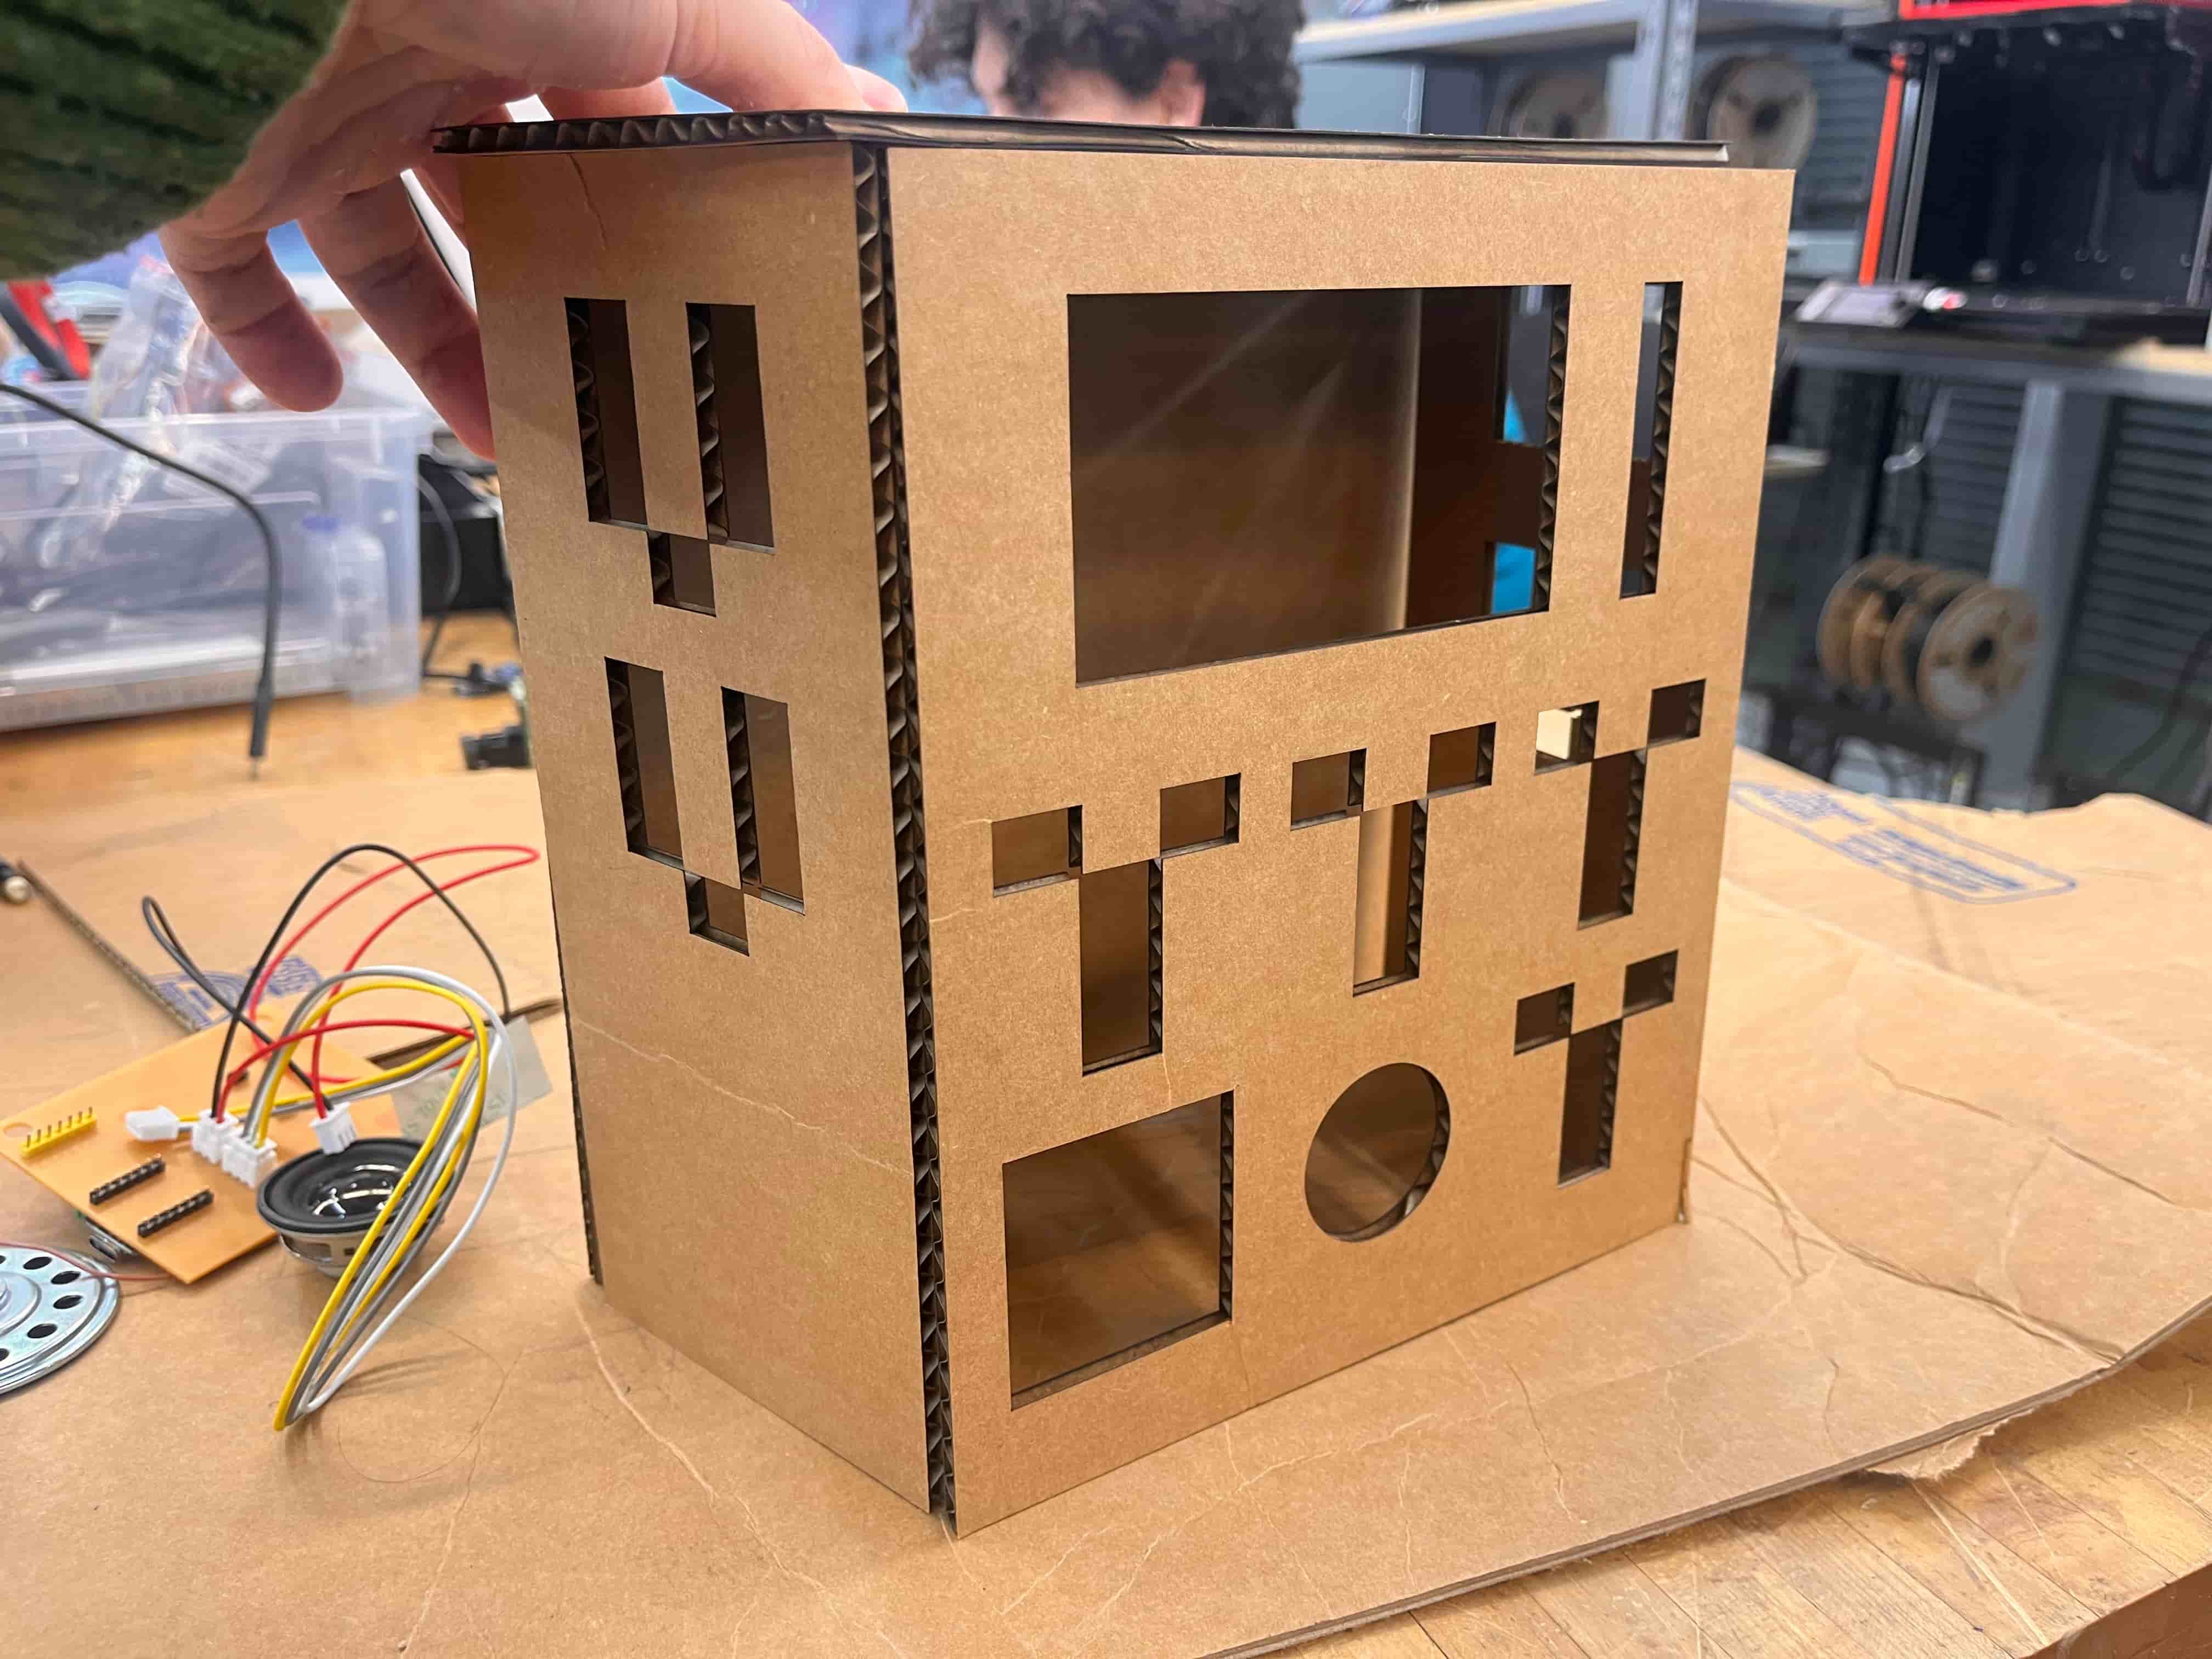
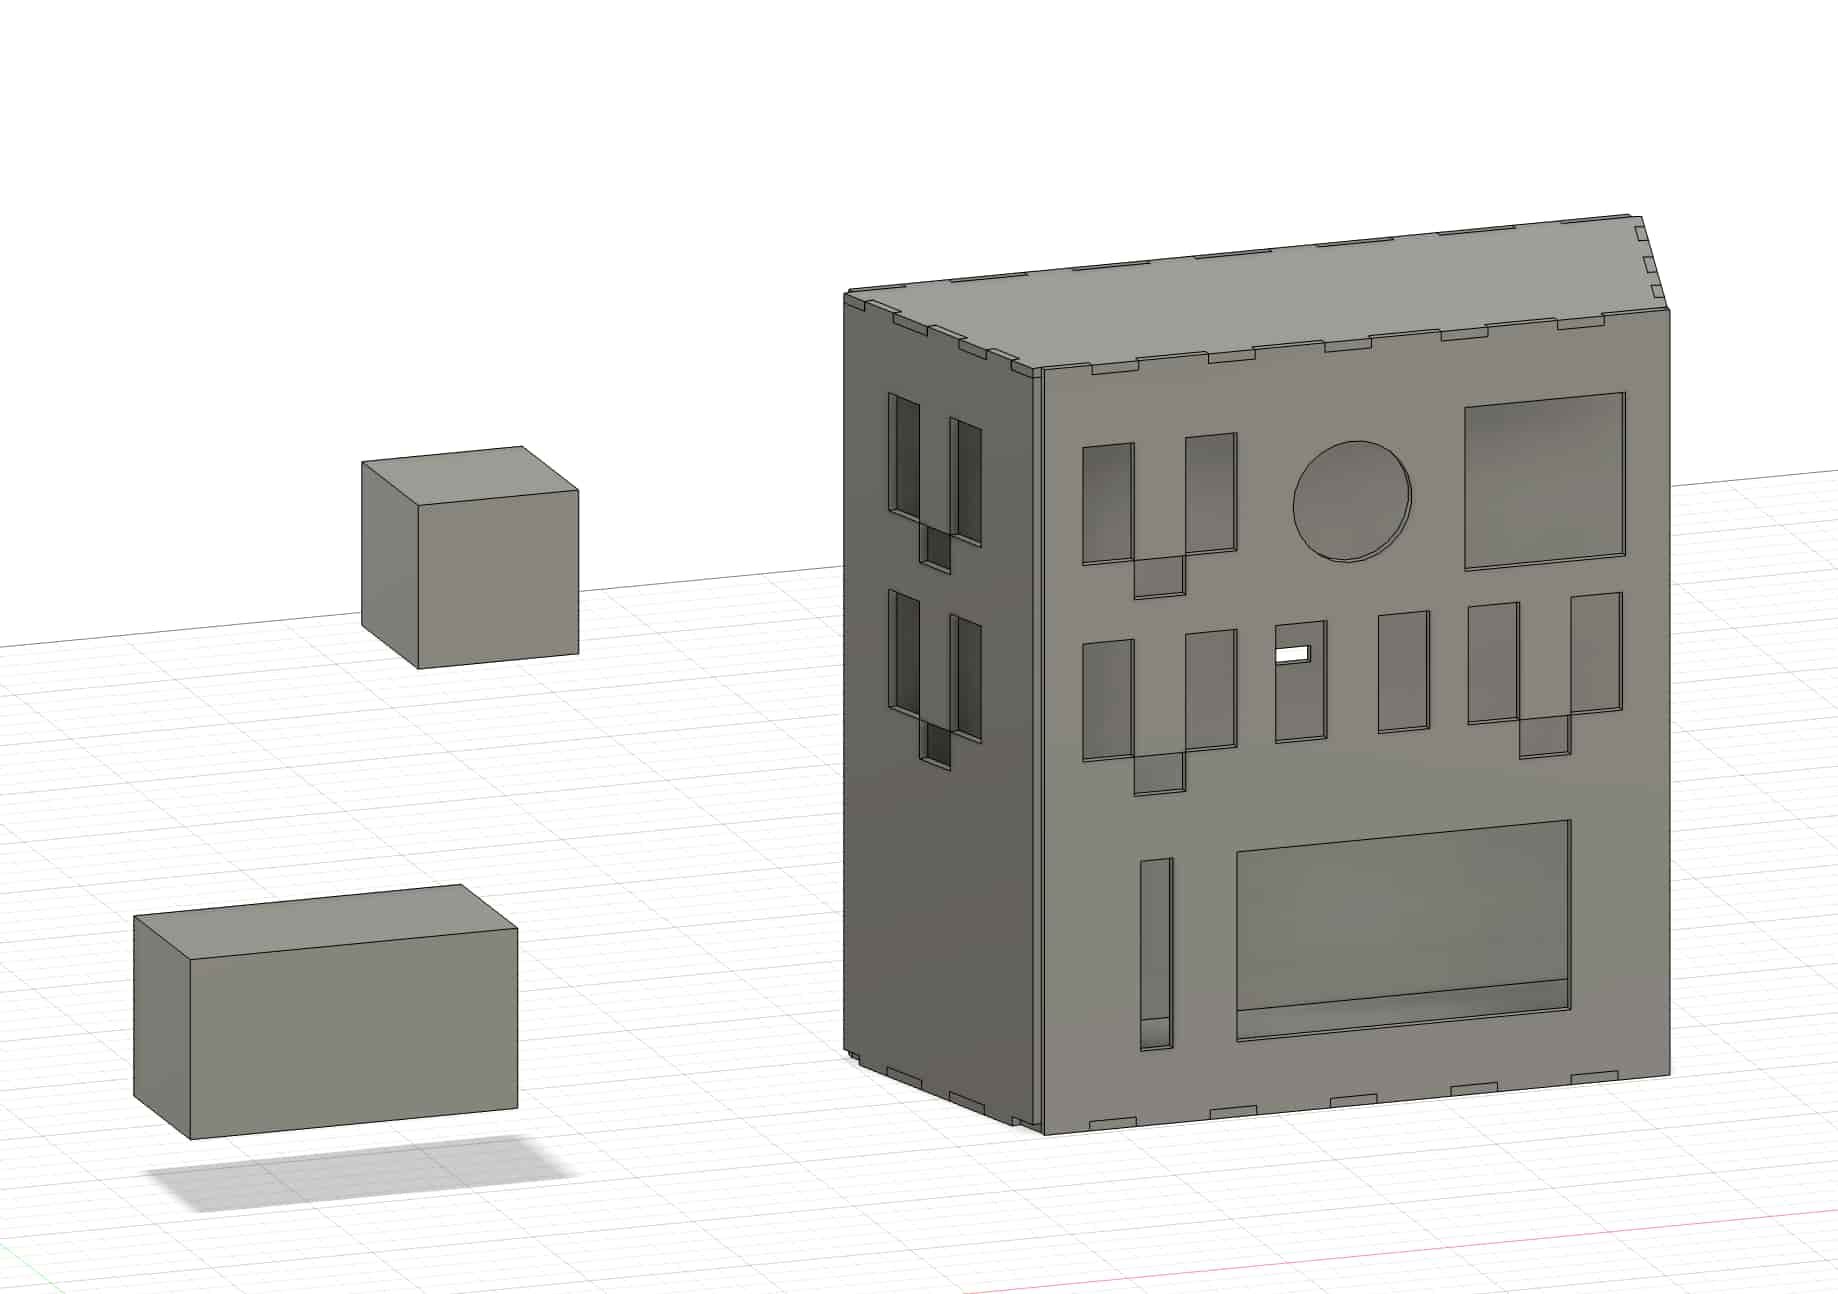
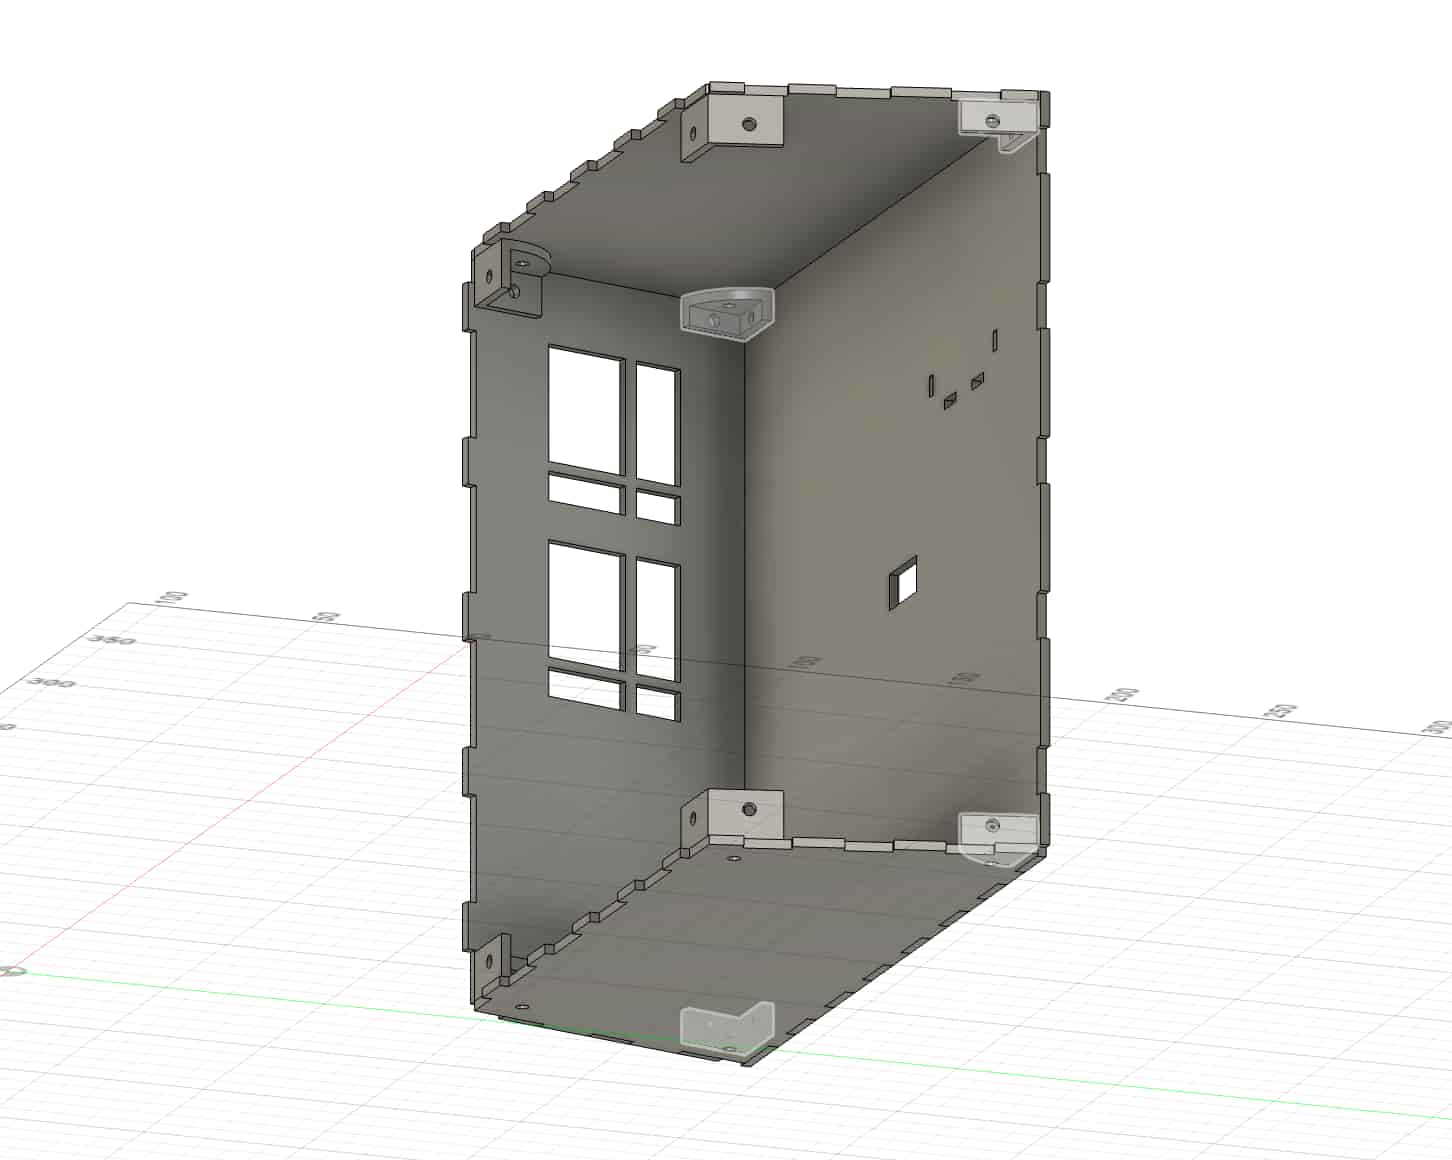
Next it was time to design the frame and housing for everything to fit in. I used Fusion360, created stand-in boxes measured to fit my components (or in the case of the PCB, exported the 3D model directly from KiCad), and got to work. I sketched out how I thought things should fit together on cardboard, did a first pass of the design, then laser cut that frame out to make sure it made sense before proceeding:
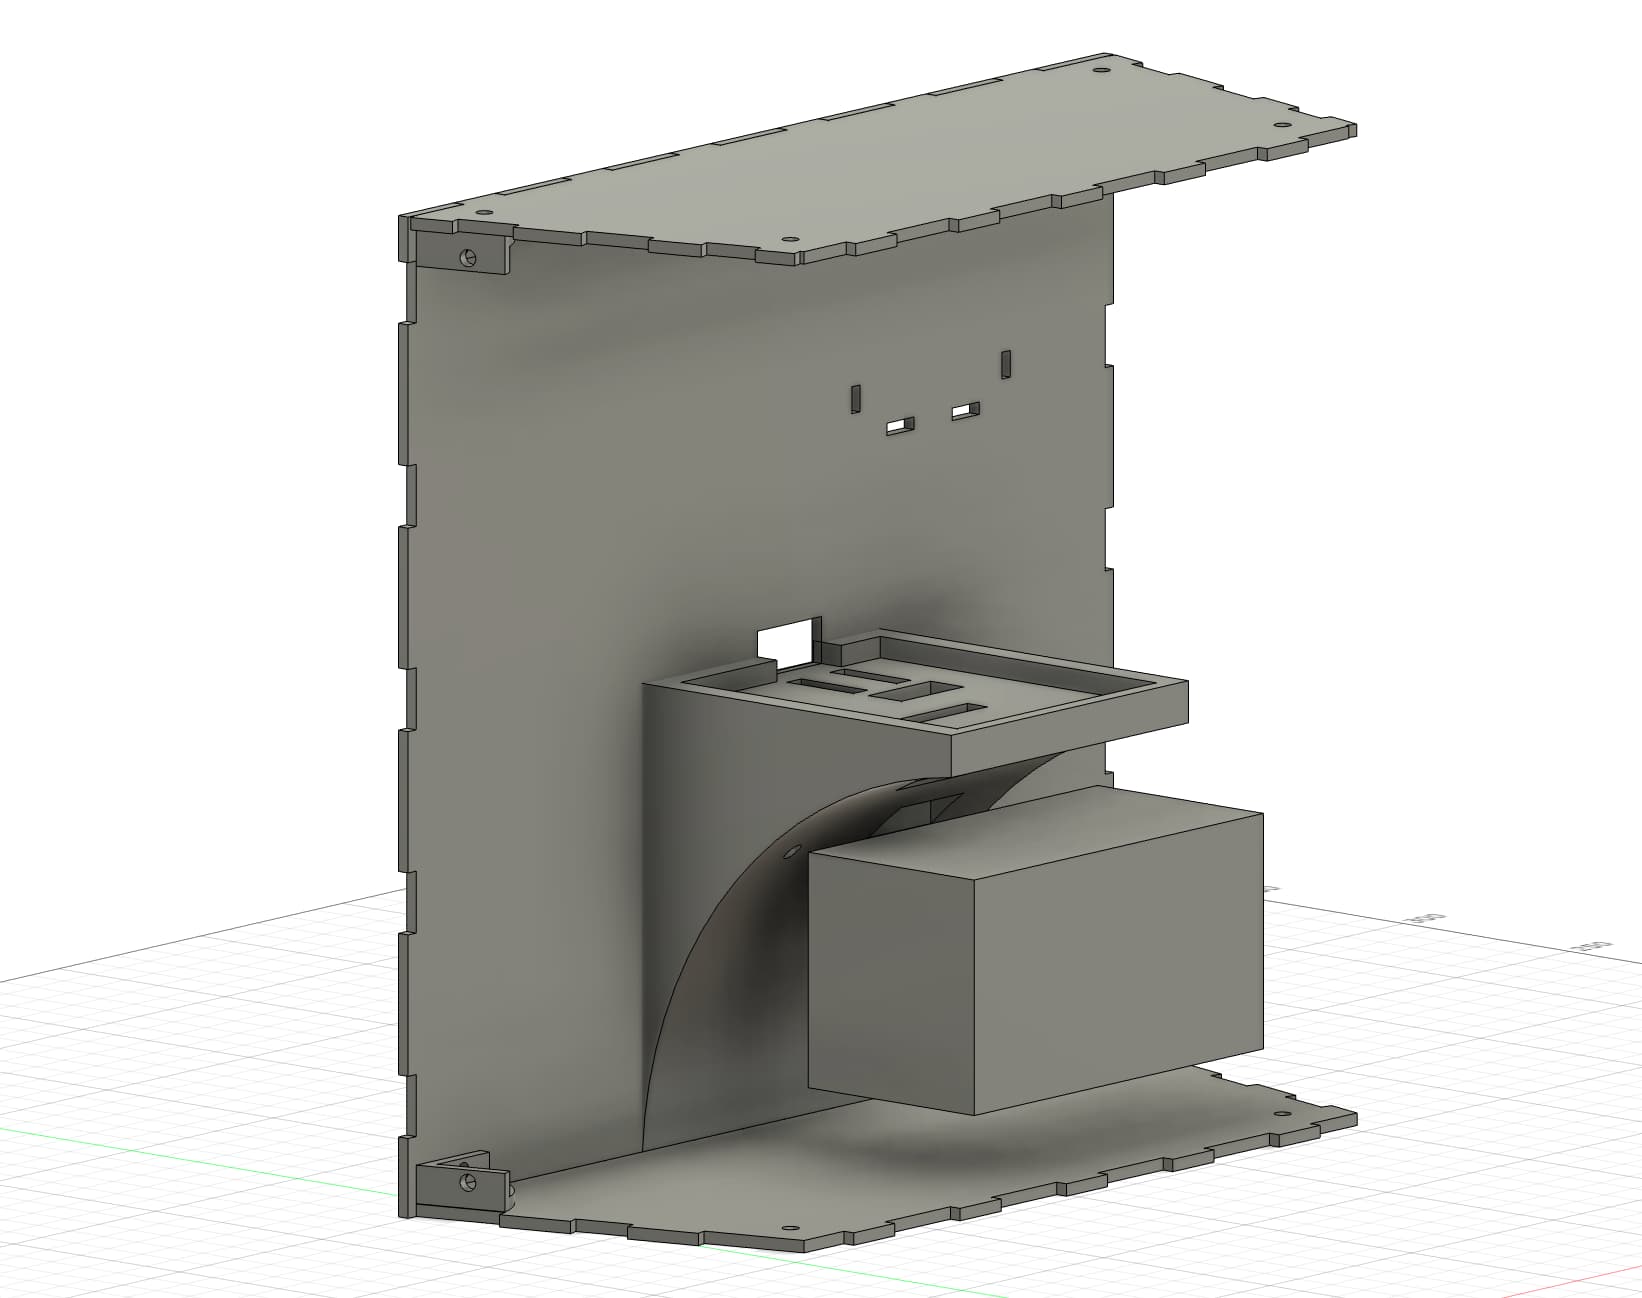
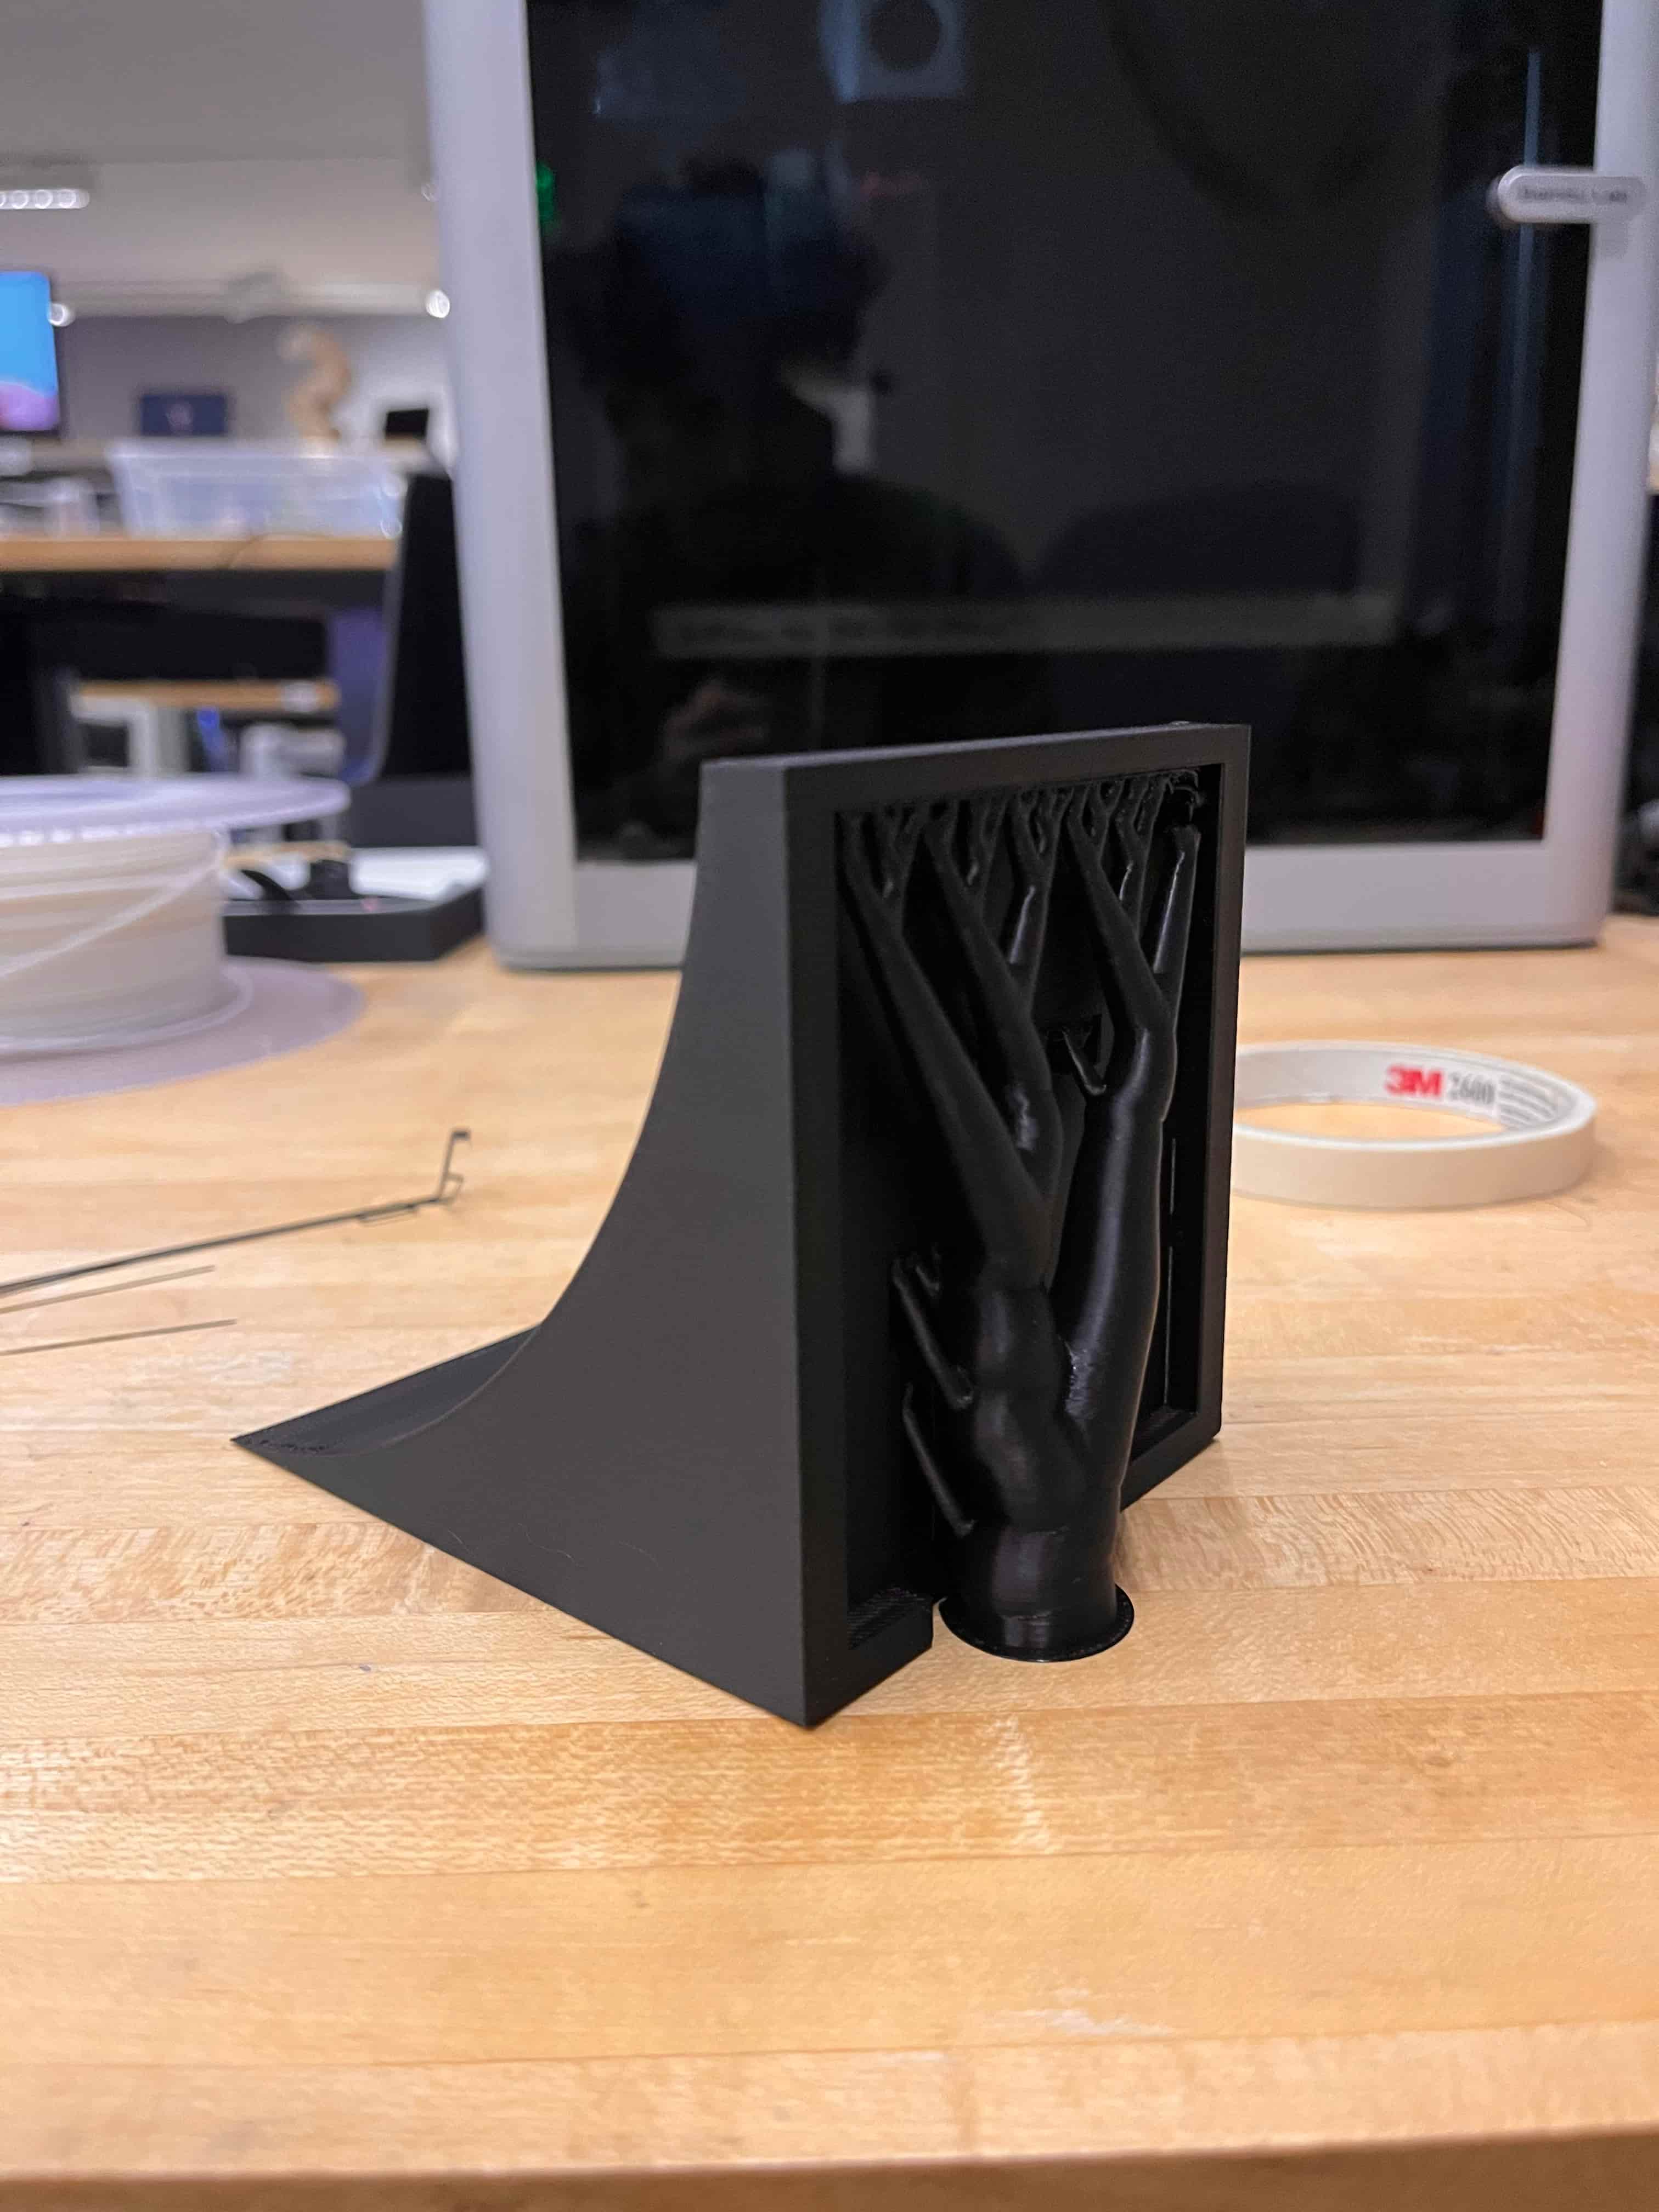
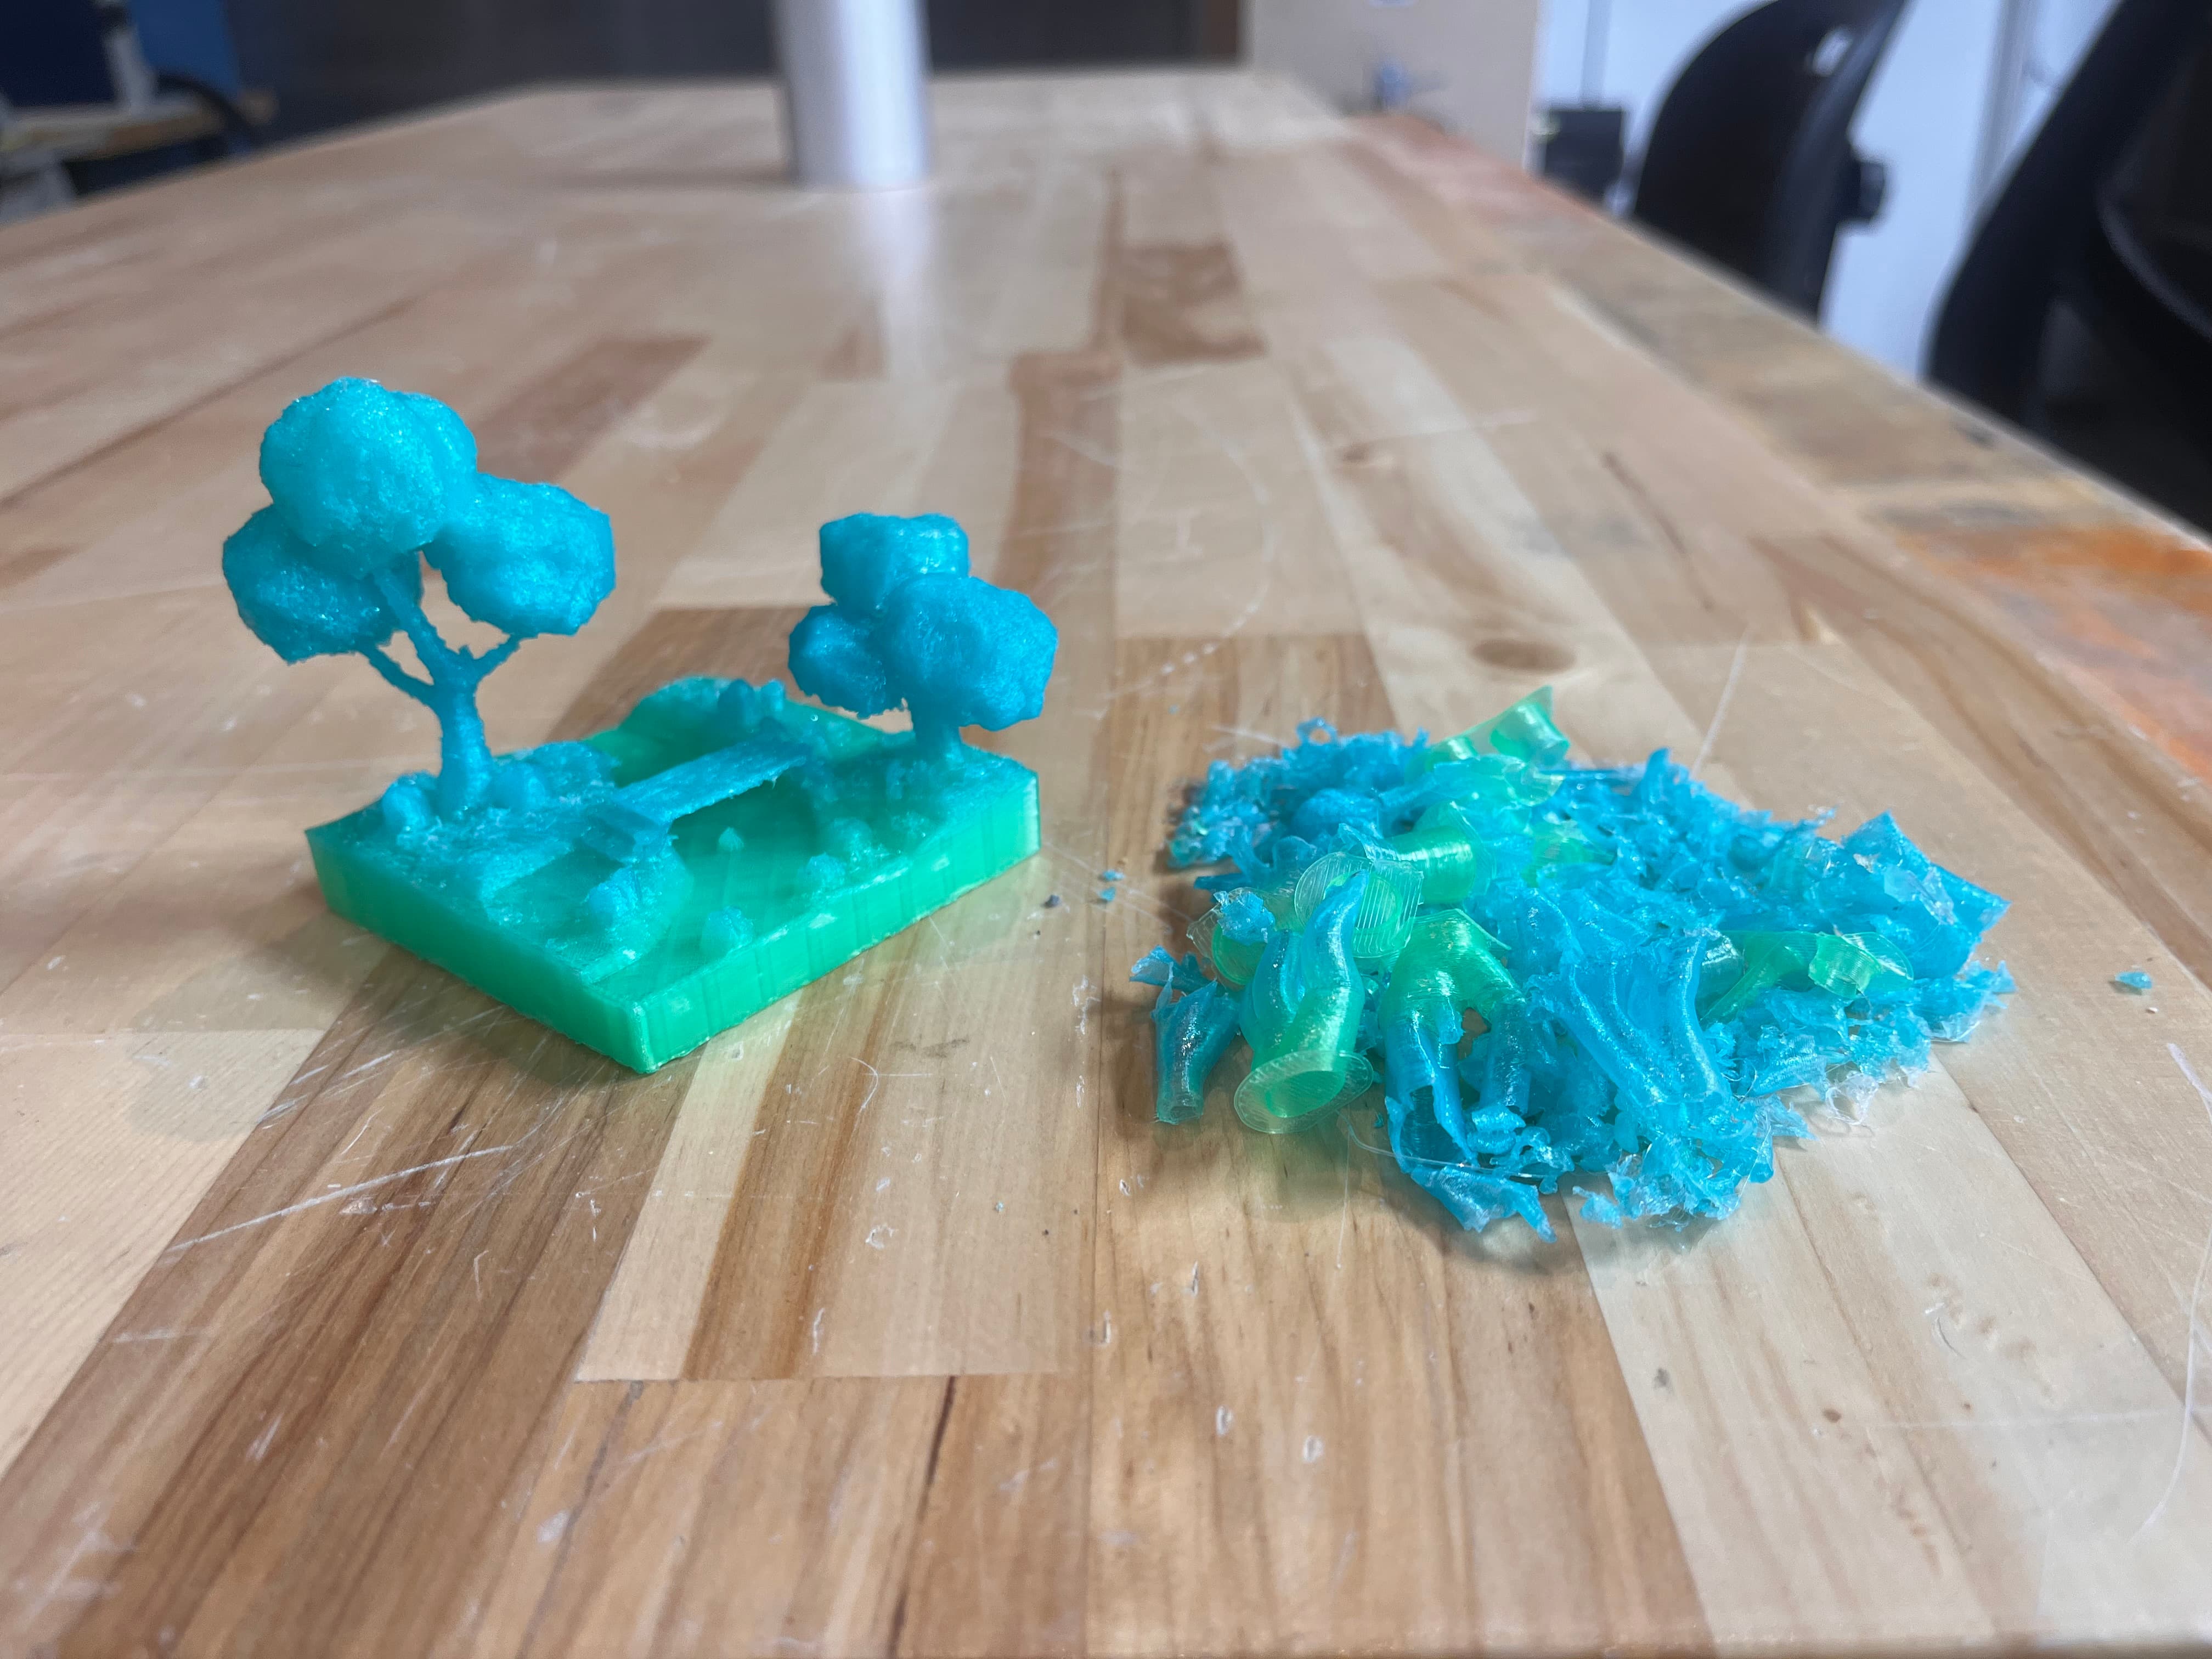
From there, using the stand-in box I'd created for the printer, I designed a PCB mount that was meant to atttach to the back wall and arc right over the printer:
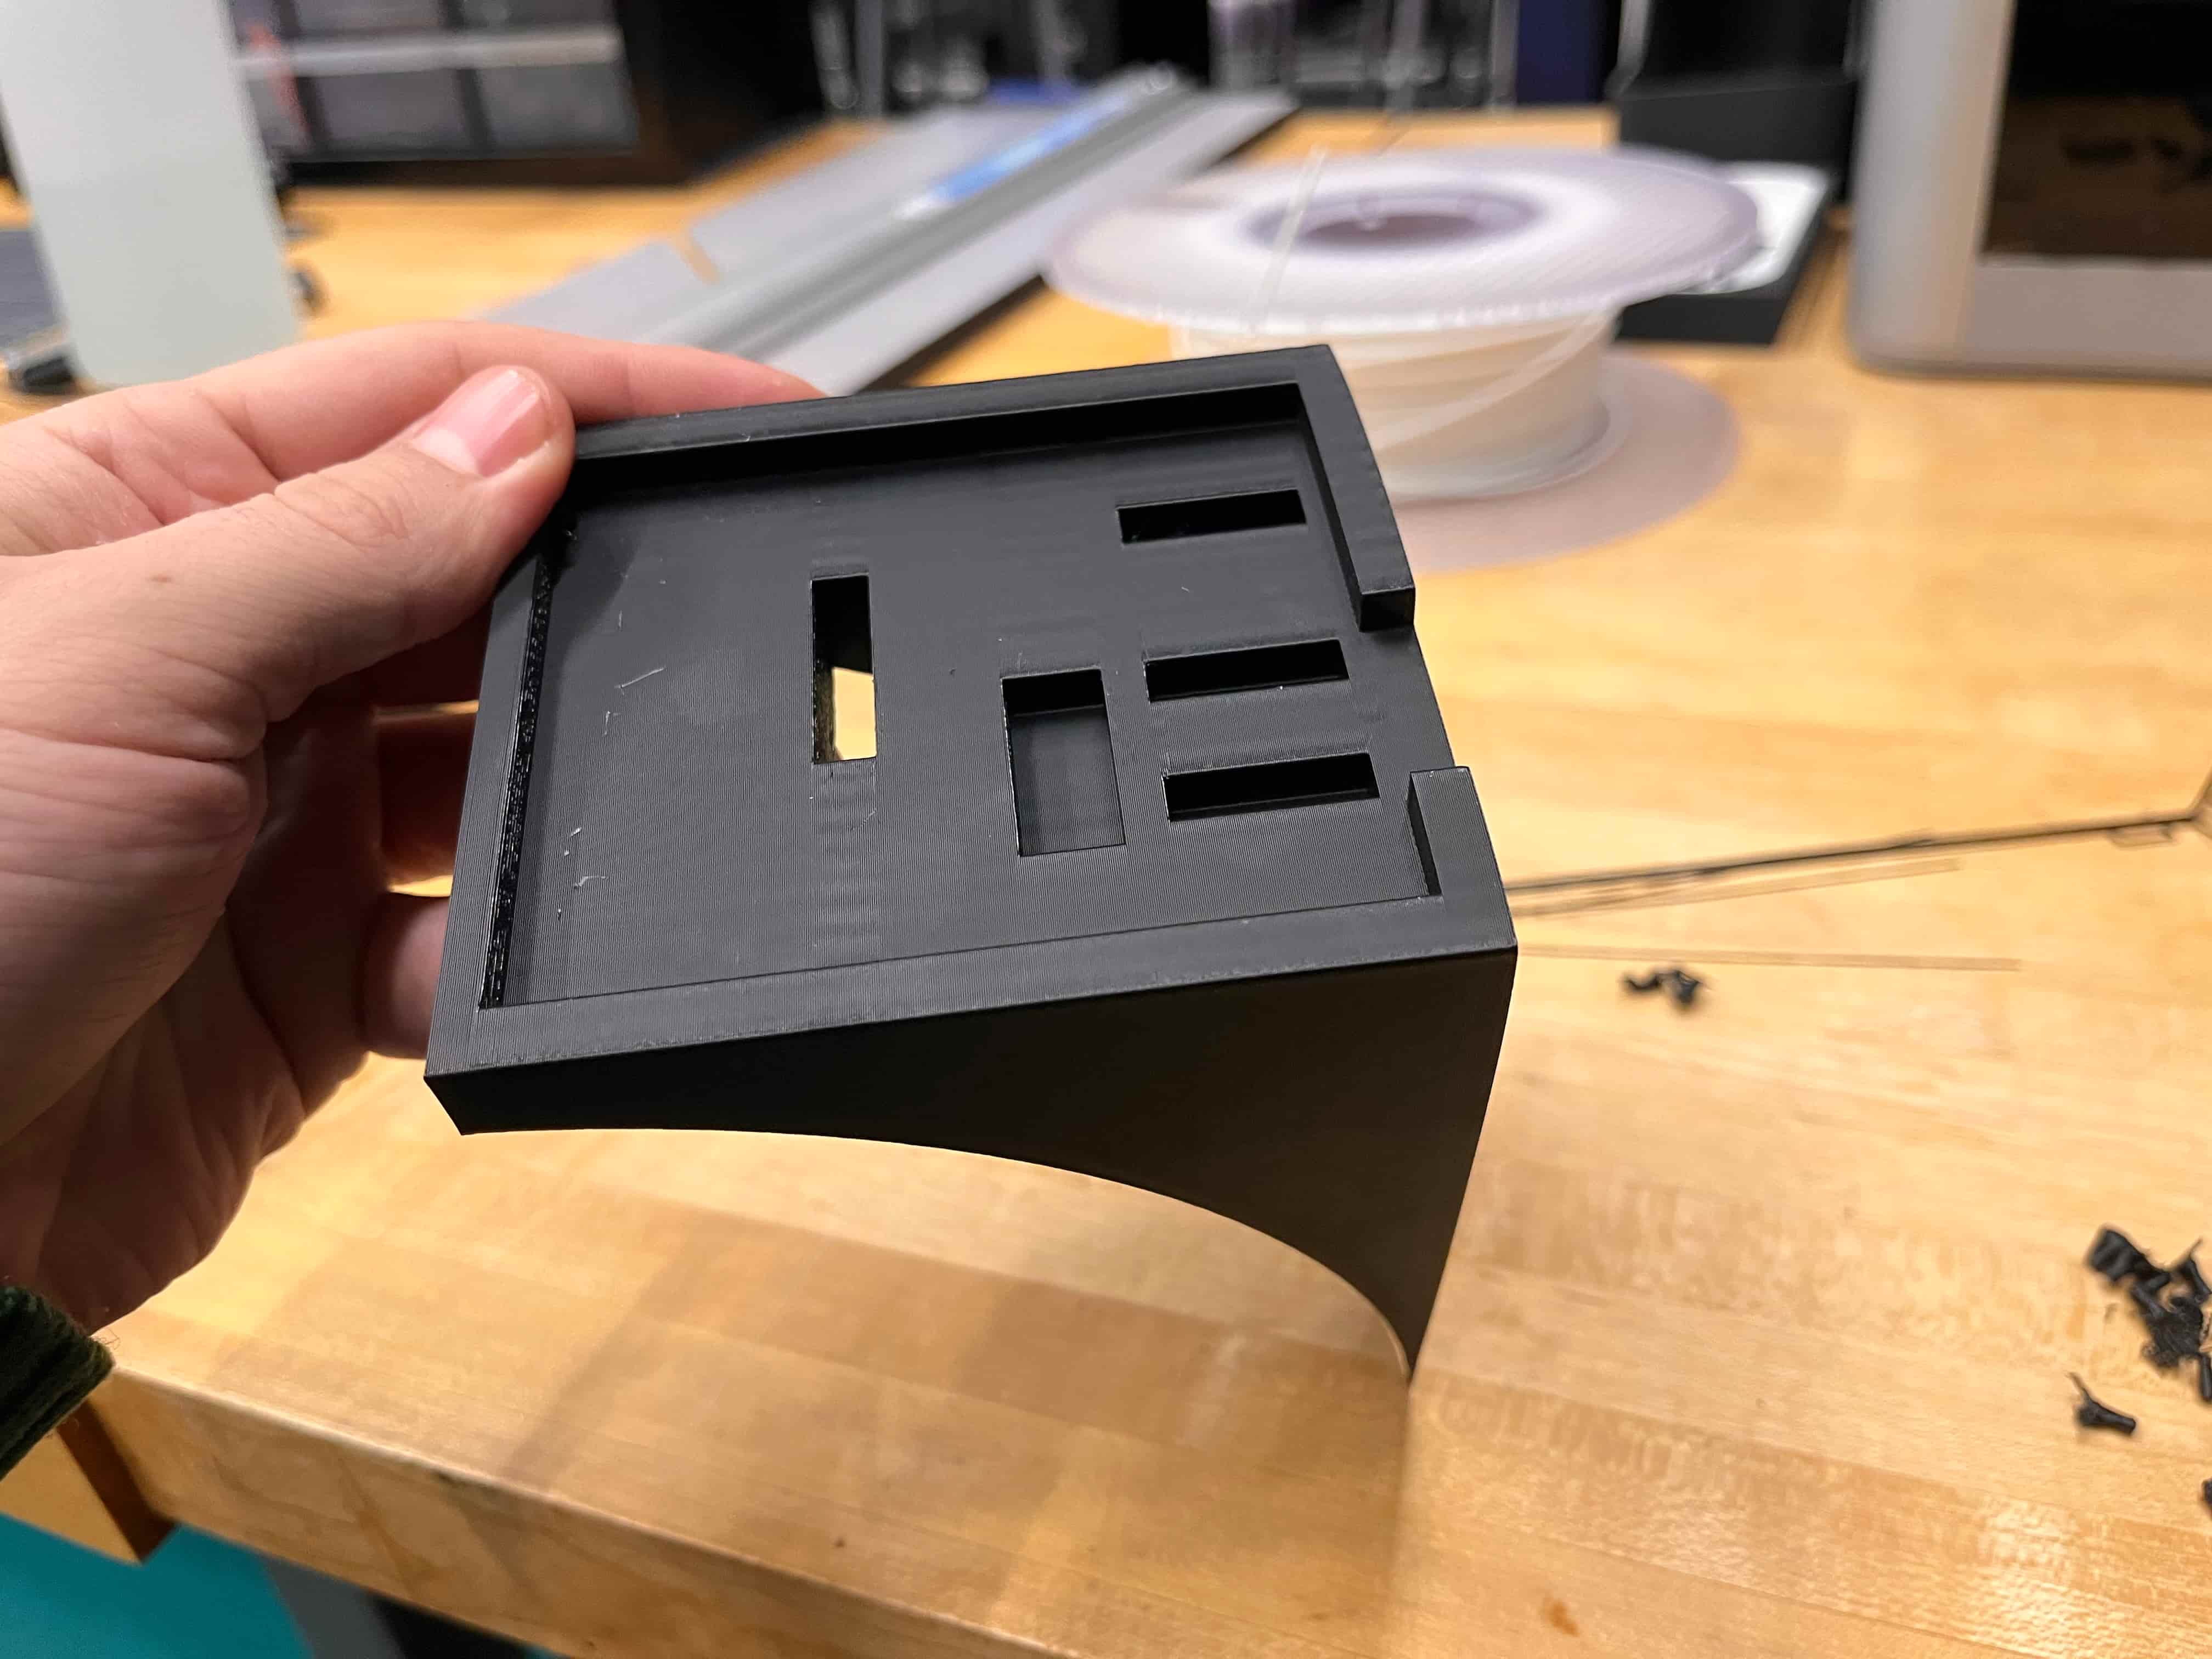
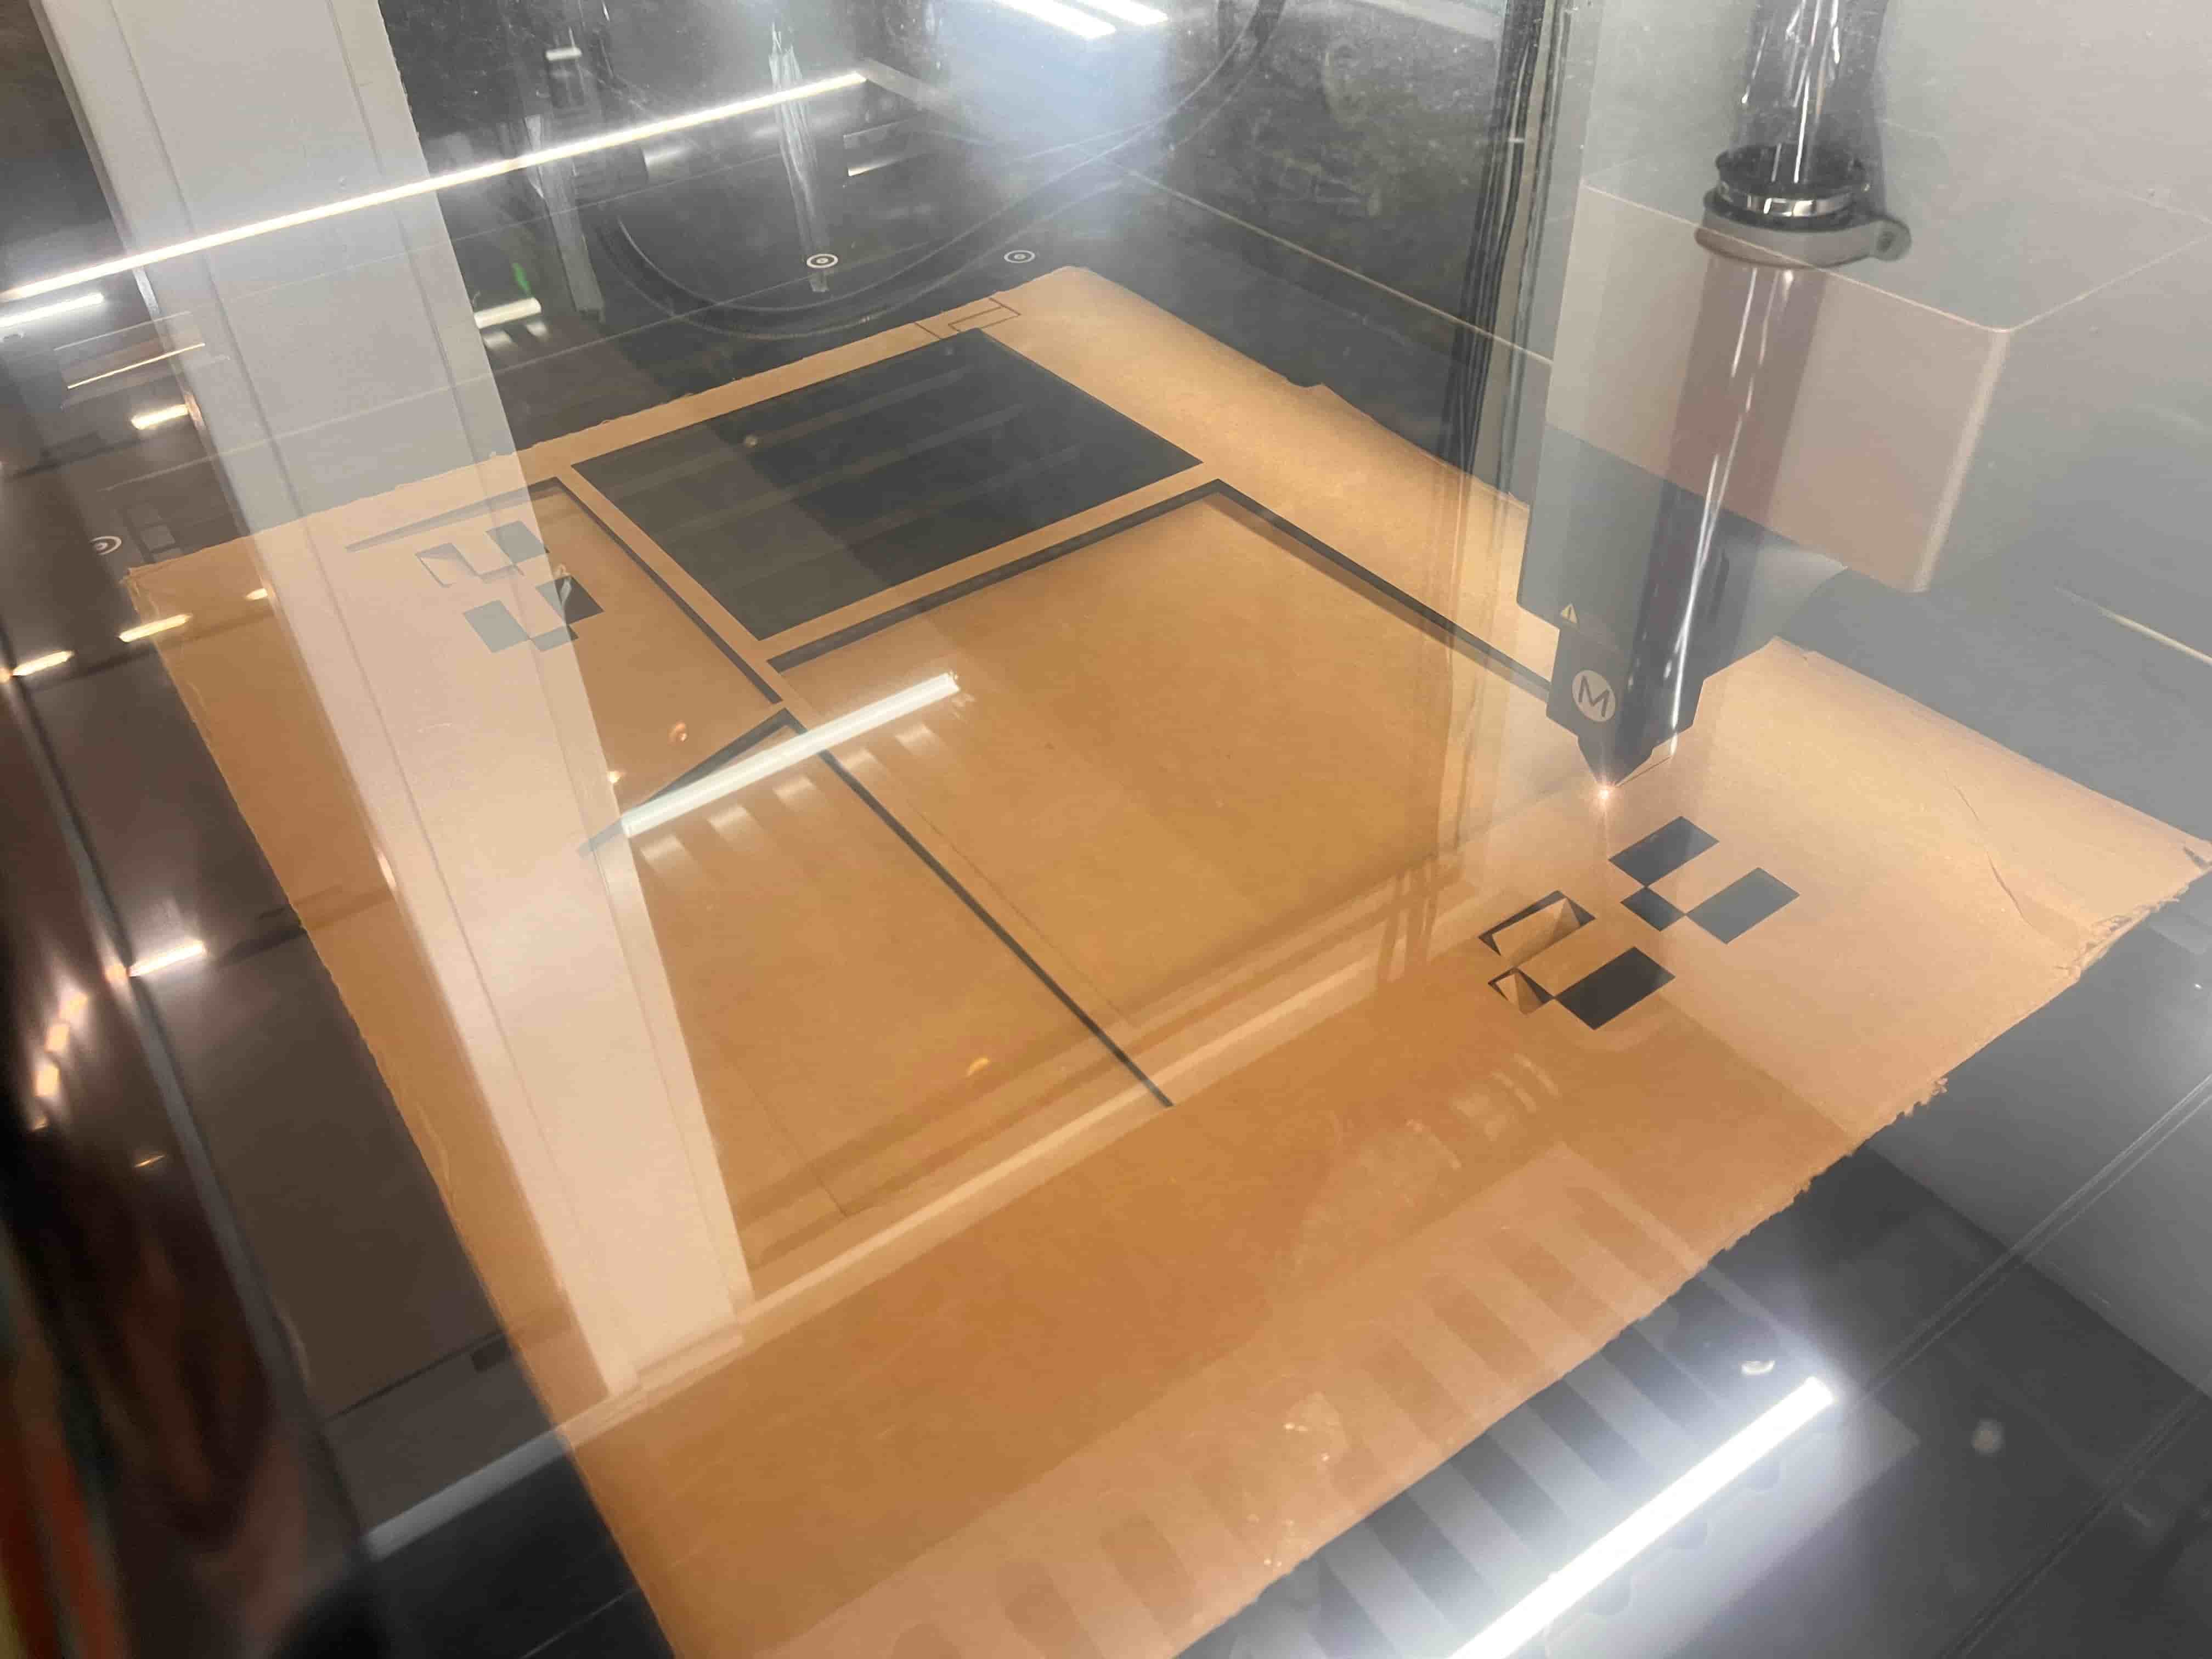
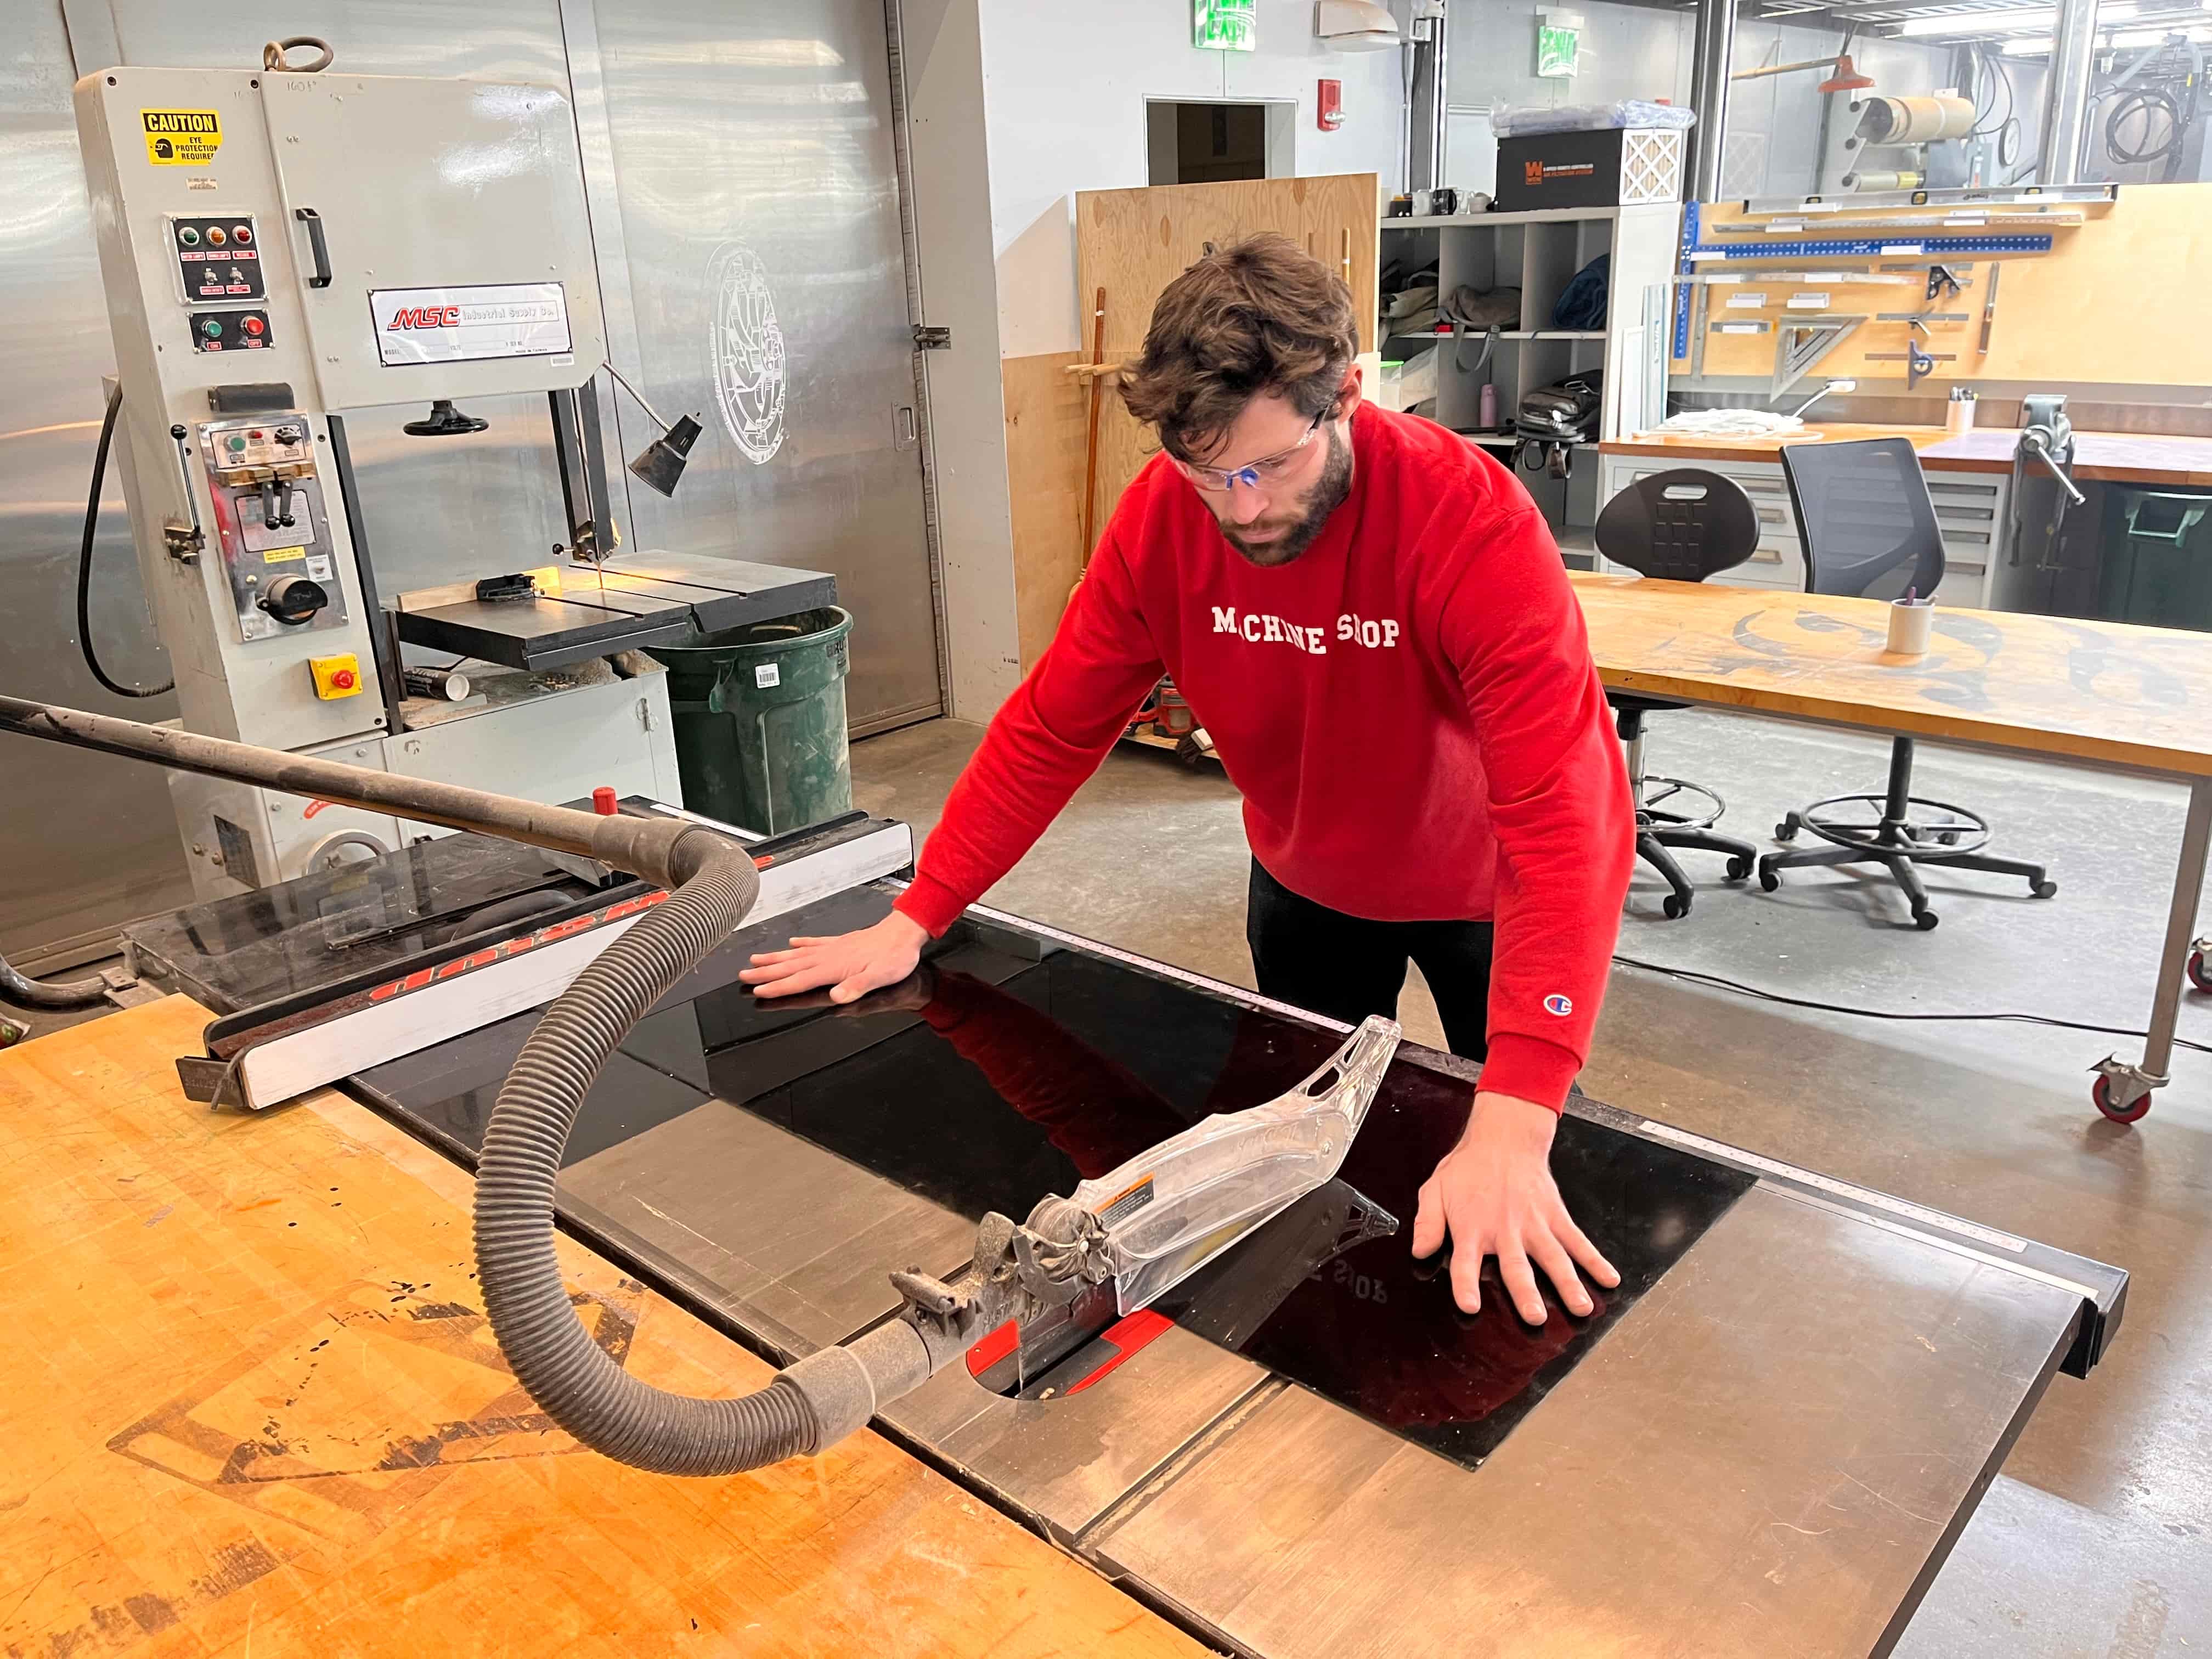
While that was printing out for a couple hours, I worked with Dan to cut out 1/8" black acrylic sheets so I could laser cut my frame. The xTool P3 made it super easy, with one-click settings for black acrylic that cut out the shapes perfectly. To get the design, I needed to isolate each body in Fusion, then one-by-one create a new sketch on each suface to project the face onto, then export that sketch with the projected face as a .DXF file. I also experimented with the xTool P3's engraving feature, as I wanted to rough up the windows to add some contrast. Here's how that whole process looked:


And good news – they all fit together!
However, despite them snapping in nicely, I wanted the faces and enclosure to be more secure. So I designed some joints for each of the corners to fit into, and included holes for M4 screws:

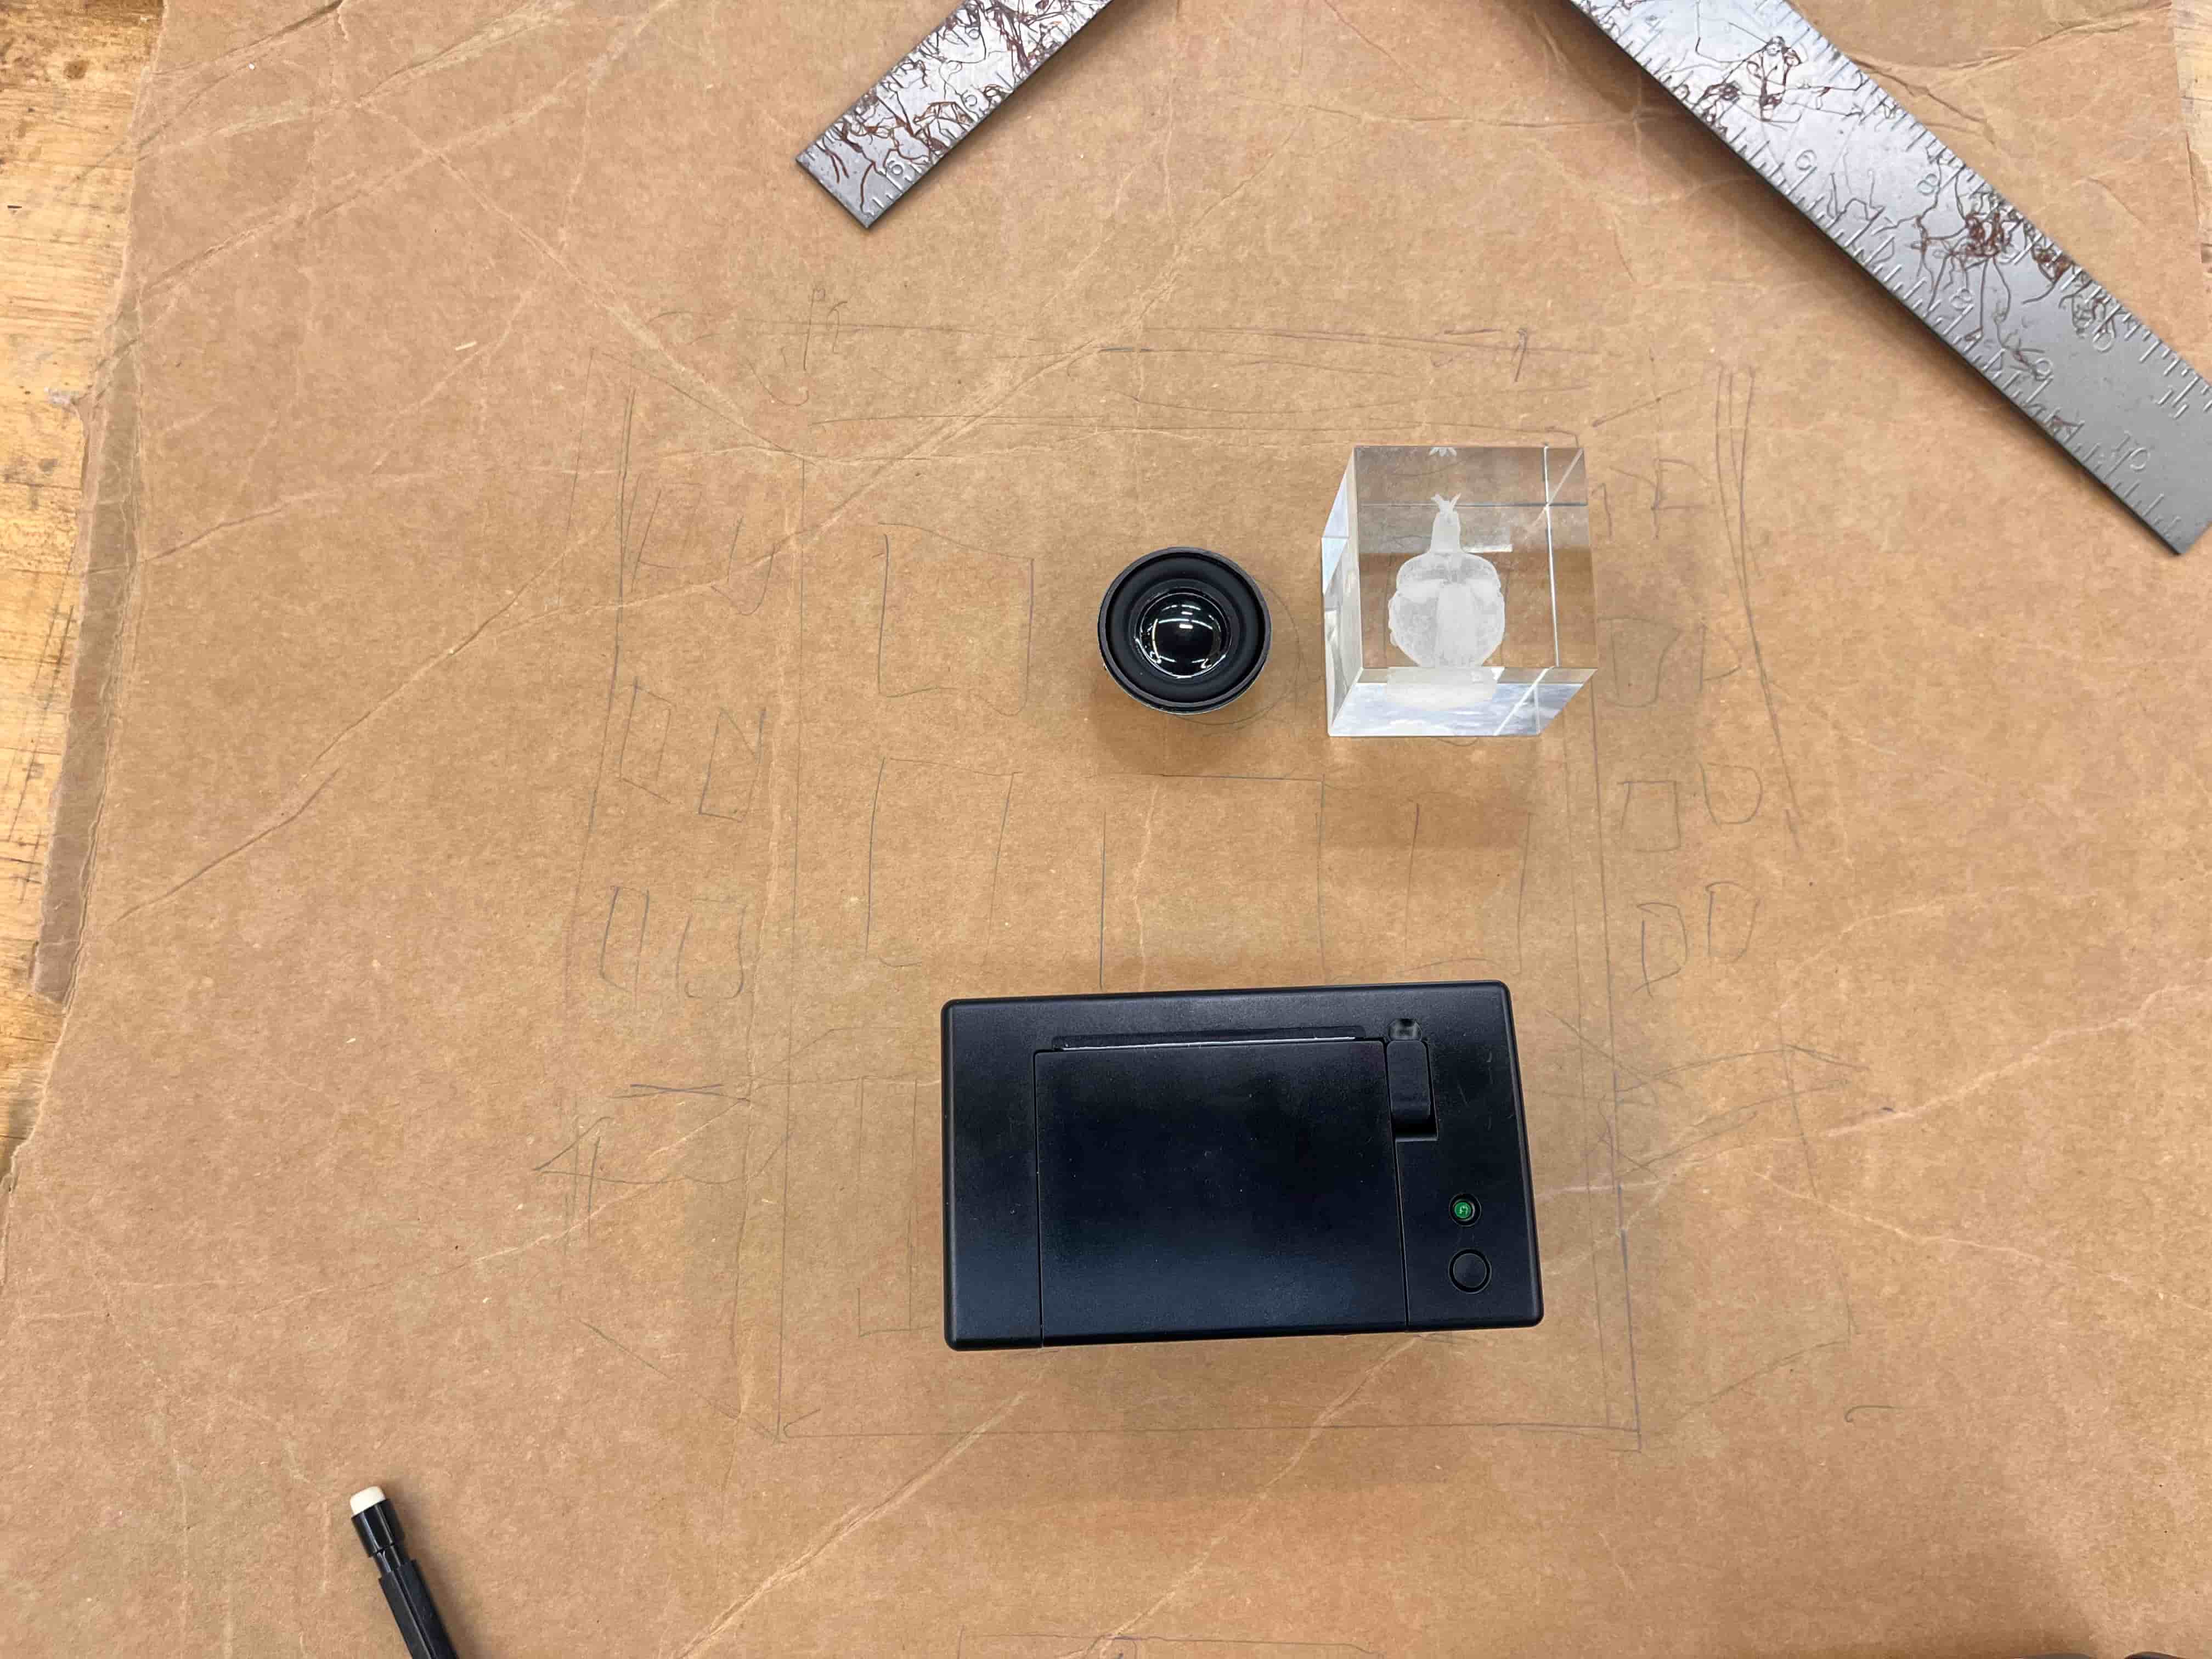
Next, I designed another small mount for the Neopixels, with an opening at the top for the LED strip to slip in from the top; as well as an acrylic bridge between the front and back faces to hold the laser engraved cube:

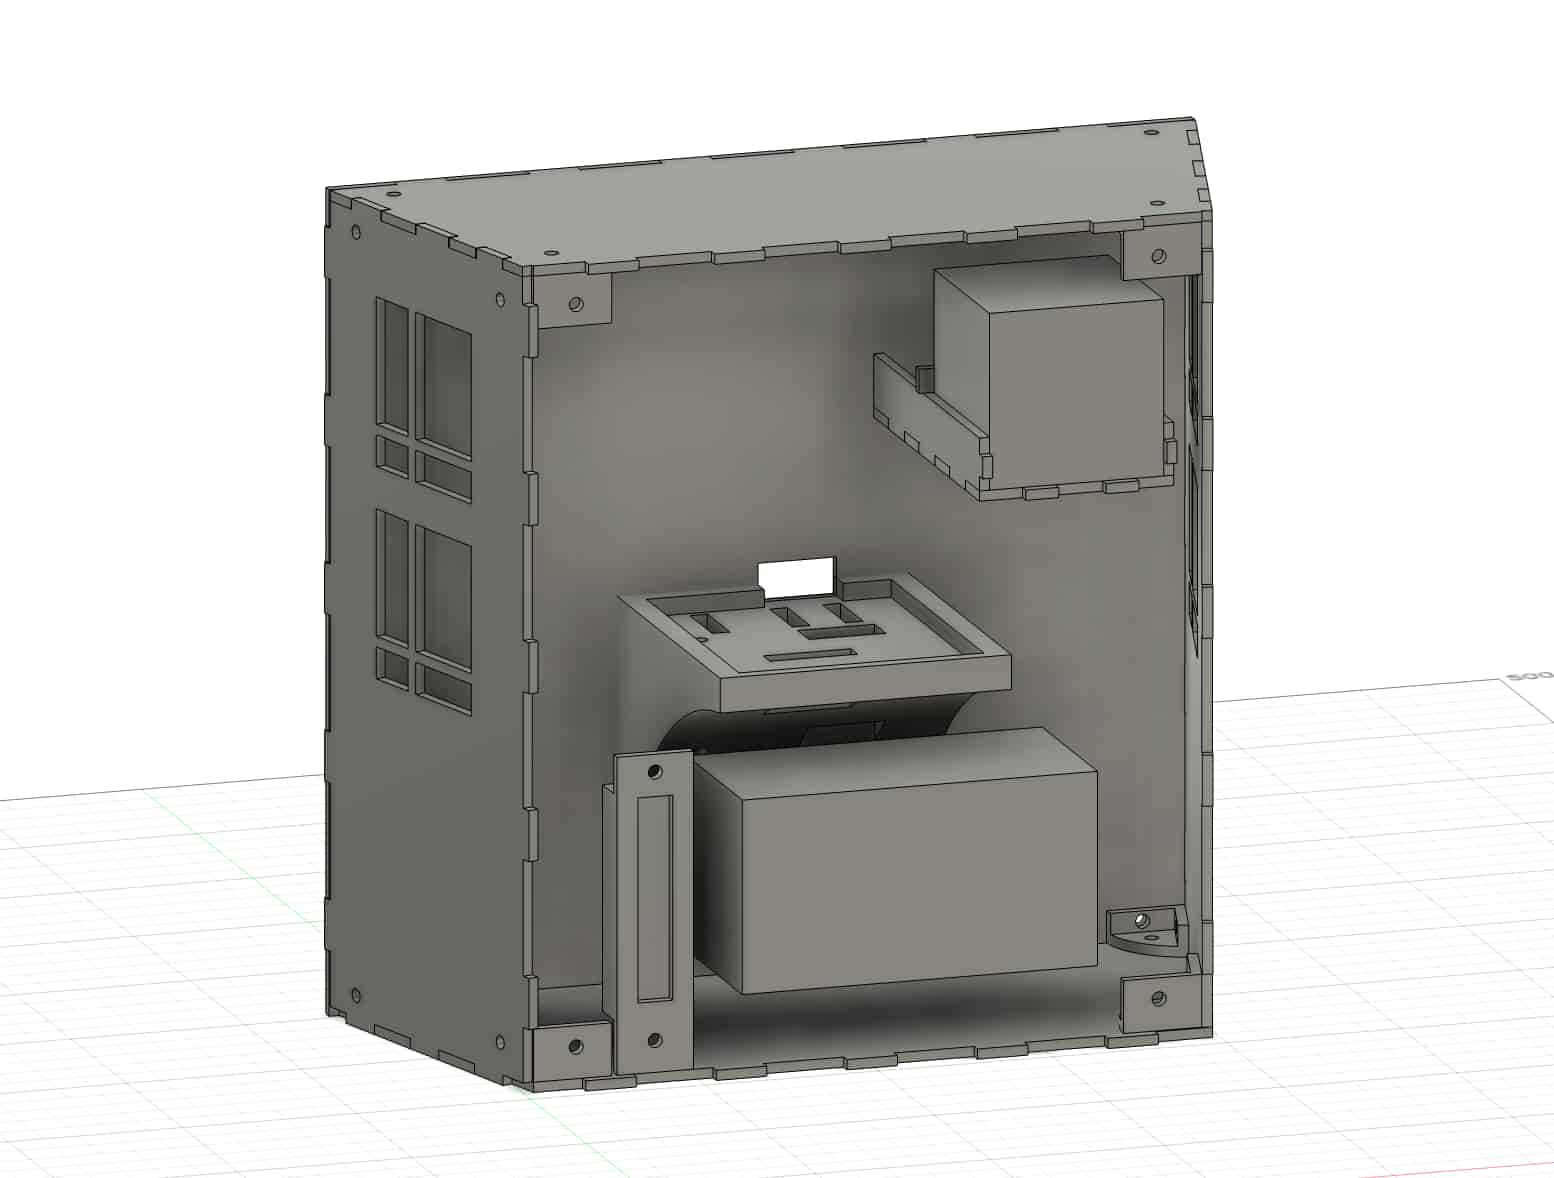
Here's a picture of all of the internal structures:
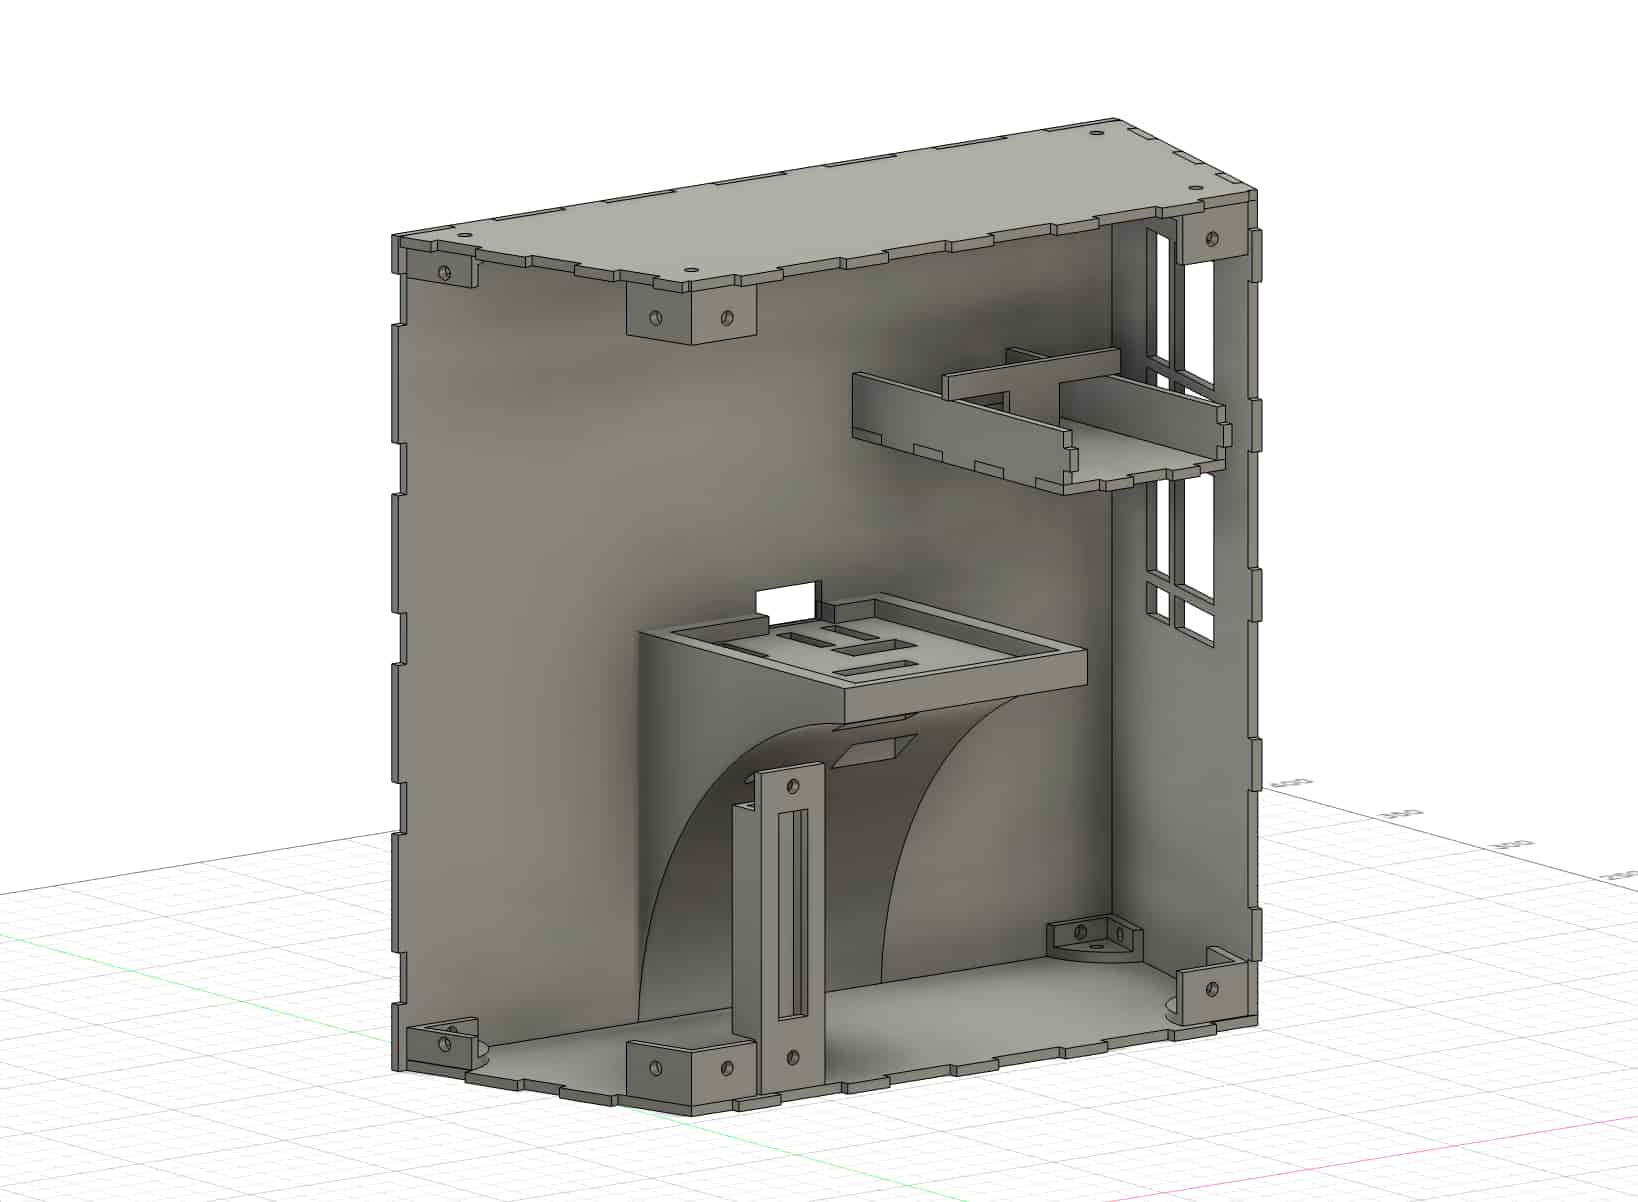
and here's a picture of all the structures, plus the stand-ins, to show how it will all fit together:
and with the front on:
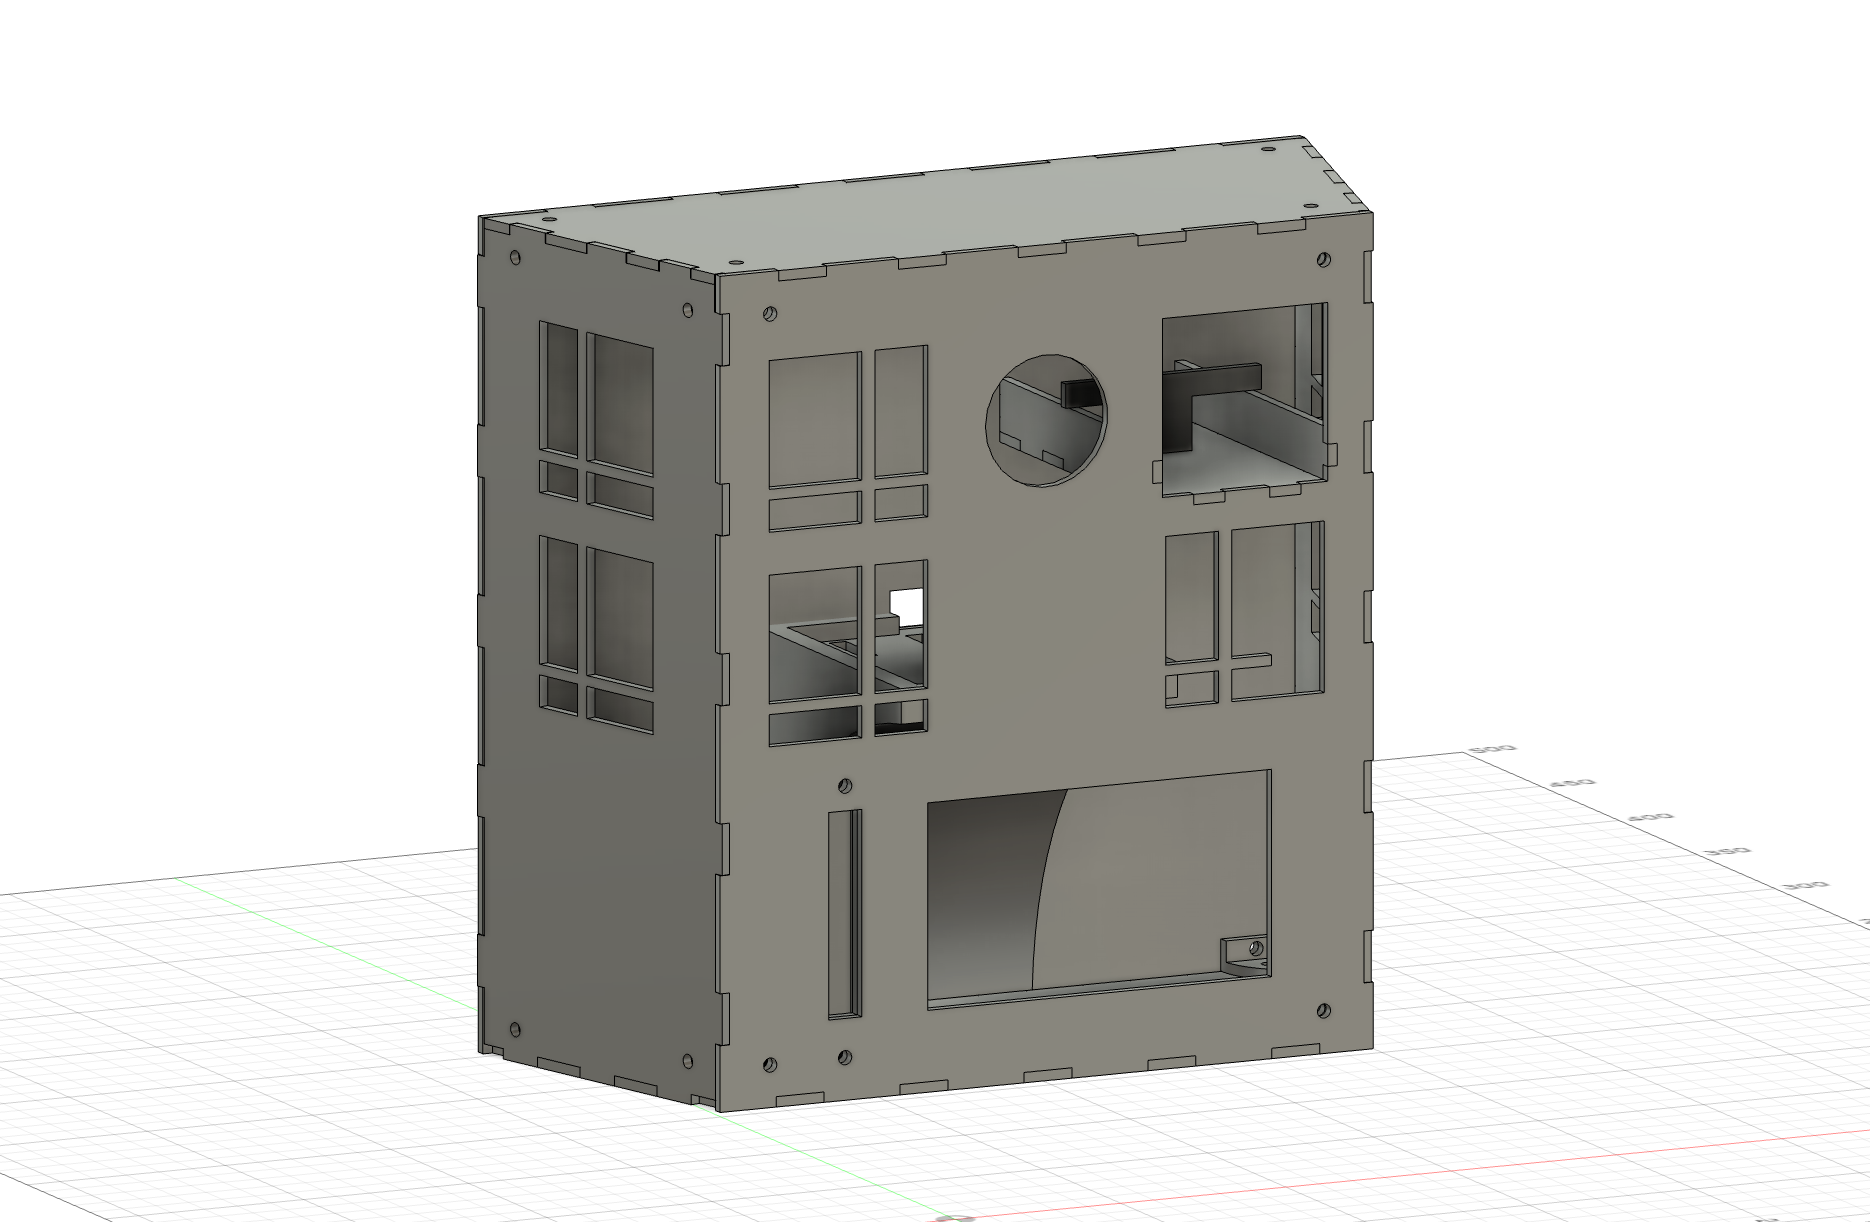
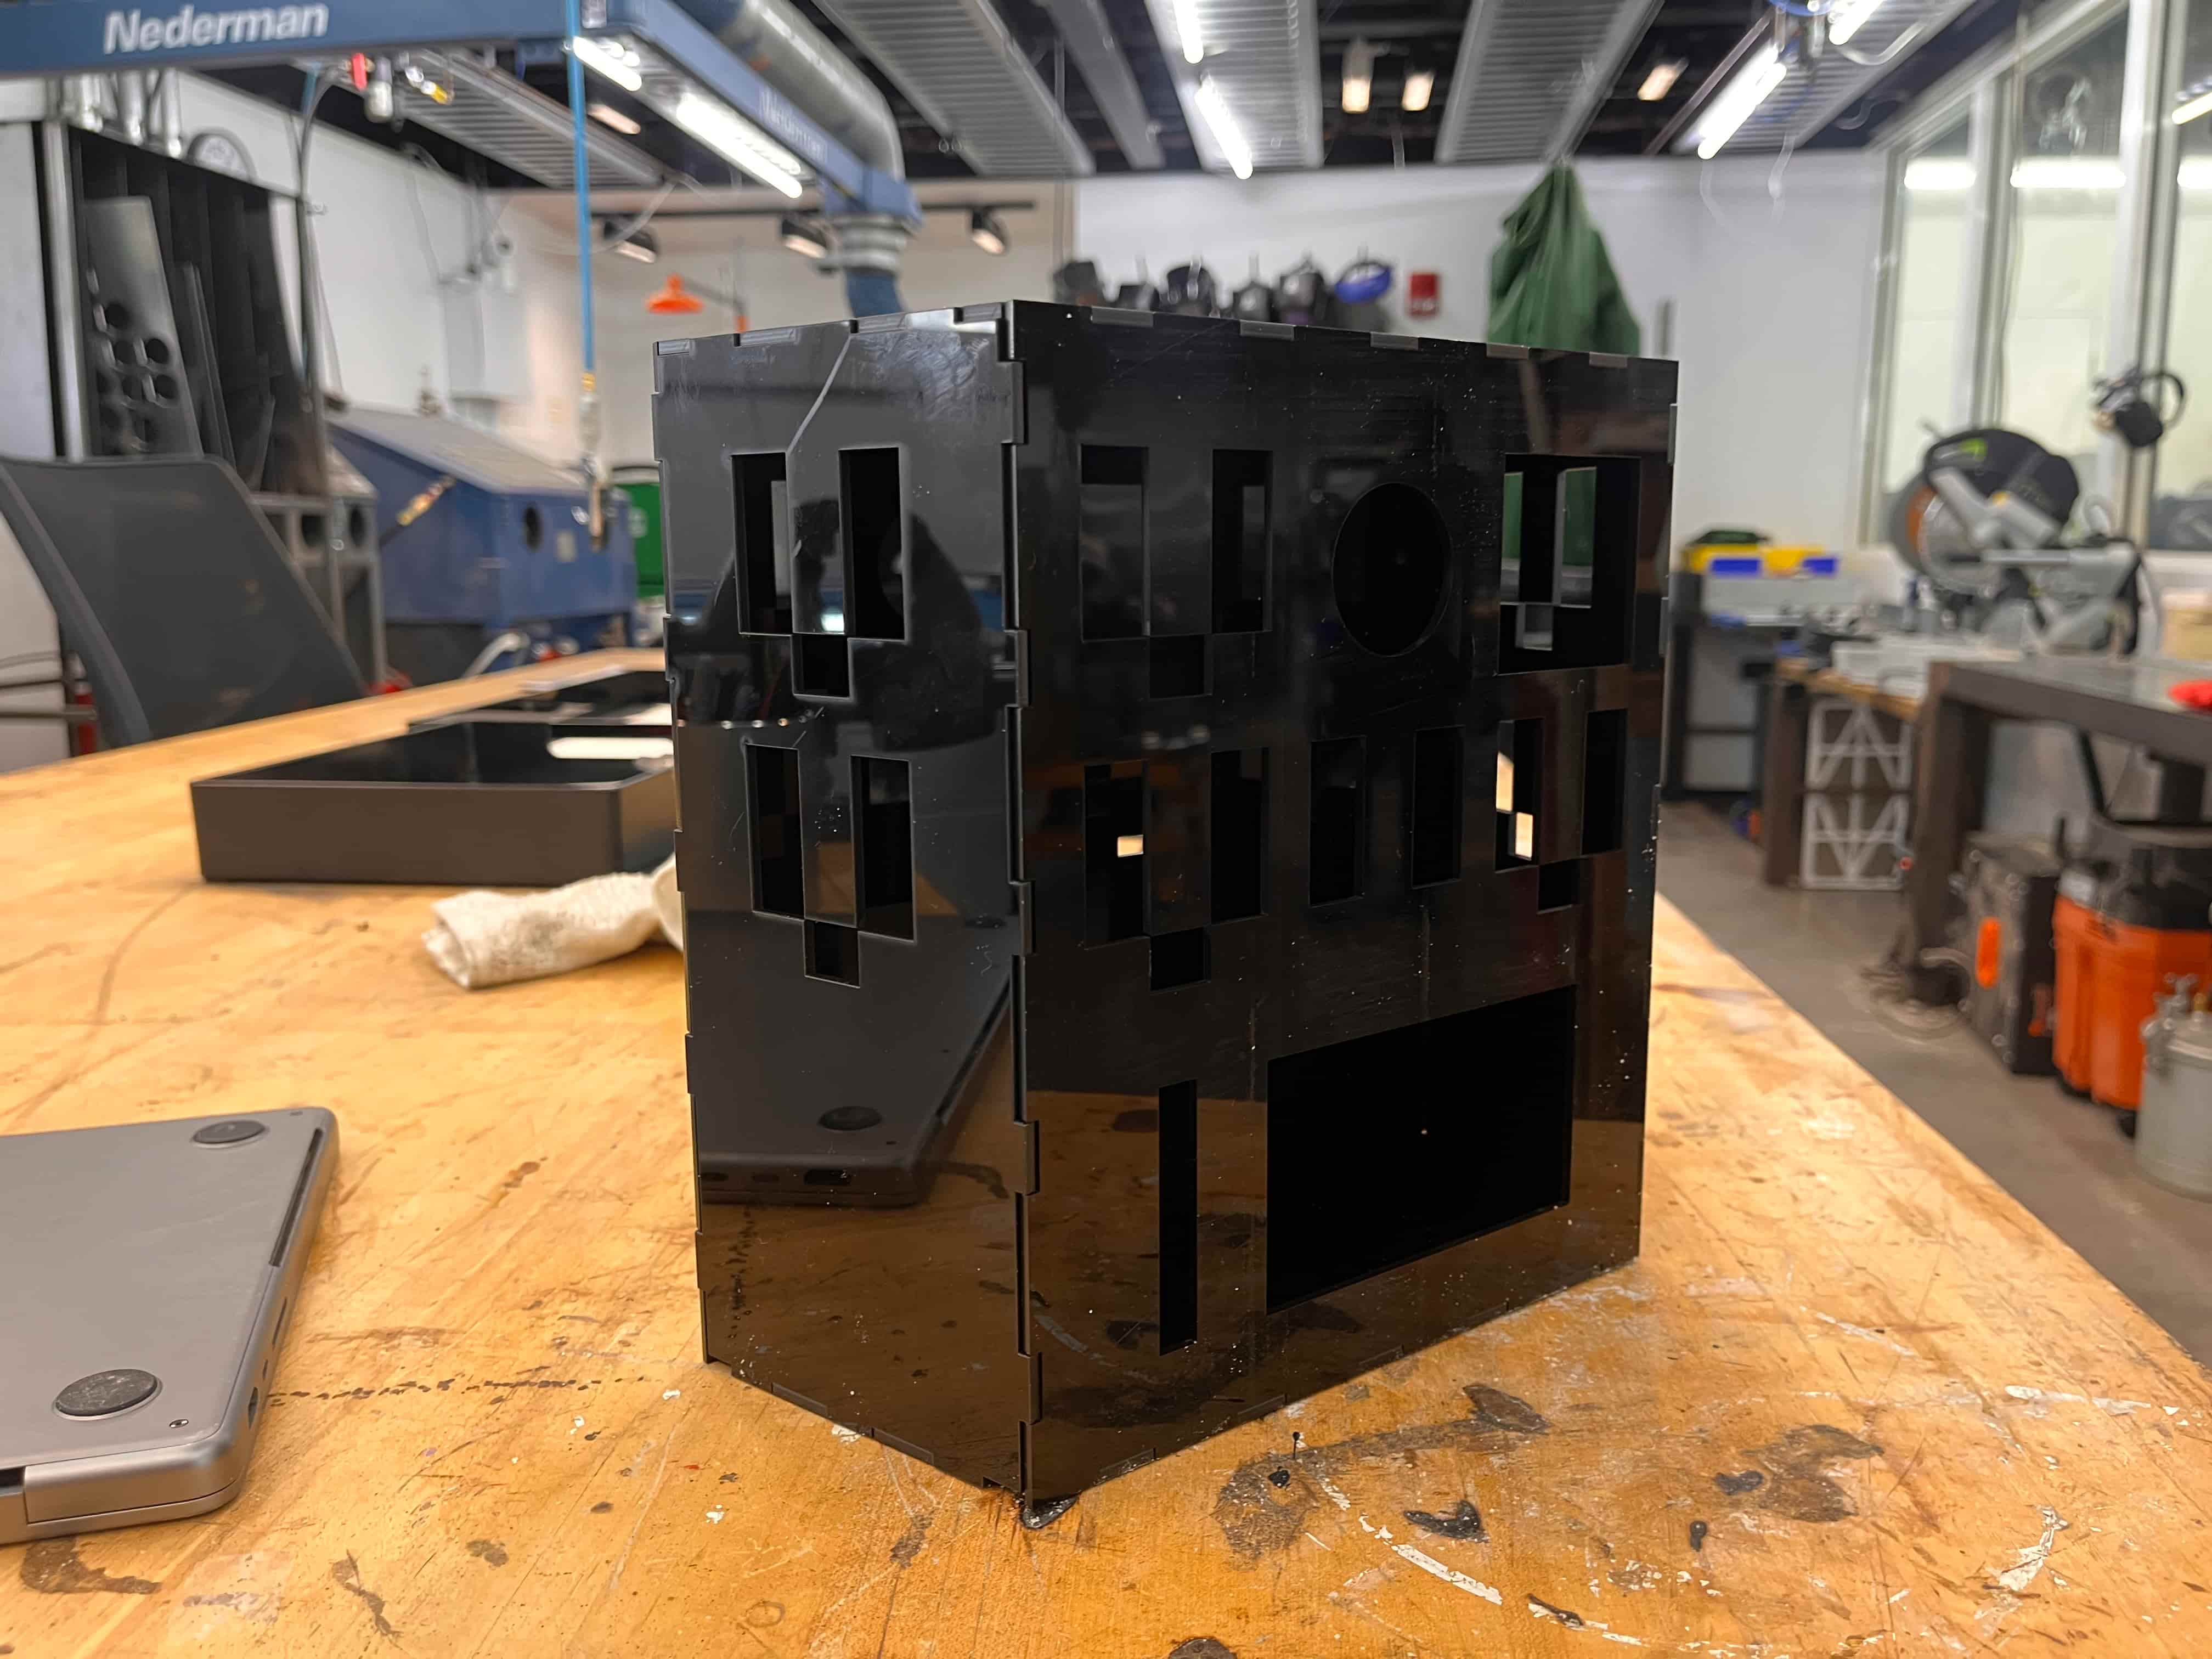
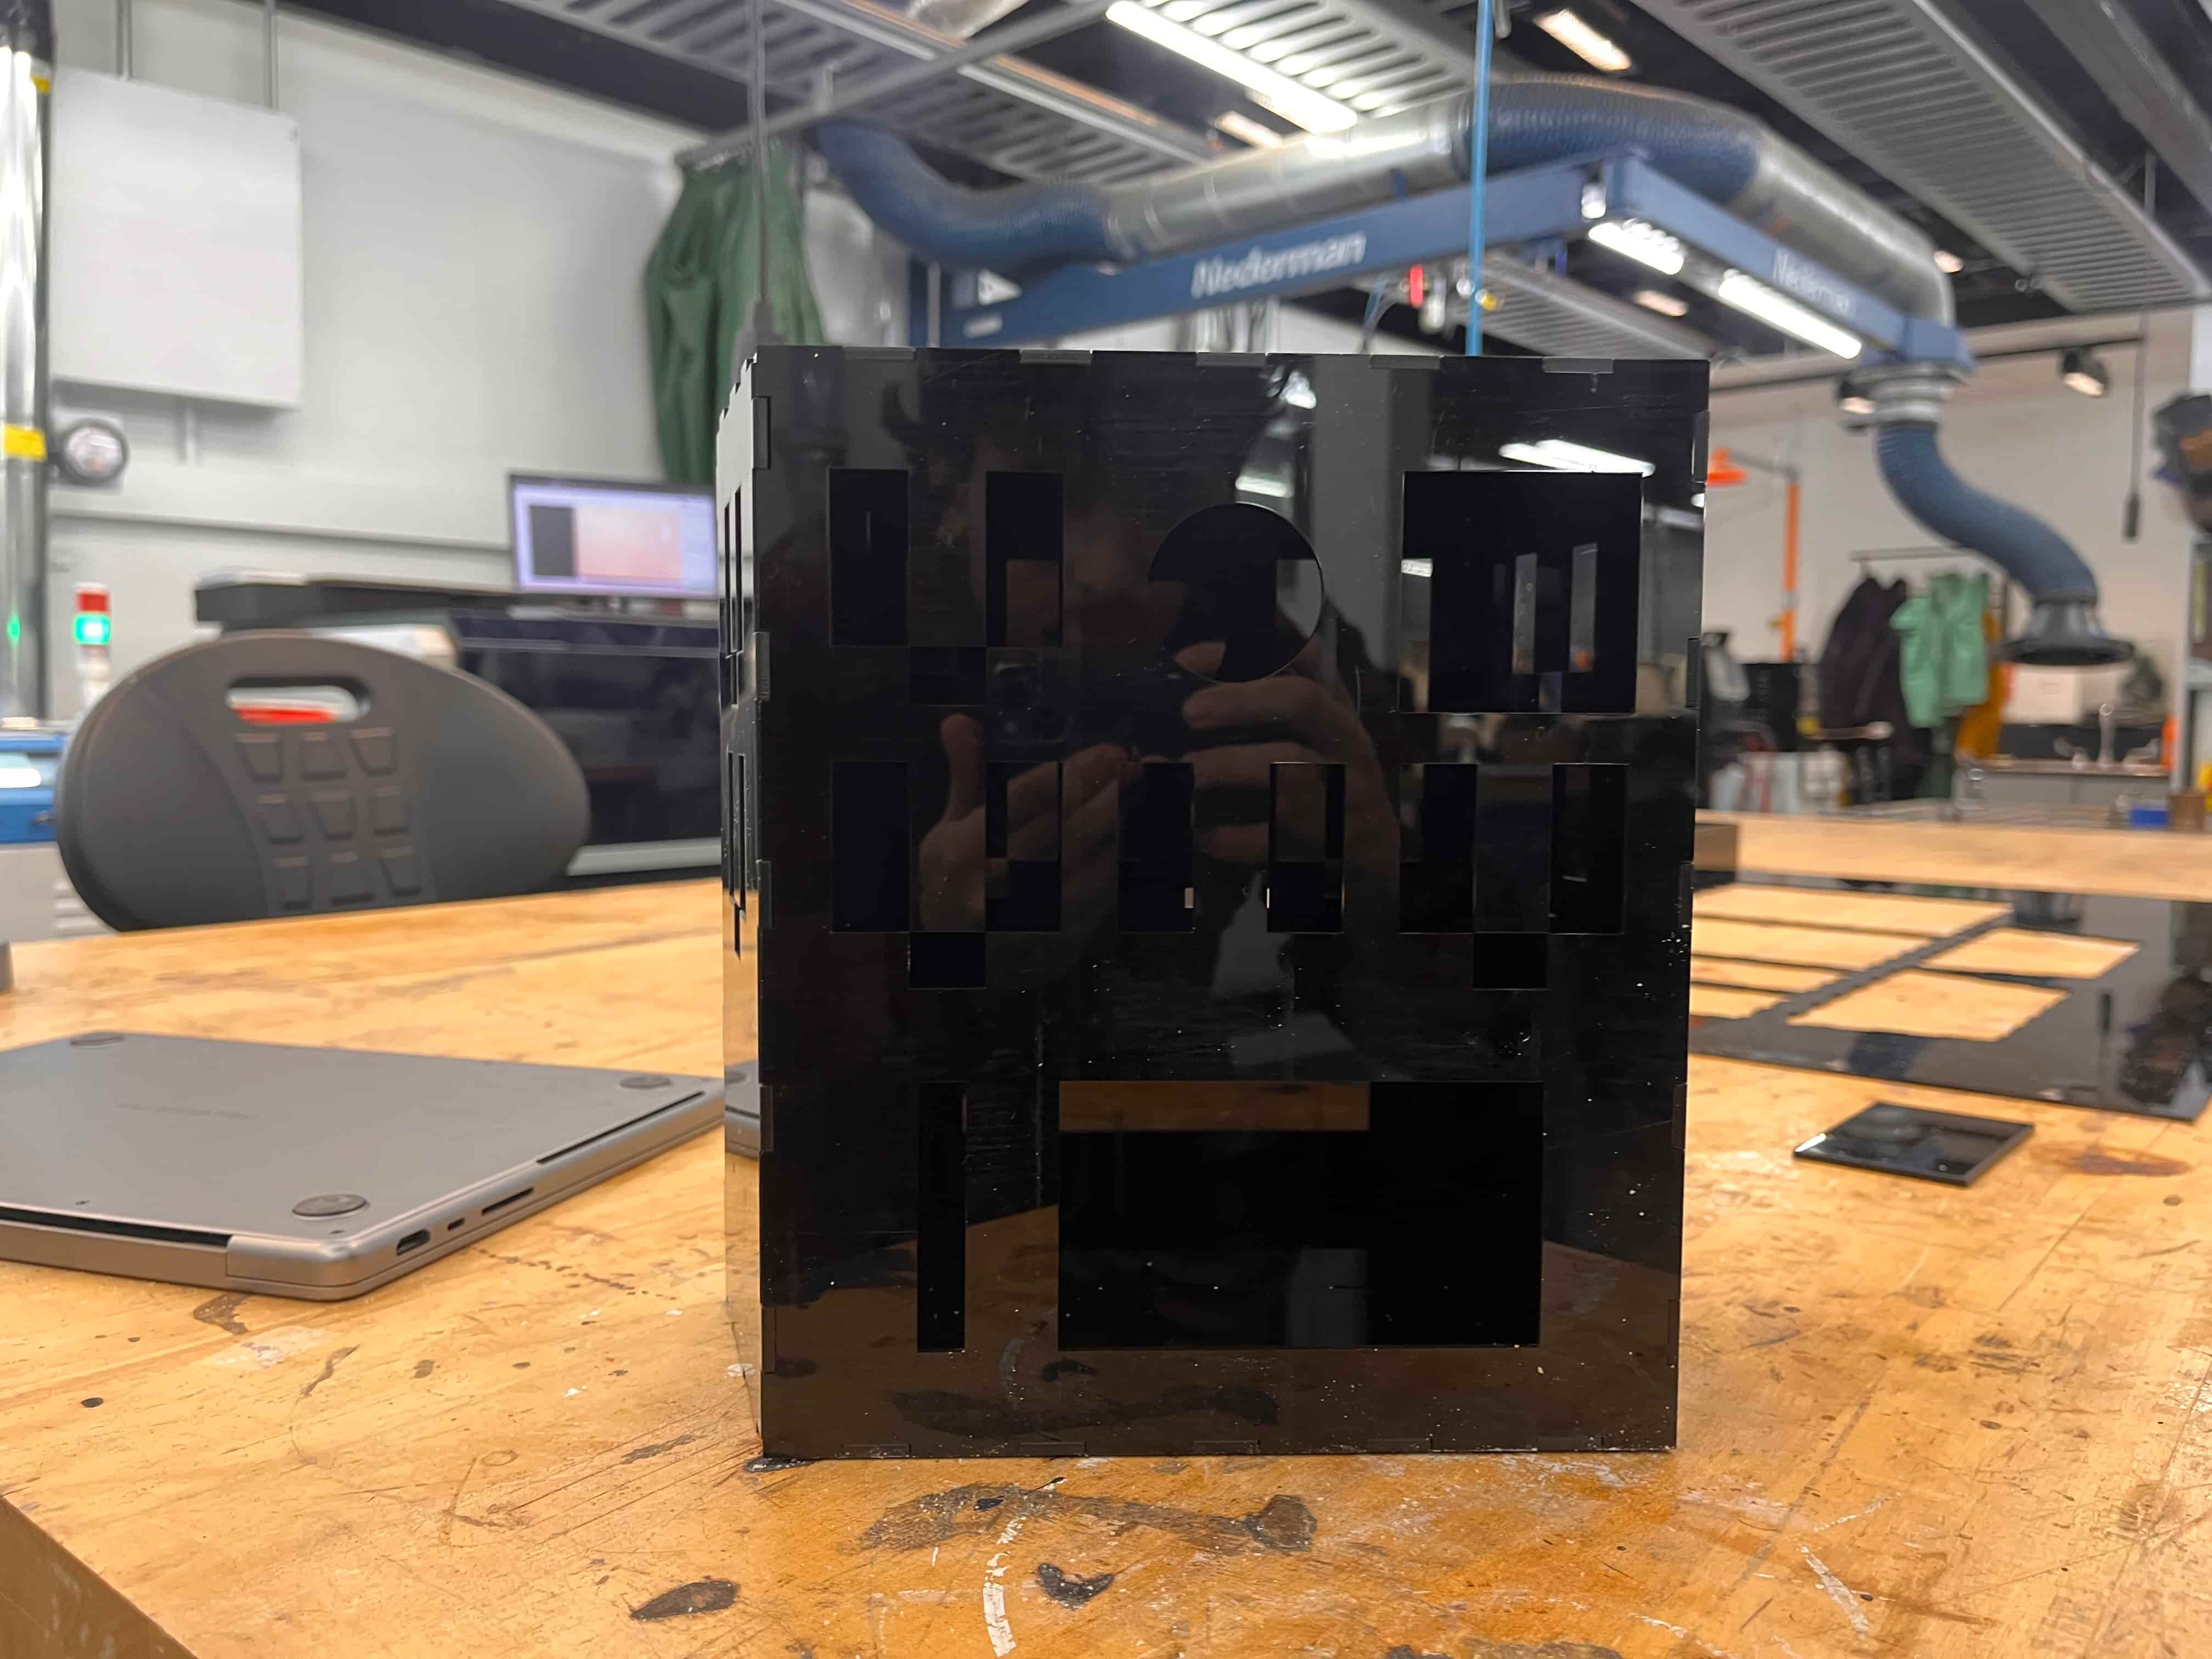
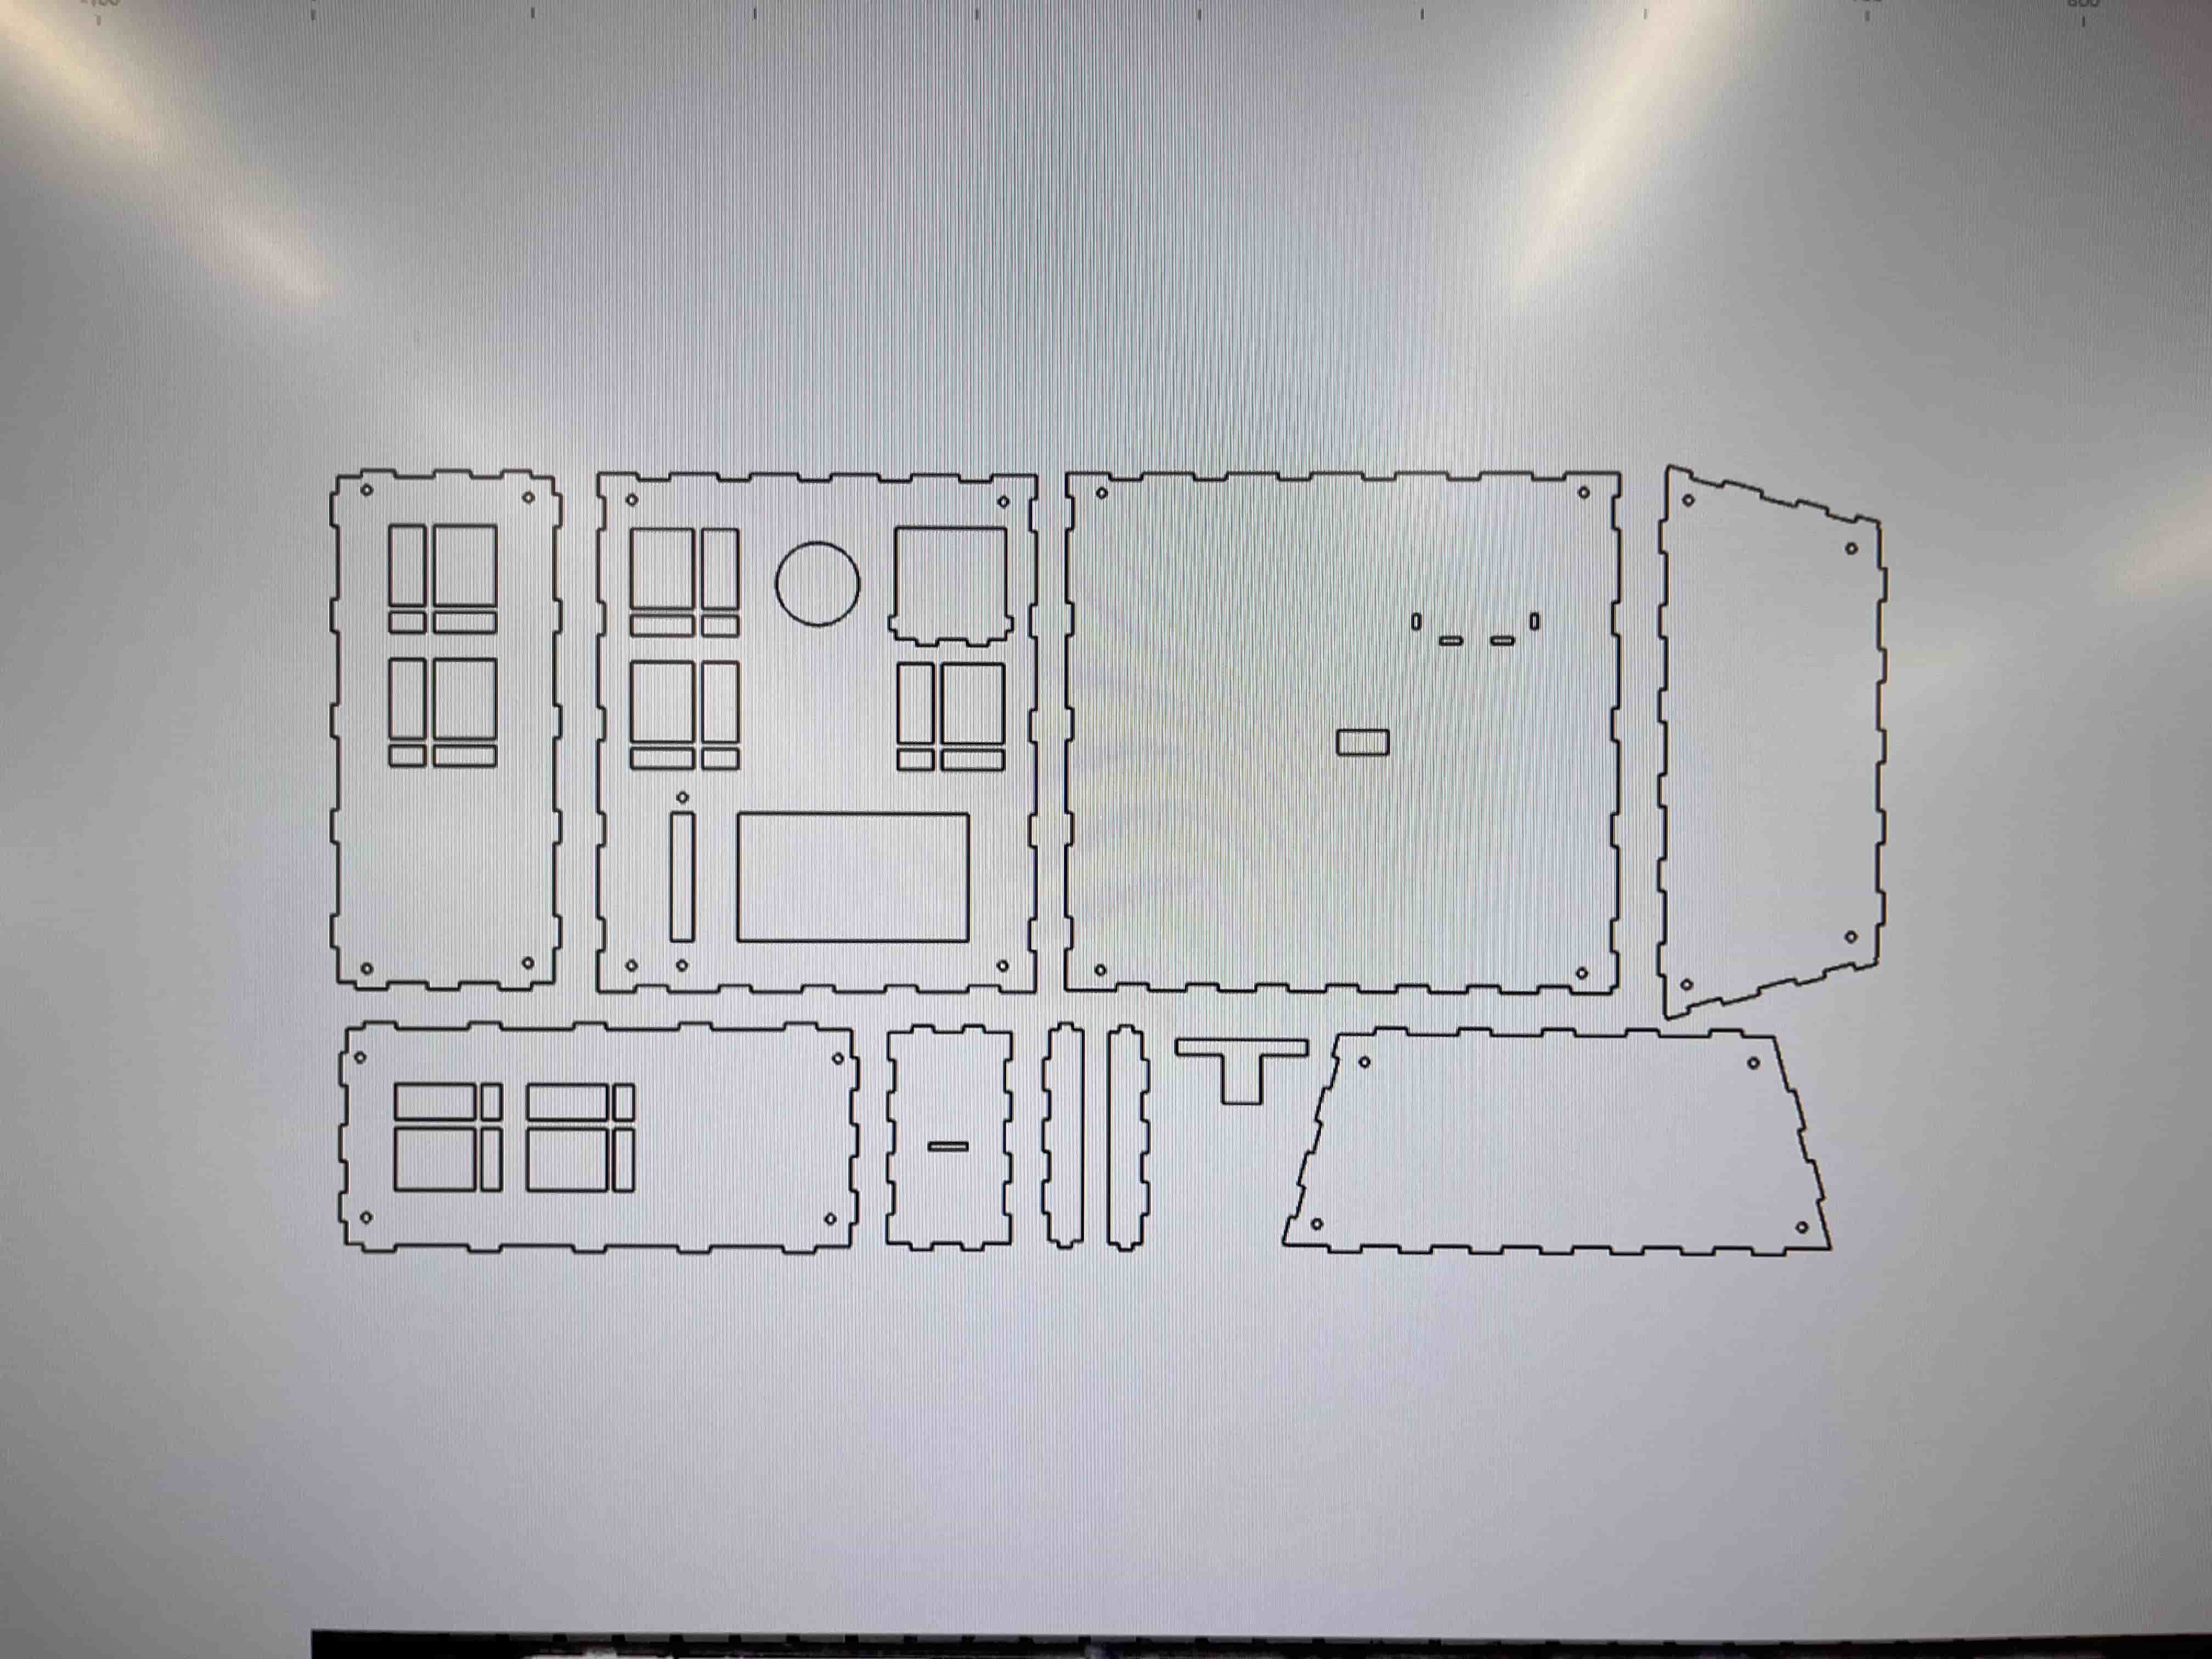
So with Dan's help, we cut out more 1/8" black acrylic sheets, and I laser cut my next enclosure (now with more attachment holes and internals!.) Here's the final layout outline, and all the pieces and components laid out for assembly:

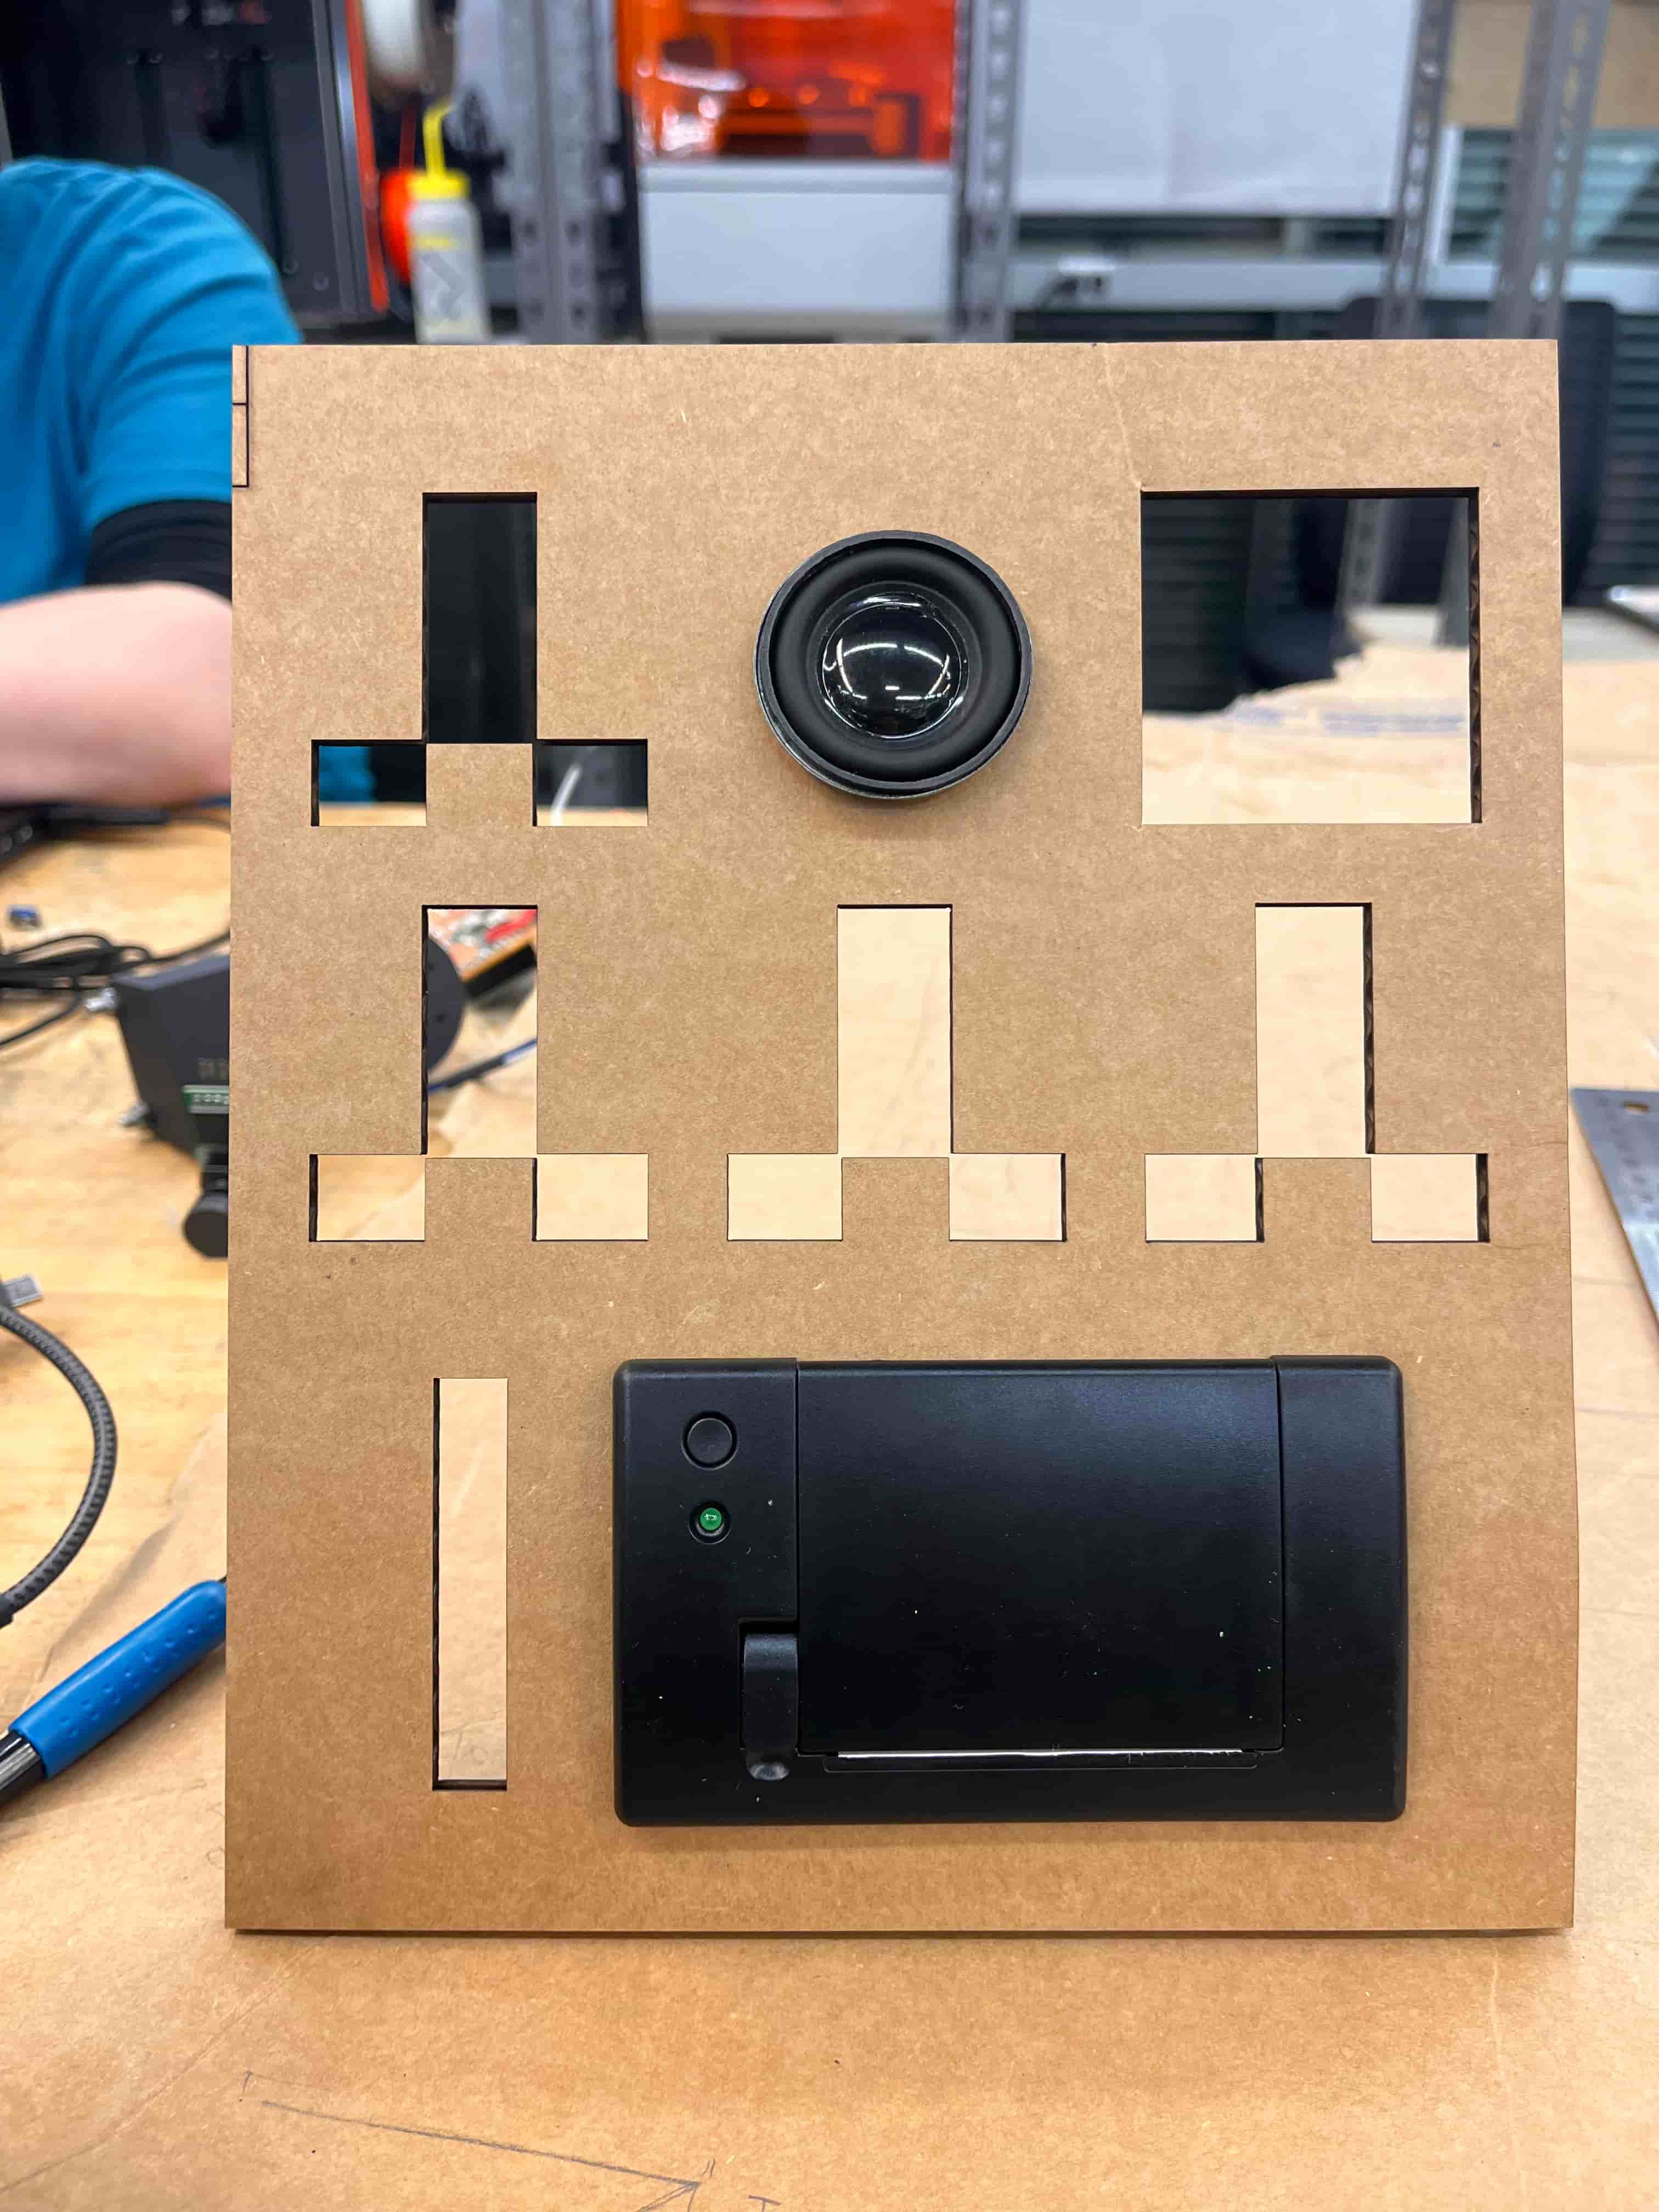
Finally, it was time to assemble!
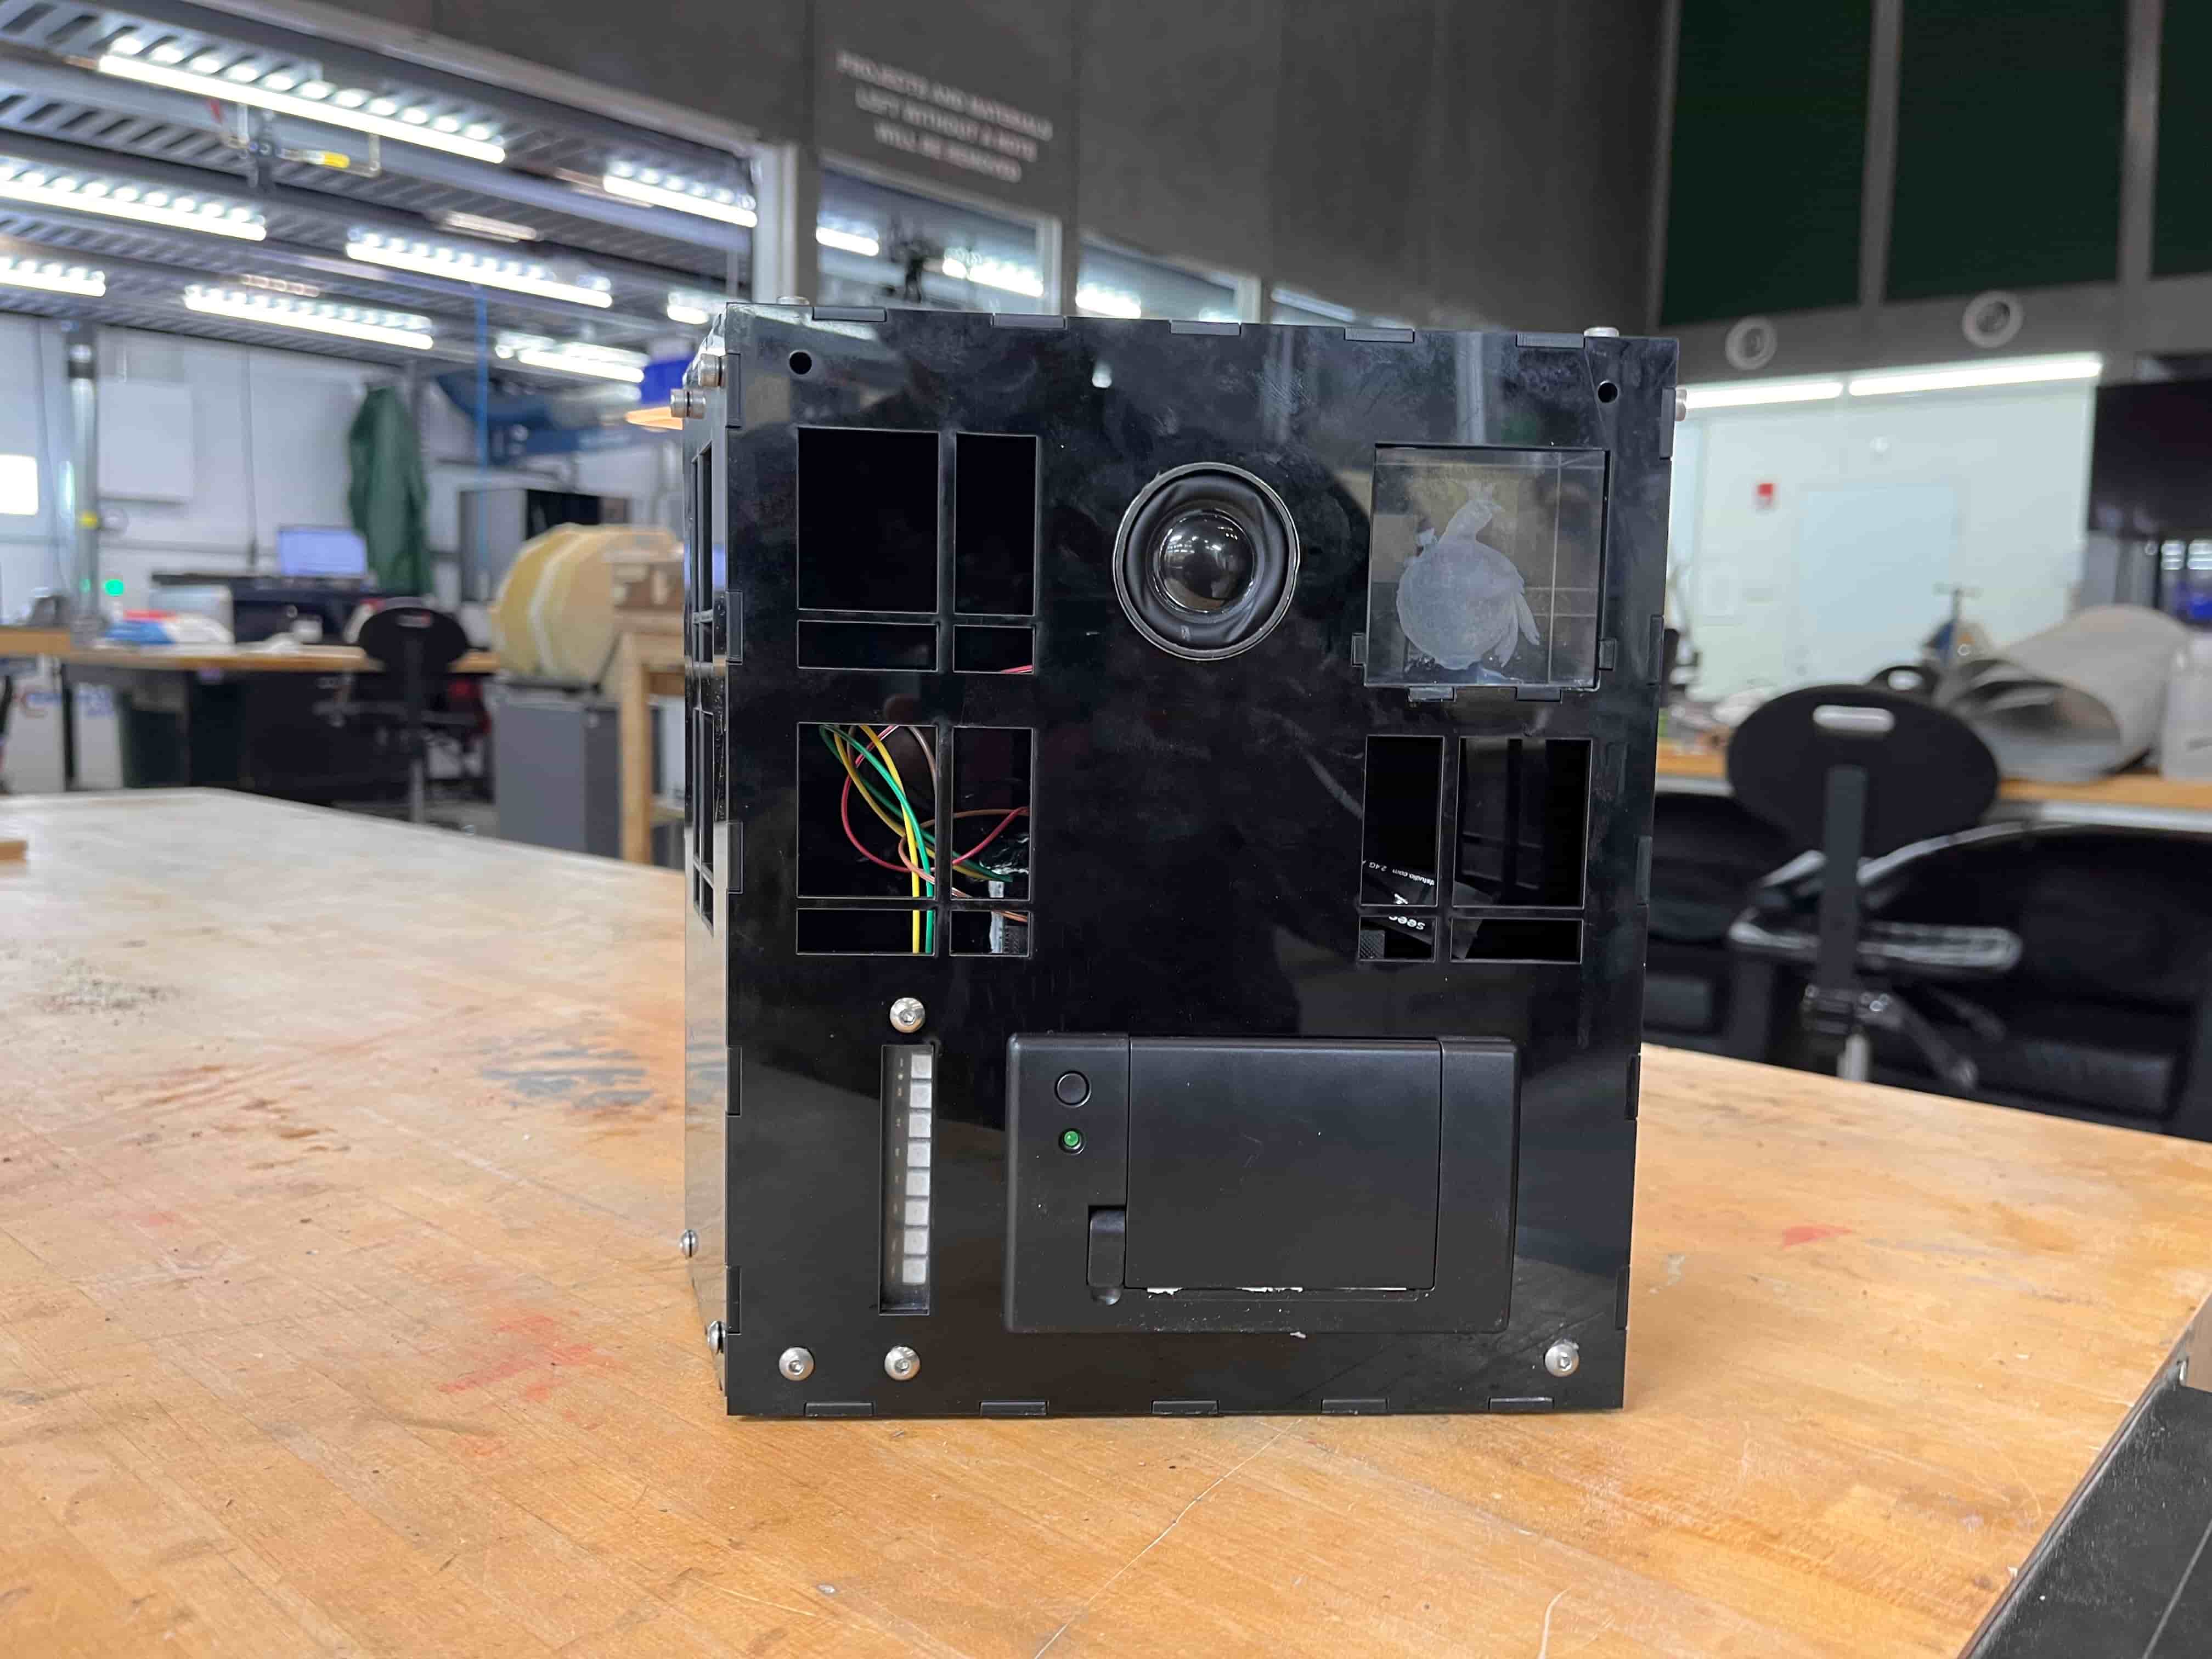

Looks great! I didn't have time to add the windows in, but that's ok – perfect is the enemy of the good, and by that point, I needed to get my butt up to present.
Week 14 Update (Wildcard Week, 12/10)
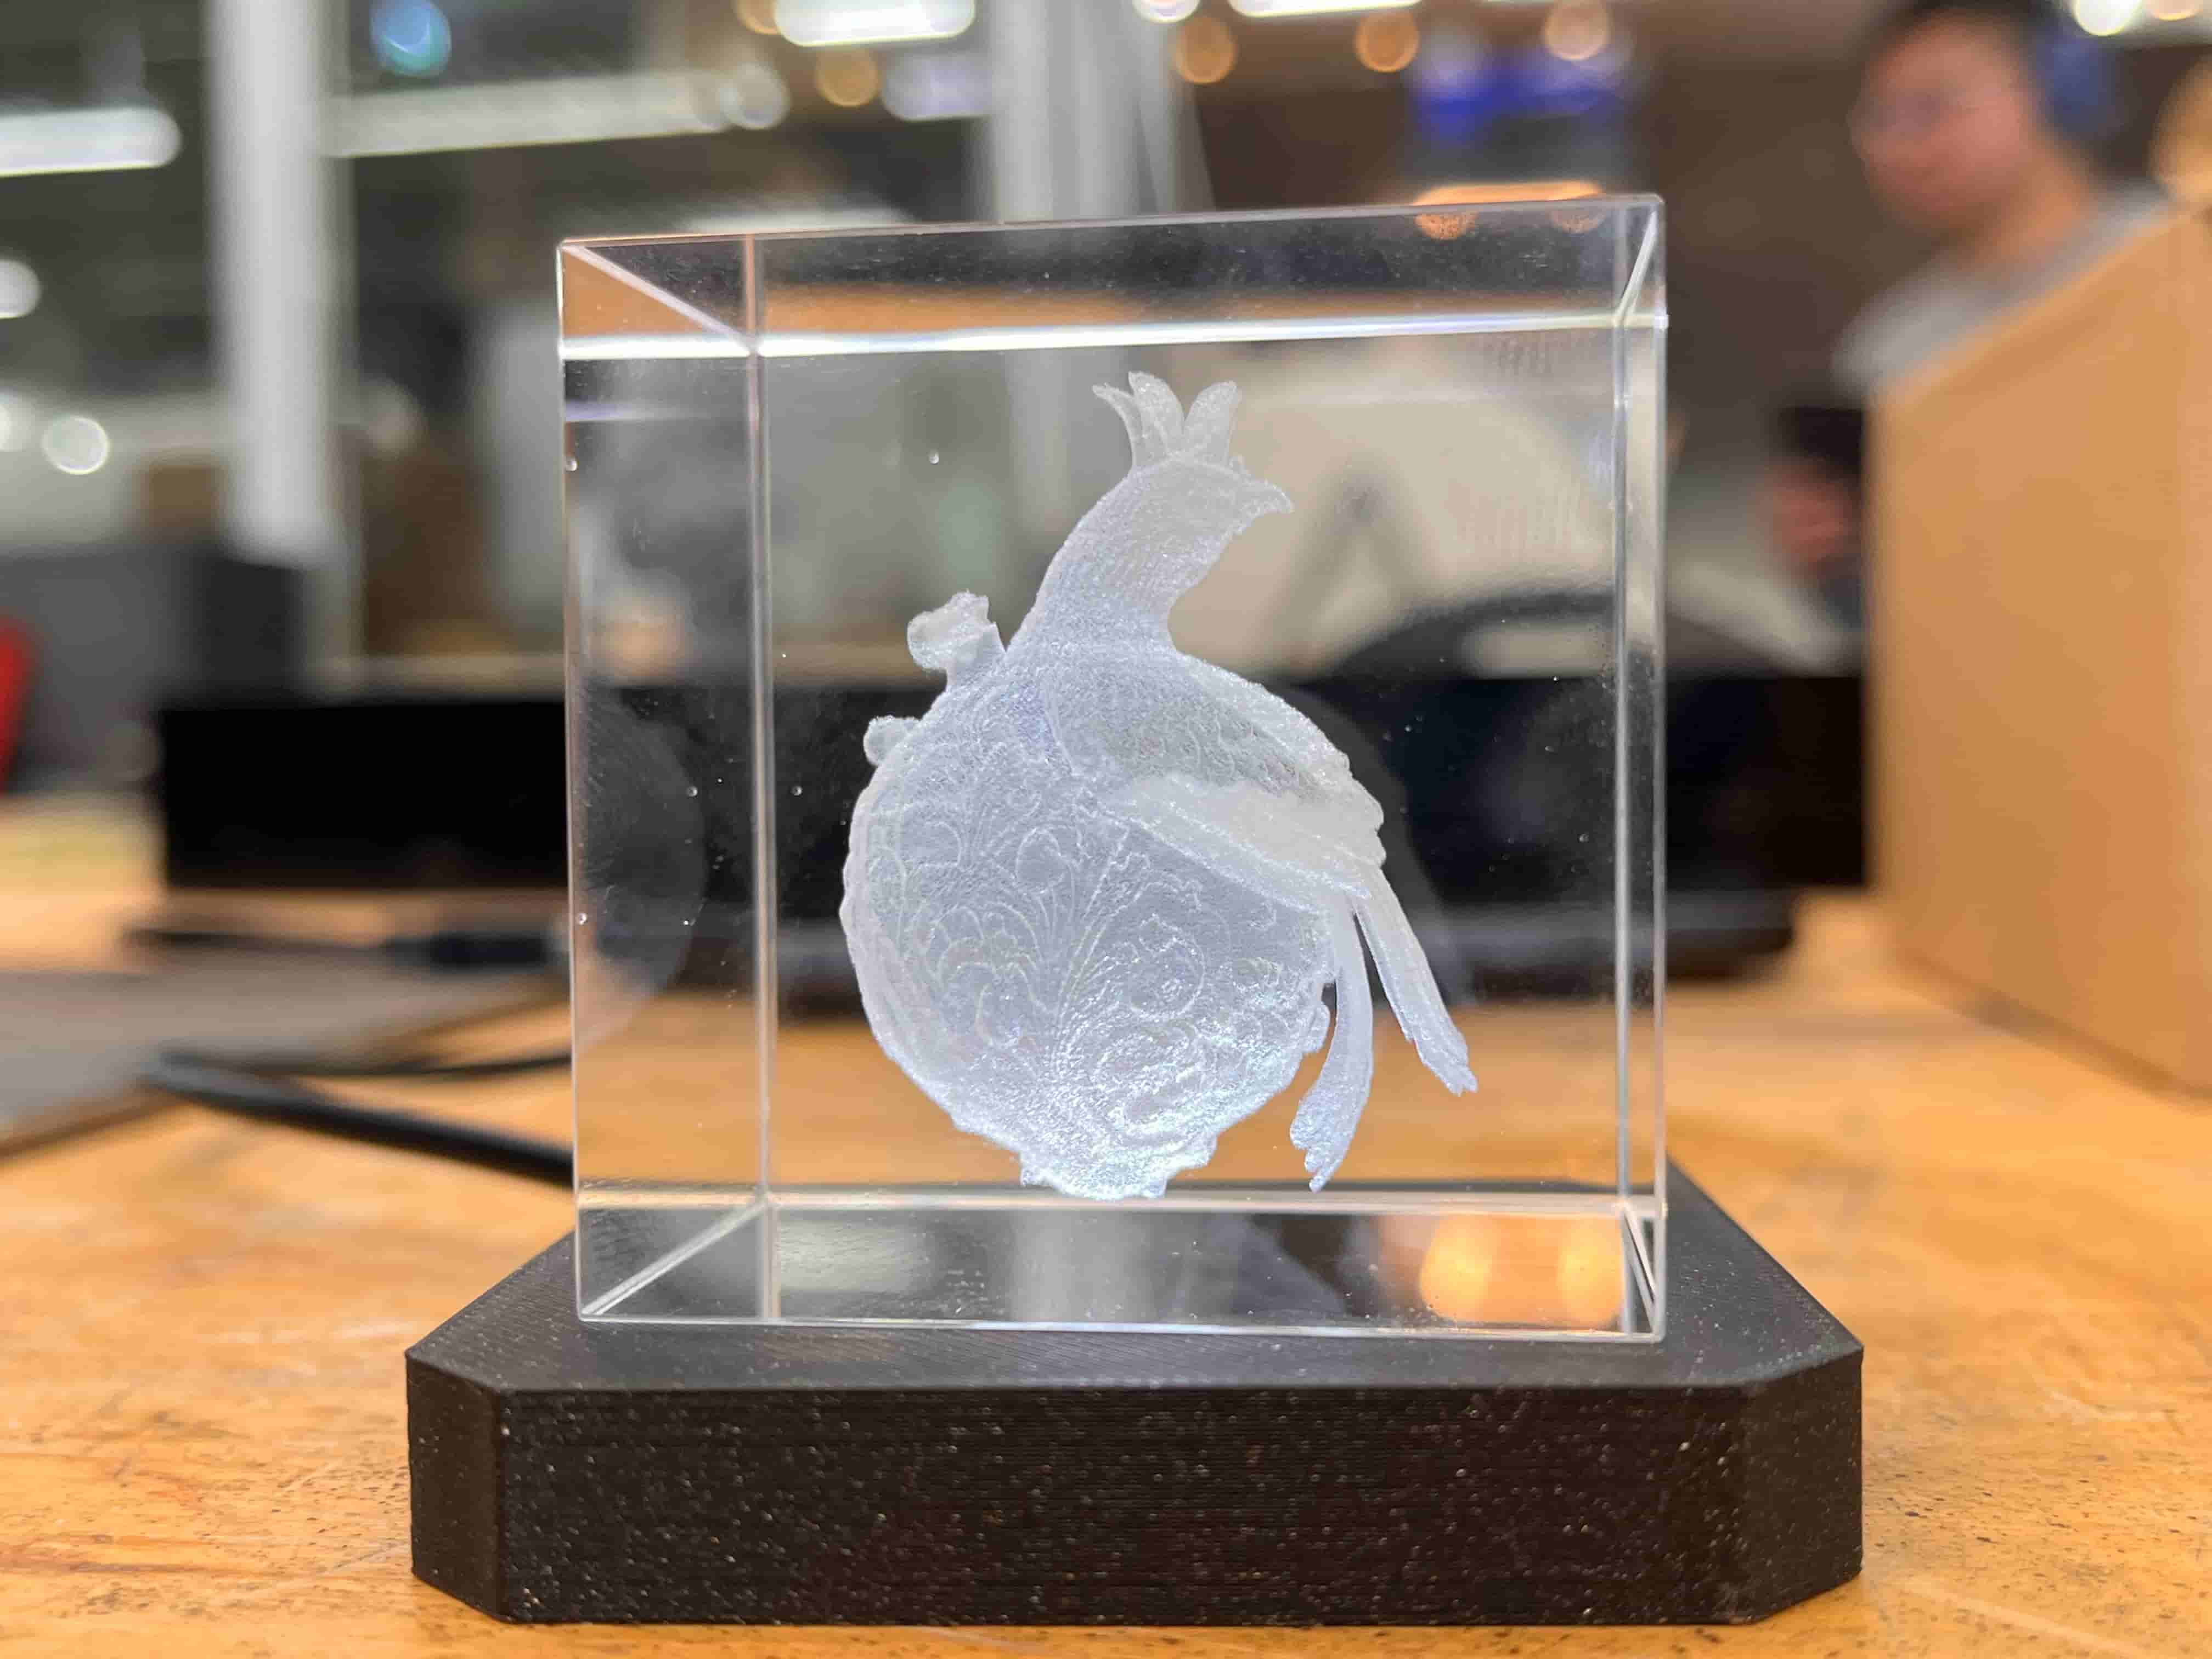
Instead of an LED strip, I thought it might be nice to try to include a light-up laser engraved cube to signal when a message has arrived. I talk more about the process on my Week 14 page, but this was originally intended to be a 3D model of me and Brenna. However, with the xTool's 2D to 3D tool being so bad with people, I instead ended up using Midjourney to generate a Cuckoo Bird mixed with a pomegranate (one of Brenna's favorite symbols - she loves the story of Persephone) which the xTool software was MUCH better at. Shockingly good at, actually – it was leagues ahead of Meshy in terms of symmetry and detail.
If you remember, I did something similar in Week 10 for the same reasons - but whereas I didn't get around to making a metal version of that one to include for this project, the cube seemed a lot easier to make and build around. Quentin sent me his 3D-printed LED stand for these, so I'll try to make one to add to my final build.
Week 13 Update (Interface Design, 12/03)
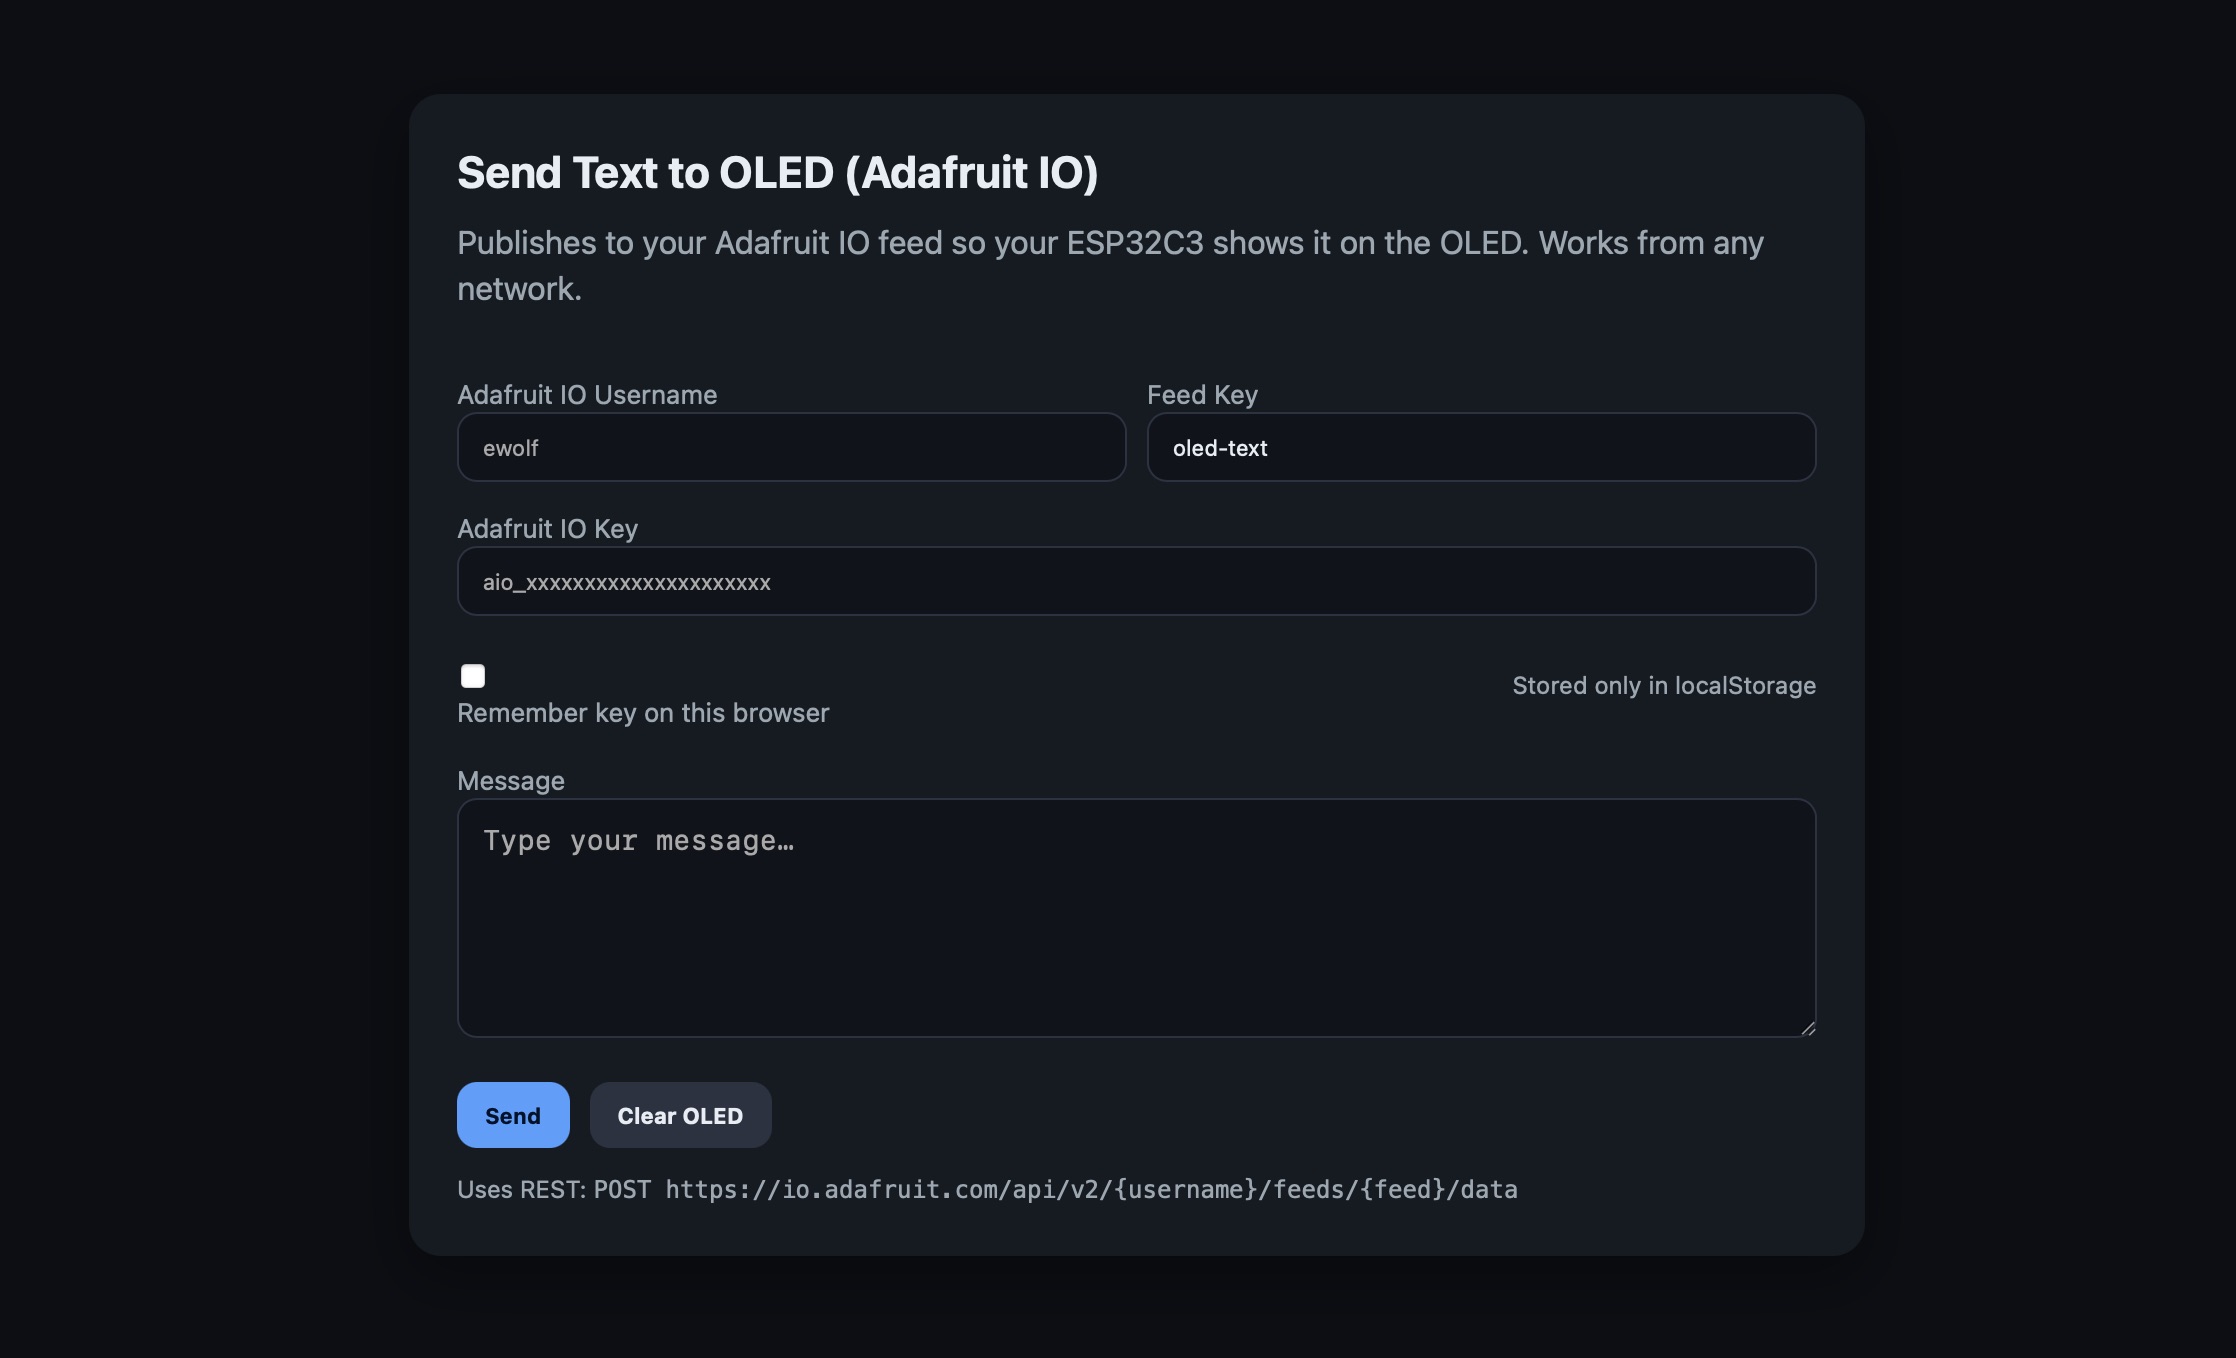
I updated my initial interface test from Week 8 to better fit the final project – it now has a character counter, "To" and "From" fields, hides the Adafruit I/O login info (well, really it hardcodes it in behind the scenes, which I know is insecure to do, but should be ok just for this use case), and gives better visual feedback. Full documentation can be found here, but here's what it looks like:
I also finished up v2 of my PCB! This time with thicker traces, an additional capacitor, and proper JST connections.
Here are the project files from these:
Week 12 Update (Networking & Communications, 11/26)
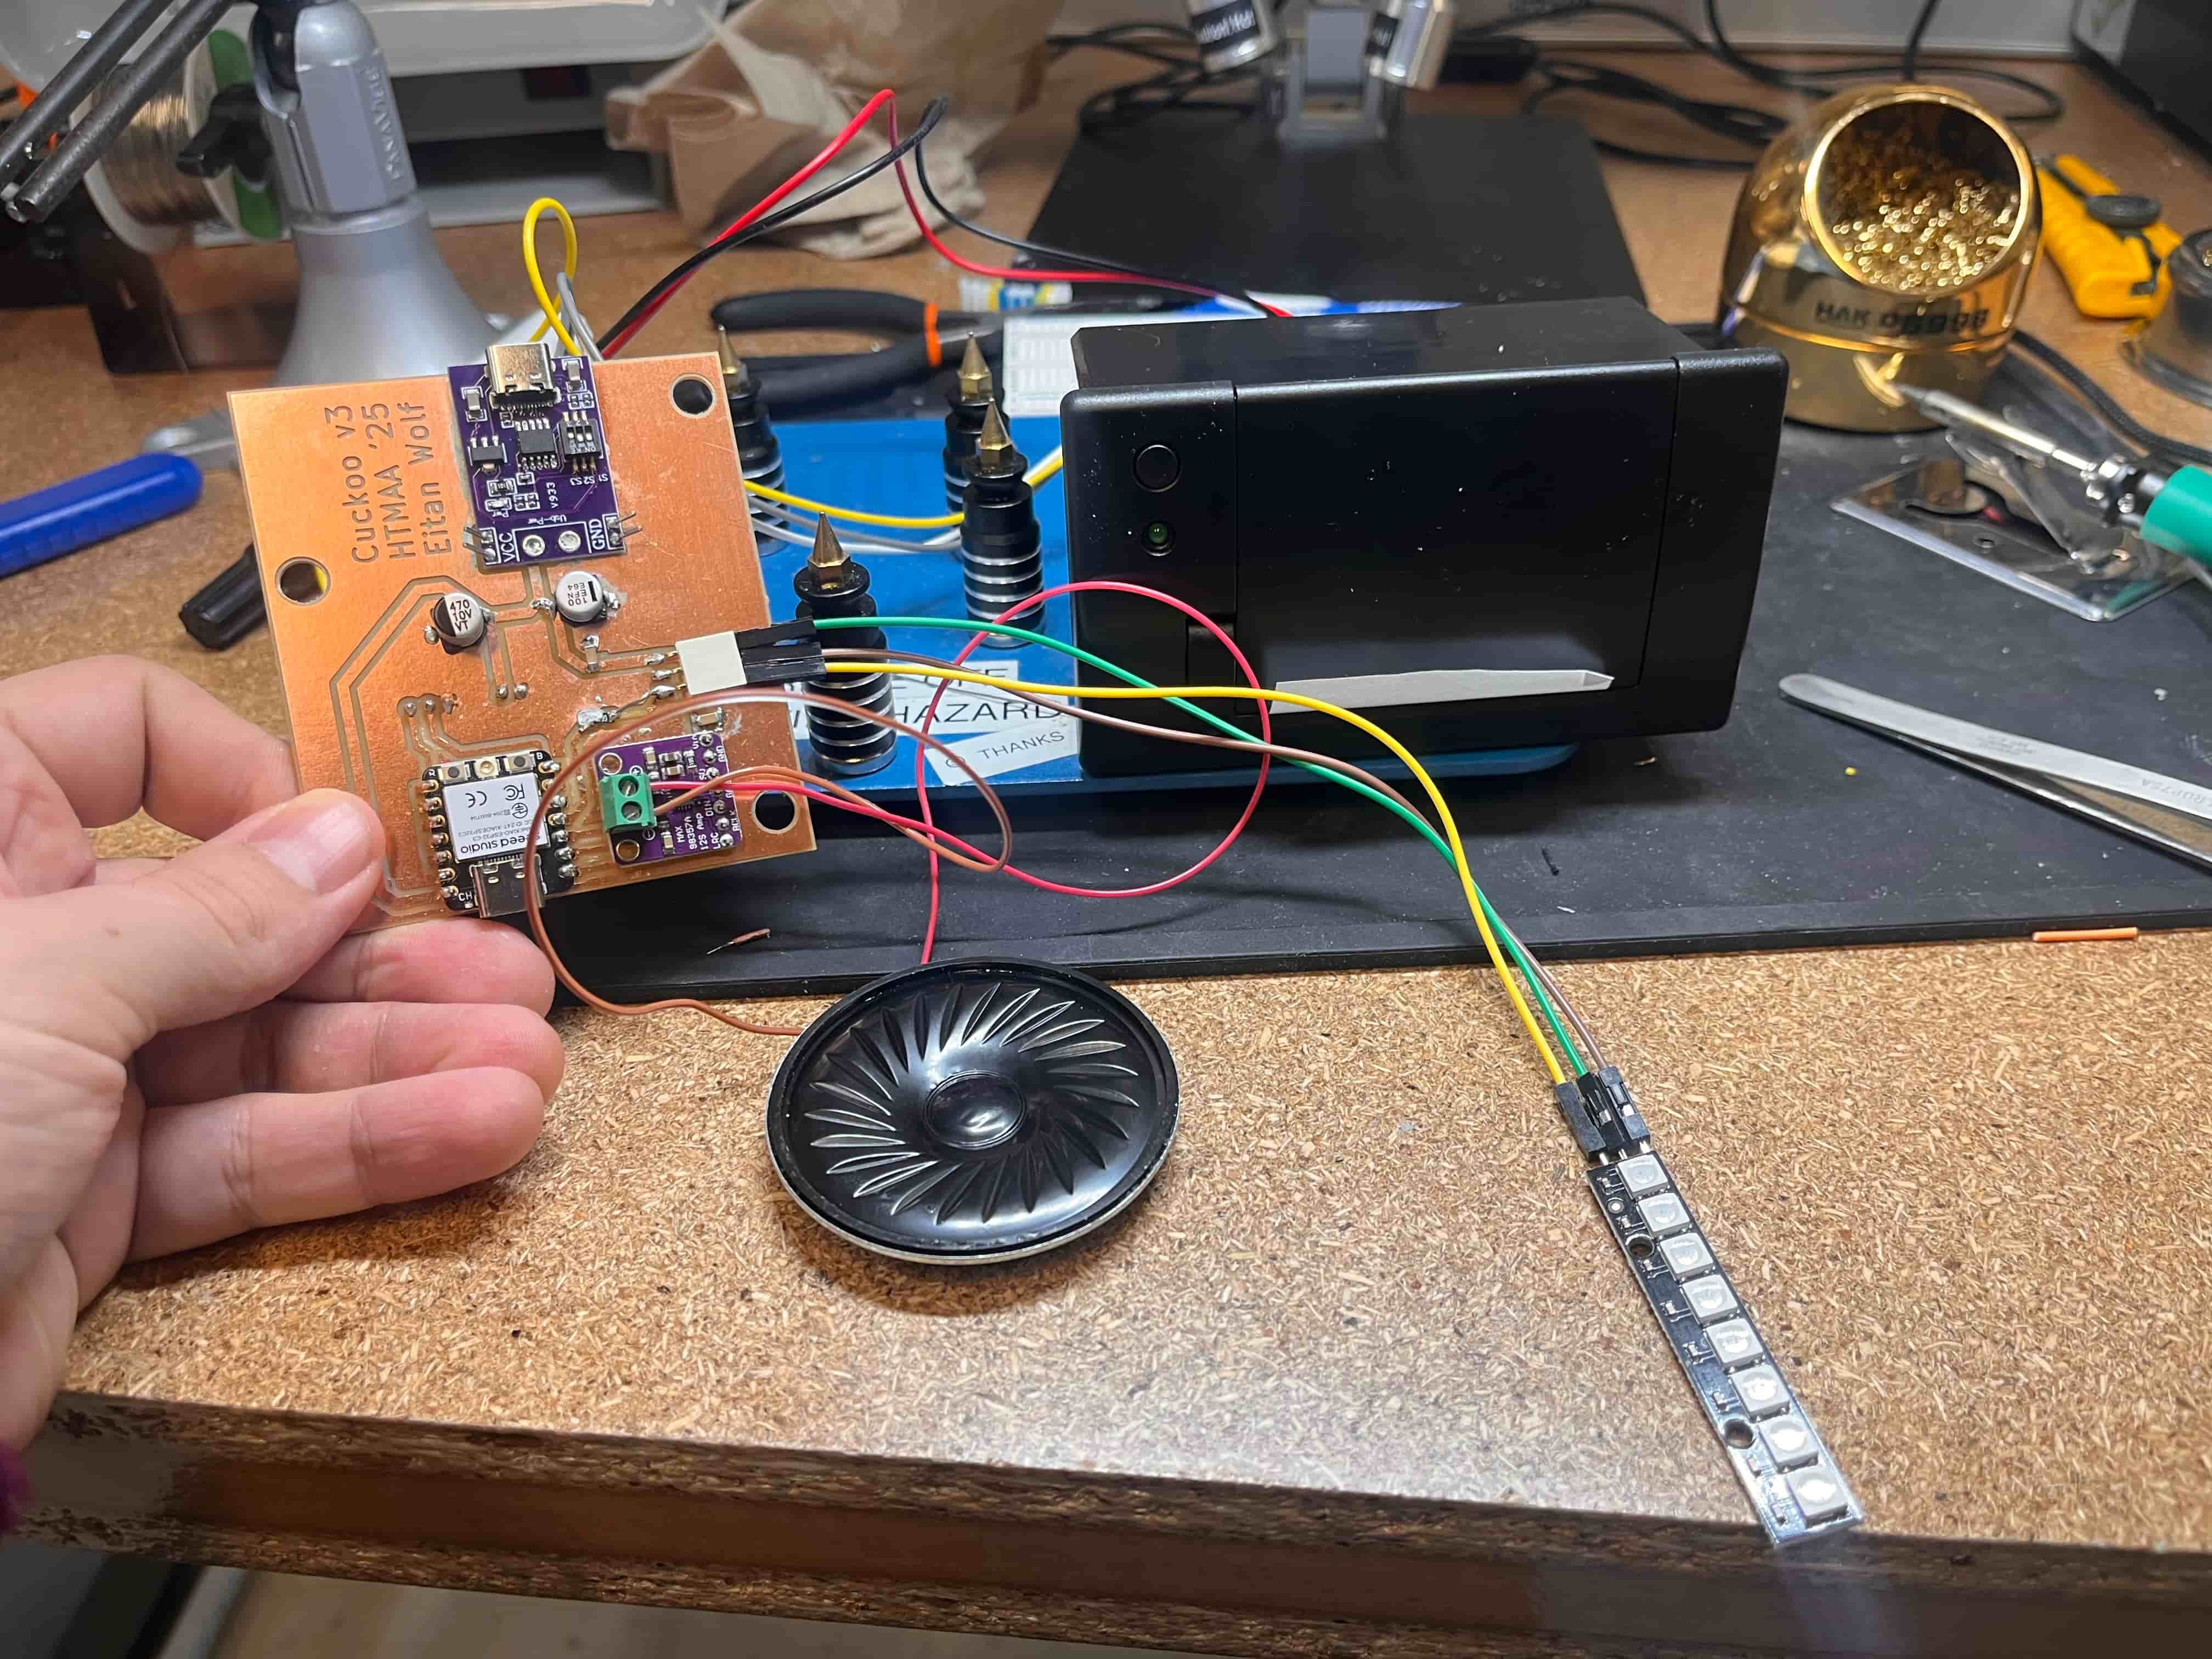
I built the first version of what is aiming to be my final PCB, and got it to successfully print!
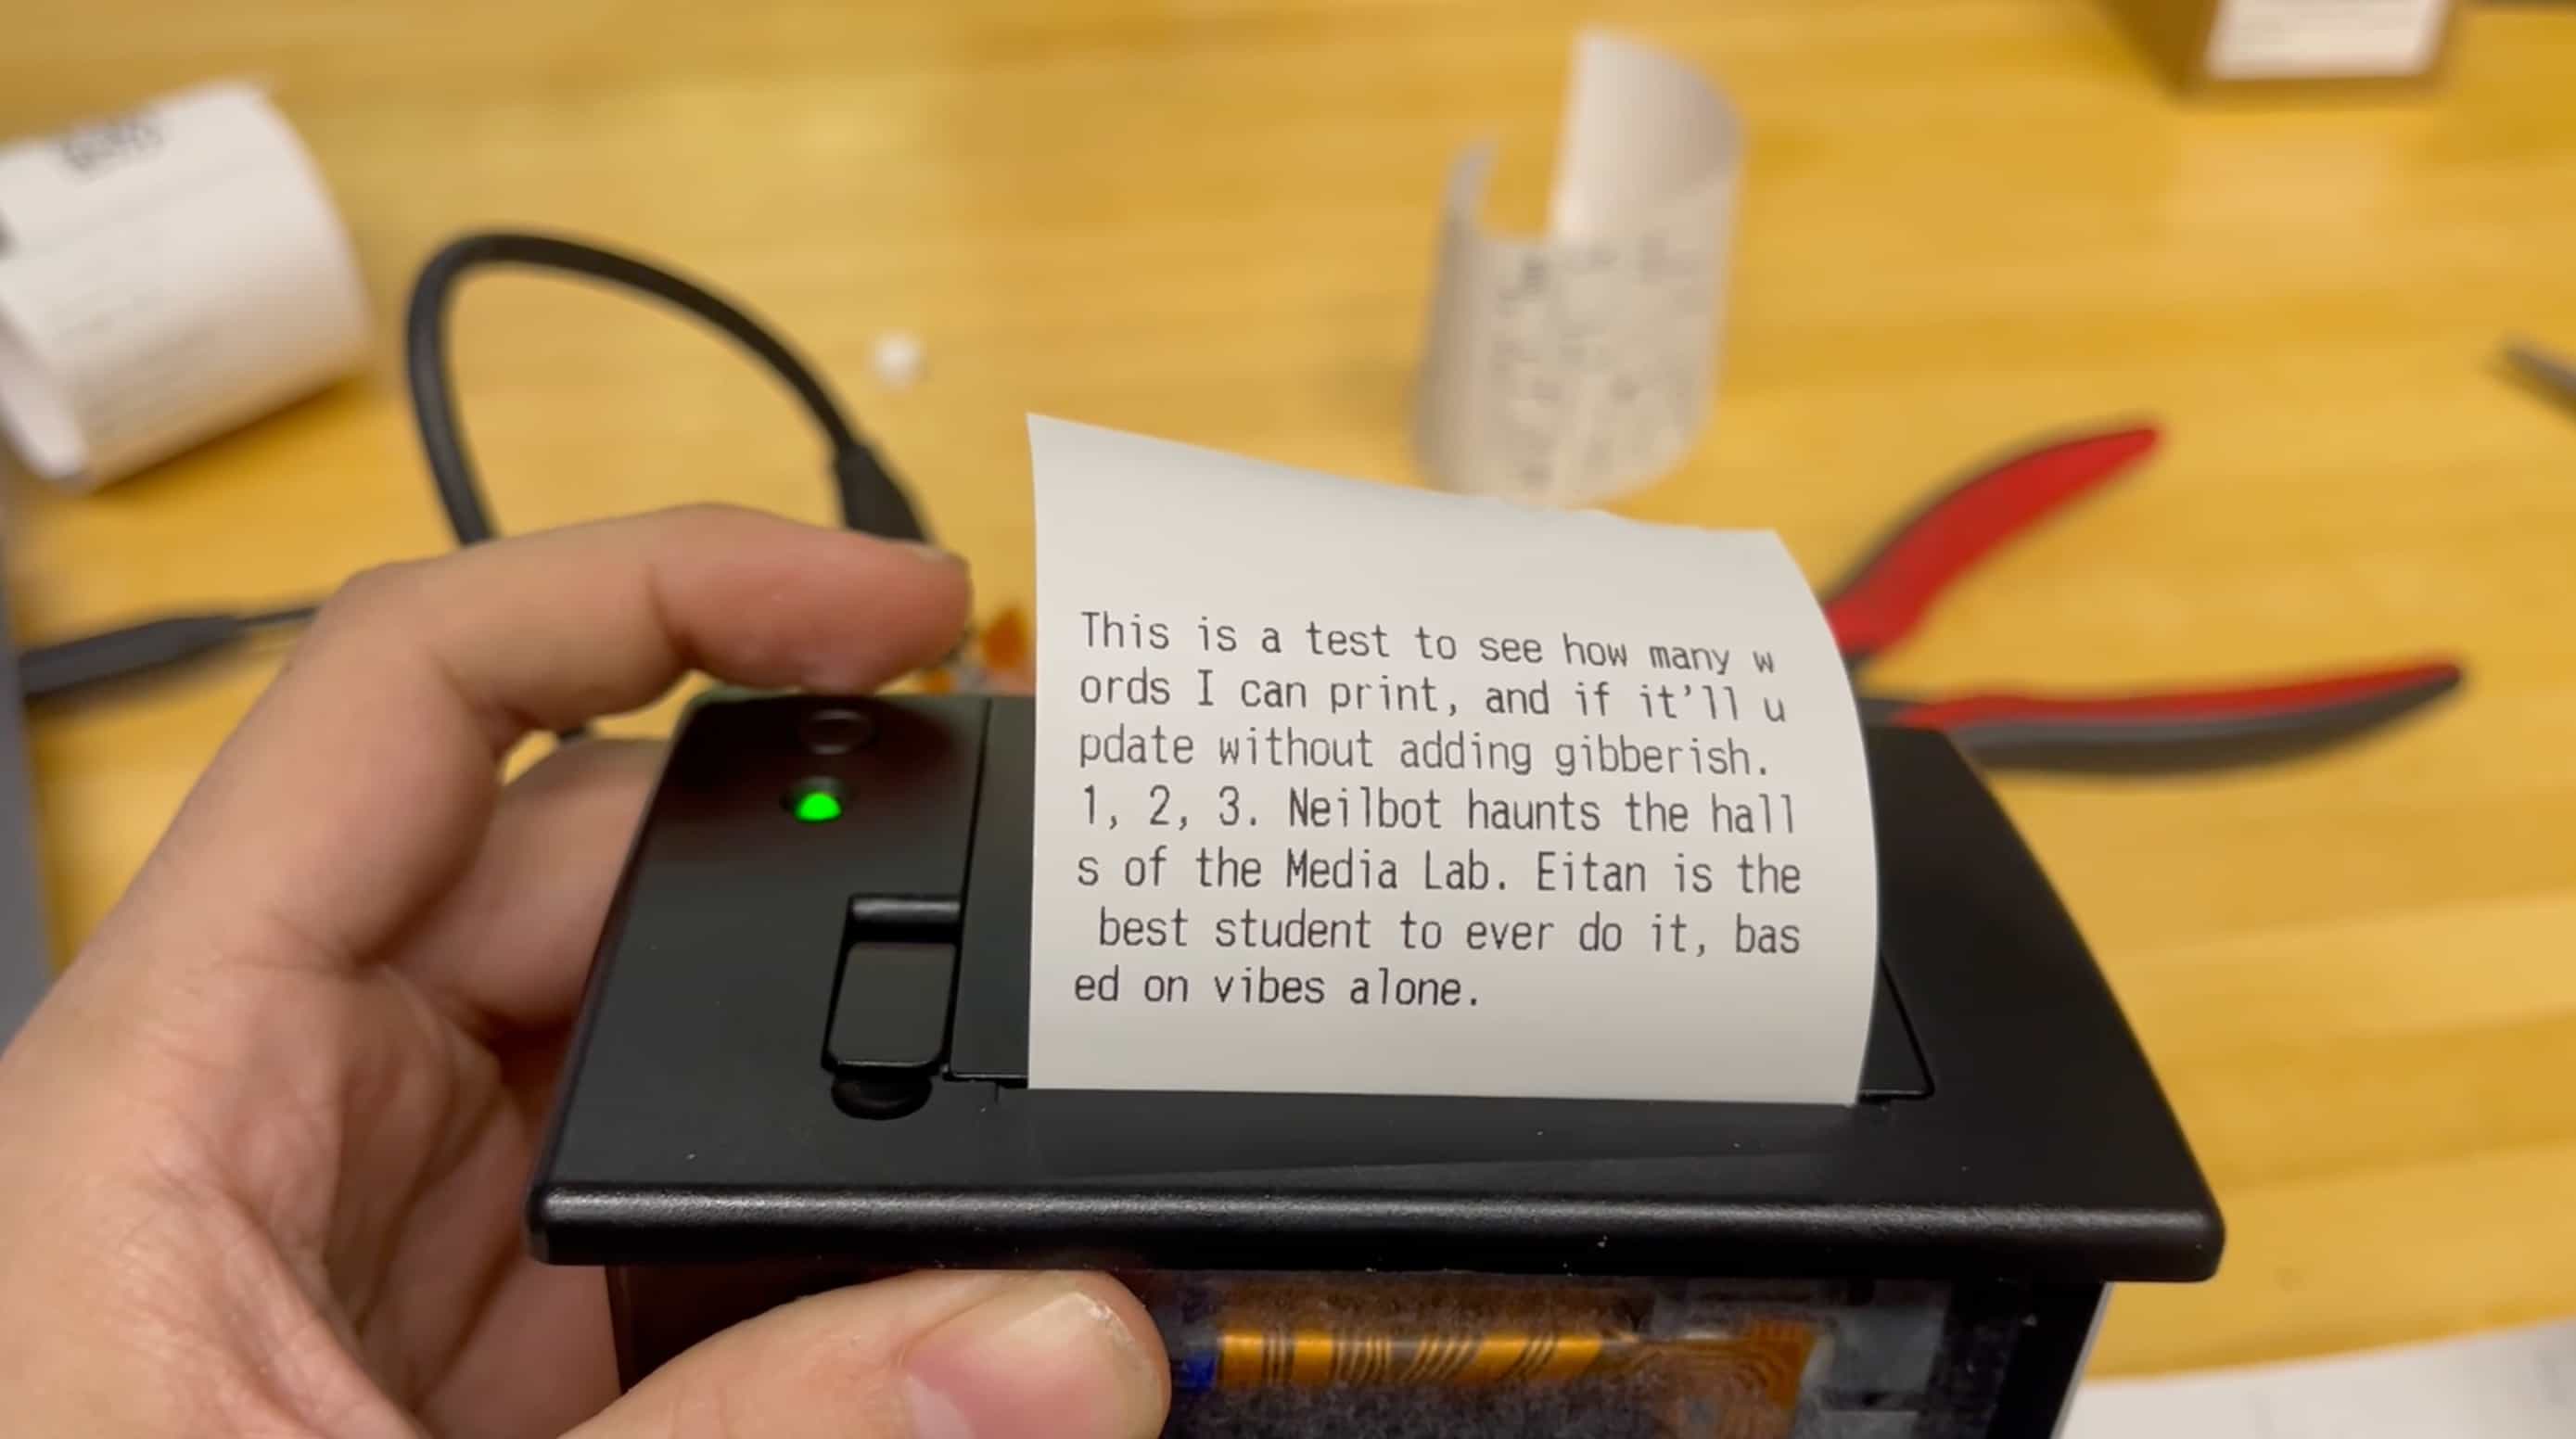
Much more detail about how the networking and overall system works can be found on my Week 12 Page here, but essentially when I send a message through the interface, it gets published to Adafruit IO's MQTT broker over the internet, then my ESP32-C3 (which is subscribed to that MQTT feed over Wi-Fi) sees it and responds by lighting up NeoPixels, playing a beep sound, and printing the message on thermal paper.
Week 11 Update (Machine Week, 11/11)
Post-Machine Week update: I am dead. I have barely slept.
But we (mostly) sucessfully created NeilBot.
In a week.
Nearly from scratch.
...no further updates. I sleep now.

Week 10 Update (Molding & Casting, 11/11)
This was actually a really fun week! Check out everything I made:
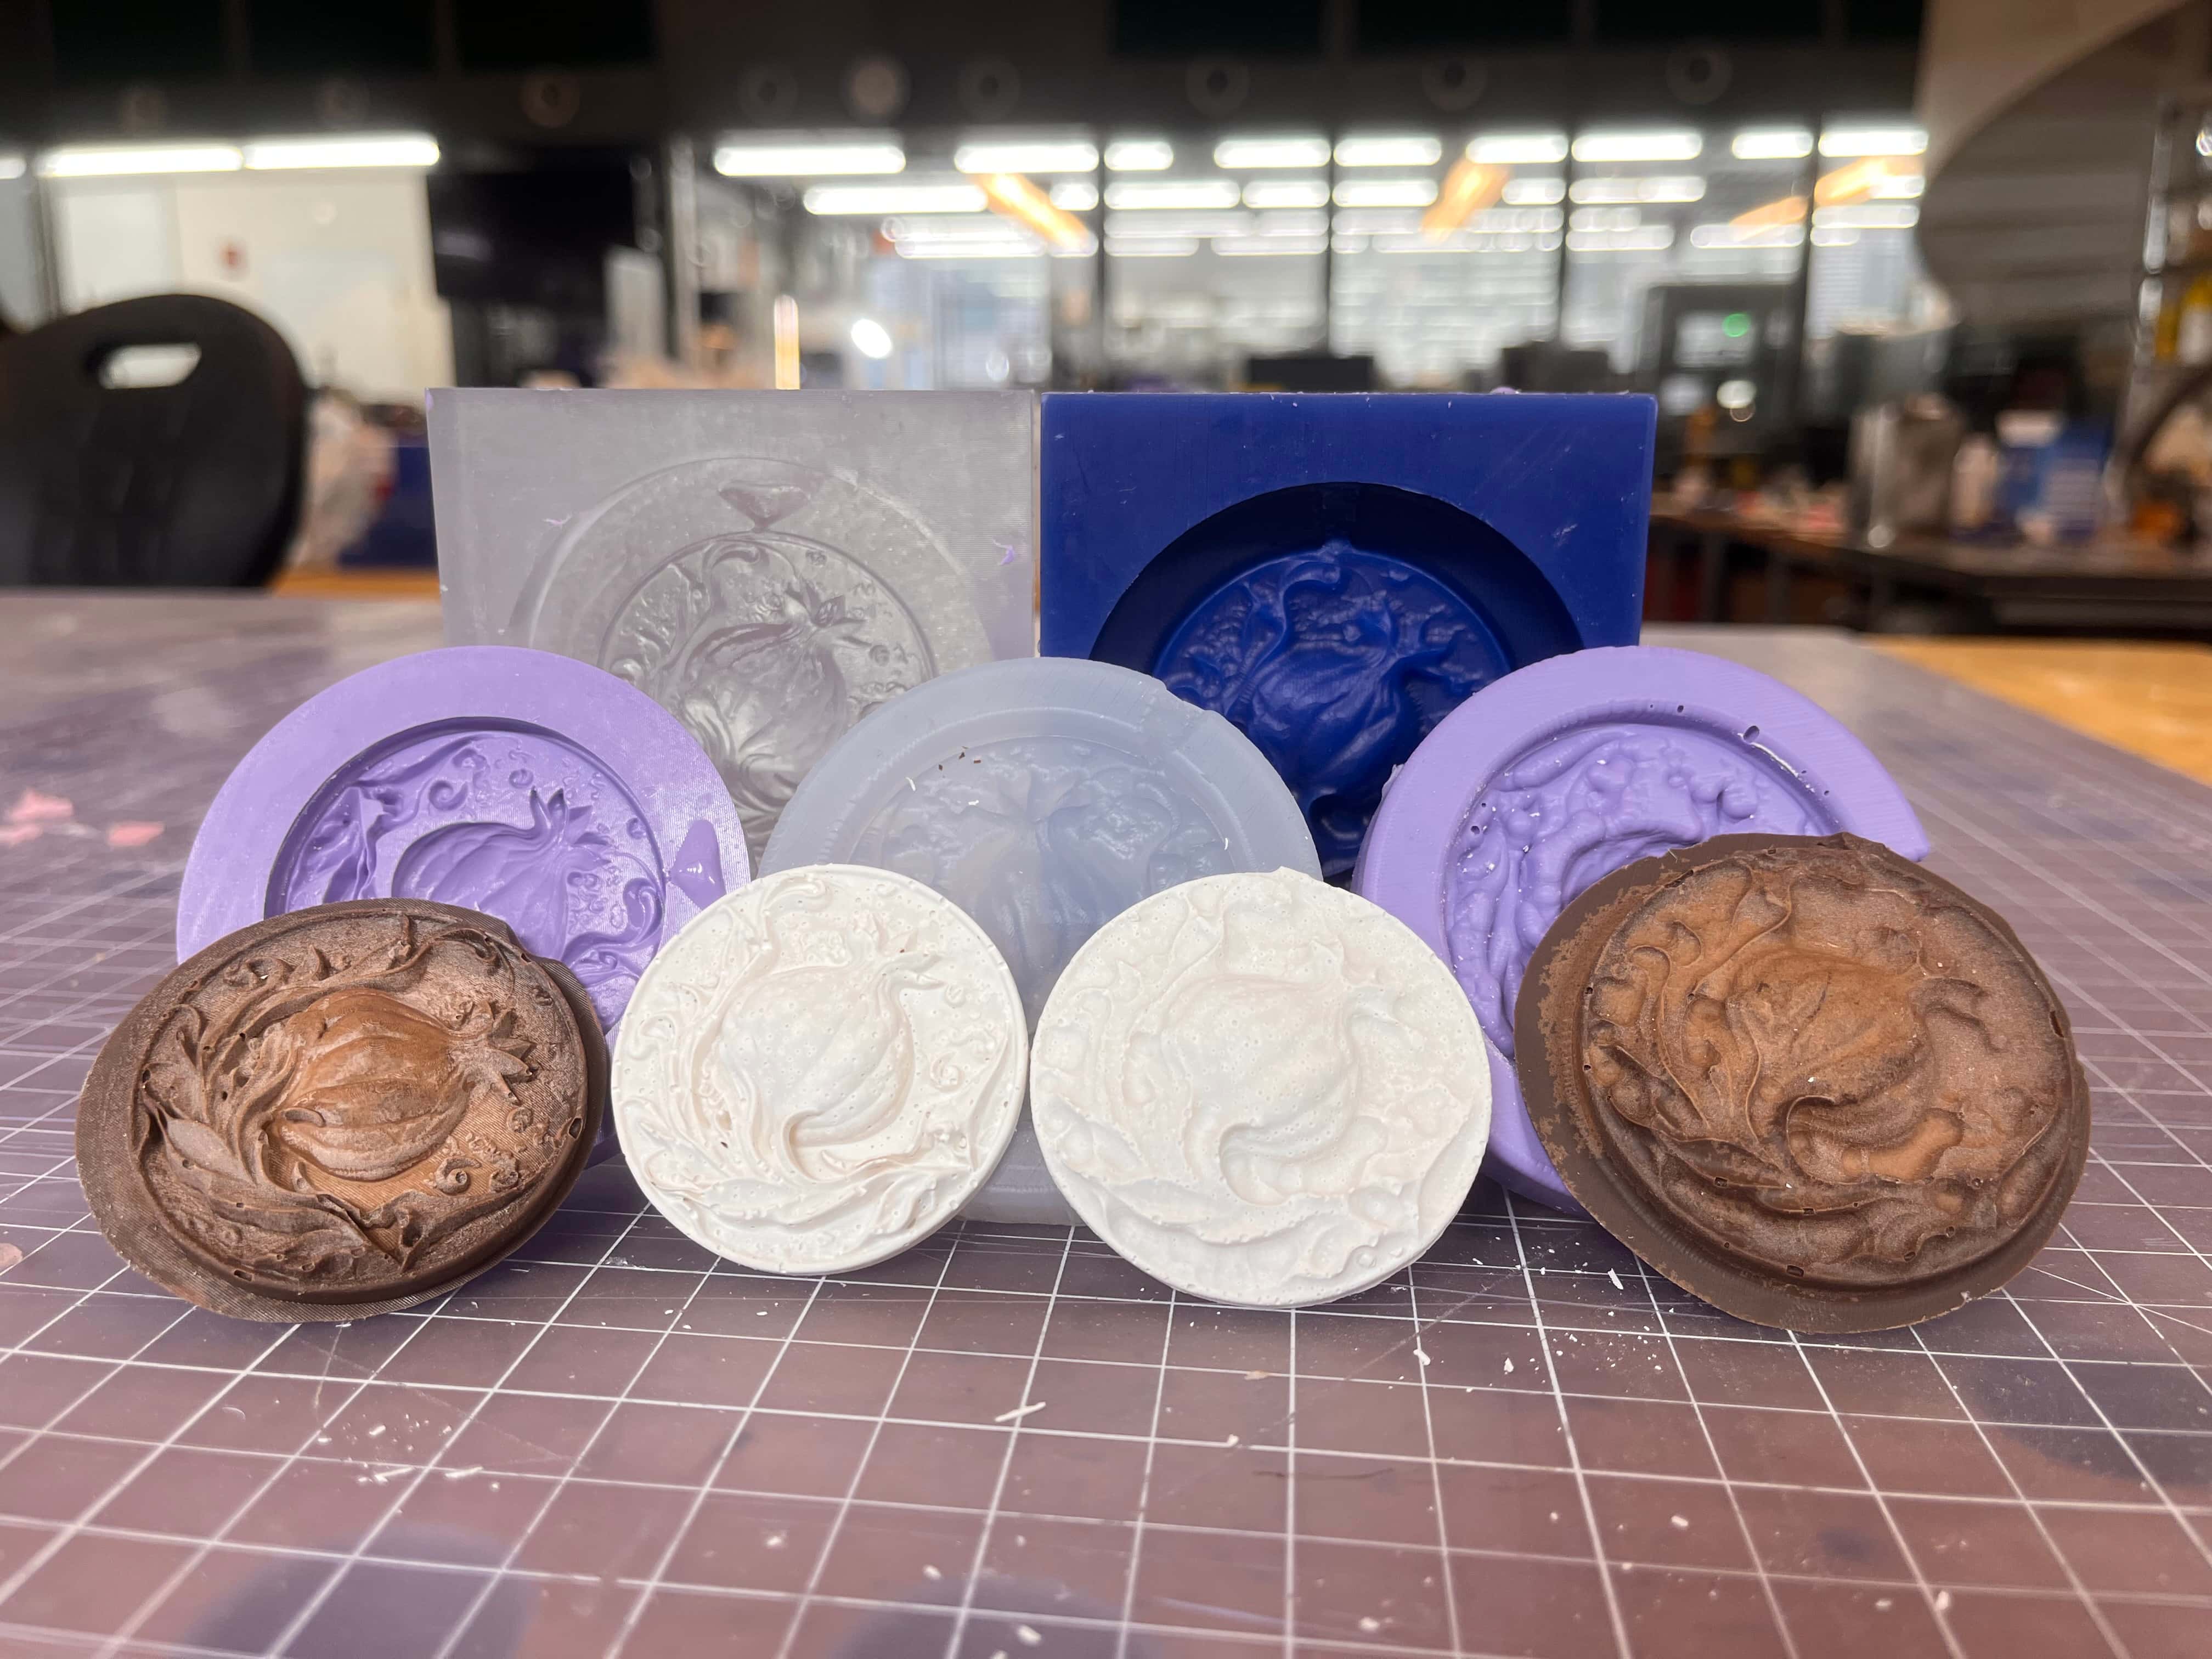
This week's lessons may come in handy for the final project, depending on if I decide to mold and cast something like the bird or buttons – I had to really struggle to figure out how to make the Meshy-generated 3D model version of the 2D Midjourney-generated image work in Fusion360 so that I could make the mold, which I'm nearly positive I'll run into again if I want to bring another AI-generated image to life for my final project.
If I have time in the future, I also really want to experiment with the metal casting process, because this mold would be really nice as a necklace for Brenna. :)
Now to start preparing for Machine Week!
Week 9 Update (Output Devices, 11/04)
In contrast to Week 8's update, this was a tough week – due to me making a very silly error (connecting pins across a double-sided PCB and thus shorting everything) I wasn't able to make something successfully. So the only update for now is don't connect pins across double-sided boards.
Oops. Onwards and upwards, I suppose.
Week 8 Update (Input Devices, 10/28)
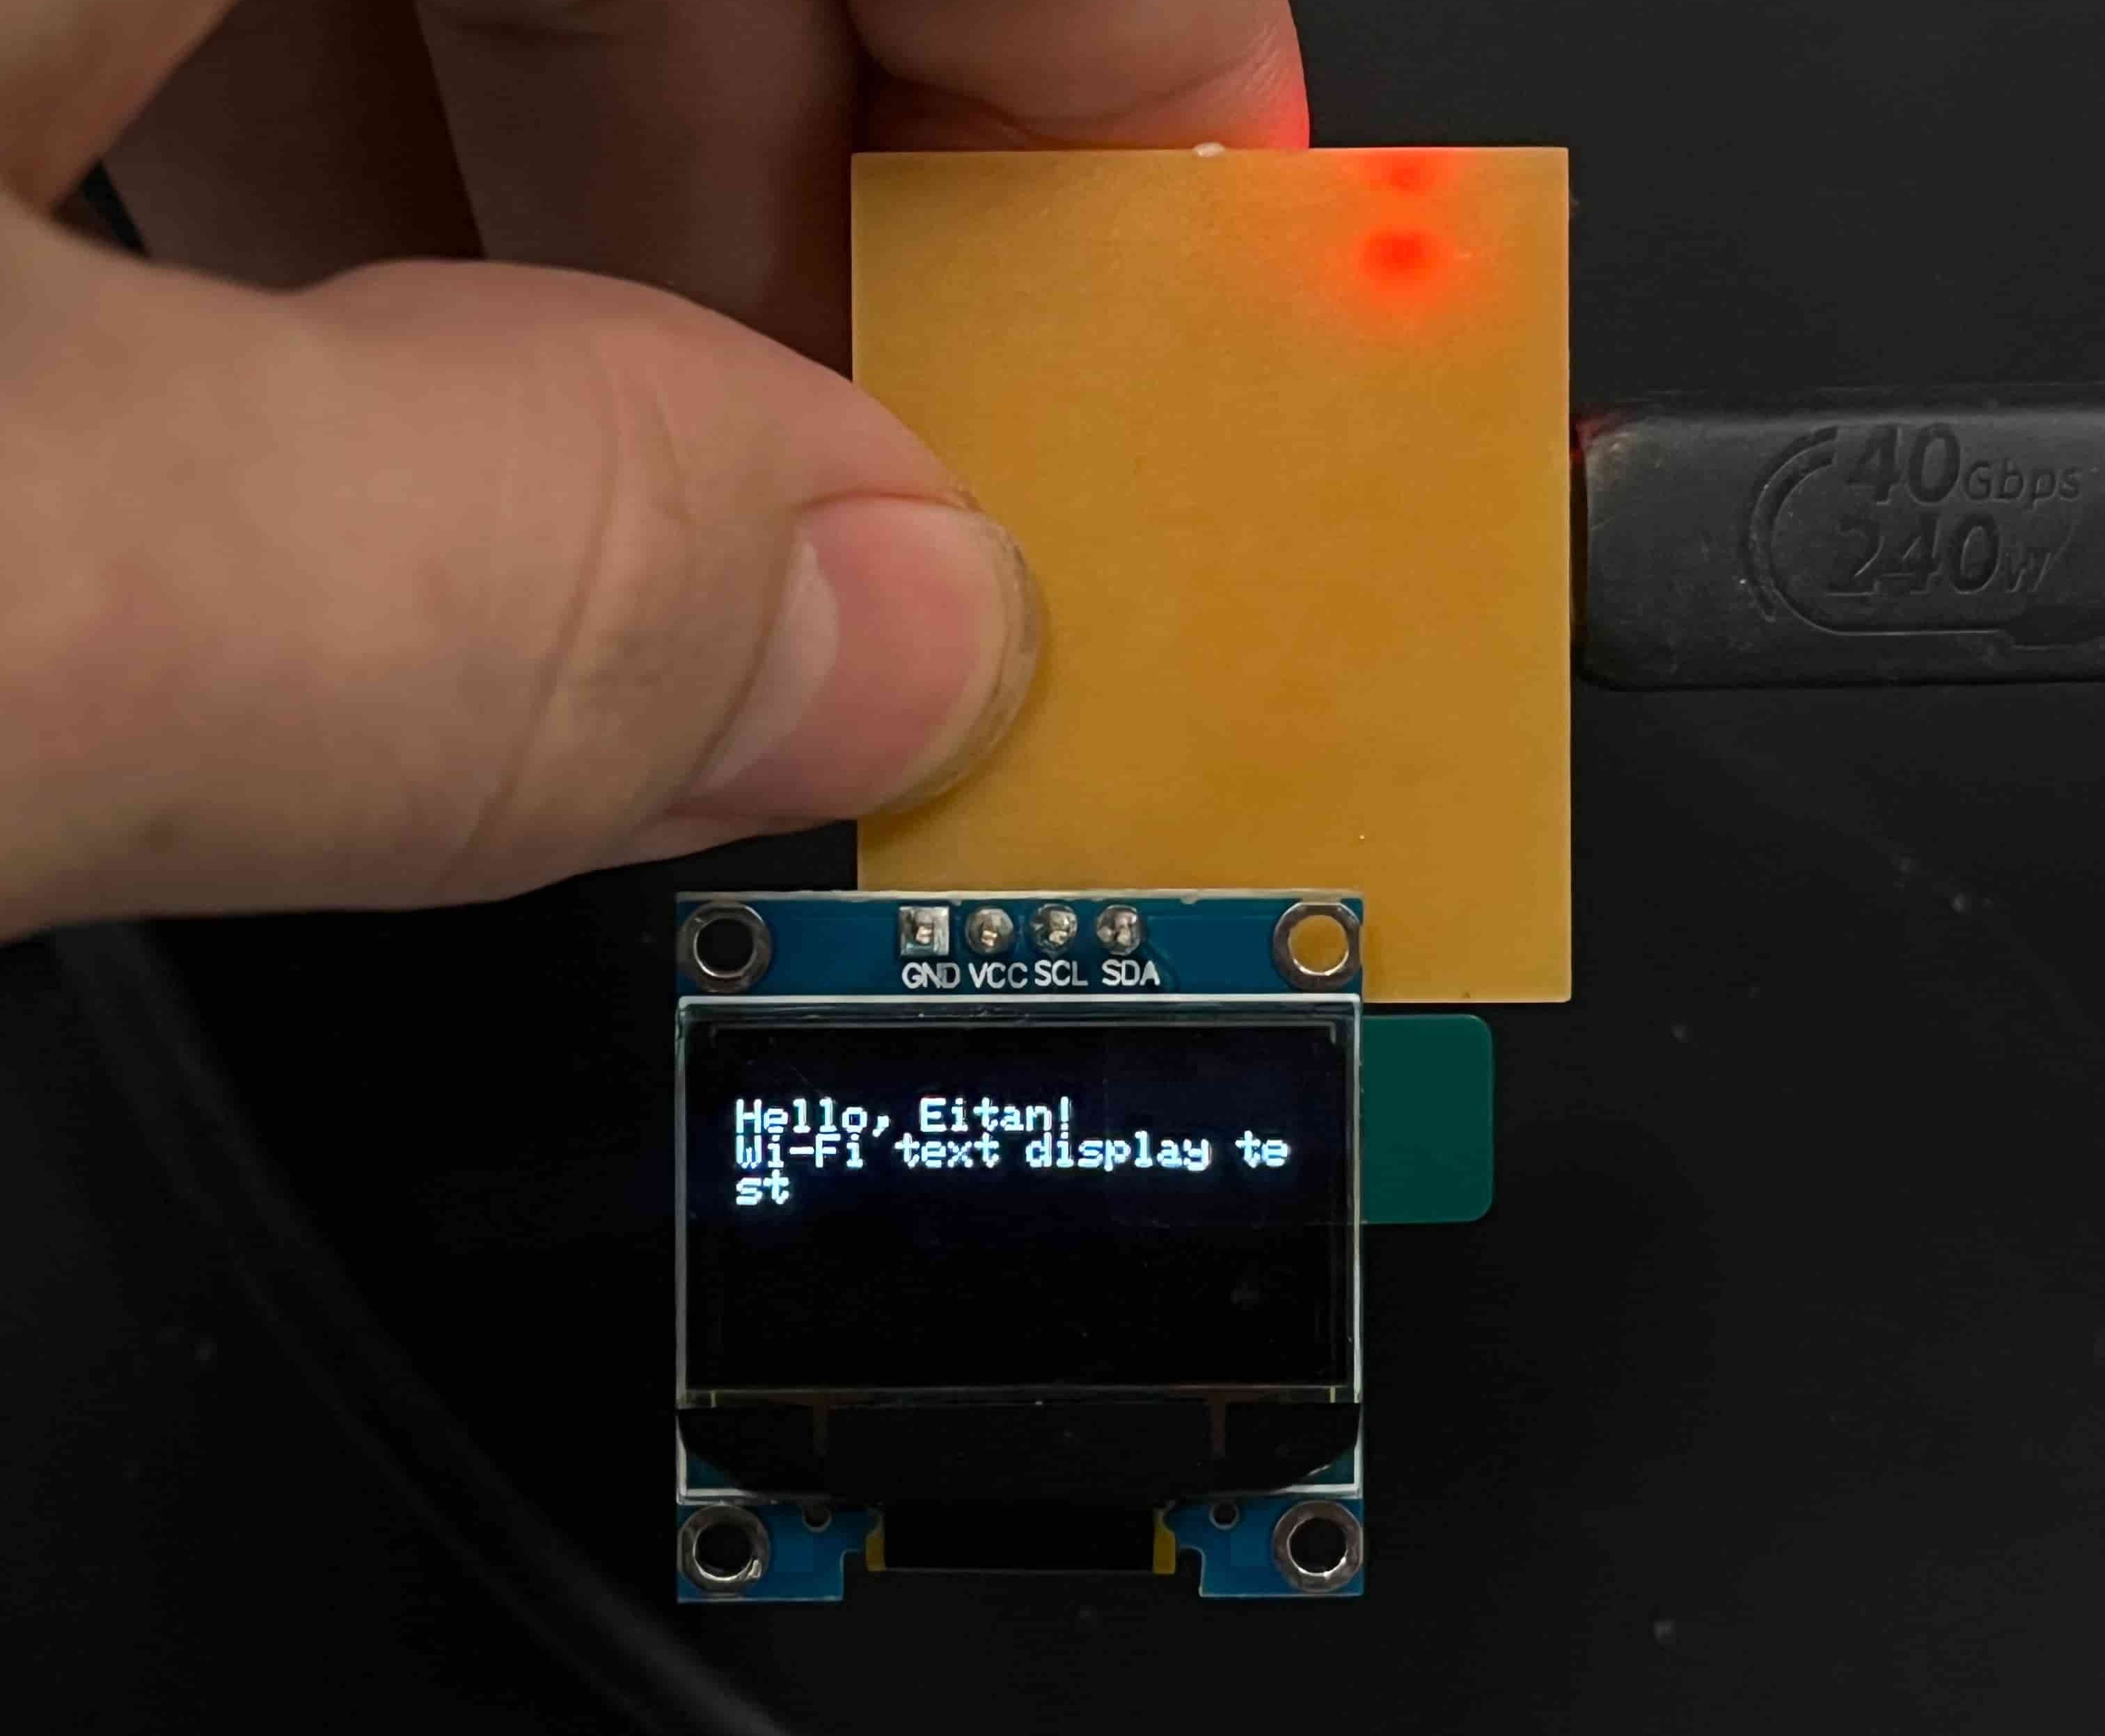
This was a really productive week in terms of angling for a final project! I did realize too late that the WiFI antenna is not actually an input device, and thus I'd really been building an output device assignment for the week; but I don't even mind, because what I ended up with this week is a decently working sketch system for sending messages over WiFi, which is what my printer will need!
Week 7 Update (Large-Scale Wood Milling, 10/21)
Wow, what a phenomenally fun week! We learned about computer-controlled machining (CAM) and used CNC machines to cut out large pieces of wood to assemble. I made a desktop skee-ball game:
Very fun! I'm super proud of this week, because I feel like so many of the previous weeks came together for this –- sketching things out, CAD/Fusion,
milling, 3D printing, and vinyl cutting –– and the result looks really great to me, almost exactly what I'd envisioned. It's really empowering being able to
conceptualize something on a larger scale and being able to make it real; it gives me confidence for the upcoming weeks. I haven't decided yet whether I want to
use wood or some other material for the final project enclosure, but I'm glad to now have the option of doing so if I want to.
If you want to check out the full process of making the skee-ball, check out my Week 7 Page here.
Week 6 Update (Electronics Production, 10/14)
Okay, now we're getting somewhere! This week we learned how to mill out our boards with the Carvera, sand it, and solder components on. Check out my ATTiny12 design from last week, now milled out, then sanded, then with components:

I was also able to go to office hours with Anthony, and we talked through some of the options for my board components:
Motor Selection and Mechanism Design
- Stepper Motors: Anthony walked me through stepper motors first. They run everything from 3D printers to CNC routers and are incredible for fine positioning, though only for relative positioning since they don't have encoders. If you tell a stepper to go to 30 degrees, it won't actually "know" it's at 30 degrees in an absolute sense. But the relative control is fantastic. By default they step at 1.8 degrees, and you can divide that down by 256 with microstepping to get incredibly fine, buttery smooth motion. The tradeoff is that I'd need a stepper motor driver, but they tend to be pretty compact.
- Servos: Servos have a little less angular precision than steppers, but the nice thing is that if you tell a servo to go to 37 degrees and then power cycle everything, when it wakes up and you say go to 37 again, it'll hit the exact same position every time. That absolute positioning is really convenient. The constraint is that the mechanism design might need to be more complicated because the radial motion is limited to either 180 or 270 degrees, depending on which servo I choose, whereas a stepper can just spin around five times if needed. On the upside, servos are easy to work with—just power, ground, and signal, but it'd mean I'd have a lot more to consider when designing the bird mechanism behavior.
- Sled Mechanism: Another option we went through is making a sled that physically pushes the doors open. The doors could be hinged and spring loaded so when the sled comes back they close naturally. I could even use an independent actuator for the doors themselves, but I'd want a good reason for doing that rather than keeping it mechanically simpler.
LED Options
-
NeoPixels vs Single Color:
Anthony explained that LEDs are super simple to work with. The main question is: do I want RGB, single color, or
controllable brightness? Can I change brightness based on ambient light? Maybe some turn on while others turn off?
These questions would lead me toward either individual RGB LEDs or NeoPixels that I can talk to digitally. NeoPixels
are great because I can chain as many as I want (within reason) and the whole string runs off just one GPIO pin total.
They're more expensive than simple LEDs—under a dollar each—but the flexibility is worth it.
So we decided I'll probably go with the NeoPixels. The wiring should be pretty straightforward: power line, ground, data in (to the microcontroller pin), and data out (which chains to the next NeoPixel's data in).
Speaker and Sound
- MP3 Decoder: Anthony laid out two main approaches based on what kind of sound output I need. The first option is a speaker that just plays "cuckoo" and nothing else (well, maybe a couple other preset sounds too) and plays them with decent fidelity; but would never change. If that's what I want, an MP3 decoder module with a built-in amp would be perfect. It has an SD card slot and can only play files from the SD card. I would just tell it to play file 1, 2, 3, etc. and get nice quality sound.
- I2S Speaker Amplifier: The second option would be more ambitious: synthesizing messages as well as printing them. This is more difficult but totally doable, and would mean using a different amplifier (specifically an I2S speaker amplifier from the inventory). I2S is a digital protocol, and I could synthesize sound as long as I have an analog waveform that can be digitized. The fidelity might be a little lower but I could do it in realtime.
Fabrication Paths
- Material Options: Anthony pointed out that there are lots of great directions to take this. A gorgeous mechanical mechanism works great, but a simple mechanical system with more emphasis on electronics and sound would also be totally fine. For fabrication methods, he outlined several options. Does it make sense to 3D print components where assembly is straightforward? Or go with a bunch of tiny wood pieces assembled together, which is time intensive and intricate but can look gorgeous? There's also molding and casting the bird itself. He also mentioned that starting tomorrow we have access to large format CNC machining with OSB. It's not the prettiest material but it's pretty cheap. I could start by making the frame of the clock on the CNC, which would give me a good feel for the overall size and proportions. Then I could spend more on different materials and techniques for the decorative elements later. of.
TBD on what I decide to go with out of these – but in the meantime, you can visit my Week 6 Page here
Week 5 Update (Electronics Design, 10/07)
This was admittedly a tough week – I'd wanted to see if I could start designing my final board, but KiCAD is proving to be a little too difficult for where I'm at right now.
I ended up pivoting to recreate the ATTiny12 for now, but I definitely want to return to seeing if I can figure out what components I'll need and how to connect them next week.
However, being able to do anything in KiCAD at all is a plus, and I'm just barely beginning to understand how the system works – I think once I get the components figured out, I should
be able to get some help on how to properly connect everything.
For more info on this week, you can visit my Week 5 Page here.
Week 4 Update (3D Printing, 9/30)
This week I learned quite a lot about 3D printing. Most importantly, I was able to turn AI-generated images from Midjourney into 3D prints – this is something I'm really
interested in, because I have a lot of experience with Midjourney but have always wanted to see if I could bring them into the physical world. Now that I know it's possible,
I'm excited to see how I can bring that into my final project. But even outside of that use case, knowing a little bit more about the design philosophies of 3D printing means that
I might be able to 3D print the bird, or the flag, or even the entire housing if need be.
More to come on that! For now, you can check out my Midjourney-generated 3D prints below, and read my full
Week 4 Documentation here.
Week 3 Update (Embedded Programming, 9/23)
We're kicking things into gear – I learned about programming directly onto microcontrollers, and soldered components onto a board for the first time!
I know I'll eventually have to solder my final board, so I did a couple extra attempts with different boards so I could get more comfortable with that process.
I learned it's a lot easier if you use the soldering iron to pre-heat where the component is about to go, and put a tiiiiny little bit of solder on the tip of the iron
to help everything flow together.
I also practiced reading datasheets to understand what's happening on each chip, and what connects to what; as well as practice loading some programs
onto the board, which is of course what I'll need to eventually do for the final project. I know in a couple weeks we'll attempt to design our own boards,
so I'll try to take a first pass at figuring out what components I might need and designing my final board at that point. But for now, you can check out
some of what I did below (like make this practice board a MIDI controller!), and read my full
Week 3 Documentation here.
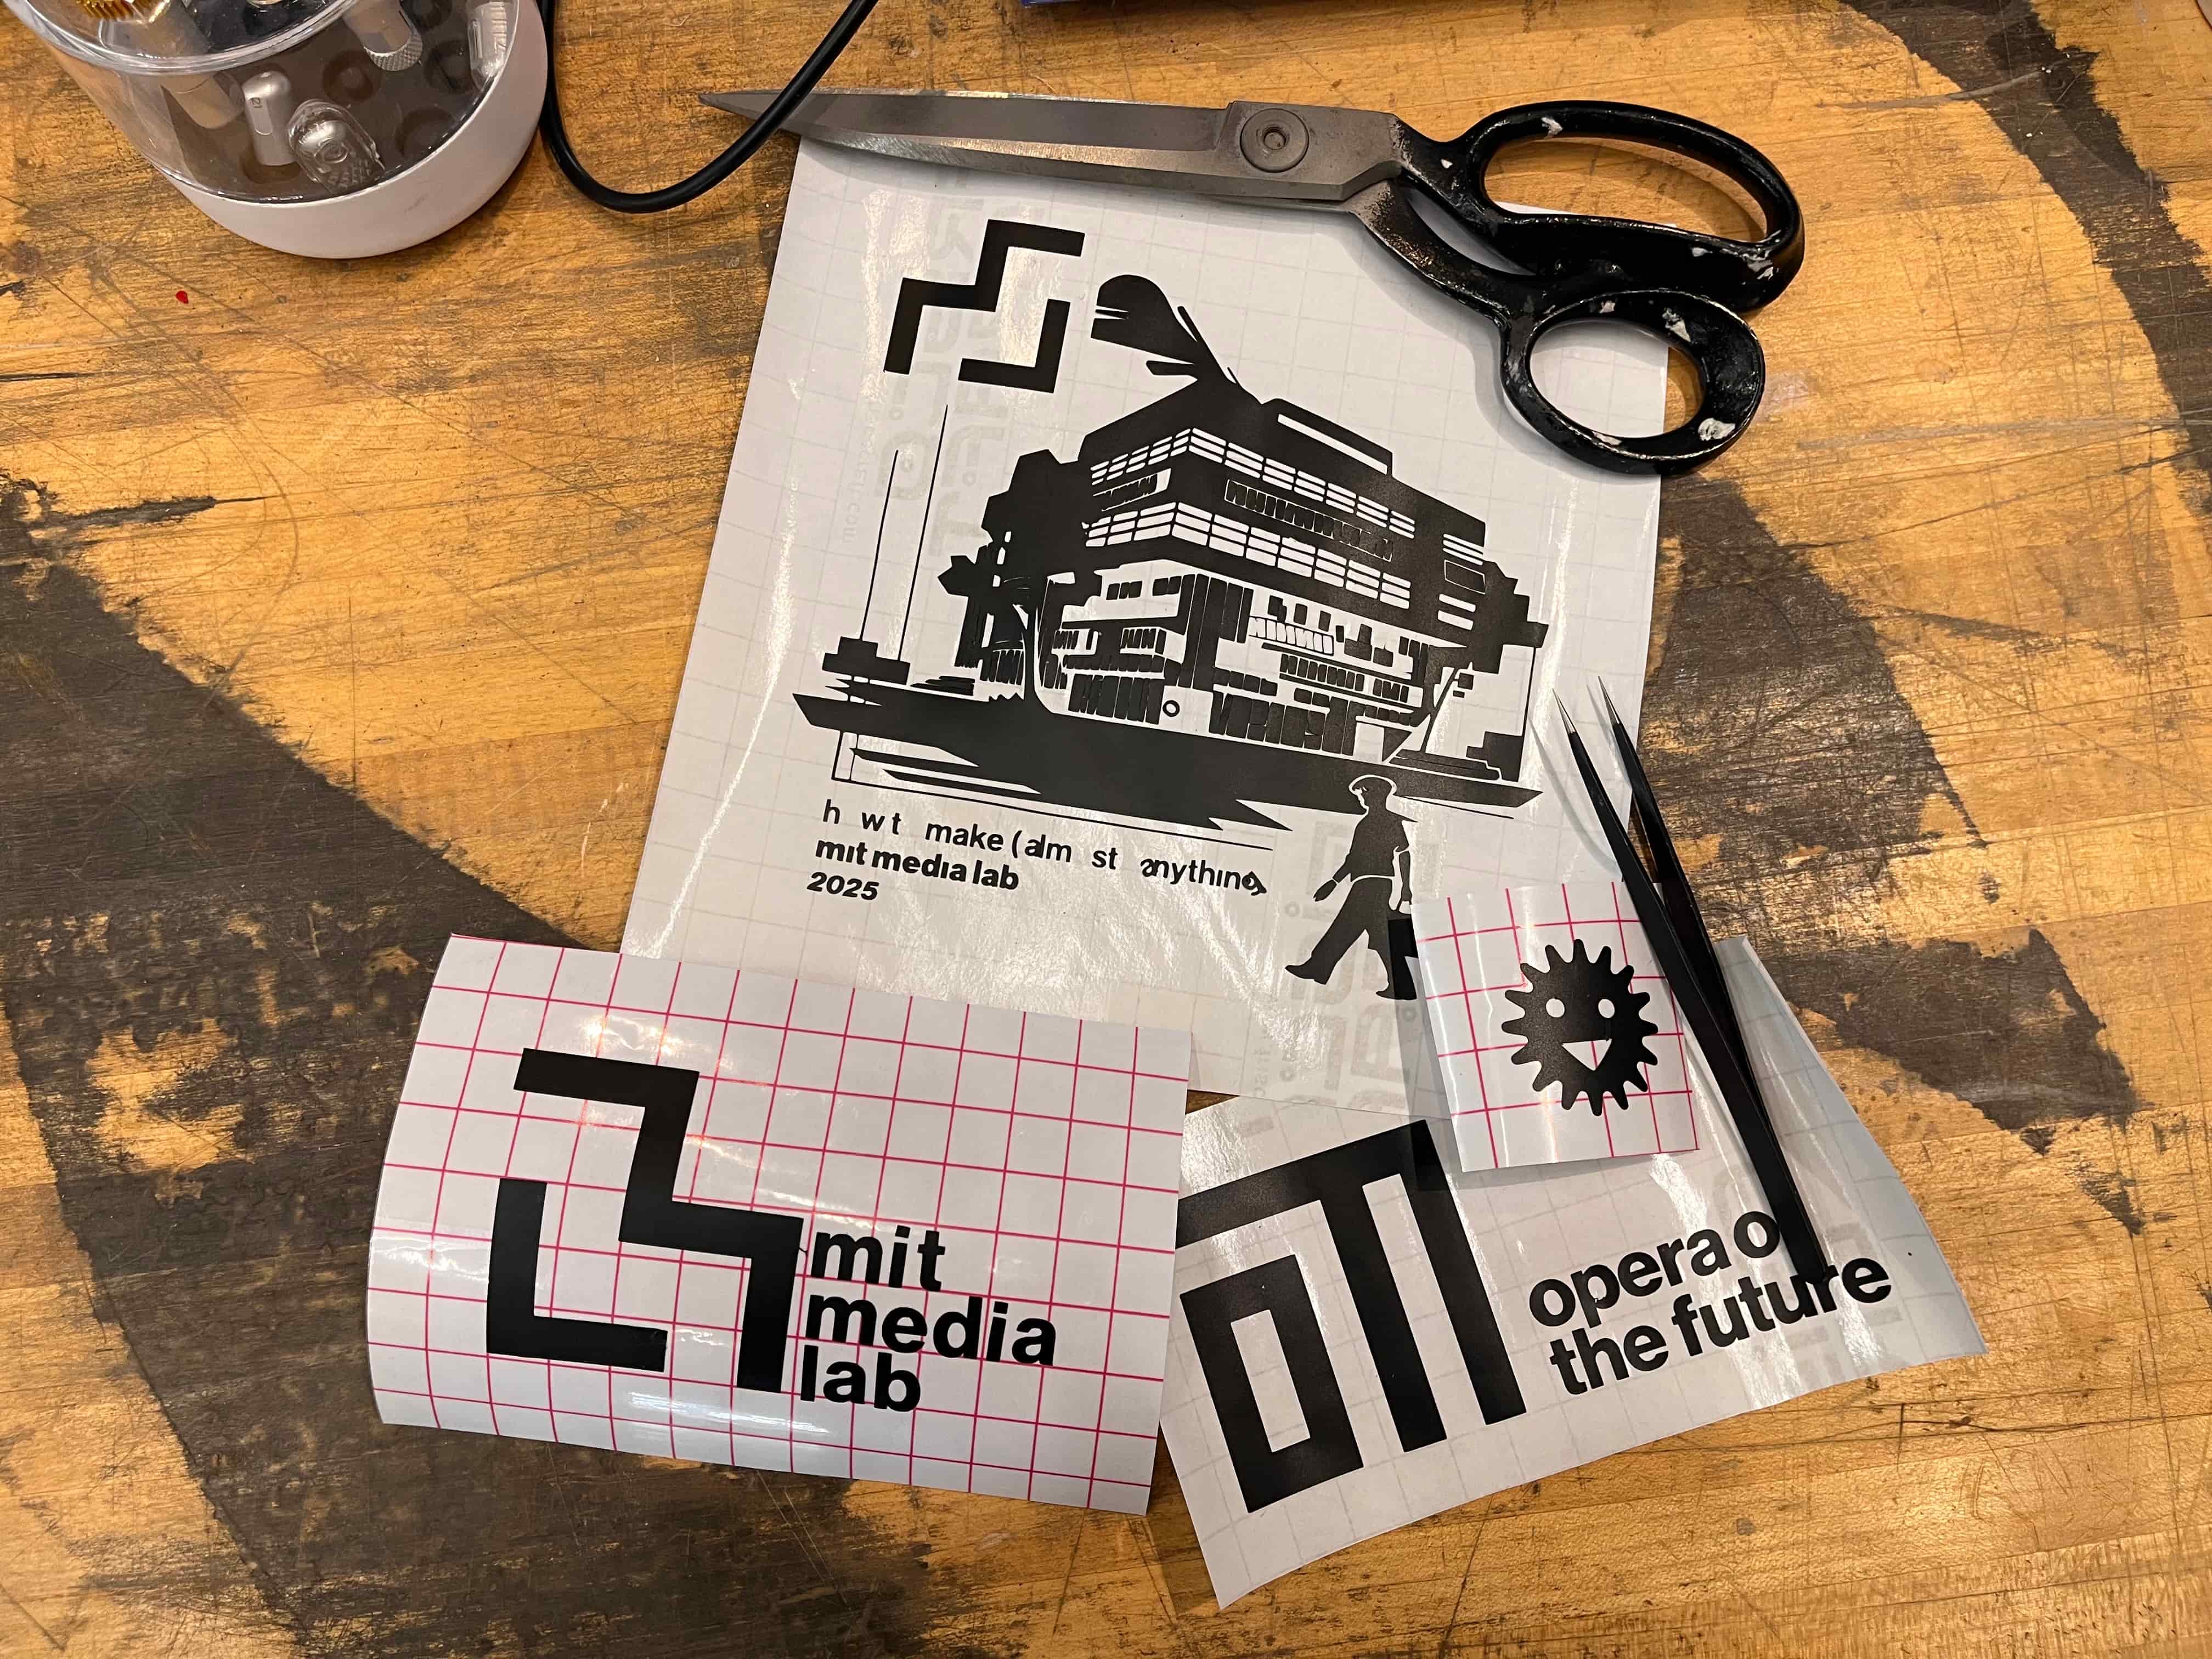
Week 2 Update (Vinyl & Laser Cutting, 9/16)
I learned how to laser cut! I'm still pretty bad in CAD, but once I get better I think I'll be able to use what I learned this week to cut out the housing of my box, and maybe even add some vinyl-cut decorative elements. We'll see how that goes, but in the meantime you can check out my full Week 2 Documentation here.