- do your lab's safety training (Completed 16.10.2025)
- Test runout, alignment, fixturing, speeds, feeds, materials,
and toolpaths for your machine (Uploaded by Tyler onto the CBA class site here )
- make (design+mill+assemble) something big (~meter-scale)
Design
The goal for this week was to create a prototype of a wooden component for my final project. I plan to use the ShopBot to manufacture
the board, so I want to use this week to get a better understanding of CAM, the feeds/speeds, etc of the machine.
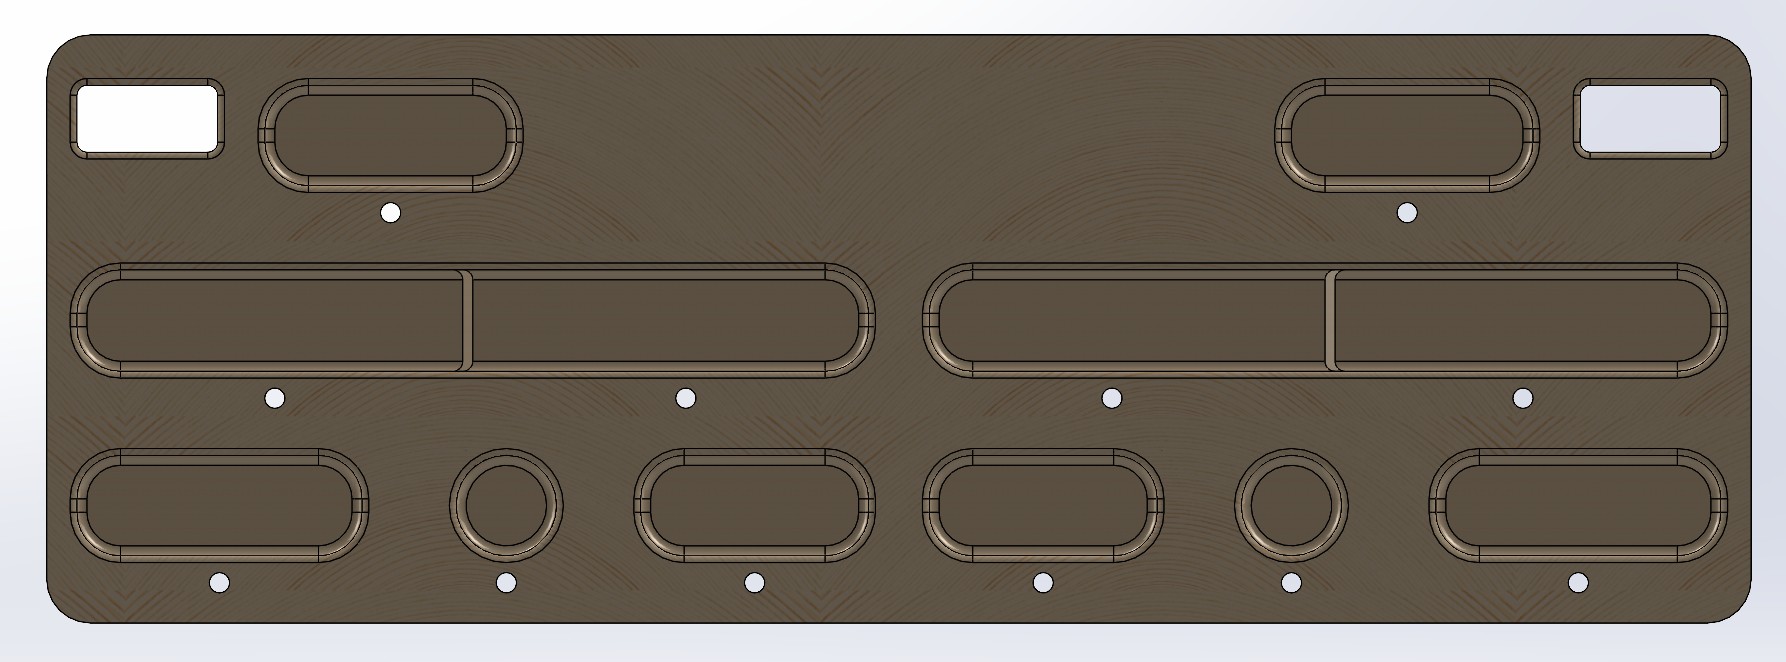
FRONT

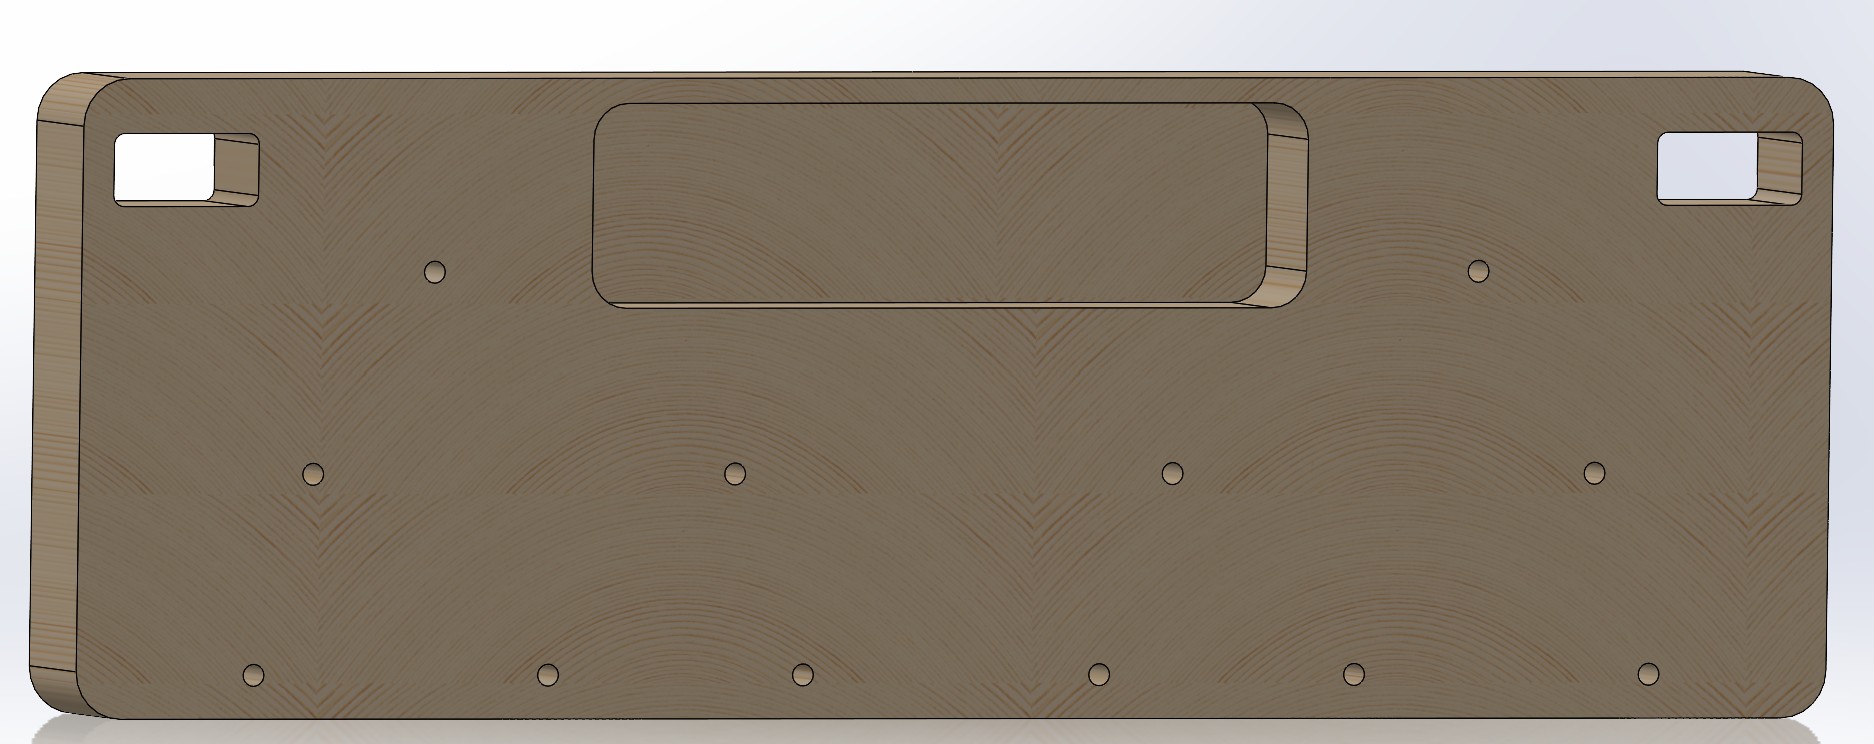
BACK
Set-up
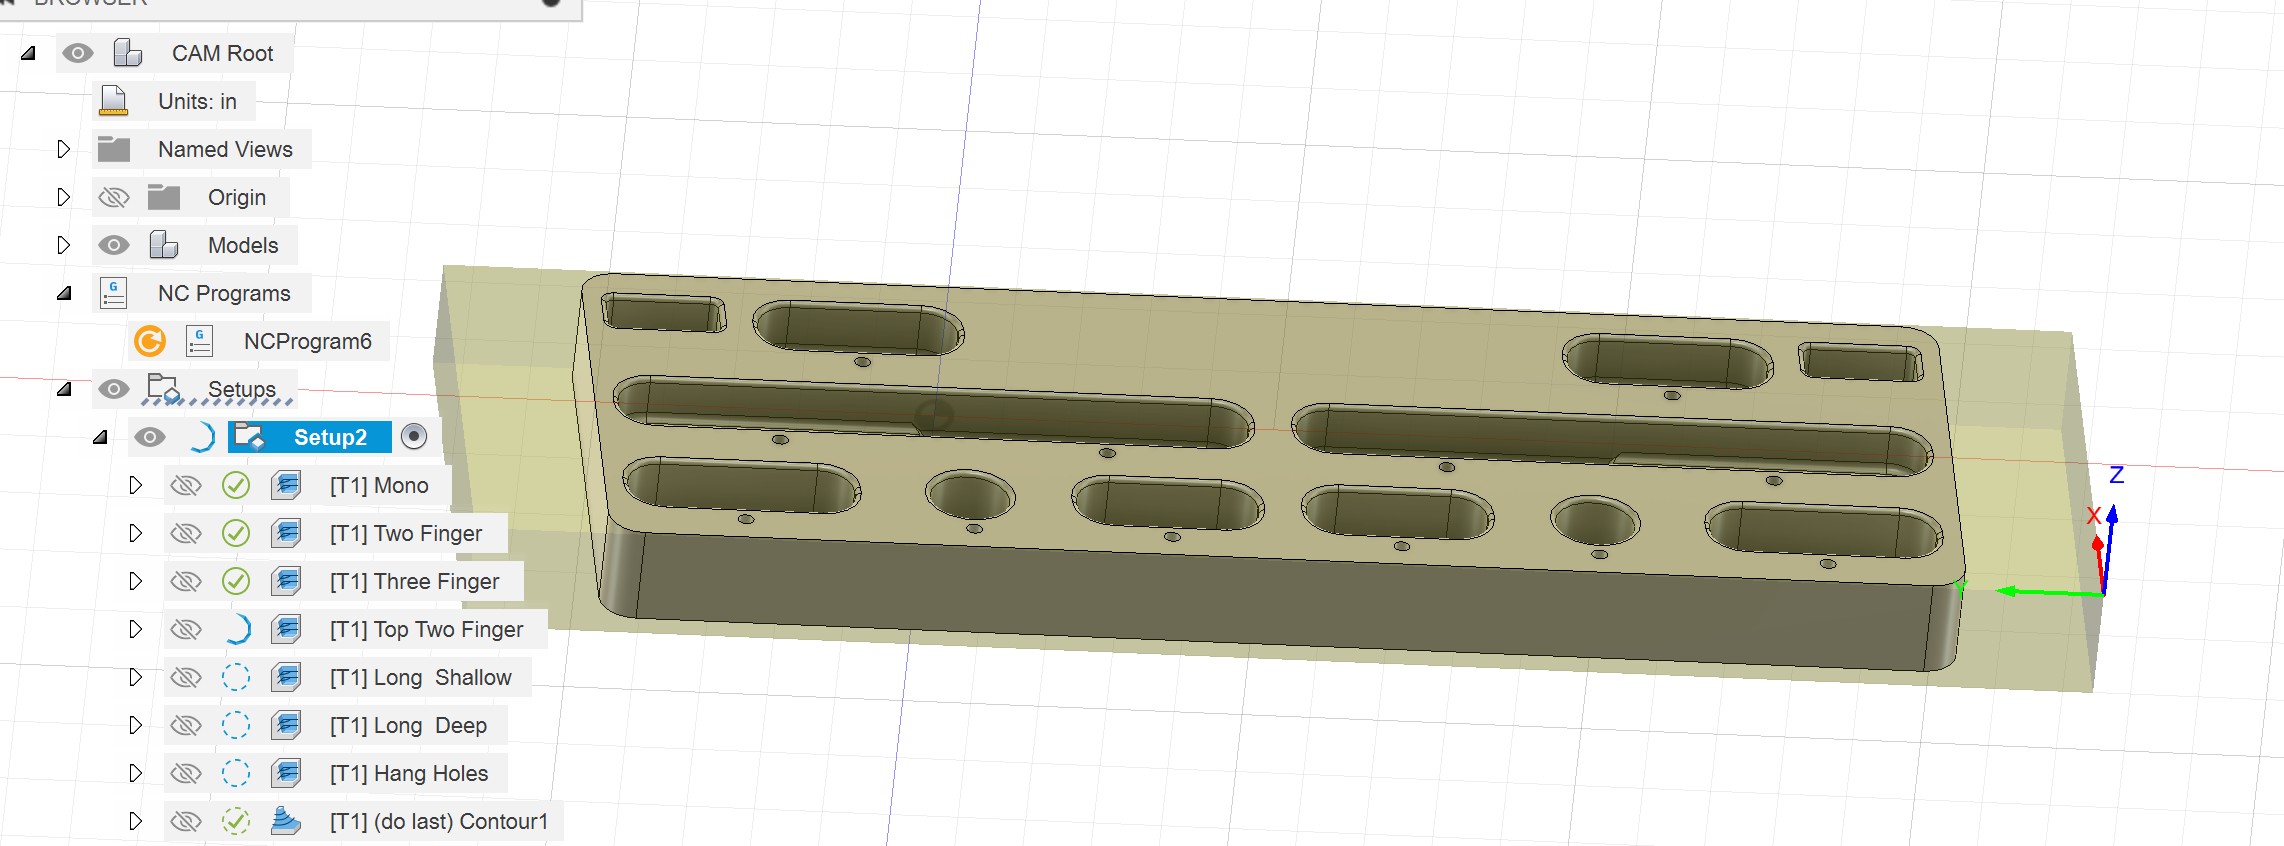
CAM
I hadn’t used Fusion before this point. During recitation, Alfonso highlighted how simple it was to use Fusion for the CAM.
I downloaded Fusion and imported my design as an STL file from SolidWorks. Sarah said that using a STEP file would be easier
because it would remove all the triangles. I had some trouble getting started and asked Dan for help.He recommended that
I set it up using Adaptive Clearing for all the pockets and Contour for the filets. It took much longer than expected to set up.
There were many unforeseen issues along the way, such as the tool height, filets at the bottom of the pockets (which I eventually
decided to ignore for now), and filets on the corners of the board (which I also chose to handle by hand). I asked about feeds, speeds, and step-down height.
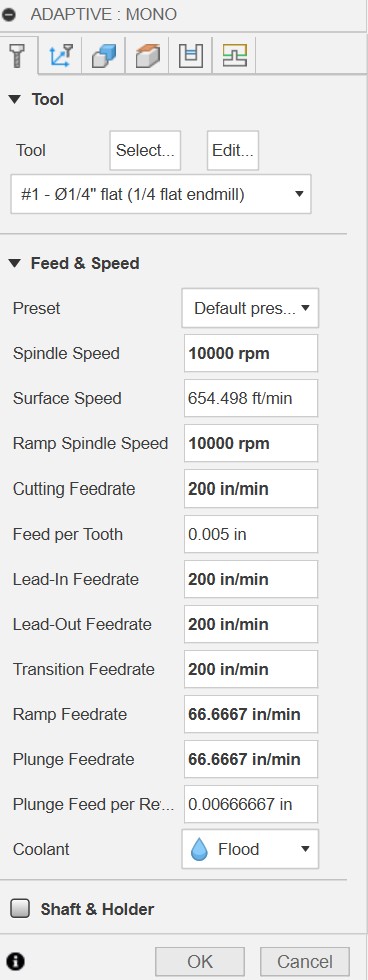
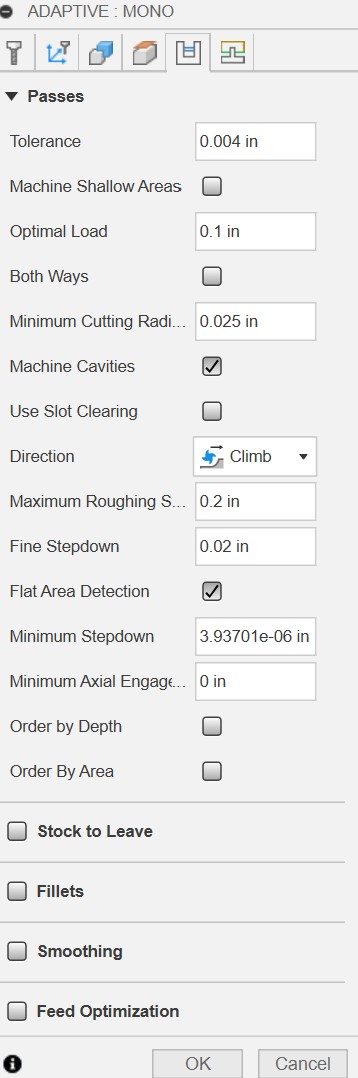
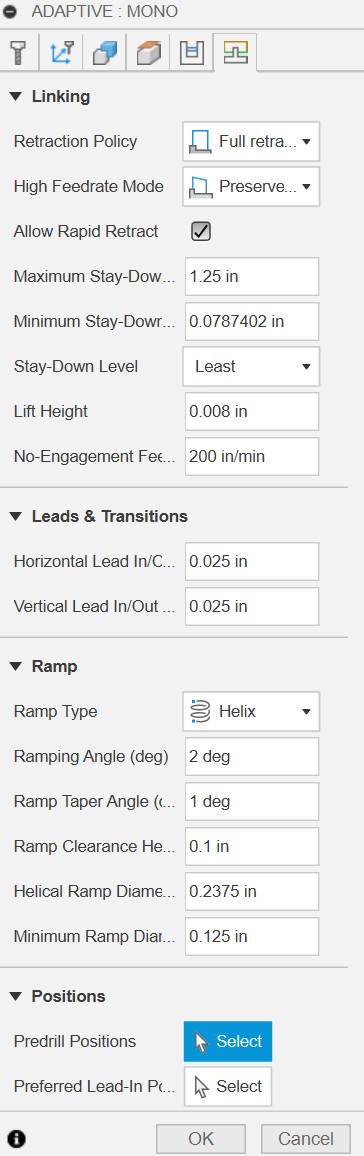
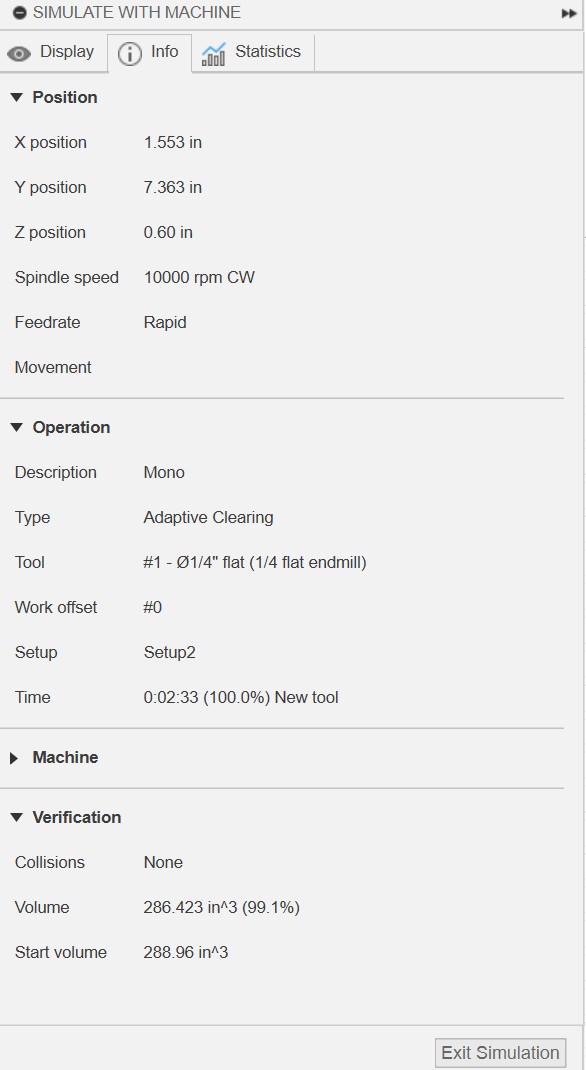
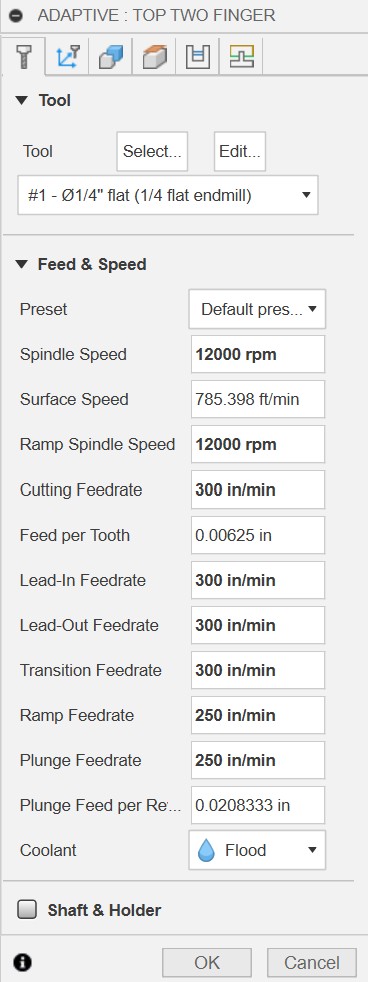
Dan recommended I use a spindle speed of 10,000 rpm, a cutting rate of 200 in/min, and a step-down of .2 in.
Settings for Mono-Pocket and Simulation Time
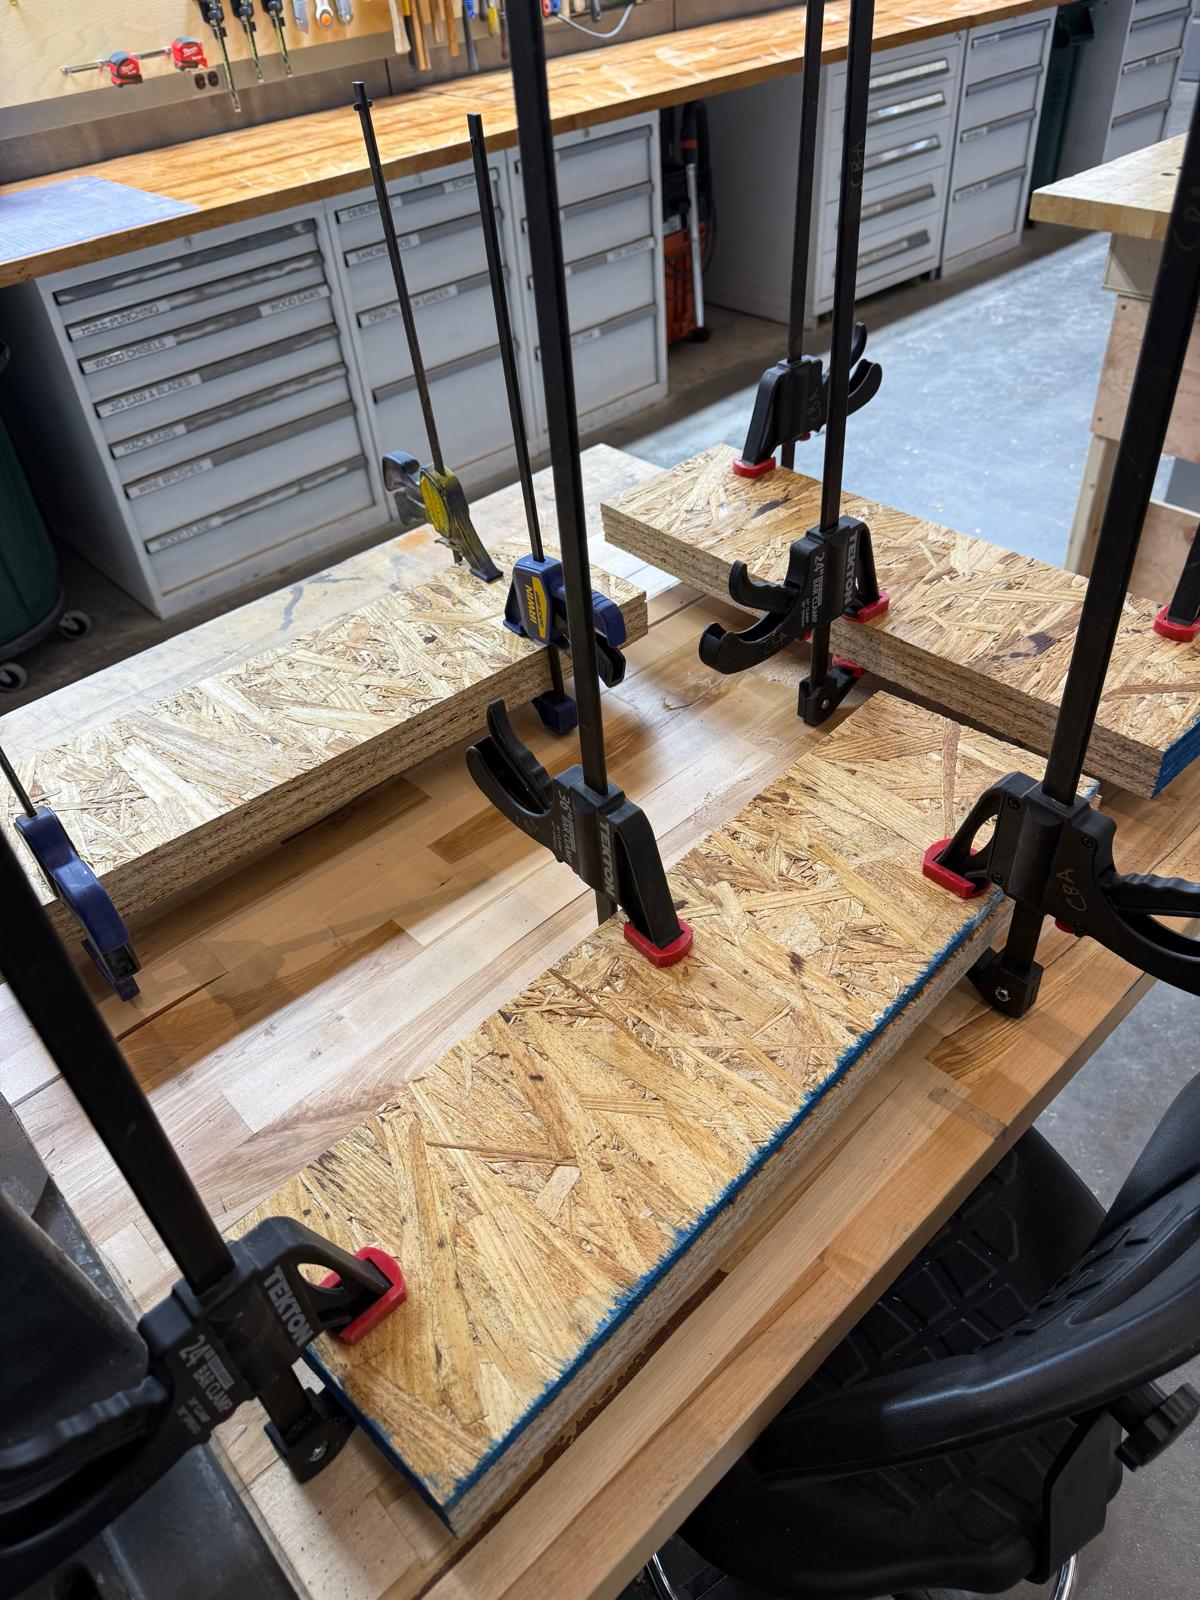
Prepping the Board
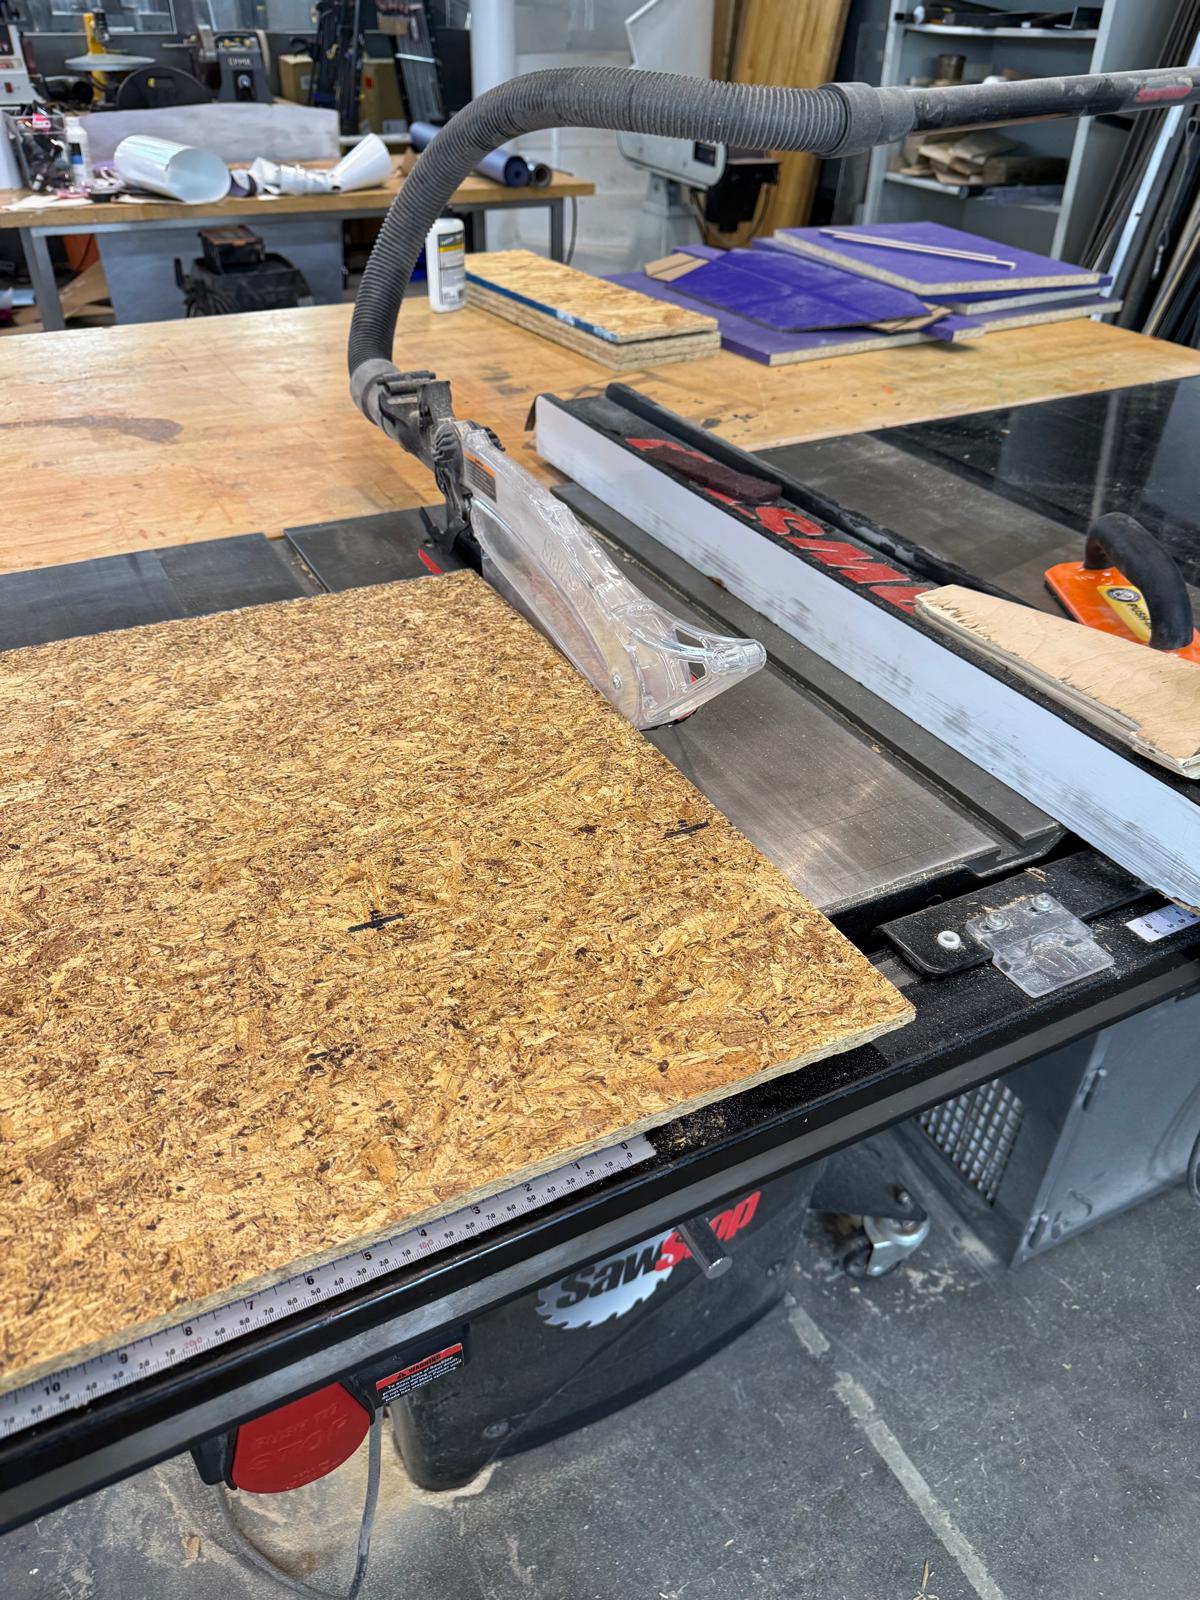
On Saturday evening, I prepared my board for cutting. I used a table saw to cut it into 7-inch by 24-inch pieces,
each 0.43 inches thick, which I believed were the dimensions I ordered for my final project. However, I changed the dimensions
from the initial screenshot I took, so the actual measurements are 6.9 inches by 20 inches by 1.5 inches, which exactly match the
dimensions in SolidWorks. I didnt realize this until Tuesday night and I placed the hangboard on top of the wood block I ordered.
For my next prototype, I will adjust the dimensions accordingly.
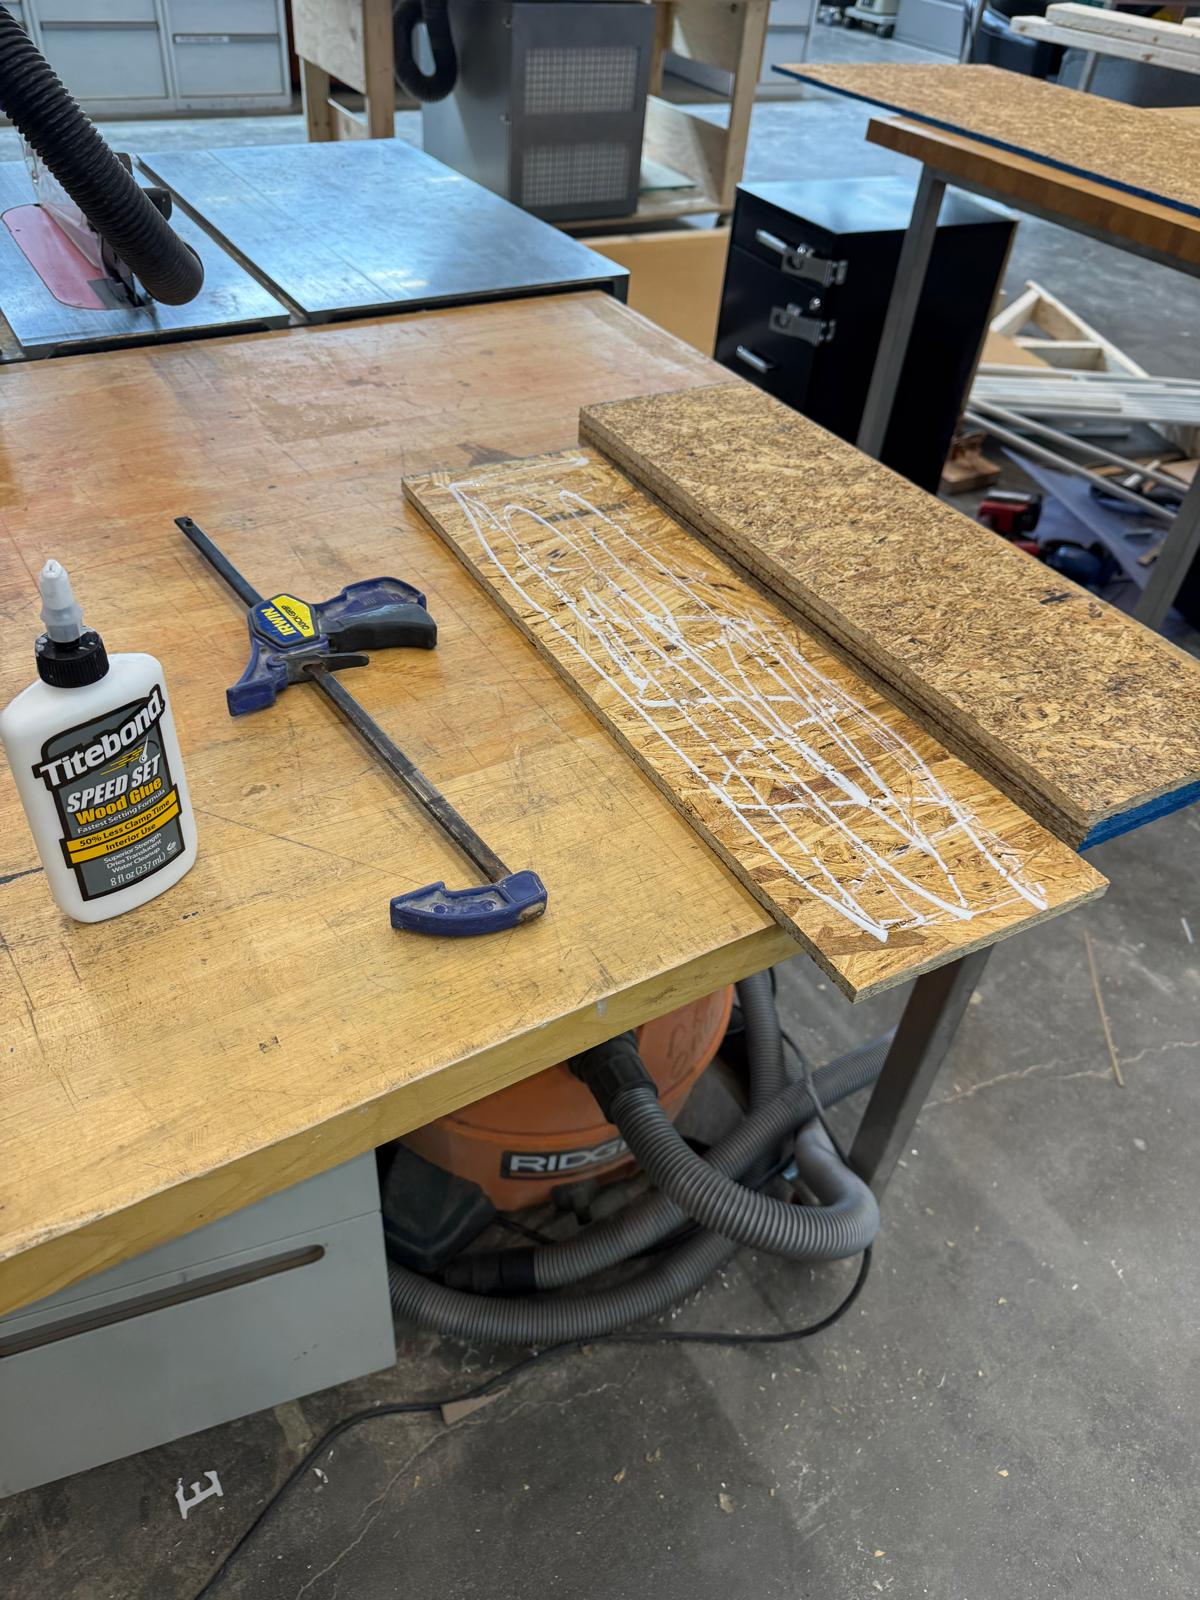
I glued four pieces of OSB together and clamped them.
MILL
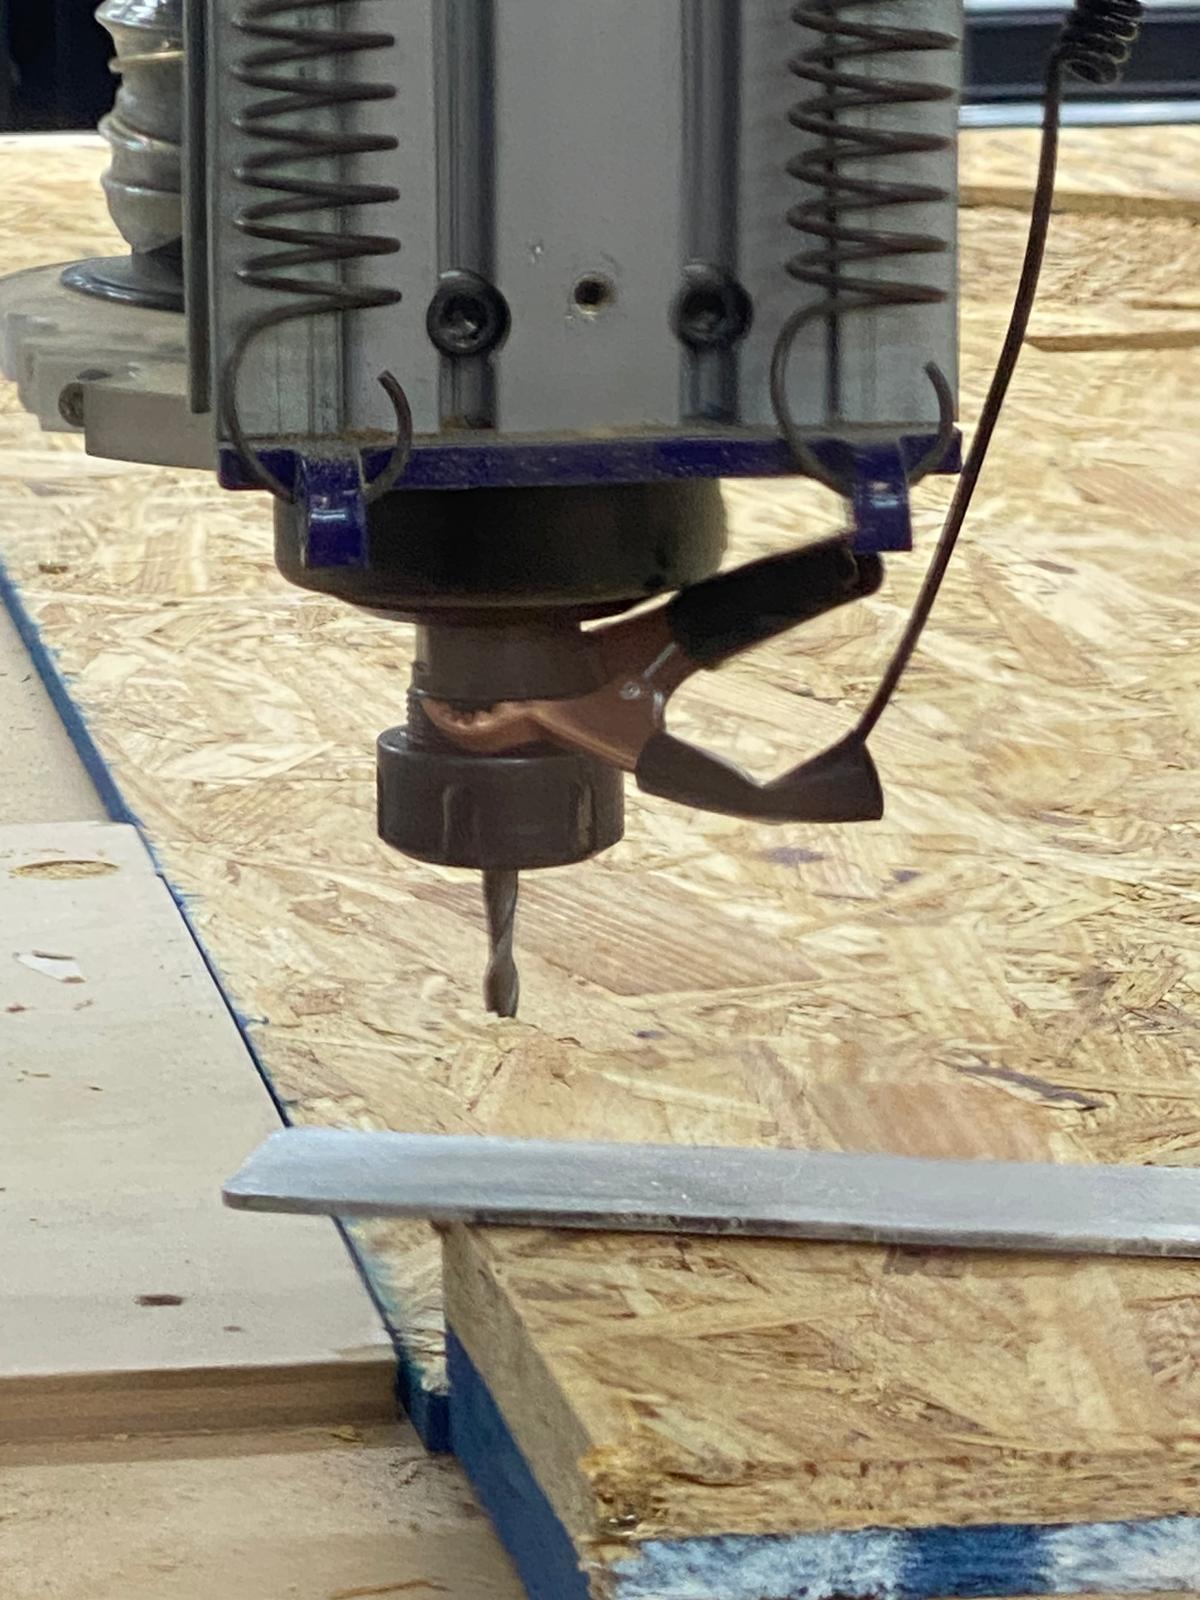
Setting up the machine
I was finally ready to cut! I helped Sarah set up her cut earlier, so it helped me get familiarized with the process.
I used long screws on all four corners to fix the board into place, and zeroed it with the ¼ in endmill, before realizing that it was
too short and I needed a longer ¼ endmill. Next, I re-zeroed the board and followed the instructions
to start the machine.
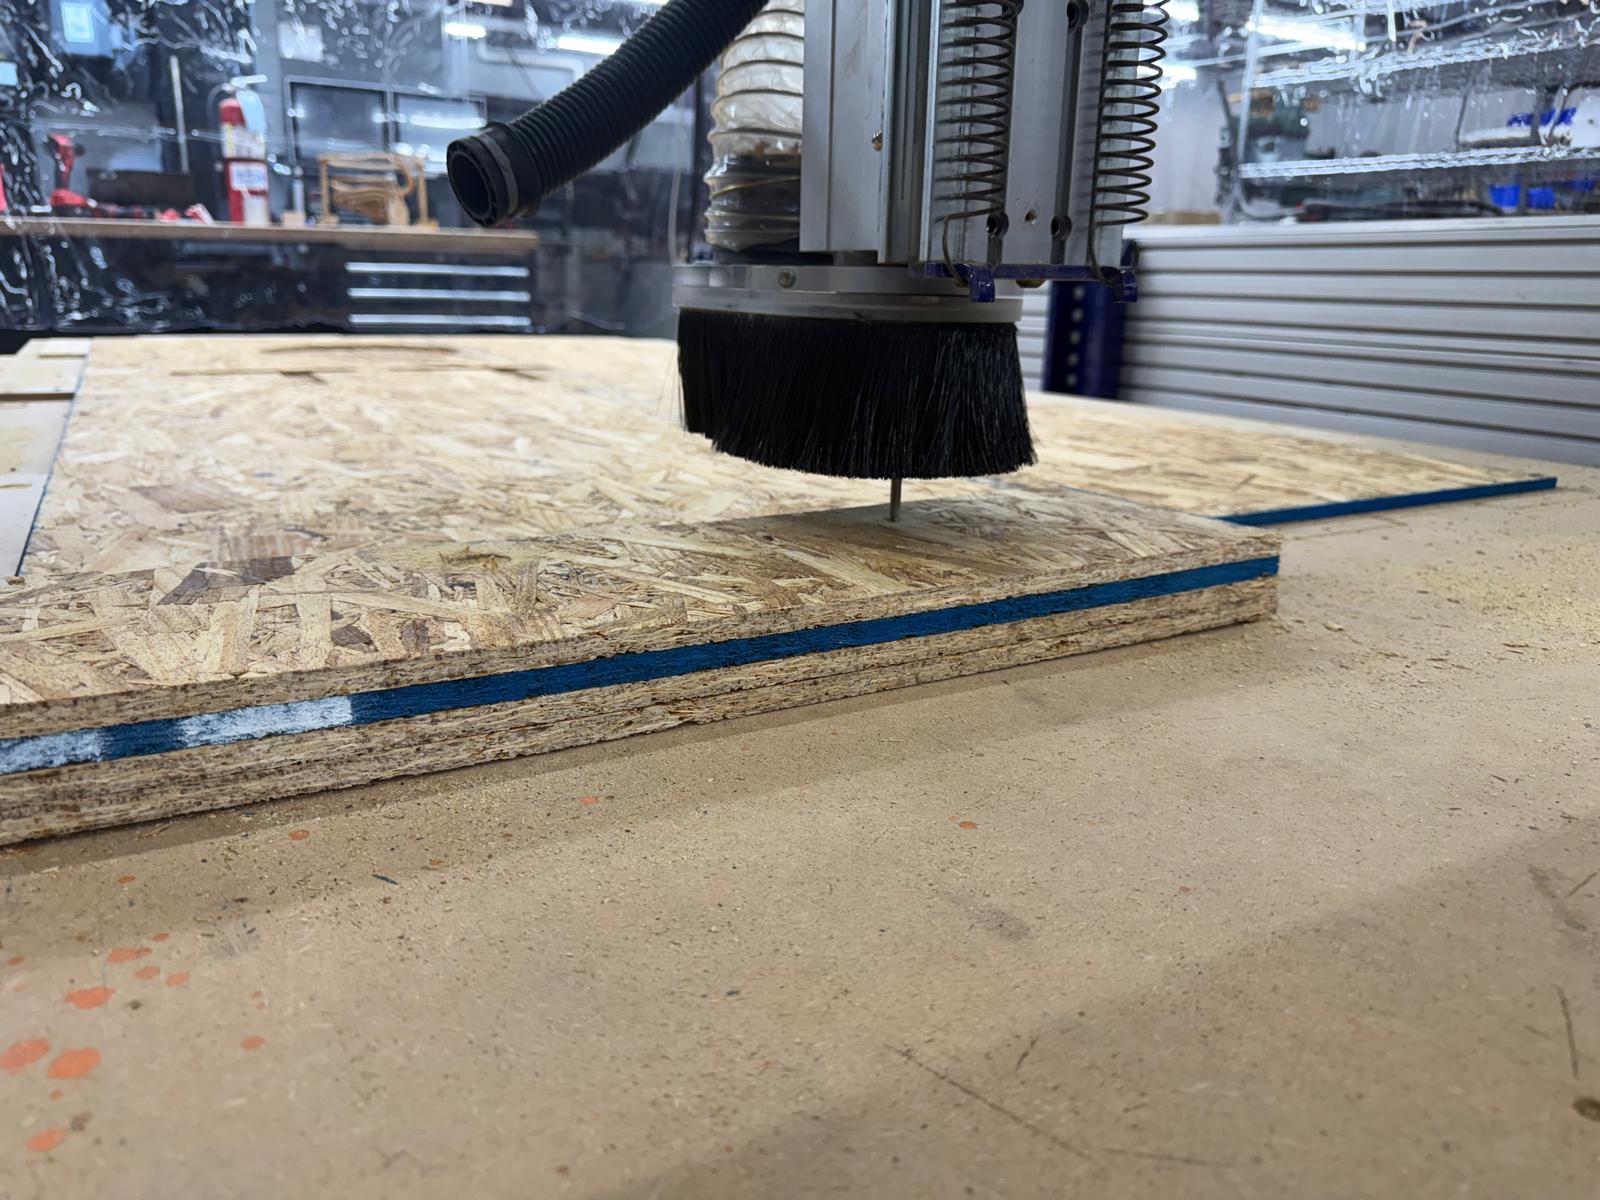
The shopbot started at the origin, then moved outside the board and started
helixing. I immediately pressed the stop button on the screen. Dan said that my origin on the board
didn’t
match the origin in my design, two tries later it started cutting. Everything looked right. In the future I should mark the board where the first cut is supposed to be
Origin Fixed
First Cut!
Some Inital Progress
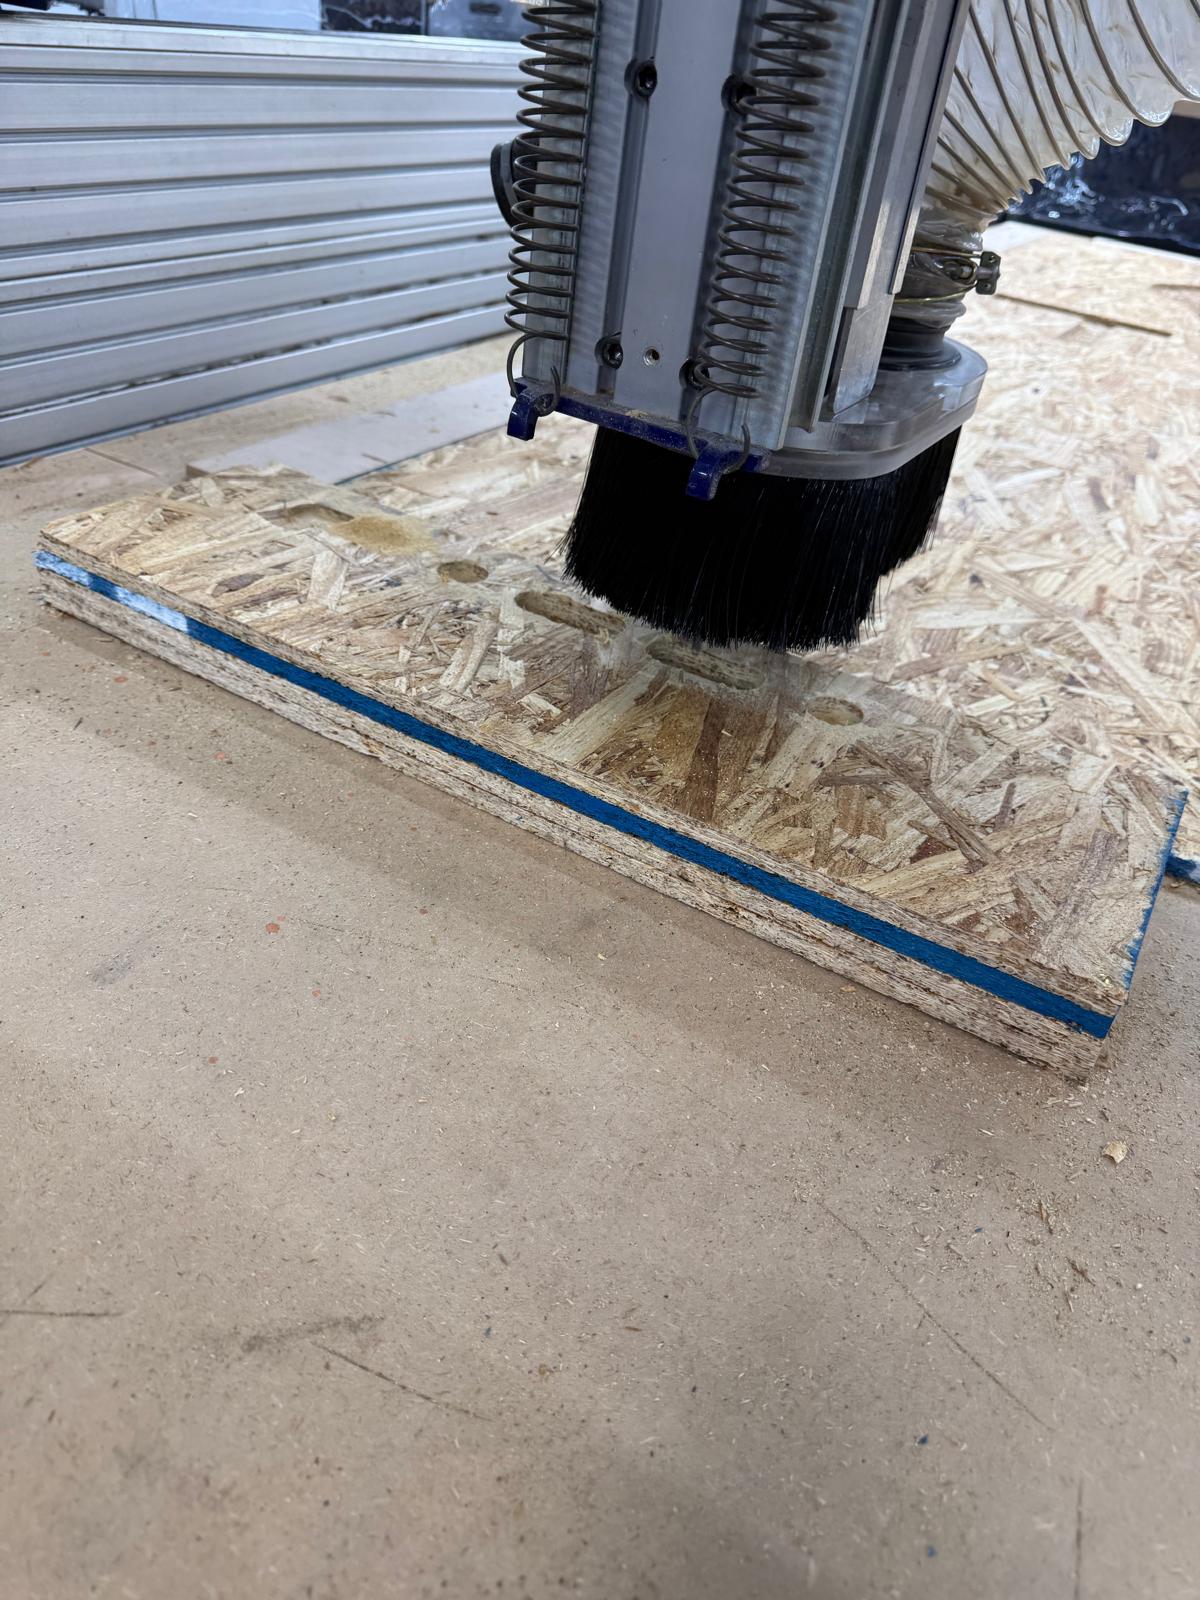
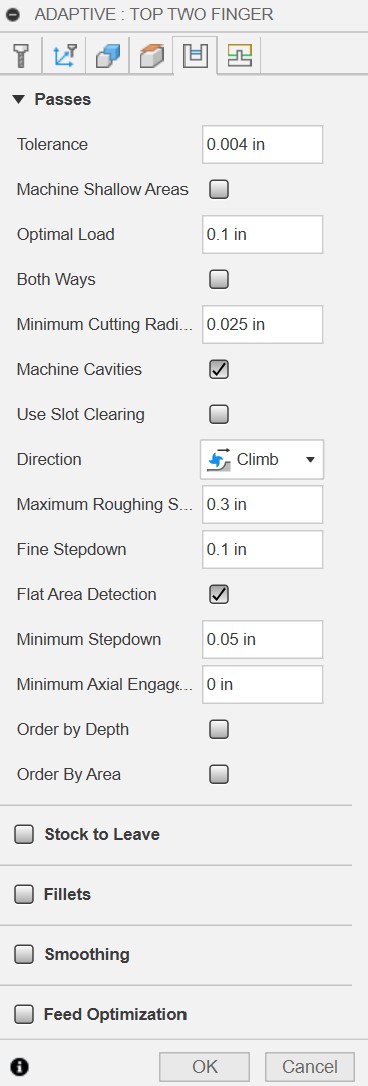
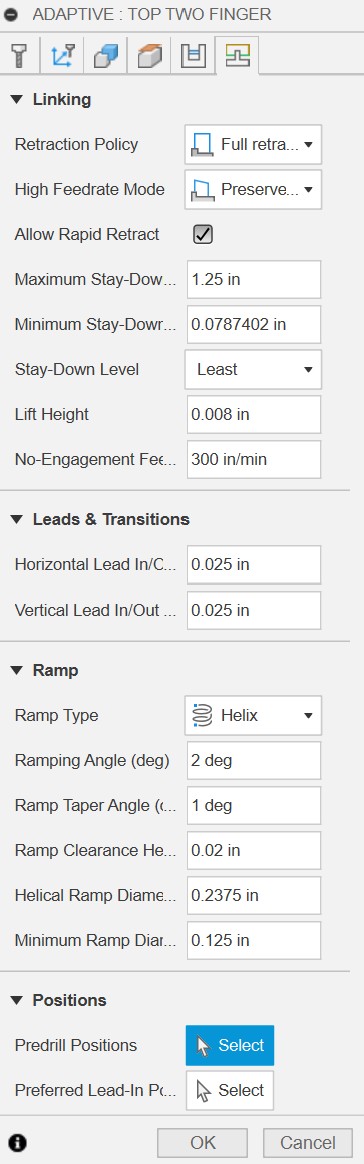
I did not expect it to take this long the first two mono finger pockets took around 16 minutes, not 2 minutes… the person who was supposed to show up after me no-showed, so I kept cutting. Two hours later, the machine had only completed the bottom row of pockets. Dan offered to help me speed things up. These are the new settings he recommended;
I also changed the decreased the tolerance to make it go faster as well.
Faster Settings (Top Two Finger Pocket)
Already a significant improvement in time, about half the duration, with a much larger pocket compared to the Mono-Pocket. I had a lot of hope that I would finish. The rest of the board took 1 hour and 40 minutes… and while it was much faster and with a lower tolerance, it wasn’t as nice. The next person came to use the machine, but I was in a spot
where the rest could be done by hand, except for the back electronics panel. That will have to be done another time.
A lot faster progress
Post-Processing
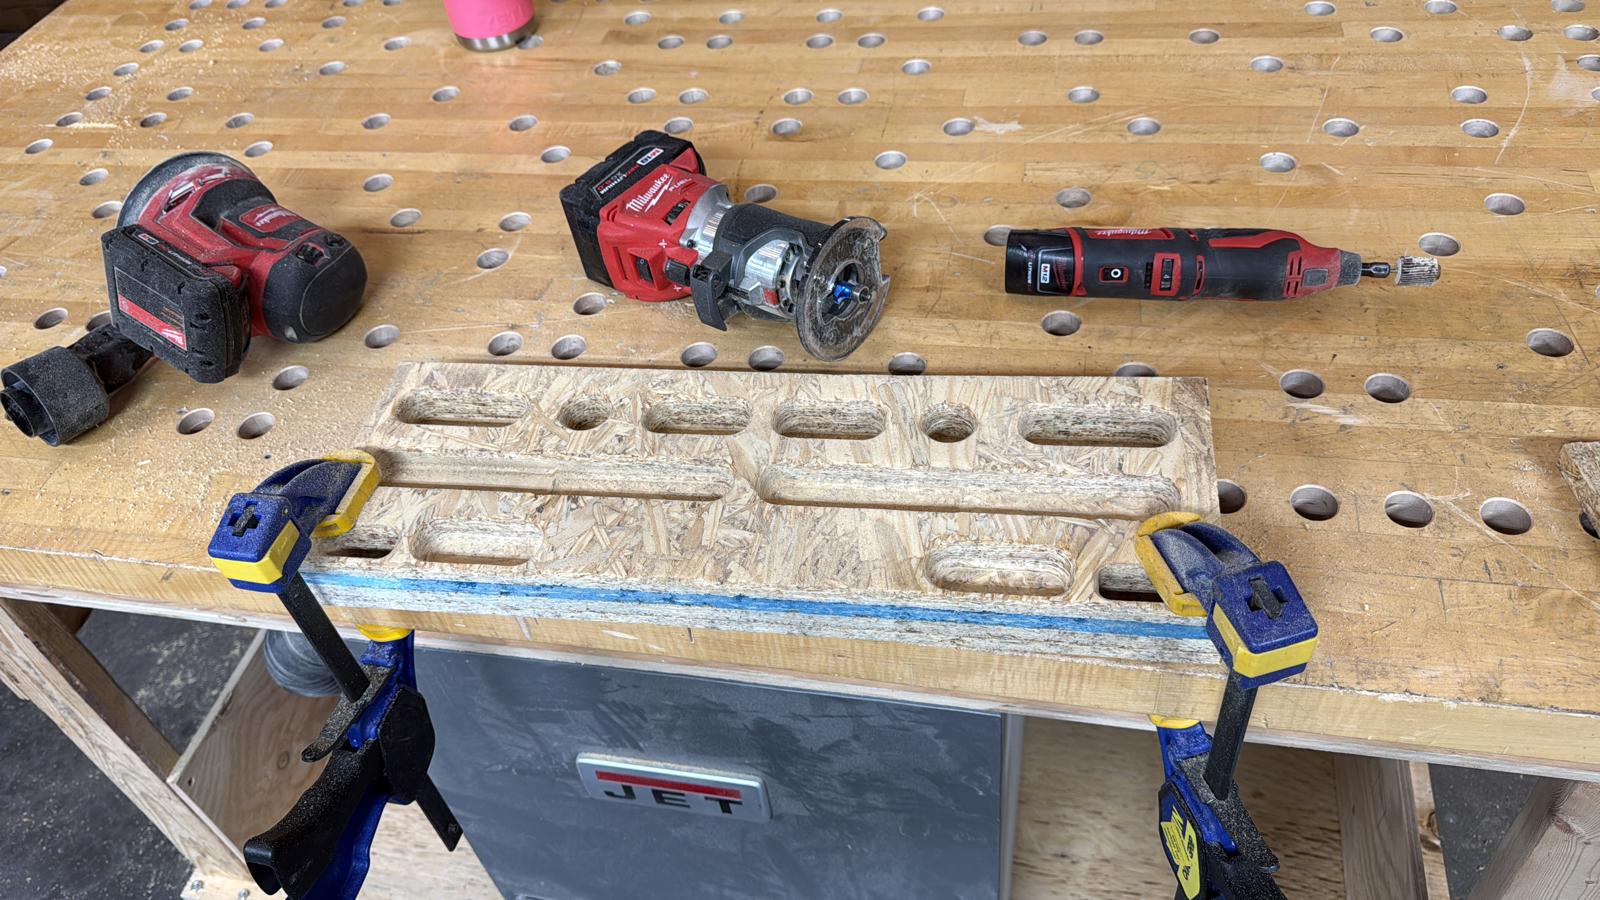
Sanded all the surfaces of the board, used a router to add fillets to the top, and a Dremel to clean up the pockets that didn’t come out as nicely. (Pictures are a bit out of order,
I forgot to take pictures at first)
Router Fillet
Dremel, Palm Sander, Router
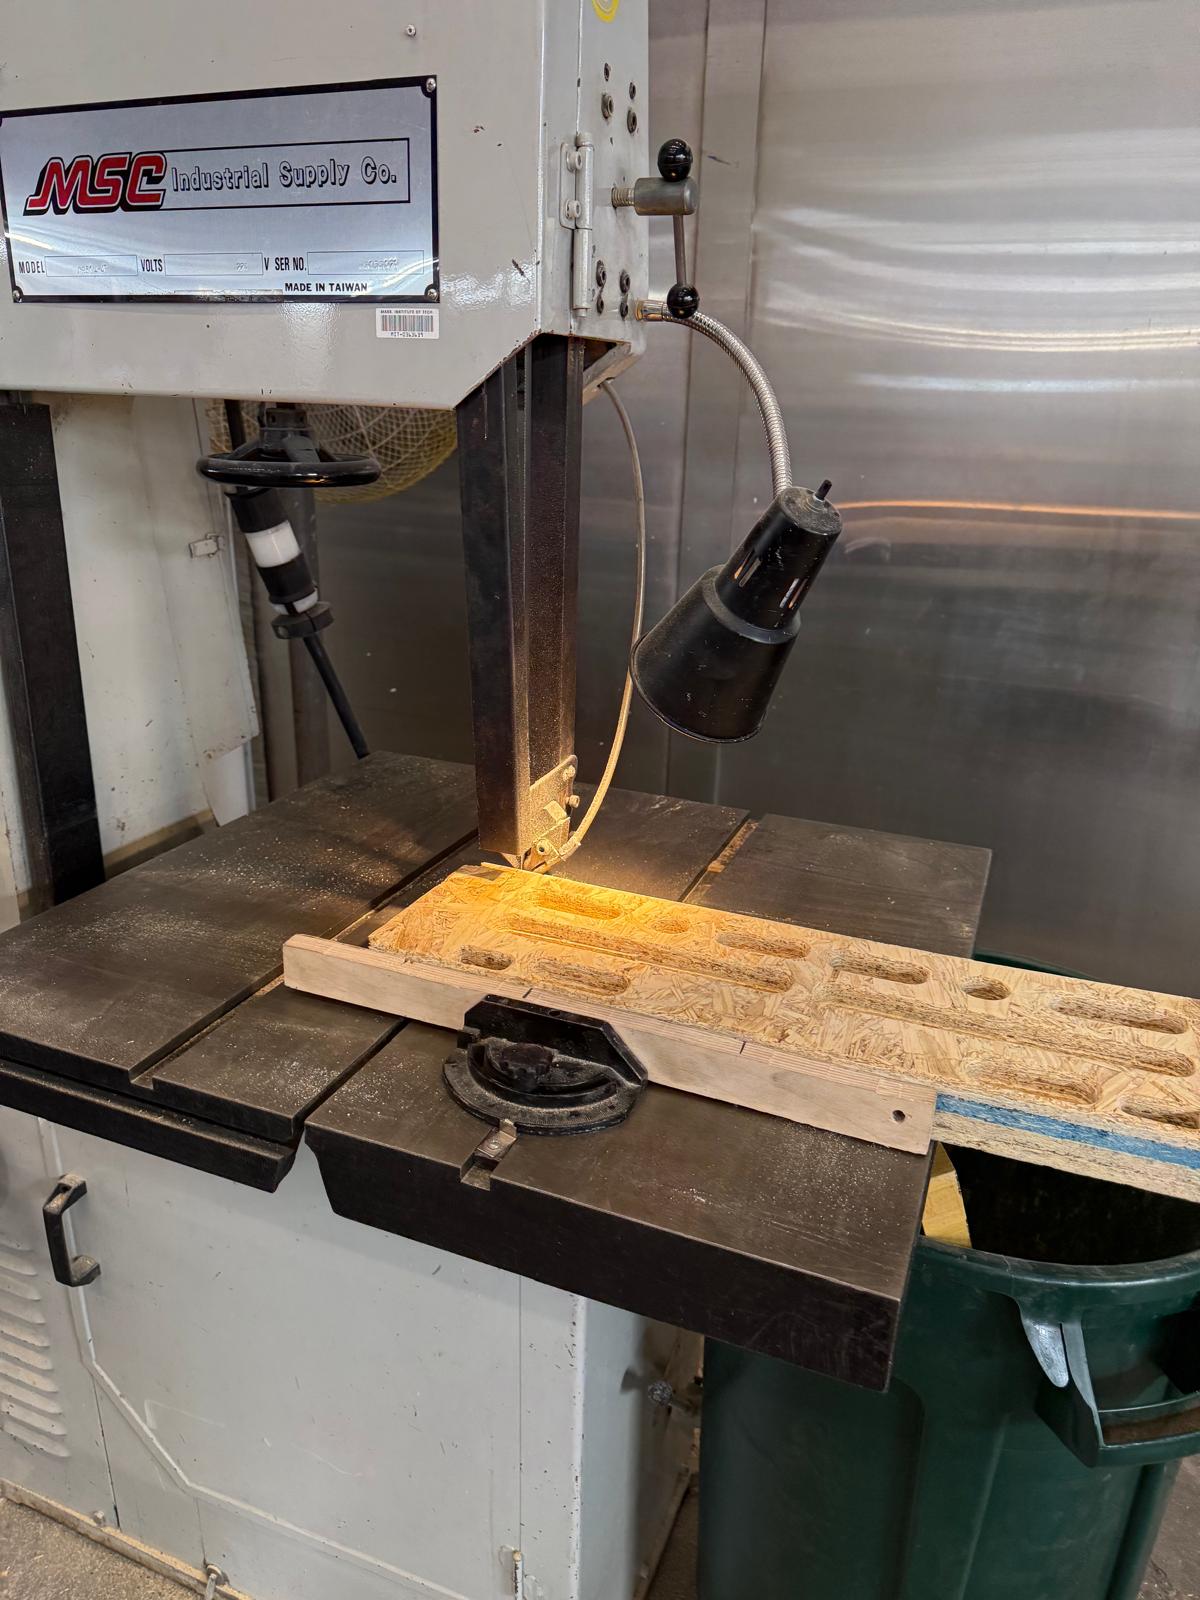
To cut the sides of the board, I initially planned to use a bandsaw, but someone suggested using a table saw instead.
However, I cut one side of the board at a slight angle.
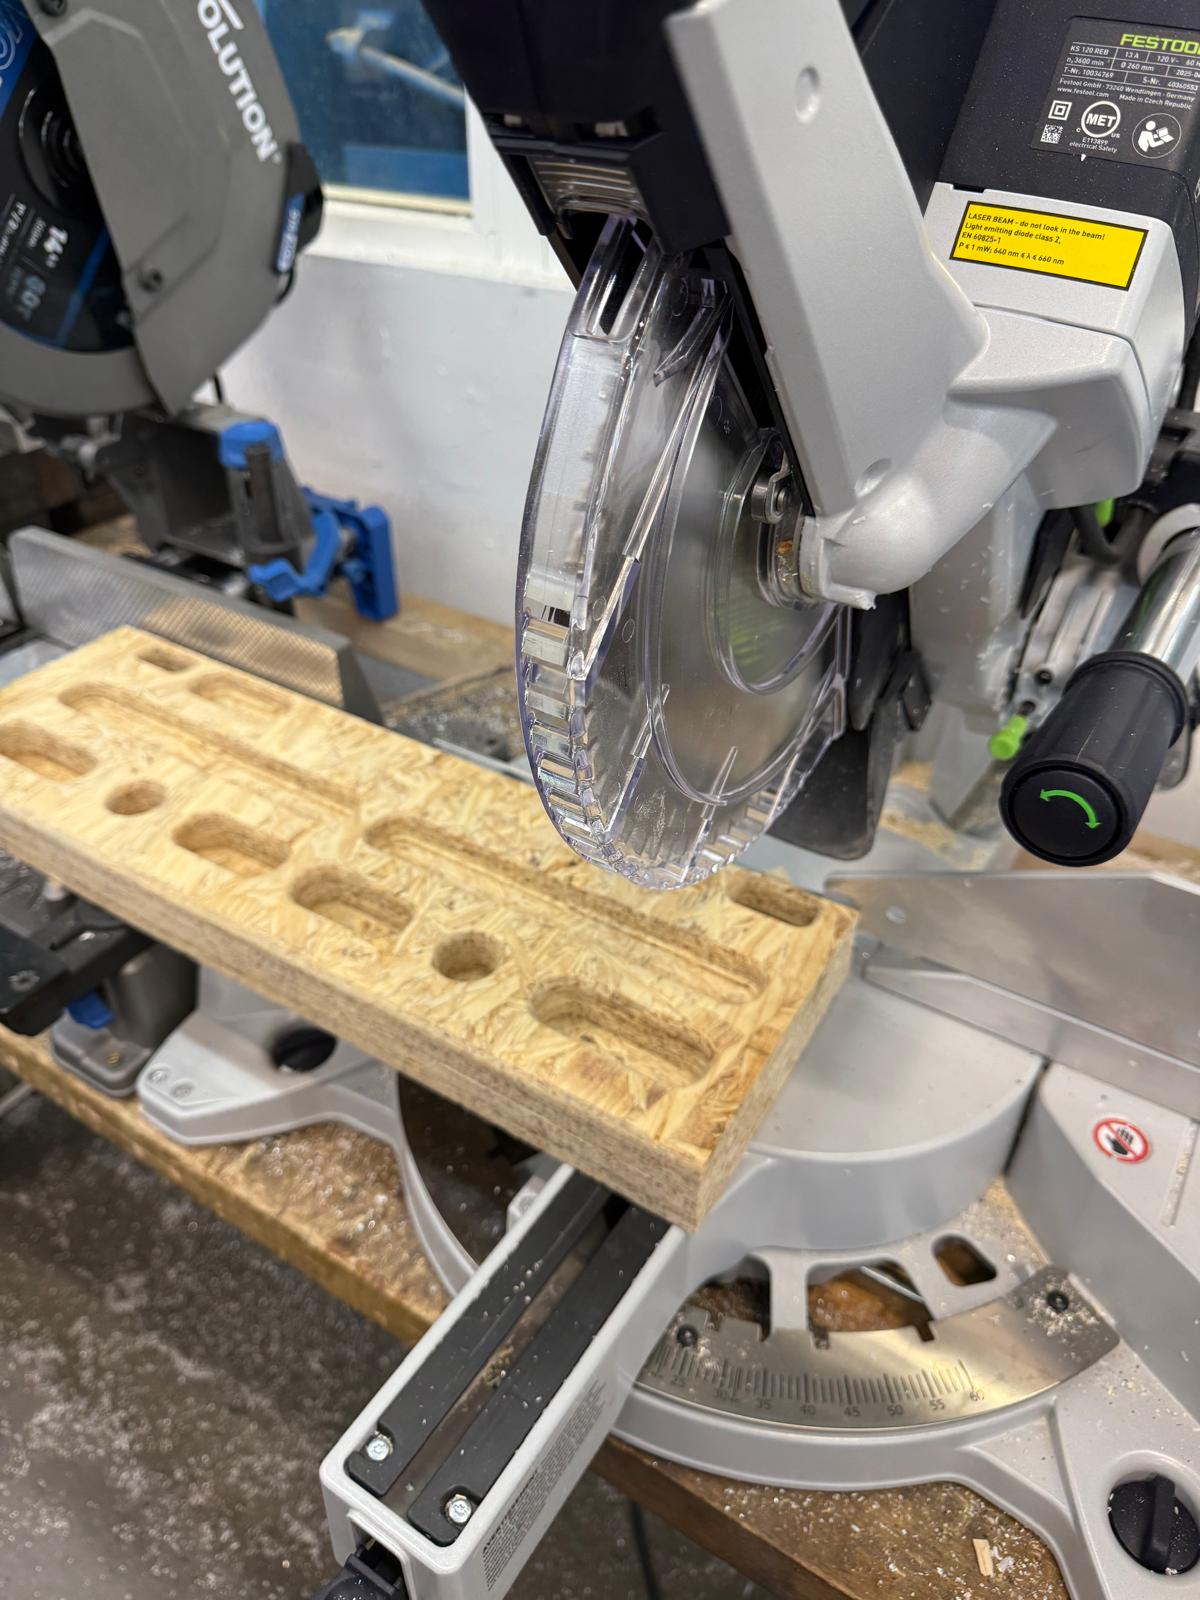
Kristof walked over and recommended using a chop saw instead.
BandSaw
Chop Saw
Drill Press
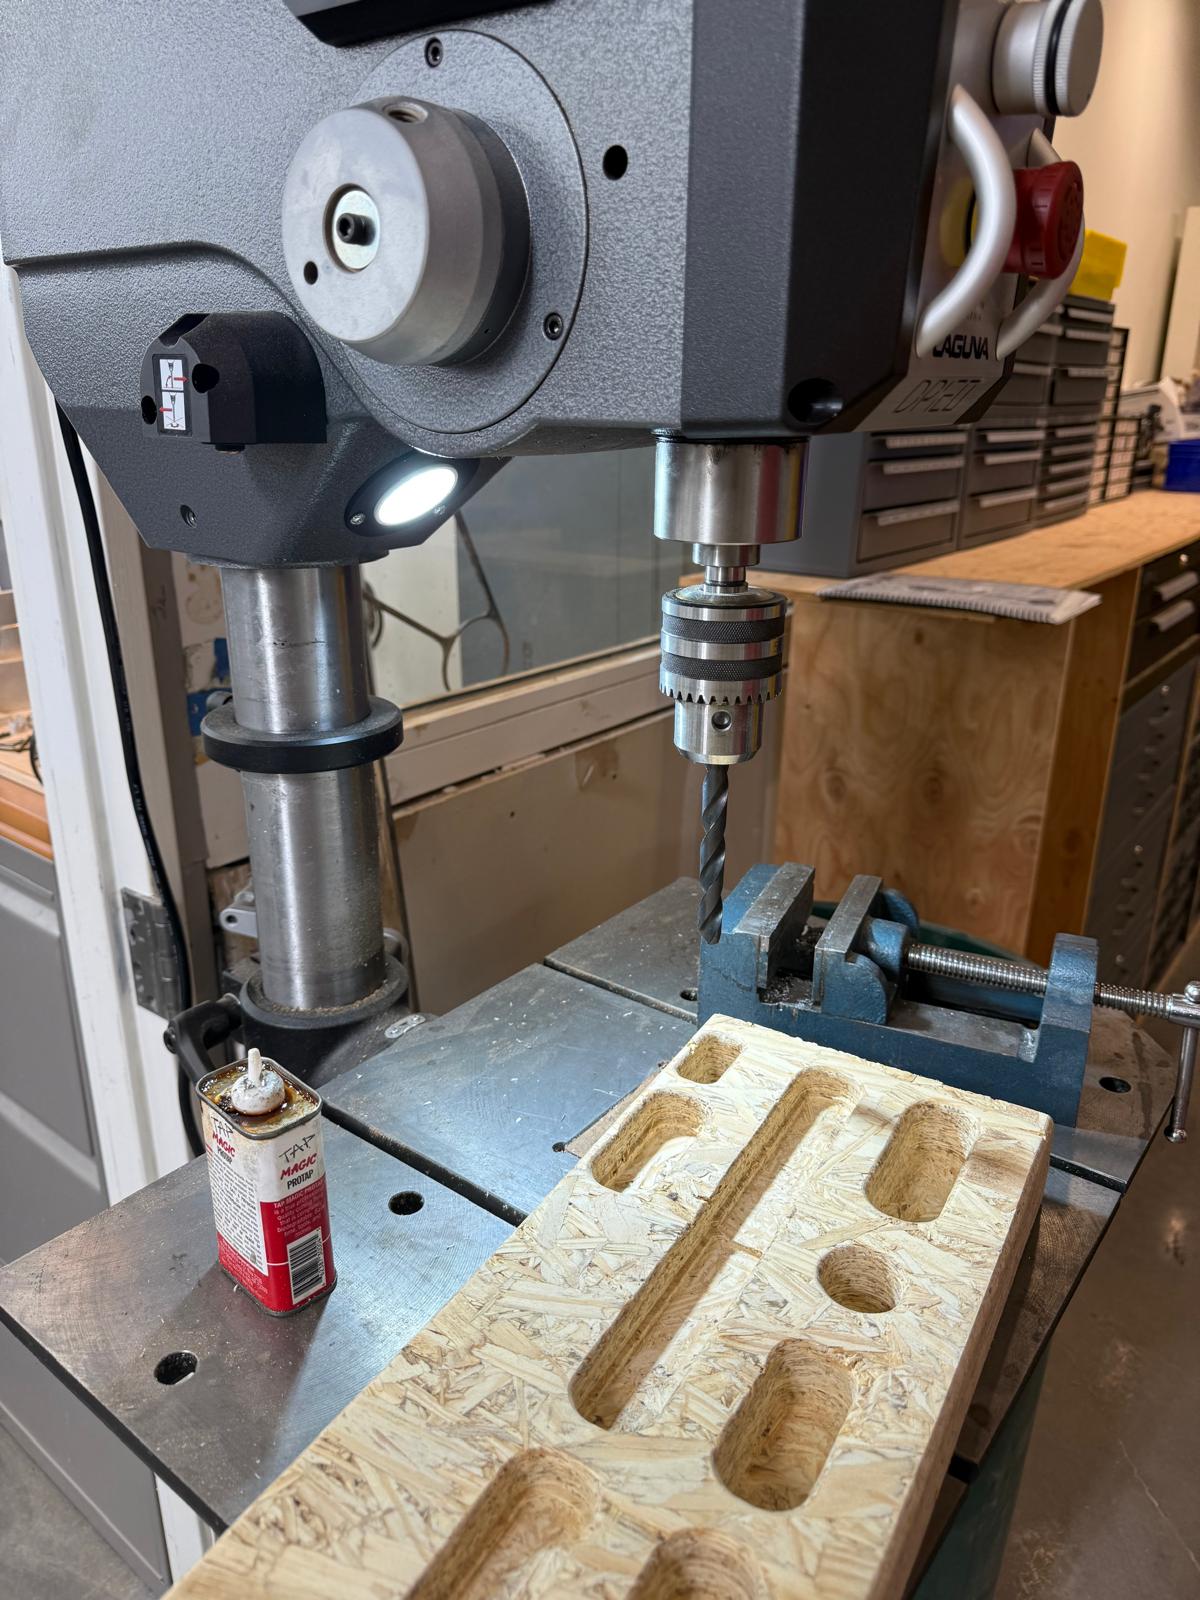
The holes weren't fully cleared, so Kristof suggested using the drill press to create the hole and the router to open it up.
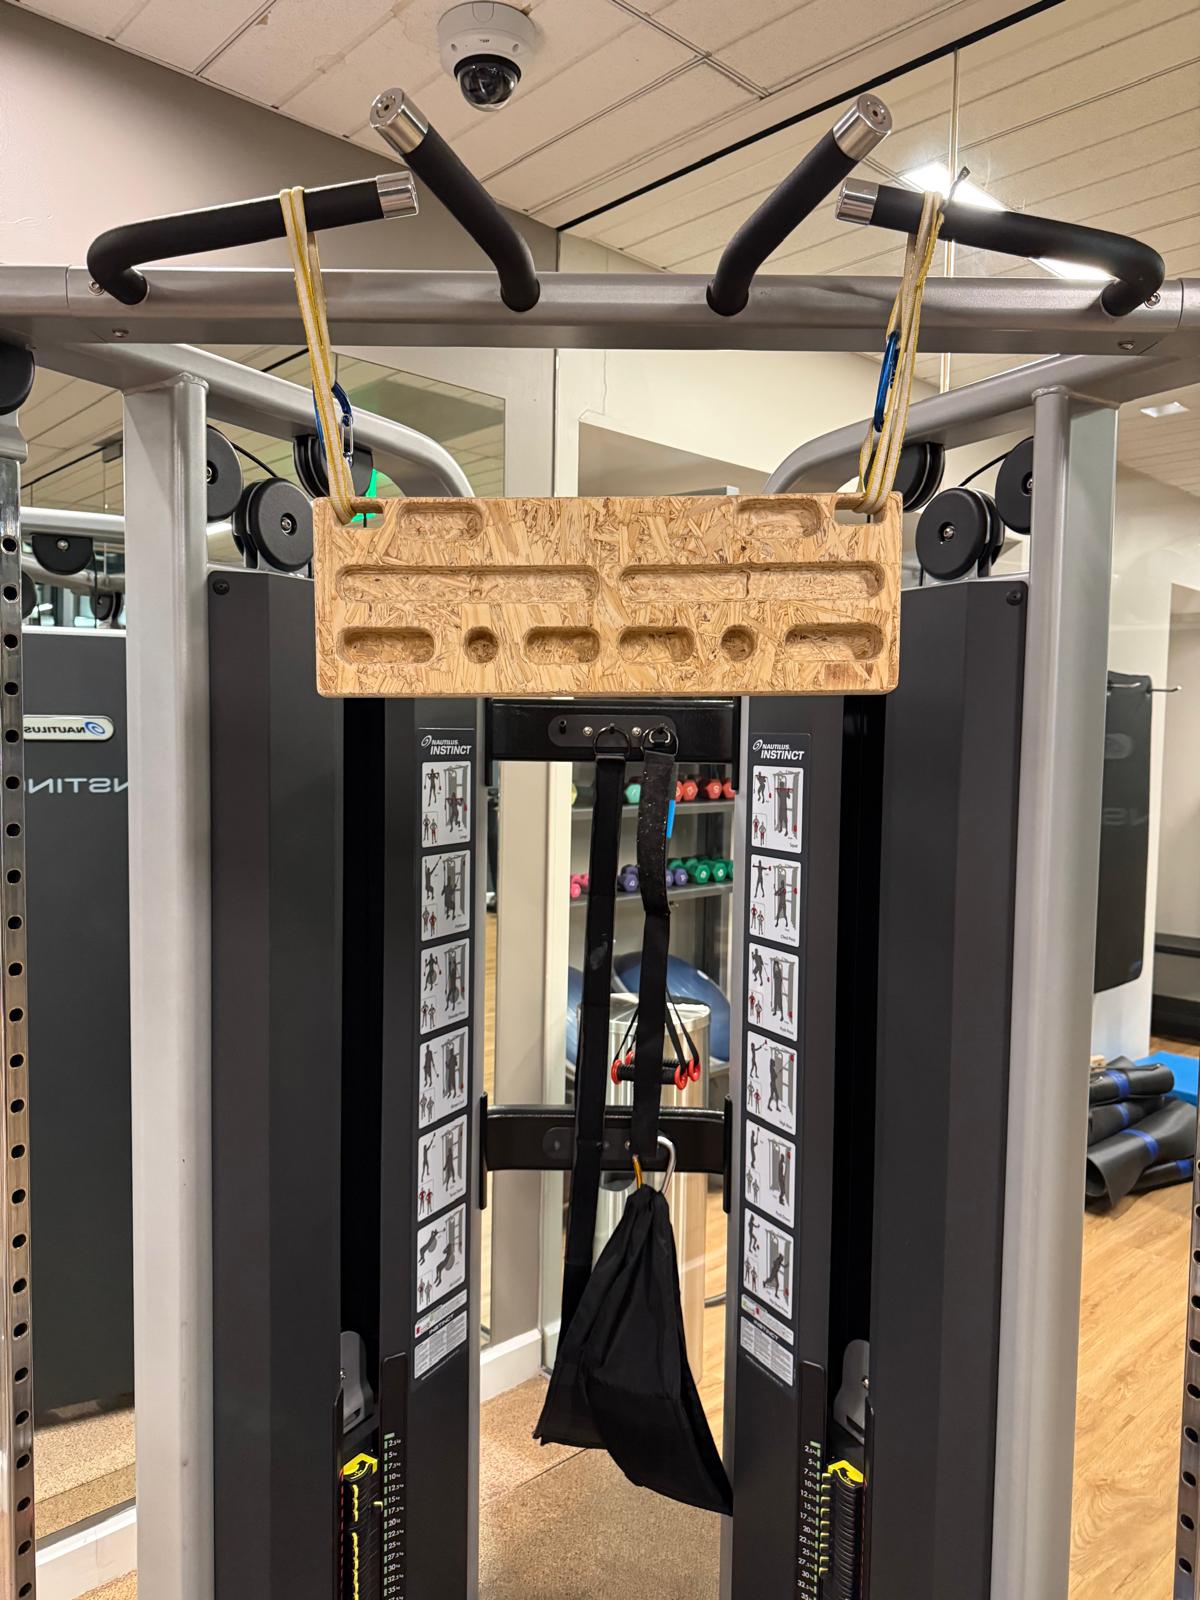
Complete!

A few hours later, it was complete! You can see it is a few milimeters too high on the board.
Test
I took the board to the gym and tested it out!
Gym Set-up
Testing the Hangboard!

Files
