HTMAA 25
home about me final projectThis week’s assignment was to design and make something big (meter scale) on a CNC mill.
For our group assignment, we cut a test piece on the mill to measure the expected runout. The relevant result to me was that a 2-inch tab was a pretty good press fit with a 2-inch slot. Full documentation can be found here.
My room is a pretty weird shape, so there aren’t actually that many places to put new big things. As such, one location I zeroed in on pretty quickly as fillable was this awkward little gap between the foot of my bed and the wall:
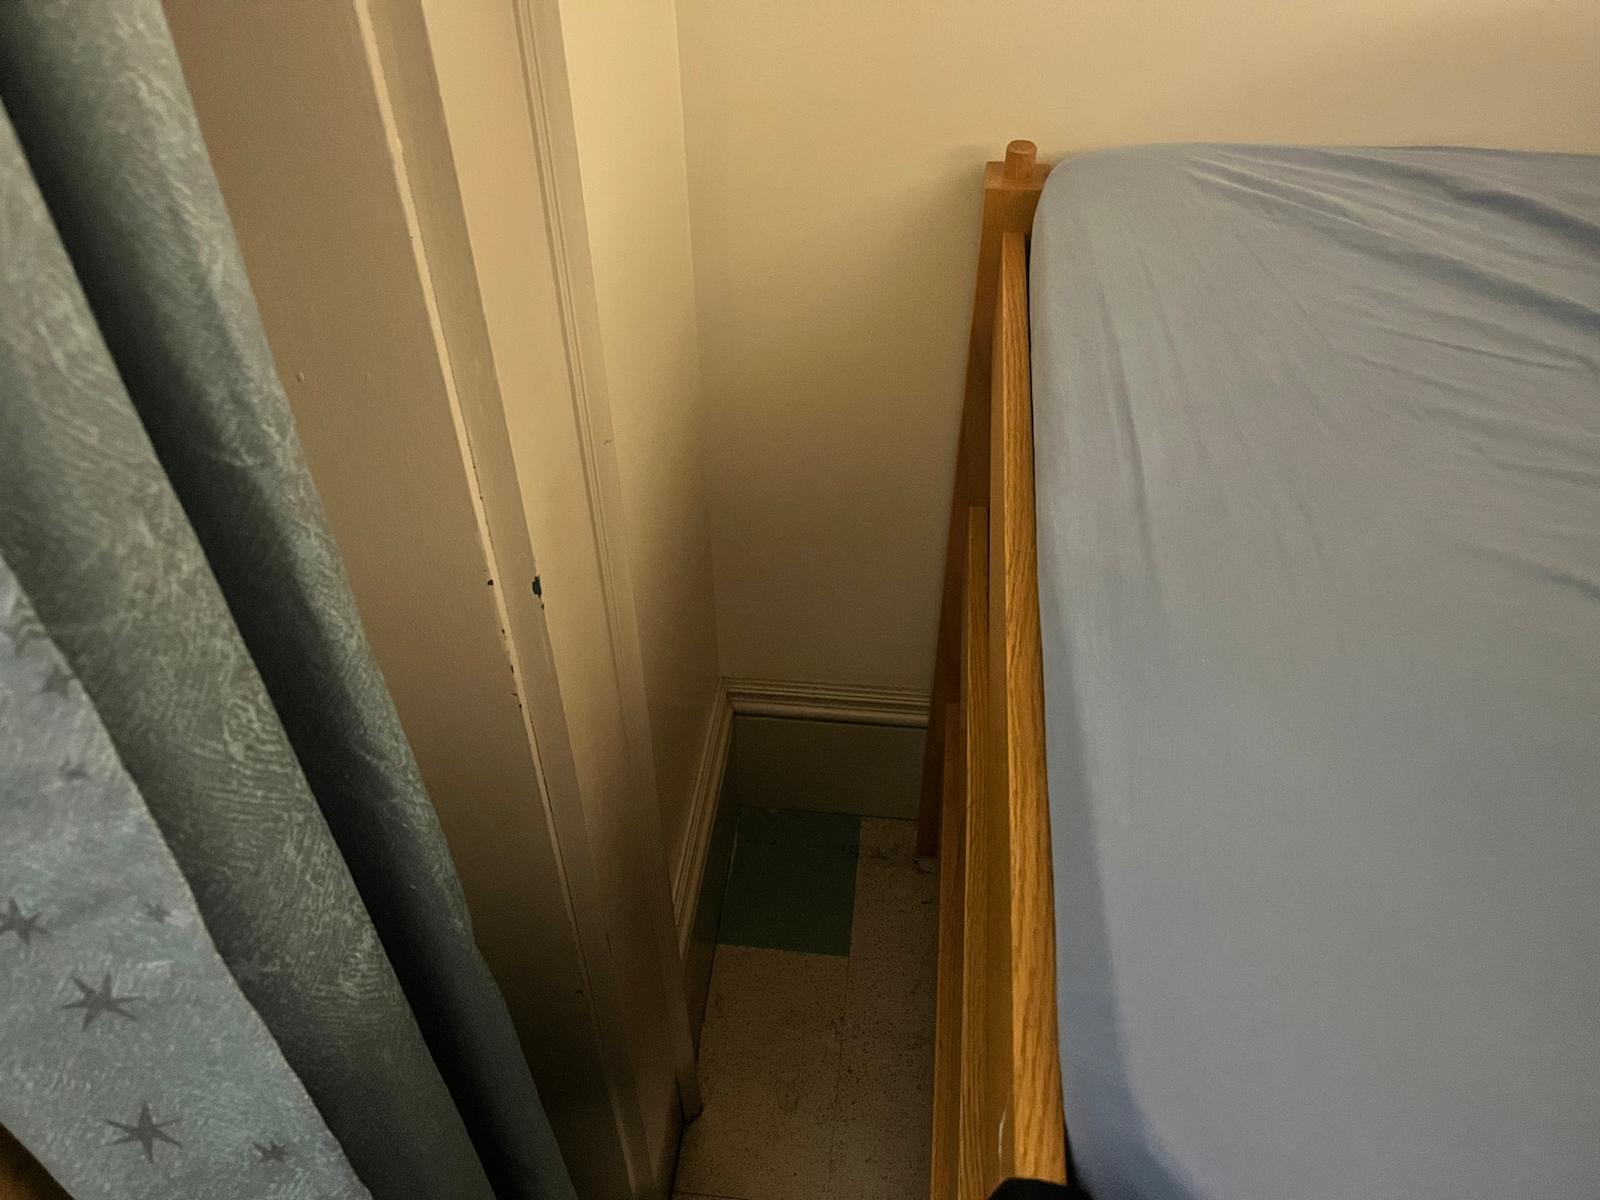
Seems like a pretty convenient place for a shelf, no?
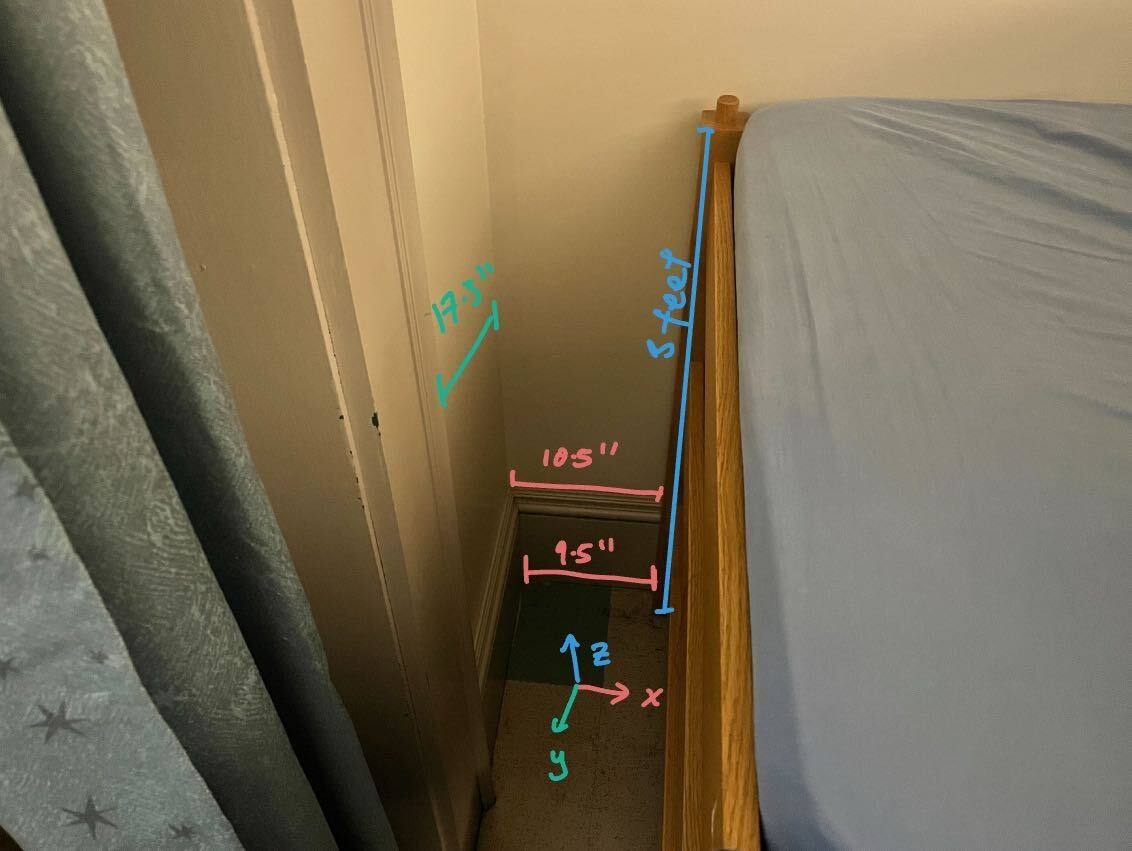
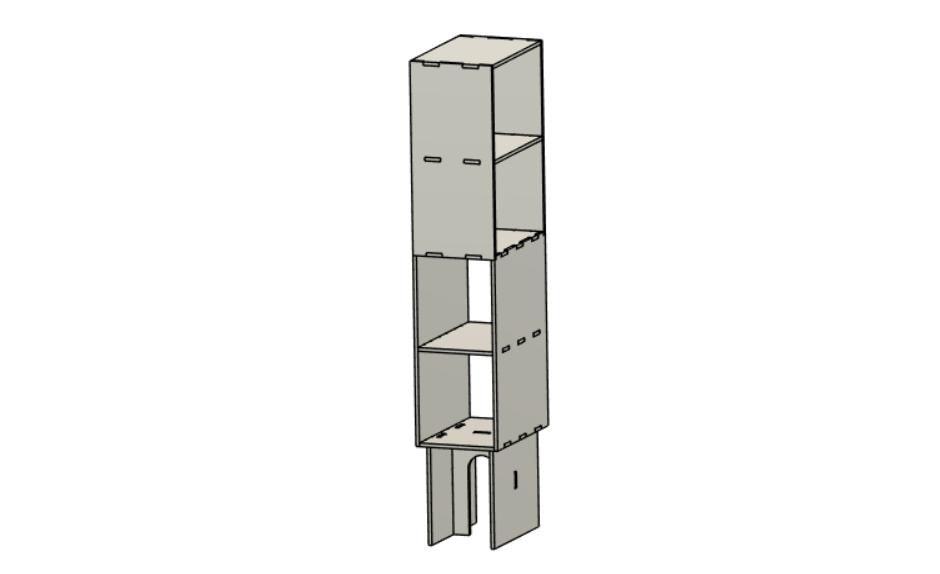
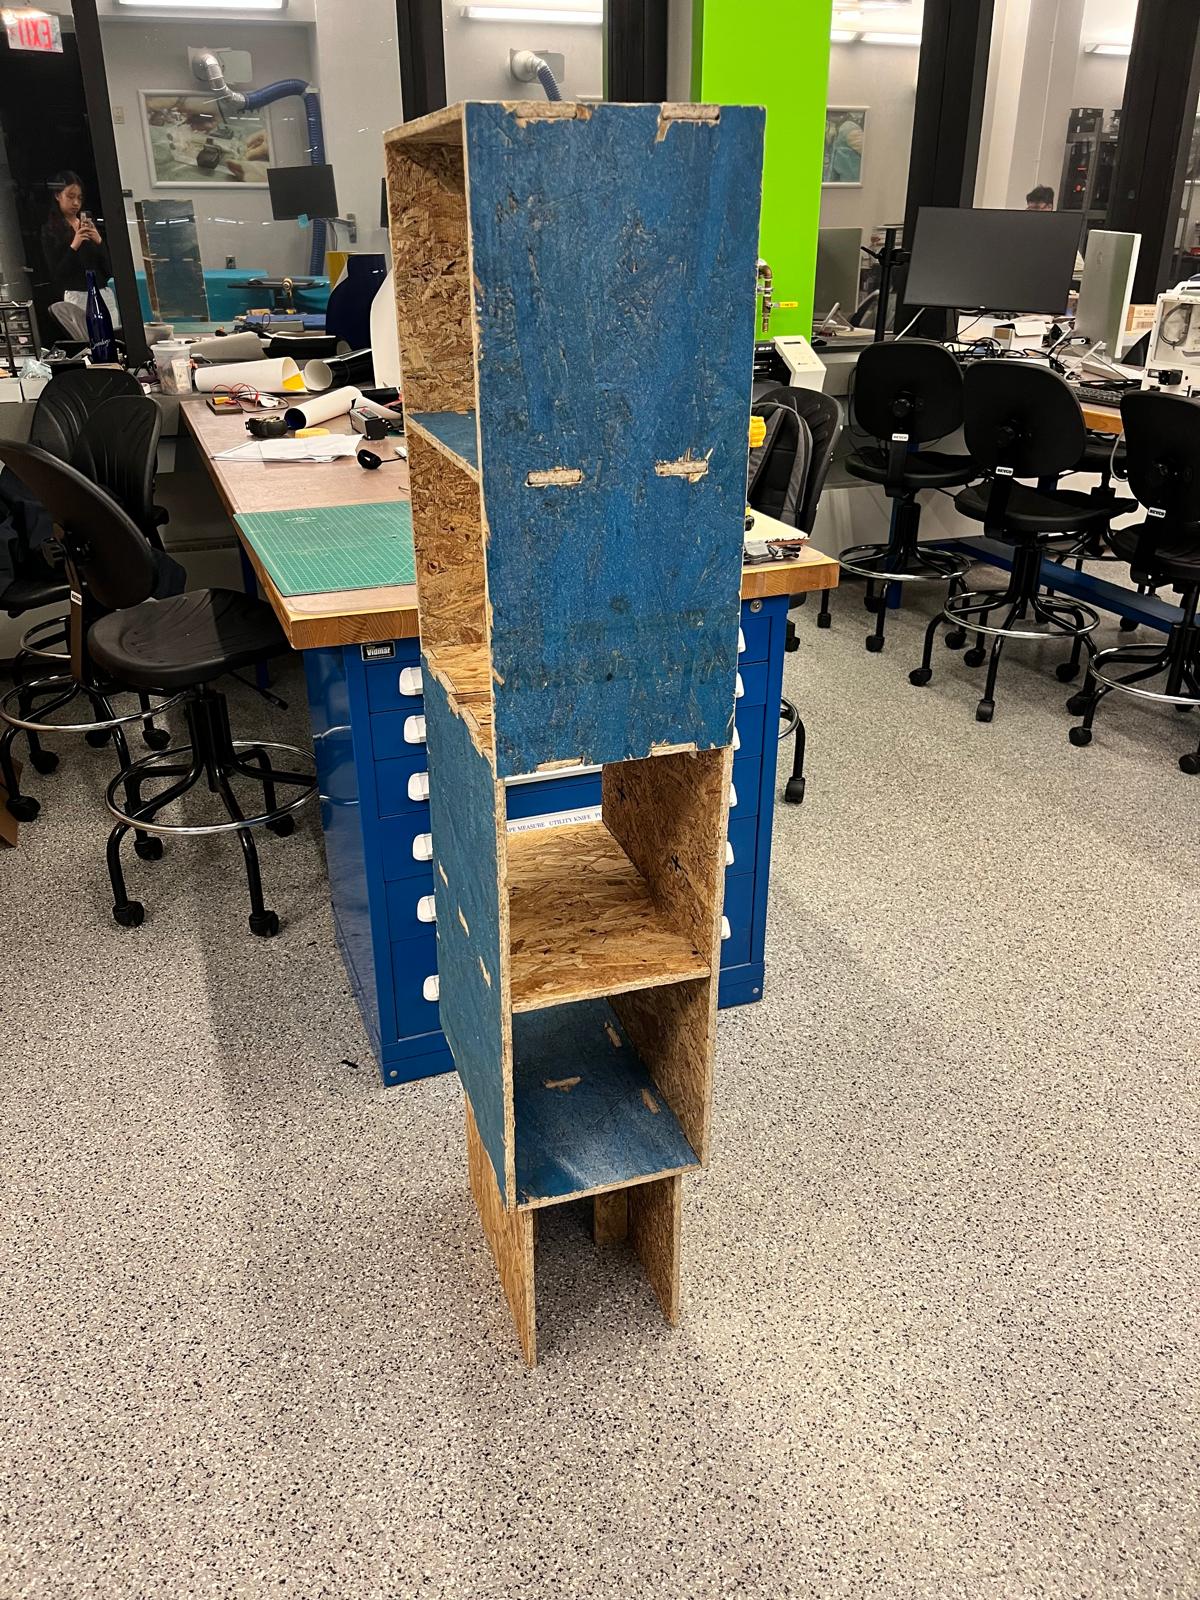
My first step was to get an idea of the shape of my shelf: I wanted shelves I could access from the direction of my bed — since that’s the direction the space of my room opens up the most in and the direction I would most likely be trying to access the shelf in — but a shelf that was open only in the y-direction (see below) would be blocked by my bed further down. Putting it directly on stilts seemed unstable and a waste of space, and I briefly entertained a corner shelf (with walls in the -x and -y direction) but it didn’t seem like it would support the OSB enough. As such, I decided on a twisting design, where the bottom half of the shelf would open towards the side of the bed, and the upper half towards the bed.
My second priority was to understand my space constraints. With a measuring tape, I got the following dimensions for the space:
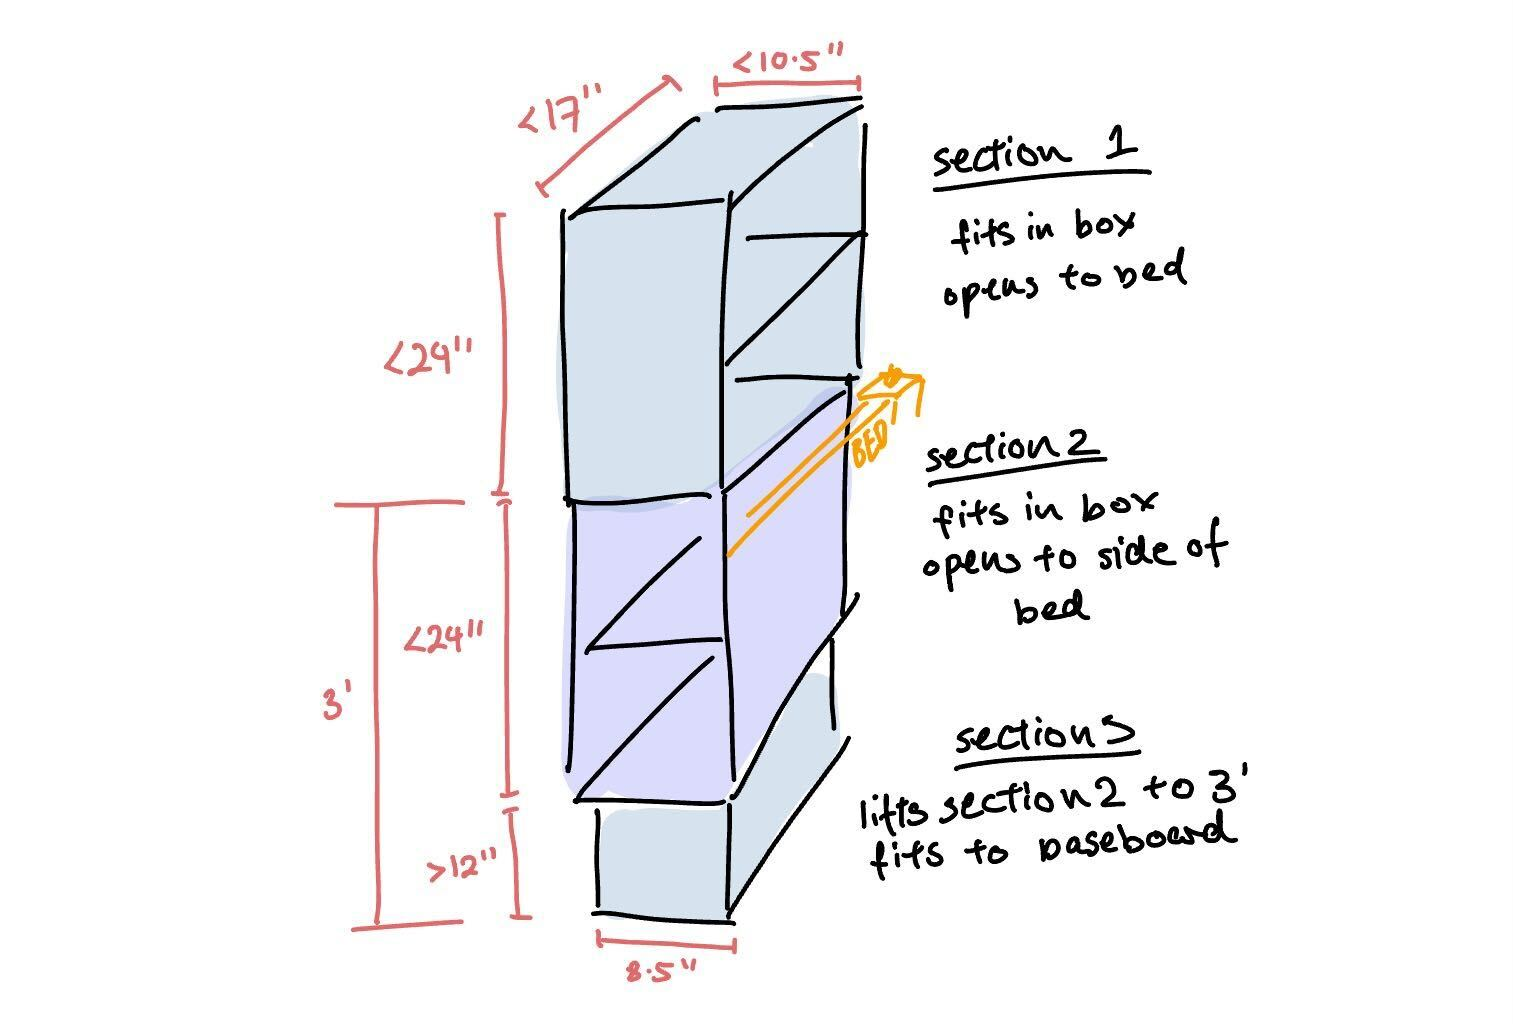
However, I also wanted to be able to store my shelf in boxes over the summer, which meant I had the additional constraint of box size. The storage company I used last summer defaults to a box size of 24”x17”x15”, but given the thickness of cardboard + some margin, my realistic bounds for modular parts of my shelf were 23.5”x16.5”x14.5”. With the above two measurement constraints, I created the following revised sketch:
I did my CAD on Fusion 360. My first step was to extrude my bounding boxes for each section of my shelf:
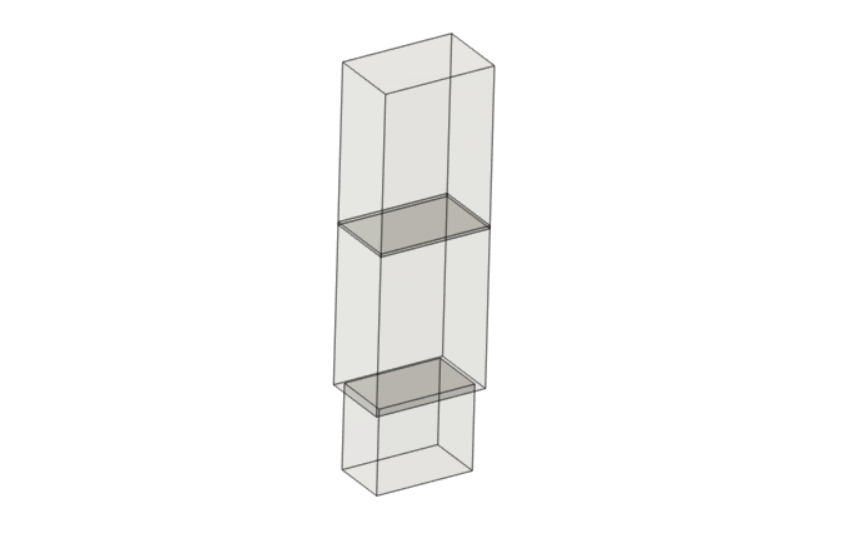
Since the boundary between each section is a board of OSB, they bounding boxes overlap by the parameter t = 7/16 in, the thickness of a board. Since my entire shelf is comprised entirely of rectangular shapes, I constructed rest of the shelf by extruding sketches made on the surface of my bounding boxes.
Each tab is 2” wide and spaced to aesthetic preference. Each piece is also symmetric when flipped or rotated, which just meant that I didn’t have to keep track of the orientation of things I was cutting.
I used the Nifty Dogbones Fusion add-in to help me put in dogbone fillets on all my joints.
Fusion file linked here for download.
I did my CAM with Fusion, largely following Anthony’s tutorial. The steps and settings I used are as follows:
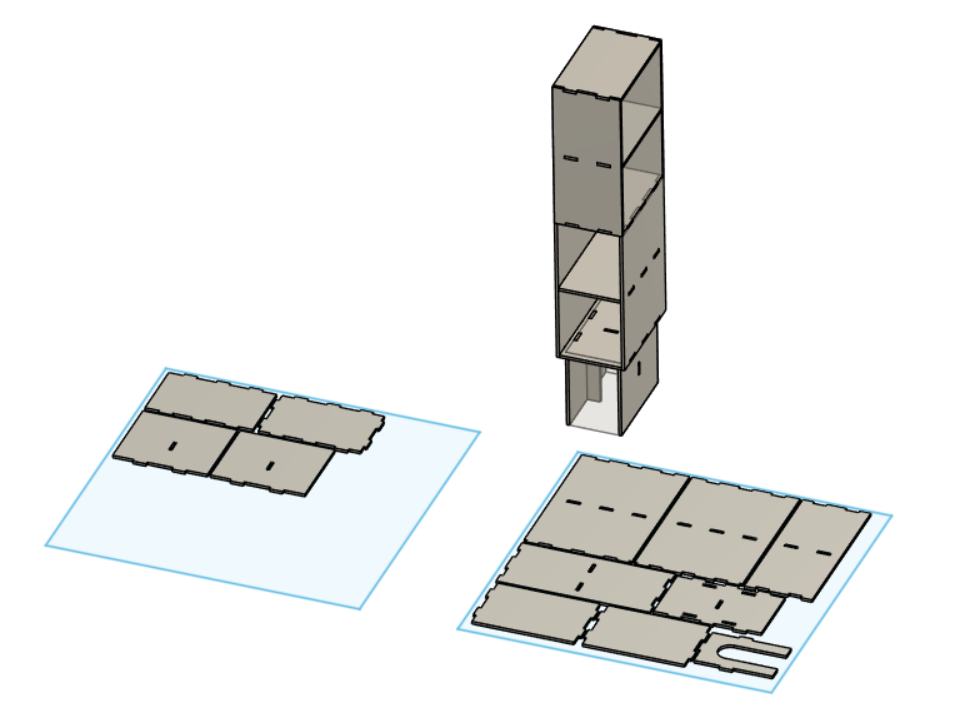
I converted all solid bodies in my shelf (apart from bounding boxes) into separate components. Using the arrange tool, I arranged these on two separate 40” by 40” sketch areas, representing our OSB stock.
I then created two manufacturing setups, each of which would be the setup for one 40” by 40” arrangement. The stock was set to be 40” by 40” by 7/16” in dimension, and the origin was set at a corner of the stock with x- and y-axes pointing along edges, and the z-axis pointed up.
I created two 2D contours for each manufacturing setup, changing the following settings from defaults:
| Setting | Value |
|---|---|
| Tool | 3/8” Flat Endmill |
| Spindle Speed | 12000 rpm |
| Feedrate | 120 ft/min |
| Tab Width & Height | 0.375” |
| Bottom Height | -0.03” (to ensure cutting all the way through the stock) |
Second contour:
| Setting | Value |
|---|---|
| Tool | 1/4” Flat Endmill |
| Spindle Speed | 12000 rpm |
| Feedrate | 100 ft/min |
| Rest Machining | Enabled, from 0.375” tool diameter |
| Bottom Height | -0.03” (to ensure cutting all the way through the stock) |
| Multiple passes | Enabled, at 0.25” stepdown |
Tabs were added liberally to ensure parts were well connected.
We then did post-processing for the Avid CNC to create the gcode file.
Fusion file linked here for download.
We fixed the OSB board to the sacrificial stock on the machine bed with a nail gun and started off with the 3/8” endmill. Unfortunately for me, this very first job went wrong:
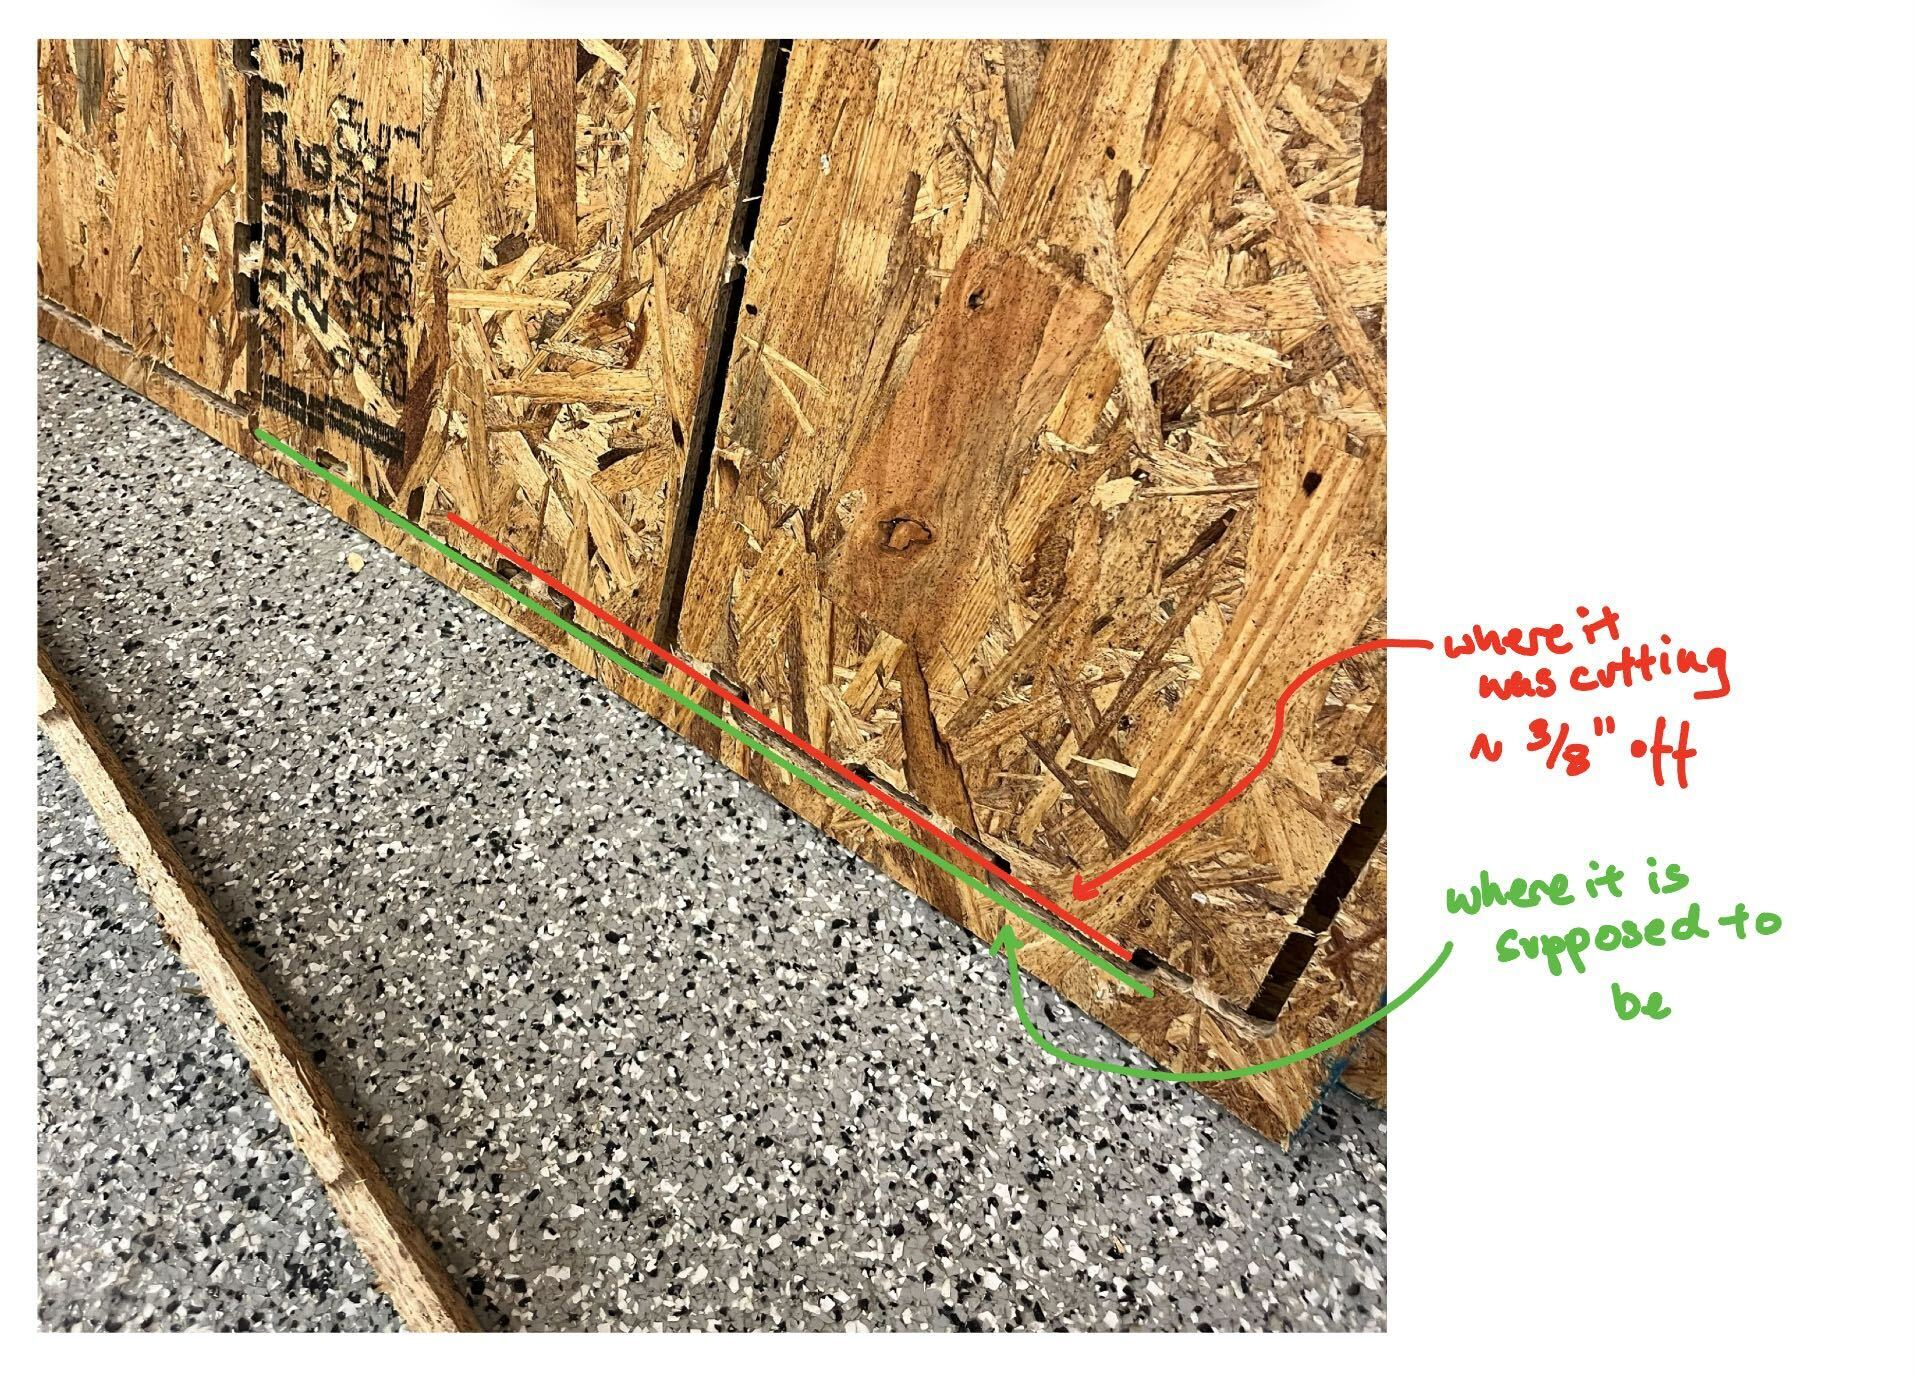
The machine had stuttered a little over halfway through the job, which threw off all the subsequent gcode offsets. This affected the size of one shelf piece, but also, crucially, the position of most of my internal slots, which would have made my shelf impossible to assemble correctly.
Anthony hypothesized this was because the dust collector clamp had momentarily caught on the side of the mill, and so we adjusted the clamp and re-ran the job on a fresh sheet of OSB. This time it ran perfectly, and so we moved on to mill my second set of pieces.

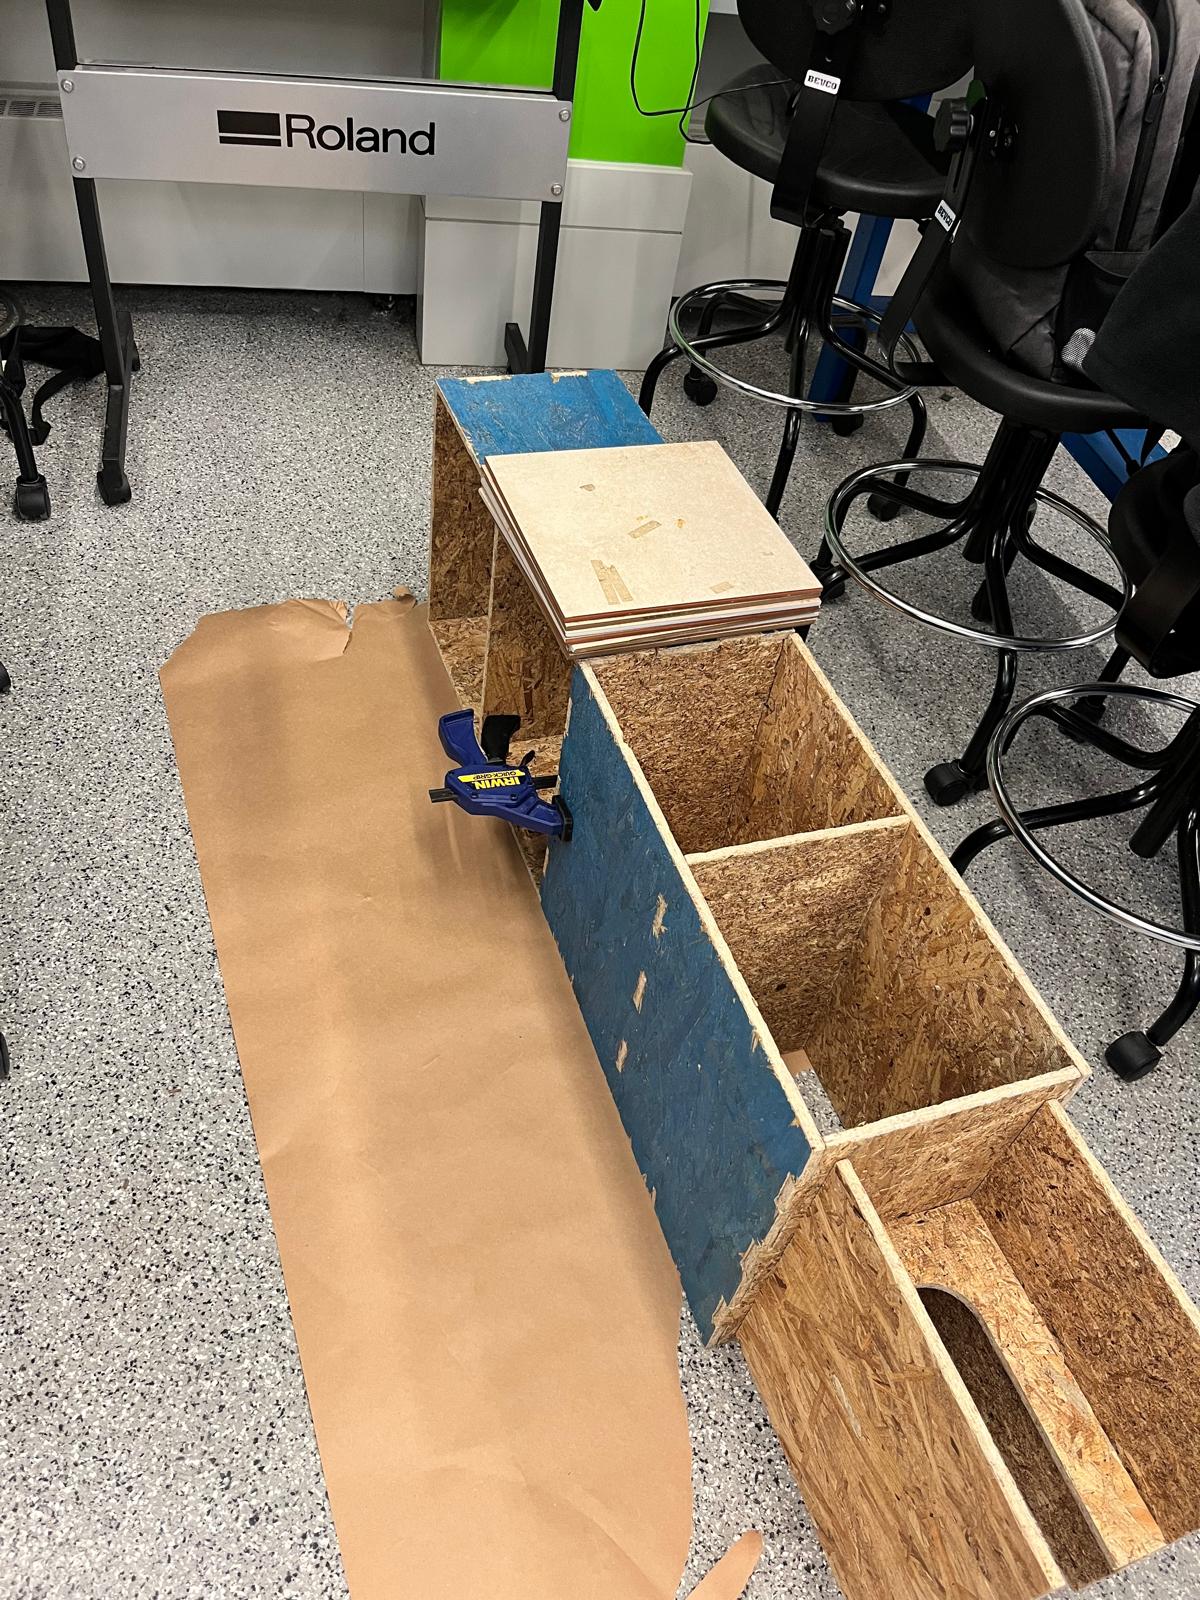
Tabs were cut with an oscillating saw, and the pieces were pried off the mill with a crowbar.
Tabs that weren’t very cleanly cut by the oscillating saw were cut off with the bandsaw. Smaller blemishes from tabs were removed with a rasp, whilst all edges in general were filed down smooth with a hand file. This addressed most of the flakiness of the OSB around the milled edges.
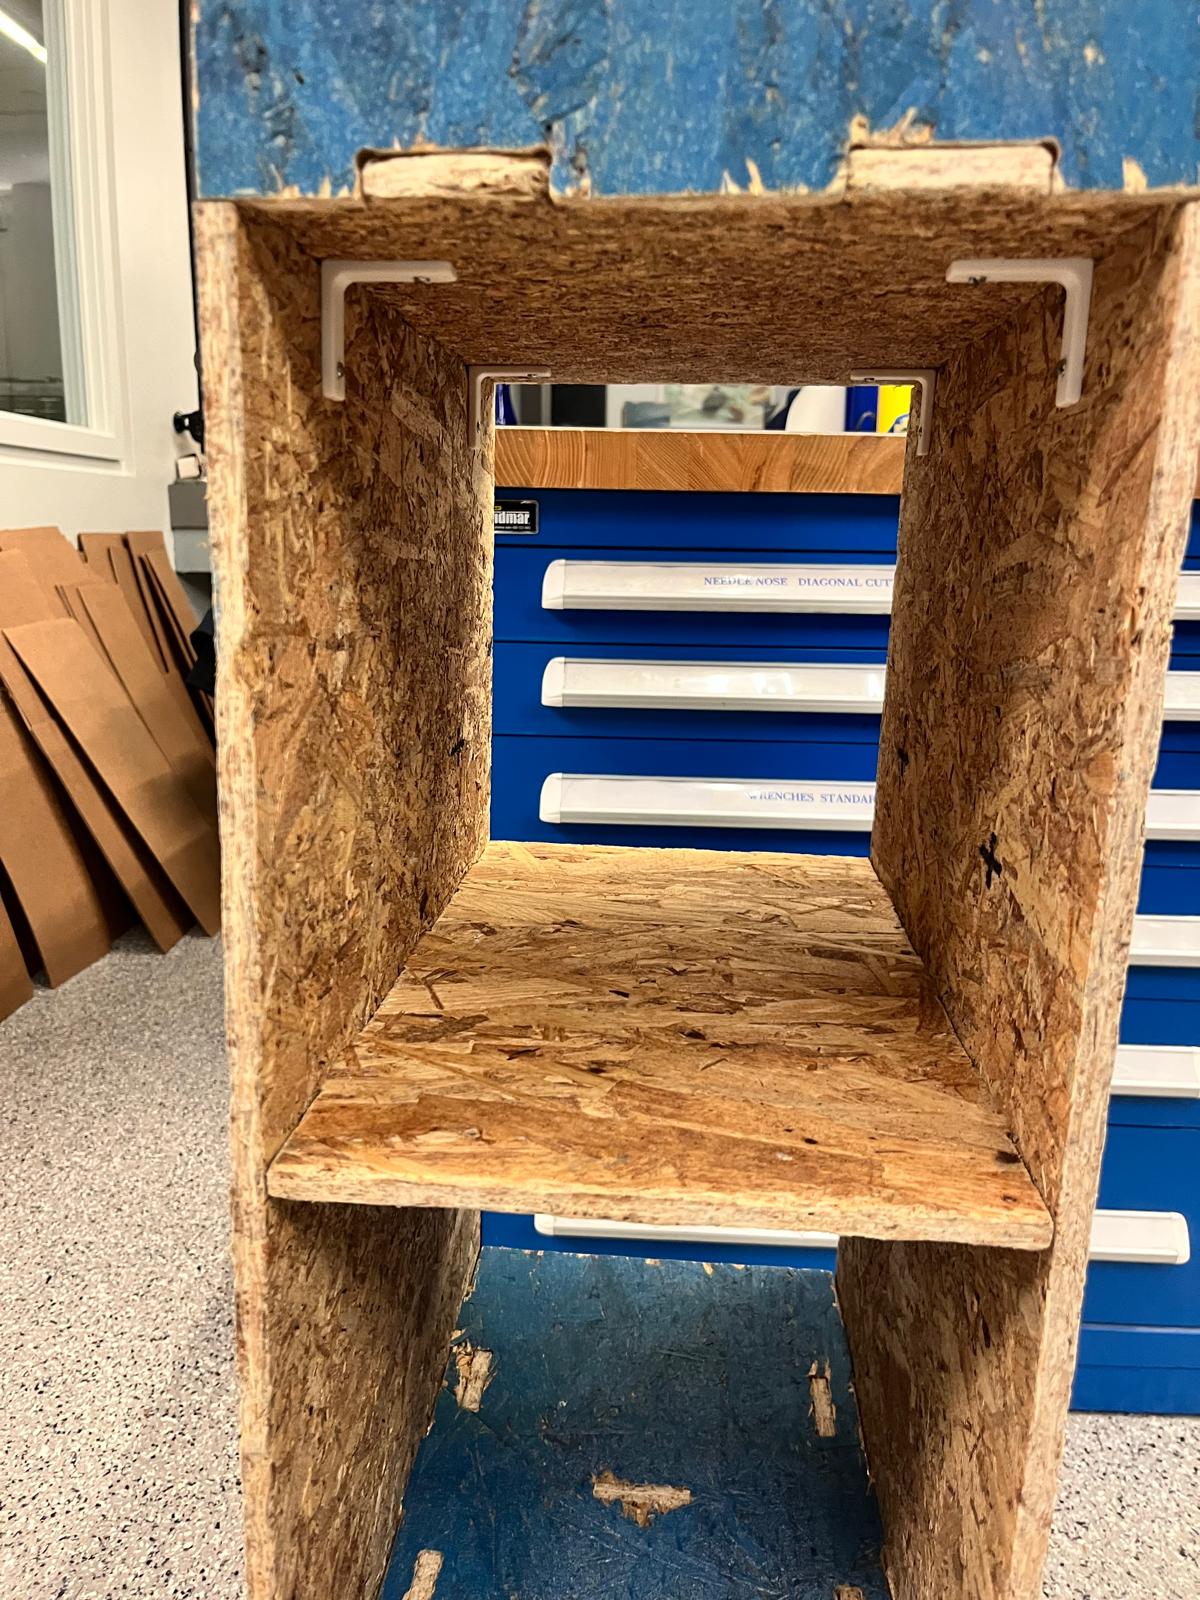
I assembled the shelf in sections: First the top section, then the middle, then the “legs”. Most of these pieces required a significant amount of force (and some hammering) to press-fit together - moreso than I’d expected from the test piece done for the group assignment, but I suppose that was to be expected with more tabs/slots fitting together at once and some natural variation in stock.
The middle piece in particular (around which the shelf rotates) I found especially hard to force into place, especially because it’s positioning in the shelf made it hard to take a hammer to, and so I made the mistake of filing down the edges of the joints more in an attempt to make my life easier.
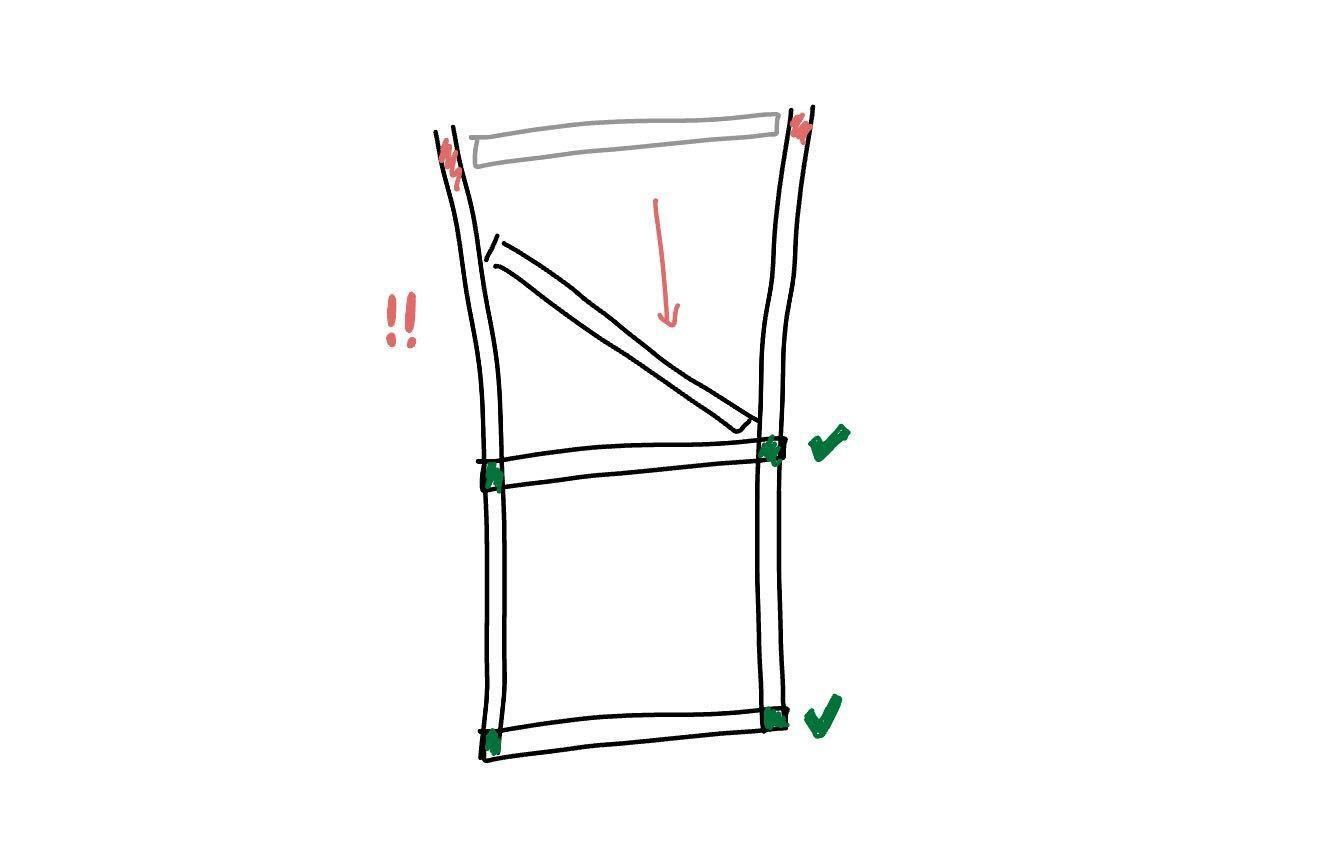
Wrong move - I was a little too aggressive, and this destroyed the press fit. Worse than that, this piece actually required a stronger press fit than some of the other pieces, because of how the side pieces of both the top and bottom shelf were slightly bowed* — as such, my entire shelf was trying to pop itself apart — especially at that piece.
Perhaps it would be able to hold itself together when wedged between my bed and the wall, but I still wanted my shelf to have some better structural stability. As such, I had to turn to other methods of assembly.
I still to be able to separate my shelf at that piece, so I could only use a permanent attachment method on one set of joints. I chose to use wood glue to attach the piece to the upper shelf, which had the sketchier joint. I applied wood glue to this joint, lay the shelf on its side so I could weight it down, and left it overnight.
To secure that piece to the bottom half-shelf, I decided to use L-brackets that would allow me to screw and unscrew the pieces together. I found an L-bracket model on Thingiverse and printed 6 of them at 85% scale (so that the brackets were ~1/2 inch wide) on the Prusa Core One printers. Here is my printed model. The entire print took about an hour.
I then selected a set of screws of unidentified size to pair with the brackets. To put them in, I marked holes where I wanted the L-bracket to sit and drilled about halfway through the OSB with a fine drill bit (smaller than the ID of the screw). This made it easier to drive the screws in to secure the actual L-brackets.
While I probably could have gotten away with one or two L-brackets on the weaker side of the joint, I went for 4 for piece of mind and symmetry.
During the transportation to class, the shelf broke again along the troublesome middle piece. The screws holding the plastic brackets pulled out (despite my belief in their redudancy), and the wood glue failed too - neither method held up to the extended lifting and jostling needed to move the shelf. Notably, all my actual press-fits survived.
I re-screwed the brackets with some unidentified screws I found with a slightly larger (thread diameter - inner diameter), in hopes that this would be more secure. I did not bother to replace the wood glue, since by this time I was home and the shelf was pretty well-constrained by the wall.
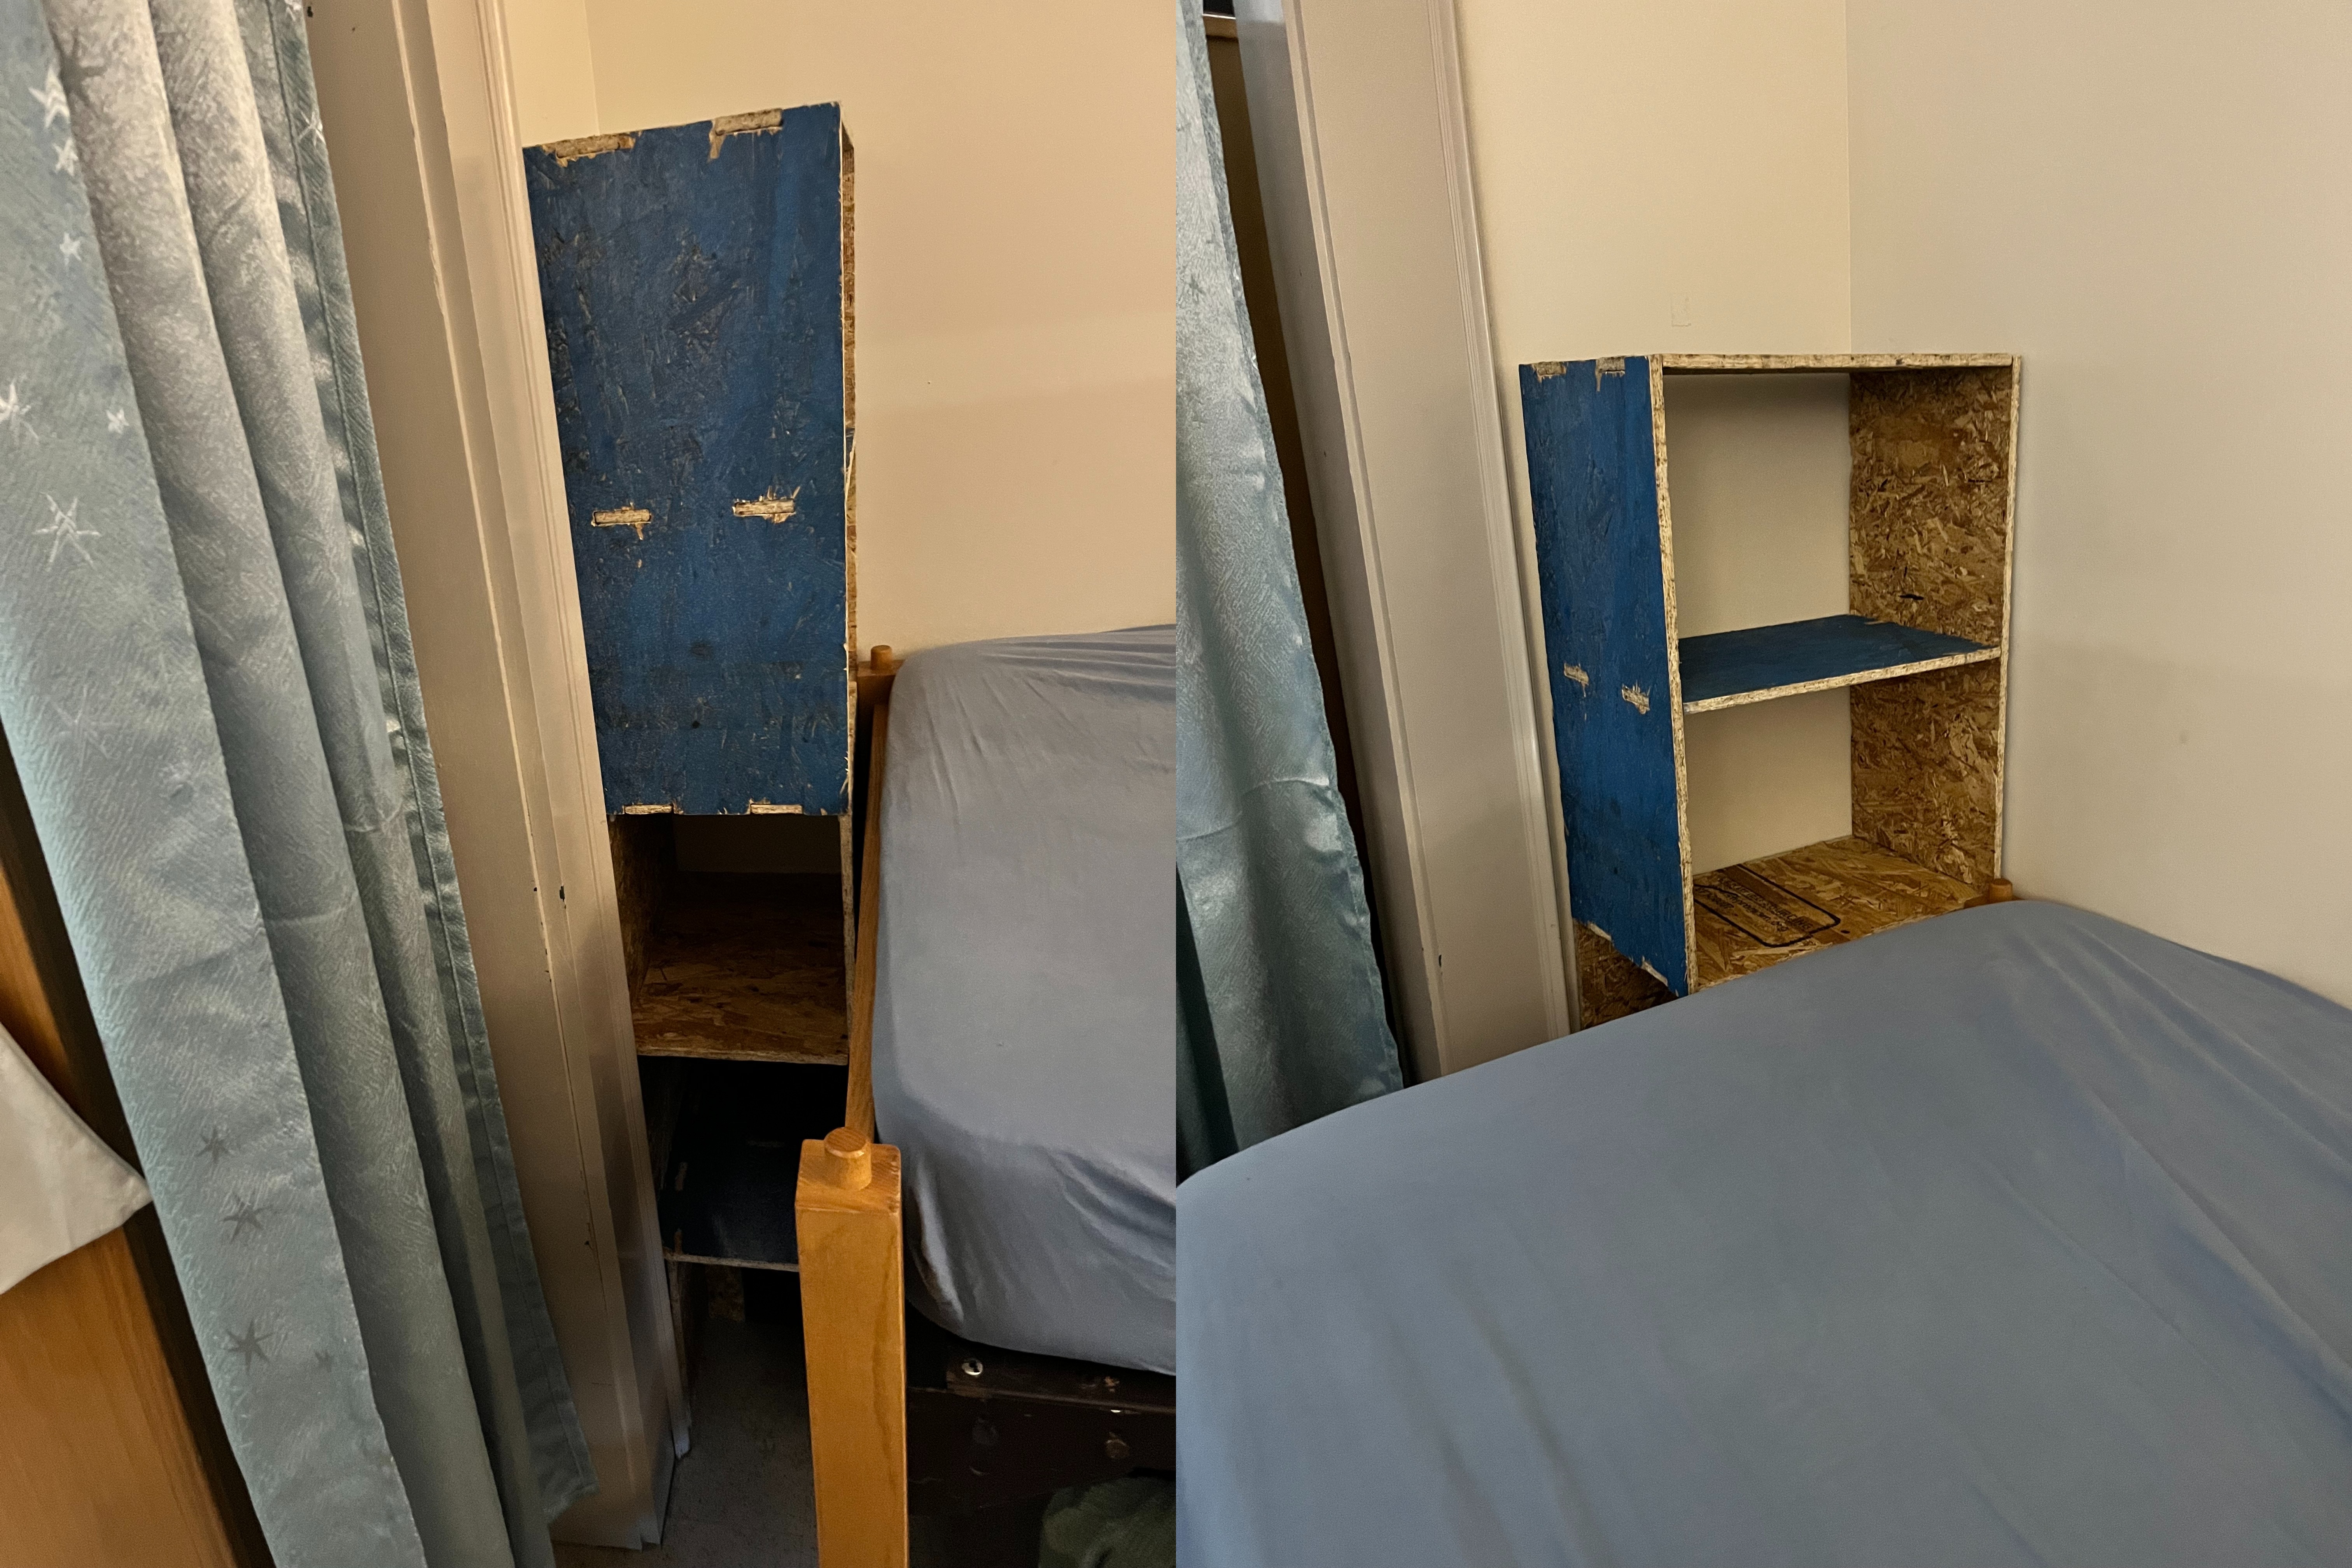
Here it is, fitting perfectly! If there’s no space for it to fall apart, it won’t fall apart :)
My first time using CAM, which was pretty cool, but also learnt a hard lesson about taking ill-advised shortcuts.