Assignment
group assignment
• do your lab's safety training
• test runout, alignment, fixturing, speeds, feeds, materials,
  and toolpaths for your machine
individual assignment
• make (design+mill+assemble) something big (~meter-scale)
• extra credit: don't use fasteners or glue
• extra credit: include curved surfaces
• extra credit: use three-axis toolpaths
Group Assignment
Tyler was kind enough to document the group assignment on the group page here.
Individual Assignment
I have zero experience with furniture making. Unless you count assembling a lifetime’s worth of IKEA furniture. If you do, I’m a master furniture maker.
First of all, I have to give a massive shoutout to Ceci. I could not have done this week’s assignment without her help. She helped me with fixing some CAD issues I ran into, setting up the machine paths and then debugging the issues we ran into when actually running the job on the ShopBot. Ceci, thank you for being so generous with your time and helping everyone in this cohort. You’re an absolute superstar.
Shoutout to Dan, as well. Thank you so much for your help! From the safety training, to staying late for our safety and coming in early so we can run our jobs… Thank you!!
Design
Thursday, Oct 16th
Started looking at inspiration and created some sketches. I settled on making a bench with some “floating” shelves that I can store some books or maybe even my yoga mat in. I haven’t specified the dimensions of the bench and need to take some measurements at home, but I like the idea of making something that I can actually put into our little apartment on campus. In terms of the approach - I think I’ll go with something quite similar as in Week 2 where I roughed out a 3D sketch in blender before taking the design into Fusion360. I think for quickly iterating on the design, I’ll be faster in a more familiar piece of software.
Friday, Oct 17th - Morning
My girlfriend, Erin, had some design suggestions that I will include. We also measured the space in our apartment where we could see this bench. I’m pretty set on storing my yoga mat in it now and I’ll actually consider the mat a main factor that’s driving the bench’s dimensions.
I’m thinking that I will do another sketch that is a bit cleaner and more obvious and then take the design right into Fusion 360 without doing a 3D sketch in Blender first.
later in the day…
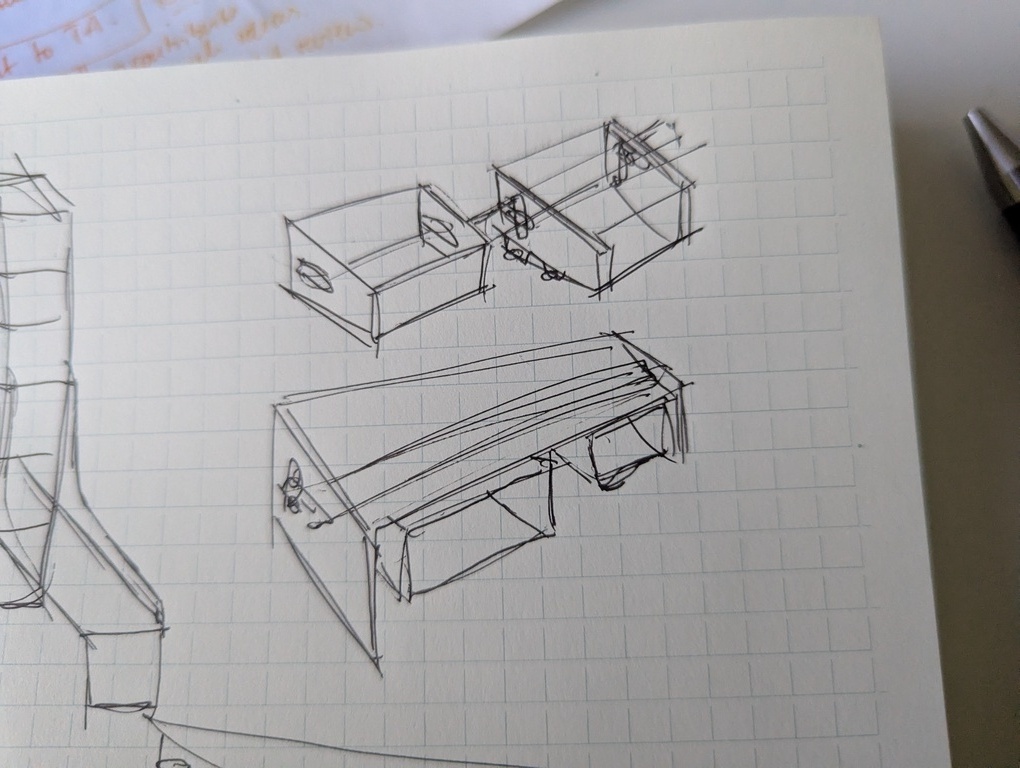
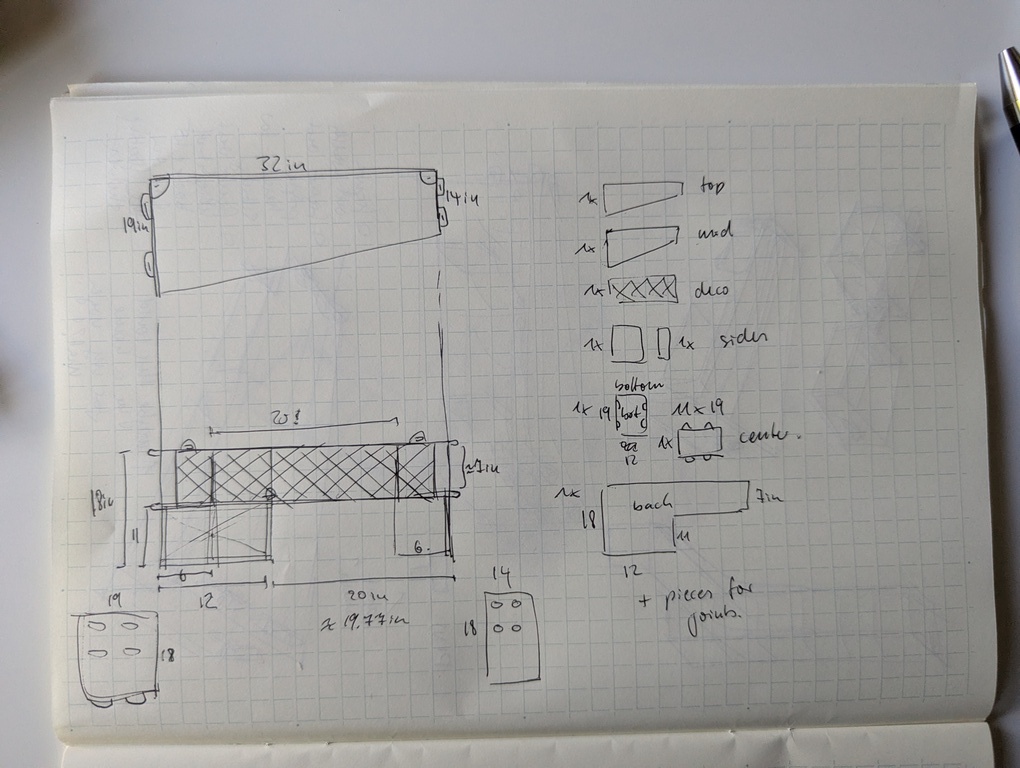
The “final” sketch I came up with is shown below. I listed and named all the pieces.
Saturday Worked on the design all day. I learned a lot about Fusion360 and realized that I’m still approaching it with the wrong mindset. My background (mesh-based 3D modeling for the creative industries) is still getting in the way a bit, but I’m enjoying the process in Fusion360. For the most part, sometimes it’s frustrating.
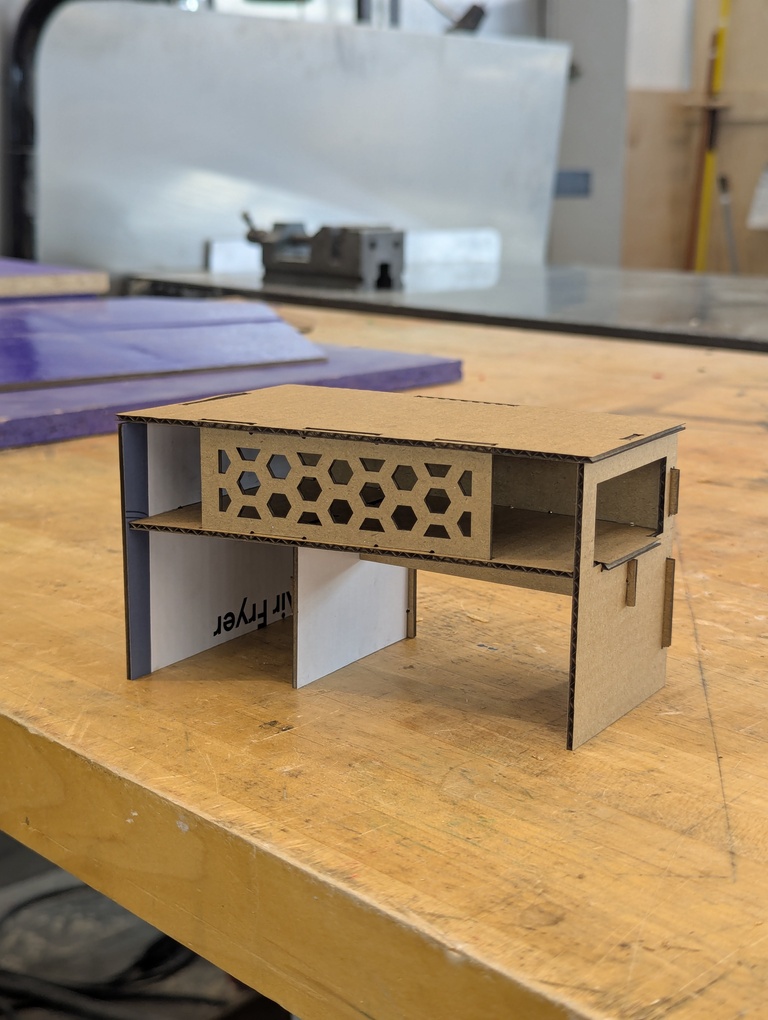
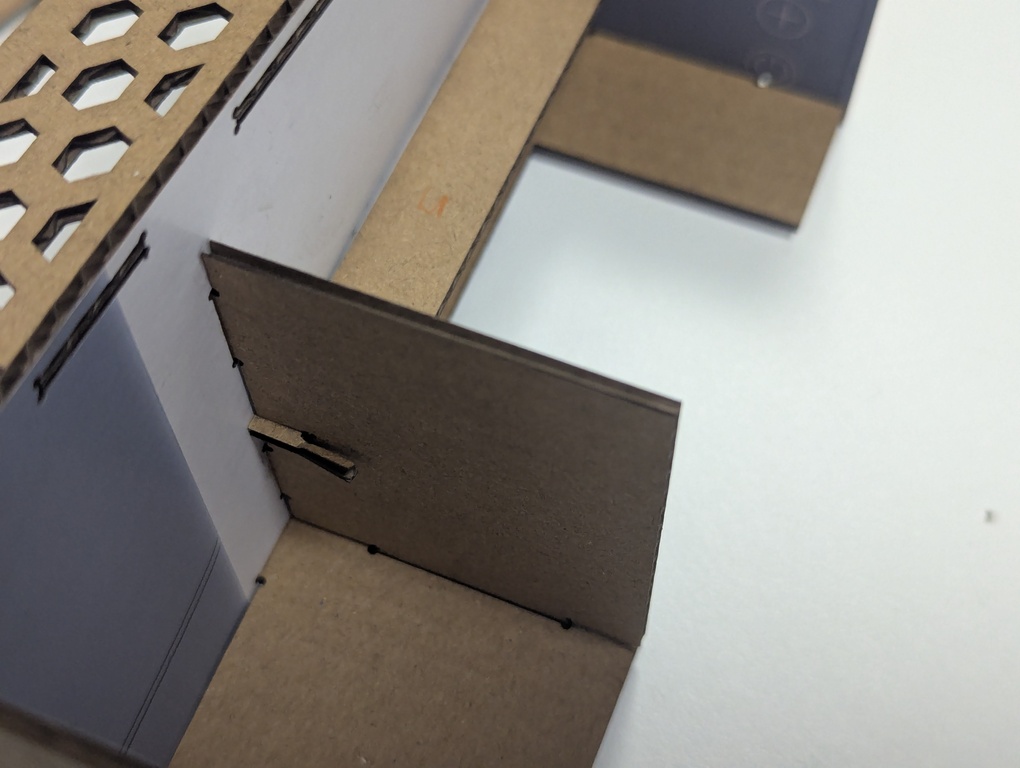
I went to the lab in the evening to laser cut a miniature model of the bench. My girlfriend Erin came along for safety reasons. Safety in numbers. She is very helpful when it comes to brainstorming design ideas, but she’s also much more knowledgeable than I am when it comes to structural considerations. She’s a Civil Engineer and had some good insights for me.
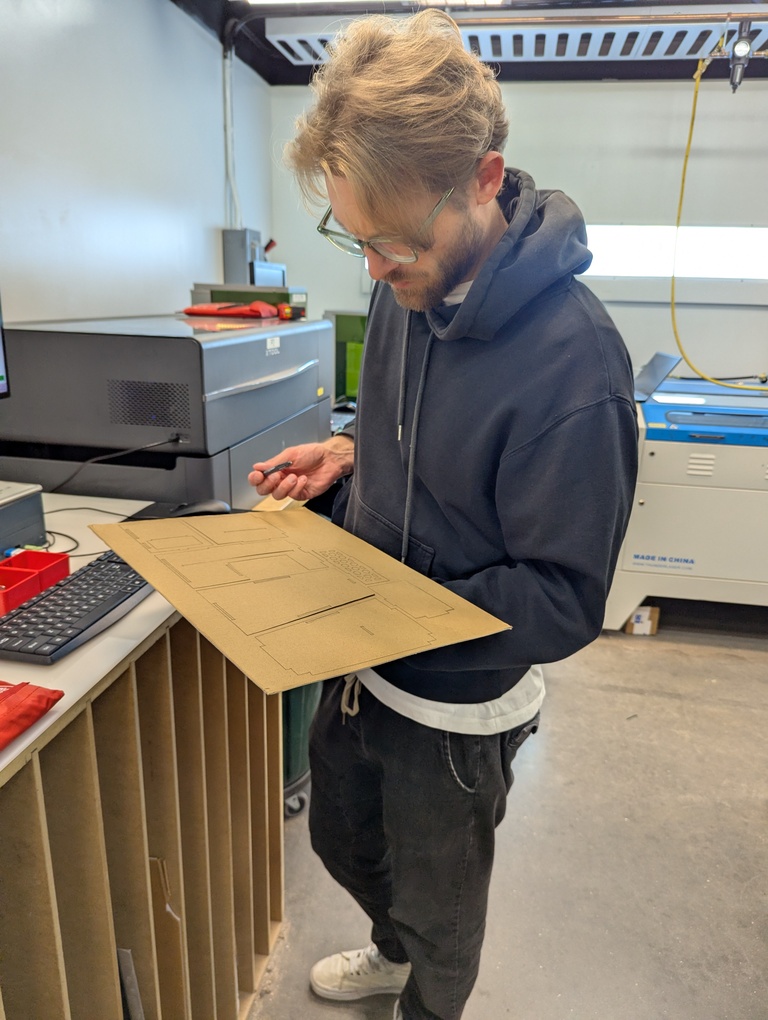
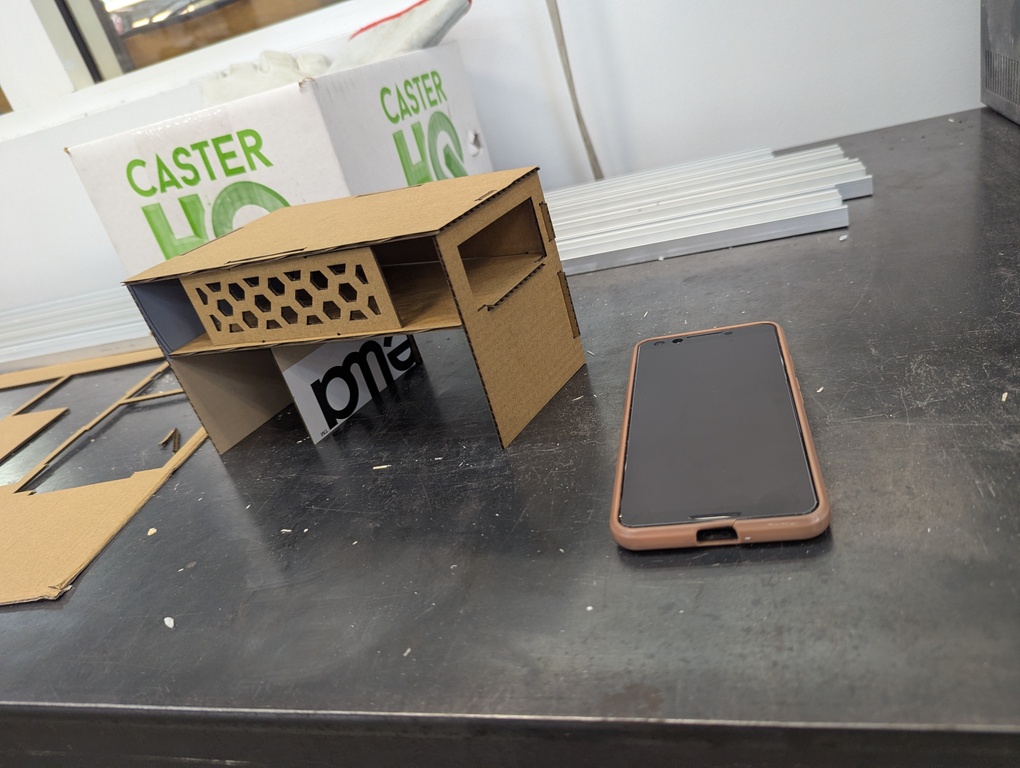
Doing the miniature model was very helpful to me. I recommend it to everyone who doesn’t have a mechanical engineering background or similar. Wobbling the model with my hands gave me a very good idea of where the bench needs more structural support and what the weak spots are! It also shows design mistakes (like where I missed including sketch shapes in holes).
Learning from these cardboard experiments, I added a cross brace, for example. I also divided some of the slots in the design into smaller but more slots to avoid having long pieces of unsupported OSB. I think putting in that work was absolutely crucial and the bench wouldn’t work well if I hadn’t done this.
Sunday
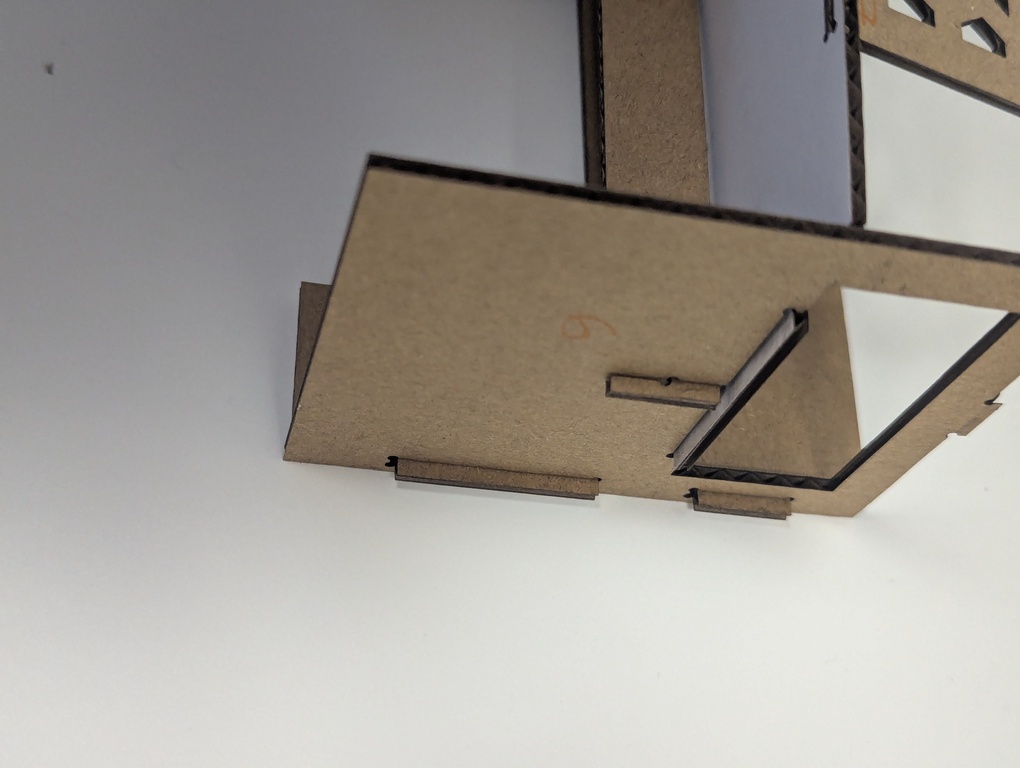
I did another round of lasercutting. I noticed that the changes (cross brace) made assembly much harder - probably impossible. Another reason why I heavily recommend testing your designs with a miniature model - multiple if you make design changes!
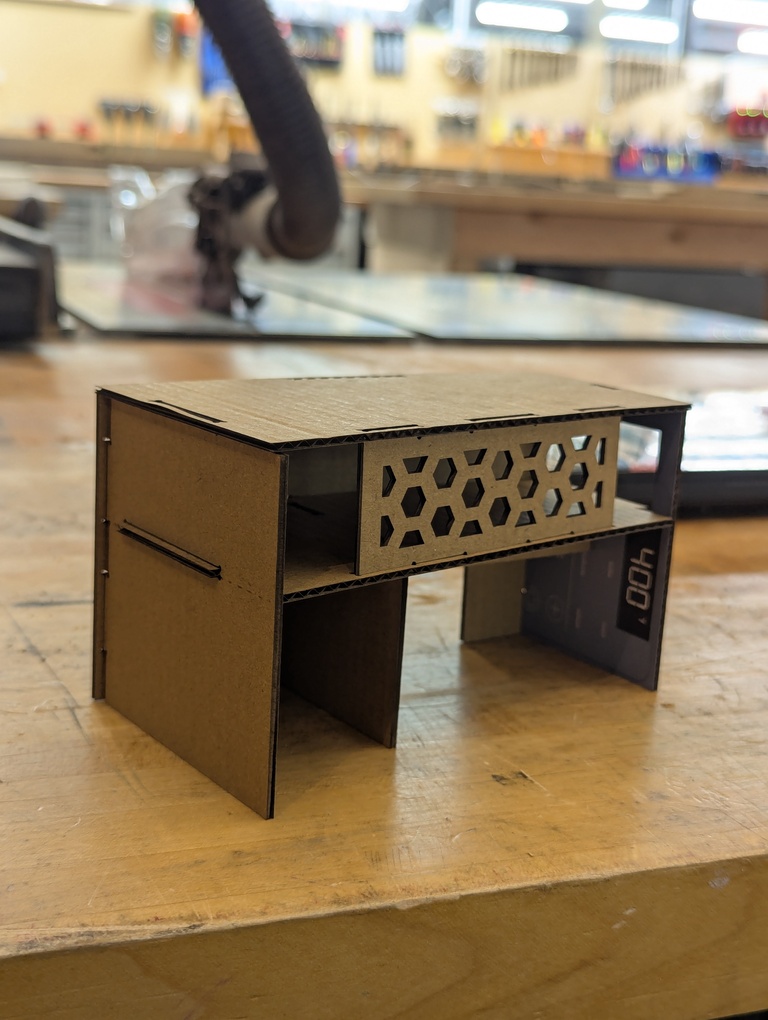
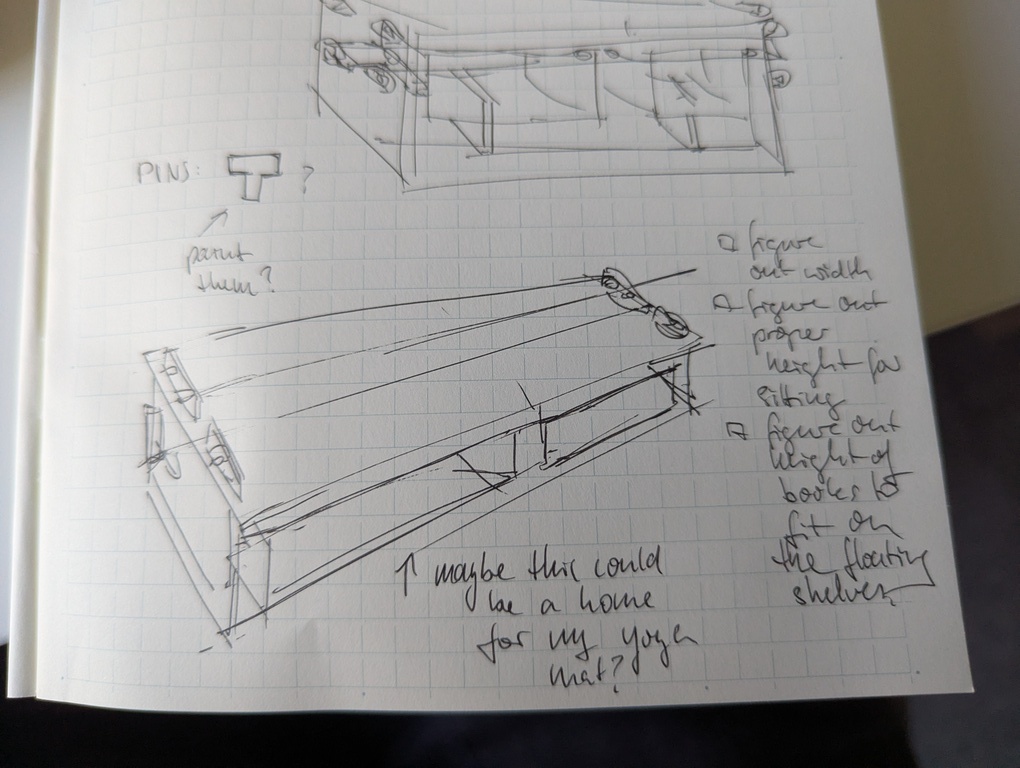
So, I changed the design of the cross brace and made a plan for assembly. You can see some images below. Initially the cross brace had two “hooks” that I added to add stability in the bench’s X dimension. Without it, the right side panel is held in place only by a small connection at the top and some friction when the back and middle shelf connects with press fit. I can’t put in those hooks considering how I want to assemble the bench, though. The new design makes it so that the brace doesn’t have to be “locked” into the center vertical panel, but can be slid in and afixed with a pin later. That allows me to hook the cross brace to the right vertical panel and then push both onto the other pieces (that are already assembled at that point) from the right side.

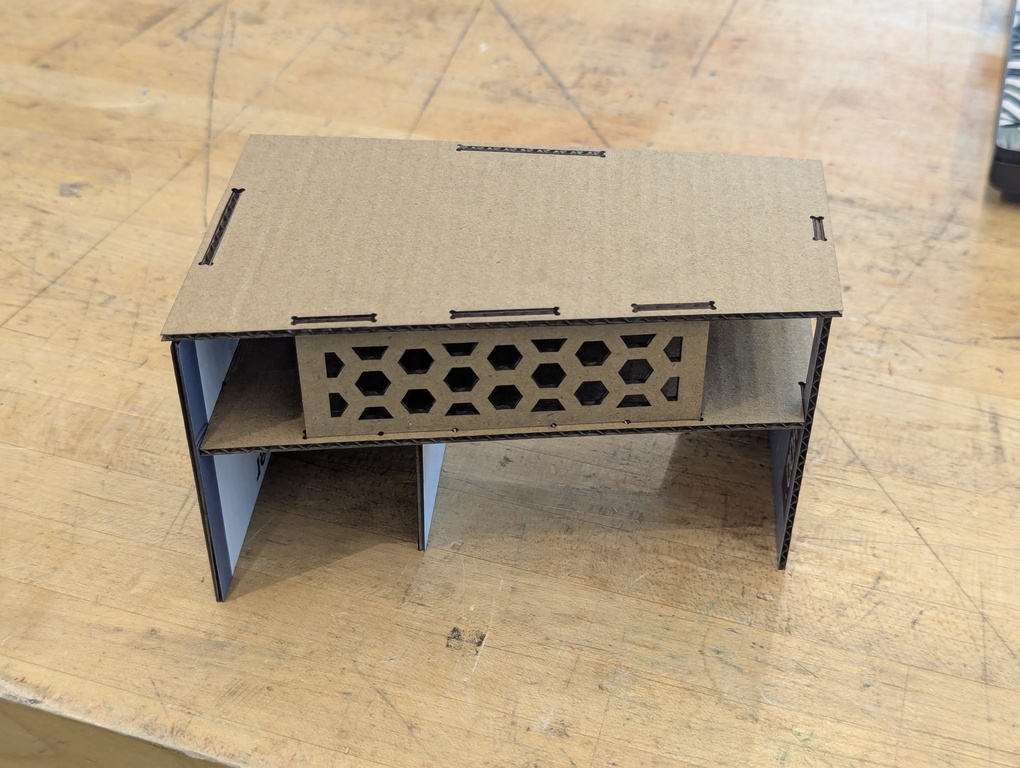
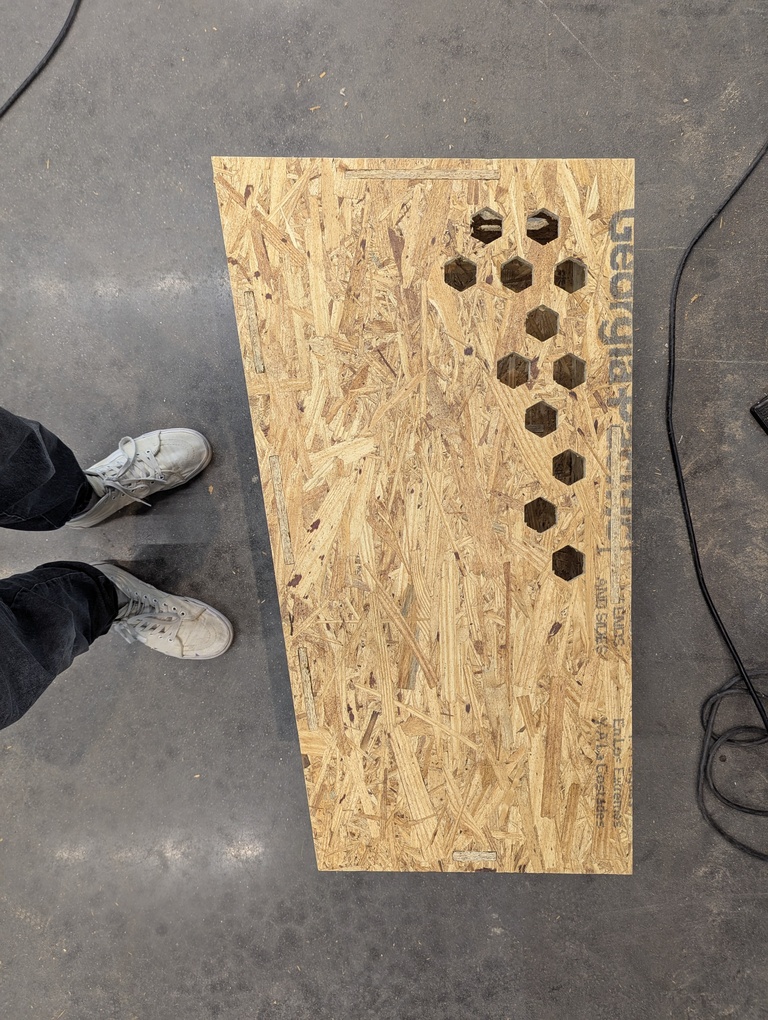
I also added more of the honey comb patterns. Erin came up with the name “Hatha Hive” for the bench - because it’s for my yoga mat and has the honey comb aesthetic.
Machining
Sunday Evening
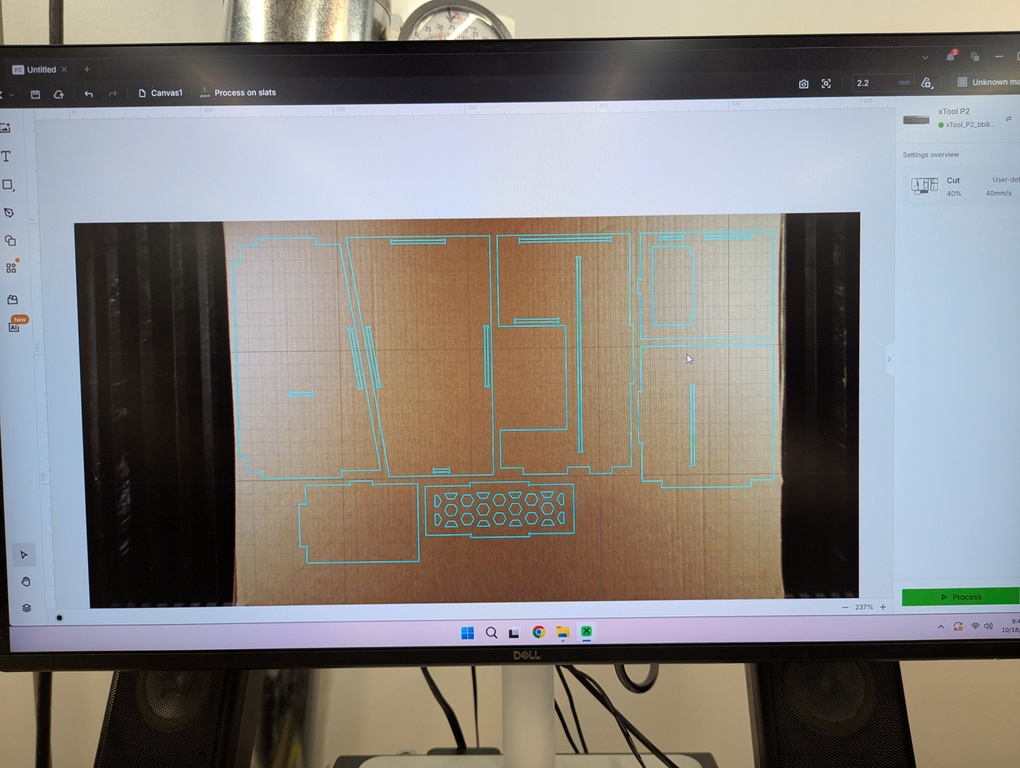
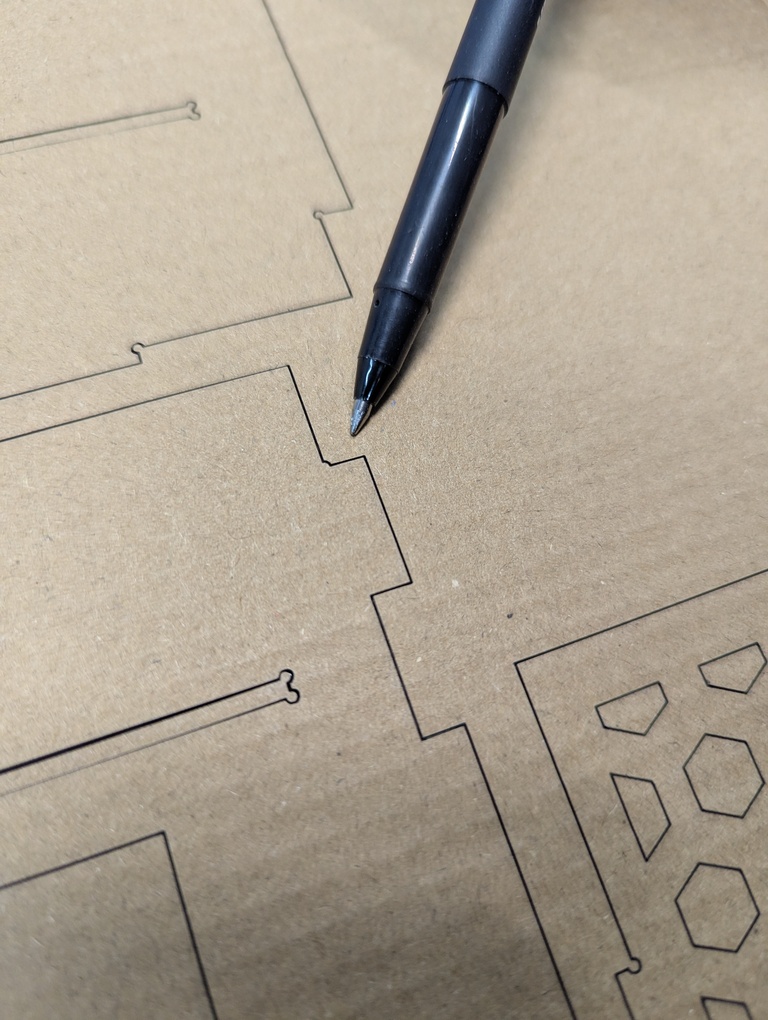
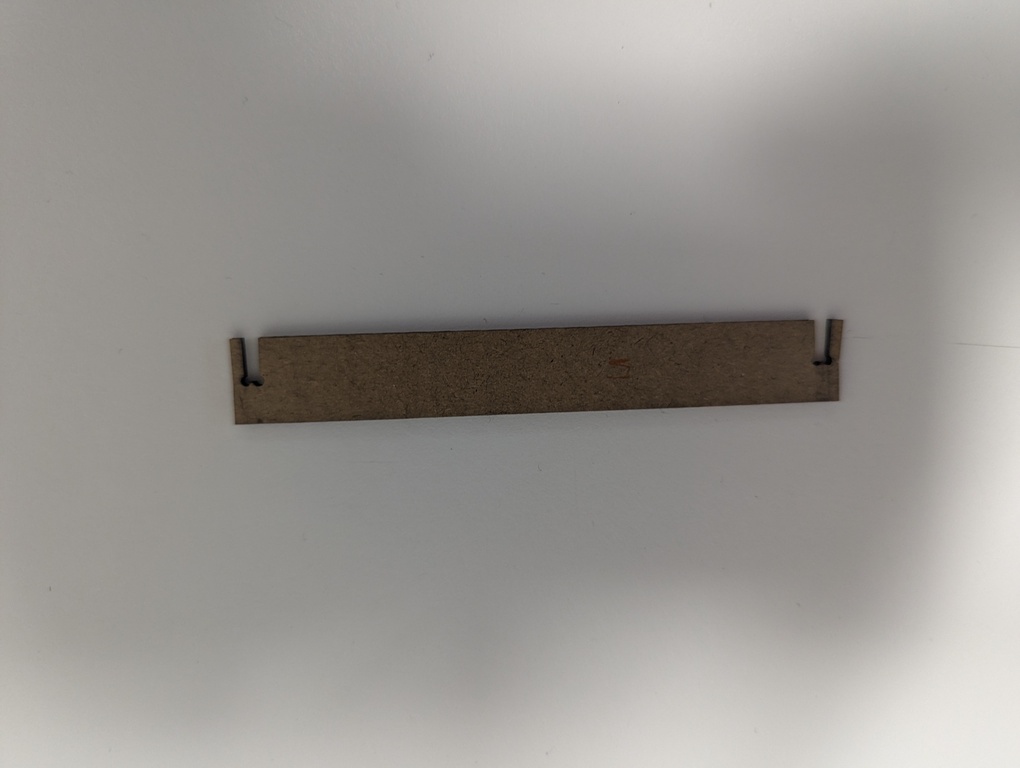
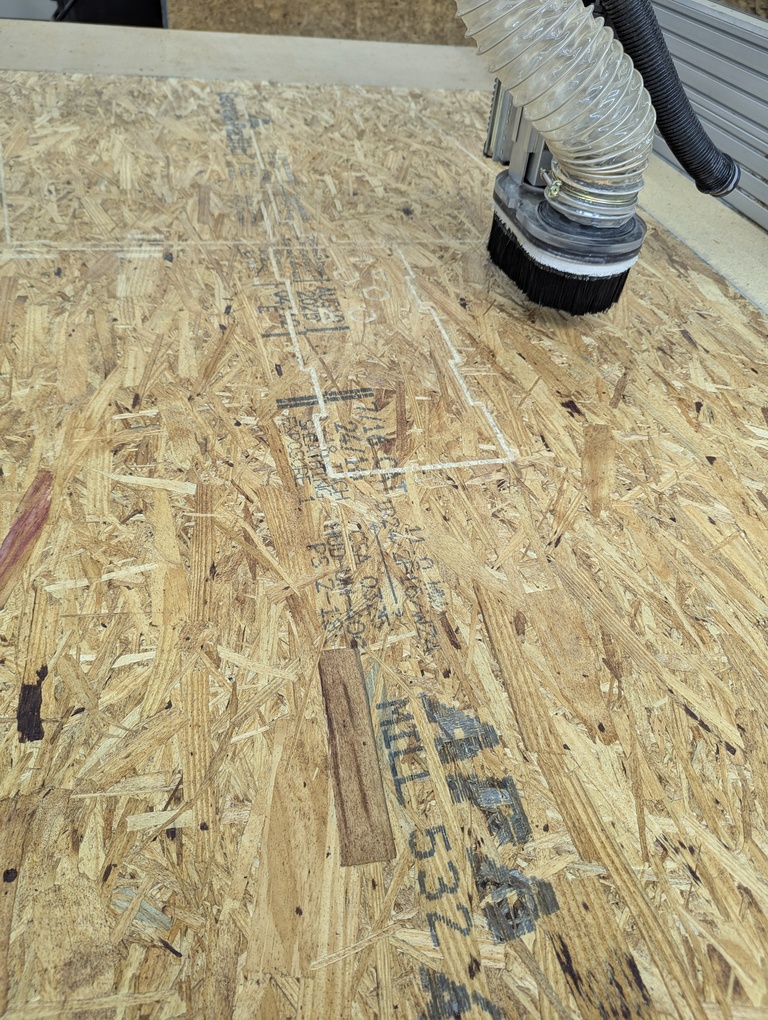
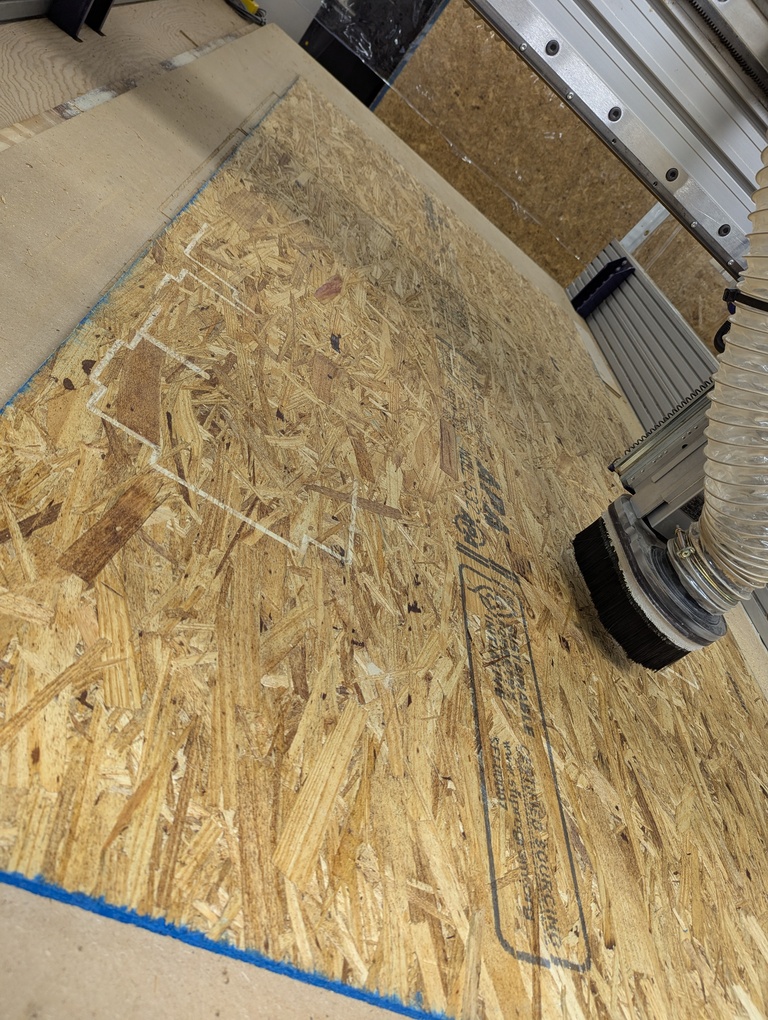
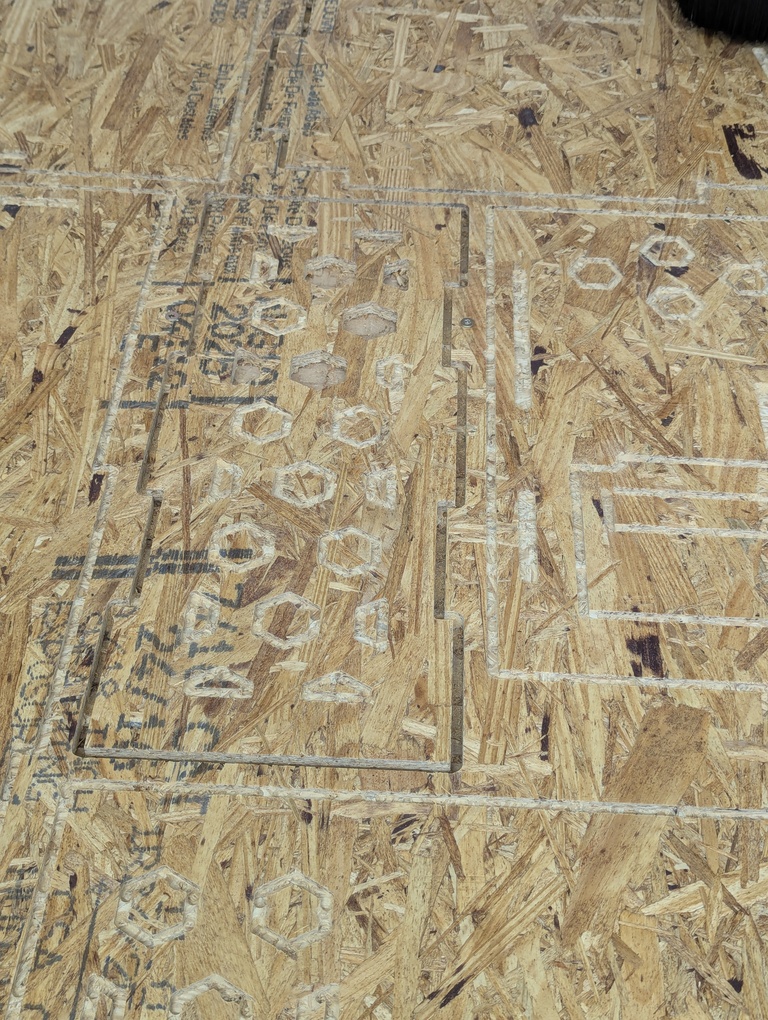
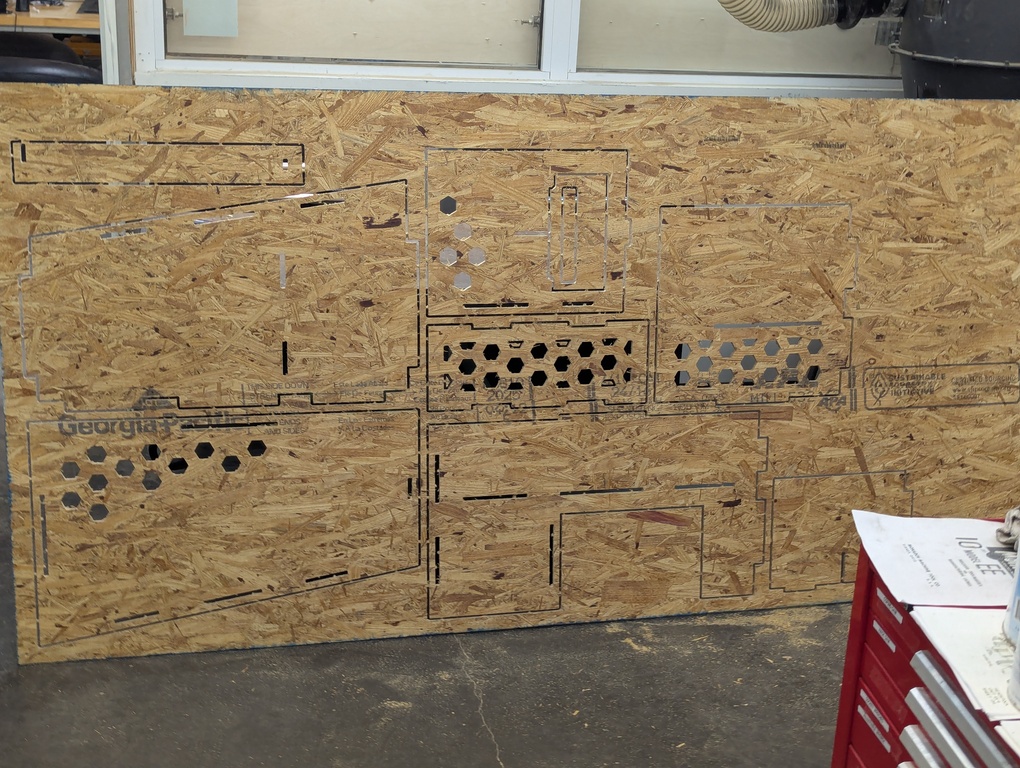
In the evening, got help from Ceci and Dan to create the tool paths needed for the Shop Bot. I think some of my design was a little “messy” because I had used a lot of projections in Fusion360 to create the slots. For some reason, sometimes my sketch shapes didn’t punch through the body’s correctly and I had to rush a fix with Ceci. That broke some of my design as we’ll see later. I also had some trouble with shapes not connecting correctly to form a consistent outline that could be turned into machine paths. An example is shown below. Since it got late, I decided to keep the current toolpaths and commit to post processing that particular part by hand. That turned out easy enough in the end and I’m glad I made that decision.
Generally, I think it’s good practice to consider the machine as the major bottleneck (as you have limited time on it and shouldn’t take up other peoples' time) and to just get the design cut as completely as possible before dealing with the problems manually. This is advice for the specific situation in HTMAA where you have limited time. If you have more time, I’d commit to getting things right - especially if you want to make more than just one copy of your design, of course.
I also ran into an issue with my dogbones. For some reason, Fusion360 didn’t show me the hole diameter in the list of editable parameters. I was able to reference it everywhere by name, but I could not change it. Again, I committed to just file the respective parts by hand so that I could get my job onto the ShopBot. That turned out to be a good decision. The filing wasn’t terribly time consuming.
ShopBot - Oh boy…
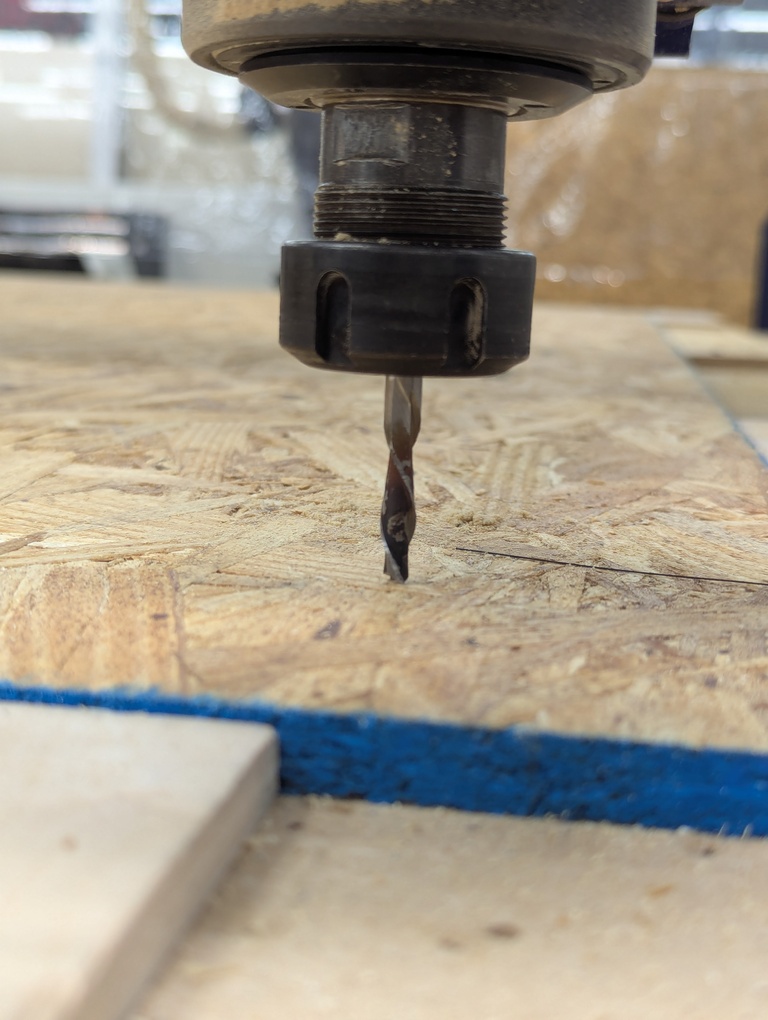
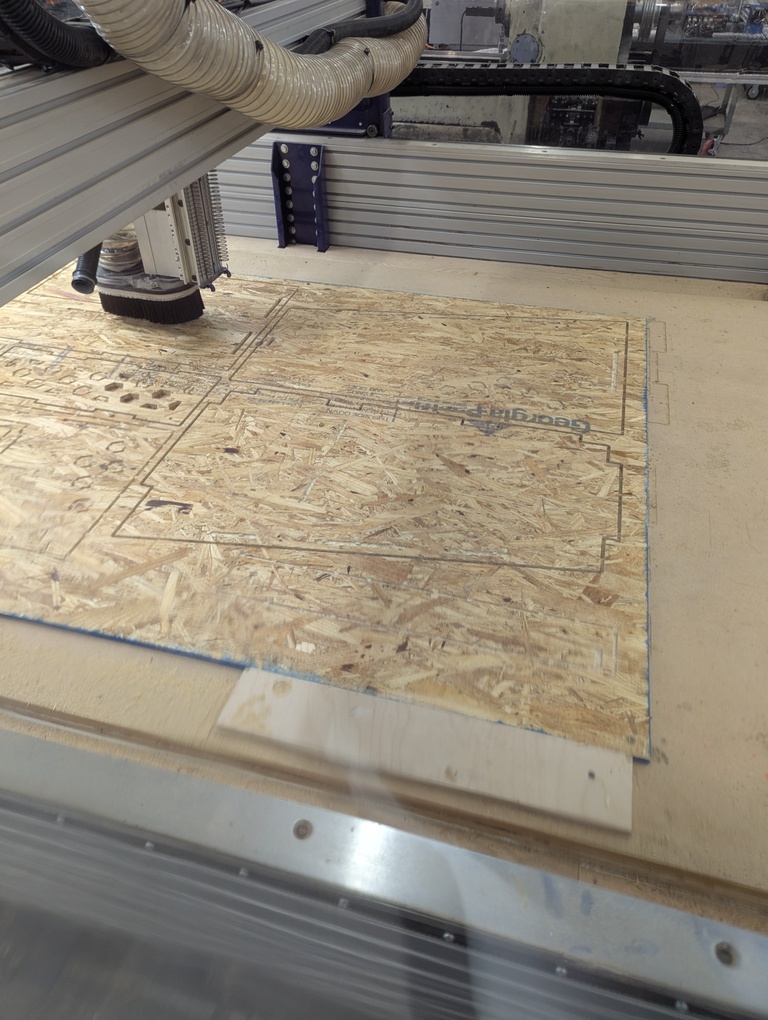
Ceci and I started my job on the ShopBot and ran into many, many issues. The first pass started ok, but then stopped going deep enough into the stock. We assumed that the stock is just uneven and that we did the zeroing in Z at a point where it bowed up. That ended up not being the case, but more about that later. We then first changed the depth of the first path (downcut bit) to make sure that we’re breaking the surface enough for a clean cut. That worked ok but in hindsight, we should have checked the depths of all the trenches it made at this point and verified that it was actually a zeroing issue that caused the lack of depth.
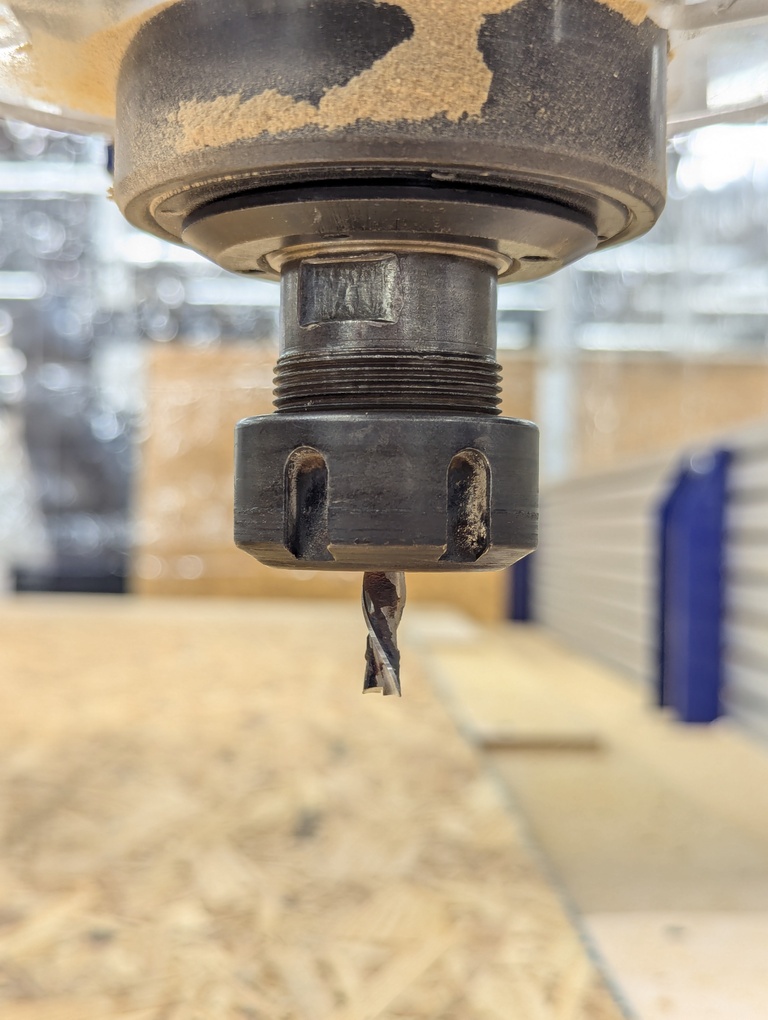
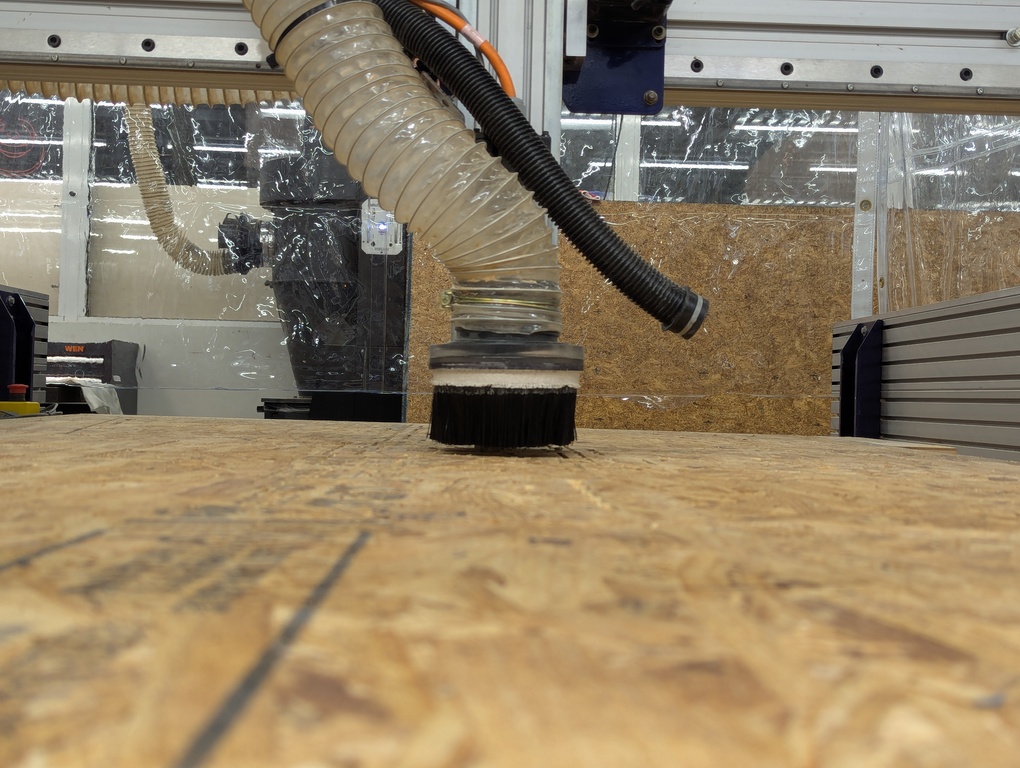
We switched to the upcut end mill for the second set of tool paths. We zeroed the end mill. There’s photographic proof below. When it cut, it again didn’t go as deep as it should have.
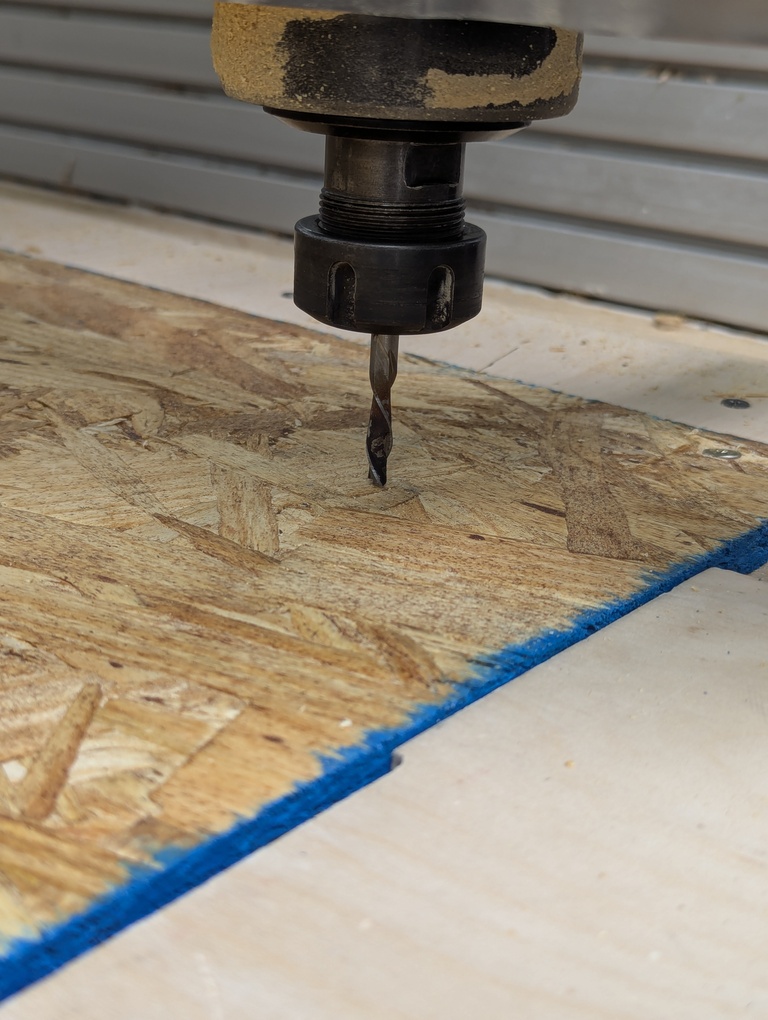
At this point we were expecting the end mill to cut all the way through (apart from the taps). It didn’t do that and we kept a close eye on the numbers on the screen. They indicated that the end mill should go all the way through (see image below). While we had noticed the problem pretty quickly, we let the machine continue and finish so that the existing problem was at least consistent across the whole stock and we could hopefully find a single solution that fixes it everywhere. We discussed our approach to debugging for when the machine would stop.
We hypothesized that the machine either changes its zero shortly after starting (checked the gcode, it doesn’t and the sims looked ok) or that the end mill is moving up into the collet while cutting. The issue was too consistent and bowing of the stock couldn’t have caused it. Pictures below, - we were right that the end mill wasn’t at zero anymore when the machine finished.
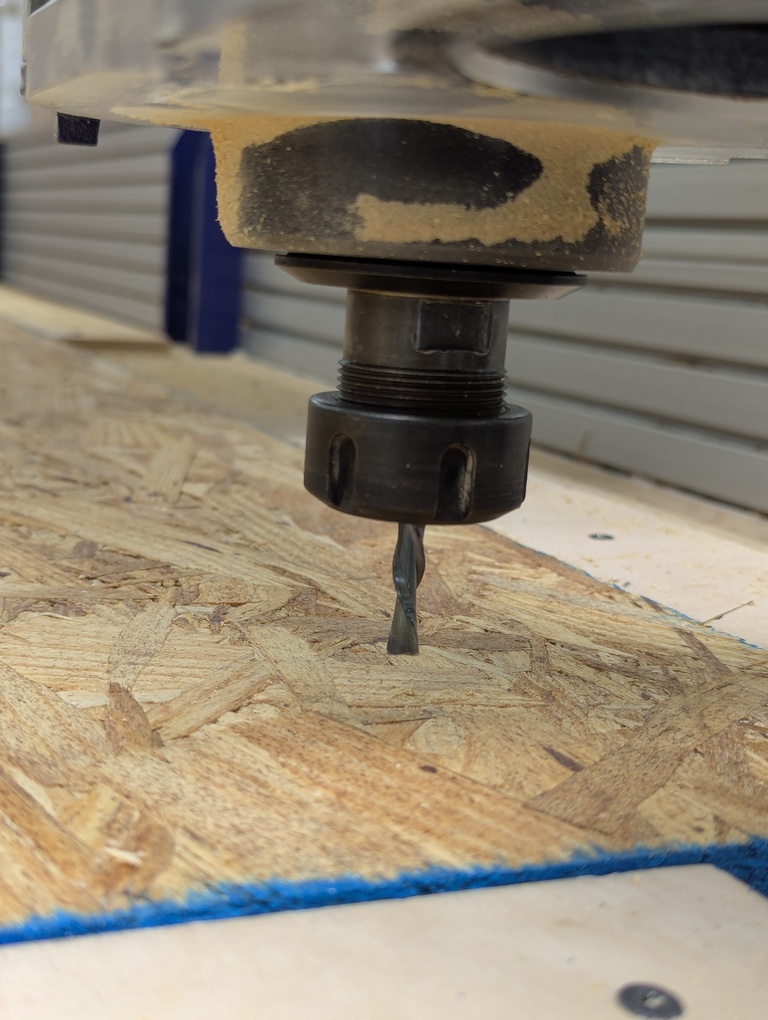

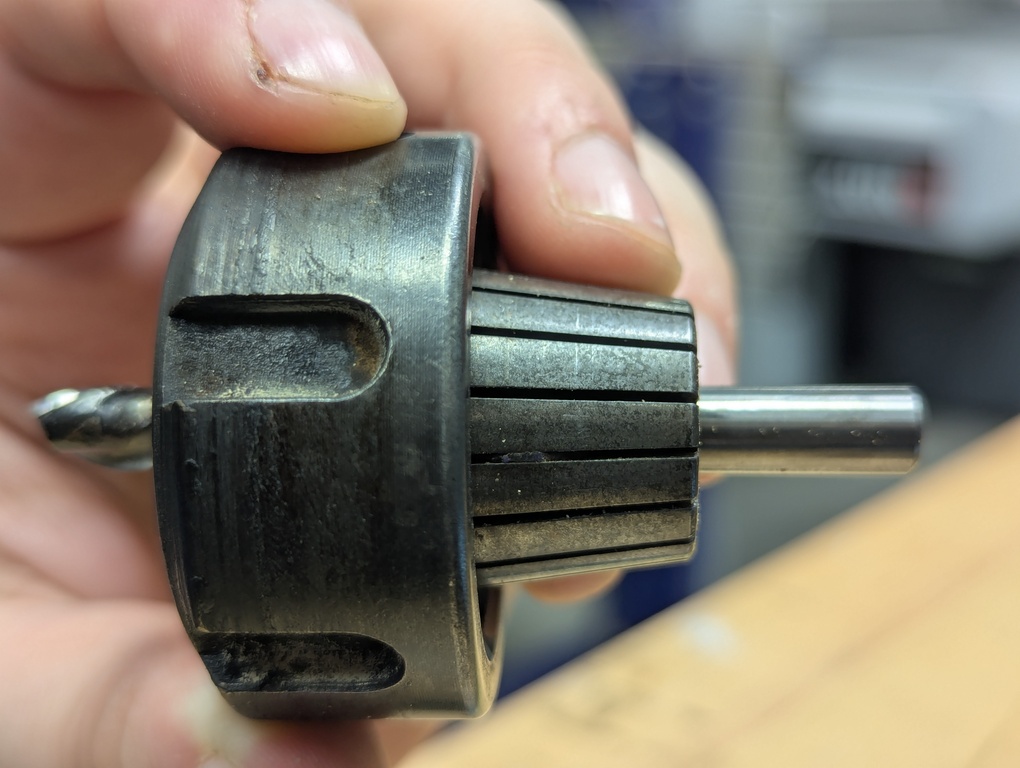
We checked after the cut finished by zeroing again (end mill floated above the stock, not zeroed). The flutes were pushed into the collet which is not how I set the tool up. It confirms that the bit had moved up.
The why: There was an incident in an earlier job that caused some sparks and fire. See Tyler’s description of his project for details. We assume that the incident pushed a lot of debris into the collet. Dan cleaned it a little bit when I initially set up my jobs. I’m confident that I tightened the collet pretty well. Looking at the collet when debugging, we noticed more debris. The remaining debris seems to make it impossible to fully tighten the collet because it sits in some of the slots that are supposed to squeeze together (which makes it feel tight when you put the end mill in and tighten the nut). Assuming that the bit moves up because of it. The nut just isn’t able to grab onto the end mill properly.
At this point it was midnight on Sunday and we left the Mars Lab. I had discussed with Dan that I would come in the next day at 7AM to finish my job before other people had their time slot on the machine.
From my notes that evening:
Trying this solution next: cleaning collet more or new collet. Will have to discuss with Dan. Will run the same gcode, just changed to a single pass cut (I have to get this done quickly in the morning).
Monday 7 AM
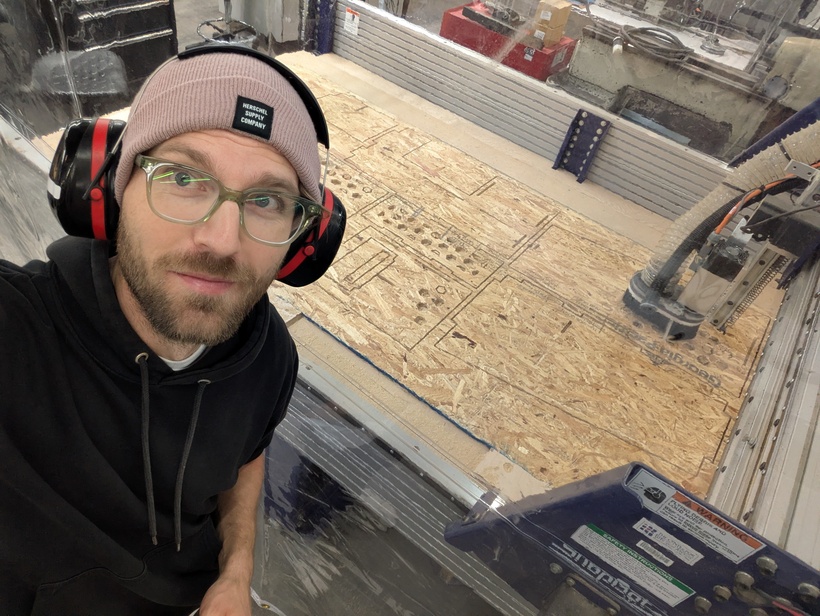
Back in the Mars Lab. Dan gave me a brand new collet. That worked well and I had absolutely no problems anymore. I removed the pieces from the sheet and started filing some corners by hand. I also dealt with the toolpath issues I described above. That was very easy and I’m glad I didn’t delay the machining because of it.
IMPORTANT I would like to call out something here - for everyone who does this in a future semester. When I walked to the Mars Lab at 7AM that morning, I was very tired. I had left way past midnight the night before and I didn’t get enough sleep. That is NOT a good state to operate a machine like the ShopBot. I was unhappy with the fact that I didn’t have that much choice if I wanted to get things done until the time of the next lecture. So, my advice to you if you’re ever in this situation:
- Be very, very aware that you are not at your best. Read Why We Sleep if you believe you can operate at your best on 4-5h of sleep. You absolutely cannot. You’re in a state that, if it was caused by alcohol, would legally prohibit you from driving a car.
- Mentally call out for yourself that you need to be careful at all times. Move slower than you usually would. Don’t rush anything.
- Communicate! I explicitly mentioned that morning that I am tired and that others should please keep an eye on me and double check what I’m doing.
I will admit that I’m overly careful with these things. I personally think that it’s absolutely crucial that you are. I have seen someone die in front of me and I don’t want to see a repeat of it - whether it’d be you or I. So, please, be careful if you’re tired.
Assembly
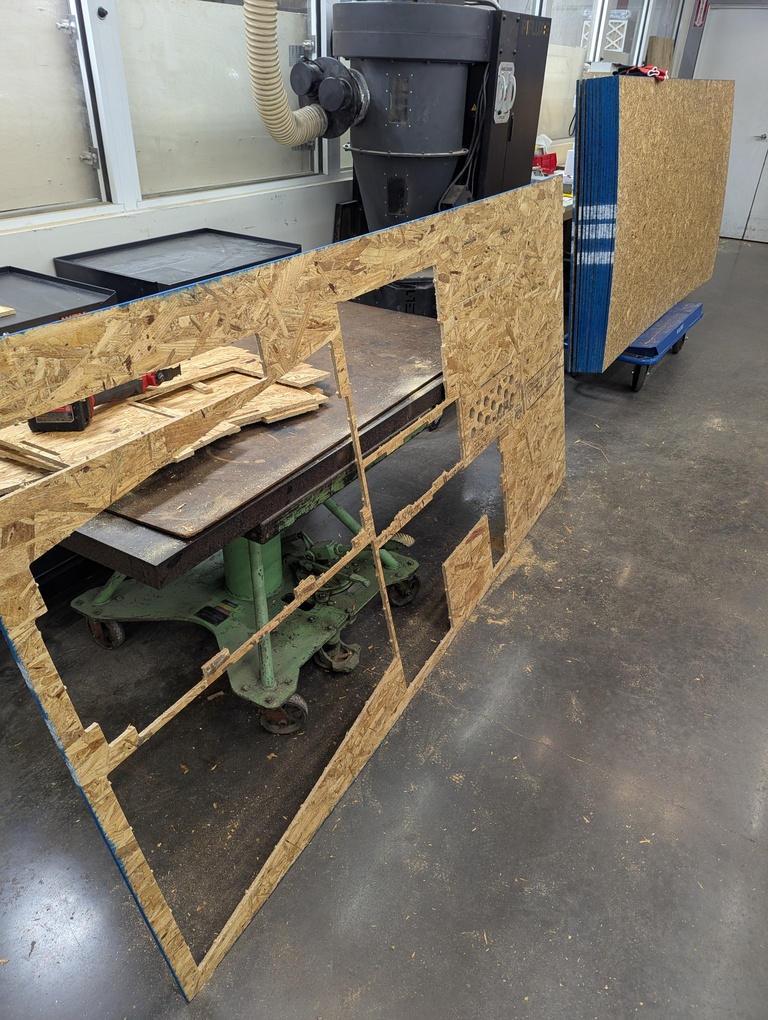
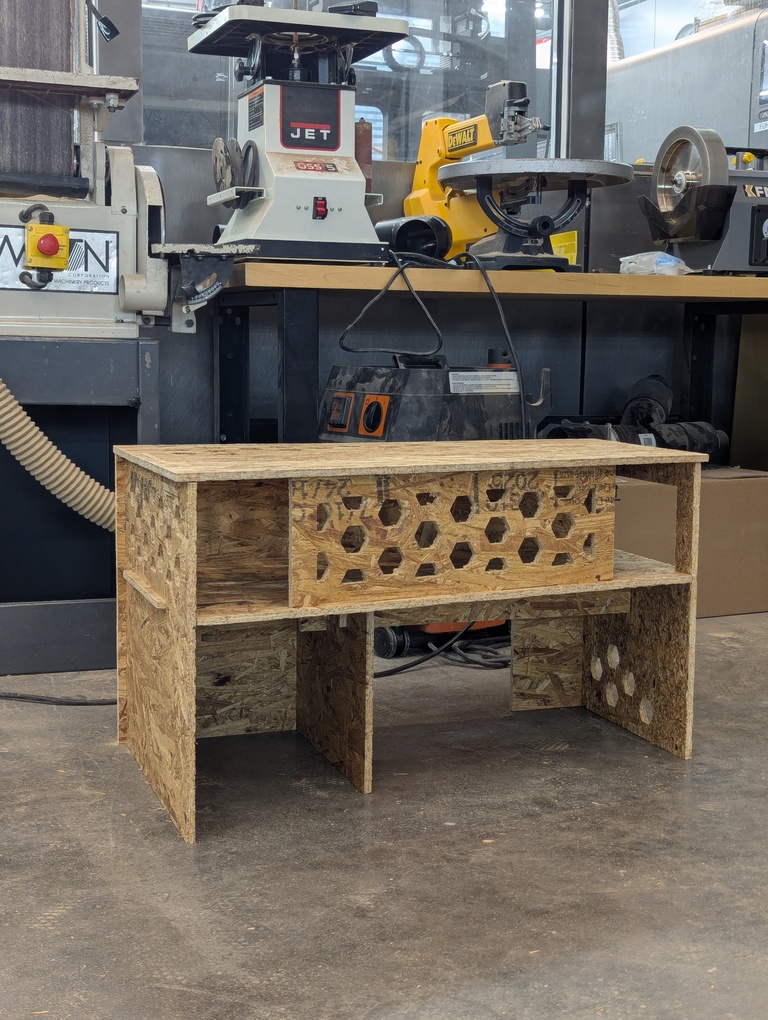
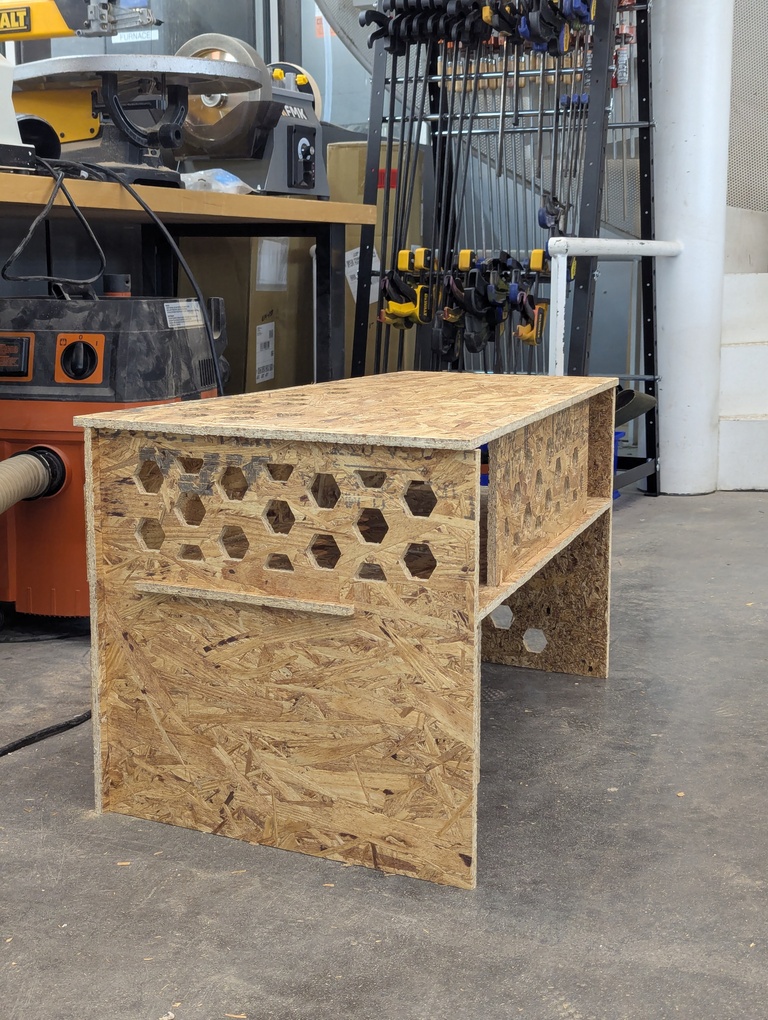
I assembled the all my pieces according to the plan I had made earlier with some force. I used a hammered and piece of wood (as protection). I did the assembly first so that I have something that I can show (instead of doing the sanding/varnishing first which is what I would do otherwise). I then quickly sanded the spots that I could access and applied varnish all over. I added a second coat later that day. Pictures from before applying the varnish below!
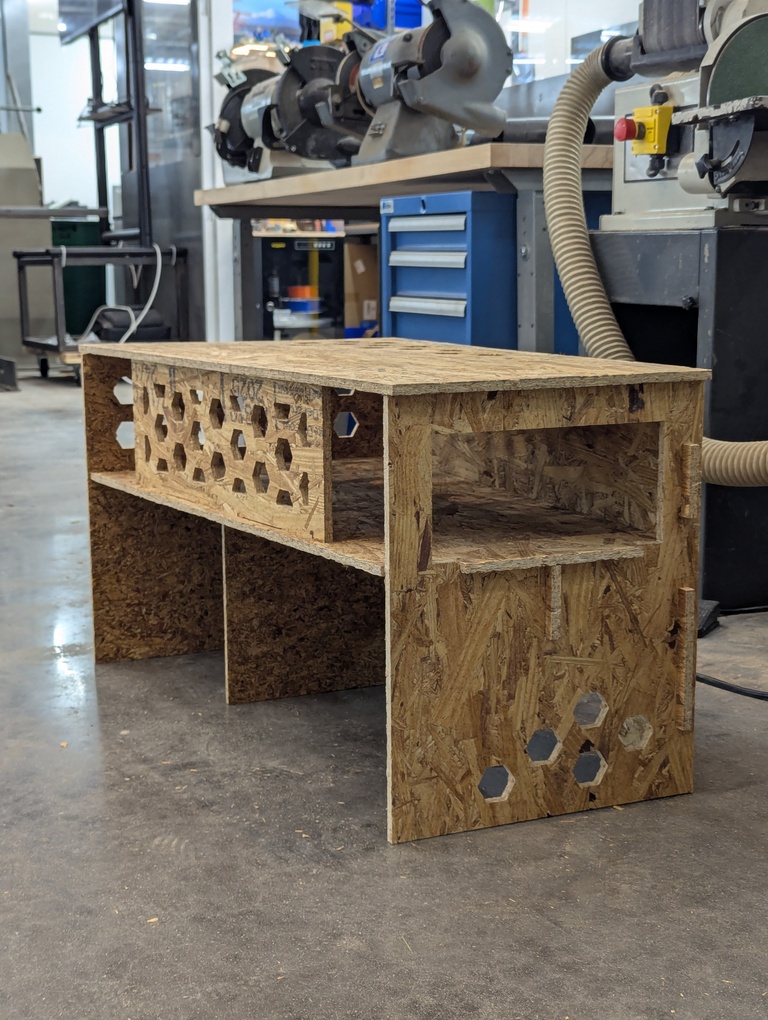
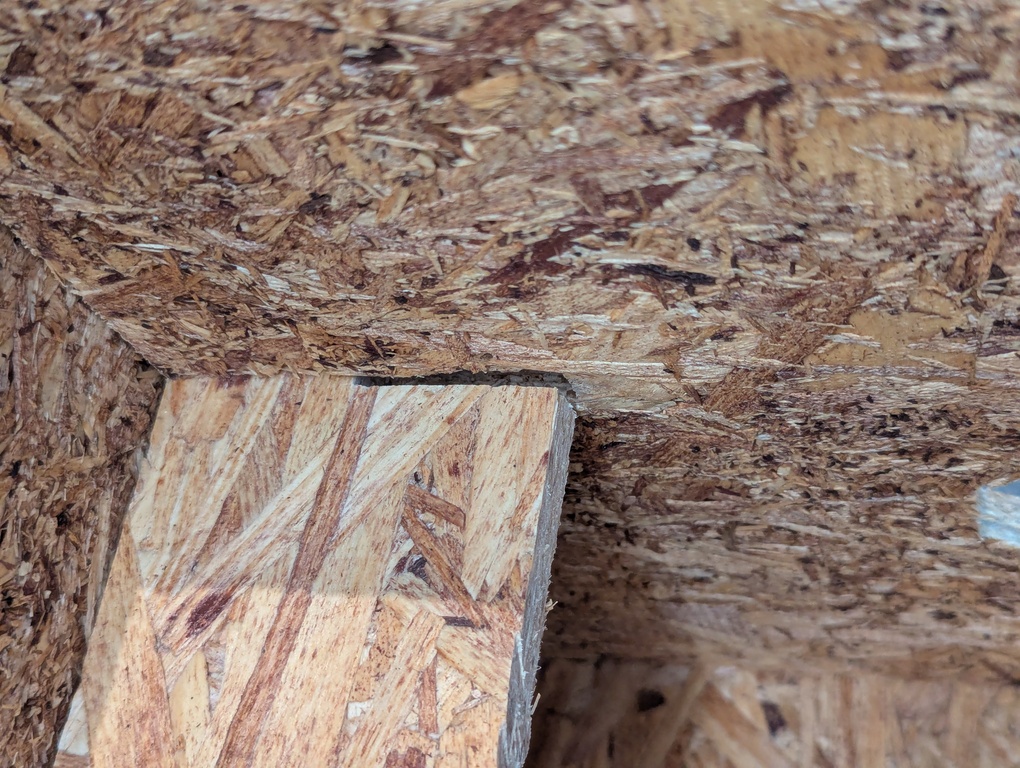
I mentioned above that I had a problem with the design of the cross brace. When rushing to get my design onto the ShopBot on Sunday night, I re-did one of the slots and made it too big. The cross brace was supposed to hook into a slot on the right vertical panel - into a slot that was half the height of the cross brace. Unfortunately, I projected the brace onto that panel and cut out the entire height of the cross brace. So, the cross brace doesn’t “hook” into that panel now but is held in place by friction. Not ideal, but works for now.
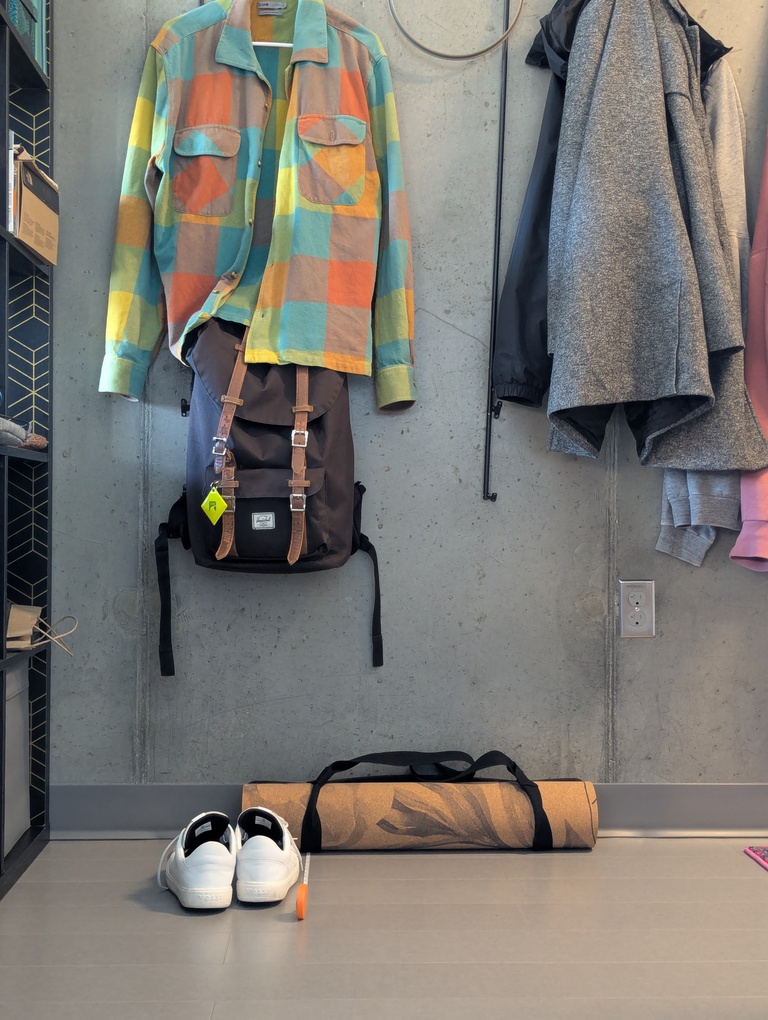
Final Result
TODO: Take pictures at showcase in today’s class.