Design, document, and 3D print an object that could not be made subtractively.
Test the design rules for your 3D printer.
3D scan an object.
Tools
Bambu Lab P1S 3D Printer
Bambu Studio Software
Fusion360 CAD
Revopoint 3D Scanner
Polycam 3D Scanner App
Individual Assignment
3D Printing
This week was my first time using the 3D printer; I had heard a lot about it and I was excited to learn how to use it!
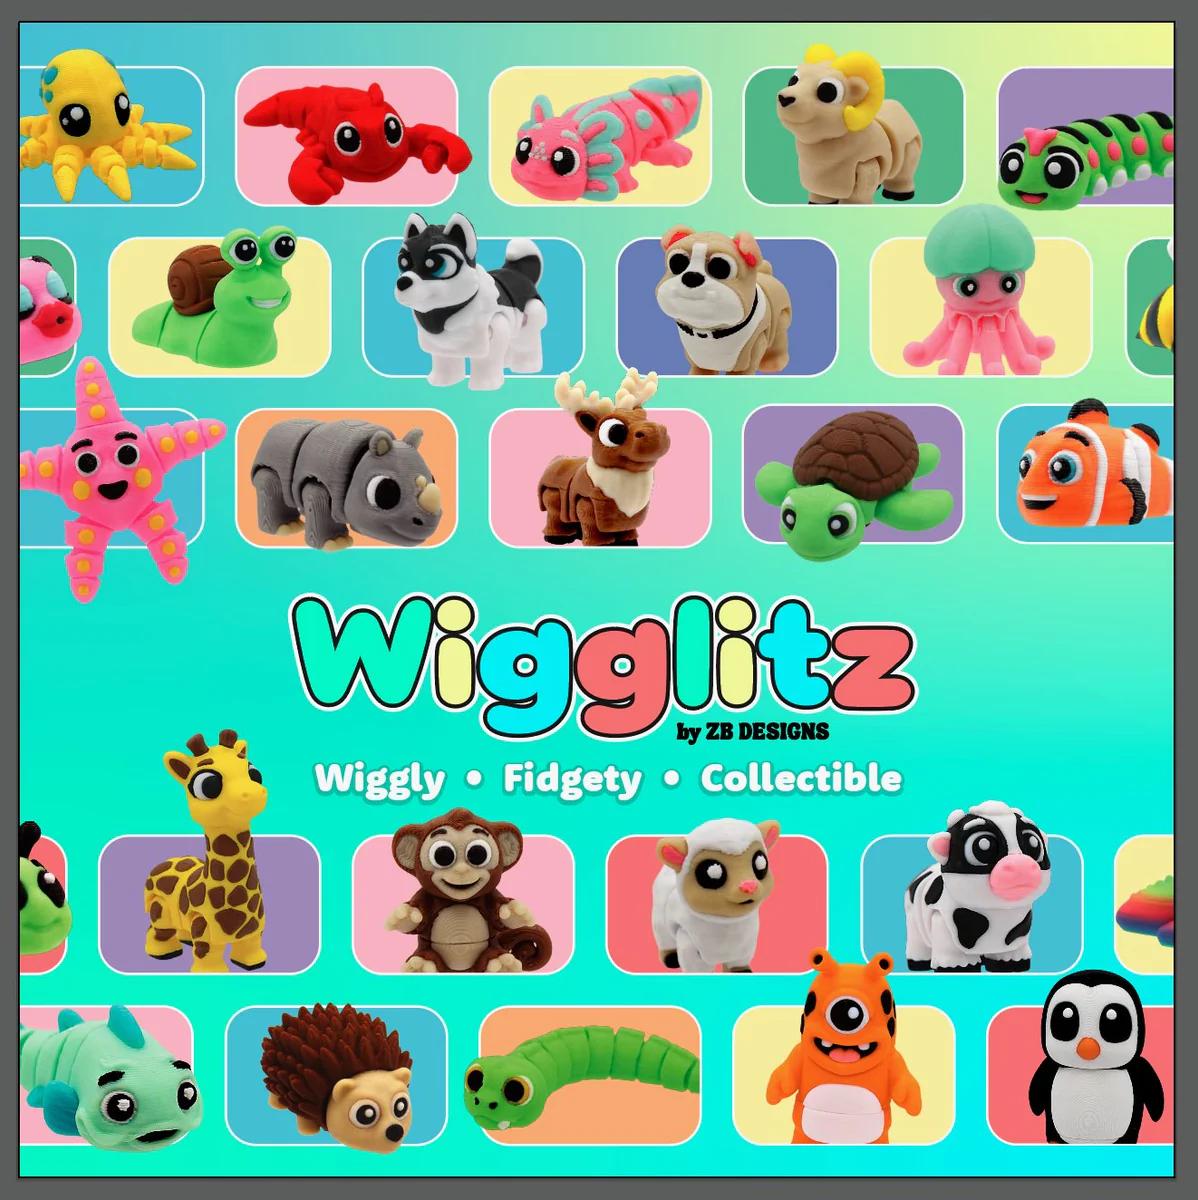
But before I could use the printer, I had to design something. The design requirements were to print something that could not be made subtractively. As with every weekly project, I had to stick to the nature theme. I was inspired by my 2.009 Product Engineering professor this time, who has an 8-year-old son obsessed with a toy called Wigglitz. I looked these up on Google: they are tiny animals with hooks and hinges along the body to give it a "wiggly" effect. Luckily enough, I think these also qualify as not being able to manufacture them subtractively due to their intersections.
Wigglitz Toys
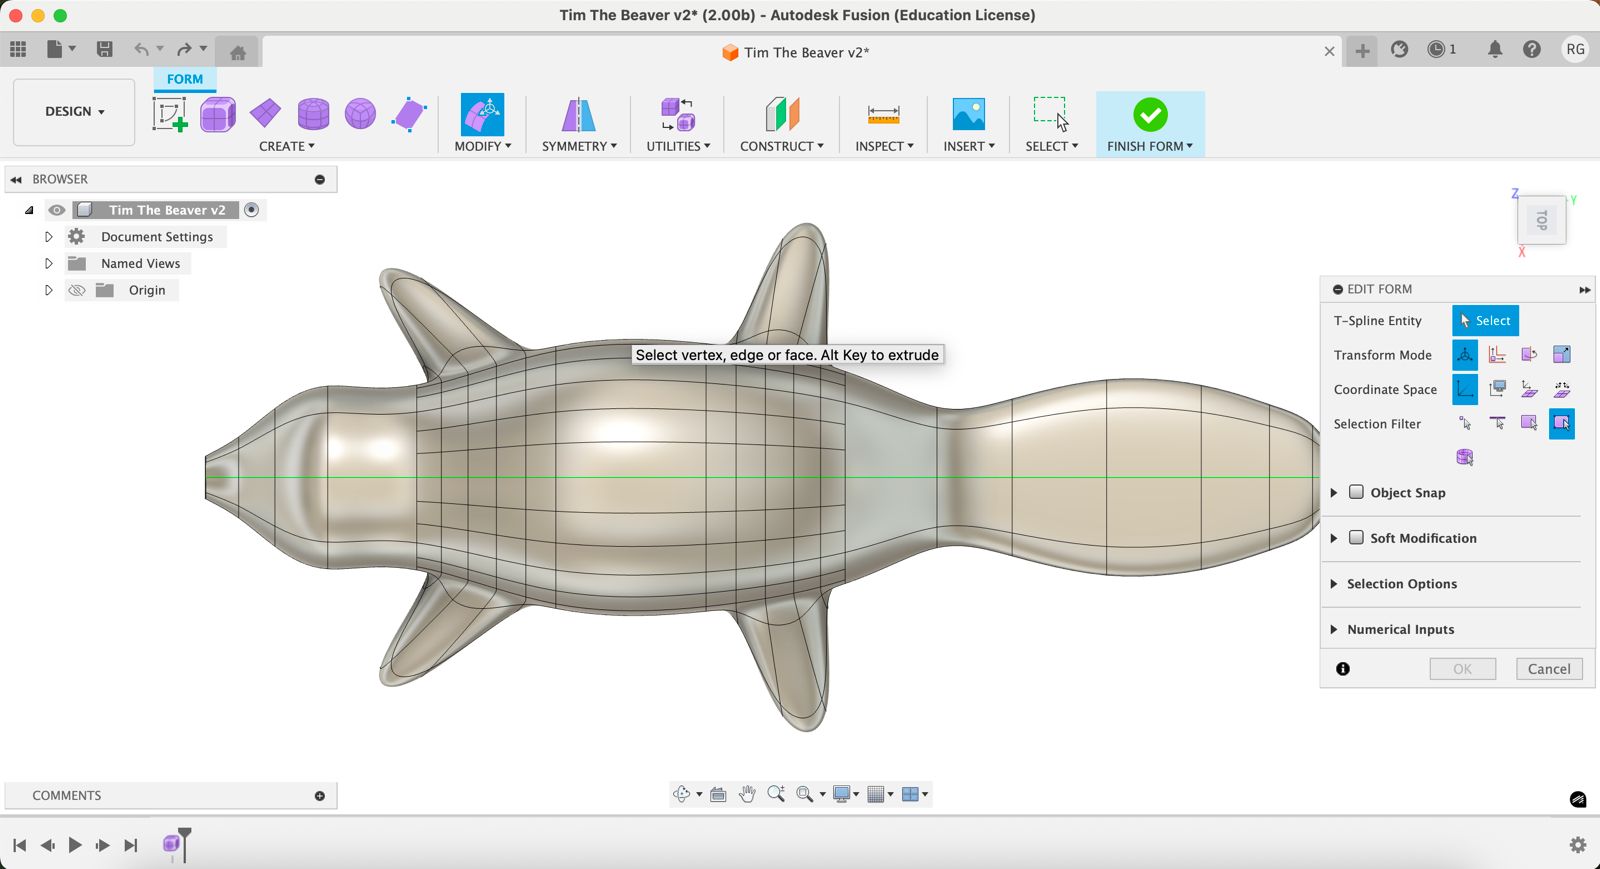
Even though the first week assignment was focused on developing 3D design skills, I would still consider myself quite a novice. I was able to find some helpful YouTube tutorials on how to use the Fusion Form design tools to create an animal. I decided to try out modeling a beaver because of our MIT mascot Tim The Beaver. Here are the steps I took in Fusion to design the beaver and add the hooks to make the wiggly shape.
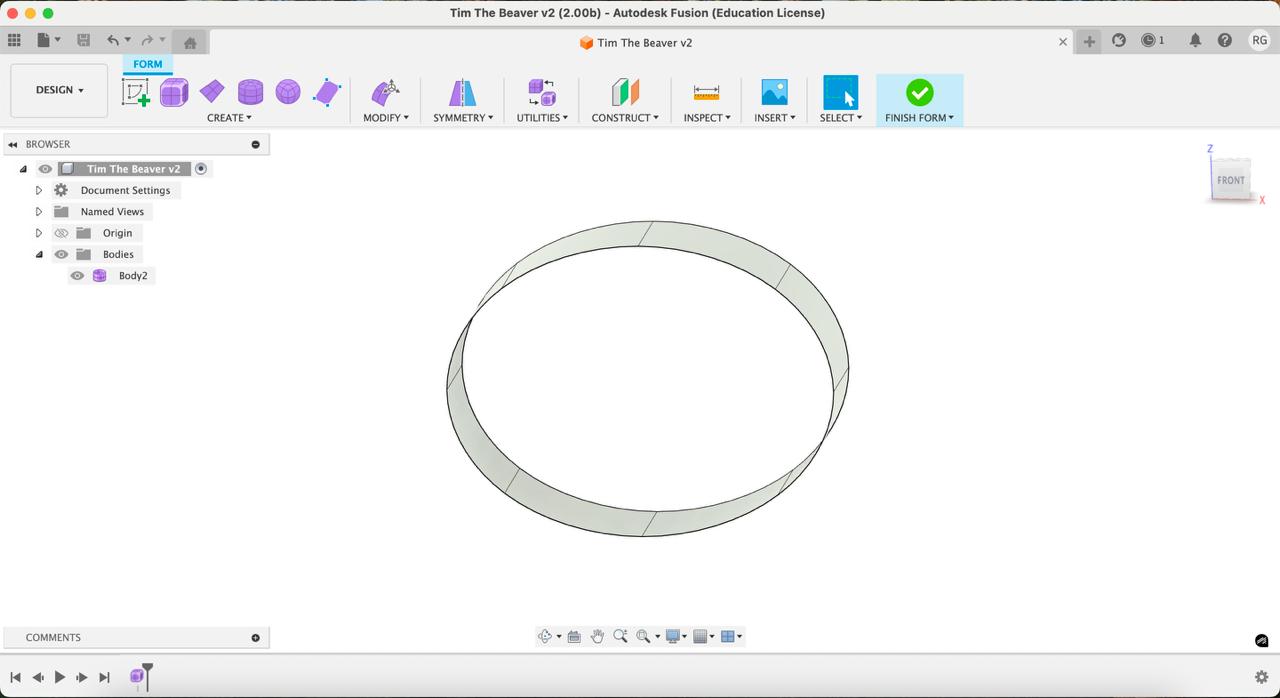
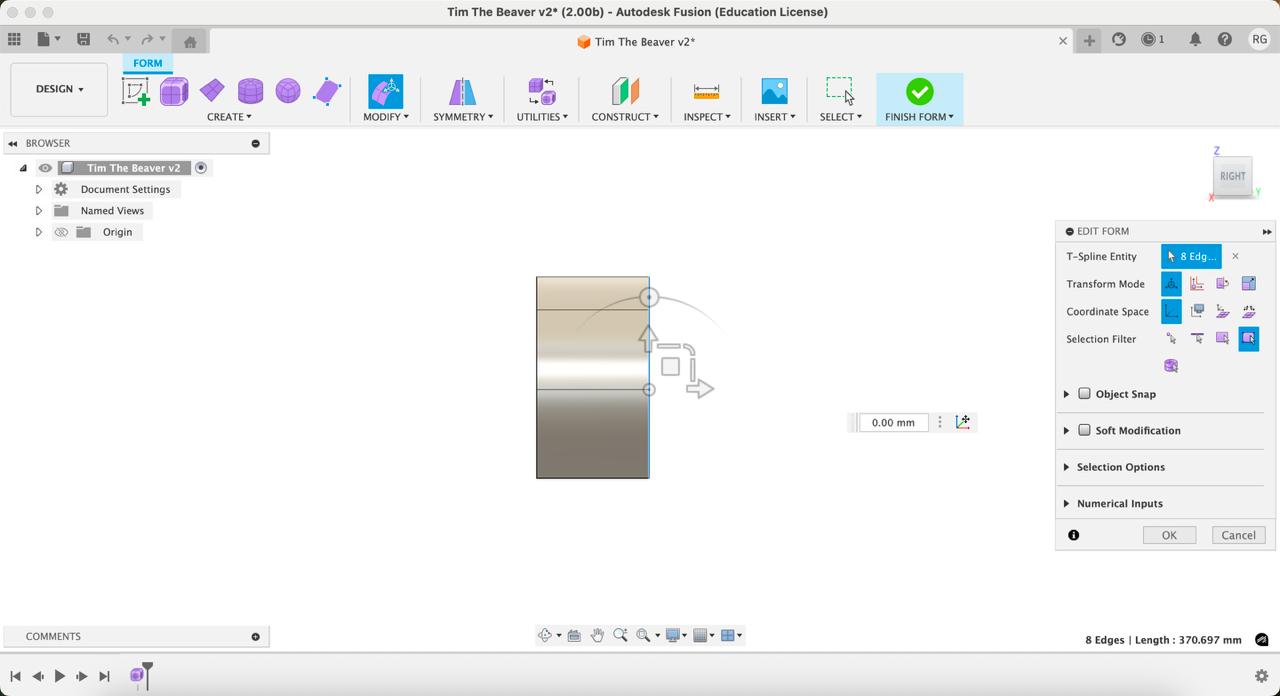
Select the Form toolbox in the top Navbar.
Use the Cylinder shape to create an elliptical shape with 8 faces.
Delete the bottom two faces and join the edges to create the flat surface for the body.
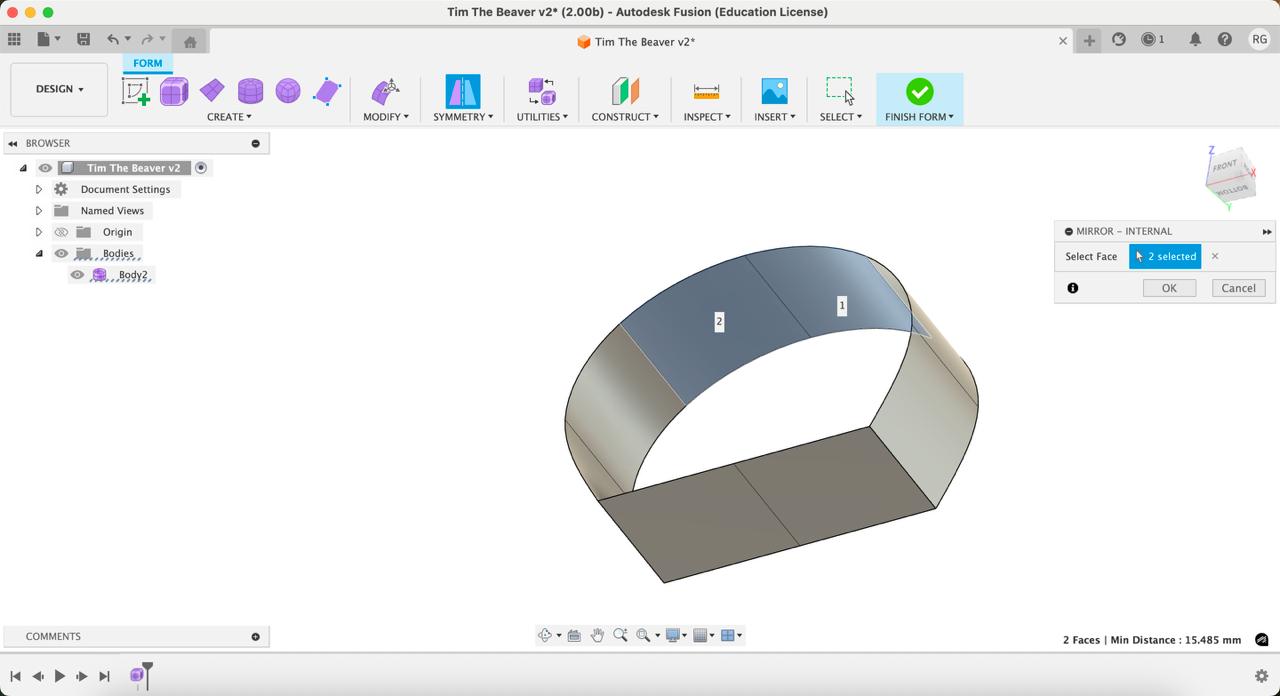
Use the Symmetry tool to mirror changes on both sides throughout the design process.
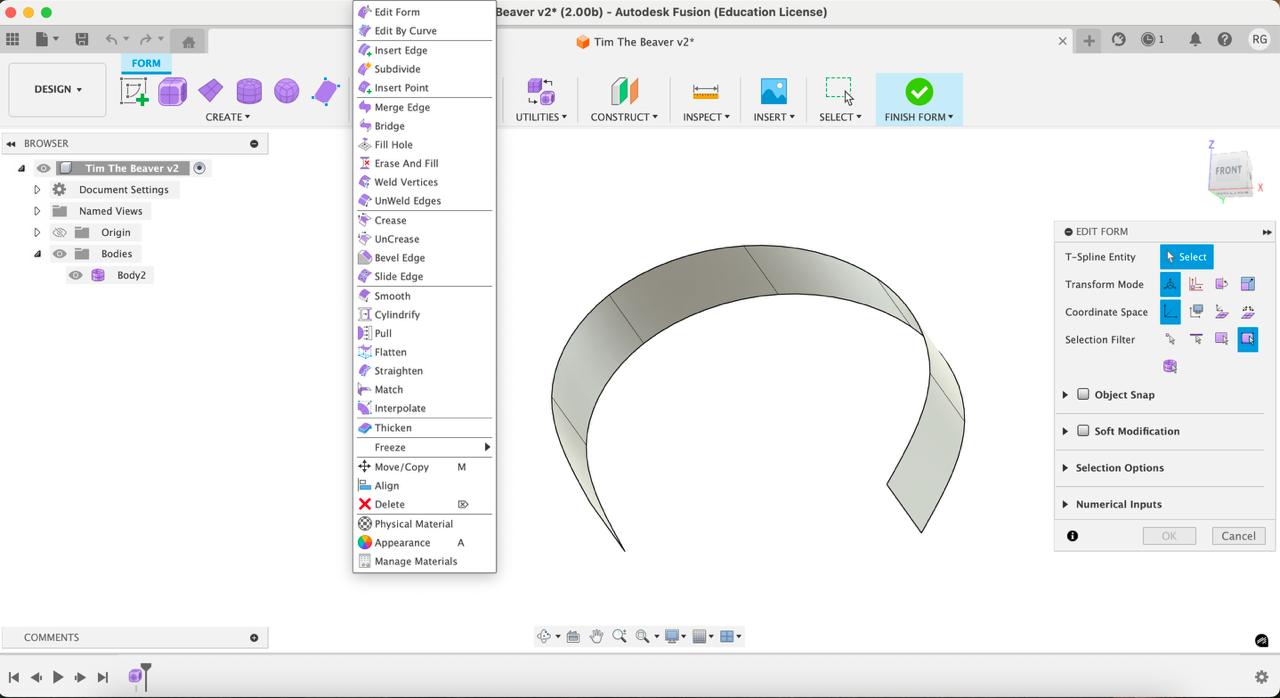
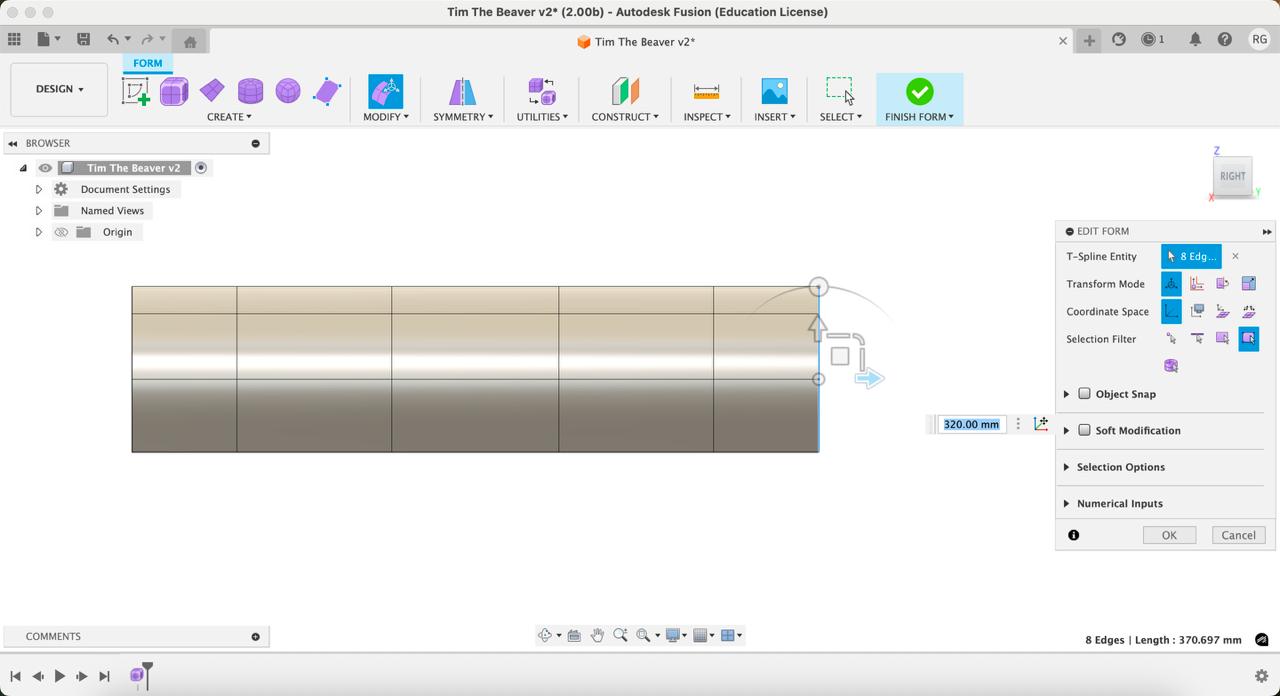
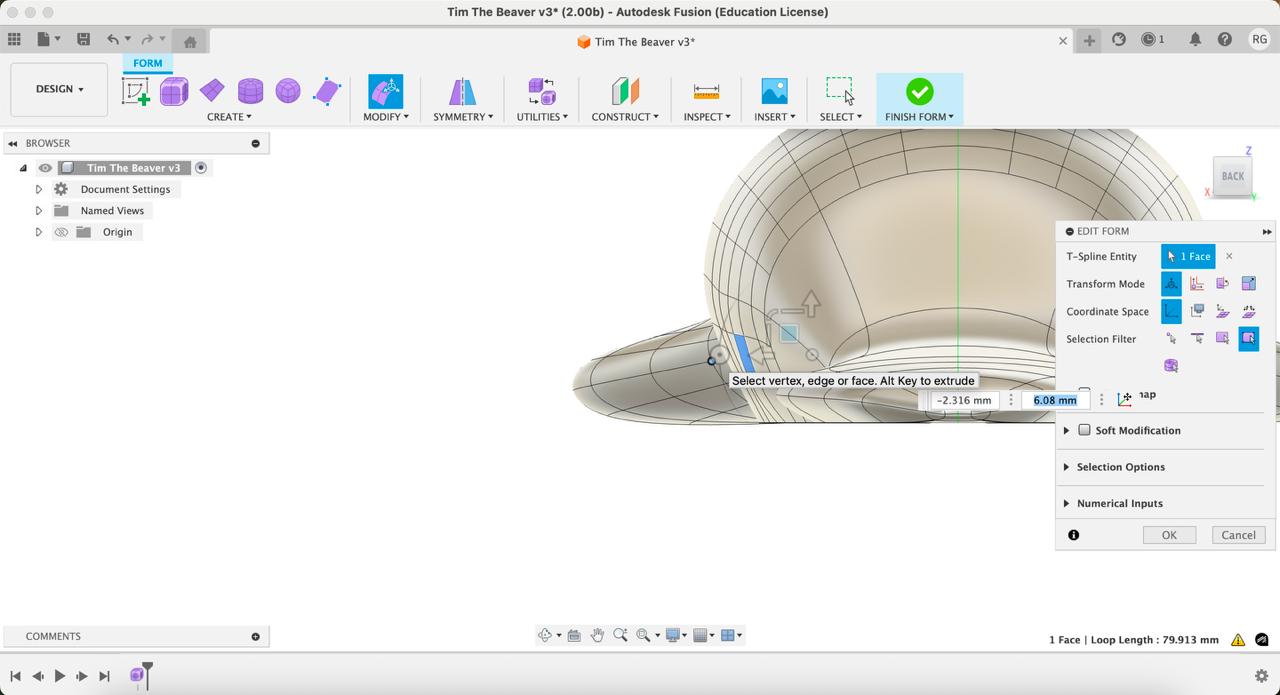
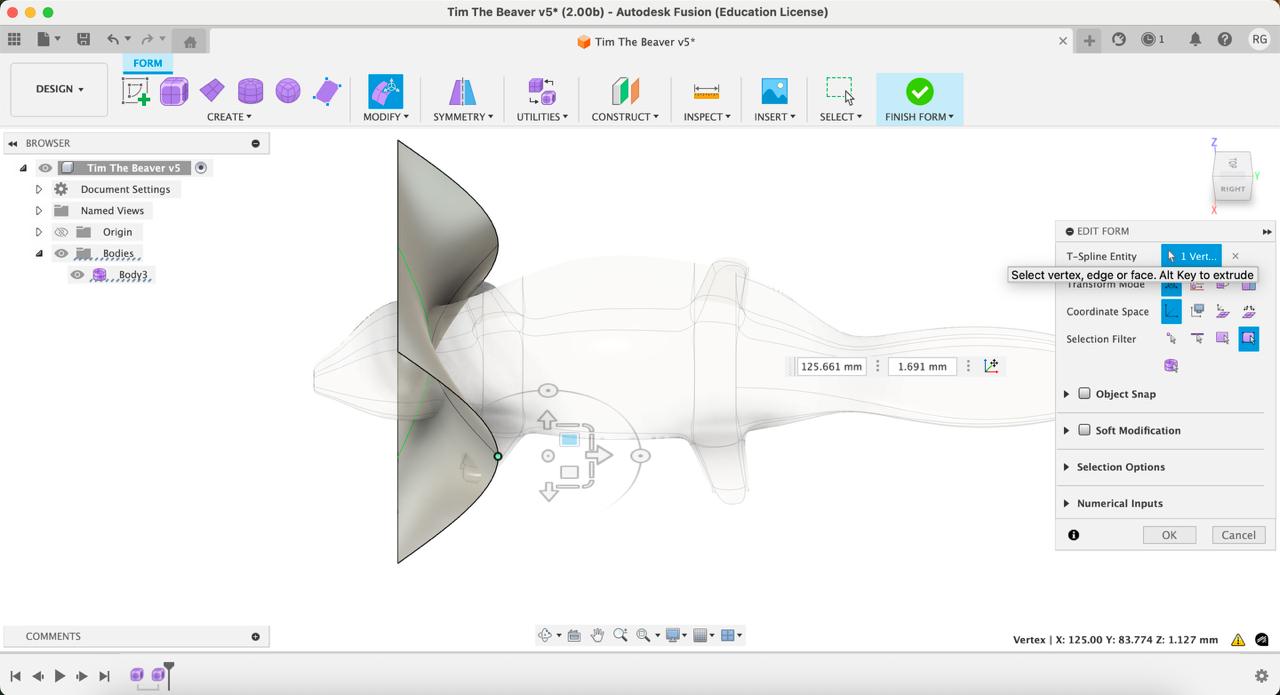
Highlight the back edge and select the Modify tool.
Drag the edge along, hitting the Alt key for each new face.
Using the Modify tool, make the set point along the bottom surface and drag the square down to fold the face.
Use the square to adjust the width of each cross section to match the beaver shape.
Repeat the Alt key + Drag combo to add new faces and make new parts like the tail.
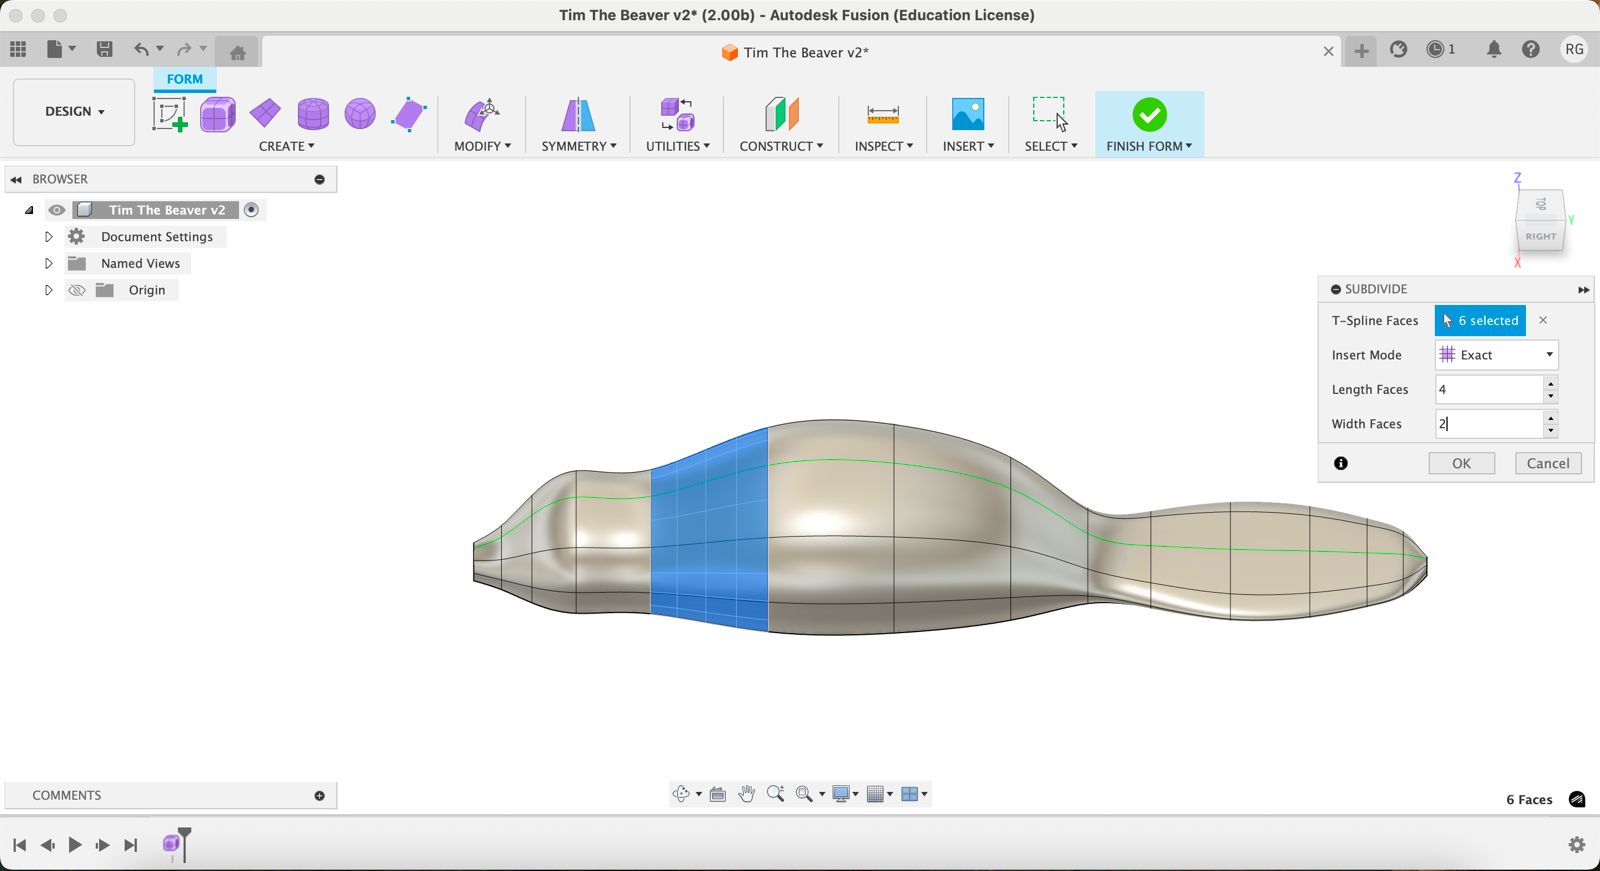
Use the Subdivide tool to break up a face into smaller sections to help with the smaller legs.
Select a face on the side, and drag the square to match beaver leg size.
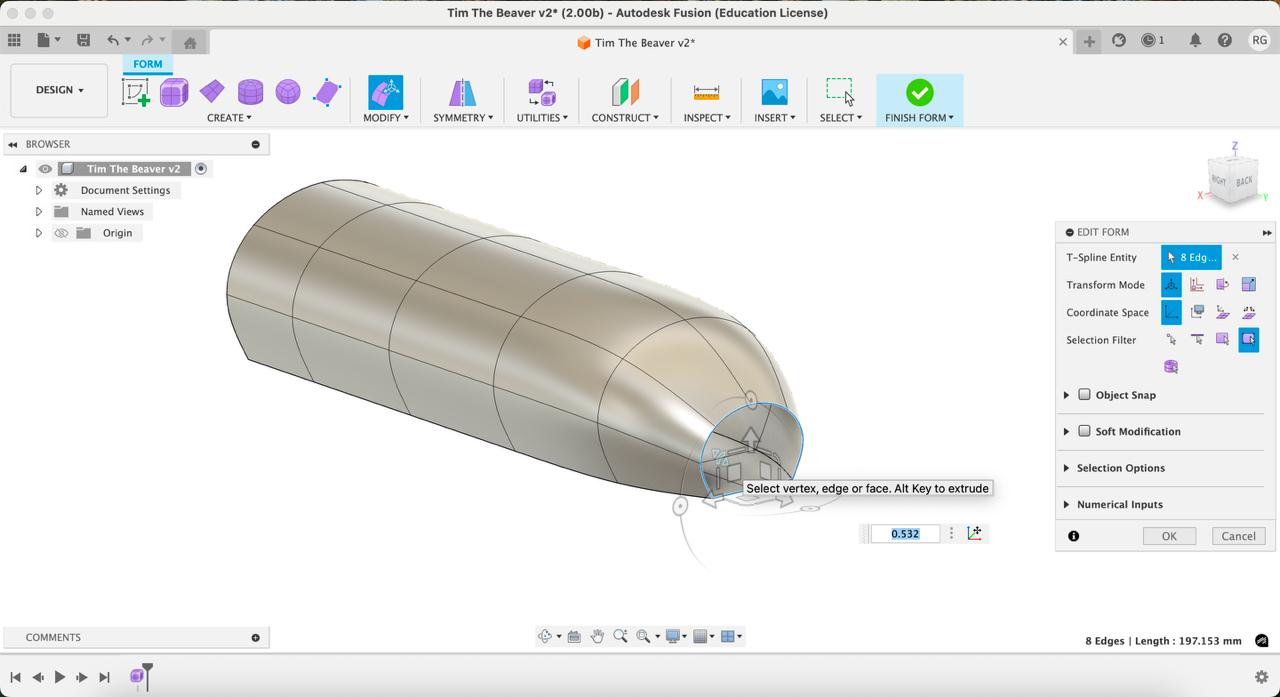
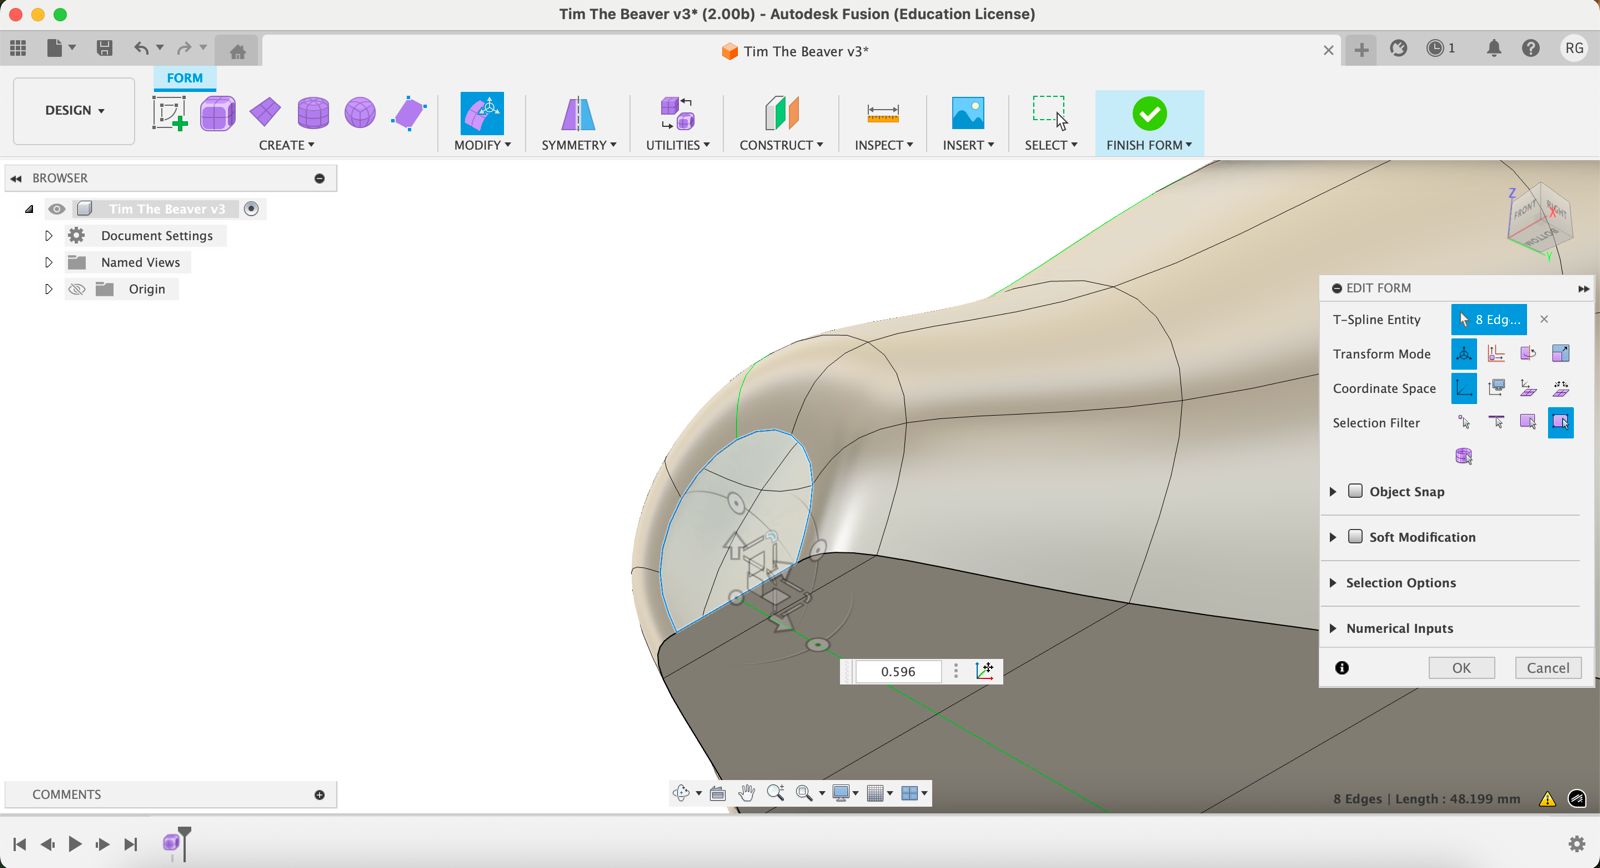
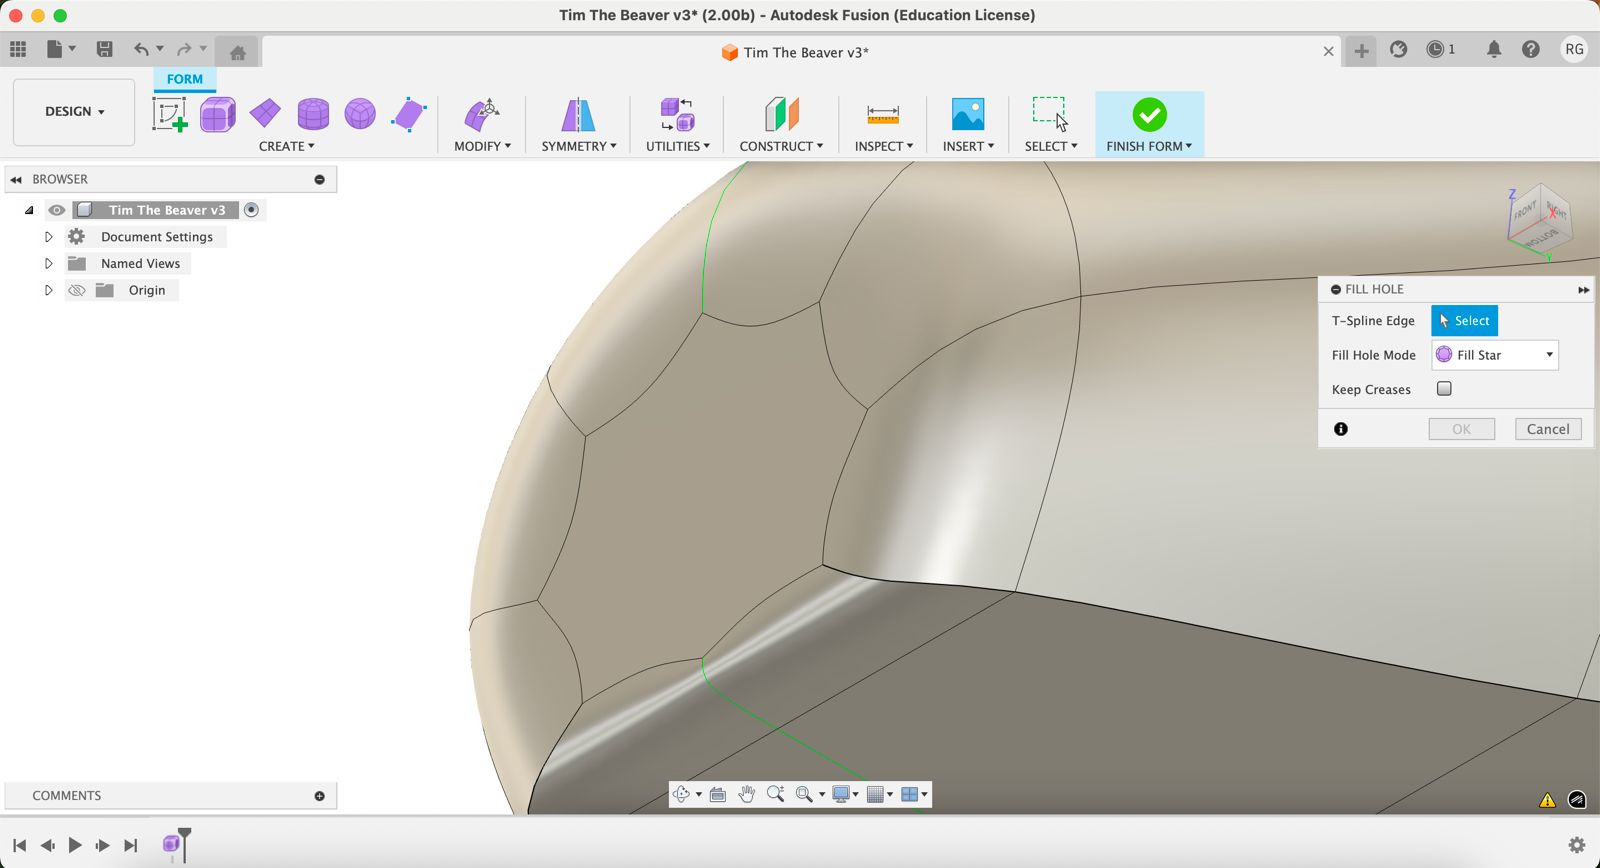
To close the ends (tail & mouth) drag the edge inside using the Alt key.
Use the Fill Star tool to close the face.
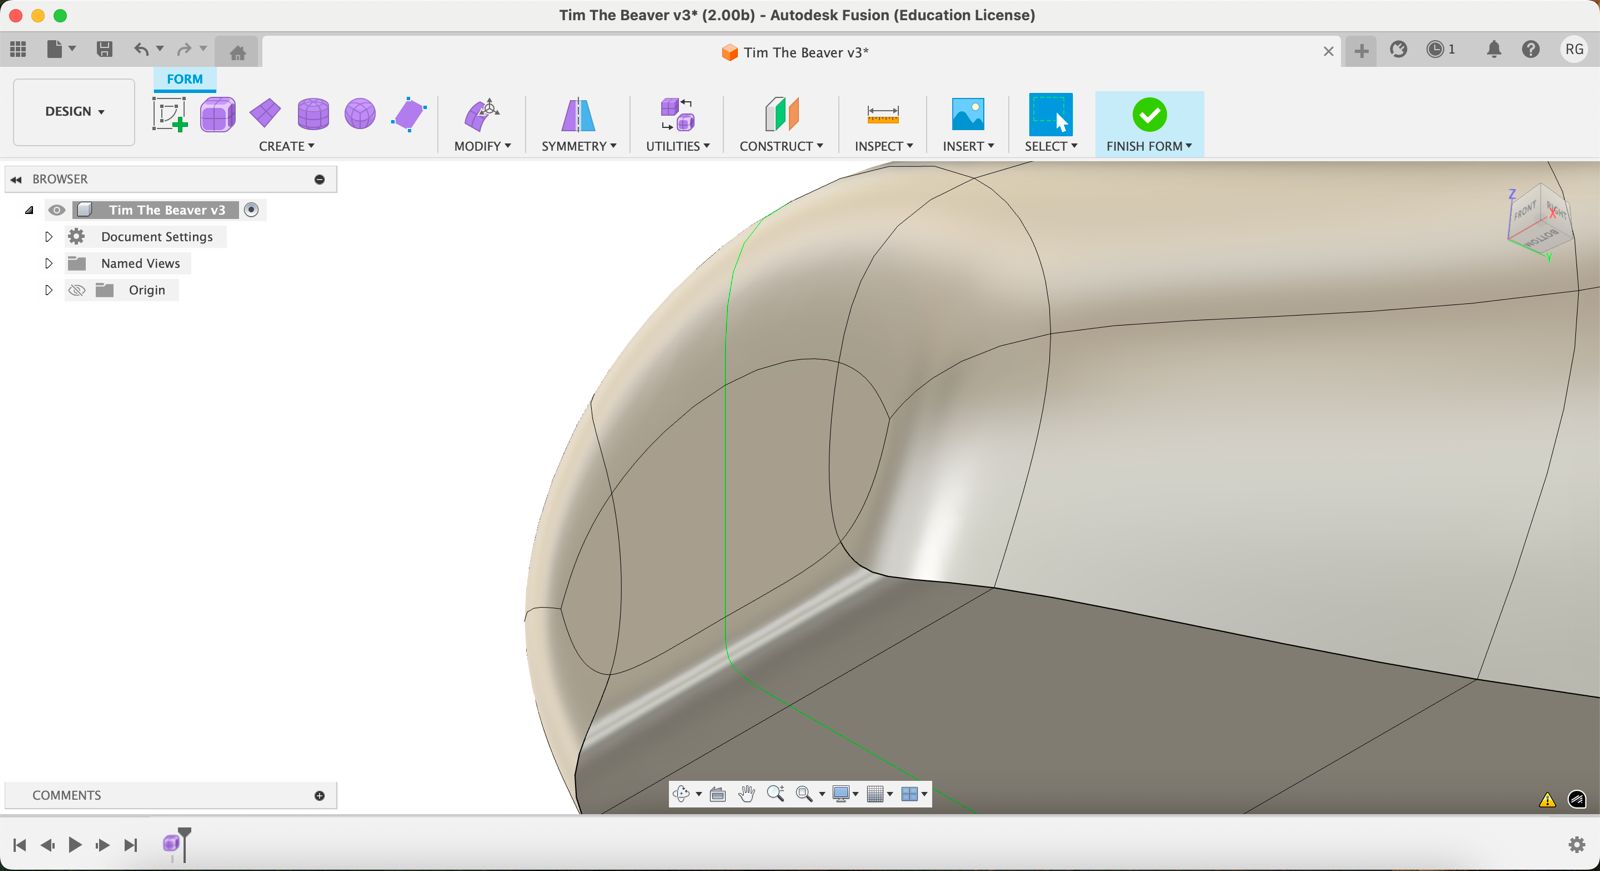
To make the mouth cleaner, use the Setpoint function.
Select points at the edges to merge them and smoothen the surface.
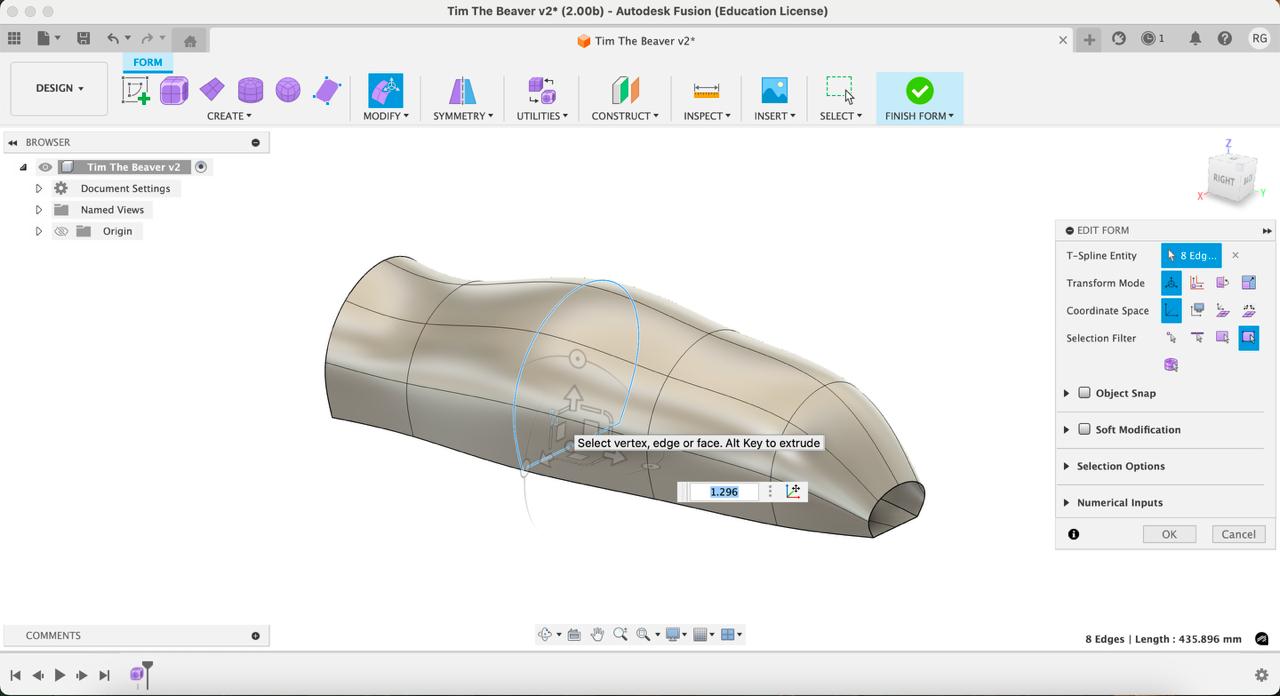
At this point I really didn't like my beaver legs, so I decided to try again.
They were not flat on the surface and would not have 3D printed well because I had grabbed the middle face.
I selected the extruded faces and, with the Modify tool, dragged them back into the body.
Then I selected the bottom face and repositioned them with the surface along the base.
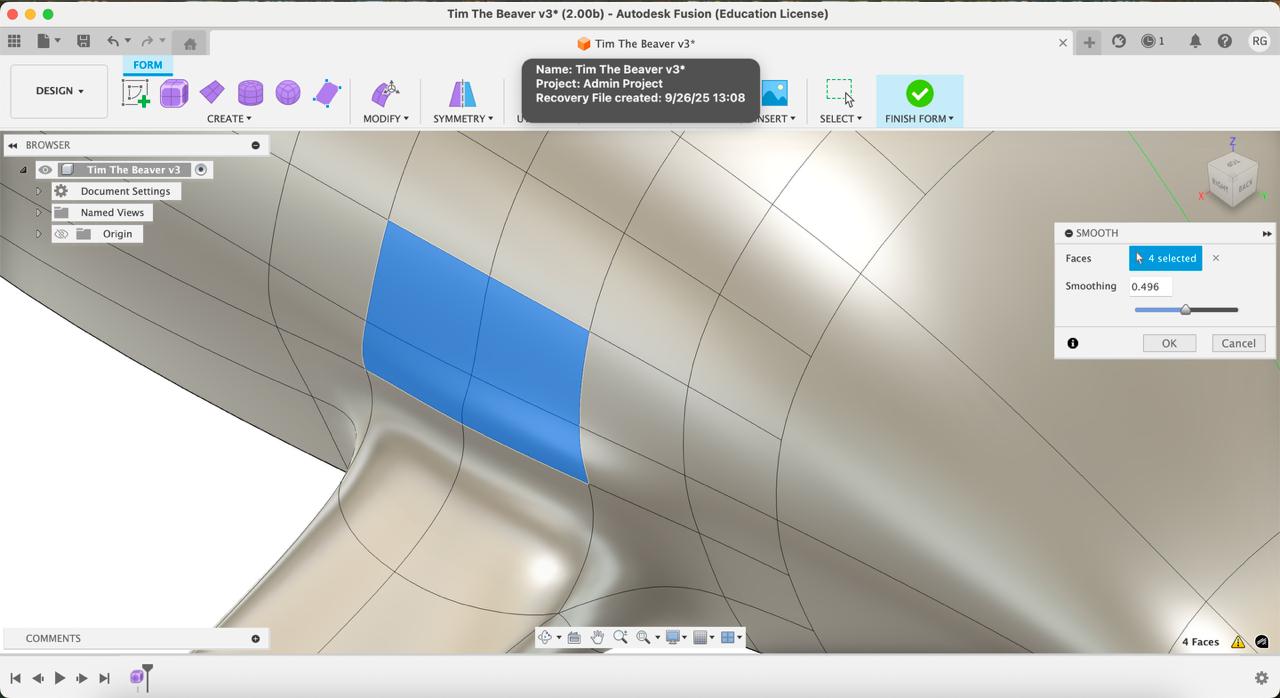
The Smooth function helped me iron out any kinks / waves that had been left over.
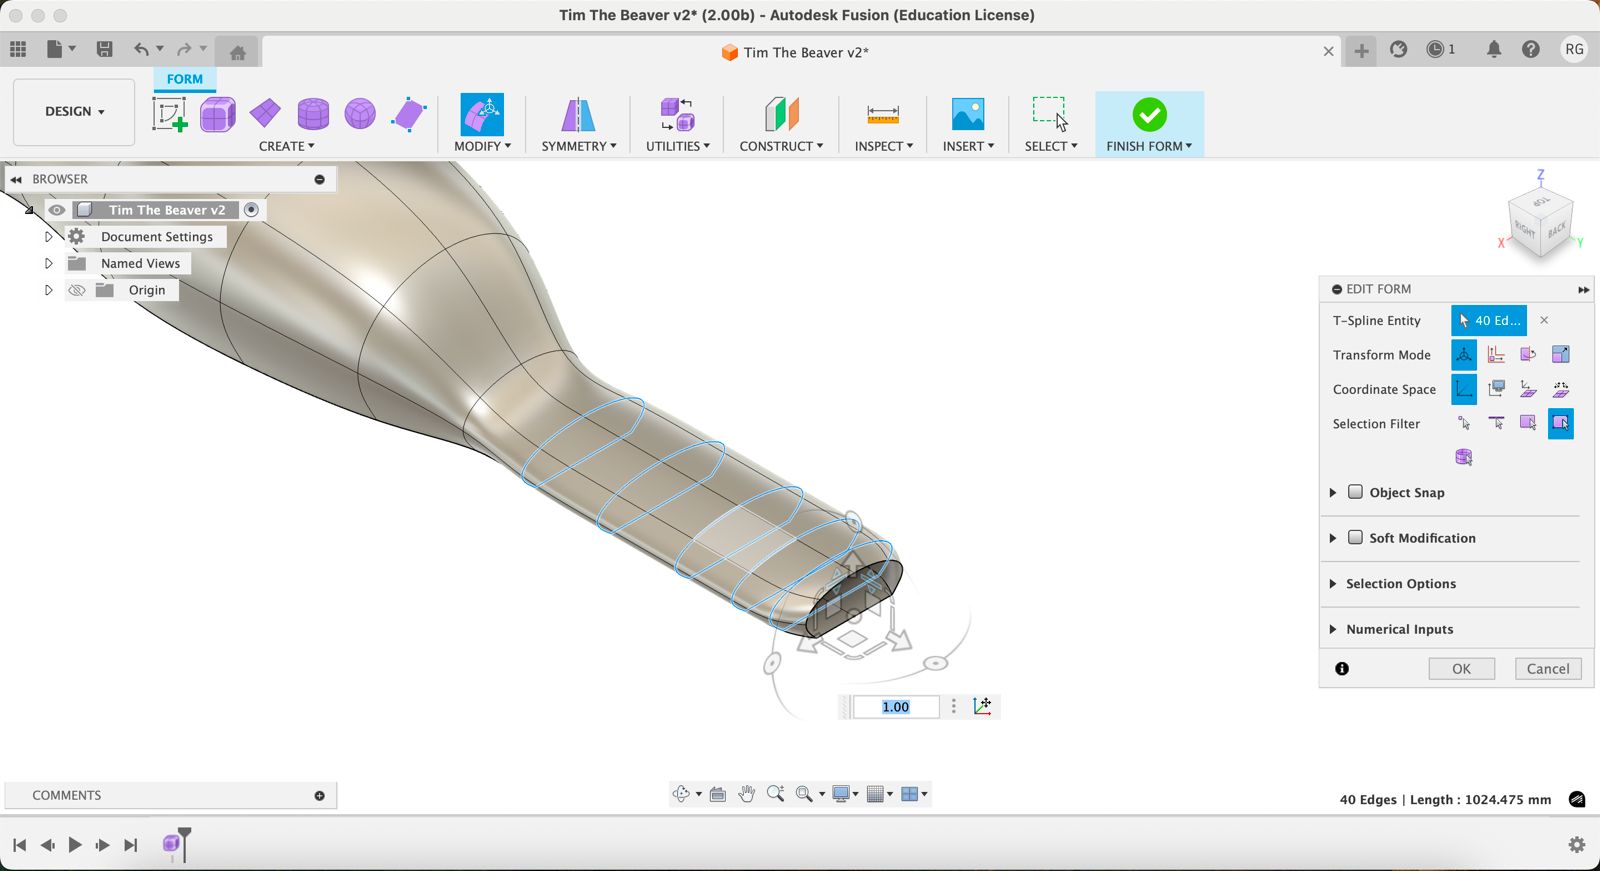
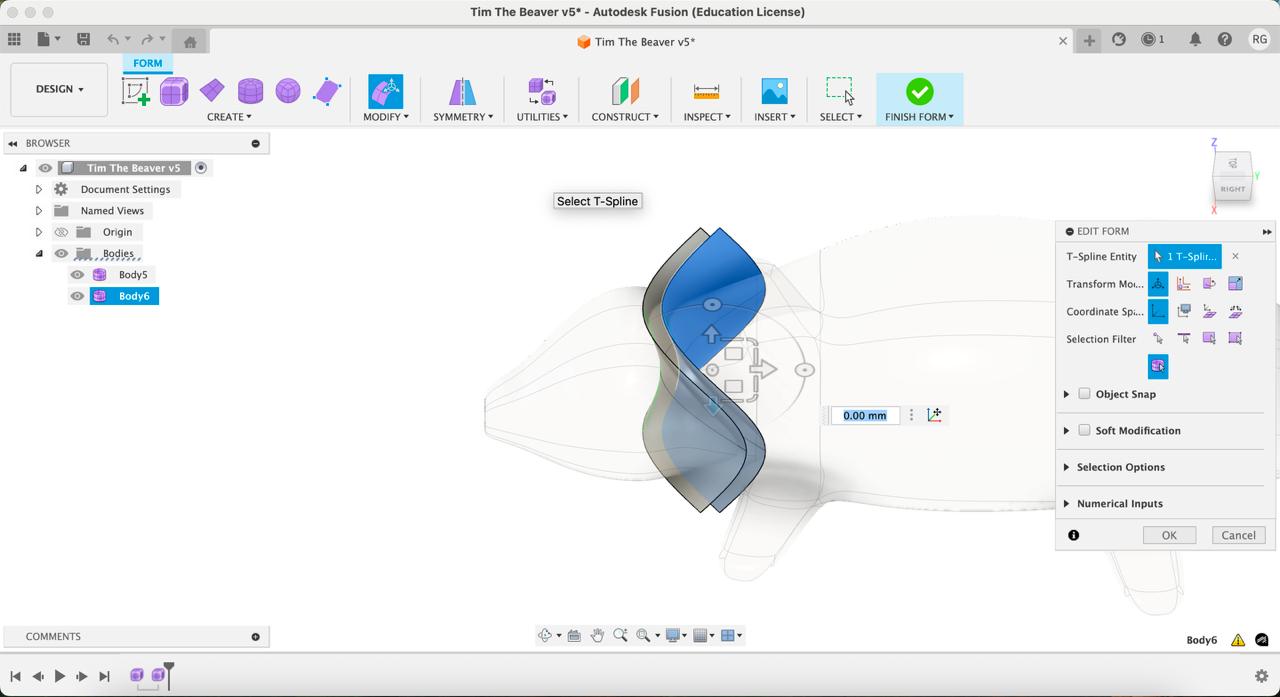
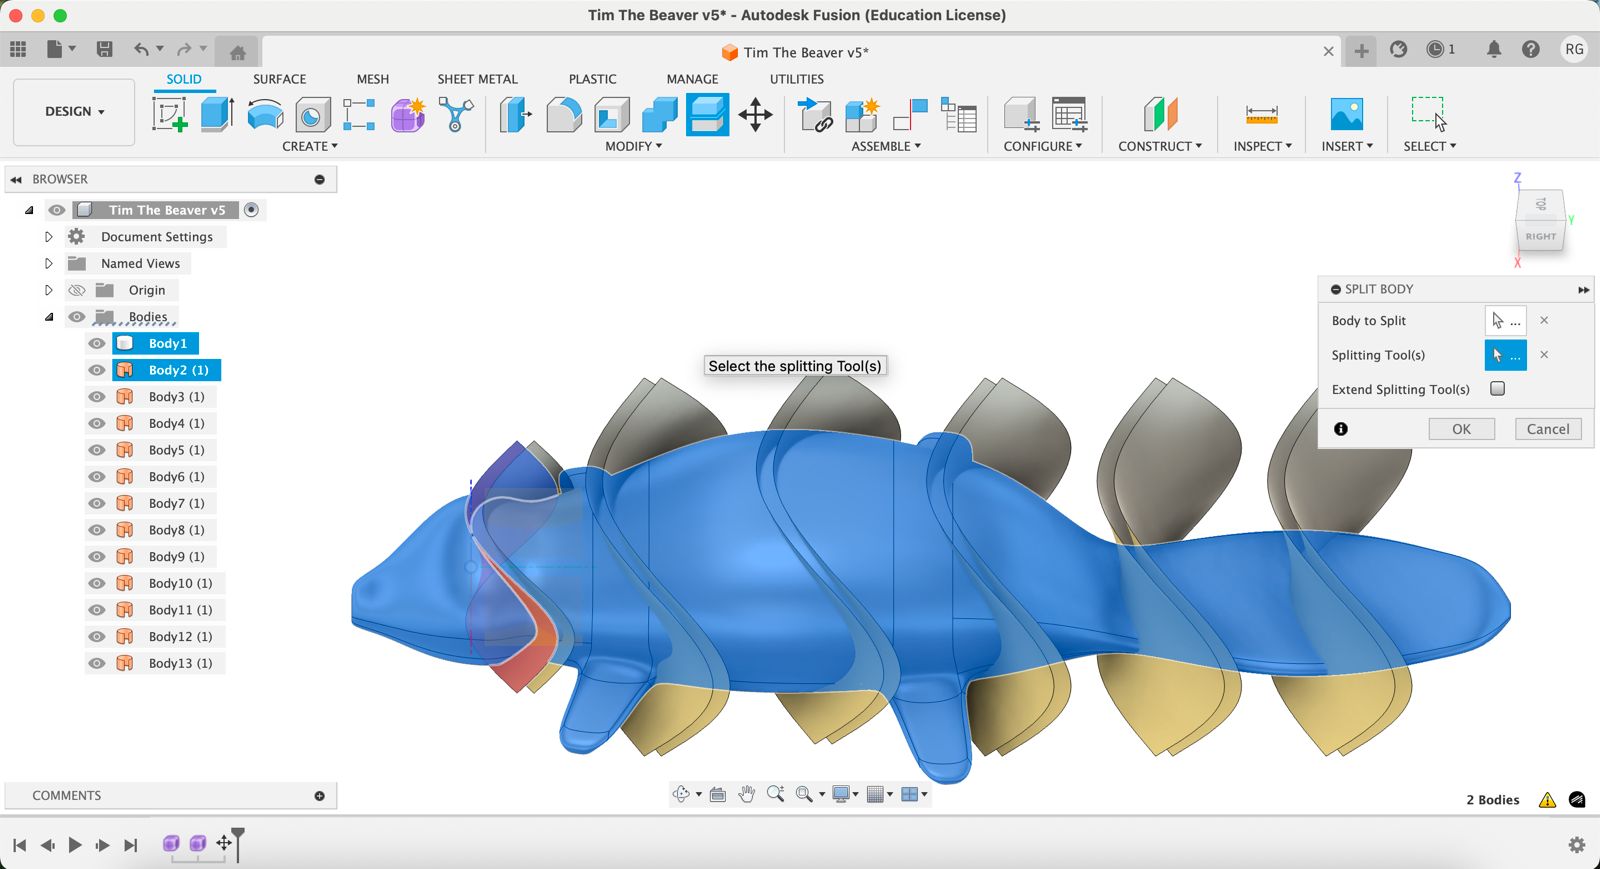
Now started the process of cutting along the body to allow for wiggle room.
Start with a plane Form and create symmetry along the body.
Bend the plane to create a woven shape from the center.
Select the plane and the Move/Copy tool, create a copy and move it back 8mm.
Replicate this along the body to create hinge spaces.
Avoid cutting any legs or protuberances with the planes.
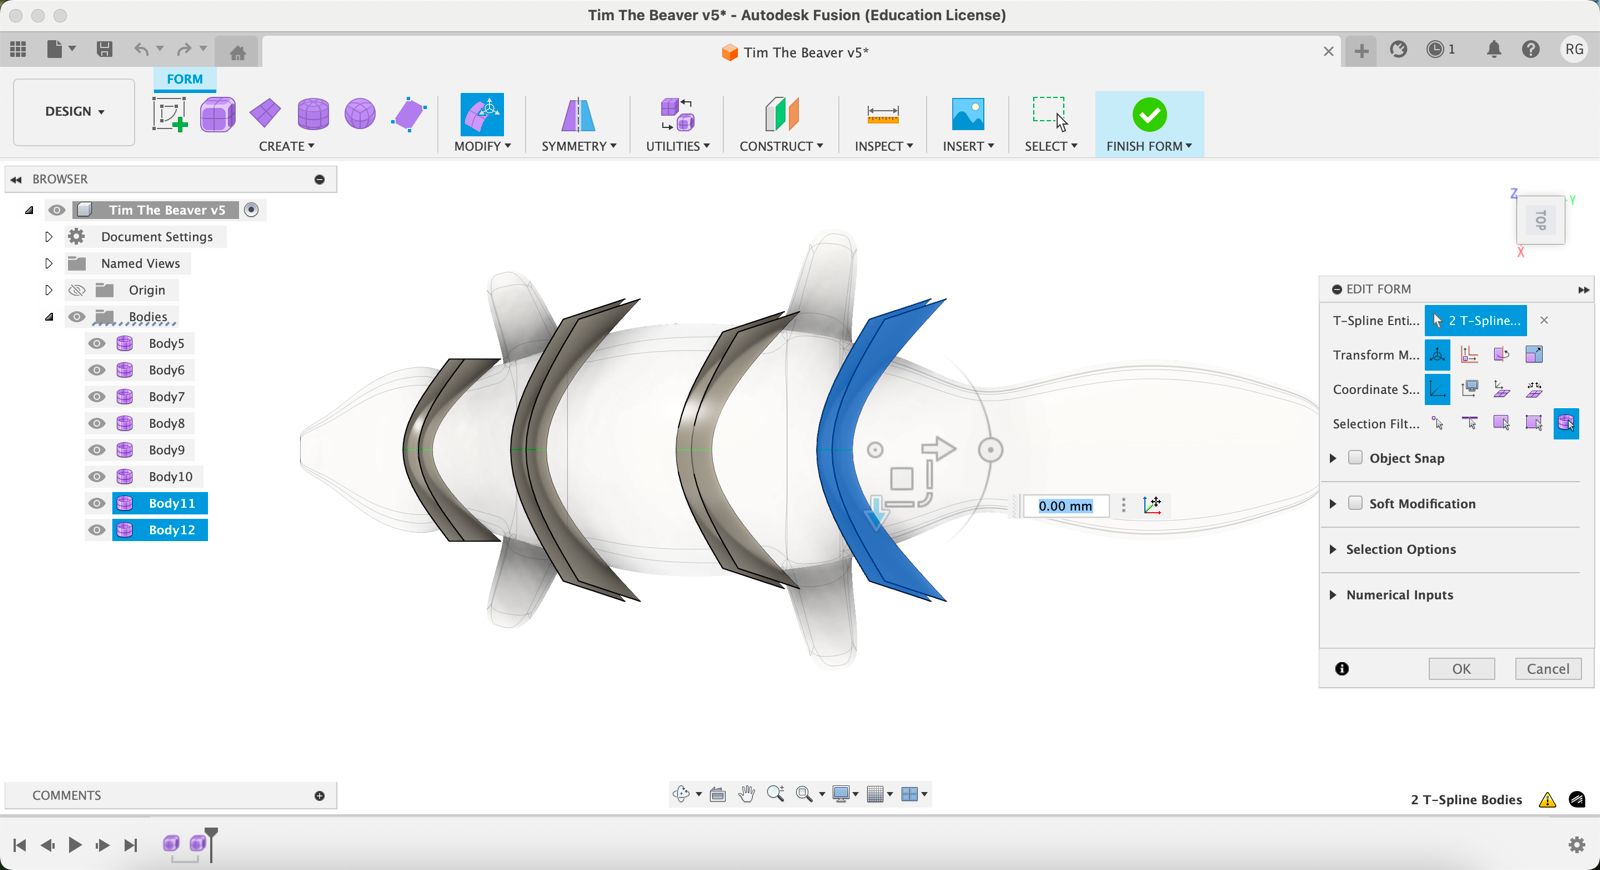
Once in place, use the Split body tool to cut the middle volume out and delete the planes.
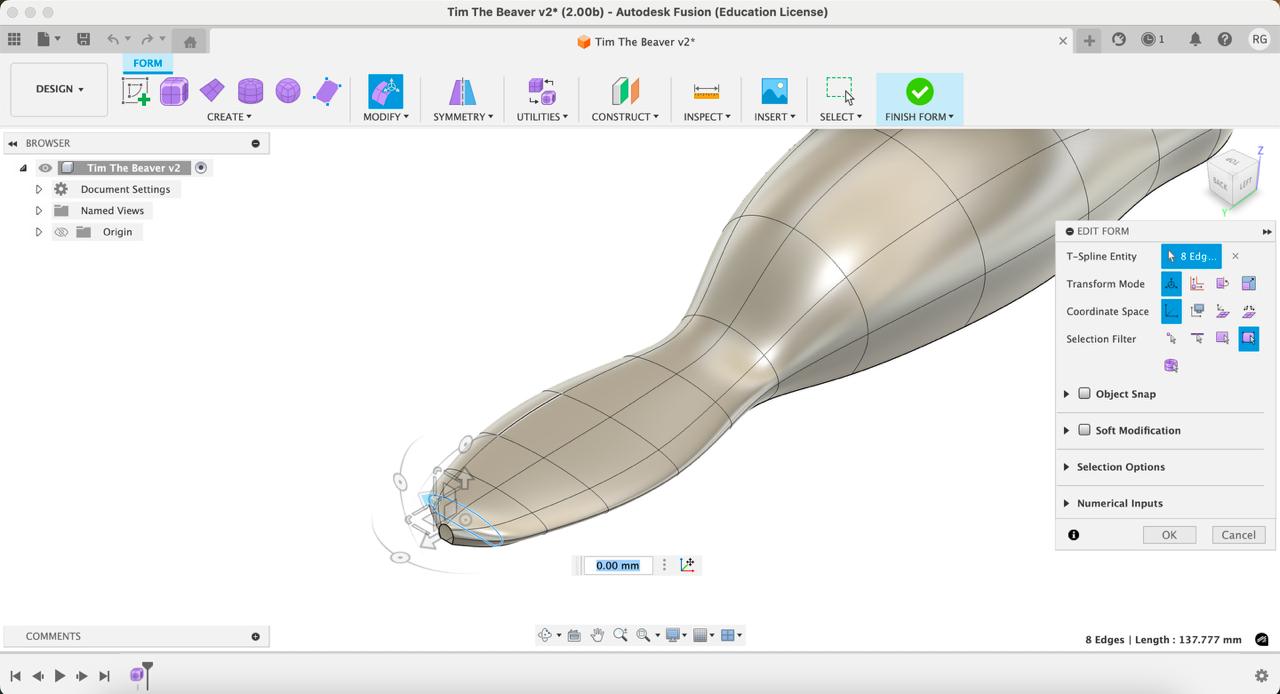
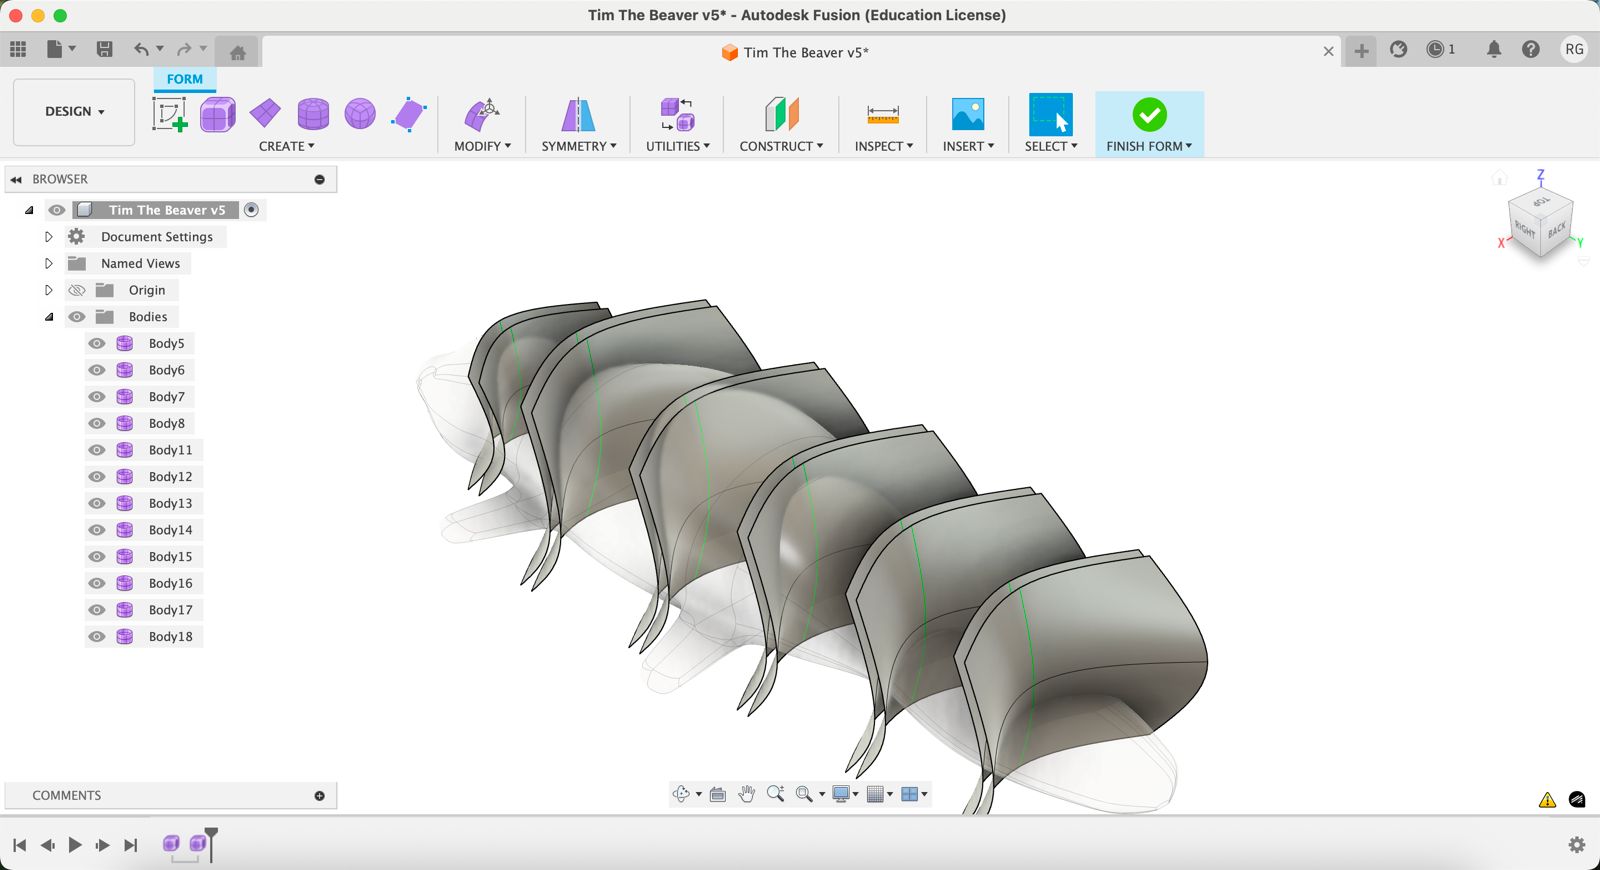
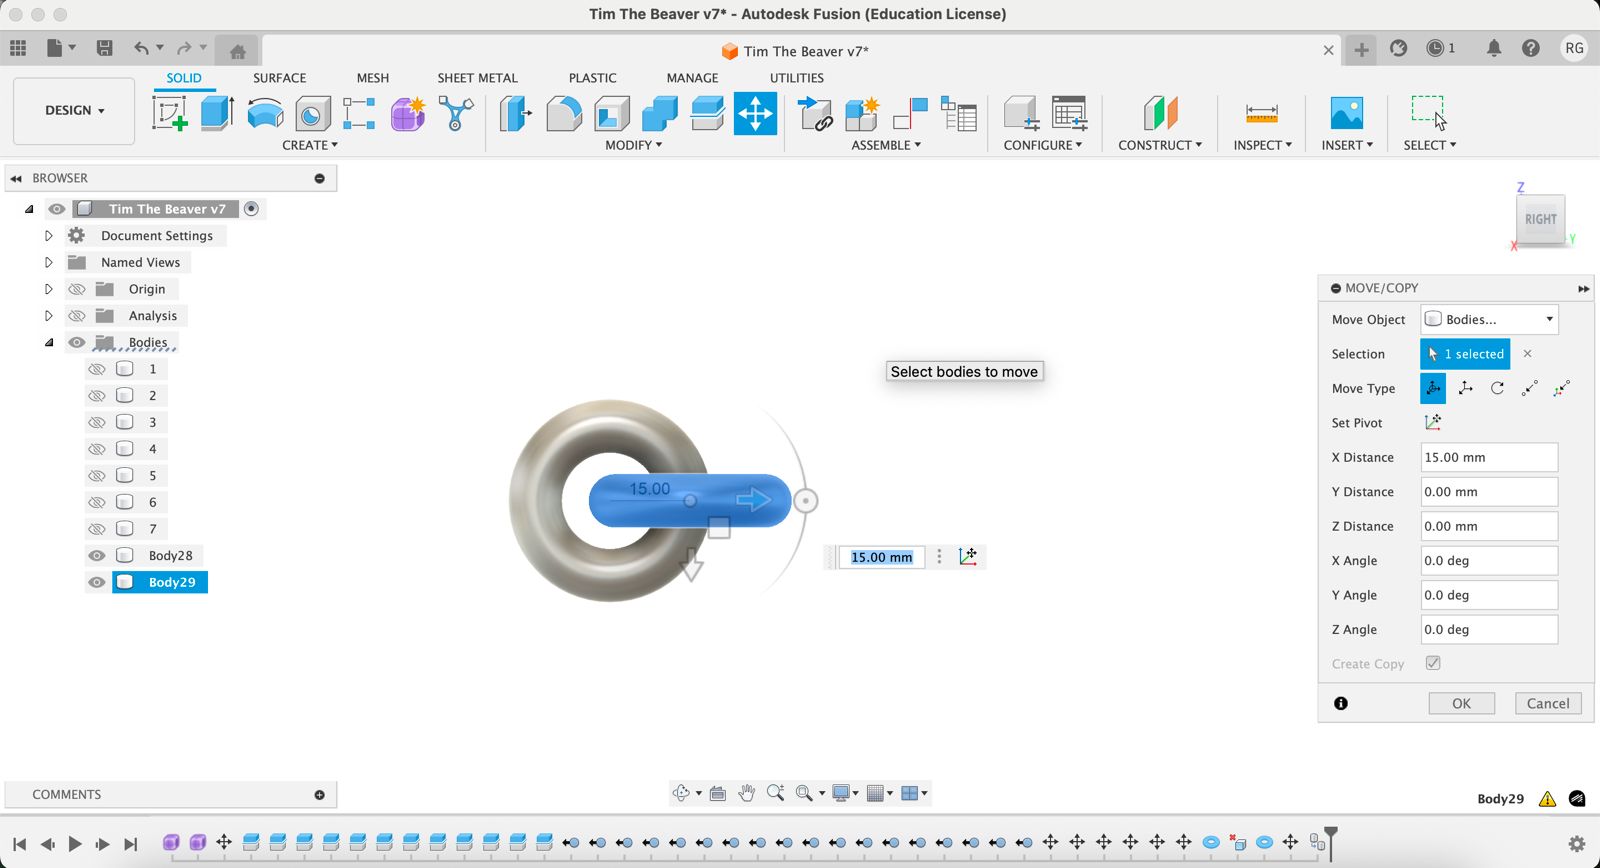
To make the hooks, create a Torus with inner diam 20mm and torus diam 8mm.
Replicate this and rotate 90 deg to place it in the middle of the other.
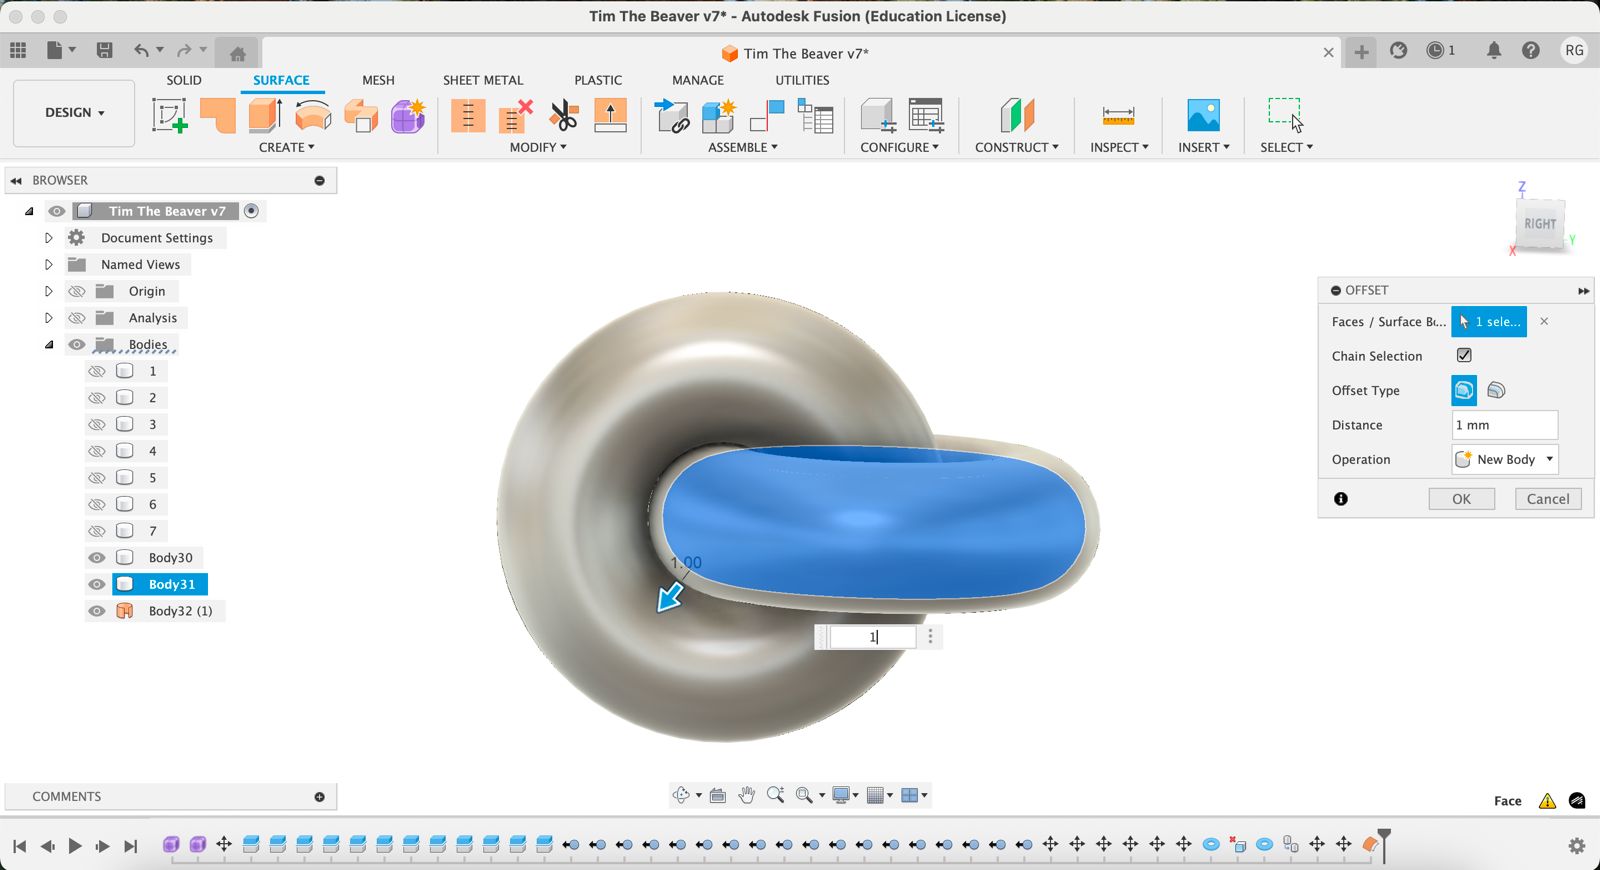
Create a 2mm offset for both toruses.
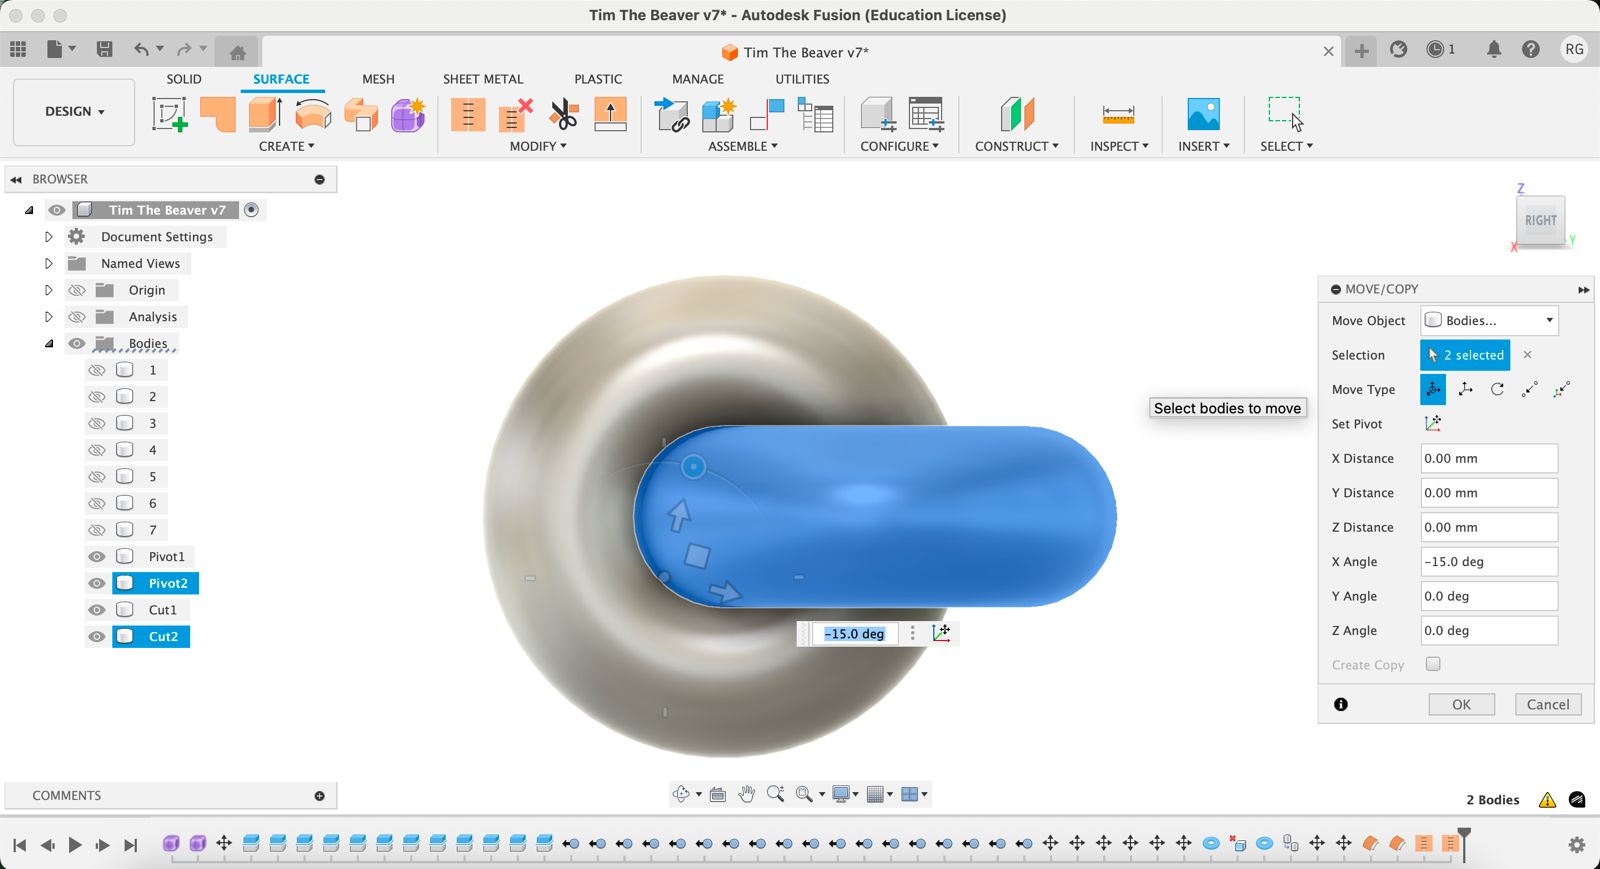
Rotate this a further 15 deg to help with 3D printing later.
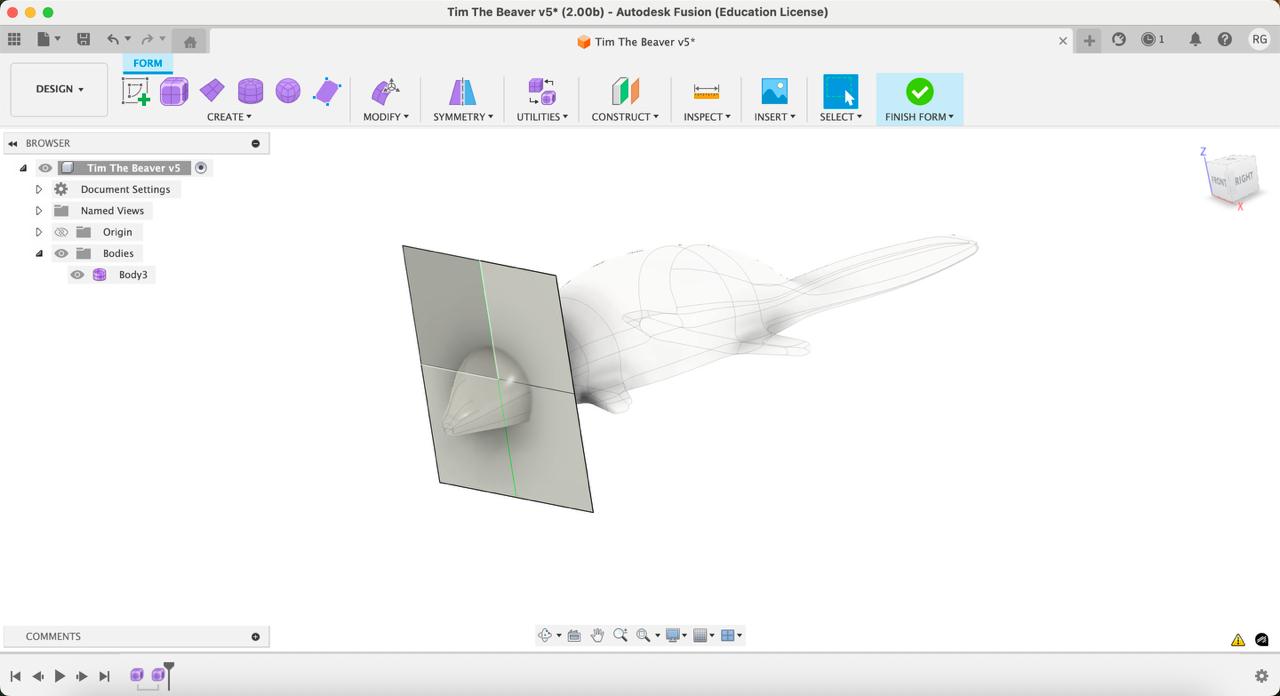
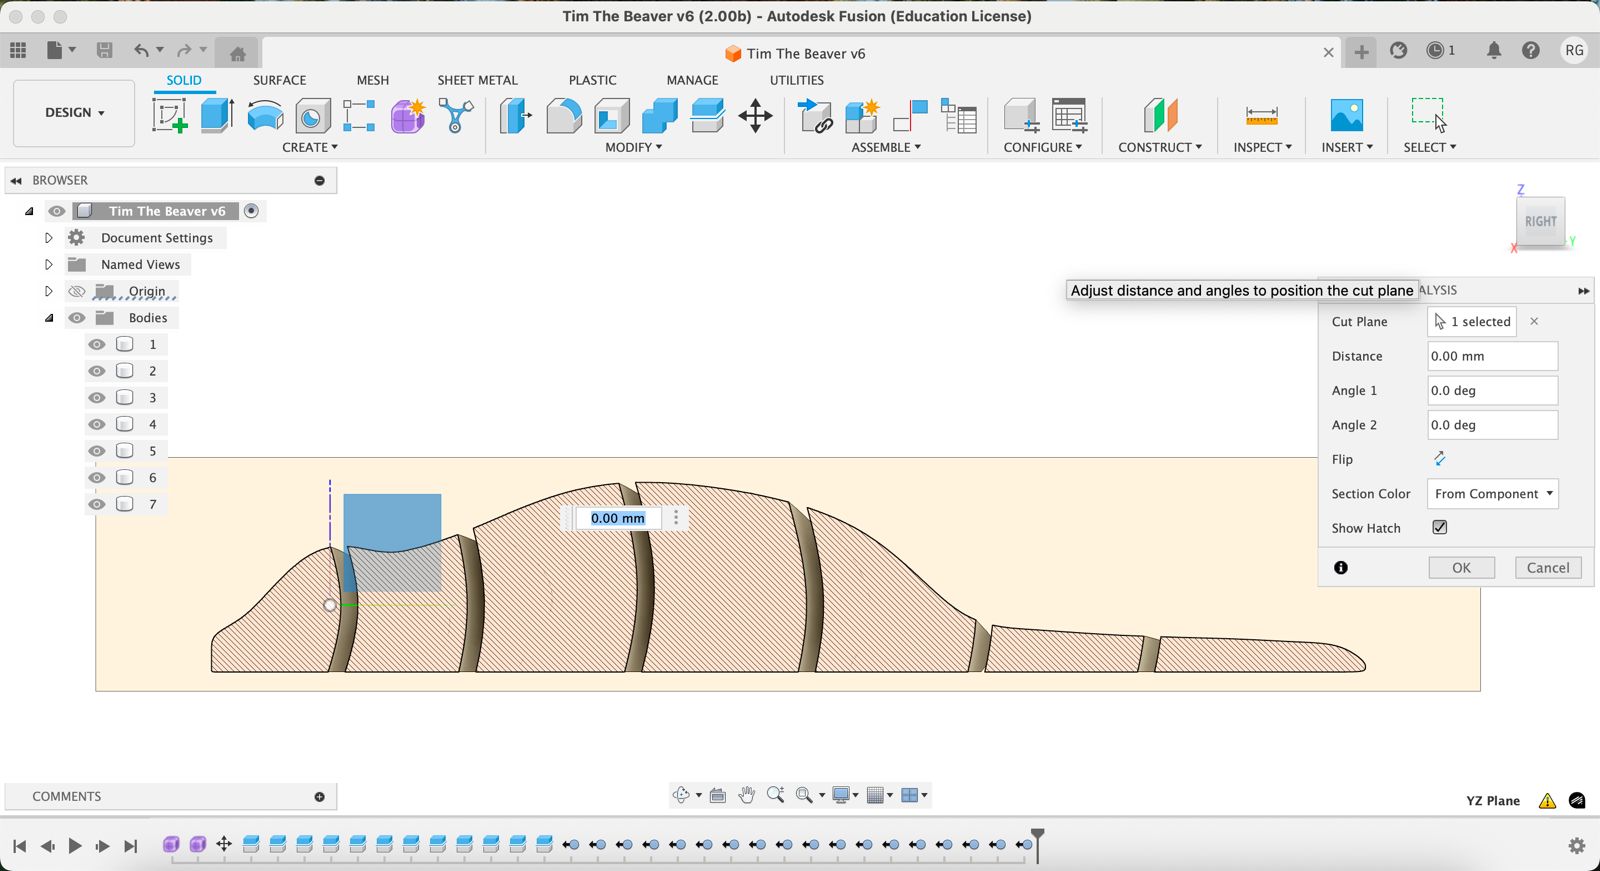
To help with placement, create a section analysis to see the midsection of the beaver.
Place the two torus structure at every break.
Make sure the inner diam of both is inside the body.
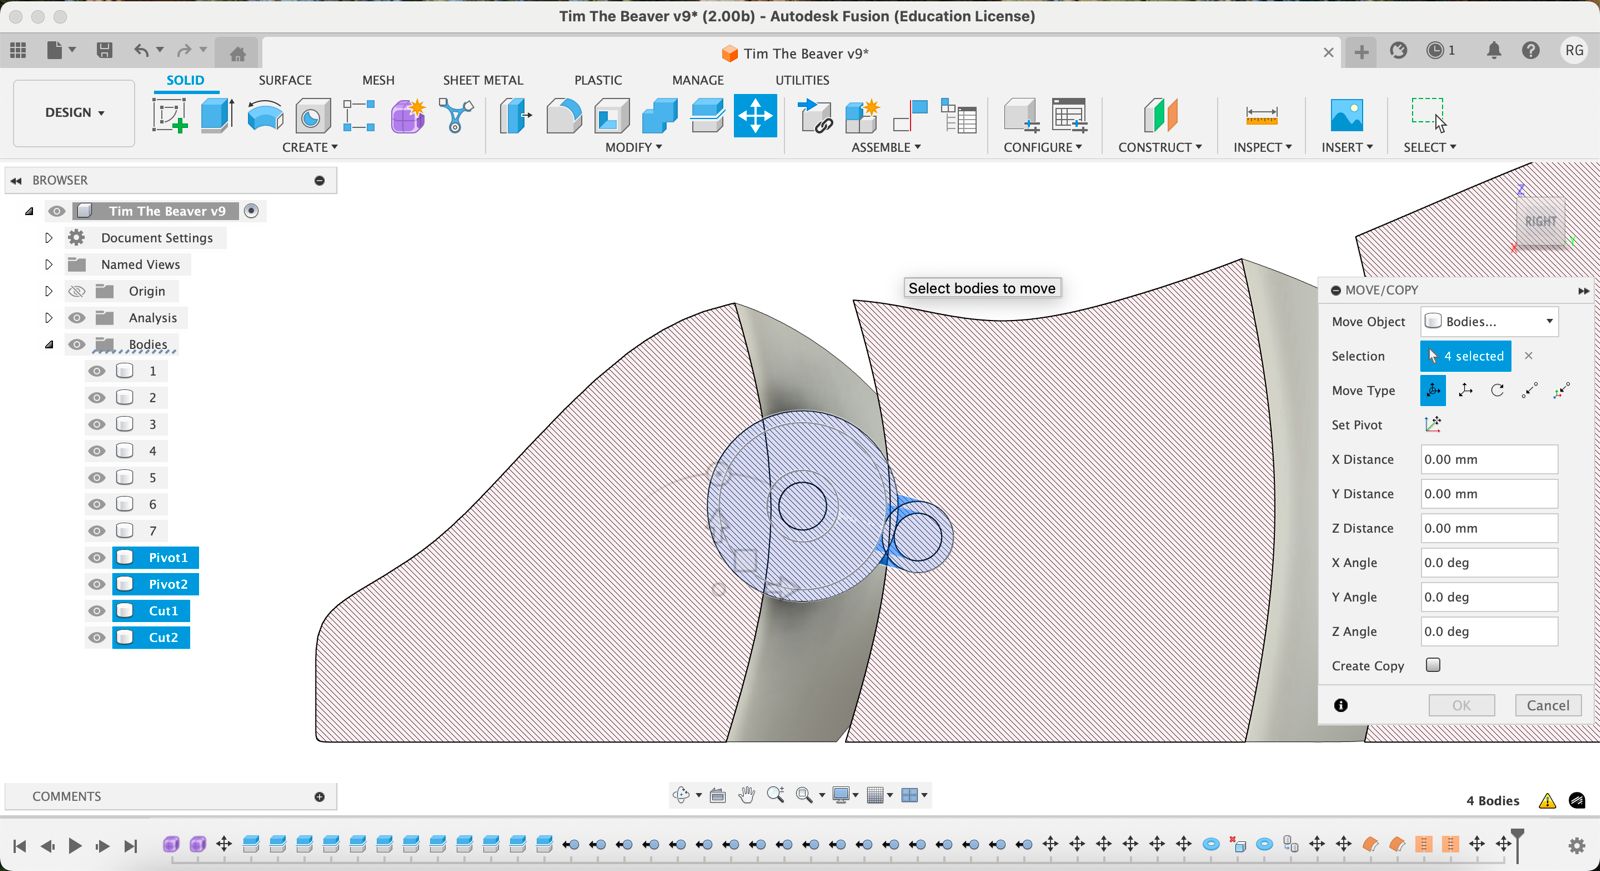
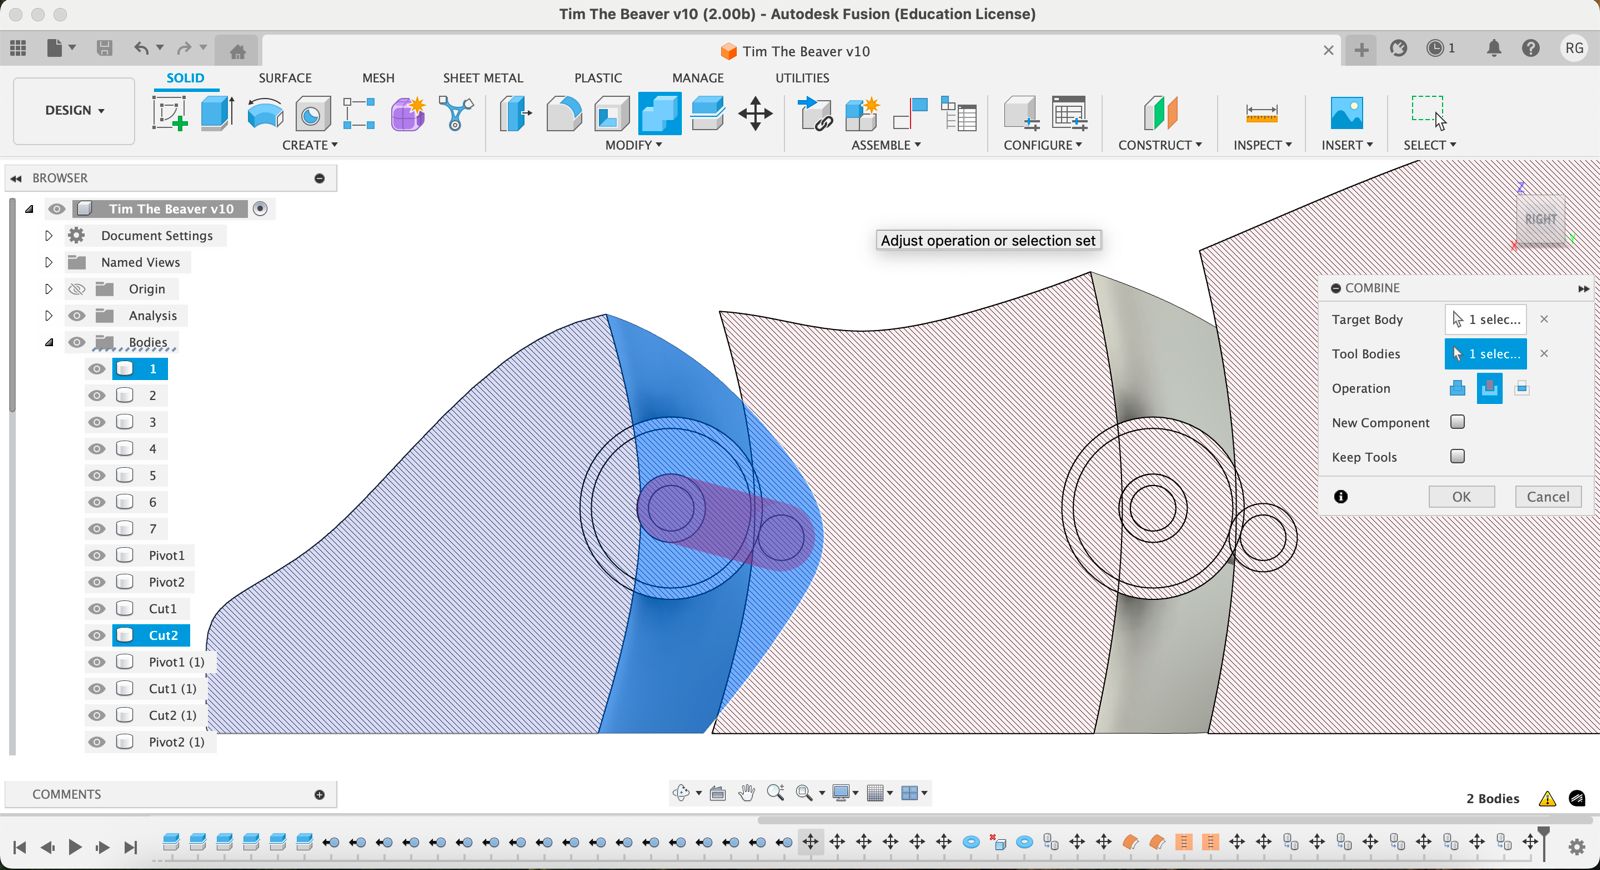
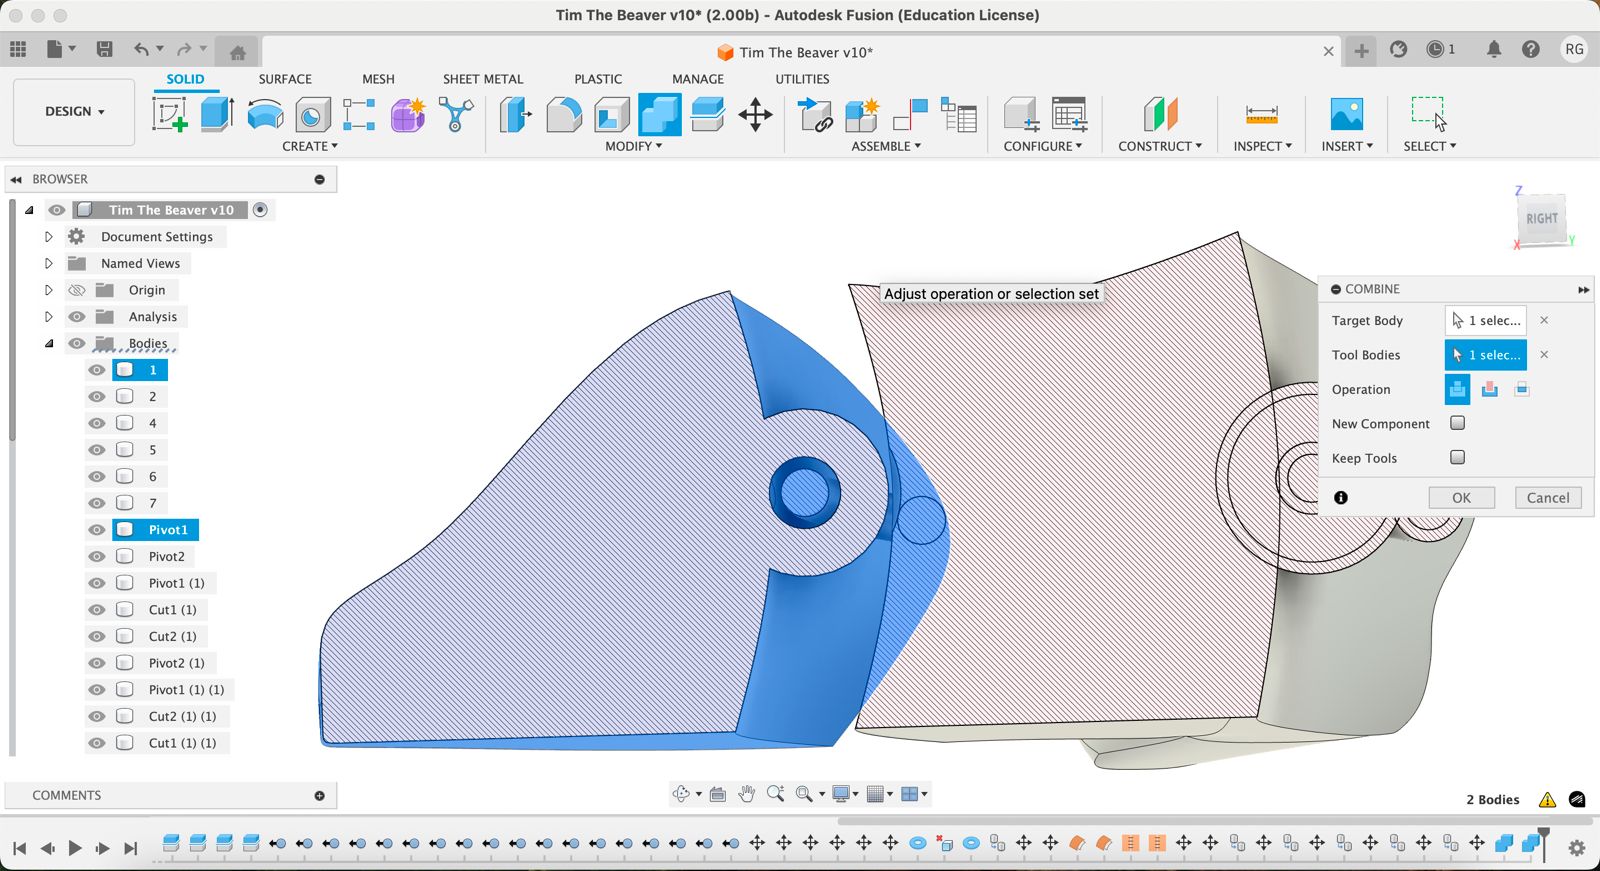
Select each body and the opposing torus offset, and use the Combine tool to cut the shape out.
Select each body and the corresponding torus inner diam, and use the Combine tool to merge the two bodies.
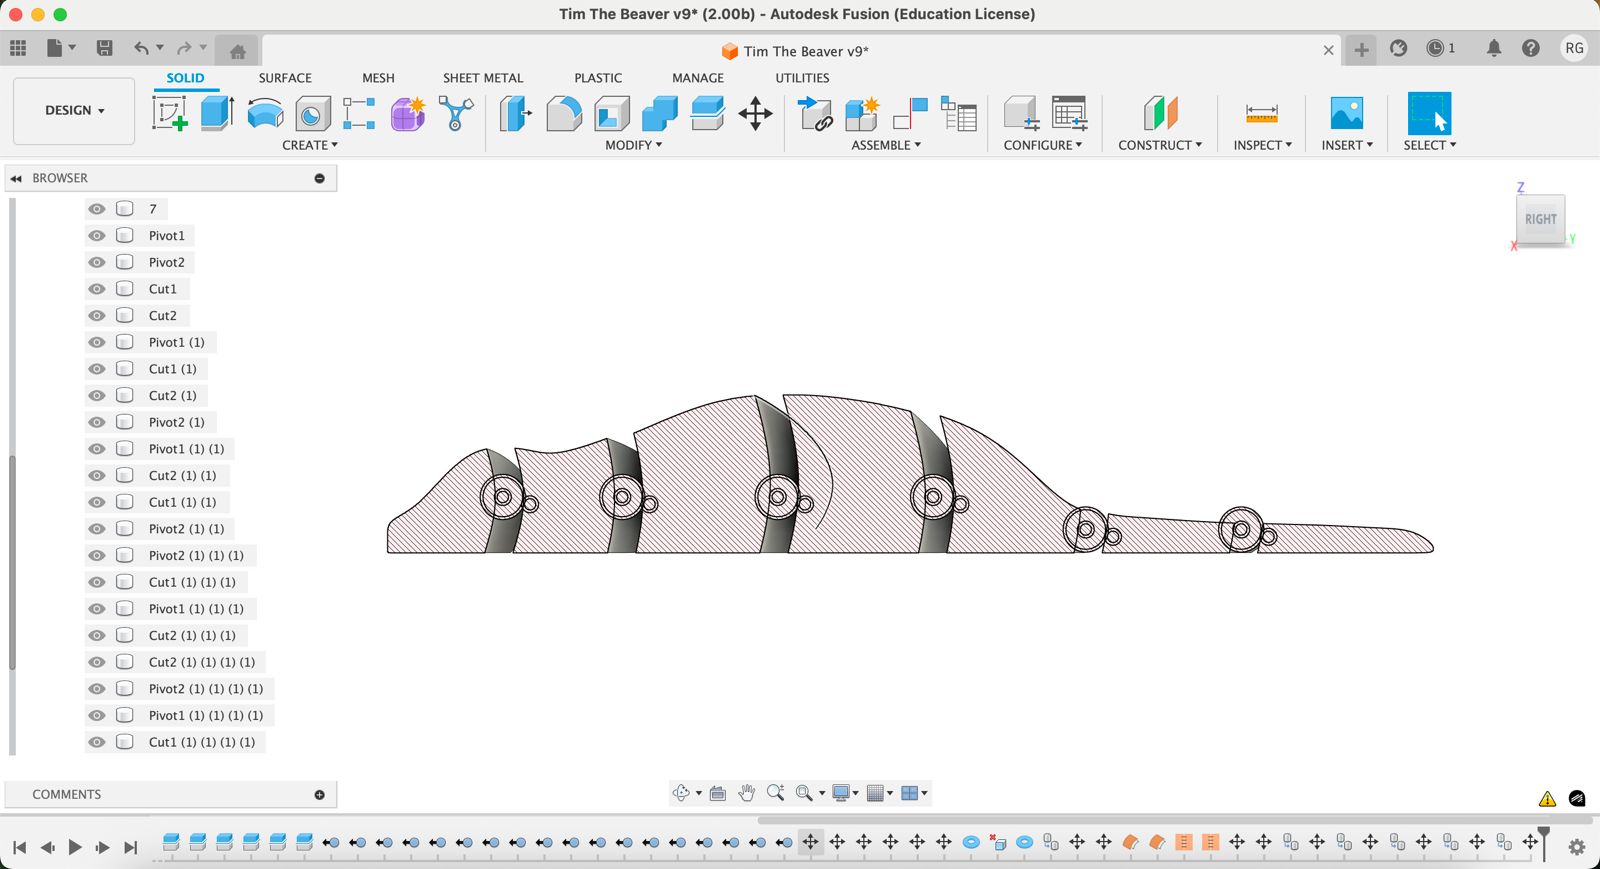
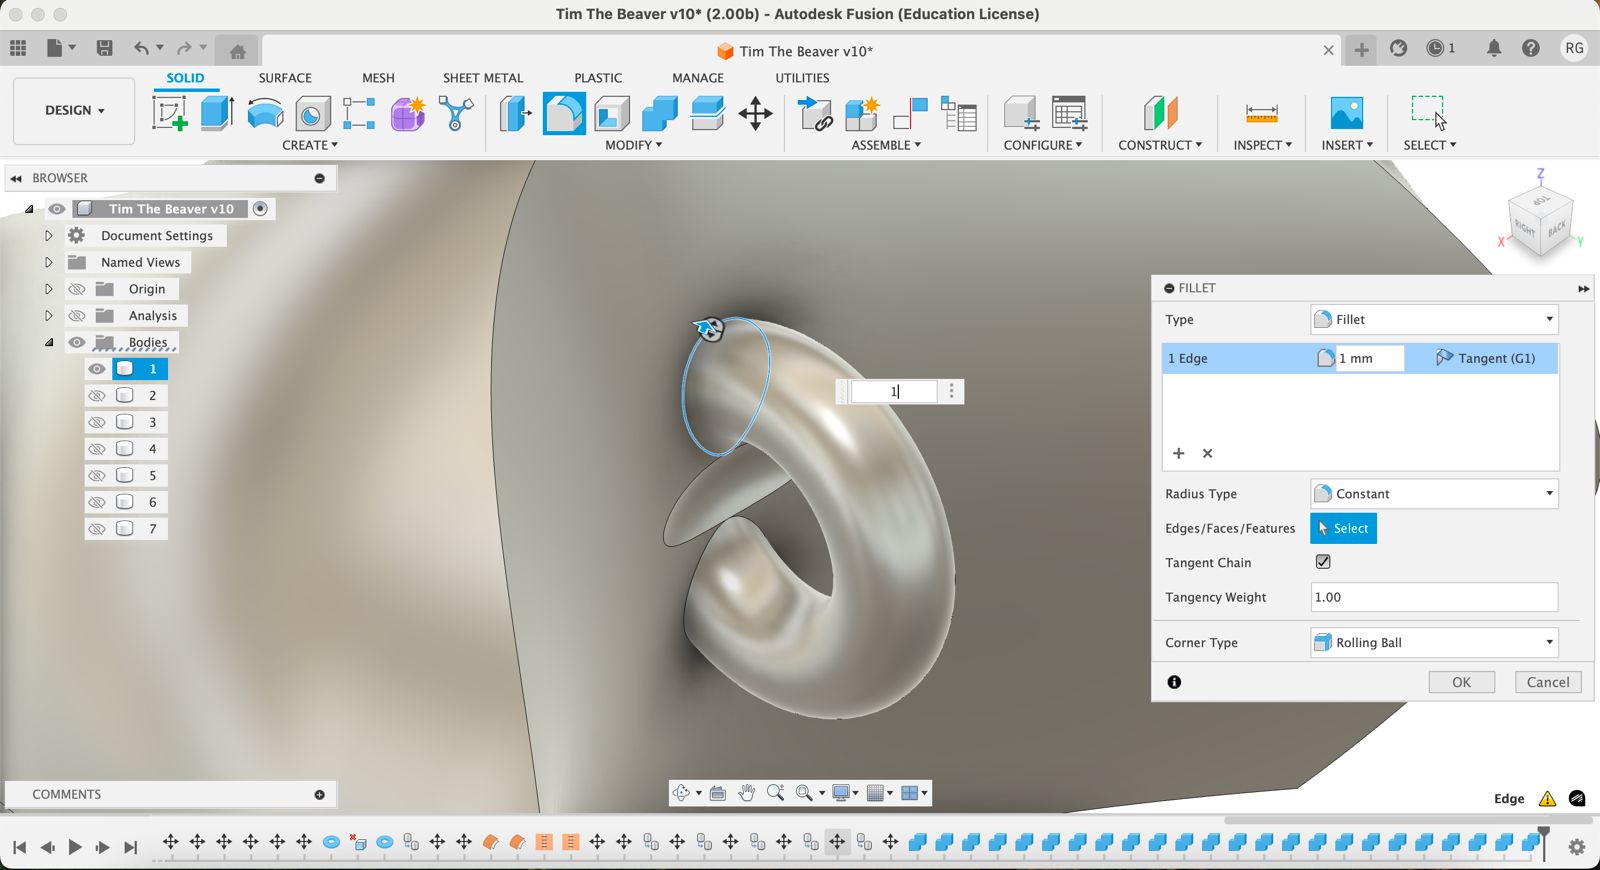
Create a 0.5mm - 1mm fillet to smoothen the torus and body curves.
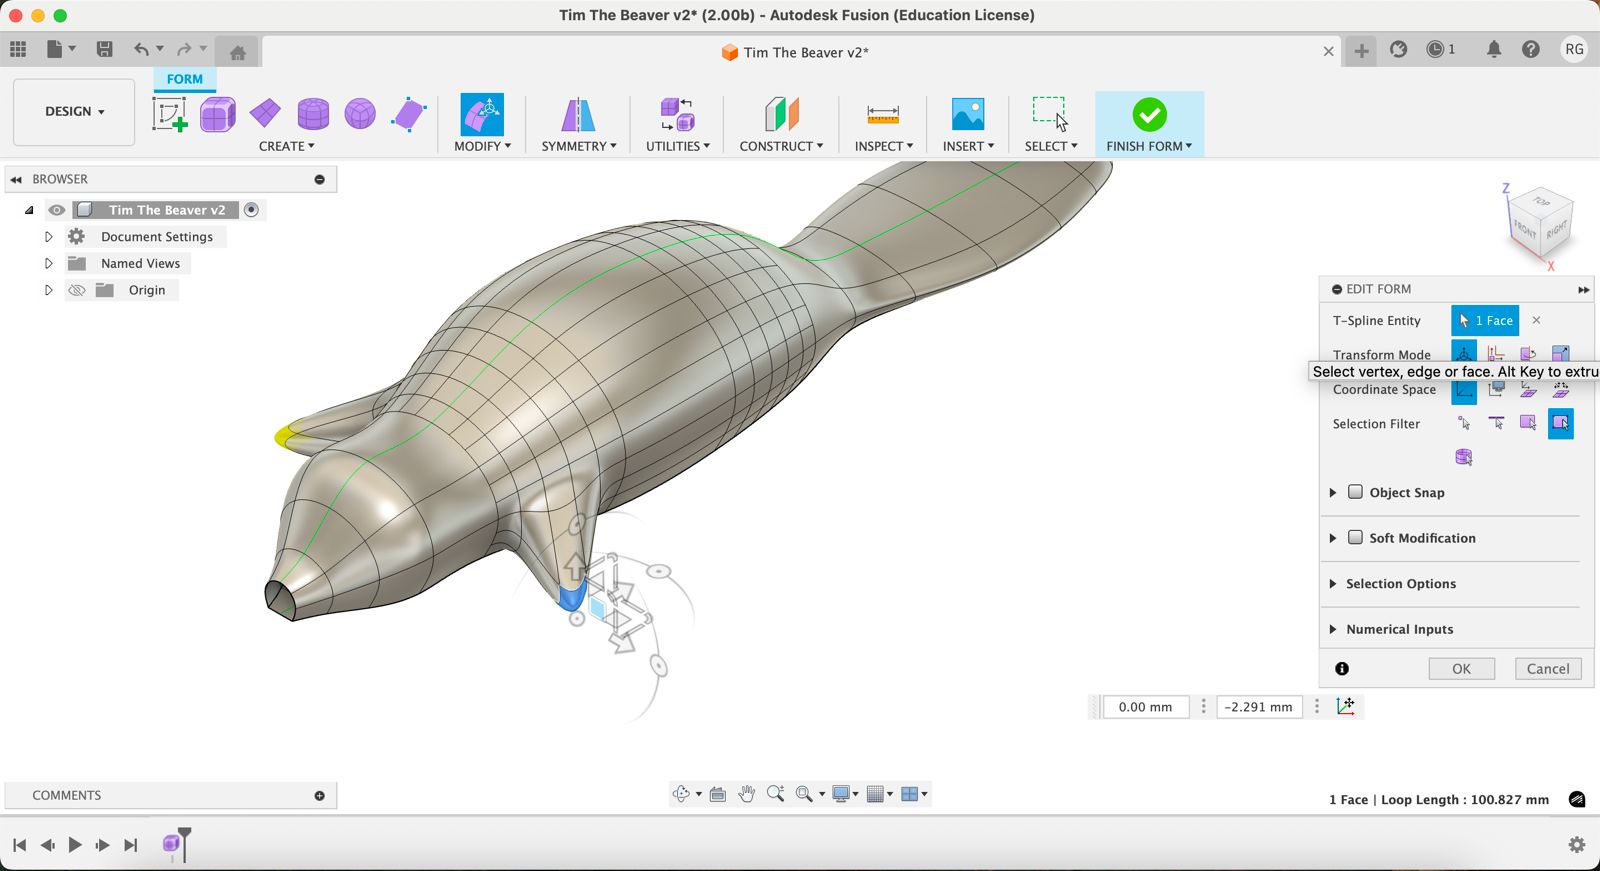
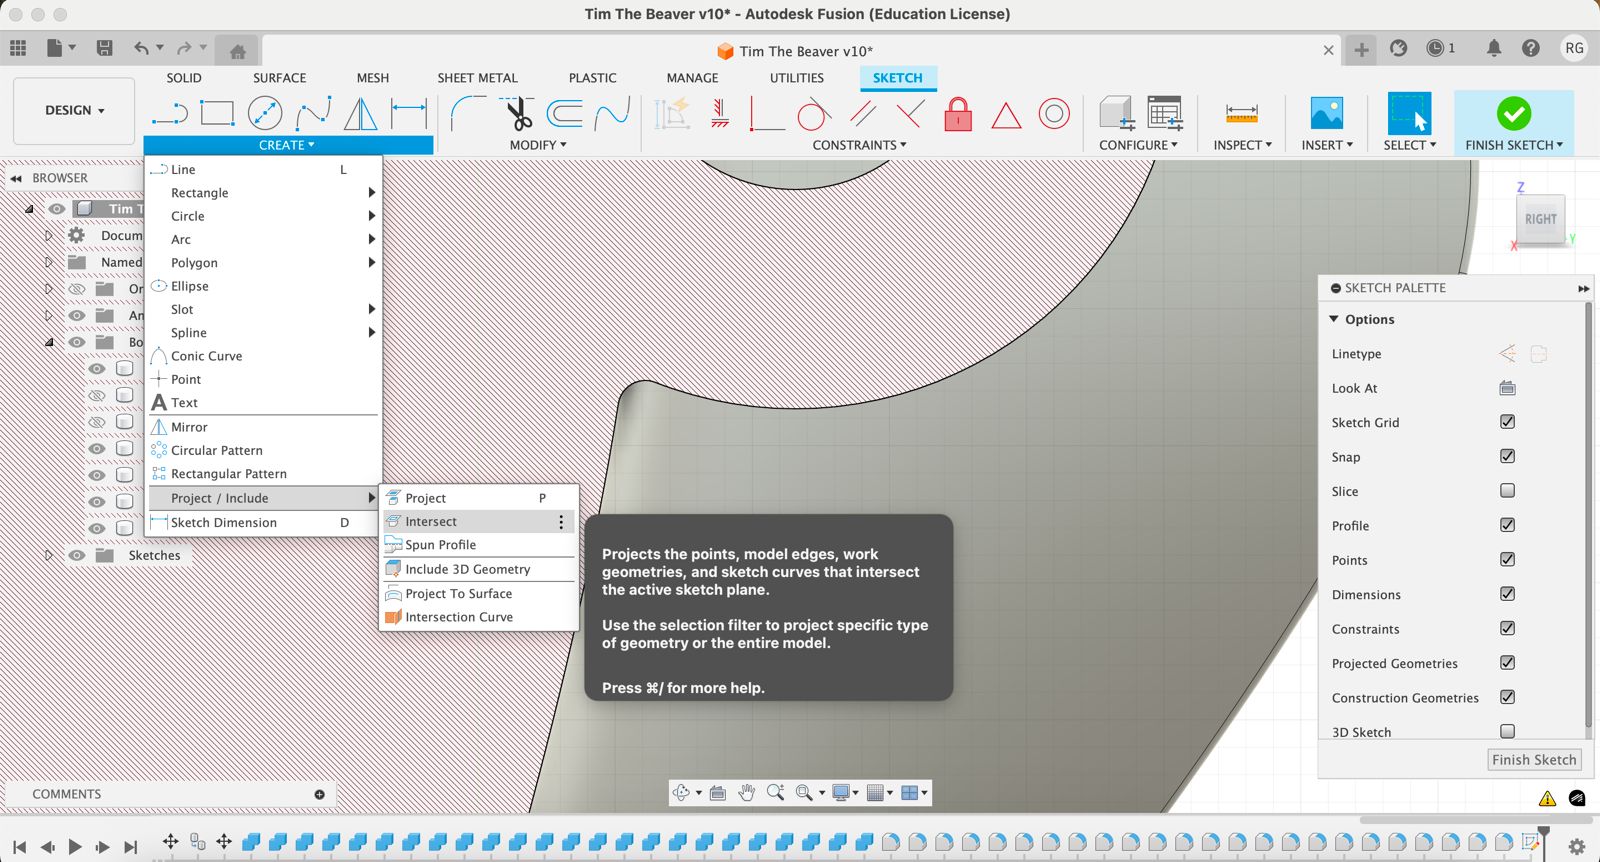
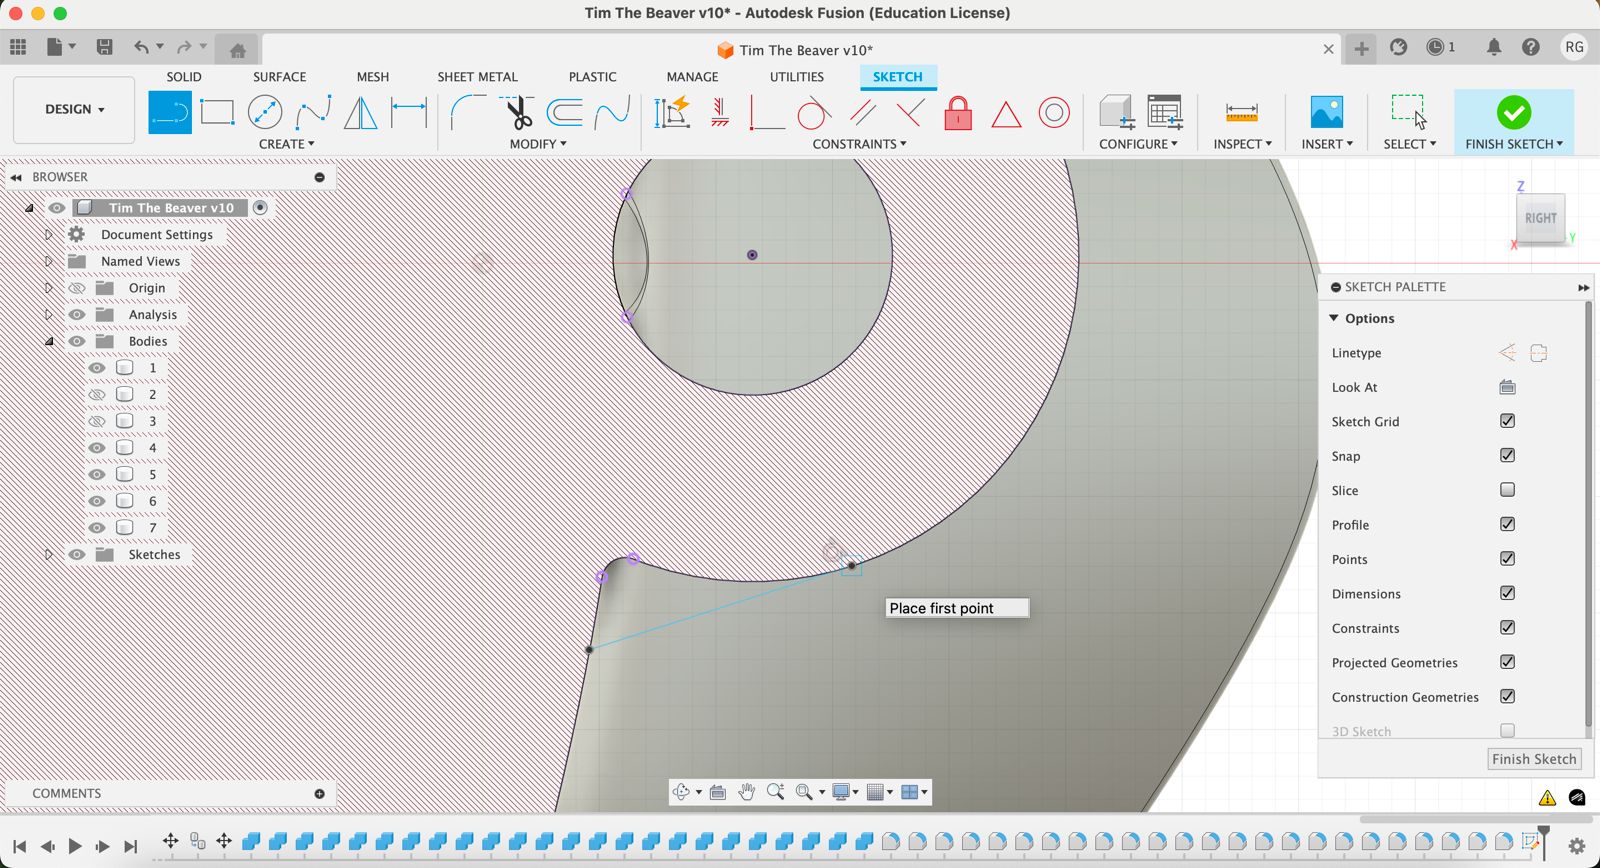
To create support for any protruding torus, select the Sketch tool.
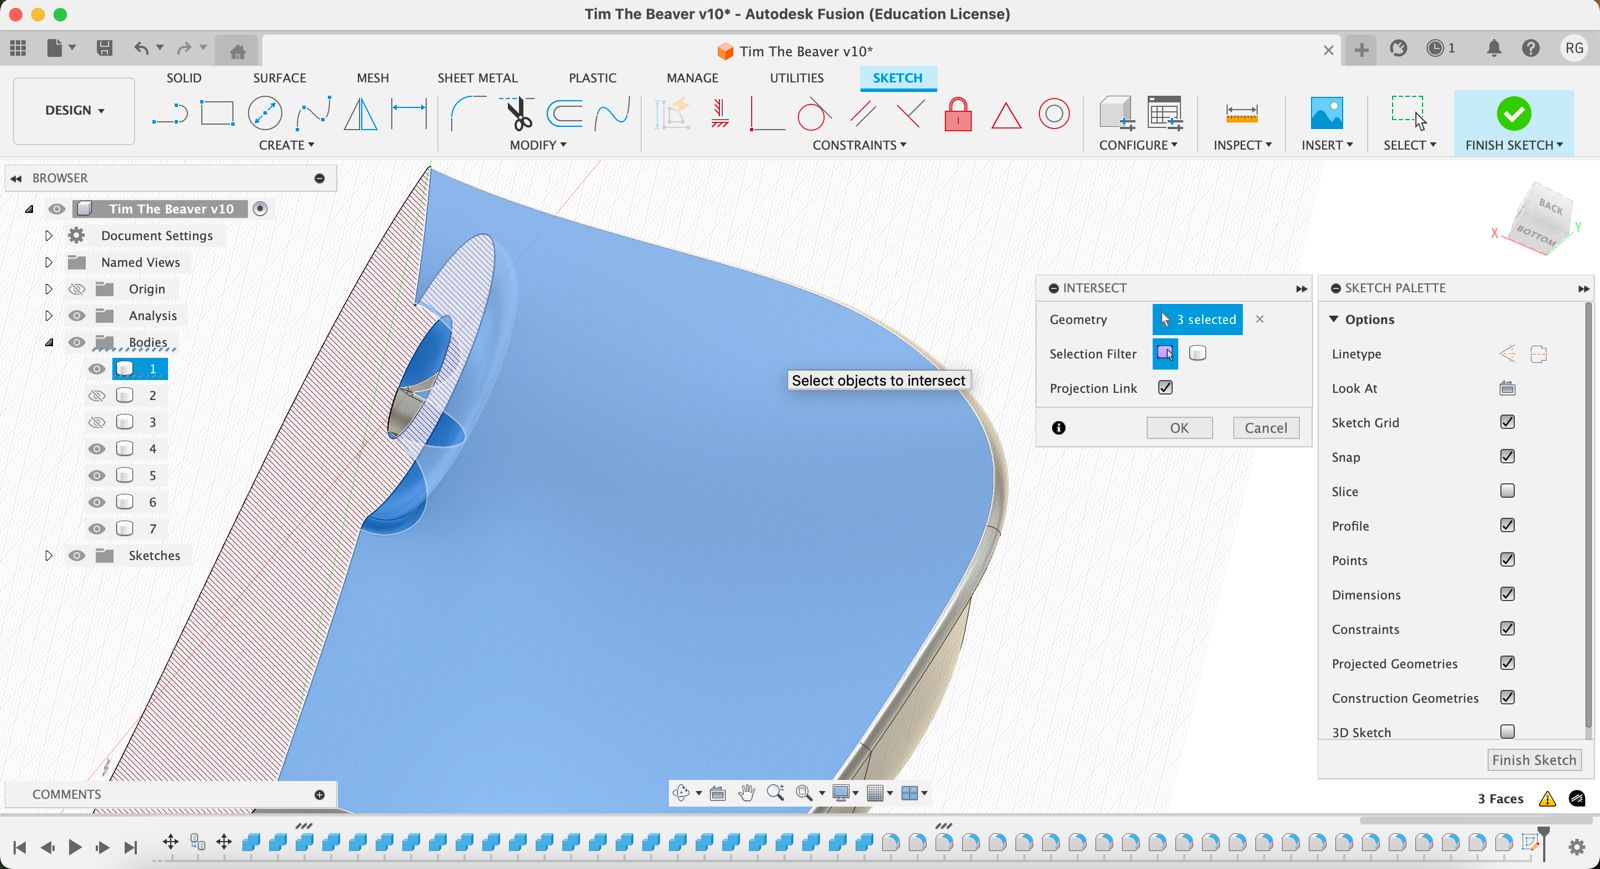
Follow Create -> Project / Include -> Intersect.
Select the torus and body including the fillet surface.
Draw a line from the body to tangency with the torus.
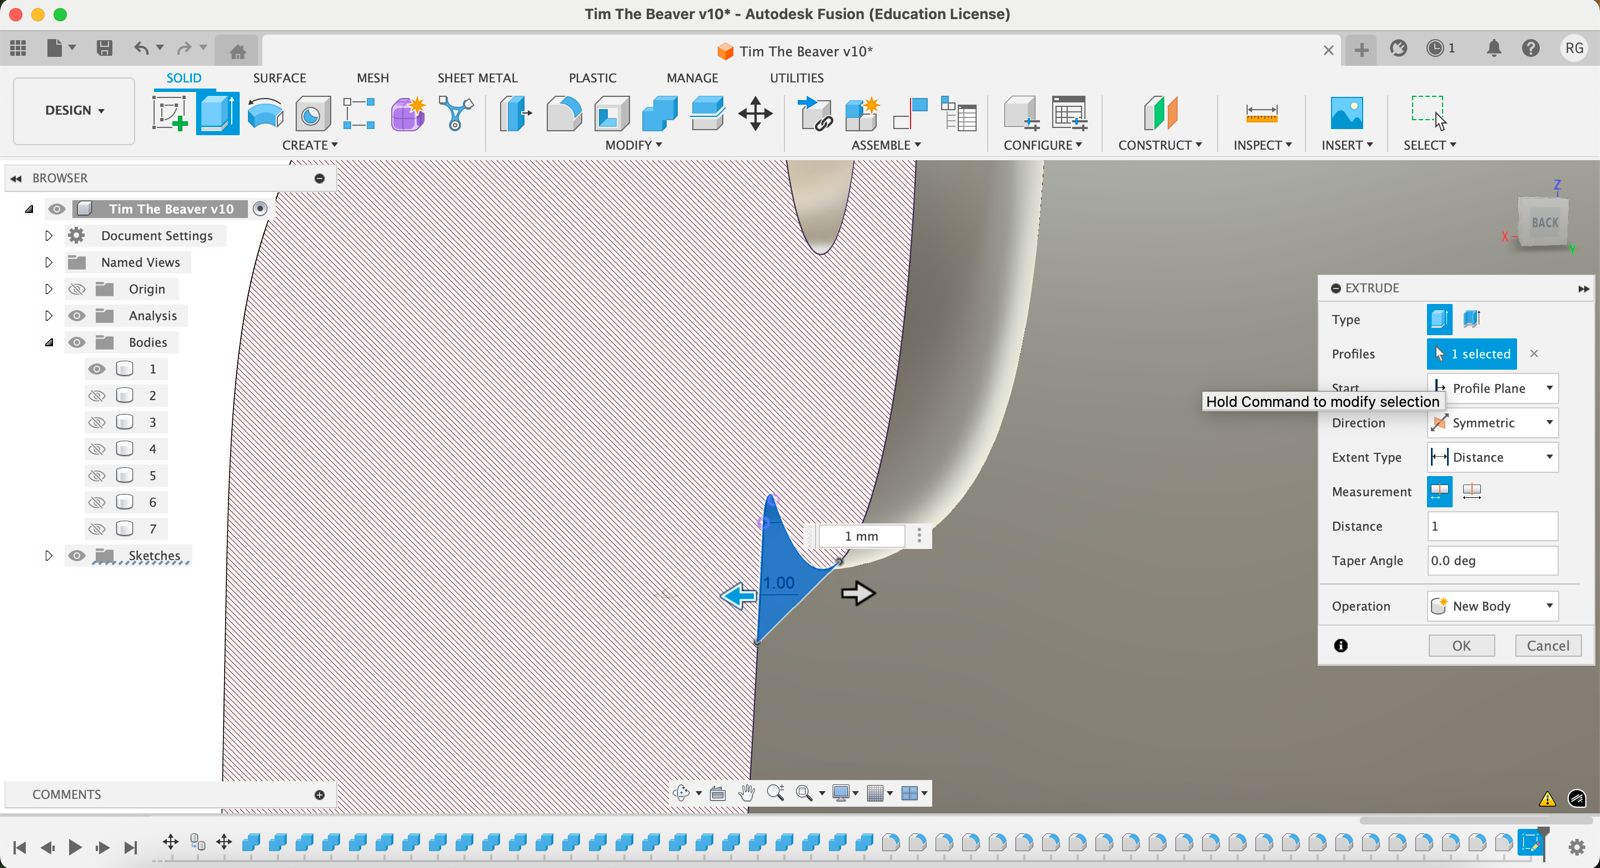
Extrude by 1mm the new intersected surface with symmetry, selecting New Body.
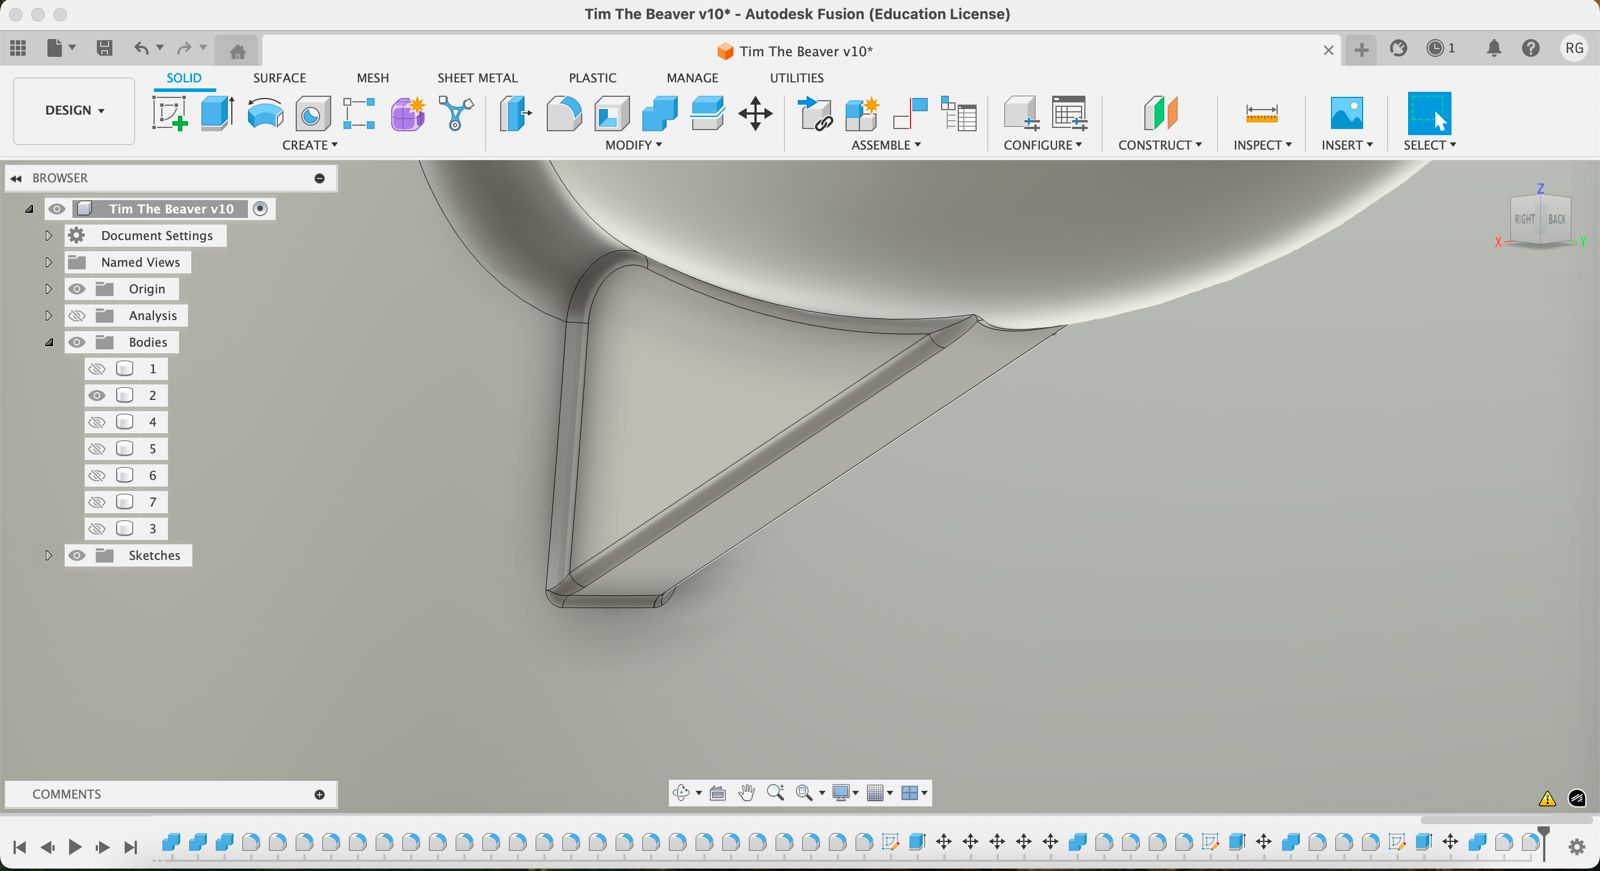
Move up and angle higher, then use Combine to merge the support and the body.
Fillet the remaining lines for a smoother print.
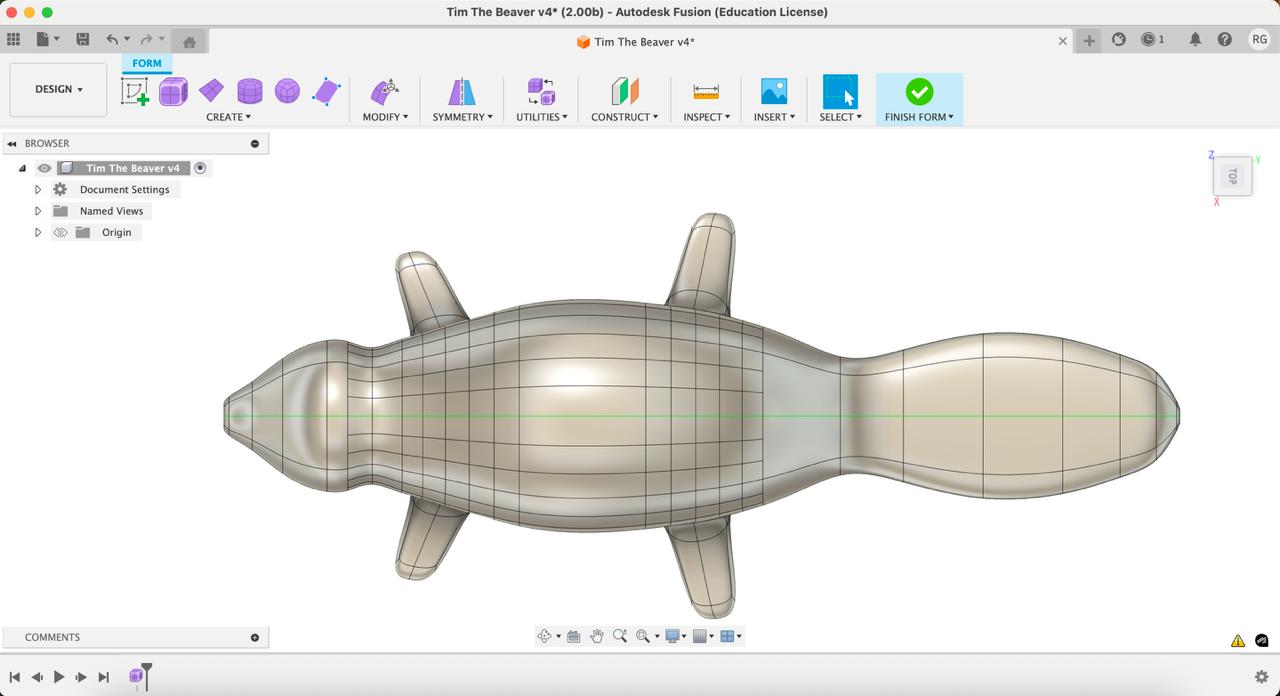
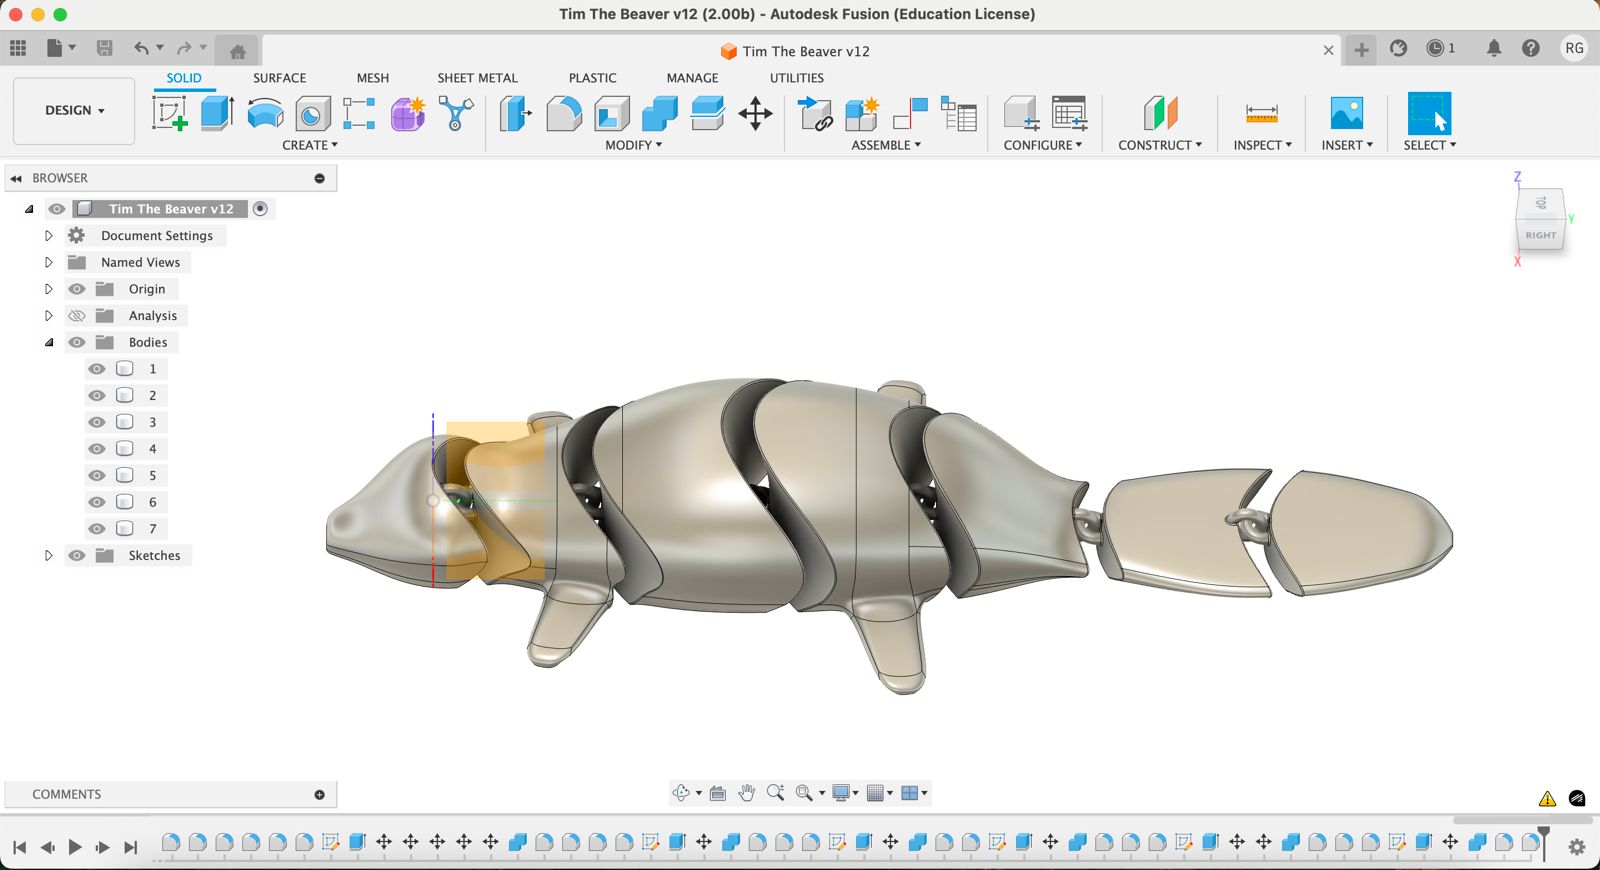
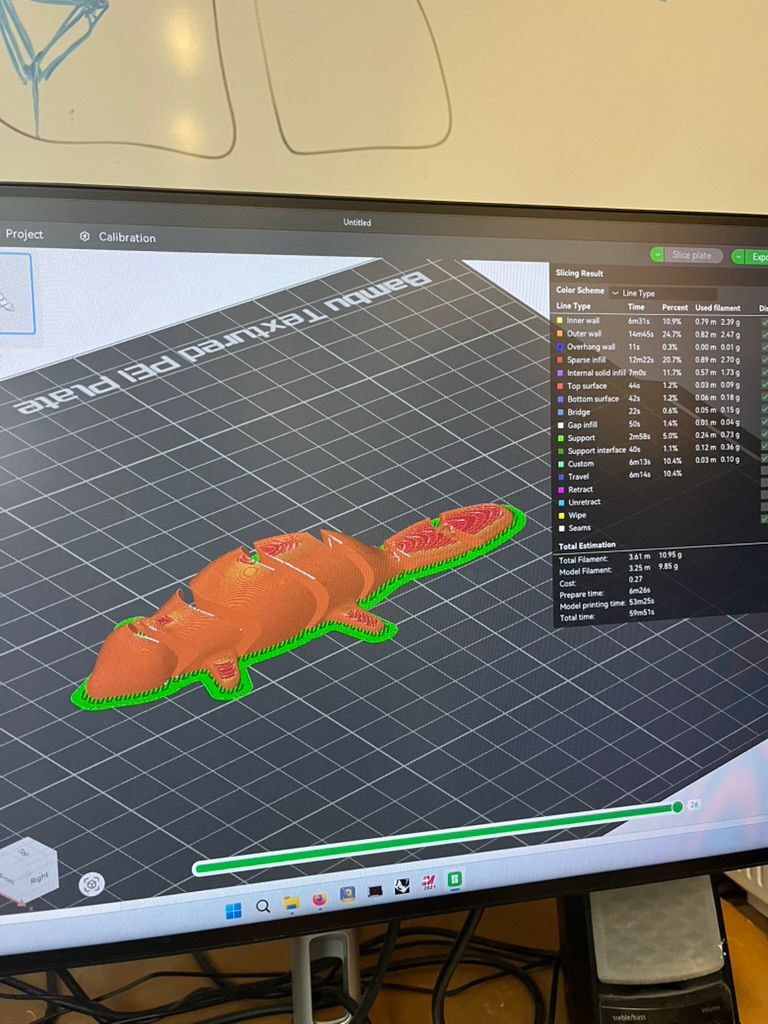
Finished! The beaver design is now complete and ready to transfer to the 3D printer.
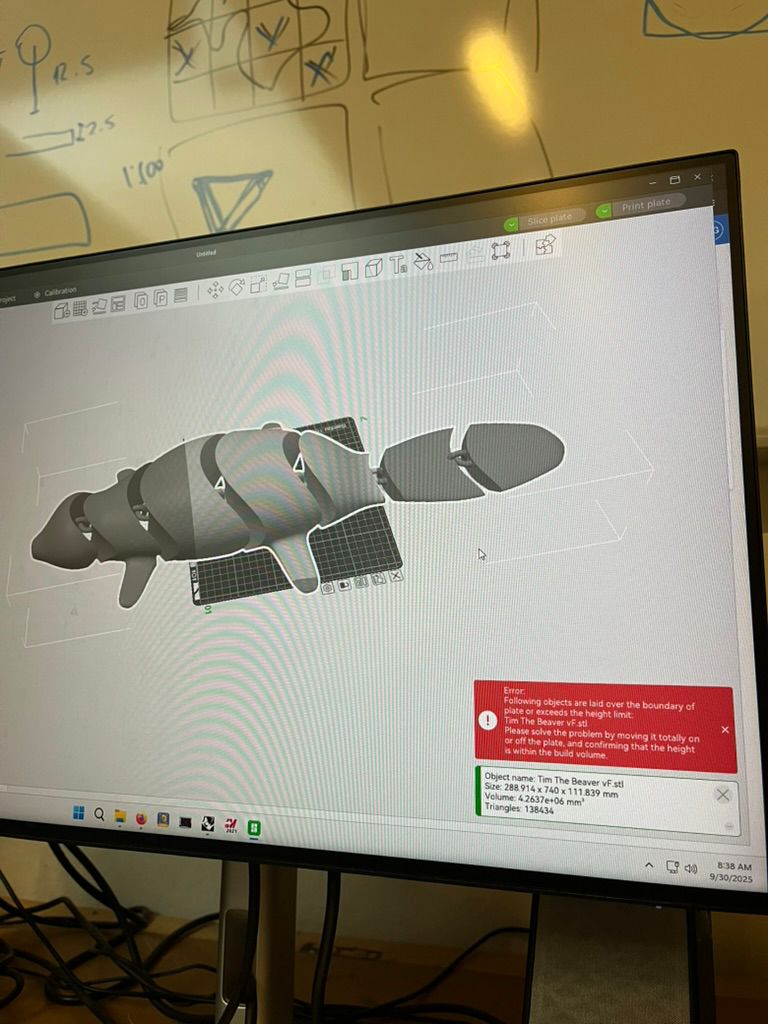
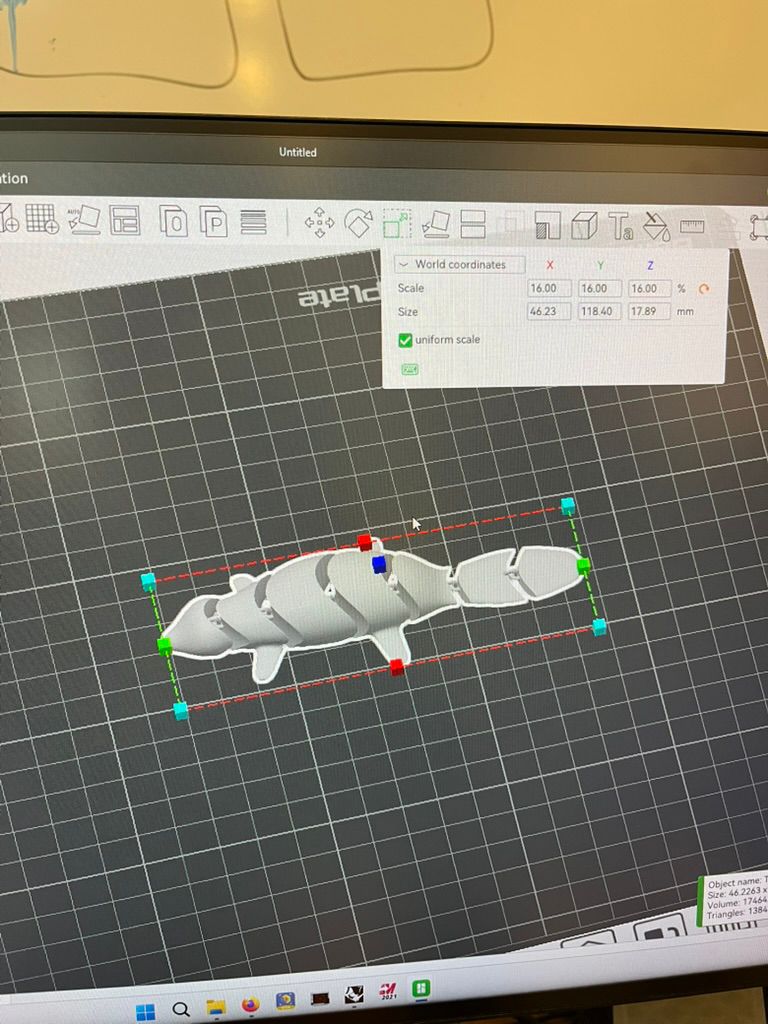
I was ready to print the design and was hopeful that it would work. I went to the Archshop, read the tutorial again, and downloaded the file in the Bambu Studio software. The first warning sign I received was that the size was way too big, so I selected the Scale tool in the Navbar and shrunk it down uniformly to 16%.
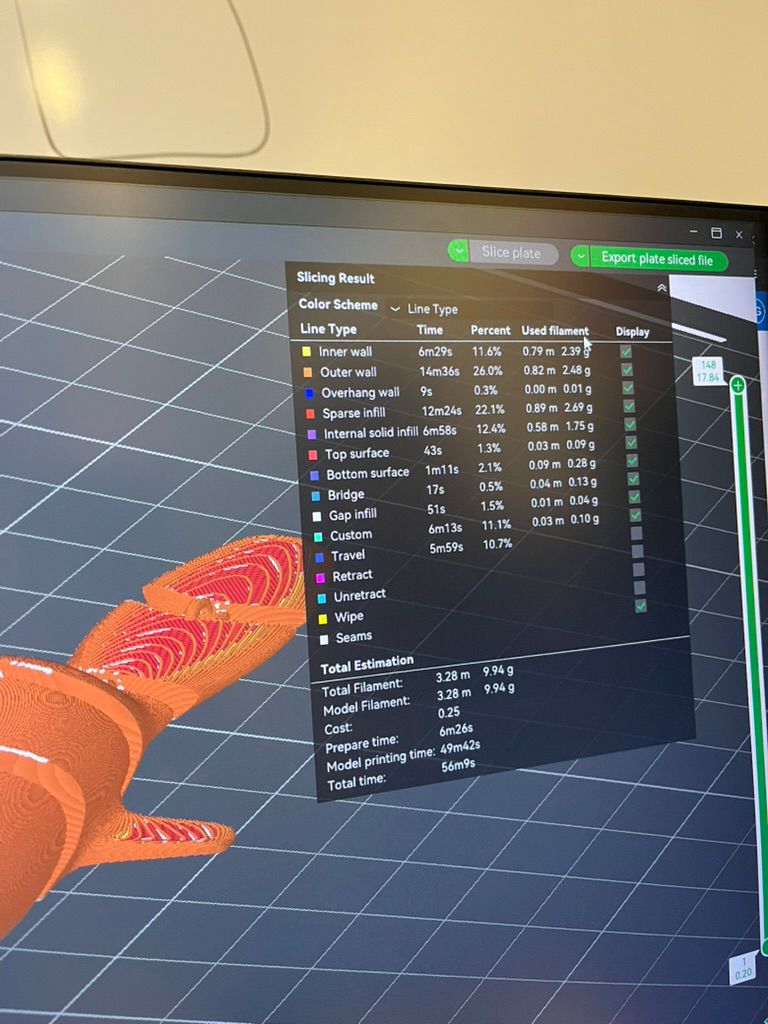
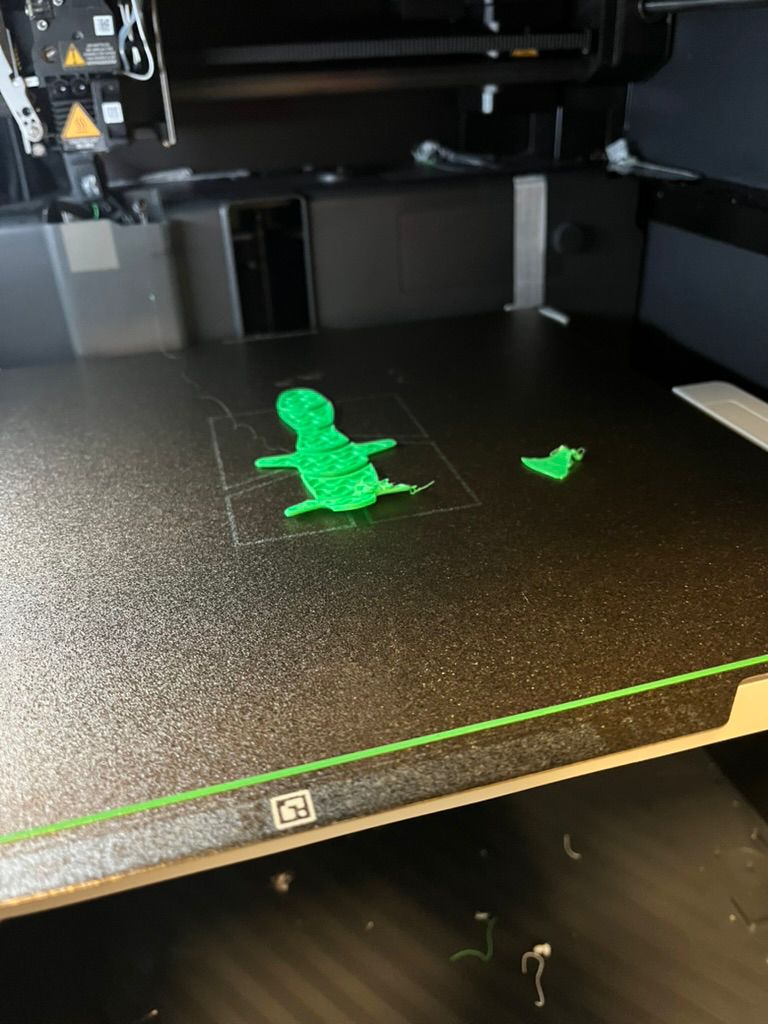
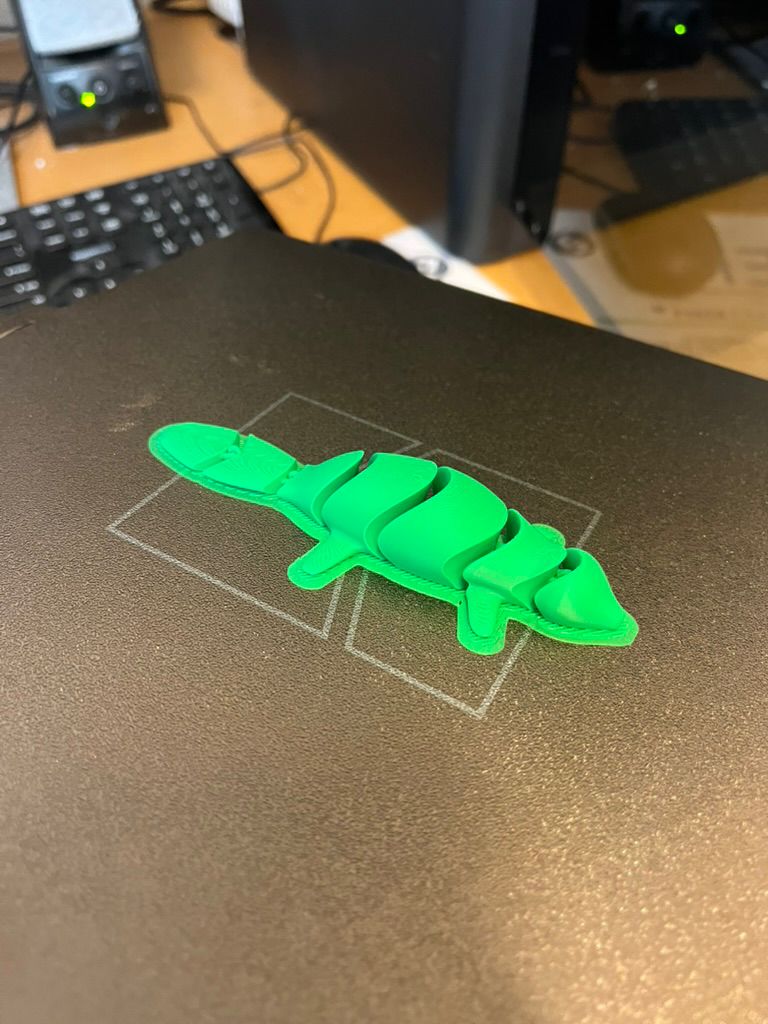
Once I thought it was ready to print, I sliced the design and exported it to my microSD card. Then I inserted the card into the print and used the printer display to start the job. However, after 10 minutes to print the head became detached from the surface and was destroying the design. I went back to Bambu Studio and added two raft layers to prevent this from happening again. I printed this new design and it worked!
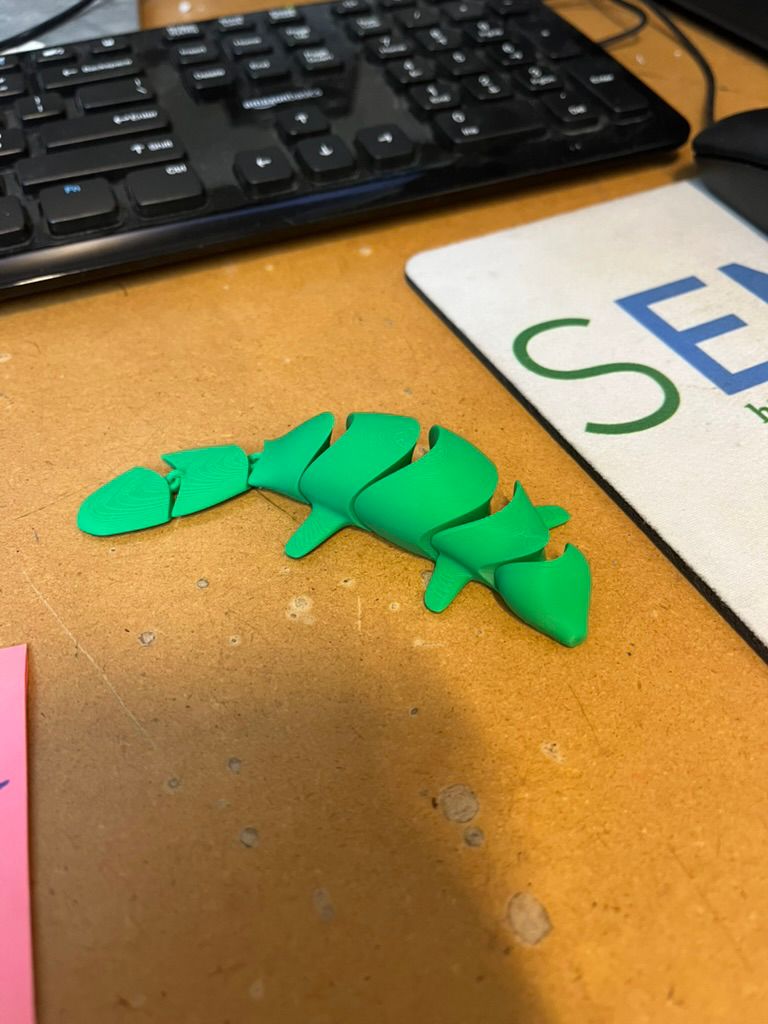
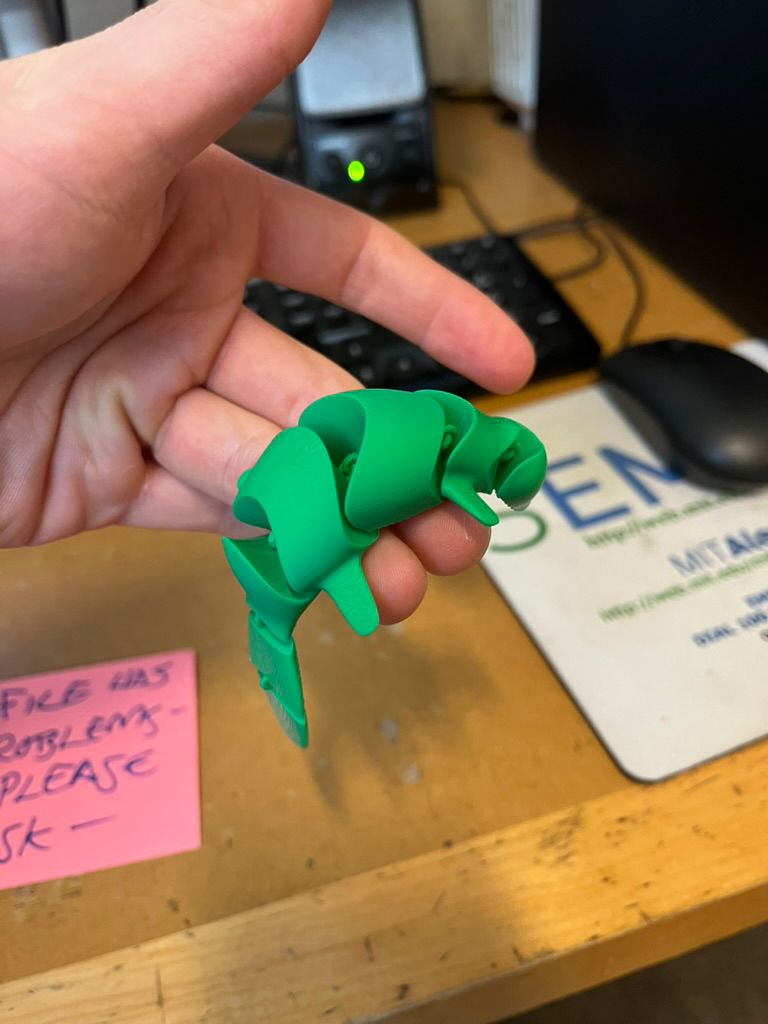
Once printed, I used some pliers to tear away the raft and have the remaining beaver design left. To my surprise, the wiggle effect was real and the body was moving well. This is my final result for the beaver Wigglitz toy! For my first 3D printer experience, I consider it a success. I will give it to my professor in lab this week and I'm hoping her son likes it!
3D Scanning
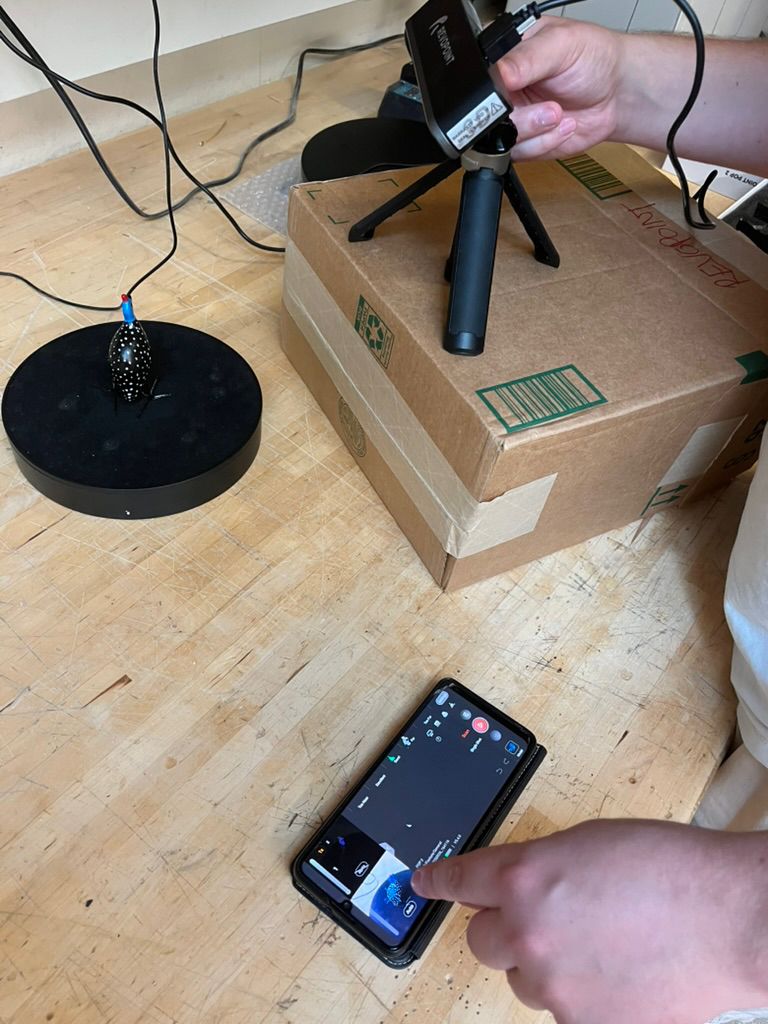
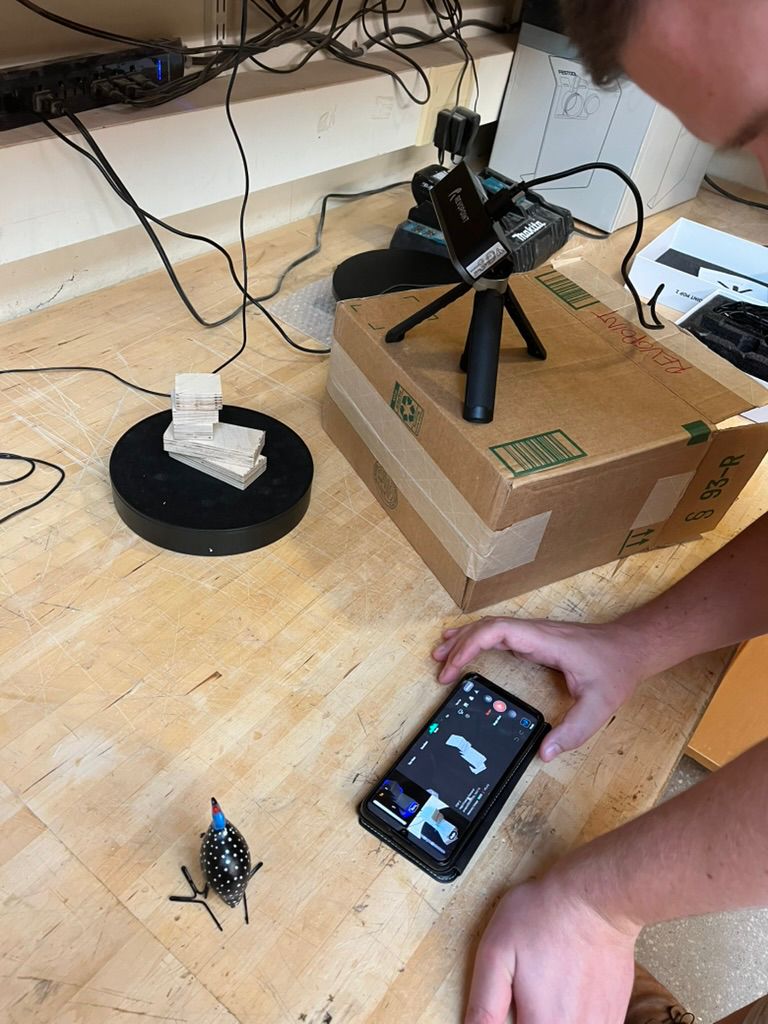
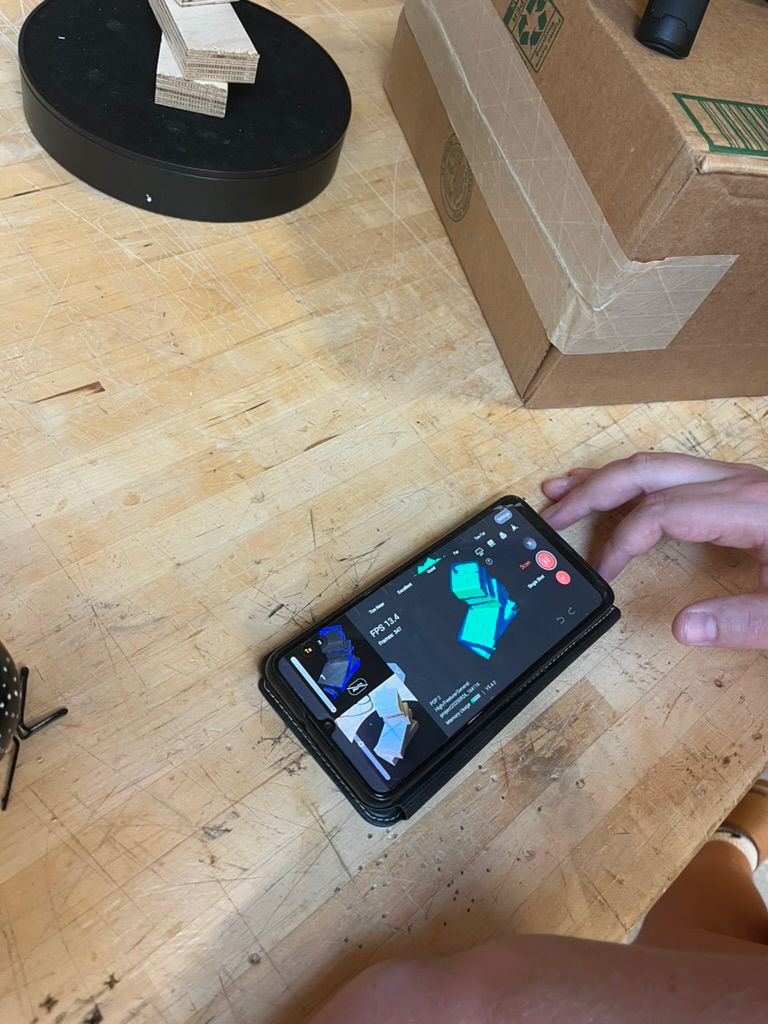
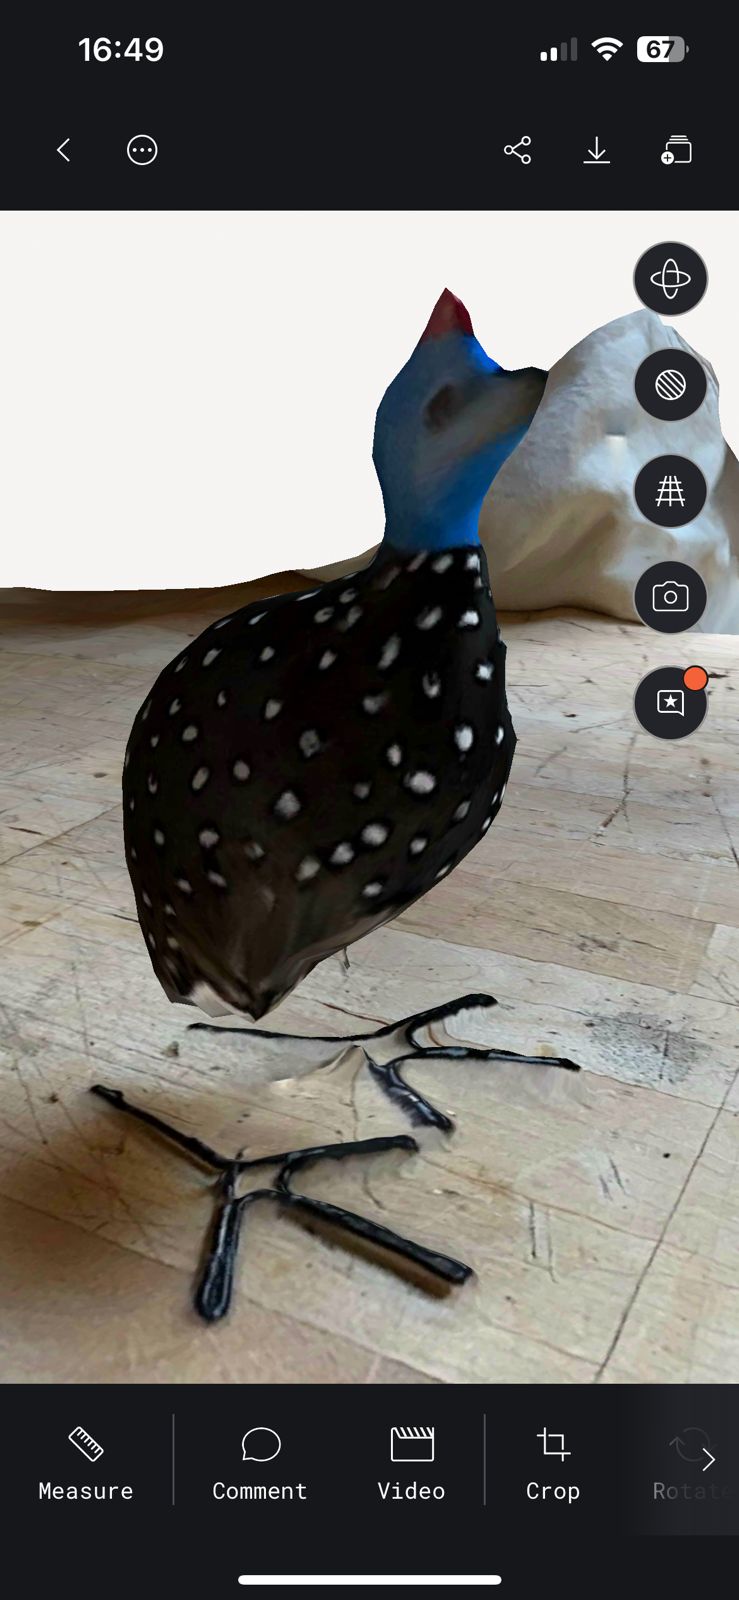
The second individual assignment this week was to 3D scan an object and I had two tools at my disposal. The first was the Revopoint 3D Scanner in the Archshop and the second was the Polycam app on my phone. During the training session this week, it became clear that the Revopoint really does not like iOS / Apple phones. I could not connect to it and had to rely on my TA Gert to thankfully send me the 3D scans himself. The scanner broadcasts a Wi-Fi signal that phones can connect to with a password. We realized that the black spinning surface meant that no contrast was possible with darker colors, which struggled to be picked up by the scan. We initially tried a dark polka-dotted peacock, and had to switch to wood planks instead due to contrast. The machine was able to render this as a 3D scan decently well, although it obviously missed some overhangs that blocked its vision.
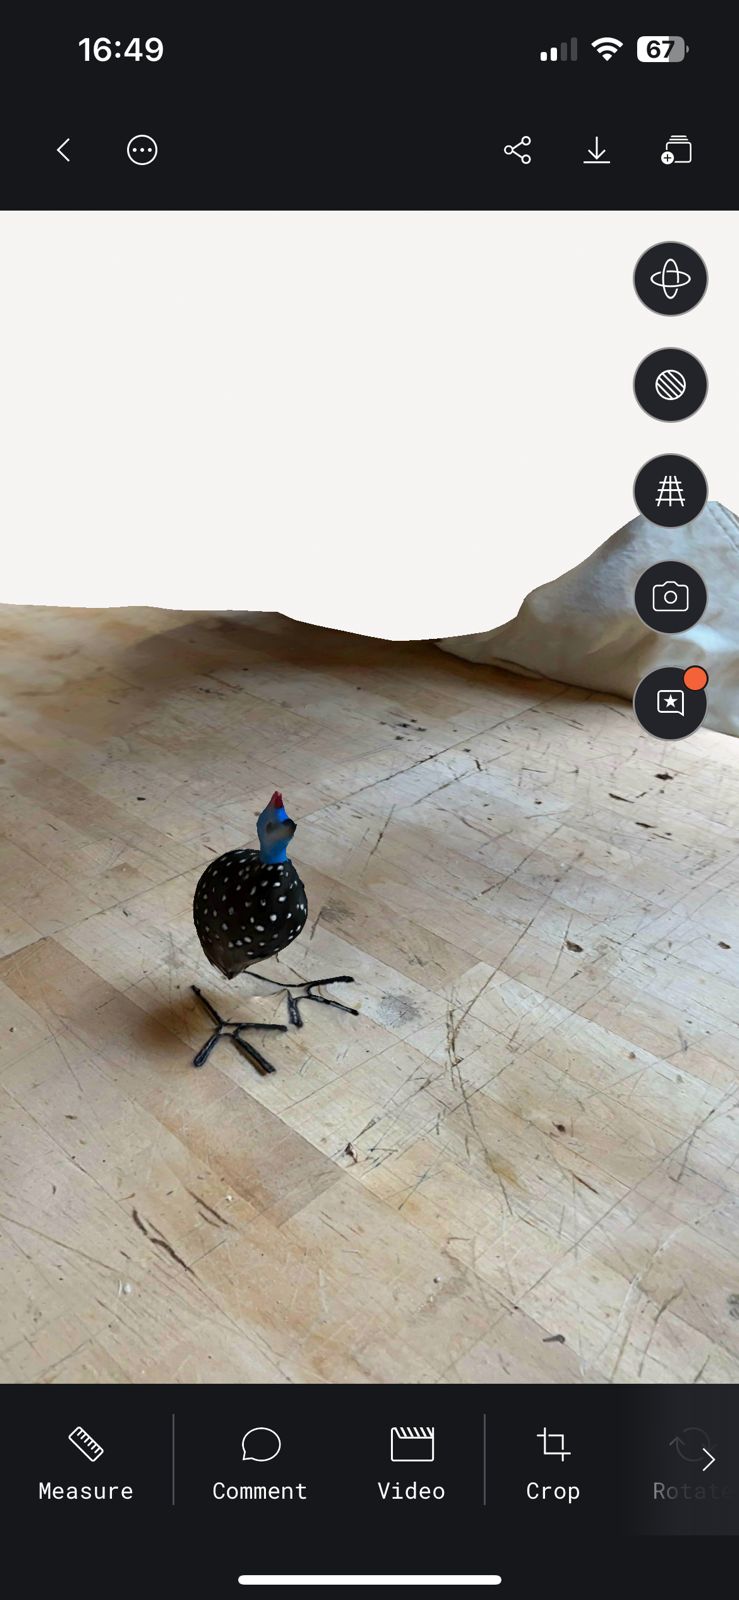
I wanted to try the Polycam phone app as well to compare the tools and see what worked best. Because of my iOS device, Polycam was a much easier tool to use and did not require much setup. It just took many photos as I swept the phone around the peacock object and was able to render an alright scan. Even though it missed the legs, it still was a cleaner experience than the Revo and allowed for dark objects to be rendered. Another difference is that Polycam exports with textures, while Revopoint does not. Once scanned, I exported it as a GLTF file.
For the group assignment this week, our goal was to test the design rules for our Bambu Lab P1S 3D printer. The architecture section site is a great resource for understanding the design rules of the printer. The biggest lesson here is that rafts suck and get stuck to your piece, like I experienced with my beaver. That required surgical intervention with pliers to remove it from the body, and I was worried about damaging my piece. The best solution instead is the brim function, which creates a contour and still prevents the piece from slipping. However, removing the brim after the print is much less invasive and has a smaller risk of damaging your piece.