Week 12: Interface and Application Programming
Project Plan
I think this week could start pretty straight forward and become incredibly complex. I figured I'd start easy and get the important functionality working and then work on the other parts of the project that need to get done. If I have more time later, I will refine the GUI and add more functionality but I need to get the fundamental parts of the project working. I wanted to start by controlling the LEDs and then write a controller to be able to move the steppers. At the beginning of this week, I did not have the stepper control working yet over multiple nodes so I needed to get that working and in the meantime, I figured I could work on the LED controller. Once the stepper control works, I will write the stepper GUI too.
Execution
My control and communication already existed in python so I wanted to start by making the GUI in python. This led me to TKinter, a builtin python library. I started by watching a few videos about it:
- "Tkinter Beginner Course - Python GUI Developmen" by NeuralNine
- "Tkinter Designer: Modern GUIs with Drag & Drop" by NeuralNine
- "Modern Graphical User Interfaces in Python" by NeuralNine
I started by using all of the code that I orginally used to control the node LEDs, the serial communication test python file which can be found on last weeks page.
    class GUI(ctk.CTk):
        def __init__(self, ser):
            super().__init__()
            self.title('LED Controller')
            self.geometry('500x500')
            self.ser = ser

            self.grid_columnconfigure(0, weight = 1)
            self.grid_columnconfigure(1, weight = 1)

            self.button_1 = ctk.CTkButton(self, text = 'Node 0 On', command = self.b1_on)
            self.button_2 = ctk.CTkButton(self, text = 'Node 0 Off', command = self.b1_off)
            self.button_3 = ctk.CTkButton(self, text = 'Node 1 On', command = self.b2_on)
            self.button_4 = ctk.CTkButton(self, text = 'Node 1 Off', command = self.b2_off)
            self.button_5 = ctk.CTkButton(self, text = 'Node 2 On', command = self.b3_on)
            self.button_6 = ctk.CTkButton(self, text = 'Node 2 Off', command = self.b3_off)

            self.button_1.grid(row=0, column=0, padx=20, pady=20, sticky='ew')
            self.button_2.grid(row=0, column=1, padx=20, pady=20, sticky='ew')
            self.button_3.grid(row=1, column=0, padx=20, pady=20, sticky='ew')
            self.button_4.grid(row=1, column=1, padx=20, pady=20, sticky='ew')
            self.button_5.grid(row=2, column=0, padx=20, pady=20, sticky='ew')
            self.button_6.grid(row=2, column=1, padx=20, pady=20, sticky='ew')

        def b1_on(self):
            print('Node 0 On')
            packet = bytearray([ord('l'), 0, 0b1])
            self.ser.write(packet)

        def b1_off(self):
            print('Node 0 Off')
            packet = bytearray([ord('l'), 0, 0b0])
            self.ser.write(packet)

        def b2_on(self):
            print('Node 1 On')
            packet = bytearray([ord('l'), 1, 0b1])
            self.ser.write(packet)

        def b2_off(self):
            print('Node 1 Off')
            packet = bytearray([ord('l'), 1, 0b0])
            self.ser.write(packet)

        def b3_on(self):
            print('Node 2 On')
            packet = bytearray([ord('l'), 2, 0b1])
            self.ser.write(packet)

        def b3_off(self):
            print('Node 2 Off')
            packet = bytearray([ord('l'), 2, 0b0])
            self.ser.write(packet)
For the GUI itself, I started by making a python class named GUI. In my __init__ function, there is a lot that happens. This is where the actual
design of the GUI itself happens. I start by defining the size and name of the window that will appear with the title and geometry methods:
        self.title('LED Controller')
        self.geometry('500x500')
I then add a two column grid in the window that I can place the buttons within:
        self.grid_columnconfigure(0, weight = 1)
        self.grid_columnconfigure(1, weight = 1)
I then go and create each individual button. The text is what is dispalyed on the button itself and the command is a pointer to the function
that I want to execute when the button is pressed. Each button has a unique function that is defined within the class and I create after the
initiatlization function.
        self.button_1 = ctk.CTkButton(self, text = 'Node 0 On', command = self.b1_on)
        self.button_2 = ctk.CTkButton(self, text = 'Node 0 Off', command = self.b1_off)
        self.button_3 = ctk.CTkButton(self, text = 'Node 1 On', command = self.b2_on)
        self.button_4 = ctk.CTkButton(self, text = 'Node 1 Off', command = self.b2_off)
        self.button_5 = ctk.CTkButton(self, text = 'Node 2 On', command = self.b3_on)
        self.button_6 = ctk.CTkButton(self, text = 'Node 2 Off', command = self.b3_off)
With the buttons made, I then had to place them within the grid that I had created earlier using lines of code like this:
        self.button_1.grid(row=0, column=0, padx=20, pady=20, sticky='ew')
        self.button_2.grid(row=0, column=1, padx=20, pady=20, sticky='ew')
        self.button_3.grid(row=1, column=0, padx=20, pady=20, sticky='ew')
        self.button_4.grid(row=1, column=1, padx=20, pady=20, sticky='ew')
        self.button_5.grid(row=2, column=0, padx=20, pady=20, sticky='ew')
        self.button_6.grid(row=2, column=1, padx=20, pady=20, sticky='ew')
With that, the GUI itself has been made. As I mentioned eariler, I also had to define functions within the class to associate with each button press.
The functions are almost identical. They print the action that is associated with the function to to the terminal, create a packet of information
to be sent over serial to the boards with the specific address of the related board. It then sends that packet over serial.
        def b1_on(self):
            print('Node 0 On')
            packet = bytearray([ord('l'), 0, 0b1])
            self.ser.write(packet)
With all of that, the GUI itself was done, and this was the result: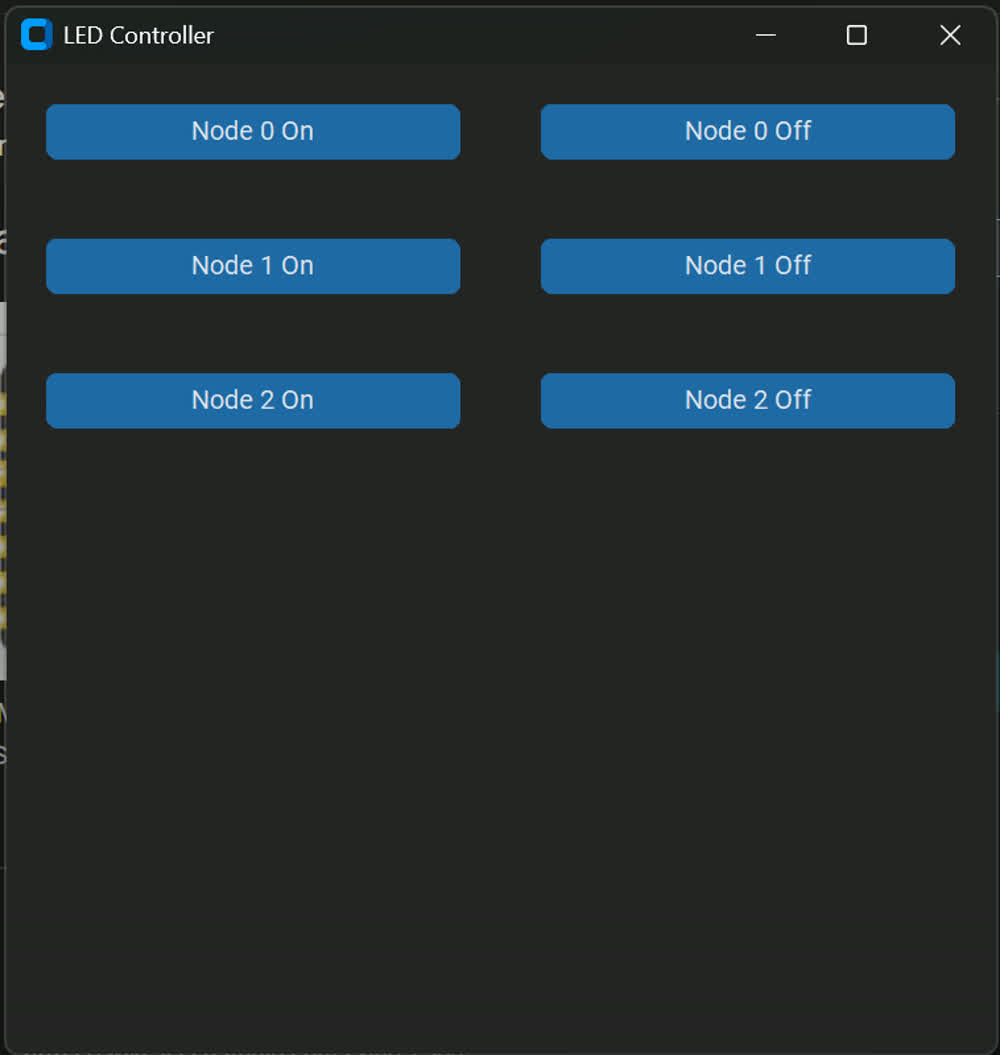
By this point in the week I had gotten the serial communication working with stepper motors, see week 11 to see details on that system along with the code I used on the microcontrollers and the python for communication with my laptop. Similar to the LEDs, I am going to take the main functions within that python file and modify it to use them within a GUI.
    class GUI(ctk.CTk):
        def __init__(self, ser):
            super().__init__()
            self.title('Node Controller')
            self.geometry('500x500')
            self.ser = ser

            print('Starting GUI')

            self.grid_columnconfigure(0, weight = 1)
            self.grid_columnconfigure(1, weight = 1)

            self.button_1 = ctk.CTkButton(self, text = 'Node 1 On', command = self.b1_on)
            self.button_2 = ctk.CTkButton(self, text = 'Node 1 Off', command = self.b1_off)
            self.button_3 = ctk.CTkButton(self, text = 'Node 2 On', command = self.b2_on)
            self.button_4 = ctk.CTkButton(self, text = 'Node 2 Off', command = self.b2_off)
            self.button_5 = ctk.CTkButton(self, text = 'Node 3 On', command = self.b3_on)
            self.button_6 = ctk.CTkButton(self, text = 'Node 3 Off', command = self.b3_off)

            self.button_1.grid(row=0, column=0, padx=20, pady=20, sticky='ew')
            self.button_2.grid(row=0, column=1, padx=20, pady=20, sticky='ew')
            self.button_3.grid(row=1, column=0, padx=20, pady=20, sticky='ew')
            self.button_4.grid(row=1, column=1, padx=20, pady=20, sticky='ew')
            self.button_5.grid(row=2, column=0, padx=20, pady=20, sticky='ew')
            self.button_6.grid(row=2, column=1, padx=20, pady=20, sticky='ew')

            self.label2 = ctk.CTkLabel(self, text = 'Motor 1 Controls', fg_color = 'transparent')
            self.label3 = ctk.CTkLabel(self, text = 'Motor 2 Controls', fg_color = 'transparent')
            self.entry2 = ctk.CTkEntry(self, placeholder_text='num steps')
            self.entry3 = ctk.CTkEntry(self, placeholder_text='num steps')
            self.b2_move = ctk.CTkButton(self, text = 'Send Position to Node 2', command = self.n2_move)
            self.b3_move = ctk.CTkButton(self, text = 'Send Position to Node 3', command = self.n3_move)

            self.label2.grid(row=3, column=0, padx=20, pady=20, sticky='ew')
            self.entry2.grid(row=4, column=0, padx=20, pady=20, sticky='ew')
            self.b2_move.grid(row=4, column=1, padx=20, pady=20, sticky='ew')

            self.label3.grid(row=5, column=0, padx=20, pady=20, sticky='ew')
            self.entry3.grid(row=6, column=0, padx=20, pady=20, sticky='ew')
            self.b3_move.grid(row=6, column=1, padx=20, pady=20, sticky='ew')

        def b1_on(self):
            set_led(ser, 1, 1)

        def b1_off(self):
            set_led(ser, 1, 0)

        def b2_on(self):
            set_led(ser, 2, 1)

        def b2_off(self):
            set_led(ser, 2, 0)

        def b3_on(self):
            set_led(ser, 3, 1)

        def b3_off(self):
            set_led(ser, 3, 0)

        def n2_move(self):
            pos = self.entry2.get()
            int_pos = int(pos)
            move_motor(ser, 2, int_pos)

        def n3_move(self):
            pos = self.entry3.get()
            int_pos = int(pos)
            move_motor(ser, 3, int_pos)
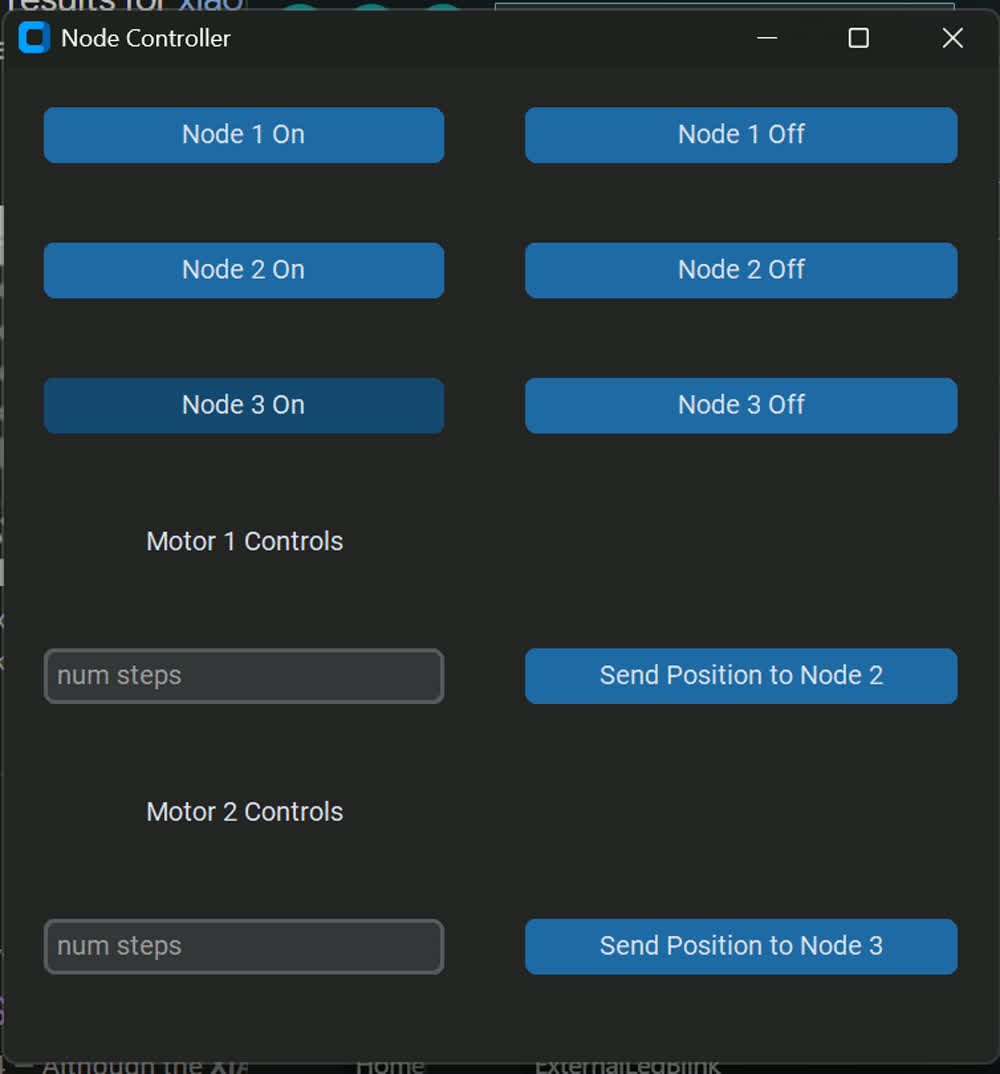
Here is what that GUI looks like:
set_led() and move_motor()
    def set_led(ser, address_int, state):
        """
        Command to control an individual LED

        Args:
            ser: serial object
            address_int: address of node with desired LED
            state: choose (0,1) to turn on or off

        Returns:
            None
        """
        addr_byte = struct.pack('B', address_int)
        led_byte = struct.pack('B', state)

        send_packet(ser, addr_byte, CMD_LED, led_byte)
This takes the address that is passed in by the command buttons, turns it into a byte address. It also takes the state, 0 or 1, and turns that a byte representation like b'\x01'
and then uses the send_packet() function to send the packet along the serial port. I will show the send packet command later in the page.
    def move_motor(ser, address_int, steps):
        """
        Command to move an individual motor using its address and
        the number of steps you want it to move.

        Args:
            ser: serial object
            addresss_int: address of node to speak to
            steps: an int, the location the stepper moves to

        Returns:
            None
        """

        addr_byte = struct.pack('B', address_int)
        step_bytes = struct.pack('>i', steps)

        send_packet(ser, addr_byte, CMD_MOVE, step_bytes)
        print(f'Move node {address_int} to {steps}')
The move_motor() function works in a similar way to the set_led function. It takes in an address int and creates a byte representation of it b'\x02' for address 2. It then creates a 4 byte
packet using the big endian form (it just means to create/order the bytes from largest to smallest the way humans read numbers, not smallest to largest). Say I entered 4,868 as the number of steps,
the data packet that would be created to represent that integer would look like b'\x00\x00\x13\x04. It then again uses the send_packet() function to send the packet to the nodes.The
send_packet() function looks like this:
    def send_packet(ser, target_addr_byte, cmd_byte, data_bytes):
        """
        Prepares and sends the data packet to the connected serial
        port and to the nodes

        Args:
            ser: serial object
            target_addr_byte: the address of the node to talk to
            cmd_byte: the command to send the node
            data_bytes: the data to send after the command

        Returns:
            None
        """

        if len(data_bytes) < 4:
            padding = b'\x00'*(4-len(data_bytes))
            data_bytes = padding + data_bytes

        packet = START_MARKER + target_addr_byte + cmd_byte + data_bytes + END_MARKER

        ser.write(packet)
This function takes in the serial connection thats been established, the target address (already in byte form), the desired command (in byte form), and then the data (in byte form) to be sent down the chain. It first starts
by ensuring that the data packet is 4 bytes long, so in the case of the LED where we originally just had the byte b'\x01, it becomes, b'\x00\x00\x00\x01. It then adds the bytes together and assigns
that to a variable named packet and then writes packet to the serial port.Those are all the components of the system and how it all works. Here is a video showing it in action:
Thoughts and Reflection
This went pretty well! I'm pretty comfortable in python and so it was nice to implement a GUI using it. There are definitley some more features that I would like to add but I will add them in time. Like I said earlier, I want to actually get the system working before I move forward with the controller. I have all of the basic functionalities working that I would need to demonstrate the system, everything else would just be iceing on the cake. It would be cool to add a stop and start feature. I also want to add a homing command to the system. I think it would also be cool to implement a save and replay function so you can store multiple locations and have it execute a series of actions. It would also be awesome to implement an inverse kinematics solver so that it could do IK with whatever system someone puts together.