Those of us who signed up for wire EDM (electrical discharge machining) during Wildcard Week met up for a quick orientation to familiarize ourselves with the Sodick SL400G Wire-EDM, go through machine safety, learn the procedure from Anthony by doing a demo cut of a puzzle piece, and look at the stock options. When we arrived, Anthony showed us some small objects that had been cut using the wire EDM.

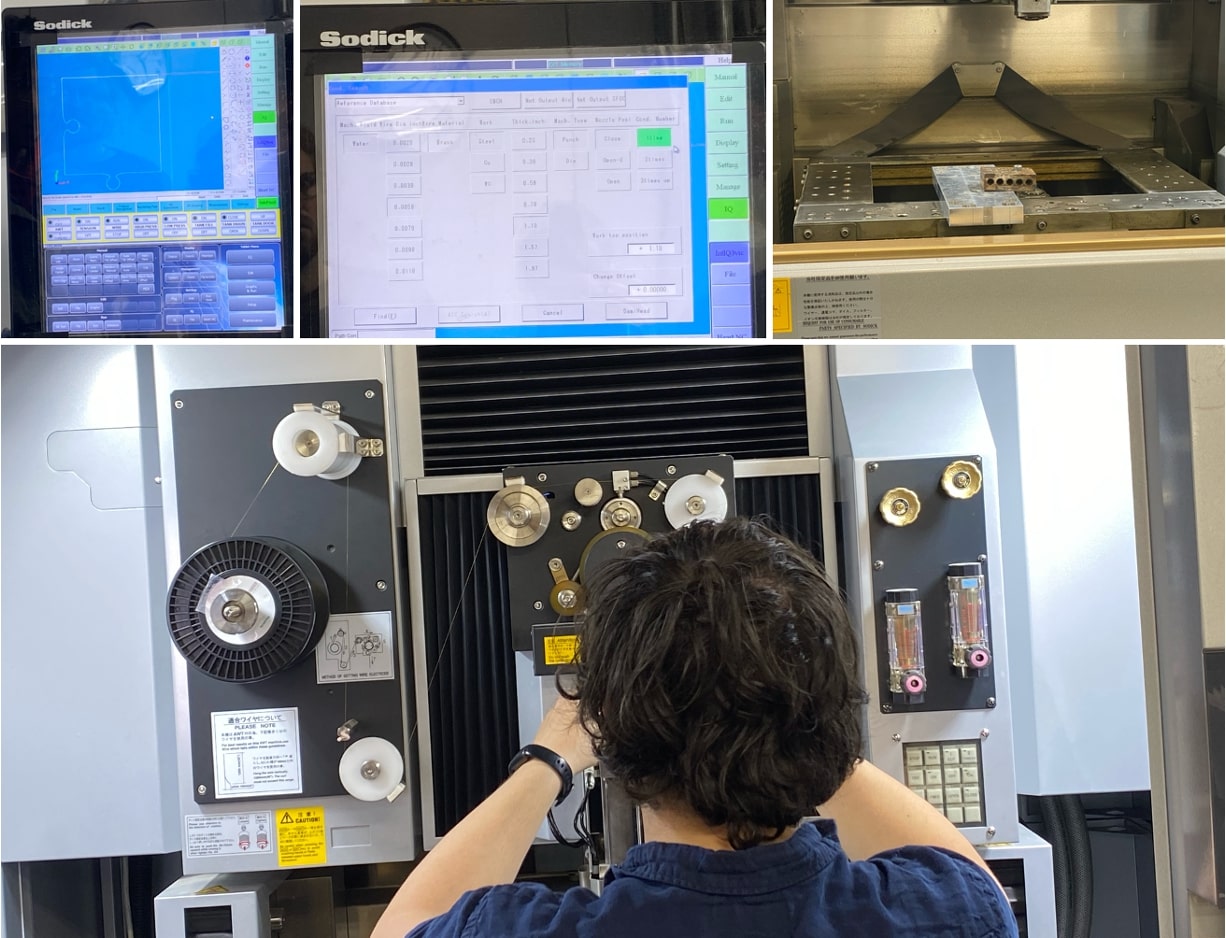
We made sure not to ever touch the wire, workpiece, or water at any point while the machine was running for safety reasons. The demo cut process included uploading the .dxf file onto the USB drive (that must stay with the machine), positioning it relative to our origin, entering parameters to make use of the reference database, workholding, re-threading the brass wire, deleting a line or two of the gcode in response to presented errors, and listening for bubbling which indicated the cut was happening. Anthony was incredibly helpful and explained things well, making sure to answer questions in an easy-to-follow manner that made the process all the more fun. He suggested we consider the time the parts will take to cut out as we design, since around 0.1 in of perimeter is cut per minute.
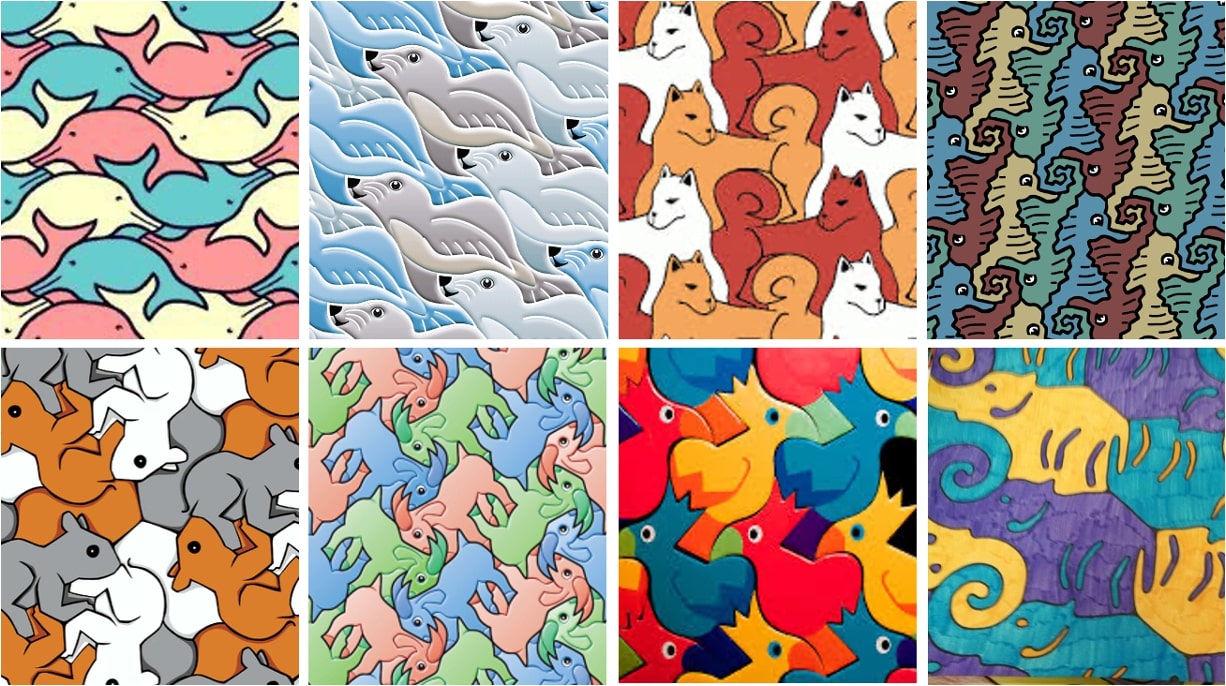
Following the session, I looked up tesselations to get some inspiration for interlocking parts since wire EDM is a great method for creating seamless parts. Googling tessalating animals yields interesting results, many of which are very beautiful. However, I noticed that since the "puzzle pieces" are cut out of different regions of the material, the surface finish and scratch orientation get rid of this seamless illusion a little bit, which I didn't like as much.
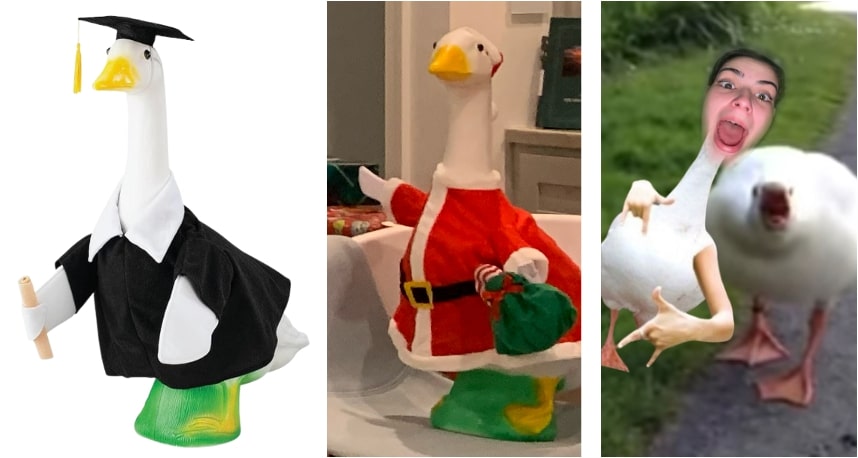
Deciding not to go forward with this idea, I started thinking about what would be a nice thing to make my sister for Christmas since she likes thoughtful gifts and shiny materials. My family's long-time nickname for her is Goose, and she loves celebrating various holidays with a lawn ornament goose that wears costumes to meet the ocassion. Thus, I set out to make a very beautiful golden goose, up to the standards of my Goose.
My self-assigned prompt for the week is as follows: Design something using computer-aided design, document, and wireEDM it. So, to design the goose, I sought inspiration from the internet and found an image I could add into Fusion 360 as a canvas. Much like I did back in 3D Printing and Scanning Week, I traced over the canvas using the spline tool. After adjusting the curvatures so that they were not too abrupt (since Anthony mentioned that ~5 or 10 thou is a good minimum fillet for corners), I extruded the goose and scaled it. Then I made a sketch on the surface, right clicked on that sketch on the left-hand side, and exported to .dxf. Since the perimeter of 60.485 mm (~2.38 in) cutting out the the goose was expected to take ~25 mins, with dimensions of ~10 mm wide and ~16 mm tall.

When I arrived to cut out the goose with help from Anthony, the first issue I encountered was not being able to get the machine's computer to recognize the .dxf file. Initially I thought it was because of "." characters in the file name, but it turned out to be because, for some reason, it simply does not like .dxf files from Fusion 360. I still had QCAD on my computer from previous weeks, and opening the .dxf file there and saving it was enough for the file to be openable in the machine's computer. I also converted from metric to imperial units on the machine's computer.
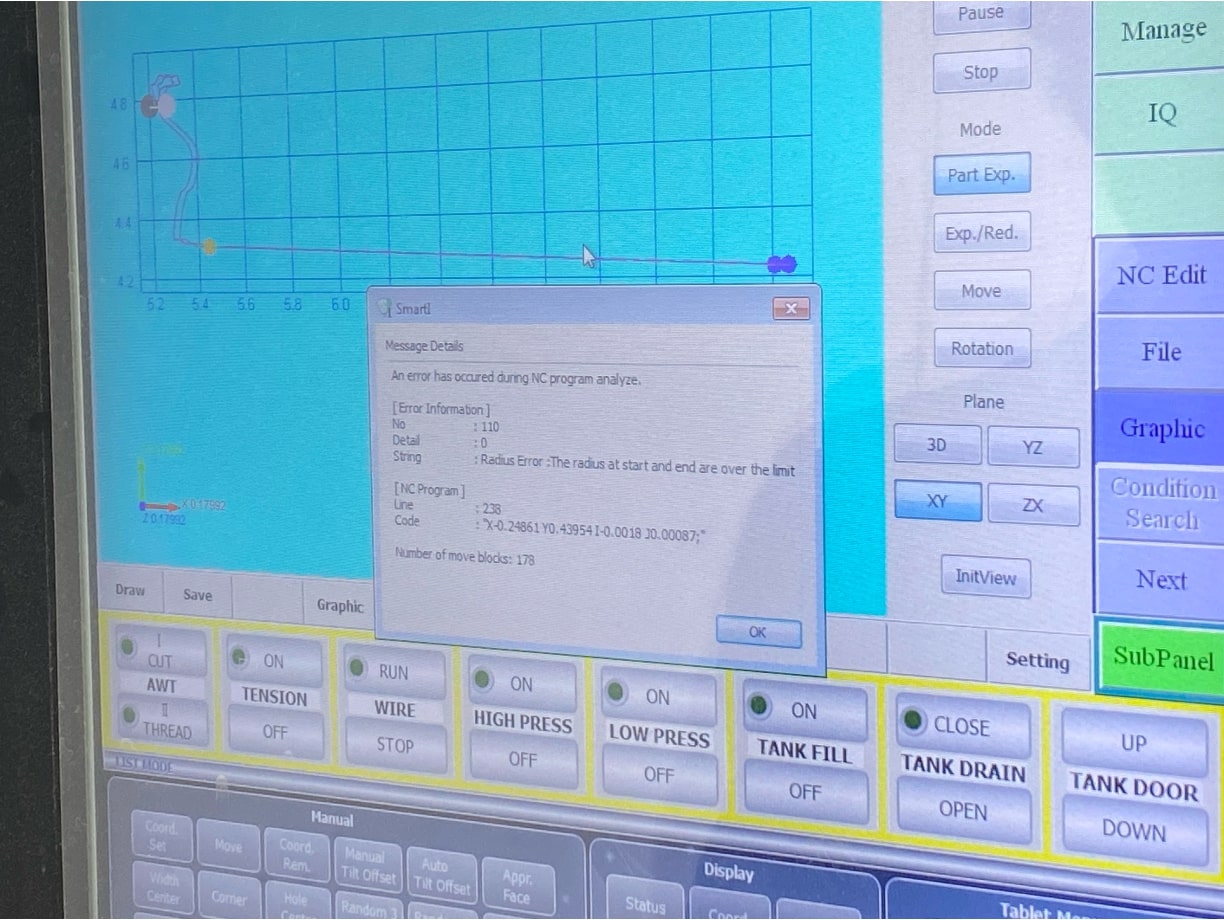
The next issue that arose was with the gcode. It threw some errors, like a radius error, which indicates that the radius at the start and end are over the limit. Our first strategy was to delete the lines or blocks of gcode that were causing problems, but after trying this a few times, we decided to scale up the image. This worked great, and the single error that was generated thereafter did not appear to cause any real problems. The new goose height is ~1.18 inches.
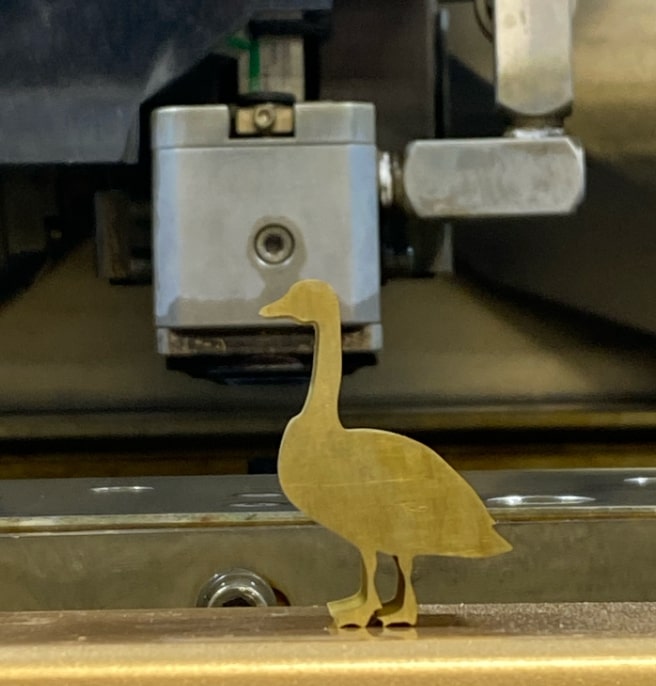
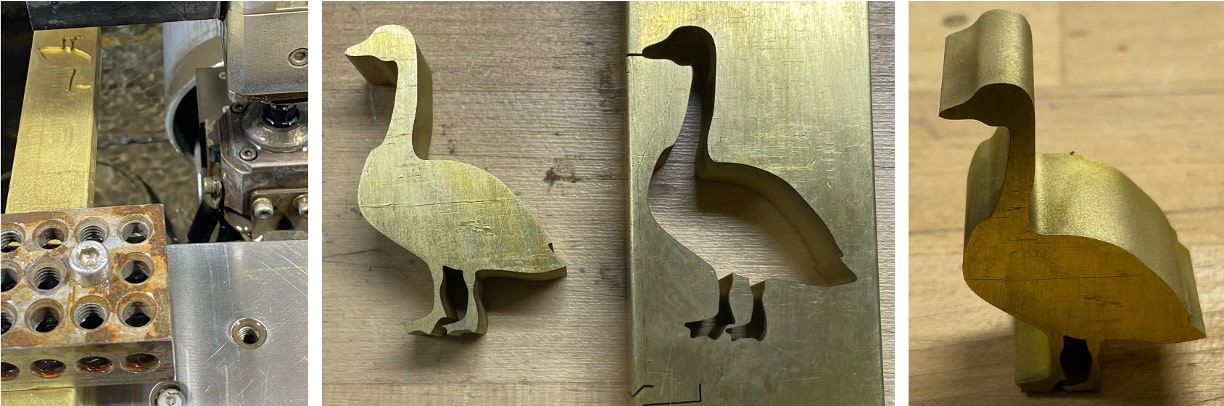
Other than those small hiccups, everything else worked smoothly. I even got lucky with the automatic rethreading! Anthony helped me throughout the process, taught me how to jog the machine, and offered suggestions such as where to start the cut (in the beak) and how far into the block to place the origin so that everything fit nicely without risking thin walls and premature part fallthrough. For this particular cut, the workpiece was made of brass and had a thickness of 0.623 in. As can be seen in the images below, after uploading the file onto the machine computer, I positioned the goose where I wanted it with reference to the origin, set the workpiece thickness to 0.623 in, and marked the pattern as "Punch" since we would be cutting all the way through the outline of the goose. The workholding was very straightforward. Since the wire exerts near zero force on the workpiece during cutting, the workholding does not need to be quite as robust as with other machining methods. The rightmost image is during the wire EDM process itself, where bubbles are visible during the cutting. The bubbling sound is characteristic of the wire cutting through the material. With the resizing, the goose ended up taking around 35 minutes to cut.

After the tool finished, the water drained and the door lowered, revealing the goose. It was kept on by a tiny, uncut portion at the tip of its beak, so all that was needed to remove it was a firm push through its center. The outline is extremely smooth, and you can barely tell that the entry point had been slightly, intentionally, broken off. I filed it down a touch, but that wasn't really necessary. I'm really happy with how it came out! Jake is right, it is pretty thick, all things considered.
Here is the finished, golden goose!