How to Make Something that Makes (almost) Anything | S21 | System
Recylced Aluminum Casting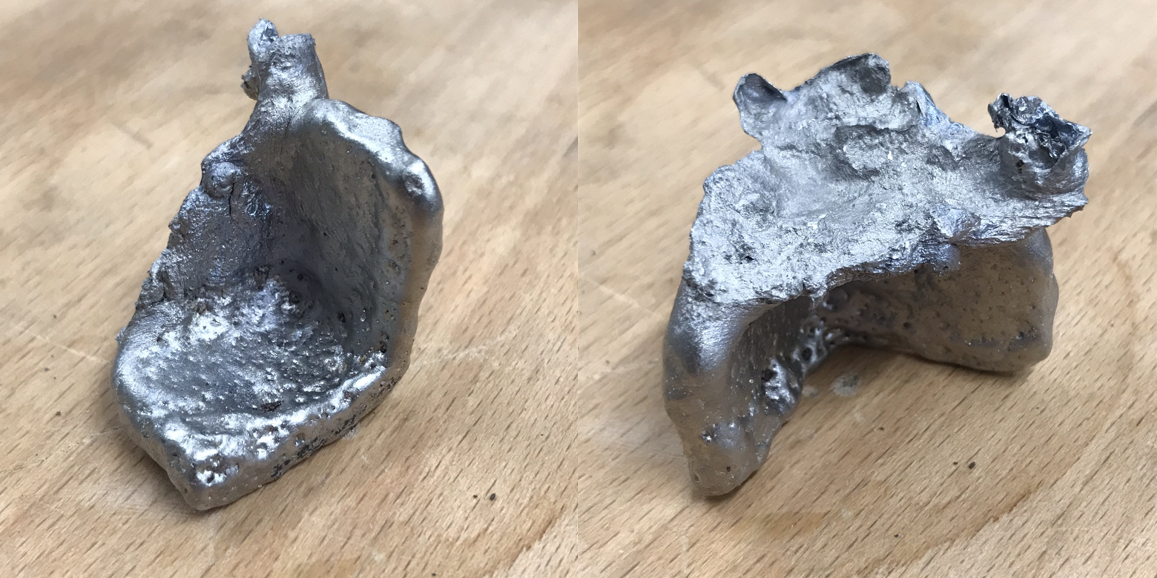
Initial Ideas:
Develop a machine/process that makes simple one-part molds for aluminum casting using granular media. An objective of this machine to recycle aluminum scarps. More project details... here
WEEKLY UPDATES
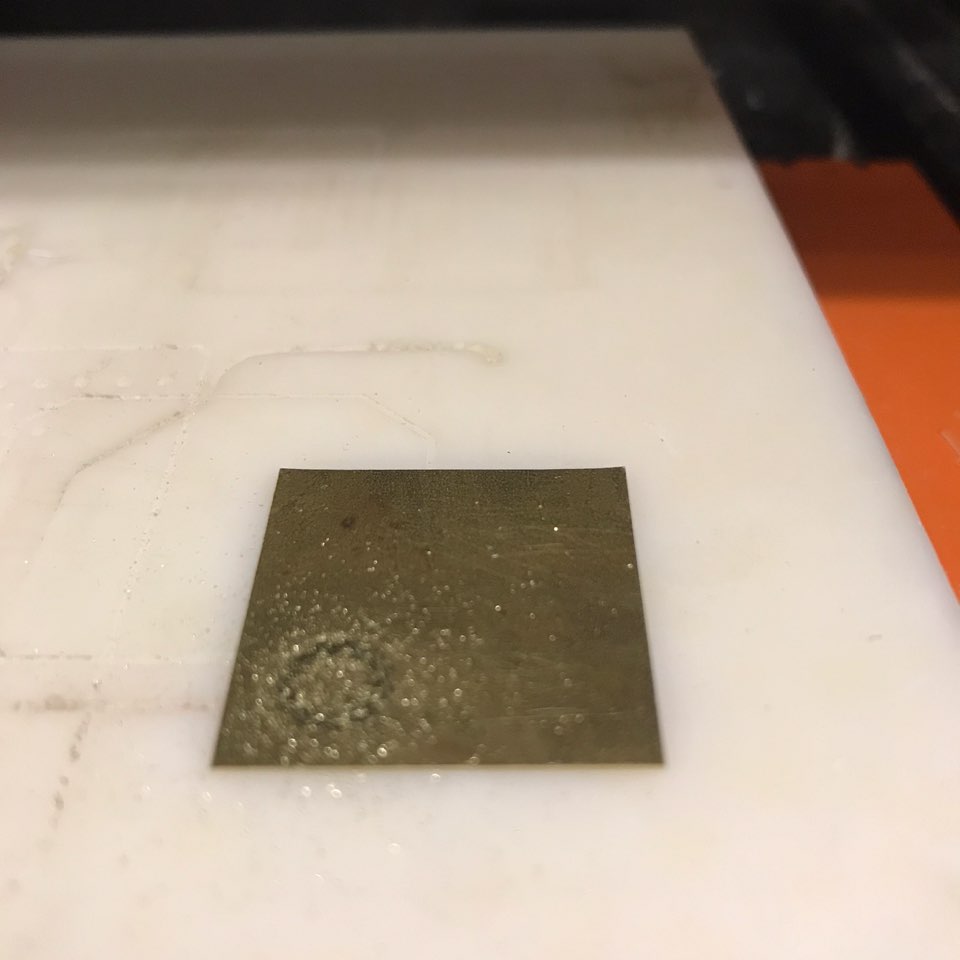
4 / 20 / 21 ~ 5/ 12 / 21 Aluminum Casting and test results here
4/ 20 / 21 Sinter Sand
During the presentation a few weeks ago, Prof. Neil Gershenfield and Zach gave us great feedback on our project, using chemical sand binders for the sand 3d printing process. However, Nathan and I would like to avoid using binders for now to make our aluminum recycling process more accessible in terms of cost and availability. Rather than using chemicals to bind sand, we are interested in sintering the sand to make the printed(or milled) sand retain its shape while pouring aluminum particles on the sand mold. As Zach had advised, we plan to test with a hand carved mold and pour aluminum as soon as possible to reveal possible issues we have in the recycling process we are thinking about.For the past few weeks, Nathan has been working hard on getting approval for indoor furnace usage for aluminum casting in our maker space. Unfortunately, however, the approval process has been protracted and we have not received a clear answer yet. So, we decided to use a tabletop electric furnace outdoor (backyard of my place) to fire sand and aluminum. We ordered a RapidFire Pro L which can reach up to 1200 degrees Celsius with a 6” x 5” x 6” firing chamber size. The temperature can be controlled by a digital controller.
First plan to test
The thing that we are most curious about is whether it is possible to sinter sand by firing. We found an interesting solar sinter project by artist Markus Kayser. The device he made generates temperatures between 1400 and 1600 degrees Celsius to sinter the silica sand. The machine we purchased can reach a maximum 1205 Celsius, so we are not sure yet if it can sinter the sand or regolite. Also, we plan to explore the feasibility of using cold aluminum scraps instead of melted liquid ones. We are planning to test casting with aluminum particles instead of chopped scraps for next week.
4 / 1 / 2021 - Linear actuator for aperture plate
One of the drawbacks of dispensing sand particles through a 1.24 diameter small aperture with a DC motor is that the particles often clog the hole, preventing further dispensing. I assumed that the biggest reason for clogged particles stemmed from the varied range of sand particle sizes. Last week, I made a 3d printed filter with .4mm holes, but because the quality of the holes was not perfect, some larger particles still made it through. With the filtered sand, vibration from the DC motor was enough to keep sand particles sliding smoothly down to the bottom of the container, but the hole would still get clogged occasionally . Sometimes, clogged particles were so strong that I could not break them by poking with tweezers and had to empty all the sand particles and turn the container upside down to pull out the clogged ones.
To solve this matter, I decided to put an extra axis and a plate with various apertures that allow the dispensing holes on the container to be much larger than the previous model to prevent clogs. Different-sized holes on the plate will control the particles' flow by expanding, contracting, or even fully closing the hole.
Motor
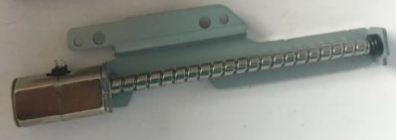
The movement of the plate with the holes will be a simple linear motion that will happen only a few times during the sand print. I checked the stepper motor inventory in the lab and found a mini linear axis motor with a 43mm length lead screw. Similar motors are used for DVD drivers pushing and pulling CD plates.
However, it was hard to find a datasheet and 3D model of this motor. I had to test different amps to run the motor. 1.5 amps per phase, the maximum amps that I used for Nema 17, made this motor extremely hot within a few seconds. 0.25 amps felt weak when I pressed the screw with a finger. 0.5 amps had better force and did not overheat the motor. But the maximum amps for the motor will be tested again after assembling the whole system with sand particles.
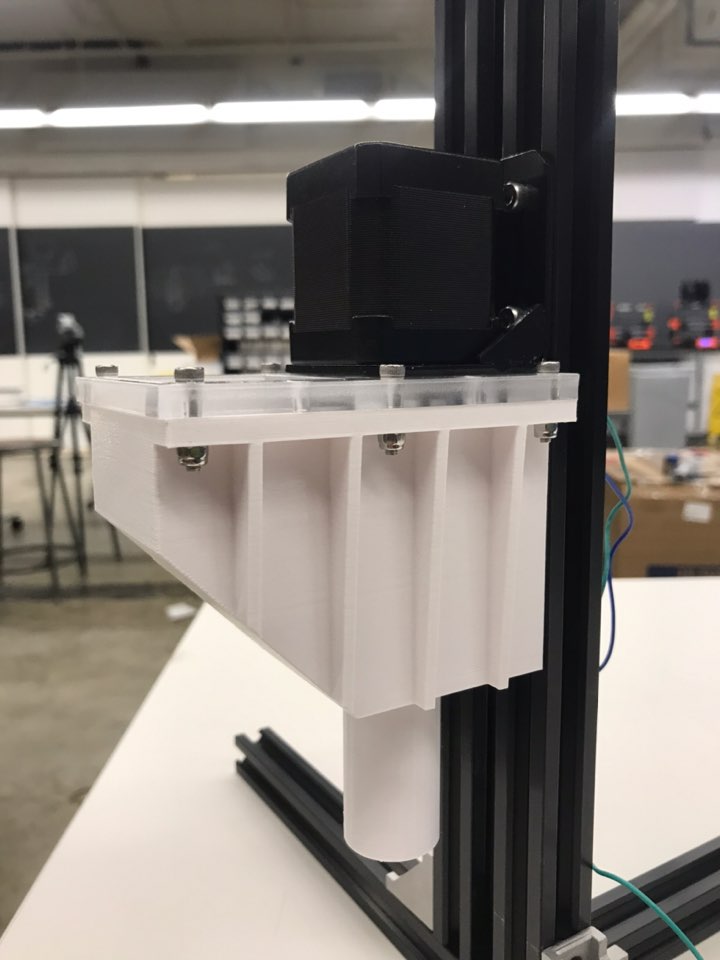
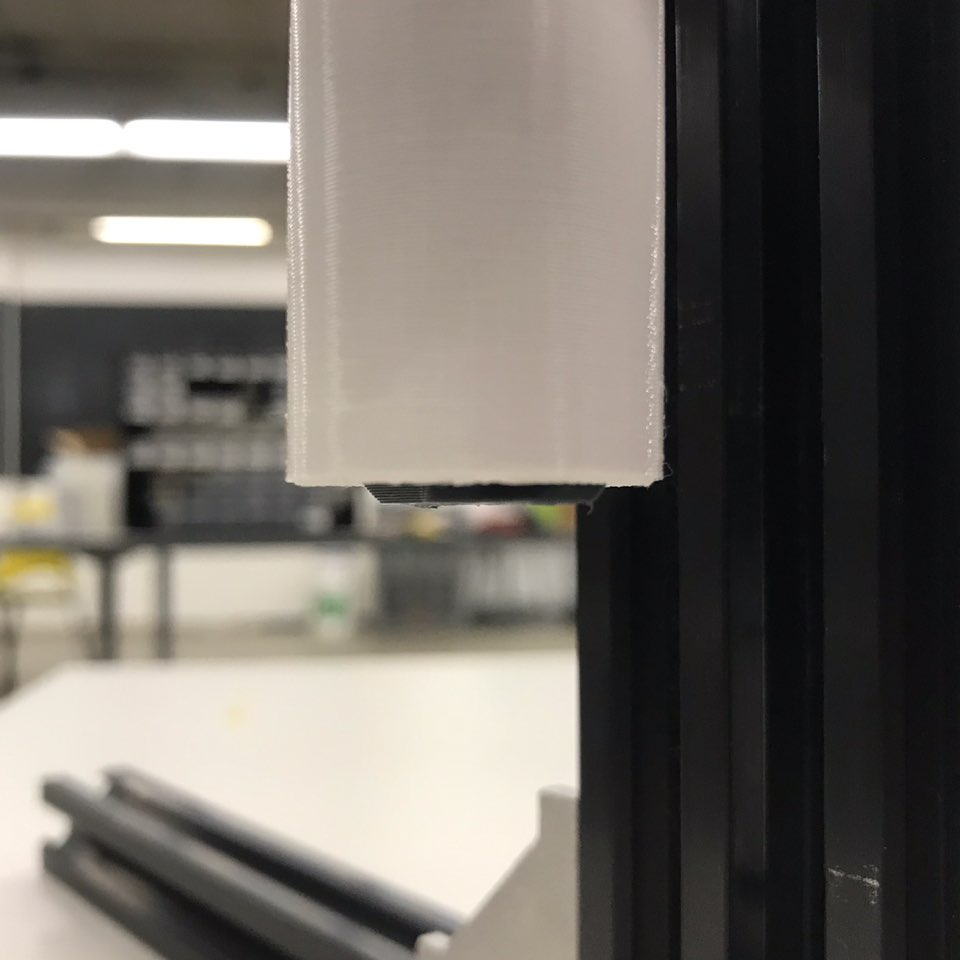
Motor Housing
I found Joshuah, a past htmaa 15 student, tried to use this motor in this project and had similar issues to what I had with this motor, including missing datasheets and no interface for the lead screw. To solve these problems, I built a 3D model of the motor from scratch and designed a motor housing for attaching the aperture plate.
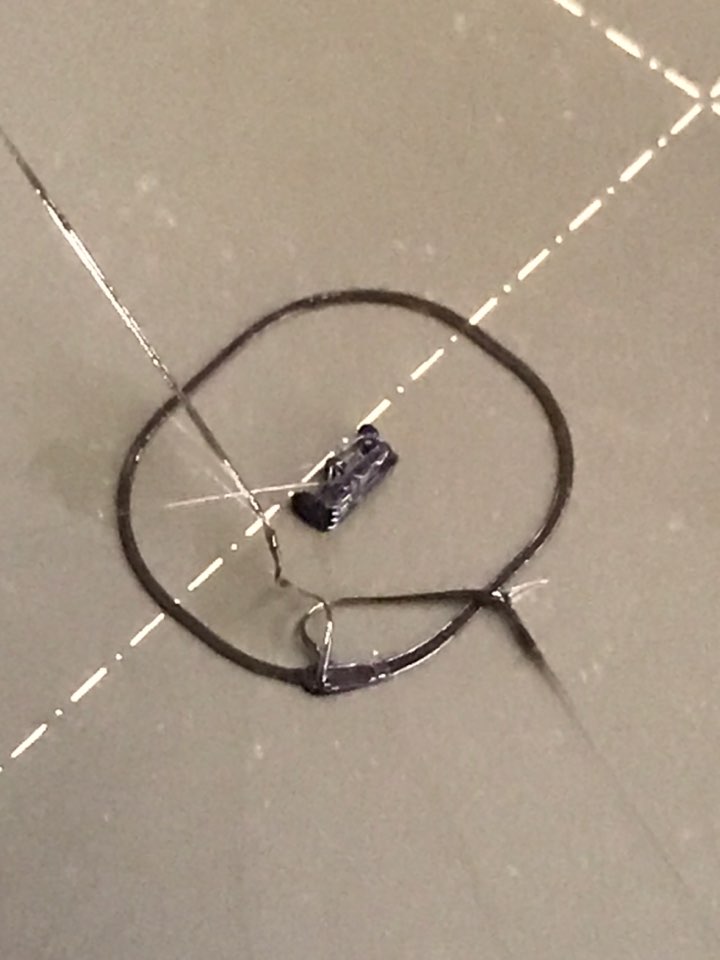
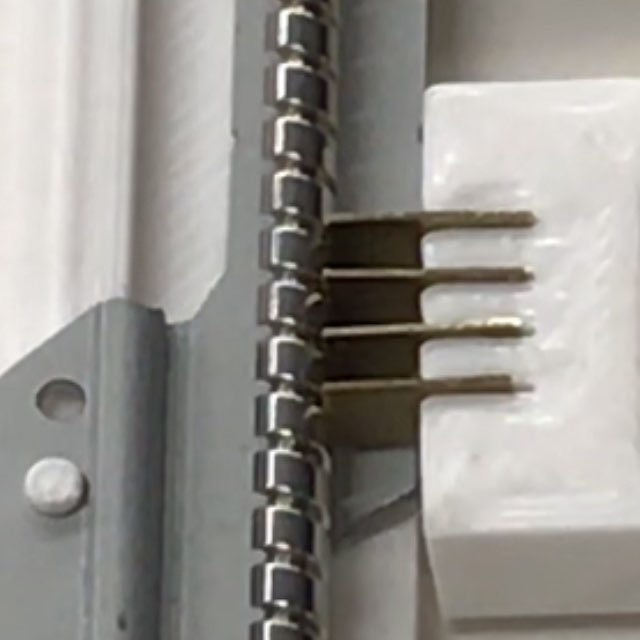
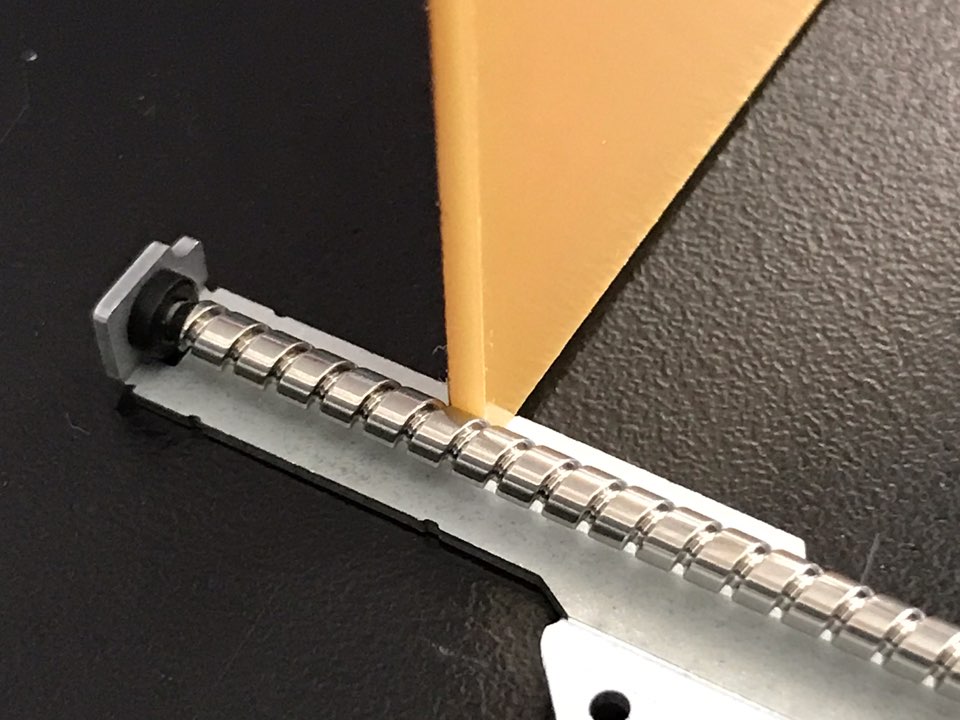
The interface between lead screws is the most tricky one, and I am looking for a better solution. I took preliminary measurements and found that the teeth width on the lead screw is approximately 1.56mm and the gaps between teeth are approximately 0.385mm. Although those measurements were not perfect, they told me it would not be possible to print something that fit in between the gaps. I I still did a test print to confirm, but as I expected, Prusa’s printing resolution made it impossible to make 0.385mm pins for the interface. Then I found a 0.27mm thick copper plate from the lab and gave it a try. The drill bit I have was not strong enough to cut through the plate, so I ended up cutting the plate with scissors.
Motor Housing
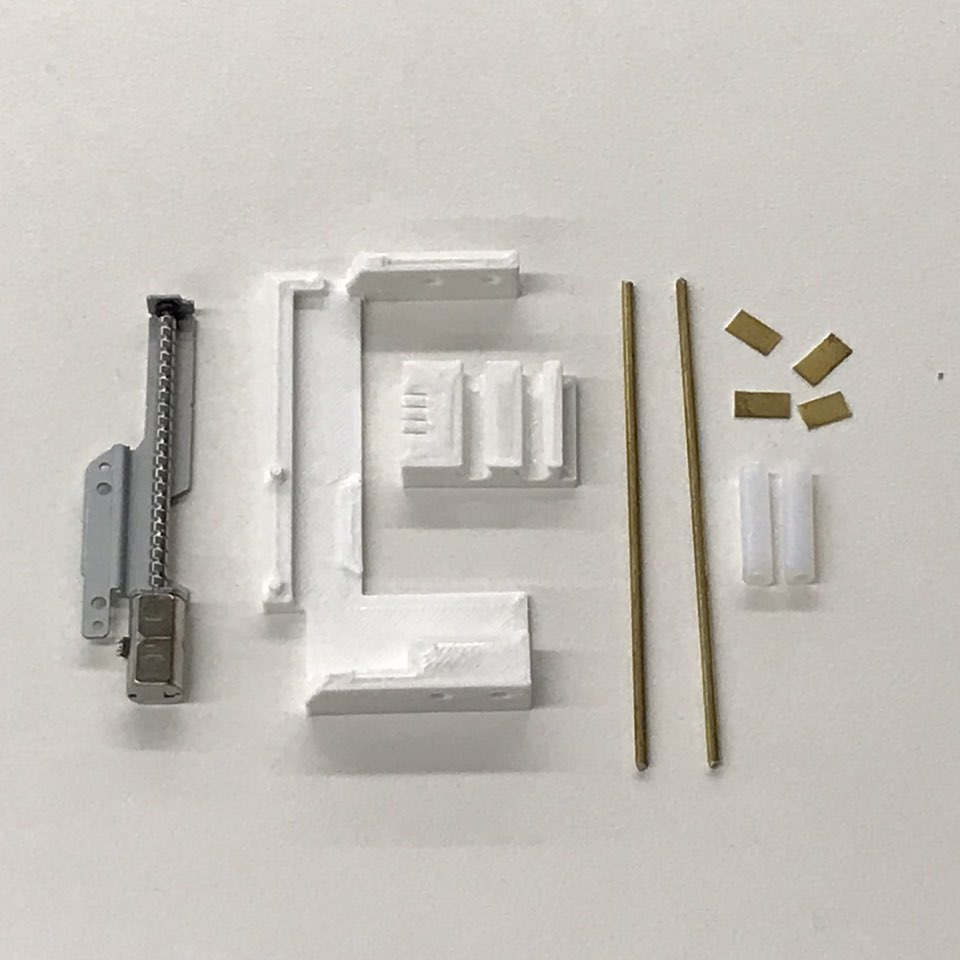
The following are some measurements of the materials that I used for this model.
- 3pcs 2-Phase 4-Wire Mini Slider Screw Stepper Motor Micro Stepper Motor DC 5V
- Copper rod 1.59mm Dia.
- Copper plate 0.27mm Thickness.
- PTFE tube 4mm Dia.
3 / 25 / 2021 - Sand dispenser with vibration
Summary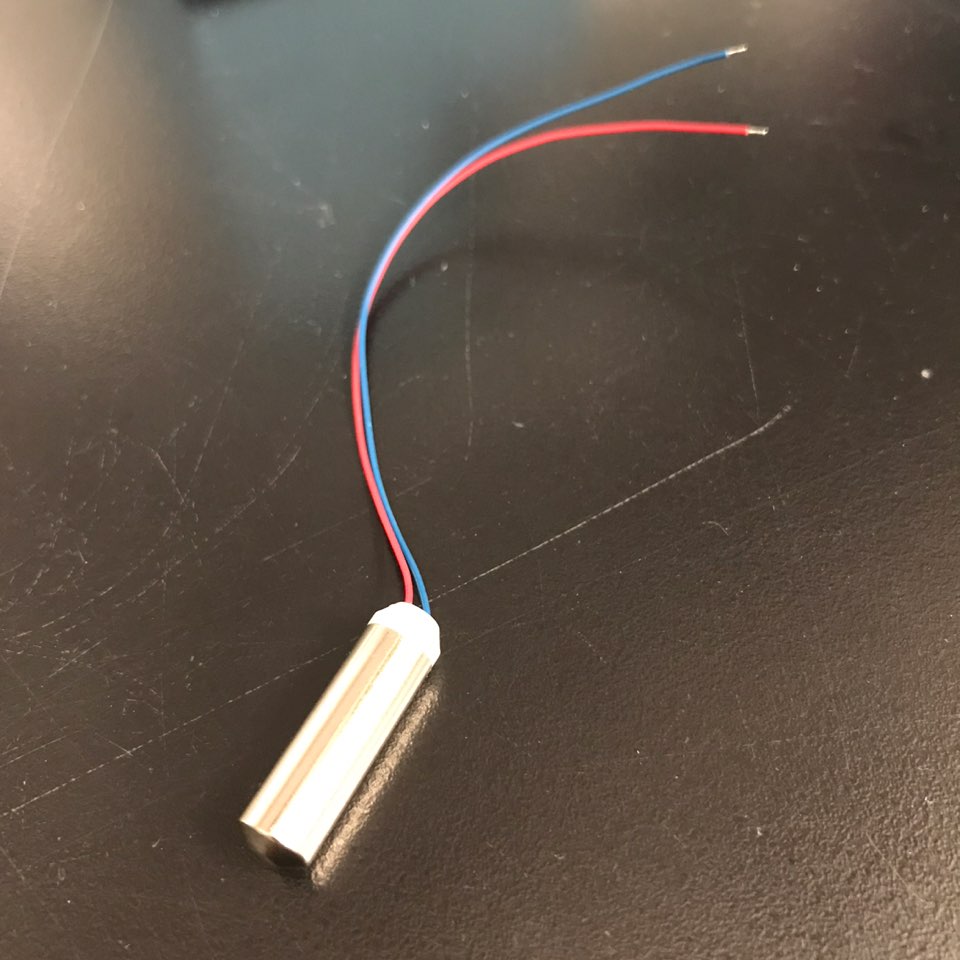
This week, I did some tests on a sand dispenser mechanism using vibration. I worked on making an auger to dispense sand from the container past week, but the result was unsuccessful due to the auger's large slope angle. Jake and David suggested an interesting development direction during their office hours - the idea was to use particle dispensing methods in SLS printers using dispenser hole with a very small diameter, an order of 4-5 times the size of the particle, with vibration. I first sorted out small particles from sand and dispensed them with a container with a 1.24mm diameter hole and a 7 x 25mm DC vibration motor.
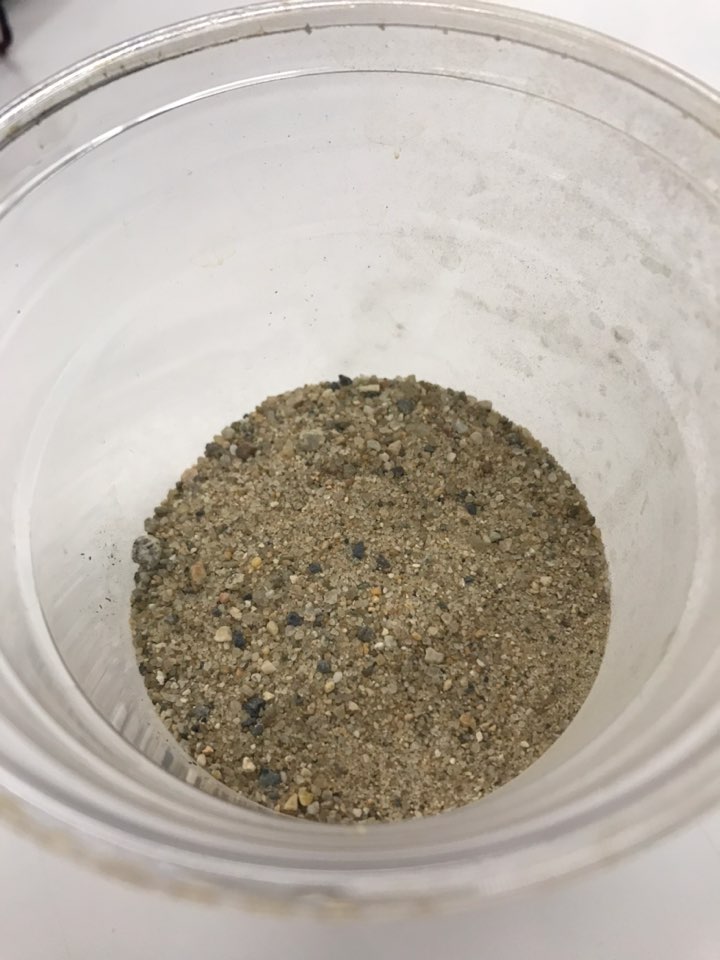
Sand filter
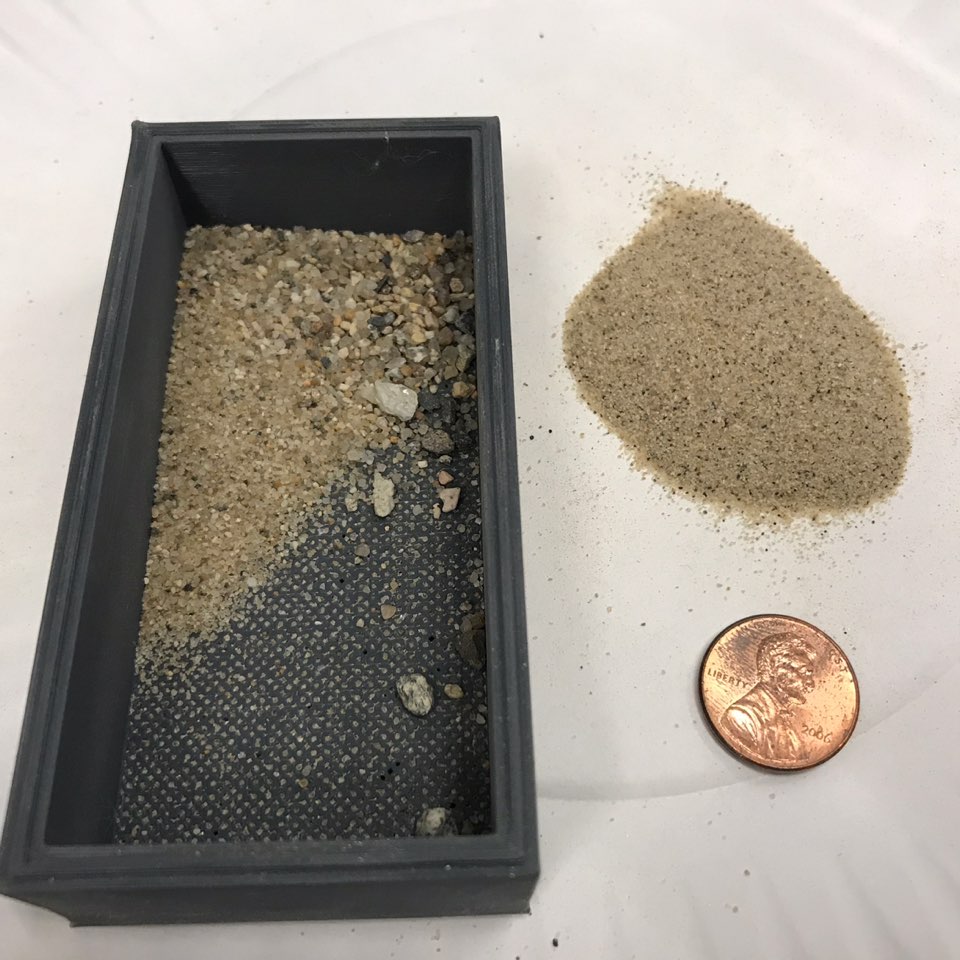
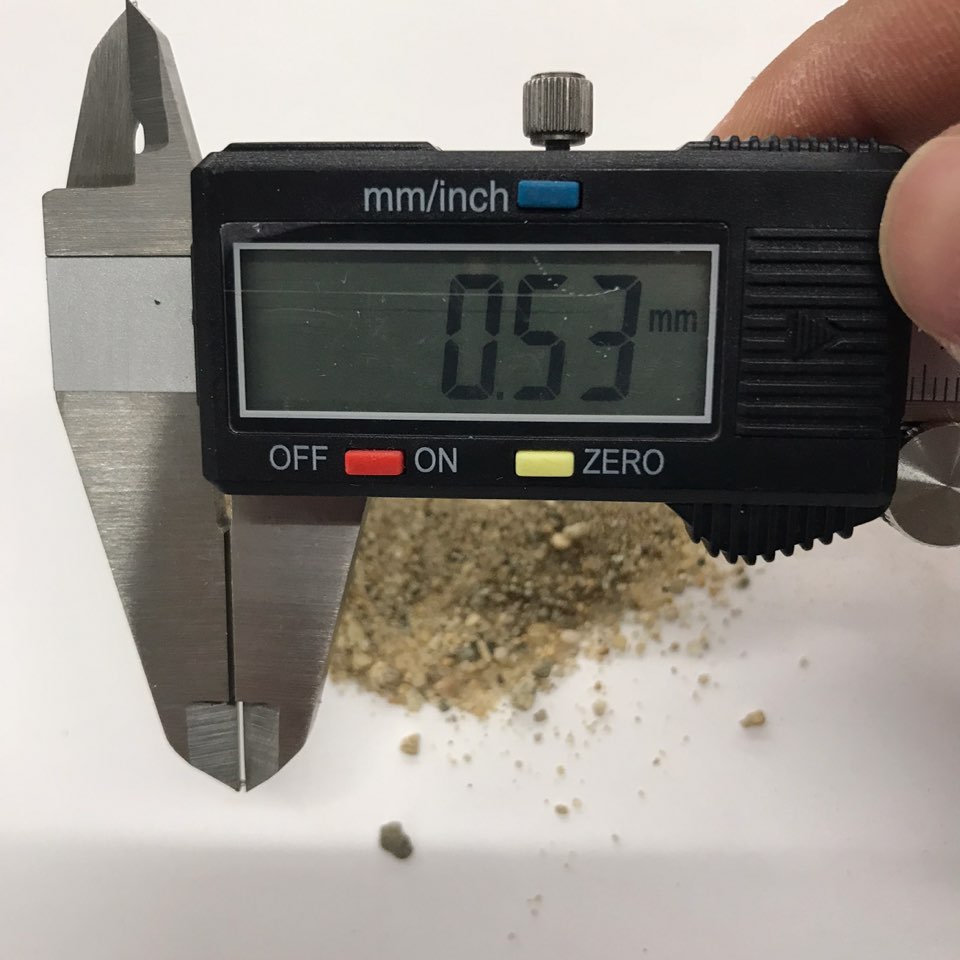
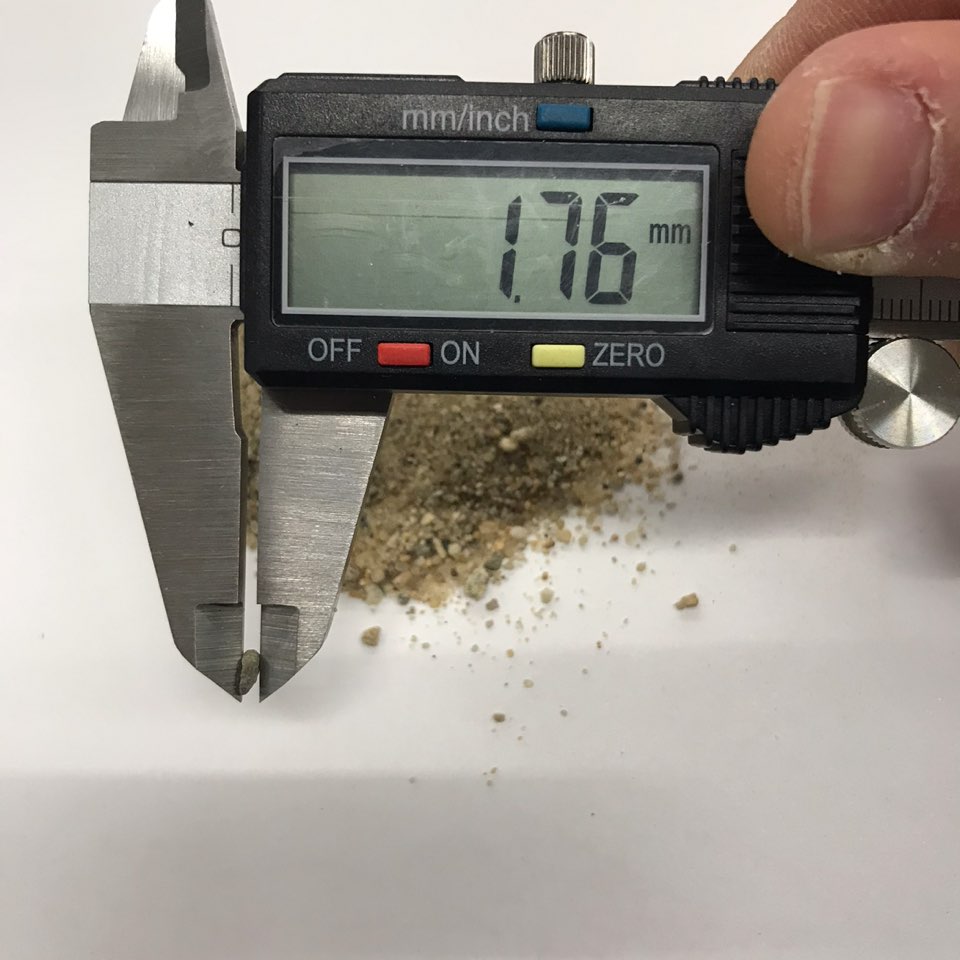
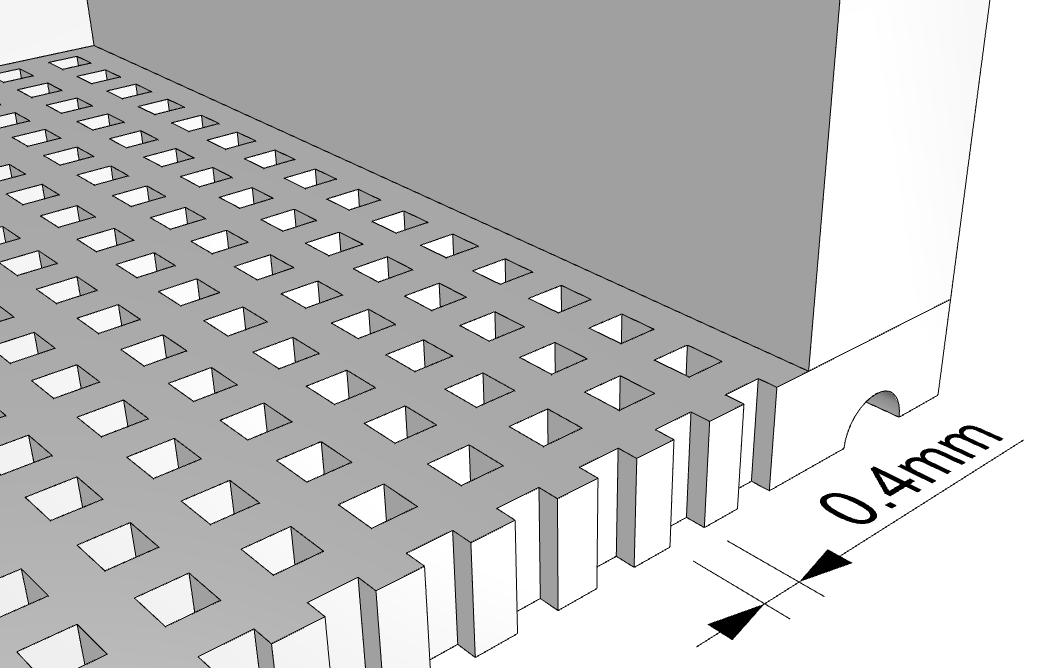

To determine the dispenser hole size, I first needed to reduce the diversity of sand particle sizes. I checked random particles that I could grab with a caliper. Within those particles, the sizes varied between 0.5 to 1. 8mm. I made a filter with 0.4 mm rectangular holes and decided to use the small particles for the next dispensing test. However the 3D printed filter did not come out as I intended. The quality of each of the holes was poor and size also varied, and particles easily clogged in each hole.
Dispense particles with various-sized holes between 1.2mm to 1.6mm
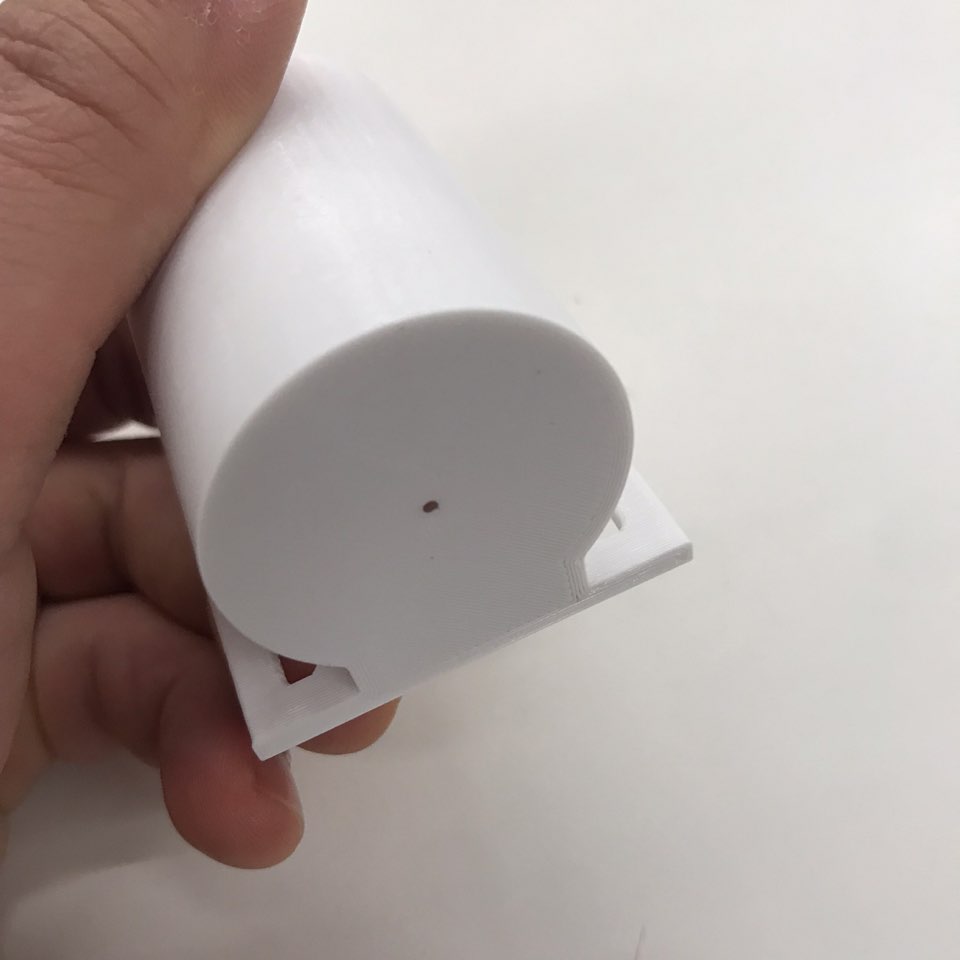
Assuming that the filtered particles' sizes would be about 0.4mm, the diameter that would perfectly fit four particles is 1.312mm. I made a container with ten different diameter holes ranging from 1.2mm to 1.6mm to test for the best hole size that I could use. I attached the 3d printed container on an angle bracket and temporarily zip-tied the DC motor vibrator on the side of the bracket. I applied 3V voltage to the motor and tested a few times to find the right hole size.
During the vibration test, the holes larger than 1.5mm diameter were too big to control the flow of the particles. The sand flowed easily out of the holes. Other-sized holes dispensed some sand while I poured the material into the container, but it stopped flowing very quickly. After testing a few times, I decided to use the 1.24mm hole for further tests since it rarely dispensed sand when it was not vibrating and had a reasonable particle flow rate when it was vibrating.
Sand dispenser
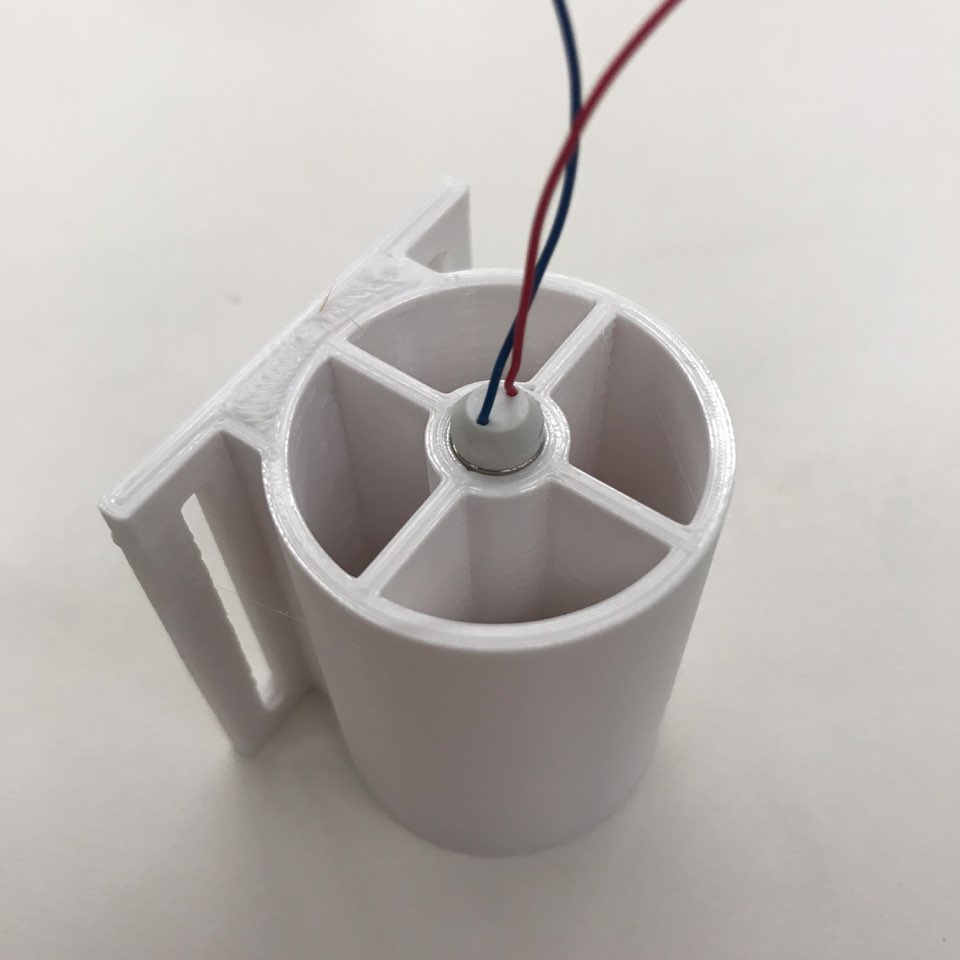
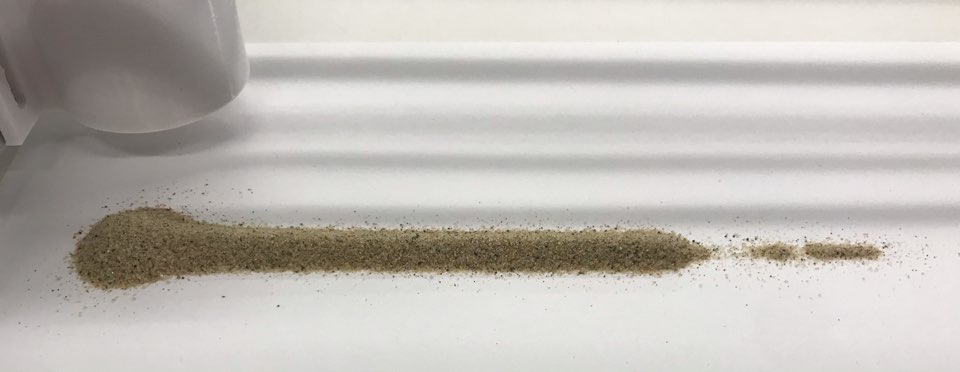
I designed a sand dispenser with a 1.24mm hole 10 mm above the ground. The dispenser was attached on a linear axis and I placed a DC motor at its center to evenly deliver the vibration to the container. I applied 3V on the motor using a dc power supply. For the first few cm, sand was evenly dispensed along the path. However, at a certain moment, the flow of sand sharply decreased and suddenly stopped. I believe that was the result of a large particle that clogged the hole.
Next steps :
After those tests, I determined that dispensing sand with vibration has potential, but there are many things to consider. First is filtering methods that would guarantee sand particles of the desired size. I found that 3D printing the filter box resulted in low quality holes. I will try other fabrication methods such as milling. Second is the necessity of an aperture on the hole that could open and close the hole or even vary the hole's size. Additionally, I need to make a circuit and system that can control the vibration of dispenser and CNC at the same time and a mechanism that can continuously feed sand into the dispenser.
3 / 18 / 2021 - Sand dispenser
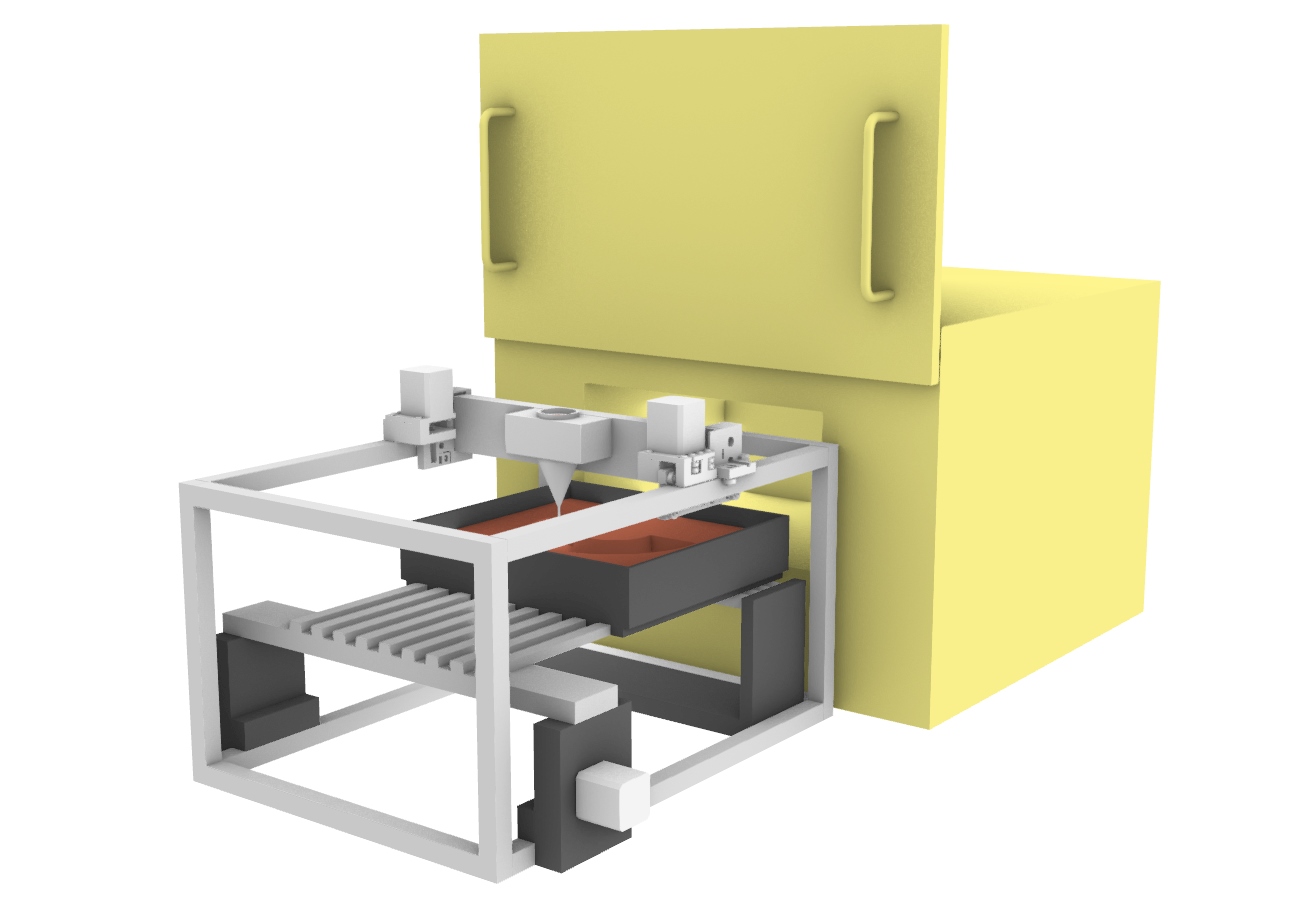
Creating a mold for aluminum casting using granular material was the first thing to consider for the project. The mold could be created using a subtractive method, milling a void from a compact sand object, or using an additive method, depositing (printing) sand in the right place. Because we are not certain yet which process will be more appropriate for mold making with a granular material like sand, we should experiment with various methods to create a mold made out of sand. First, I am making a sand dispenser component to test the additive mold-making method for aluminum casting. 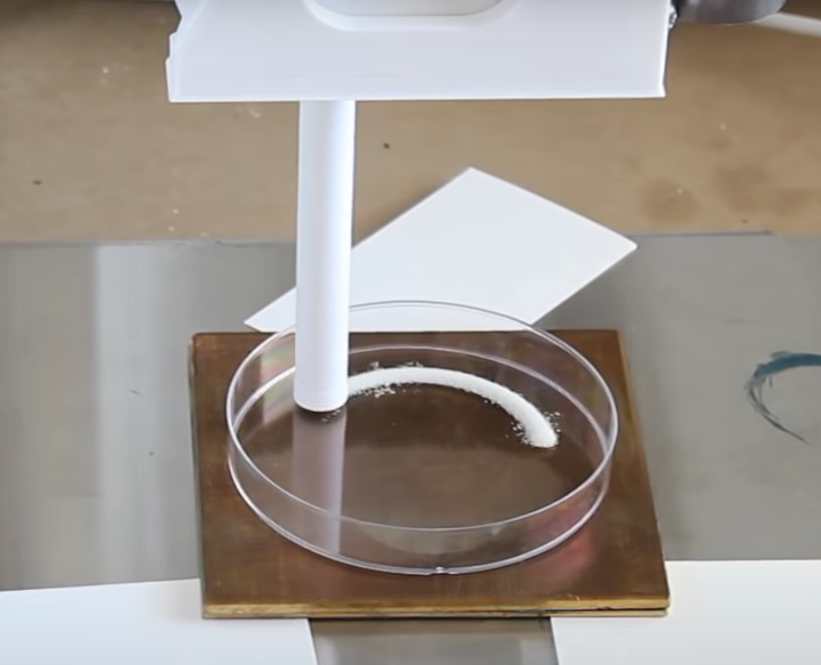
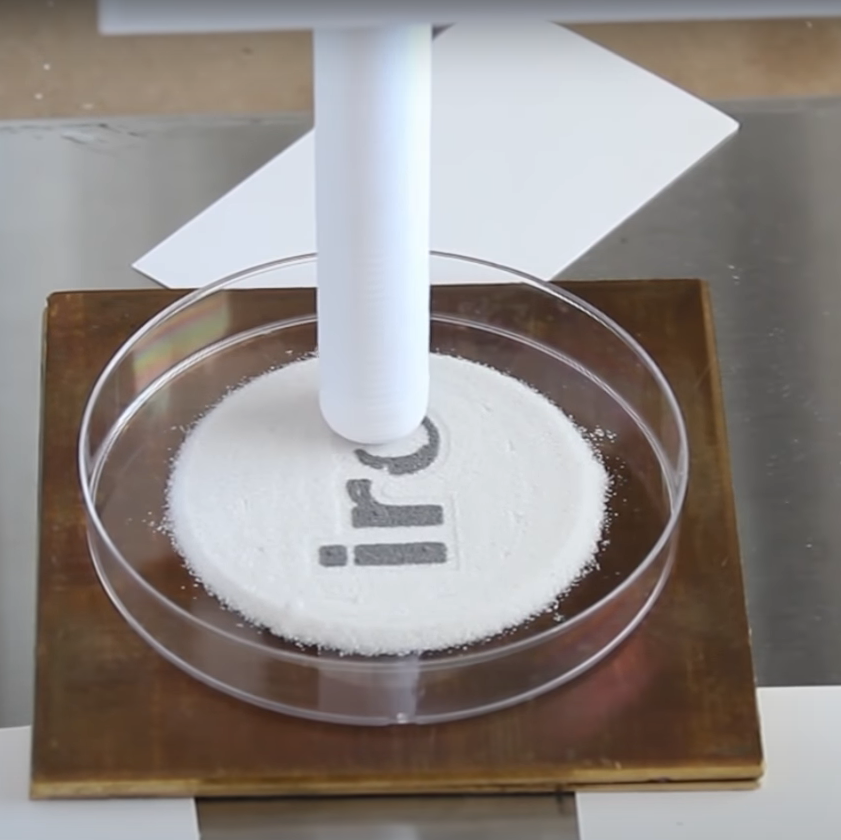
While Nathan and I were building up ideas on this project, we referenced the Iro3d metal 3d printing machine, which selectively deposits metal powders and builds powers layer by layer. The end effector in the product instruction video dispenses powder with one rotating axis on top. It was not clear how the component worked internally, but I assumed that it pushes powders out using augers, like food filling machines, food dispensers, and pet feeders. Based on that assumption, I started building a housing design that contains sand and has a hole for the auger.
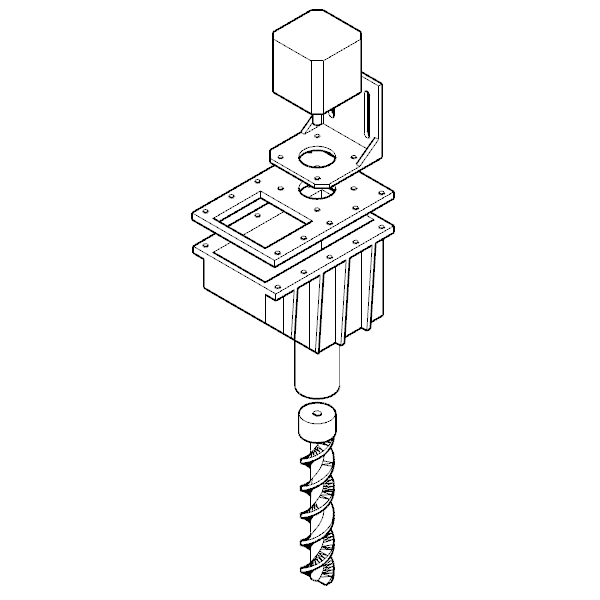
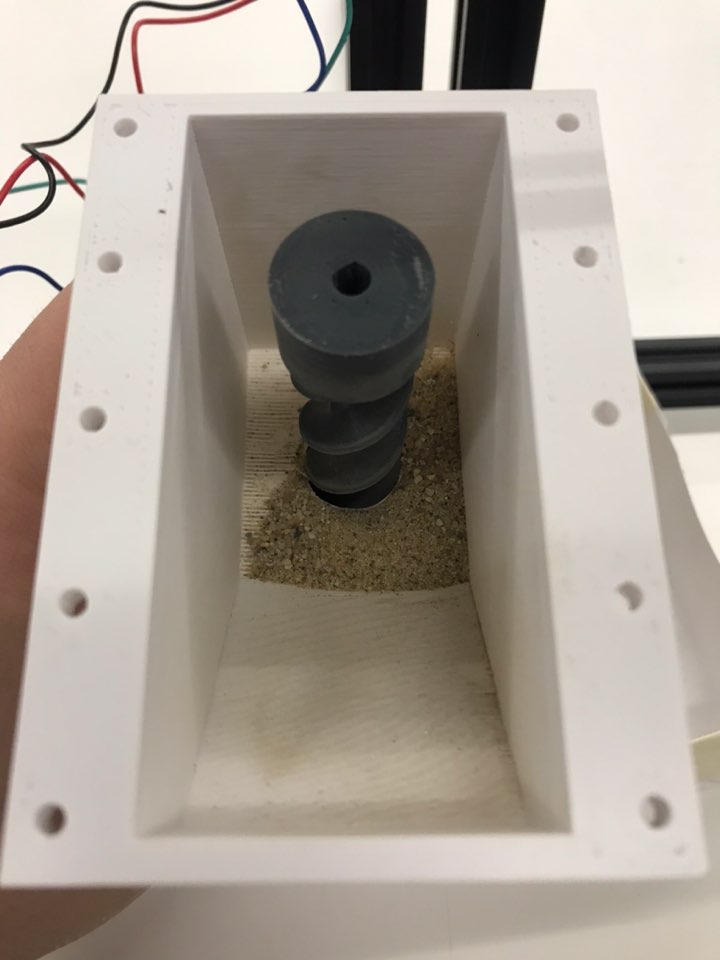
Making a container that could store a small volume of sand was straightforward, but designing an auger was not. The long, slender geometry made it tricky for 3d printing and I got many failures while printing the auger. Finally, I made ten brim circles on the bottom and made the auger with minimal overhangs to succeed with 3d printing. More iterations are still needed. Further consideration is also necessary for the volume that the auger pushes out during one rotation, etc. I built a WIP grasshopper script to make multiple augers for future tests.
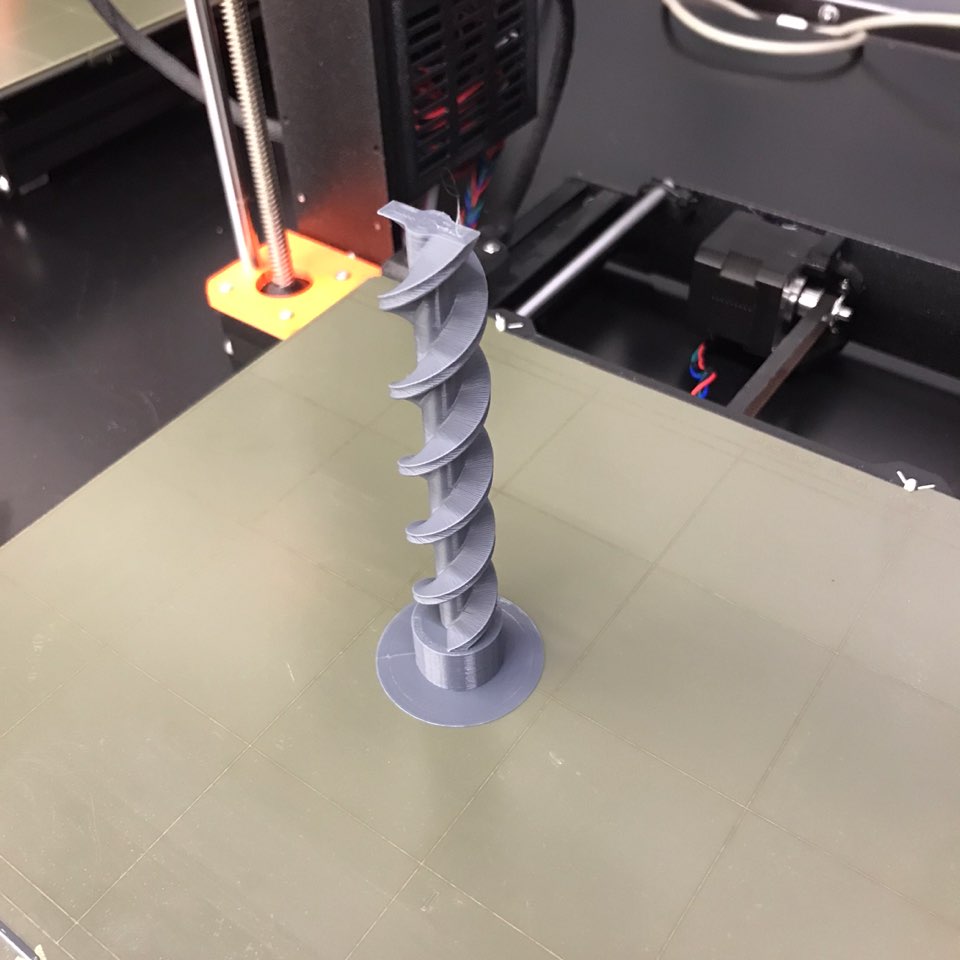
An one piece 3D print auger and motor actuation
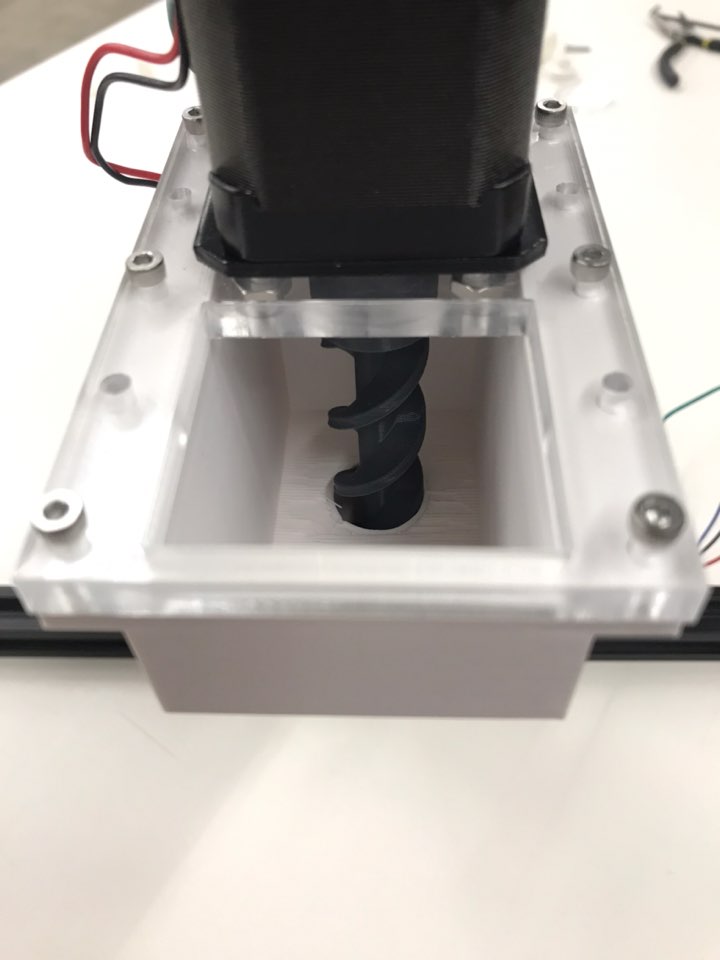
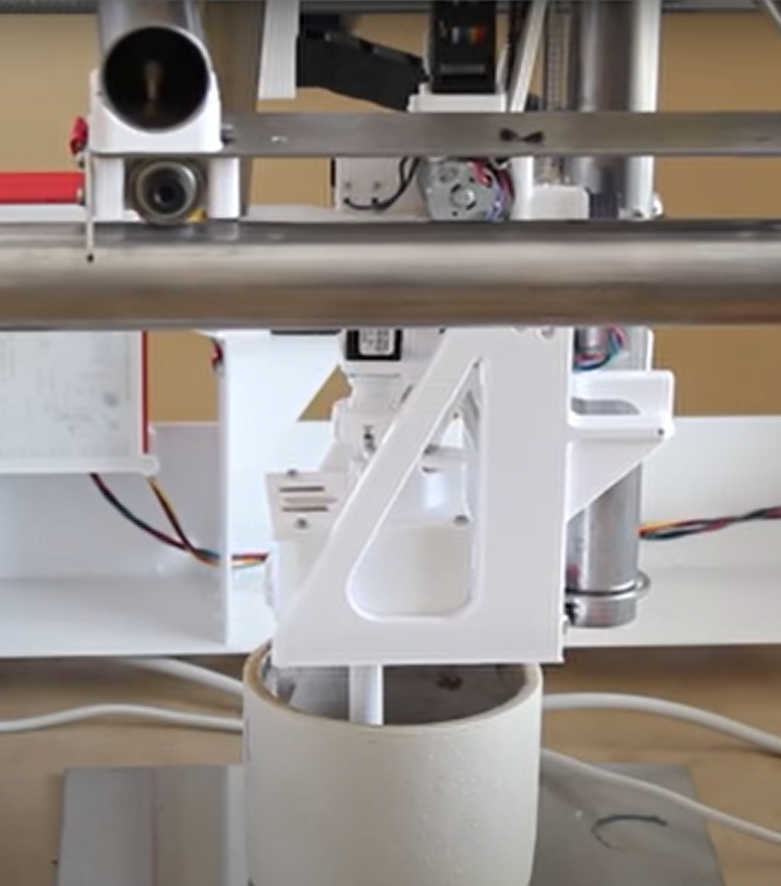
A container assembled with the motor and the auger
And... FAILURE.
The gap of the auger was too big that it dispense sand even before actuating the motor.
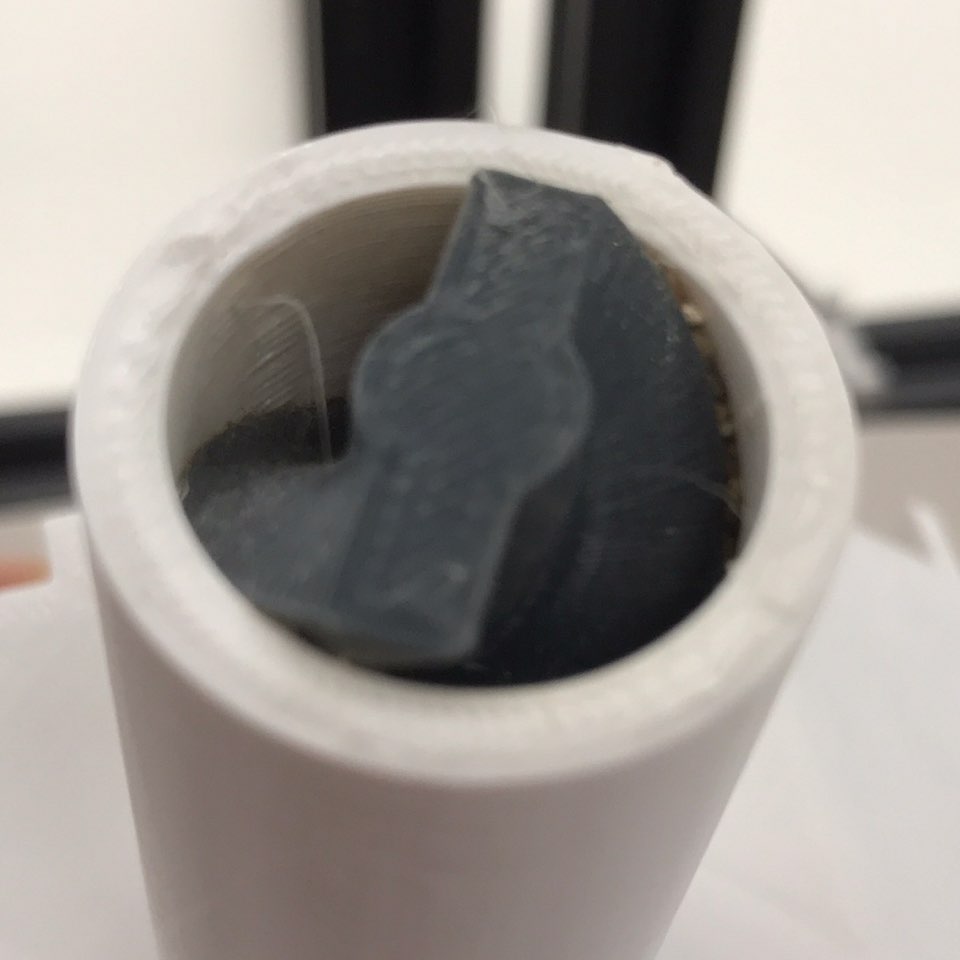
Worse.
After the container stops dispensing the sand, I actuate the auger. It only rotates about 10 degrees and vibrates without spinning. I found it was the vibration of the motor that spread the sand, not the pushing force from the auger. I realized that particles stuck between 0.25mm gaps between the auger and the cylinder were causing a lot of friction. I was not able to pull the auger out by hand.
2 / 25 / 2021 - Ideas and concept
Proposal:
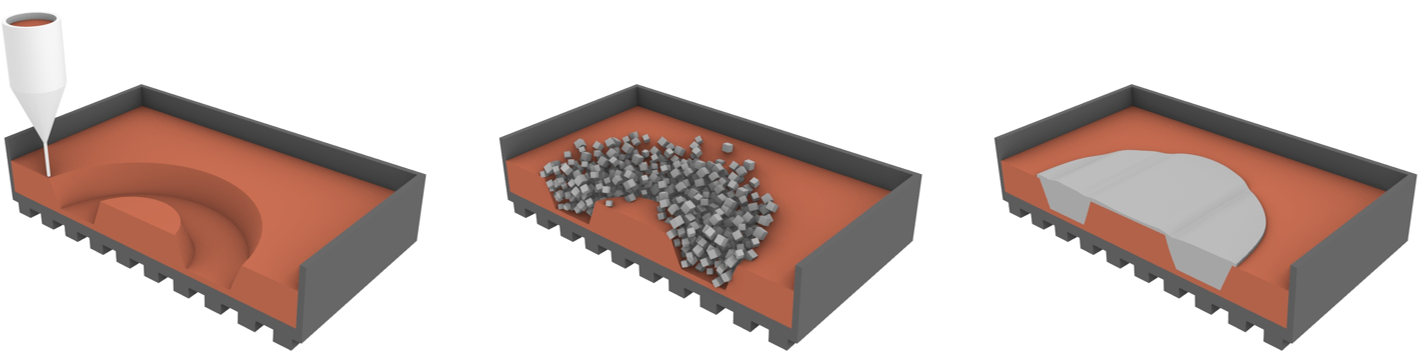
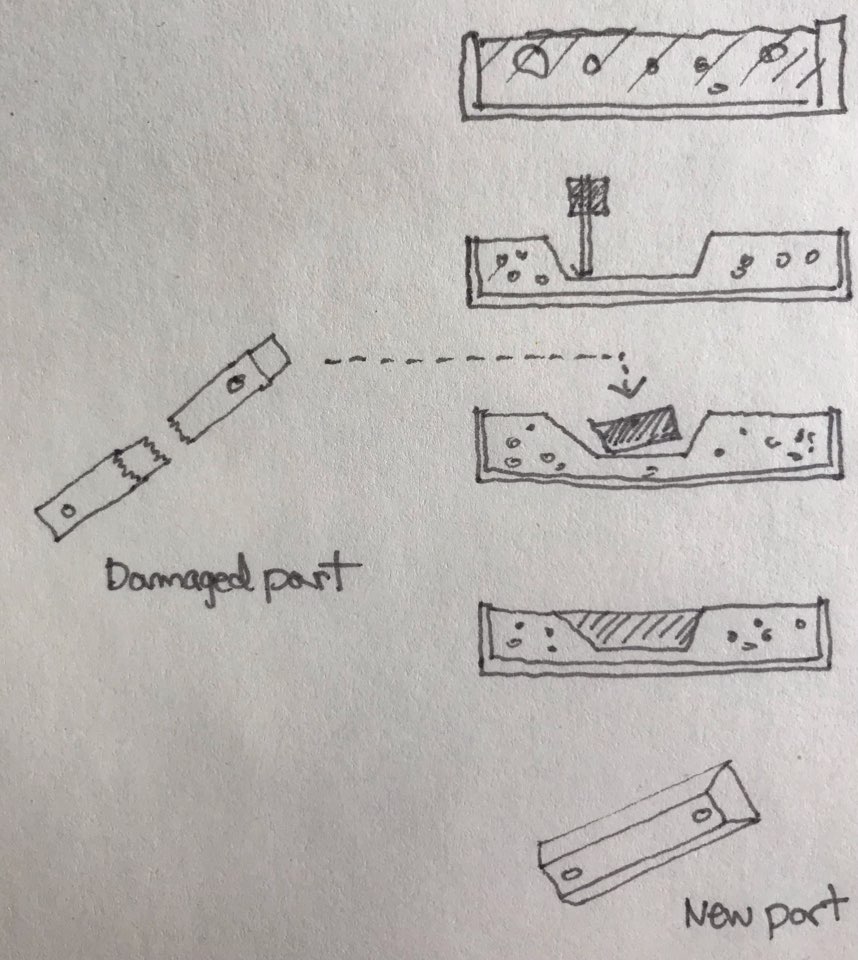
As a part of the Resilient Extra-Terrestrial Habitats research project that Nathan Melenbrink and I are working on, we want to develop a machine that makes simple one-part molds for aluminum casting using granular media. (Ultimately we will select a regolith simulant to make this work more relevant to NASA; these kinds of material explorations, which fall outside of the scope of this class, are studies that Nathan was already planning to conduct under support) The objective of this machine or system is to recycle aluminum in harsh space conditions. The desired process of making recycled aluminum parts would be:
- Make casting molds using regolith. The machine will carve out, dig, or hammer regolith to make casting patterns on the regolith tray.
- Put broken aluminum parts / scrap aluminum in the mold.
- Bake the scrap aluminum to create a new part. (We have access to a 1200C lab furnace).
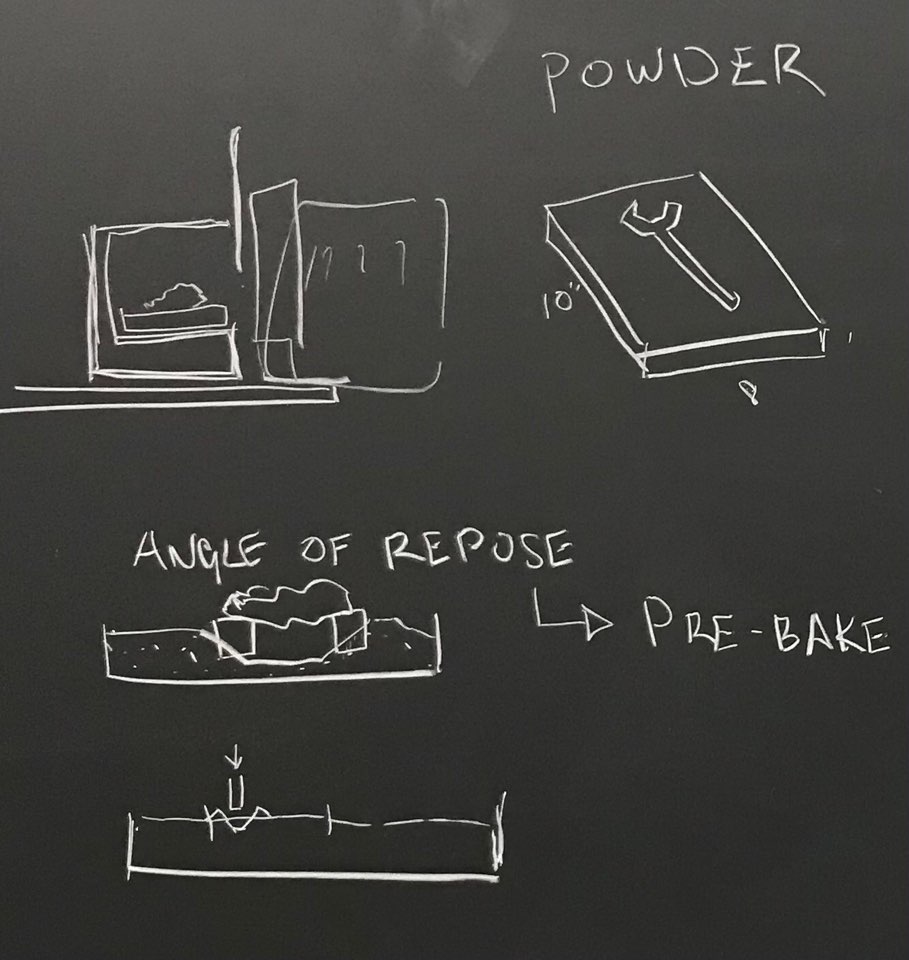
- Determine dimensions for a rough one-part mold for the desired part.
- Compact sand on a tray. Use CNC (milling bit, or another tool?) to create the rough void. Does the compacted sand still have an angle of repose? Maybe that's okay since the part will need to be milled anyway.
- Prepare scrap aluminum. How granular does the scrap material need to be effective? This may require a separate sequence on its own. I assume it's not sufficient to place a big chunk of aluminum on top of a mold and just hope it melts its way into the cavity.
- Arrange scrap aluminum in and around the mold cavity. (Is this manual? Pick & place? Or dispensed from a nozzle? It depends on the granularity.)
- Fire the tray in the furnace
- Remove the rough-cast part and place it on the CNC bed. Mill finish pass.