21.03.25 Tiny Z Progress
After getting a lot of the hardware we had ordered to make our Tiny Z, Maryam and I started assembling some of the machine this week. We have recieved everything to essentially put together the bones of the machine and we got to it with our aluminum framing and allen keys.
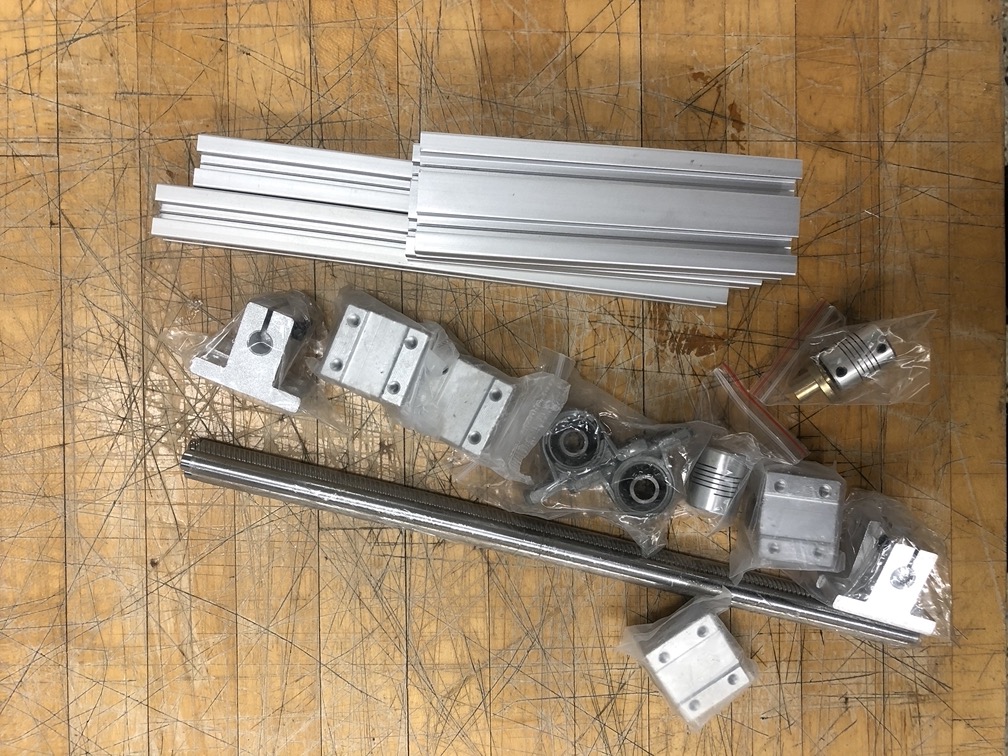
This pile of hardware is the z-axis of Tiny Z. Each axis of the machine is essentially the same as this and consists of aluminum framing that is held together in a frame, and then a lead screw and rails driven by Nema motors to move each axis.
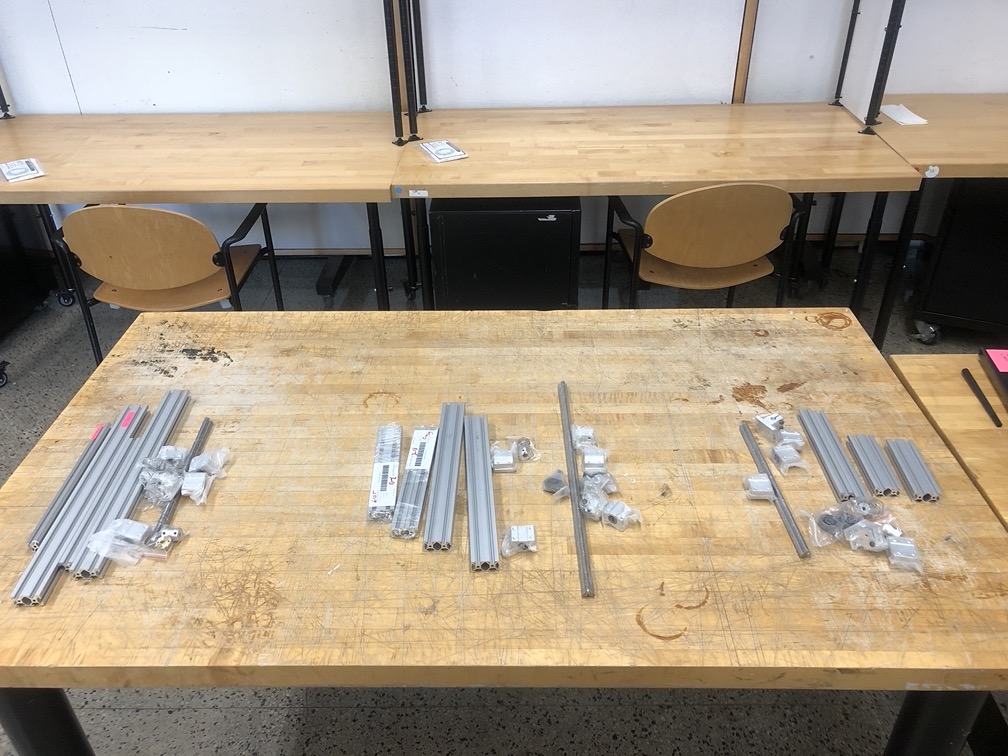
Here is each axis laid out before assembly. Each axis is a mix of 2020 and 2040 aluminum profiles depending on what parts it are connected to it. There are 3 lead screws, the y and z axis are 300mm long and the x axis is a bit bigger at 500mm long. Part of this project is updating the BOM to a machine that is in constant evolution which you can see here.

Assembly of all the parts thus far is very simple. T-nuts that slide into the aluminum framing, aluminum corner connectors, and 5mm BHCS are pretty much all that is required to put together Tiny Z (thank you Zain). However, as we were updating the hardware for the project we also realized a weird sparing use of washers throughout the build in older iterations of the machine. We generally thought it wise to include them, even though we completely forgot about needing them while ordering 5mm screws (...).
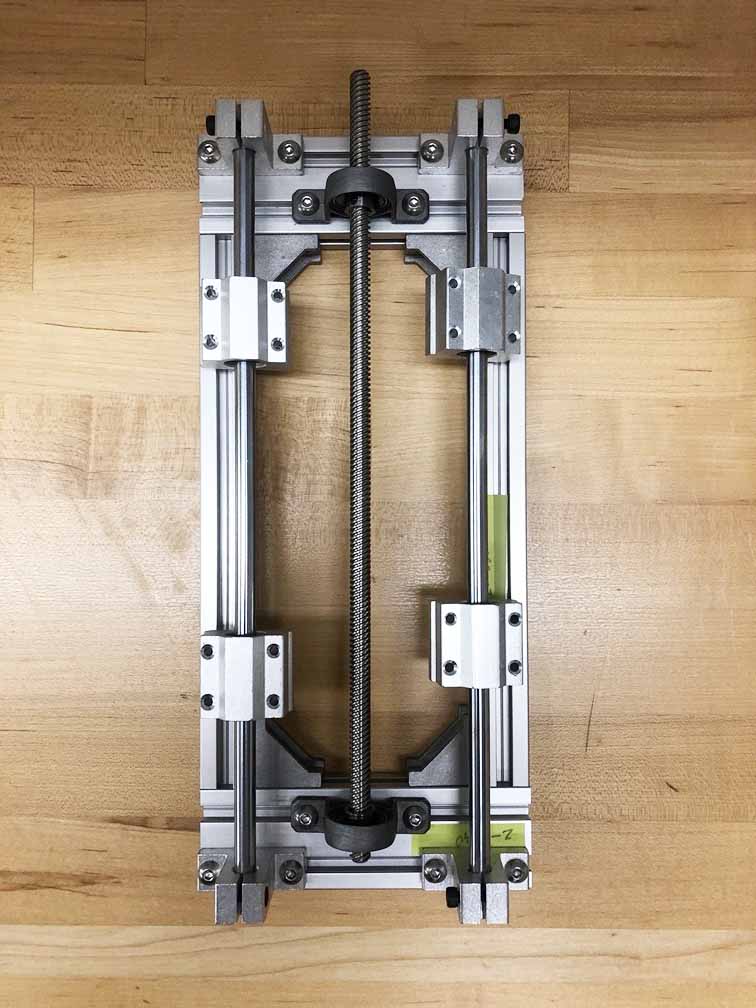
This is what an almost complete axis looks like when assembled. This is the z-axis, which still needs an aluminum plate that will connect to these currently floating rails. We are also still waiting for the nut housing which connects the aluminum plate to the lead screw on each axis.
Here is the y-axis of the Tiny Z missing the same parts as the previous axis. We will be waterjetting the aluminum plate on Friday to hopefully get closer to completion. It is also important to note, that during assembly, it can be tricky to keep everything square with these cheap aluminum corner connectors. The plates will add another layer of security to keep things hopefully more square and stable.
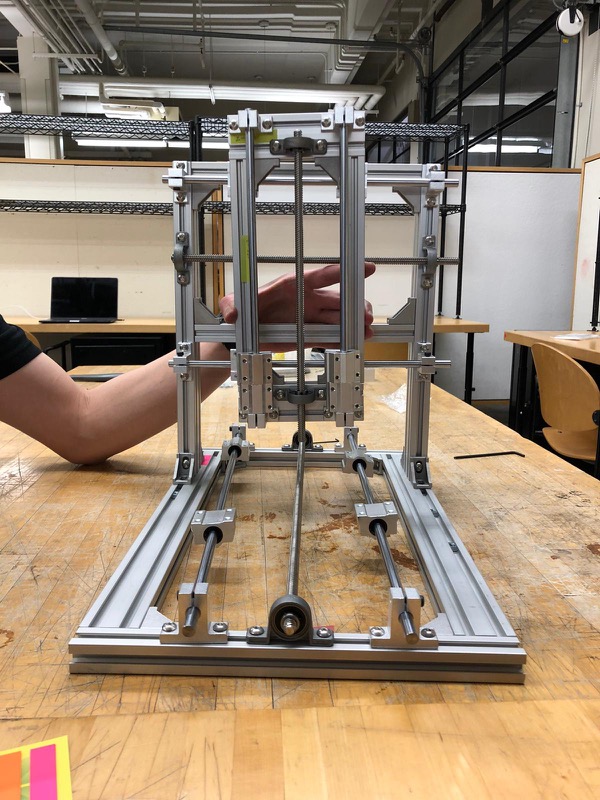
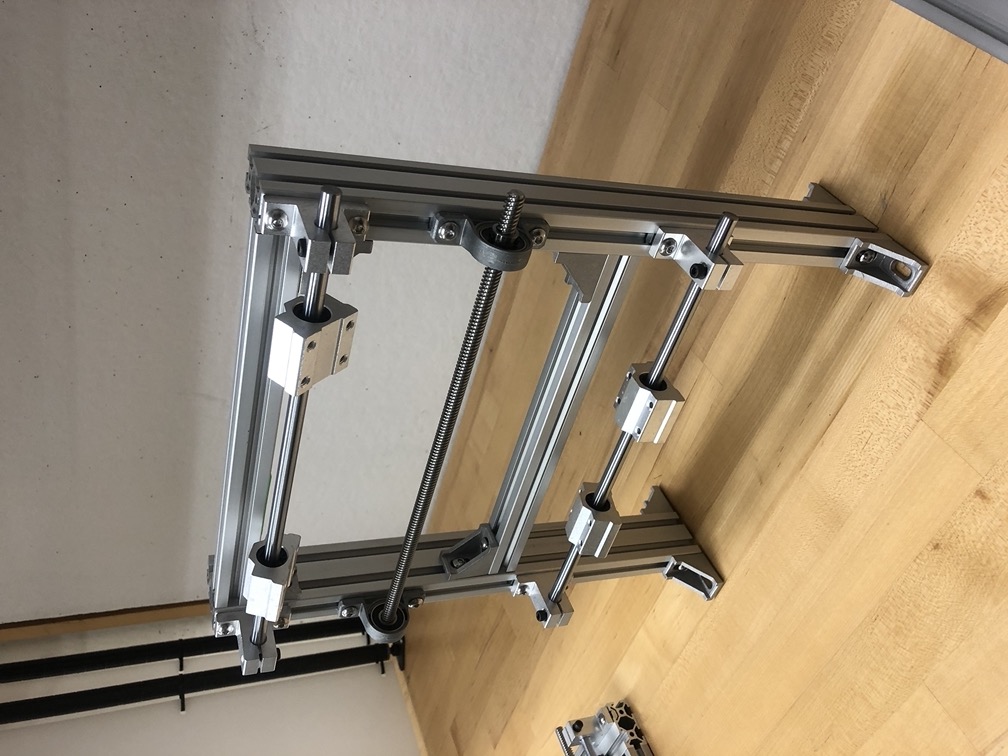
This is the full extent of our current assembly. This is roughly the overall size of the Tiny Z when all axis are together (arm for scale). We have just recieved our motors, but are still waiting on some the electronic components to get the machine running. We also will need the nut housings that connect to each lead screw.
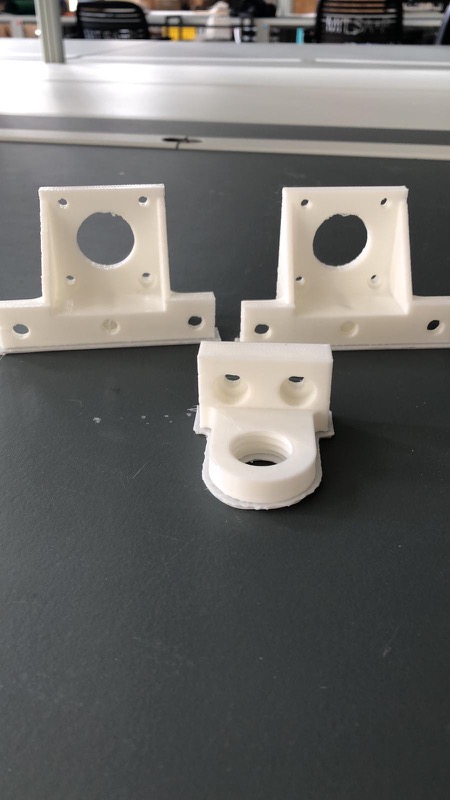
Tiny Z also has a set of a few 3d printed parts to integrate. We are currently printing those parts which are essentially a box for the tinyG controller, brackets for securing the motors, and a few pieces for holding the Dremel end effector.